
Iteration H1: Adding Fields Dynamically to a Form
We need a dynamic form that changes what fields are shown based on what pay type the user has selected. While we could cobble something together with jQuery, it would be a bit cleaner if we could use a more modern JavaScript library like React.[59] This will also form a solid base from which we can easily add additional features later.
Using JavaScript libraries or frameworks can often be difficult, as the configuration burden they bear is far greater than what we’ve seen with Rails. To help us manage this complexity, Rails includes Webpacker, which provides configuration for Webpack.[60] Webpack is a tool to manage the JavaScript files that we write. Note the similar names. Webpacker is a gem that’s part of Rails and sets up Webpack inside our Rails app.
Managing JavaScript is surprisingly complex. By using Webpack we can easily put our JavaScript into several different files, bring in third-party libraries (like React), and use more advanced features of JavaScript not supported by a browser (such as the ability to define classes). Webpack then compiles all of our JavaScript, along with the third-party libraries we are using, into a pack. Because this isn’t merely sprinkling small bits of JavaScript in our view, Rails refers to this as app-like JavaScript.
While we could use Webpack directly with Rails, configuring Webpack is extremely difficult. It’s highly customizable and not very opinionated, meaning developers must make many decisions just to get something working. Webpacker essentially is the decisions made by the Rails team and bundled up into a gem. Almost everything Webpacker does is to provide a working configuration for Webpack and React so that we can focus on writing JavaScript instead of configuring tools. But Webpack is the tool that manages our JavaScript day-to-day.
React is a JavaScript view library designed to quickly create dynamic user interfaces. We’ll use it to create a dynamic payment method details form, and Webpacker will ensure that the configuration and setup for all this is as simple as possible. That said, there’s a bit of setup we need to do.
First, we’ll use Webpacker to install React. After that, we’ll replace our existing payment-type drop-down with a React-rendered version, which will demonstrate how all the moving parts fit together. With that in place, we’ll enhance our React-powered payment type selector to show the dynamic form elements we want.
Installing React
Webpacker can install and configure some common JavaScript frameworks such as Angular, Vue, or React. We chose React because it’s the simplest overall and is the best fit for solving our problem. To have Webpacker set it all up for us, run the task webpacker:install:react:
| | $ bin/rails webpacker:install:react |
| | Copying react loader to …config/webpack/loaders |
| | create config/webpack/loaders/react.js |
| | Copying .babelrc to app root directory |
| | create .babelrc |
| | Copying react example entry file to …app/javascript/packs |
| | create app/javascript/packs/hello_react.jsx |
| | Installing all react dependencies |
| | run ./bin/yarn add react react-dom babel-preset-react from "." |
| | yarn add v0.20.3 |
| | [1/4] Resolving packages... |
| | [2/4] Fetching packages... |
| | [3/4] Linking dependencies... |
| | warning "[email protected]" has unmet peer dependency "react@^15.4.2". |
| | [4/4] Building fresh packages... |
| | success Saved lockfile. |
| | success Saved 26 new dependencies. |
| | |
| | lots of output |
| | Done in 7.17s. |
| | Webpacker now supports react.js |
If you’ve ever tried to set up Webpack and a JavaScript framework like React before, you’ll appreciate how much work Webpacker has just done for us. If you’ve never had the privilege, trust me, this saves a ton of time and aggravation.
Webpacker also created a rudimentary React component in app/javascript/packs/hello_react.jsx. Don’t worry about what that means for now. We’re going to use this generated code to validate the installation and set up our development environment. This generated code will append the string “Hello React!” to the end of our page, but it’s not activated by default. Let’s find out why, configure it to be included in our views, and set up our development environment to work smoothly with Webpacker.
Updating Our Development Environment for Webpack
Webpacker includes a helper method called javascript_pack_tag that takes as an argument the name of the file in app/javascript/packs whose JavaScript should be included on the page.
The reason Rails doesn’t simply include all JavaScript all the time is that you might not want that to happen for performance reasons. Although our payment details code won’t be terribly complex, it’ll still be a chunk of code our users will have to download. Since it won’t be needed anywhere else in our app, we can make the user experience faster and better by only downloading the code when it’s needed.
Webpacker allows us to have any number of these separately managed packs. We can include any that we like, wherever we like. To see how this works, let’s add a call to javascript_pack_tag to our app/views/orders/new.html.erb page to bring in the sample React component that Webpacker created for us.
| | <section class="depot_form"> |
| | <h1>Please Enter Your Details</h1> |
| | <%= render 'form', order: @order %> |
| | </section> |
| | |
| » | <%= javascript_pack_tag("hello_react") %> |
If you add some items to your cart and navigate to the checkout page, you should see the string “Hello React!” at the bottom of the page, as shown in the following screenshot.
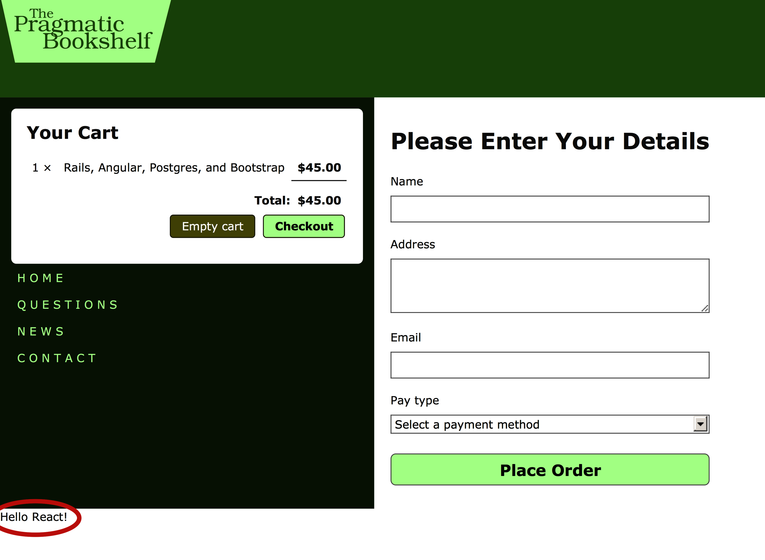
This validates that all the internals of Webpack are working with the app (which is always a good practice before writing code so we can be sure what might be the cause if something’s wrong). Now we can start building our feature. We need to replace the existing drop-down with one powered by React and our Webpacker-managed JavaScript. Doing that requires a slight diversion to learn about React.
Learning Just Enough React
We’ve validated our Webpack setup, but we still don’t have the full picture of what is going on. What is a jsx file, and what is the odd syntax inside app/javascript/packs/hello_react.jsx? We can answer these questions by talking about what React is and why we’re using it.
As mentioned above, React is a view library for JavaScript. Like the erb files we’ve been using, React dynamically renders HTML. Unlike ERB, React does this in the browser, and it is optimized to do it fast. Because the selected pay type will only affect a small part of our page, it will be a much better user experience to have React rerender that part of our page than to have the server rerender the entire thing.
React is more than just a library with some handy functions we can call. It’s actually a mini-framework that includes extensions to JavaScript to make our work easier—--once we understand how to use those extensions. When we do, our job of creating a dynamic payment details form will result in easy-to-understand code that’s also easy to manage, thanks to Webpacker.
The core concept in React is components. A component is a view, backed by some sort of state. When the state changes, the view rerenders. The view can behave differently depending on the current state inside the component. For us, we’ll track the currently selected pay type as our state and have our view render different input tags based on that.
We could certainly accomplish all of this using React’s JavaScript API. The resulting code would be verbose, hard to follow, and hard to maintain. We mentioned React’s extensions to JavaScript, and that extension is JSX.[61] JSX allows you to intermix JavaScript code and HTML-like markup in one file. The result might look a bit odd at first, but it’s quite convenient for implementing components.
React provides a compiler from JSX to JavaScript, and Webpack can use that compiler as part of its build process. Let’s learn what JSX is actually like and what it can do by replacing our existing pay type drop-down with a React component that behaves the same way.
Creating a React-Powered Drop-Down
To get a sense of how to work with React and Webpack, we’ll replace the existing pay type drop-down that’s being rendered by Rails with one that’s rendered by React. Doing this requires three steps:
- Create a new pack called pay_type that’ll be the root of our implementation.
- Create the PayTypeSelector component that we’ll use to replace the existing pay type selector drop-down.
- Bring the component into our checkout view using javascript_pack_tag and a piece of markup that React can hook into to render the component.
This won’t change how our application behaves, but it will allow us to see all the moving parts and understand what they do.
Creating a New Pack
As we mentioned, packs go in app/javascript/packs, so we’ll create our new pack in app/javascript/packs/pay_type.jsx. This code is not a React component, but just a few lines of code to bootstrap our React component and get it onto our page.
The most straightforward way to do that is to locate an element in the DOM and use the React function React.render to render our component into that element. Let’s see the code, and then we’ll go through and explain what’s happening, line by line.
| ① | import React from 'react' |
| ② | import ReactDOM from 'react-dom' |
| ③ | import PayTypeSelector from 'PayTypeSelector' |
| | |
| ④ | document.addEventListener('turbolinks:load', function() { |
| ⑤ | var element = document.getElementById("pay-type-component"); |
| ⑥ | ReactDOM.render(<PayTypeSelector />, element); |
| | }); |
If you haven’t done much JavaScript, or haven’t kept up with recent advances in the language, much of this file will look alien. Let’s break it down line by line.
- ①
-
This is how we get access to the main React library. import is like require in Ruby: it allows us to access code located in other files. Although it’s formally part of the JavaScript standard, browsers don’t support it. Webpack provides an implementation for us when it compiles our code. When it processes this line, it’ll try to find a file named react.js in one of the paths it’s configured to search (we’ll learn more about this in a bit).
- ②
-
This brings in the ReactDOM object, which has the render function we need to bootstrap our React component.
- ③
-
Here, we’re importing PayTypeSelector, which is the component we’ll make next. When we actually build this component, we’ll explain how Webpack knows where to find the code. The most important thing about this line for now is the name PayTypeSelector, which we’ll reference later in the file.
- ④
-
This uses the standard function addEventListener available on document to ensure that the code we’re about to execute only runs after the entire DOM has loaded.[62] Note that we aren’t using the more standard DOMContentLoaded event.
Due to how Turbolinks works, that event isn’t fired every time our page is reloaded. Turbolinks manages the page-loading events for us and instead fires the turbolinks:load event. If you were to use DOMContentLoaded, then navigate away from the page, and then use the back button, the page would not properly set up React and nothing would work. Using turbolinks:load ensures that React is set up every time the page is rendered.
- ⑤
-
This line is also vanilla JavaScript and is locating an element with the ID pay-type-component. We’ll create that element in our Rails view later.
- ⑥
-
This is the weirdest line in this file. It doesn’t even look like JavaScript! ReactDOM.render’s job is to replace element with the React component PayTypeSelector. In a JSX file, the way to do that is via this odd HTML-like value <PayTypeSelector />. We’ll see a more involved example of JSX when we build PayTypeSelector, but part of what happens when Webpack compiles a JSX file is to interpret this strange-looking syntax and produce JavaScript that works in our browser. It works because we used PayTypeSelector in the import line above.
That is a lot of new information for just six lines of code. While it looks a bit weird, it makes some sense, and you’ll get used to it as you work with React more. Now, let’s define PayTypeSelector.
Creating the PayTypeSelector Component
We talked about what import does, and now we need to know more about how it does it. When Webpack is compiling our files into a bundle our browser can understand, it’s configured with certain paths it will use to locate files we ask to import. The first path is node_modules. This is where Yarn downloaded all of our third-party JavaScript libraries, including React.
If you look inside node_modules, you’ll see many, many directories, but react and react-dom are among them. Our code doesn’t go in node_modules but instead goes in app/javascript. Webpacker has configured Webpack to also look there for files to import.
Webpack isn’t just looking for files like app/javascript/PayTypeSelector.jsx. Rails and Webpack both want us to organize our JavaScript into multiple files, so when we ask to import ’PayTypeSelector’, Webpack will load the file app/javascript/PayTypeSelector/index.jsx.
This might seem odd, but it’s consistent with how third-party JavaScript is bundled, and it also allows us to organize files needed by PayTypeSelector into one location—app/javascript/PayTypeSelector. We’ll do this later when we build our payment details component in full.
For now, we’ll create the file app/javascript/PayTypeSelector/index.jsx. This file will contain a React component that renders the exact same HTML for the pay type drop-down as our current Rails view.
A React component doesn’t need much to work. It must be a class that extends React.Component and must have a render method that returns markup for the component’s view.
Of course, regular JavaScript that runs in our browser doesn’t have classes or methods. However, the latest version of the JavaScript specification does support creating classes with methods,[63] just like we do in Ruby. Webpack will gladly translate this code into vanilla JavaScript our browser can execute. The syntax for this is demonstrated in app/javascript/PayTypeSelector/index.jsx, which you should create like so:
| | import React from 'react' |
| | |
| | class PayTypeSelector extends React.Component { |
| | render() { |
| | return ( |
| | <div className="field"> |
| | <label htmlFor="order_pay_type">Pay type</label> |
| | <select id="order_pay_type" name="order[pay_type]"> |
| | <option value="">Select a payment method</option> |
| | <option value="Check">Check</option> |
| | <option value="Credit card">Credit card</option> |
| | <option value="Purchase order">Purchase order</option> |
| | </select> |
| | </div> |
| | ); |
| | } |
| | } |
| | export default PayTypeSelector |
Inside render we can see a more involved use of the markup-like syntax that JSX allows. It might look like HTML, but it’s not. It’s usually referred to as “JSX” and it has some subtle deviations from HTML.
First, it must be well-formed XML, meaning that each tag must either have a closing tag (for example <strong>foo<strong>), or be self-closing (for example <input/>). HTML does not require this, notably for input elements.
Second, JSX cannot use JavaScript keywords for attributes. You’ll notice we’re using className and htmlFor. In normal HTML, we’d use class and for, but these are reserved words in JavaScript. React’s documentation has more details on the differences between this markup and HTML.[64]
Also note that we’ve judiciously chosen the name value for select in exactly the same way a Rails form helper would. This allows our controller to find the values, even though they are coming from a React-rendered component and not a Rails-rendered view.
The last line of the file contains something new: export. This is the other side of import. In Ruby, a file that is required via require is simply executed. Any classes it creates are inserted into the global namespace. In JavaScript, you must explicitly state what you are exporting from your file.
Although you could export several different classes or functions from a file, in our case, we just need to export one—--PayTypeSelector. The syntax to do that is export default «class».
Now that we’ve implemented our component and created the glue code in our pack to hook it up, we need to modify our Rails views to use it.
Bringing the PayTypeSelector Component into the Rails View
Inside app/views/orders/new.html.erb we added javascript_pack_tag("hello_react") to validate that Webpacker had installed and configured React and that our development environment was working. Let’s replace that and bring in the pay_type pack we just created.
| | <section class="depot_form"> |
| | <h1>Please Enter Your Details</h1> |
| | <%= render 'form', order: @order %> |
| | </section> |
| | |
| » | <%= javascript_pack_tag("pay_type") %> |
The last thing to do is remove the Rails-rendered pay type drop-down and add in a piece of markup with the ID pay-type-component so that the code inside our pack file can tell React to render there.
| | <div class="field"> |
| | <%= form.label :email %> |
| | <%= form.email_field :email, size: 40 %> |
| | </div> |
| | |
| » | <div id='pay-type-component'></div> |
| | |
| | <div class="actions"> |
| | <%= form.submit 'Place Order' %> |
| | </div> |
| | <% end %> |
The type of element doesn’t matter, since React will replace it, but a div is semantically appropriate.
With our new pay type component in place, you should be able to reload the checkout page and see the pay type drop-down exactly as it was. You should also be able to select a pay type, check out, and see the correct data make it into the database.
We are now ready to build the dynamic form we talked about with the customer. React components render their views based on the state inside a component. This means we need to capture the selected pay type as the component’s state and render different form fields based on that state.
Dynamically Replacing Components Based on User Actions
To detect events in plain JavaScript, we’d add the onchange attribute to our select element, setting its value to JavaScript code we’d like to execute. This is exactly how it works in React as well, except that we use the attribute onChange (note that capitalized “C”):
| | import React from 'react' |
| | |
| | class PayTypeSelector extends React.Component { |
| | render() { |
| | return ( |
| | <div className="field"> |
| | <label htmlFor="order_pay_type">Pay type</label> |
| | <select onChange={this.onPayTypeSelected} name="order[pay_type]"> |
| | <option value="">Select a payment method</option> |
| | <option value="Check">Check</option> |
| | <option value="Credit card">Credit card</option> |
| | <option value="Purchase order">Purchase order</option> |
| | </select> |
| | </div> |
| | ); |
| | } |
| | } |
Note that we aren’t quoting the value to onChange but instead using curly braces. This is another feature of JSX and is part of making the view dynamic. Curly braces allow us to interpolate JavaScript, much like how #{...} does in Ruby or <%= ... %> does in ERB. React knows to put quotes in the right places when the HTML is rendered.
We can now define the method onPayTypeSelected like so:
| | import React from 'react' |
| | |
| | class PayTypeSelector extends React.Component { |
| » | onPayTypeSelected(event) { |
| » | console.log(event.target.value); |
| » | } |
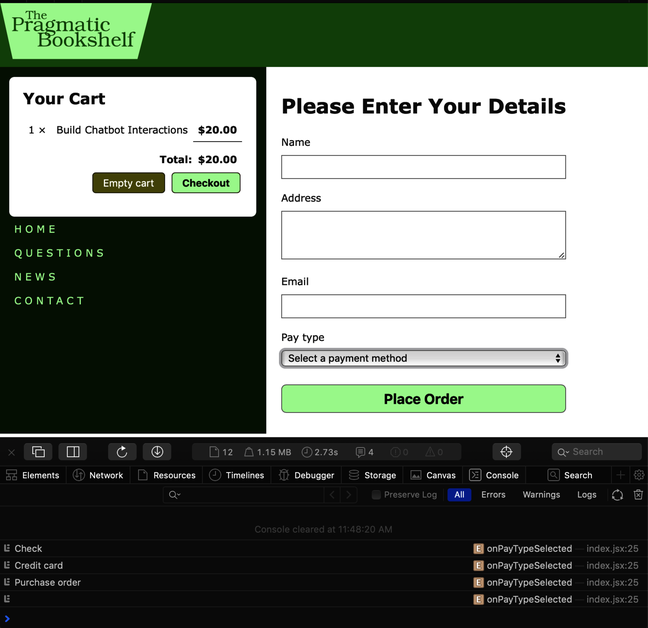
This implementation demonstrates how we can access the user’s selection. The event passed in is a synthetic event,[65] which has a property target that is a DOMEventTarget, which itself has a property value that has the value of the selected payment type.
If you reload the page in your browser, open the JavaScript console, and select different payment types, you should see messages in the console. The following screenshot shows this after selecting each pay type one at a time.
What do we do with this new method? If you recall, a React component is a view and state; and when state changes, the view is rerendered by calling the component’s render method. We want the view to be rerendered when the user changes payment types, so we need to get the currently selected payment type into the component’s state.
We can do this via the method setState provided by our superclass, React.Component:
| | onPayTypeSelected(event) { |
| » | this.setState({ selectedPayType: event.target.value }); |
| | } |
Surprisingly this doesn’t work, because this is undefined. It’s tempting to view this in JavaScript the same way you would self in Ruby, because it often refers to the current instance of the class, just as in Ruby. But “often” isn’t “always.”
Under the covers, JavaScript classes and methods are just functions. When you call a function in JavaScript, it’s possible to control what the value of this is inside that function. When we call a method on an object created from a class, that method is really a function whose value for this is set to the object…except when that method is called from an event handler.
To understand why this happens is outside the scope of this book, but the short explanation is that because we are passing a function to our event handler, when the event fires, the object that contains the function—--which we would very much like to be available as this—--is not remembered by JavaScript (this is a complex concept in JavaScript[66]).
To ensure that this is remembered and thus set to the object, we call bind on the method itself and pass this when this is set to the instance of our class. bind returns a new function where this is always set how we’d expect.
| | this.onPayTypeSelected = this.onPayTypeSelected.bind(this); |
The only trick is to make sure we execute this code before the event handler fires and at a time when the value of this is correct. JavaScript classes have constructors, just like Ruby classes, and that is the right location to execute this code. We haven’t declared a constructor yet; and as it turns out, React component constructors accept an argument called props that we must pass up to the superclass. We should also initialize our state. This means our constructor will look like so:
| | class PayTypeSelector extends React.Component { |
| » | constructor(props) { |
| » | super(props); |
| » | this.onPayTypeSelected = this.onPayTypeSelected.bind(this); |
| » | this.state = { selectedPayType: null }; |
| » | } |
Inside render, we can examine the value of state by accessing this.state.selectedPayType, which will be the string from our select control.
We now want to render a custom component based on the value of this.state.selectedPayType. We can’t easily put control logic inside the JSX, but we can insert a dynamic component by declaring a variable that starts with an uppercase letter. This is another feature of JSX we can use. Our code will look something like this:
| | let PayTypeCustomComponent = «to be determined» |
| | return ( |
| | <div> |
| | <div className="field"> |
| | <label htmlFor="order_pay_type">Pay type</label> |
| | <select id="pay_type" onChange={this.onPayTypeSelected} |
| | name="order[pay_type]"> |
| | <option value="">Select a payment method</option> |
| | <option value="Check">Check</option> |
| | <option value="Credit card">Credit card</option> |
| | <option value="Purchase order">Purchase order</option> |
| | </select> |
| | </div> |
| | <PayTypeCustomComponent /> |
| | </div> |
| | ); |
This means we need to make the components we’ll use for each pay type, along with a blank component for when no pay type is selected. We’ll import those into PayTypeSelector and, based on the value of state, assign them to a local variable named PayTypeCustomComponent. First, let’s set up our imports for the files we’ll create in a moment:
| | import React from 'react' |
| | |
| » | import NoPayType from './NoPayType'; |
| » | import CreditCardPayType from './CreditCardPayType'; |
| » | import CheckPayType from './CheckPayType'; |
| » | import PurchaseOrderPayType from './PurchaseOrderPayType'; |
Note that each file we’re importing is preceded by a dot and a slash (./). This tells Webpack to locate the file in the same directory as the file being processed. Since the file being processed is app/javascript/PayTypeSelector/index.jsx, Webpack will look in app/javascript/PayTypeSelector. Hopefully, you can see the logic of Rails’ convention around using a directory with index.jsx in it. It means that app/javascript/PayTypeSelector will have all the files needed for that component.
Next, we’ll enhance render with the necessary logic to choose the right component based on the value of this.state.selectedPayType:
| | render() { |
| » | let PayTypeCustomComponent = NoPayType; |
| » | if (this.state.selectedPayType == "Credit card") { |
| » | PayTypeCustomComponent = CreditCardPayType; |
| » | } else if (this.state.selectedPayType == "Check") { |
| » | PayTypeCustomComponent = CheckPayType; |
| » | } else if (this.state.selectedPayType == "Purchase order") { |
| » | PayTypeCustomComponent = PurchaseOrderPayType; |
| » | } |
| | return ( |
| » | <div> |
| » | <div className="field"> |
| » | <label htmlFor="order_pay_type">Pay type</label> |
| » | <select id="order_pay_type" onChange={this.onPayTypeSelected} |
| » | name="order[pay_type]"> |
| » | <option value="">Select a payment method</option> |
| » | <option value="Check">Check</option> |
| » | <option value="Credit card">Credit card</option> |
| » | <option value="Purchase order">Purchase order</option> |
| » | </select> |
| » | </div> |
| » | <PayTypeCustomComponent /> |
| » | </div> |
| | ); |
| | } |
Note the change in the markup. In addition to adding <PayTypeCustomComponent />, we’ve wrapped the entire thing in a div. React components must have a single, top-level element; and due to the way our CSS works, each line of our form must be inside a div with the CSS class field. Now let’s see our components. The first is the simplest, NoPayType:
| | import React from 'react' |
| | |
| | class NoPayType extends React.Component { |
| | render() { |
| | return (<div></div>); |
| | } |
| | } |
| | export default NoPayType |
Even though this does nothing, it gives us a clear space to put UI later if we wanted to (for example, a message prompting the user to select a pay type). Next is CheckPayType:
| | import React from 'react' |
| | |
| | class CheckPayType extends React.Component { |
| | render() { |
| | return ( |
| | <div> |
| | <div className="field"> |
| | <label htmlFor="order_routing_number">Routing #</label> |
| | <input type="password" |
| | name="order[routing_number]" |
| | id="order_routing_number" /> |
| | </div> |
| | <div className="field"> |
| | <label htmlFor="order_account_number">Account #</label> |
| | <input type="text" |
| | name="order[account_number]" |
| | id="order_account_number" /> |
| | </div> |
| | </div> |
| | ); |
| | } |
| | } |
| | export default CheckPayType |
Note that we’re self-closing the input elements. This isn’t required in HTML but is in JSX. The CreditCardPayType is similar:
| | import React from 'react' |
| | |
| | class CreditCardPayType extends React.Component { |
| | render() { |
| | return ( |
| | <div> |
| | <div className="field"> |
| | <label htmlFor="order_credit_card_number">CC #</label> |
| | <input type="password" |
| | name="order[credit_card_number]" |
| | id="order_credit_card_number" /> |
| | </div> |
| | <div className="field"> |
| | <label htmlFor="order_expiration_date">Expiry</label> |
| | <input type="text" |
| | name="order[expiration_date]" |
| | id="order_expiration_date" |
| | size="9" |
| | placeholder="e.g. 03/19" /> |
| | </div> |
| | </div> |
| | ); |
| | } |
| | } |
| | export default CreditCardPayType |
And finally, the PurchaseOrderPayType:
| | import React from 'react' |
| | |
| | class PurchaseOrderPayType extends React.Component { |
| | render() { |
| | return ( |
| | <div> |
| | <div className="field"> |
| | <label htmlFor="order_po_number">PO #</label> |
| | <input type="password" |
| | name="order[po_number]" |
| | id="order_po_number" /> |
| | </div> |
| | </div> |
| | ); |
| | } |
| | } |
| | export default PurchaseOrderPayType |
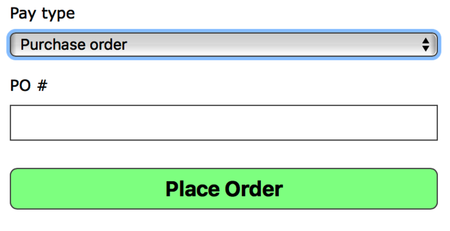
Note that we’ve judiciously chosen the fields’ name values to match Rails conventions. When our React components use a name like "order[credit_card_number]", we’ll be able to access that field’s value in Ruby using params[:order][:credit_card_number], as we’ll see later.
If you reload the page and select different payment types, you’ll see that the form dynamically switches to the right fields for the payment type! See the screenshots following and.


For completeness, let’s access these values in the controller. We could add the new parameters to order_params, but let’s make it a bit more explicit by creating a method called pay_type_params that returns only the params relevant to the chosen pay type:
| | def pay_type_params |
| | if order_params[:pay_type] == "Credit card" |
| | params.require(:order).permit(:credit_card_number, :expiration_date) |
| | elsif order_params[:pay_type] == "Check" |
| | params.require(:order).permit(:routing_number, :account_number) |
| | elsif order_params[:pay_type] == "Purchase order" |
| | params.require(:order).permit(:po_number) |
| | else |
| | {} |
| | end |
| | end |
We can use these params to submit the payment details to the customer’s back-end payment processing system, which we’ll do in Iteration I2: Connecting to a Slow Payment Processor with Active Job.
Wrapping Up Webpack and React
This was quite a journey, and it might’ve felt complex. In a sense, this is expected, because we tried to do something more complex than we have previously done. Webpacker exists exactly to help us with complex interactions like the one we implemented. And if you think a lot of setup was needed to get there, know that without Webpacker it would have been far more difficult and would have required making many more decisions.
Webpacker is a great demonstration of the best of Rails. It removes uninteresting decisions, such as where files should go, and provides a basic mechanism that just works so we can spend our time on our problem, not on configuration. Even if you didn’t know React before reading this, you now know enough to build some fairly complex features. It’s just a matter of putting code in the right place.
One thing that we can no longer do is completely test our application. Because we now depend on JavaScript for a piece of functionality, we can’t really test that functionality without executing our application in a web browser. In earlier versions of Rails, developers had to configure add-on libraries to be able to do this. As of Rails 6, this is baked into the framework and ready for you to use.