
Iteration A1: Creating the Product Maintenance Application
At the heart of the Depot application is a database. Getting this installed and configured and tested before proceeding will prevent a lot of headaches. If you are not certain about what you want, take the defaults, and it will go easily. If you know what you want, Rails makes it easy for you to describe your configuration.
Creating a Rails Application
In Creating a New Application, you saw how to create a new Rails application. We will do the same thing here. Go to a command prompt and type rails new followed by the name of our project. Here, our project is called depot, so make sure you are not inside an existing application directory, and type this:
| | work> rails new depot |
We see a bunch of output scroll by. When it has finished, we find that a new directory, depot, has been created. That’s where we’ll be doing our work:
| | work> cd depot |
| | depot> ls -p |
| | app/ db/ node_modules/ README.md yarn.lock |
| | babel.config.js Gemfile package.json storage/ |
| | bin/ Gemfile.lock postcss.config.js test/ |
| | config/ lib/ public/ tmp/ |
| | config.ru log/ Rakefile vendor/ |
Of course, Windows users need to use dir /w instead of ls -p.
Creating the Database
For this application, we’ll use the open source SQLite database (which you’ll need if you’re following along with the code). We’re using SQLite version 3 here.
SQLite 3 is the default database for Rails development and was installed along with Rails in Chapter 1, Installing Rails. With SQLite 3, no steps are required to create a database, and we have no special user accounts or passwords to deal with. So, now you get to experience one of the benefits of going with the flow (or, convention over configuration, as the Rails folks say...ad nauseam).
If it’s important to you to use a database server other than SQLite 3, the commands to create the database and grant permissions will be different. You can find some helpful hints in the database configuration section of Configuring Rails Applications in the Ruby on Rails Guides.[33]
Generating the Scaffold
Back in our initial guess at application data , we sketched out the basic content of the products table. Now let’s turn that into reality. We need to create a database table and a Rails model that lets our application use that table, a number of views to make up the user interface, and a controller to orchestrate the application.
So, let’s create the model, views, controller, and migration for our products table. With Rails, you can do all that with one command by asking Rails to generate a scaffold for a given model. Note that on the command line that follows, we use the singular form, Product. In Rails, a model is automatically mapped to a database table whose name is the plural form of the model’s class. In our case, we ask for a model called Product, so Rails associates it with the table called products. (And how will it find that table? The development entry in config/database.yml tells Rails where to look for it. For SQLite 3 users, this’ll be a file in the db directory.)
Note that that command is too wide to fit comfortably on the page. To enter a command on multiple lines, put a backslash as the last character on all but the last line, and you’ll be prompted for more input. Windows users need to substitute a caret (^) for the backslash at the end of the first line and a backslash for the forward slash in bin/rails:
| | depot> bin/rails generate scaffold Product |
| | title:string description:text image_url:string price:decimal |
| | invoke active_record |
| | create db/migrate/20190425000001_create_products.rb |
| | create app/models/product.rb |
| | invoke test_unit |
| | create test/models/product_test.rb |
| | create test/fixtures/products.yml |
| | invoke resource_route |
| | route resources :products |
| | invoke scaffold_controller |
| | create app/controllers/products_controller.rb |
| | invoke erb |
| | create app/views/products |
| | create app/views/products/index.html.erb |
| | create app/views/products/edit.html.erb |
| | create app/views/products/show.html.erb |
| | create app/views/products/new.html.erb |
| | create app/views/products/_form.html.erb |
| | invoke test_unit |
| | create test/controllers/products_controller_test.rb |
| | create test/system/products_test.rb |
| | invoke helper |
| | create app/helpers/products_helper.rb |
| | invoke test_unit |
| | invoke jbuilder |
| | create app/views/products/index.json.jbuilder |
| | create app/views/products/show.json.jbuilder |
| | create app/views/products/_product.json.jbuilder |
| | invoke assets |
| | invoke scss |
| | create app/assets/stylesheets/products.scss |
| | invoke scss |
| | create app/assets/stylesheets/scaffolds.scss |
The generator creates a bunch of files. The one we’re interested in first is the migration one, namely, 20190425000001_create_products.rb.
A migration represents a change we either want to make to a database as a whole or to the data contained within the database, and it’s expressed in a source file in database-independent terms. These changes can update both the database schema and the data in the database tables. We apply these migrations to update our database, and we can unapply them to roll our database back. We have a whole section on migrations starting in Chapter 22, Migrations. For now, we’ll just use them without too much more comment.
The migration has a UTC-based timestamp prefix (20190425000001), a name (create_products), and a file extension (rb, because it’s Ruby code).
The timestamp prefix that you see will be different. In fact, the timestamps used in this book are clearly fictitious. Typically, your timestamps won’t be consecutive; instead, they’ll reflect the time the migration was created.
Applying the Migration
Although we’ve already told Rails about the basic data types of each property, let’s refine the definition of the price to have eight digits of significance and two digits after the decimal point:
| | class CreateProducts < ActiveRecord::Migration[6.0] |
| | def change |
| | create_table :products do |t| |
| | t.string :title |
| | t.text :description |
| | t.string :image_url |
| » | t.decimal :price, precision: 8, scale: 2 |
| | |
| | t.timestamps |
| | end |
| | end |
| | end |
Now that we’re done with our changes, we need to get Rails to apply this migration to our development database. We do this by using the bin/rails db:migrate command:
| | depot> bin/rails db:migrate |
| | == 20190425000001 CreateProducts: migrating ================================ |
| | -- create_table(:products) |
| | -> 0.0027s |
| | == CreateProducts: migrated (0.0023s) ====================================== |
And that’s it. Rails looks for all the migrations not yet applied to the database and applies them. In our case, the products table is added to the database defined by the development section of the database.yml file.
OK, all the groundwork has been done. We set up our Depot application as a Rails project. We created the development database and configured our application to be able to connect to it. We created a products controller and a Product model and used a migration to create the corresponding products table. And a number of views have been created for us. It’s time to see all this in action.
Seeing the List of Products
With three commands, we’ve created an application and a database (or a table inside an existing database, if you chose something besides SQLite 3). Before we worry too much about what happened behind the scenes here, let’s try our shiny new application.
First, we start a local server, supplied with Rails (remember if you are using a virtual machine, you must do bin/rails server -b 0.0.0.0):
| | depot> bin/rails server |
| | => Booting Puma |
| | => Rails 6.0.0 application starting in development |
| | => Run `rails server -help` for more startup options |
| | Puma starting in single mode... |
| | * Version 3.12.1 (ruby 2.6.2-p47), codename: Llamas in Pajamas |
| | * Min threads: 5, max threads: 5 |
| | * Environment: development |
| | * Listening on tcp://localhost:3000 |
| | Use Ctrl-C to stop |
As it did with our demo application, this command starts a web server on our local host, port 3000. If you get an error saying Address already in use when you try to run the server, that means you already have a Rails server running on your machine. If you’ve been following along with the examples in the book, that might well be the Hello, World! application from Chapter 4. Find its console and kill the server using Ctrl-C. If you’re running on Windows, you might see the prompt Terminate batch job (Y/N)?. If so, respond with y.
Let’s connect to our application. Remember, the URL we give to our browser is http://localhost:3000/products, which has both the port number (3000) and the name of the controller in lowercase (products). The application looks like the following screenshot.
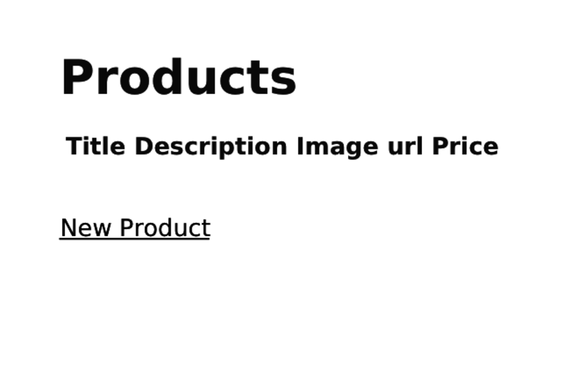
That’s pretty boring. It’s showing us an empty list of products. Let’s add some. Click the New Product link. A form should appear, as shown in the following screenshot.
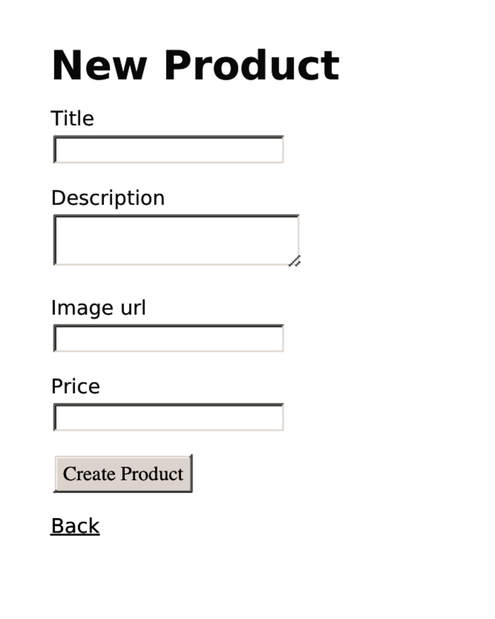
These forms are simply HTML templates, like the ones you created in Hello, Rails!. In fact, we can modify them. Let’s change the number of rows and columns in the Description field:
| | <%= form_with(model: product, local: true) do |form| %> |
| | <% if product.errors.any? %> |
| | <div id="error_explanation"> |
| | <h2><%= pluralize(product.errors.count, "error") %> |
| | prohibited this product from being saved:</h2> |
| | |
| | <ul> |
| | <% product.errors.full_messages.each do |message| %> |
| | <li><%= message %></li> |
| | <% end %> |
| | </ul> |
| | </div> |
| | <% end %> |
| | |
| | <div class="field"> |
| | <%= form.label :title %> |
| | <%= form.text_field :title %> |
| | </div> |
| | |
| | <div class="field"> |
| | <%= form.label :description %> |
| » | <%= form.text_area :description, rows: 10, cols: 60 %> |
| | </div> |
| | |
| | <div class="field"> |
| | <%= form.label :image_url %> |
| | <%= form.text_field :image_url %> |
| | </div> |
| | |
| | <div class="field"> |
| | <%= form.label :price %> |
| | <%= form.text_field :price %> |
| | </div> |
| | |
| | <div class="actions"> |
| | <%= form.submit %> |
| | </div> |
| | <% end %> |
We’ll explore this more in Chapter 8, Task C: Catalog Display. But for now, we’ve adjusted one field to taste, so let’s fill it in, as shown in the following screenshot (note the use of HTML tags in the description—--this is intentional and will make more sense later).

Click the Create button, and you should see that the new product was successfully created. If you now click the Back link, you should see the new product in the list, as shown in the screenshot.

Perhaps it isn’t the prettiest interface, but it works, and we can show it to our client for approval. She can play with the other links (showing details, editing existing products, and so on). We explain to her that this is only a first step—we know it’s rough, but we wanted to get her feedback early. (And four commands probably count as early in anyone’s book.)
At this point, we’ve accomplished a lot with only four commands. Before we move on, let’s try one more command:
| | bin/rails test |
Included in the output should be a line that says 0 failures, 0 errors. This is for the model and controller tests that Rails generates along with the scaffolding. They’re minimal at this point, but simply knowing that they’re there and that they pass should give you confidence. As you proceed through these chapters in Part II, you’re encouraged to run this command frequently, because it’ll help you spot and track down errors. We’ll cover this more in Iteration B2: Unit Testing of Models.
Note that if you’ve used a database other than SQLite 3, this step may have failed. Check your database.yml file.