
Microsoft Access is very capable of interfacing with data from other sources. It can use data from any ODBC data source, as well as data from FoxPro, dBASE, Paradox, Lotus, Excel, and many other sources. In this chapter, you will learn how to interface with external data sources through the user interface and by using code.
External data is data stored outside the current database. It can refer to data stored in another Microsoft Access database, as well as data stored in a multitude of other file formats—including ODBC, ISAM, spreadsheet, ASCII, and more. This chapter focuses on accessing data sources other than ODBC data sources. ODBC data sources are covered extensively in Chapter 20, “Client/Server Techniques,” and Chapter 21, “Client/Server Strategies.”
Access is an excellent front-end product, which means that it provides a powerful and effective means of presenting data—even data from external sources. Data is stored in places other than Access for many reasons. Large databases, for example, can be managed more effectively on a back-end database server such as Microsoft SQL Server. Data often is stored in a FoxPro, dBASE, or Paradox file format because the data is being used by a legacy application written in one of those environments. Text data often has been downloaded from a mainframe. Regardless of the reason why data is stored in another format, it is necessary that you understand how to manipulate this external data in your VBA modules. With the capability to access data from other sources, you can create queries, forms, and reports.
When accessing external data, you have three choices. You can import the data into an Access database, access the data by linking to it from your Access database, or open a data source directly. Importing the data is the best route (except with ODBC data sources) but not always possible. If you can't import external data, you should link to external files, because Microsoft Access maintains a lot of information about these linked files. This optimizes performance when manipulating the external files. Sometimes a particular situation warrants accessing the data directly. You therefore should know how to work with linked files, as well as how to open and manipulate files directly.
When you import data into an Access table, a copy is made of the data and is placed in an Access table. After data is imported, it is treated like any other native Access table. In fact, neither you nor Access has any way of knowing from where the data came. As a result, imported data offers the same performance and flexibility as any other Access table.
Linking to external data is quite different from importing data. Linked data remains in its native format. By establishing a link to the external data, you can build queries, forms, and reports that present the data. After you create a link to external data, the link remains permanently established unless you explicitly remove it. The linked table appears in the database window just like any other Access table. The only difference is that you cannot modify its structure from within Access. In fact, if the data source permits multiuser access, the users of your application can modify the data along with the users of applications written in the data source's native database format (such as FoxPro, dBASE, or Paradox).
Opening an external table is similar to linking to a table, except that a permanent relationship is not created. When you link to an external table, connection information is maintained from session to session. When you open a table, you create a recordset from the table, and no permanent link is established.
It is important that you understand when to import external data, when to link to external data, and when to open an external table directly. You should import external data in either of these circumstances:
You are migrating an existing system into Access.
You want to use external data to run a large volume of queries and reports, and you will not update the data. You want the added performance that native Access data provides.
When you are migrating an existing system to Access and you are ready to permanently migrate test or production data into your application, you import the tables into Access. Another good reason to import external data is if the data is downloaded from a mainframe into ASCII format on a regular basis, and you want to use the data for reports. Instead of attempting to link to the data and suffering the performance hits associated with such a link, you can import the data each time it is downloaded from the mainframe.
You should link to external data in any of the following circumstances:
The data is used by a legacy application requiring the native file format.
The data resides on an ODBC-compliant database server.
You will access the data on a regular basis.
Often, you won't have the time or resources to rewrite an application written in FoxPro, Paradox, or some other language. You might be developing additional applications that will share data with the legacy application, or you might want to use the strong querying and reporting capabilities of Access instead of developing queries and reports in the native environment.
By linking to the external data, users of existing applications can continue to work with the applications and their data. Your Access applications can retrieve and modify data without corrupting or harming the data.
If the data resides in an ODBC database such as Microsoft SQL Server, you want to reap the data-retrieval benefits provided by a database server. By linking to the ODBC data source, you can take advantage of Access's ease of use as a front-end tool, while taking advantage of client/server technology at the same time.
Finally, if you intend to access data on a regular basis, linking to the external table instead of temporarily opening the table directly provides you with ease of use and performance benefits. After you create the link, Access treats the table just like any other Access table.
You should open an external table directly in either of these circumstances:
You rarely need to establish a connection to the external data source.
You have determined that performance actually improves by opening the data source directly.
If you rarely need to access the external data, it might be appropriate to open it directly. Links increase the size of your MDB file. This size increase is not necessary if you rarely will access the data. Furthermore, in certain situations, when accessing ISAM data, you might find that opening the table directly provides better performance than linking to it.
Although this chapter covers the process of importing external data, this is essentially a one-time process and doesn't require a lot of discussion. It is important to note, however, that after data is imported into an Access table, it no longer is accessed by the application in its native format. The majority of this chapter focuses on linking to or directly opening external data tables.
Microsoft Access enables you to import, link to, and open files in these formats:
Microsoft Jet databases (including previous versions of Jet)
ODBC databases
HTML documents
Microsoft Exchange/OutLook
Microsoft FoxPro 2.0, 2.5, 2.6, 3.0, and DBC (Visual FoxPro)
dBASE III, dBASE IV, and dBASE 5.0
Paradox 3.x, 4.x, and 5.x
Microsoft Excel spreadsheets, versions 3.0, 4.0, 5.0, and 8.0
Lotus WKS, WK1, WK3, and WK4 spreadsheets
Note
Drivers for Lotus 1-2-3, Paradox, and Microsoft Exchange/OutLook are not available through Access Setup. They are included in the Office 97 ValuPack, which is on the Microsoft Office Professional Edition 97 CD-ROM. To install these drivers, run the dataacc.exe program located in the ValuPackDataAcc directory. The ValuPack contains a variety of useful information and tools.
The process of importing external data is quite simple. You can import external data through the user interface or by using VBA code. If you are planning to import the data only once or twice, you should use the user interface. If you are importing data on a regular basis (for example, from a downloaded mainframe file), you should write code that accomplishes the task transparently to the user.
To import an external data file using the user interface, follow these steps:
Right-click on any tab of the database window.
Choose Import (or choose File | Get External Data | Import). The Import dialog box appears, as shown in Figure 19.1.
From the Files of Type drop-down list, select the type of file you are importing.
Select the file you want to import and click Import.
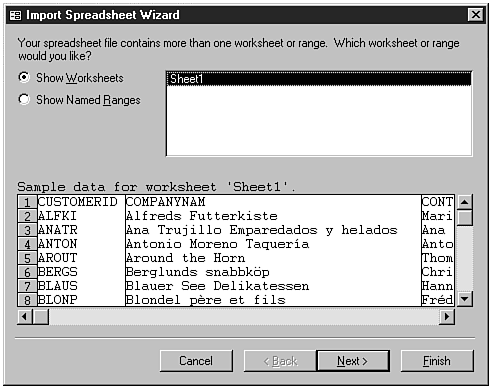
Depending on the type of file you select, the import process finishes, or you see additional dialog boxes. If you select Excel Spreadsheet, the Import Spreadsheet Wizard appears, as shown in Figure 19.2. This Wizard walks you through the process of importing spreadsheet data.

The DoCmd object has three methods that assist you with importing external data. They are TransferDatabase, TransferText, and TransferSpreadsheet, each of which is covered in this section.
You use the TransferDatabase method of the DoCmd object to import data from a database such as FoxPro, dBASE, Paradox, or another Access database. A public constant called APPPATH has been declared in the General Declarations section of basImport. You need to change the value of this constant if you run the sample code from this chapter in a different directory. Listing 19.1, included in basImport, shows an example that uses the TransferDatabase method.
Example 19.1. Using the TransferDatabase method.
Sub ImportDatabase()
  DoCmd.TransferDatabase _
    TransferType:=acImport, _
    DatabaseType:="FoxPro 2.5", _
    DatabaseName:=APPPATH,
    ObjectType:=acTable, _
    Source:="Customers", _
    Destination:="tblCustomers", _
    StructureOnly:=False
End Sub
Note
This code and all the code in this chapter are located in the CHAP19EX.MDB file on the sample code CD-ROM.
Table 19.1 lists the arguments for the TransferDatabase method.
Table 19.1. TransferDatabase arguments.
You use the TransferText method of the DoCmd object to import text from a text file. Listing 19.2 shows an example of this method.
Example 19.2. Using the TransferText method.
Sub ImportText()
  DoCmd.TransferText _
    TransferType:=acImportDelim, _
    TableName:="tblCustomerText", _
    FileName:=APPPATH & "Customer.Txt"
End Sub
Table 19.2 lists the arguments for the TransferText method.
Table 19.2. TransferText arguments.
You use the TransferSpreadsheet method of the DoCmd object to import data from a spreadsheet file. Listing 19.3 shows an example that uses the TransferSpreadsheet method.
Example 19.3. Using the TransferSpreadsheet method.
Sub ImportSpreadsheet()
  DoCmd.TransferSpreadsheet _
    TransferType:=acImport, _
    SpreadsheetType:=5, _
    TableName:="tblCustomerSpread", _
    FileName:=APPPATH & "Customer.Xls",
    HasFieldNames:=True
End Sub
Table 19.3 lists the arguments for the TransferSpreadsheet method.
Table 19.3. TransferSpreadsheet arguments.
If you need to keep the data in its original format but want to treat the data just like any other Access table, linking is the best solution. All the information required to establish and maintain the connection to the remote data source is stored in the linked table definition. You can create links through the user interface and by using code. This section covers both alternatives.
One of the most common types of links is a link to another Access table. This type of link is created so that the application objects (queries, forms, reports, macros, and modules) can be placed in a local database and the tables can be stored in another database on a file server. Numerous benefits are associated with such a configuration. Chapter 18, “Developing for a Multiuser Environment,” discusses these benefits in detail.
It is very common to create a link using the user interface. If you know what links you want to establish at design time, this is probably the easiest way to establish links to external data. You can establish links by using the Database Splitter or by establishing them manually.
The Database Splitter was designed to split databases that already have been built with the tables and other database objects all in one physical MDB database file. It automates the process of moving the data tables to another database. The Database Splitter is covered in detail in Chapter 18.
To create a link to an Access table, follow these steps:
Right-click on any tab of the Database window.
Choose Link Tables. The Link dialog box appears, as shown in Figure 19.3.
Select the name of the database containing the table to which you want to link.
Click the Link button. The Link Tables dialog box appears, as shown in Figure 19.4.
Select the tables to which you want to establish a link.
Click OK. The link process finishes. Notice the arrows in Figure 19.5, which indicate that the tables are linked tables instead of tables stored in the current database.


The process of creating links to other types of database files is a little different. It works like this:
Right-click on any tab of the Database window.
Choose Link Tables. The Link dialog box appears.
From the Files of Type drop-down list, select the type of table to which you are linking.
Select the external file containing the data to which you will be linking.
Click the Link button. The next dialog box that appears varies, depending on the type of table to which you want to link. With a FoxPro file, for example, the Select Index Files dialog box appears, as shown in Figure 19.6. It is important that you select any index files associated with the data file. These indexes are updated automatically by Access as you add, change, and delete table data from Access.
You receive a message indicating that the index was added successfully and that you can add other indexes if you choose. Click OK.
Add any additional indexes and click Close.
The Select Unique Record Identifier dialog box appears, as shown in Figure 19.7. This dialog box enables you to select a unique identifier for each record in the table. Select a unique field and click OK.


Notice the icon indicating the type of file you linked to, as shown in Figure 19.8.
Creating a link to an external table using code is a five-step process. Here are the steps involved in establishing the link:
Open the Microsoft Access database that will contain the link to the external file.
Create a new table definition using the external data source.
Set connection information for the external database and table.
Provide a name for the new table.
Link the table by appending the table definition to the database.
Listing 19.4 shows the code for linking to an external table, which in this case exists in another Microsoft Access database.
Example 19.4. Linking to an external table.
Sub LinkToAccessTableProps()
   Dim db As DATABASE
   Dim tdf As TableDef
   Set db = CurrentDb
   Set tdf = db.CreateTableDef("tblLinkedTable")
   tdf.Connect = ";Database=" & APPPATH & "Chap19Data.MDB"
   tdf.SourceTableName = "tblClients"
   db.TableDefs.Append tdf
End Sub
In Listing 19.4, the source database (Chap19Data.MDB) does not need to be opened, because you are adding a table definition to the current database. The CreateTableDef method is used to create the new table definition. The Connect property is set, and the SourceTableName is defined. Finally, the table definition is appended to the TableDefs collection of the database. This process is discussed in further detail in the following sections.
When you link to an external table, you must provide information about the type, name, and location of the external database. This can be accomplished in one of two ways:
Setting the SourceTableName and Connect properties of the
TableDefobject.Including the
SourceandConnectvalues as arguments to the CreateTableDef method.
The process of setting the SourceTableName and Connect properties is illustrated by these three lines of code:
Set tdf = db.CreateTableDef("tblLinkedTable")
tdf.Connect = ";Database=" & APPPATH & "Chap19Data.MDB"
tdf.SourceTableName = "tblClients"
Including the Source and Connect values as arguments to the CreateTableDef method looks like this:
Set tdf = db.CreateTableDef("tblLinkedTable", _
    0, "tblClients", _
    ";Database=" & APPPATH & "Chap19Data")
As you can see from the example, which is extracted from Sub LinkToAccessTableArgs() in basLinks, both the Source (tblClients) and the Connect values are included as arguments to the CreateTableDef method.
The connect string actually is composed of several pieces. These include the source database type, database name, password, and data source name. The database name is used for tables that are not ODBC-compliant, and the data source name is used for ODBC tables.
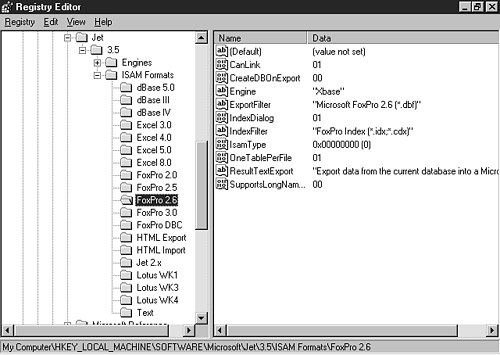
The source database type is the ISAM format that will be used for the link. Each source database type is a different folder in the Windows Registry. The folders are located in the HKEY_LOCAL_MACHINESOFTWAREMicrosoftJet3.5ISAM Formats section of the Registry.
Valid source database types follow:
| dBASE | dBASE III, dBASE IV, and dBASE 5.0 |
| Excel | Excel 3.0, Excel 4.0, Excel 5.0, and Excel 8.0 |
| FoxPro | FoxPro 2.0, FoxPro 2.5, FoxPro 2.6, FoxPro 3.0, and FoxPro DBC |
| HTML | HTML Export and HTML Import |
| Jet 2.x | |
| Lotus | Lotus WK1, Lotus WK3, and Lotus WK4 |
| Paradox | Paradox 3.x, Paradox 4.x, and Paradox 5.x |
| Text |
You must enter the source database type exactly as it is specified in the preceding list. Spaces and punctuation must be exact in order for the connection to be successful.
The database name must include a fully qualified path to the file. You can specify the path with a drive letter and directory path or by using universal naming conventions (UNCs). For a local database, you must specify the path like this:
Database=c:DatabasesChap19Data
For a file server, you can specify the UNC path or the drive letter path. The UNC path looks like this:
\FILESERVERNAMEDatabasesChap19Data
In this case, the database called Chap19Data is stored on the databases share of a particular file server.
The password is used to supply a password to a database (Access or another) that has been secured. It is best to fill in this part of the connection string from a variable at runtime instead of hard-coding it into the VBA code. Sending a password is covered in further detail in the “Working with Passwords” section of this chapter.
The completed connection string looks like this:
tdf.Connect = "FoxPro 2.6;Database=c:Databases;PWD="
In this example, the connection string is set up to link to a FoxPro 2.6 database in the c:Databases directory. No password is specified.
Listing 19.5 shows how you put all the connection information together to establish a link to an external table.
Example 19.5. Establishing a link to an external table.
Sub LinkToFox25(strDirName As String, strTableName As String, strAccessTable)
   Dim db As DATABASE
   Dim tdf As TableDef
   Set db = CurrentDb
   Set tdf = db.CreateTableDef(strAccessTable)
   tdf.Connect = "FoxPro 2.5;Database=" & strDirName
   tdf.SourceTableName = strTableName
   db.TableDefs.Append tdf
End Sub
Here is an example of how this subroutine is called:
Call LinkToFox25("c:customerdata","customer","tblCustomers")The LinkToFox25 subroutine receives three parameters:
The name of the directory in which the FoxPro file is stored.
The name of the file (the name of the table, without the DBF extension) to which you want to connect.
The name of the Access table that you are creating.
The subroutine creates two object variables: a database object variable and a table definition object variable. The subroutine points the database object variable at the current database. Next, it creates a table definition called tblCustomers. It establishes a connection string for that table definition. The connection string specified in the subroutine indicates that you will link to a FoxPro 2.5 table. The directory name acts as the database to which you are linked. After you set the Connect property of the table definition, you are ready to indicate the name of the table with which you are establishing the link. This is the name of the FoxPro file. Finally, you are ready to append the table definition to the database.
Listing 19.6 shows an alternative to Listing 19.5.
Example 19.6. An alternative for establishing a link to an external table.
Sub LinkToFoxAlt(strDirName As String, strTableName As String, strAccessTable)
   Dim db As DATABASE
   Dim tdf As TableDef
   Set db = CurrentDb
   Set tdf = db.CreateTableDef(strAccessTable, 0, strTableName, _
      "FoxPro 2.5;Database=" & strDirName)
   db.TableDefs.Append tdf
End Sub
Notice that here you are specifying the Access table name, the source table name, and the source database type and name—all as parameters to the CreateTableDef method.
You have seen how you can link to a FoxPro table. Listing 19.7 puts together everything you have learned in this chapter by creating a link to an Access table stored in another database.
Example 19.7. Creating a link to an Access table stored in another database.
Sub LinkToAccess(strDBName As String, strTableName As String, strAccessTable)
   Dim db As DATABASE
   Dim tdf As TableDef
   Set db = CurrentDb
   Set tdf = db.CreateTableDef(strAccessTable)
   tdf.Connect = ";DATABASE=" & strDBName
   tdf.SourceTableName = strTableName
   db.TableDefs.Append tdf
End Sub
Notice that the connection string no longer specifies the type of database to which you are connecting. Everything else in this routine is the same as the routine that connected to FoxPro. Also notice the parameters passed to this routine:
Call LinkToAccess("C:databases
orthwind","Customers","tblCustomers")
The database passed to the routine is an actual Access database (as opposed to a directory), and the table name is the name of the Access table in the other database (instead of the DBF filename).
It generally is preferable to link to, rather than open, an external table. Linking provides additional performance and ease of use when dealing with an external table. After you link to a table, it is treated just like any other Access table. Occasionally, though, it is necessary to open an external table without creating a link to it. Opening an external table is a two-step process:
Open the database using the OpenDatabase method.
Create a
Recordsetobject based on the external table.
The connection information you provide when you open an external table is similar to the information you provide when you link to the table. The connection information is provided as arguments of the OpenDatabase method. Here's an example:
OpenDatabase("c:customerdata", False, False, "FoxPro 2.5")Here, the connection string is to the c:customerdata database using the FoxPro 2.5 ISAM.
The OpenDatabase method receives the following arguments:
OpenDatabase(DBname, Exclusive, Read-Only, Source)
DBname is the name of the database you are opening. The Exclusive and Read-Only parameters specify whether you are opening the database exclusively or as read-only. The Source argument specifies the database type and connection string. Listing 19.8 shows what the OpenDatabase method looks like in code.
Example 19.8. Using the OpenDatabase method.
Sub OpenExternalFox(strDBName As String, strTableName As String)
   Dim db As DATABASE
   Dim rst As Recordset
   Set db = DBEngine.Workspaces(0).OpenDatabase(strDBName, False, _
      False, "FoxPro 2.5")
   Set rst = db.OpenRecordset(strTableName)
   Do While Not rst.EOF
      Debug.Print rst.Fields(0).Value
      rst.MoveNext
   Loop
End Sub
Listing 19.8 is called with this code:
Call OpenExternalFox("c:customerdata","Customer")Notice that you are not appending a table definition here. Instead, you are creating a temporary recordset that refers to the external data. After the external table is opened as a recordset, the code traverses through each record of the table, printing the value of the first field. Of course, after the recordset is opened, you can manipulate it in any way you want. The table does not show up as a linked table in the database window. In fact, when the routine completes and the local variable goes out of scope, the recordset no longer exists.
Now that you have seen how you can link to external tables as well as open them, you are ready to take a look at how you can refine both these processes. This involves learning the Windows Registry settings that affect the linking process, learning more about the parameters that are available to you when specifying connection information, learning how to specify passwords, learning how to refresh and remove links, and learning how to create an external table using VBA code.
Each ISAM driver has a separate key in the Windows Registry. These keys are located in the appropriate ISAM driver in the HKEY_LOCAL_MACHINESOFTWAREMicrosoftJet 3.5ISAM Formats section of the Registry. These keys are used to configure the driver after initialization. As you can see in Figure 19.9, the Setup program has created keys for several data sources. If you look at a specific data source (in this case, FoxPro 2.6), you can see all the settings that exist for the FoxPro 2.6 driver. The IndexFilter is set to FoxPro Index(*.idx;*.cdx), for example. At times, you will need to modify one of the Registry settings to customize the behavior of the ISAM driver; this is covered later in this chapter in the section “Looking At Special Considerations.”
The connection string includes the source database type, database name, user ID, password, and dataset name (DSN). Each part of the connection string must be separated by a semicolon.
Each source database type has a valid name. This is the name that must be used when accessing that type of data. These database types are listed in Help in the Connect Property section. This is the name found in the Windows Registry under HKEY_LOCAL_MACHINESoftware MicrosoftJet3.5ISAM Formats.
You must accurately specify the source database type, or you will be unable to access the external data.
The source database name is the name of the database to which you are linking. In the case of ISAM files, this is the name of the directory in which the file is contained. The Database keyword is used to specify the database name.
The user ID is used whenever a user name must be specified in order to successfully log onto the data source. This is most common when dealing with back-end databases such as Oracle, Sybase, or Microsoft SQL Server. This part of the parameter string can be required to log the user onto the system where the source data resides. The UID keyword is used to refer to the user ID.
As with the user ID, the password most often is included when dealing with back-end data. It also can be used on other database types that support passwords, such as Paradox, or when linking to an external Access table. The PWD keyword is used when specifying the password.
Finally, the dataset name is used to refer to a defined ODBC data source. Communicating with an ODBC data source is covered in detail in Chapter 20. The DSN keyword is used when referring to the dataset name in the connection string.
When working with passwords, you probably won't want to hard-code the password into your application because it defeats the purpose of placing a password on your database. In Listing 19.9, the database's password is included in the code, allowing the link to be made to the secured table without any password validation.
Example 19.9. Embedding a database password in code.
Sub LinkToSecured()
Dim db As DATABASE
Dim tdf As TableDef
Set db = CurrentDb
Set tdf = db.CreateTableDef("tblSecuredTable")
tdf.Connect = ";Database=" & APPPATH & "secure.mdb;PWD=alison"
tdf.SourceTableName = "tblClients"
db.TableDefs.Append tdf
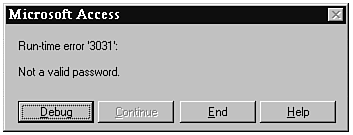
End SubAlthough an invalid password results in a message such as the one in Figure 19.10, it is best to require the user to supply the password at runtime. In Listing 19.10, the password argument is left blank, which causes the user to be prompted for a database.
Example 19.10. Requiring password validation.
Sub ReallySecure()
   Dim db As DATABASE
   Dim tdf As TableDef
   Dim strPassword As String
   Set db = CurrentDb
   Set tdf = db.CreateTableDef("tblSecuredTable")
   strPassword = InputBox("Please Enter Your Password", "Database Security!!")
   tdf.Connect = ";Database=" & APPPATH & "secure.mdb;PWD=" _
       & strPassword
   tdf.SourceTableName = "tblClients"
   db.TableDefs.Append tdf
End Sub
The password is retrieved from the user and stored in a variable called strPassword. This strPassword variable is included in the connection string at runtime.
Refreshing links refers to updating links to an external table. Links need to be refreshed when the location of an external table has changed. Removing links refers to the process of permanently removing links to an external table.
Access cannot find external tables if their locations have moved. You need to accommodate for this in your VBA code. Furthermore, there might be times when you want to remove a link to external data—when it is no longer necessary to use the data, or when the data has been imported permanently into Access.
To refresh a link using VBA code, follow these steps:
Listing 19.11 shows the code to refresh a link.
Example 19.11. Refreshing a link.
Sub RefreshLink()
   Dim db As Database
   Set db = CurrentDb
   db.TableDefs!FoxCusts.Connect = "FoxPro 2.6;DATABASE=d:
ewdir"
   db.TableDefs!FoxCusts.RefreshLink
End Sub
You can modify this routine to prompt the user for the directory containing the data tables, as Listing 19.12 shows.
Example 19.12. Prompting the user for the database path and name.
Sub RefreshLink()
   On Error GoTo RefreshLink_Err
   Dim db As DATABASE
   Dim tdf As TableDef
   Dim strNewLocation As String
   Set db = CurrentDb
   Set tdf = db.TableDefs("tblClients")
   tdf.RefreshLink
   Exit Sub

RefreshLink_Err:
   strNewLocation = InputBox("Please Enter Database Path and Name")
   db.TableDefs!tblClients.Connect = ";DATABASE=" & strNewLocation
   Resume
End Sub
This routine points a TableDef object to the tblClients table. It then issues a RefreshLink method on the table definition object. The RefreshLink method attempts to refresh the link for the table. If an error occurs, an input box prompts the user for the new location of the database. The Connect property for the database is modified to incorporate the new location. The code then resumes on the offending line of code (the RefreshLink). You should modify this routine to give the user a way out. Resume throws the user into an endless loop if the database is not available. An enhanced routine (Listing 19.15) is presented later in the “Practical Examples: Working with External Data from within Your Application” section of this chapter.
To remove a link using VBA code, simply execute a Delete method on the Table Definition collection of the database, as shown in Listing 19.13.
Not only can you link to existing tables, but you can even create new external tables. This means that you actually can design a FoxPro, Paradox, or other type of table using VBA code. The table resides on disk as an independent entity and can be used by its native application and as an external linked table in Access.
Sometimes, it is necessary for your application to provide another application with a data file. That other application might not be capable of reading an Access table. Therefore, you must create the file in a format native to the application that needs to read it.
Creating a “foreign” table is not as difficult as you might think. It's actually not very different from creating an Access table using VBA code, as Listing 19.14 shows.
Example 19.14. Creating a foreign table.
Sub CreateFoxTable()
   Dim db As DATABASE
   Dim rst As Recordset
   Dim fld As Field
   Dim dbFox As DATABASE
   Dim tdfFox As TableDef
   Set dbFox = DBEngine.Workspaces(0).OpenDatabase_
   ("c:databases", False, False, "FoxPro 2.6")
   Set tdfFox = dbFox.CreateTableDef("PayMeth")
   Set db = CurrentDb
   Set rst = db.OpenRecordset("tblPaymentMethods", dbOpenSnapshot)
   For Each fld In rst.Fields
      Set fld = tdfFox.CreateField(fld.Name, _
                           fld.Type, _
                           fld.Size)
      tdfFox.Fields.Append fld
   Next fld
   dbFox.TableDefs.Append tdfFox
End Sub
This example reads an Access table and writes its structure to a FoxPro table. It uses two Database object variables, one Recordset object variable, a TableDef object variable, and a Field object variable. It opens a table called tblPaymentMethods as a snapshot. This is the table that contains the structure you will send to FoxPro. Looking at each field in the table, it grabs that field's Name, Type, and Size properties. It uses those properties as parameters to the CreateField method of the FoxPro table definition, appends each FoxPro field as it loops through each field in the Access table definition, and appends the table definition to create the FoxPro table.
When dealing with different types of external files, various problems and issues arise. If you understand these stumbling blocks before they affect you, you will get a great head start in dealing with these potential obstacles.
The major concerns you will have when dealing with dBASE files surround deleted records, indexes, data types, and Memo fields. When you delete a record from a dBASE table, it is not actually removed from the table. Instead, it is just marked for deletion. A Pack process must be completed in order for the records to actually be removed from the table. If records are deleted from a dBASE table using an Access application, the records are not removed. Because you cannot pack a dBASE database from within an Access application, the records still remain in the table. In fact, they are not automatically filtered from the Access table. In order to filter deleted records so that they cannot be seen in the Access application, the deleted value in the HKEY_LOCAL_MACHINESOFTWAREMicrosoftJet3.5EnginesXbase section of the Registry must be set to 01 (True).
Access can use the dBASE indexes to improve performance. After you link to a dBASE table and select an index, an INF file is created. This file has the same name as your dBASE database with an INF extension. It contains information about all the indexes being used. Here's an example of an INF:
[dBASE III]
NDX1=CUSTID.NDX
UNDX1=CUSTID.NDX
dBASE III is the database type identifier. NDX1 is an index number for the first index. The UNDX1 entry specifies a unique index.
The data types available in dBASE files are different from those available in Access files. It is important to understand how the field types are mapped. Table 19.4 shows how each dBASE data type is mapped to a Jet data type.
Table 19.4. Mapping of dBASE data types.
| dBASE Data Type | Jet Data Type |
|---|---|
| Character | Text |
| Numeric, Float | Double |
| Logical | Boolean |
| Date | Date/Time |
| Memo | Memo |
| OLE | OLE Object |
Finally, it is important to ensure that the dBASE memo files are stored in the same directory as the table. Otherwise, Access is unable to read the data in the memo file.
Like dBASE files, the major concerns you will have when dealing with FoxPro files surround deleted records, indexes, data types, and Memo fields. You handle deleted records in the same way you handle dBASE files. You filter deleted records by setting the deleted value in the HKEY_LOCAL_MACHINESOFTWAREMicrosoftJet3.5EnginesXbase section of the Registry to 01.
As with dBASE indexes, the Access Jet Engine can take advantage of FoxPro indexes. The format of an INF file for a FoxPro file is identical to that of a dBASE file.
FoxPro field types are mapped to Jet field types in the same way that dBASE fields are mapped. The only difference is that FoxPro 3.0 supports Double, Currency, Integer, and DateTime field types. These map to the corresponding Jet field types. As with dBASE, make sure that the Memo files are stored in the same directory as the data tables.
When linking to an ASCII text file, Jet can determine the format of the file directly, or it can use a schema information file, which resides in the same directory as the text file. It always is named SCHEMA.INI, and it contains information about the format of the file, the column names, and the data types. The schema information file is optional for delimited files, but it is required for fixed-length files. It is important to understand that ASCII files can never be opened for shared use.
Unfortunately, working with external data is not always a smooth process. Many things can go wrong, including connection problems and a lack of temporary disk space.
Difficulties with accessing external data can be caused by any of the following circumstances:
The server on which the external data is stored is down.
The user does not have rights to the directory in which the external data is stored.
The user does not have rights to the external data source.
The external data source was moved.
The UNC path or network share name was modified.
The connection string is incorrect.
The installable ISAM driver has not been installed.
Access requires a significant amount of disk space in order to run complex queries on large tables. This disk space is required whether the tables are linked tables stored remotely in another format, or they reside on the local machine. If not enough disk space is available to run a query, the application behaves unpredictably. It therefore is necessary to ensure that all users have enough disk space to meet the requirements of the queries that are run.
Because your application has to go through an extra translation layer (the installable ISAM), performance is not nearly as good with ISAM files as it is with native Jet data. It always is best to import ISAM data whenever possible. If it is not possible to import the data, you need to accept the performance that linking offers or consider linking the best solution to an otherwise unsolvable problem. Opening the recordset using the OpenDatabase method might alleviate the problem, but remember that you cannot use this option with bound forms.
Access 97 enables you to import, export, and link to HTML documents. Although working with HTML documents is similar to working with other files types, HTML documents deserve special mention. To import an HTML document, follow these steps:
Right-click the Tables tab and choose Import.
From the Files of type drop-down list, select HTML Documents.
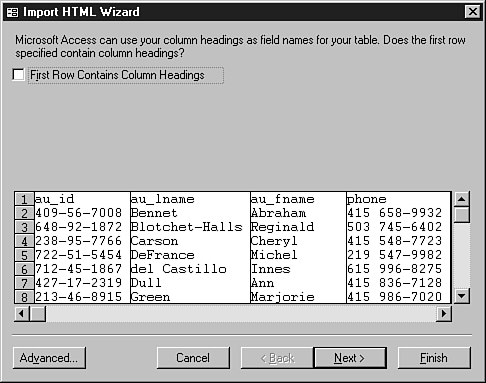
Select the document you want to import and click Import. The Import HTML Wizard dialog box appears, as shown in Figure 19.11.
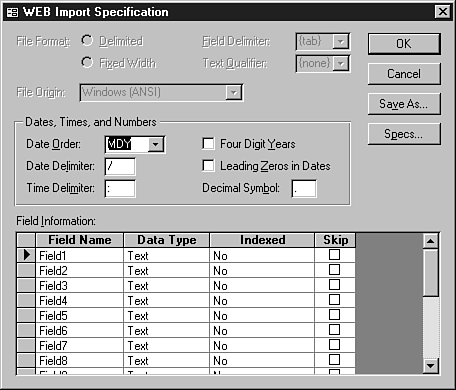
The first step of the Wizard attempts to parse the HTML document into fields. You can accept what the Wizard has done or click Advanced. The Web Import Specification dialog box that appears enables you to designate field names, data types, and indexes for each field; and to select any fields you want to eliminate from the imported file. (See Figure 19.12.) This dialog box also enables you to modify the date order, date delimiter, and more.
After you make any required changes to the import specifications, click OK to return to the HTML Wizard. Click Next to advance to the next step of the Wizard, which enables you to select whether the imported data is stored in a new table or in an existing table. Make your selection and then click Next.
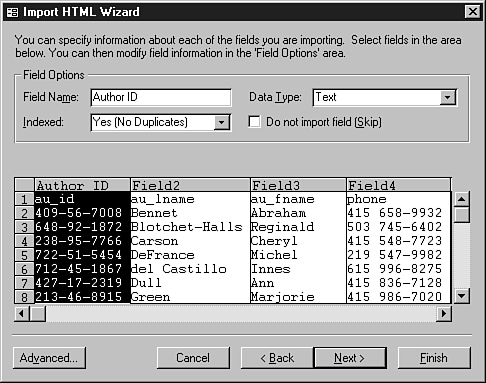
The third step of the Wizard enables you to designate a field name, data type, and index for each field, as shown in Figure 19.13. Make any desired changes here and click Next.
The fourth step of the Wizard enables you to indicate that you want Access to add a primary key to the table, that you want to select your own primary key, or that you don't want the imported table to have a primary key. Make your selection and click Next.
The final step of the Wizard enables you to assign a name to the table. You even can have the Wizard analyze the table after importing it. Click Finish after you make your selection.
Not only can you import an HTML document, but you also can link to one. To link to an HTML document, follow these steps:
Right-click the Tables tab and choose Link Tables.
From the Files of Type drop-down list, select HTML Documents.
Select the table you want to link to and click Link. The Link HTML Wizard appears.
Click the Advanced button to modify any link specifications and return to the first step of the Wizard. Click Next to move to the second step of the Wizard.
The second step of the Link HTML Wizard enables you to specify information about each field you are importing. Make any required changes and click Next.
Supply a name for the linked table and click Finish.
Whereas an imported HTML document acts like any other Access table, the data in a linked HTML document is not modifiable from within Access. You can use the linked document to create queries, reports, and forms.
It's time to split the data tables from the remainder of the application objects. You easily can accomplish this by using the Database Splitter. After you split the tables from the rest of the database objects, you need to write code to refresh links. Both these topics are covered in this section.
Begin by using the Database Splitter to separate the tables from the rest of the database objects. The CHAP19.MDB and CHAP19DATA.MDB files are on the sample code CD-ROM. The CHAP19DATA.MDB file contains all the tables, and CHAP19.MDB contains the rest of the database objects.
If you distributed the Time and Billing application and all users did not have the same path to the CHAP19DATA.MDB file, the application would not load successfully. The AutoExec function ensures that the tables are successfully linked, as Listing 19.15 shows.
Example 19.15. Loading the application and checking table attachments.
Function AutoExec()
  On Error GoTo AutoExec_Err:

  Dim fAnswer As Boolean
  Dim dblStartTime As Double
  Dim dblTimeElapsed As Double

  'Open splash screen form
  DoCmd.OpenForm "frmSplash"
  DoEvents
  'Invoke hourglass
  DoCmd.Hourglass True
  'Call routine that checks if tables are properly attached
  fAnswer = AreTablesAttached()
  'Test return value and proceed only if tables were
  'successfully attached
  If Not fAnswer Then
    MsgBox "You Cannot Run This App Without Locating Data Tables"
    DoCmd.Close acForm, "frmSplash"
    DoCmd.Close acForm, "frmGetTables"
  End If
  Call GetCompanyInfo
  DoCmd.Hourglass False
  DoCmd.OpenForm "frmClients"
  'If splash screen is still loaded, unload it
  If IsLoaded("frmSplash") Then
    DoCmd.Close acForm, "frmSplash"
  End If
  Exit Sub

AutoExec_Err:
    MsgBox "Error # " & Err.Number & ": " & Err.Description
    Exit Sub
End Function
Notice that the AreTablesAttached routine is called from the AutoExec routine. If the AreTablesAttached routine returns False, a message is displayed and the application is exited. Listing 19.16 shows the AreTablesAttached routine.
Example 19.16. The AreTablesAttached routine.
Function AreTablesAttached() As Boolean
   ' Update connection information in attached tables.
   '
   ' Number of attached tables for progress meter.
   Const MAXTABLES = 8
   Const NONEXISTENT_TABLE = 3011
   Const DB_NOT_FOUND = 3024
   Const ACCESS_DENIED = 3051
   Const READ_ONLY_DATABASE = 3027

   Dim intTableCount As Integer
   Dim intResponse As Integer
   Dim strFilename As String
   Dim strAppDir As String
   Dim vntReturnValue As Variant
   Dim tdf As TableDef
   Dim db As DATABASE
   Dim rst As Recordset

   Set db = CurrentDb

   AreTablesAttached = True
   ' Continue if attachments are broken.
   On Error Resume Next
   ' Open attached table to see if connection information is correct.
   Set rst = db.OpenRecordset("tblClients")
   ' Exit if connection information is correct.
   If Err.Number = 0 Then
    rst.Close
    Exit Function
   Else
    'Otherwise, determine location of current database
    strAppDir = Left(db.Name, LastOccurence(db.Name, ""))
    'Try to establish the connection searching for the linked
    'tables in the same folder as the application database
    If TryAgain(strAppDir) Then
       rst.Close
       Exit Function
    End If
    'If connection still cannot be established, continue
    'Warn the user
    MsgBox "You Must Locate the Data Tables"
    DoEvents
    Forms!frmGetTables!dlgCommon.DialogTitle = _
        "Please Locate the Database Containing the Data Tables"
    Forms!frmGetTables!dlgCommon.ShowOpen
    strFilename = Forms!frmLogon!dlgCommon.filename
   End If
   If strFilename = "" Then
      GoTo Exit_Failed ' User pressed Cancel.
   End If
   ' Initialize progress meter.
   vntReturnValue = SysCmd(SYSCMD_INITMETER, "Attaching tables", MAXTABLES)

   ' Loop through all tables, reattaching those with
   ' nonzero-length Connect strings.
   intTableCount = 1 ' Initialize TableCount for status meter.
   For Each tdf In db.TableDefs
      If tdf.Connect <> "" Then
         tdf.Connect = ";DATABASE=" & strFilename
         Err.Number = 0
         tdf.RefreshLink
         If Err.Number <> 0 Then
           If Err.Number = NONEXISTENT_TABLE Then
             MsgBox "File '" & strFilename & _
                "' does not contain required table '" & _
                tdf.SourceTableName & "'", 16, "Can't Run This App"
           ElseIf Err.Number = DB_NOT_FOUND Then
             MsgBox "You can't run FSG Main Application " & vbCrLf & _
                "Until you locate Data File", 16, "Can't Run Application"
           ElseIf Err.Number = ACCESS_DENIED Then
             MsgBox "Couldn't open " & strFilename & _
                " because it is read-only or it is located " & _
                "on a read-only share.", 16, "Can't Run This App"
           ElseIf Err.Number = READ_ONLY_DATABASE Then
             MsgBox "Can't reattach tables because Data File " & _
                "is read-only or is located on a read-only share.", _
                16, "Can't Run This App"
           Else
             MsgBox Error, 16, "Can't Run This App"
           End If
           intResponse = MsgBox(tdf.Name & " Not Found. " & _
             vbCrLf & "Would You Like to Locate it?", _
             vbQuestion + vbYesNo)
           If intResponse = vbYes Then
             Forms!frmLogon!dlgCommon.DialogTitle = "Please Locate " & _
                tdf.Name
             Forms!frmLogon!dlgCommon.ShowOpen
             strFilename = Forms!frmLogon!dlgCommon.filename
           Else
             AreTablesAttached = False
             GoTo Exit_Final
           End If
         End If
         intTableCount = intTableCount + 1
         vntReturnValue = SysCmd(SYSCMD_UPDATEMETER, intTableCount)
      End If
   Next tdf
   GoTo Exit_Final
Exit_Failed:
   MsgBox "You can't run this example until " & _
    "you locate Data File", 16, "Can't Run This Example"
   AreTablesAttached = False
Exit_Final:
   vntReturnValue = SysCmd(SYSCMD_REMOVEMETER)
End Function
The AreTablesAttached function begins by pointing the DB object variable to the current database and setting its default return value to True. It issues an On Error Resume Next statement, instructing Access to proceed with the next line of code if an error is encountered. Next, it attempts to open a recordset based on the tblClients table. If the tables are not properly linked, an error occurs. The If Err.Number = 0 statement tests to see whether an error occurred. If the Err.Number is equal to 0, no error occurred and the function can be exited. Otherwise, the application attempts to locate the data file in the directory that contains the application database. If this is not successful, the ShowOpen method is applied to a Common Dialog control, which is placed on a hidden form called frmGetTables.
The Common Dialog control is an ActiveX control that is included as part of the Office Developer Edition Tools for Windows 95. It is covered in detail in Chapter 26, “Using ActiveX Controls.” In this case, the control invokes the File Open common dialog box. The filename the user selects in the File Open dialog box is returned to the variable strFilename. After a potential new location for the tables is identified by the user, Access attempts to issue the RefreshLink method on each table found in the Table Definitions collection of the current database. If the link to any table is not refreshed properly, another error occurs and a return value of False is returned from the AreTablesAttached function.
The capability to link to external data is one of Access 97's strongest attributes. It is important that you understand how to link to external data via the user interface and by using VBA code. This chapter taught you how to link to external tables, open external data sources directly, refresh and remove links, and create external tables using VBA code. Many of the techniques covered in this chapter are explored further in Chapter 20.