
Chapter 5: Angular and RxJS – Awesomeness Combined
Angular and RxJS create a killer combination of awesomeness. By combining these, you can handle your data reactively, work with streams, and do really complex stuff in your Angular apps. That's exactly what you're going to learn in this chapter.
Here are the recipes we're going to cover in this chapter:
- Working with RxJS operators using instance methods
- Working with RxJS operators using static methods
- Unsubscribing streams to avoid memory leaks
- Using an Observable with the async pipe to synchronously bind data to your Angular templates
- Using combineLatest to subscribe to multiple streams together
- Using the flatMap operator to create sequential HyperText Transfer Protocol (HTTP) calls
- Using the switchMap operator to switch the last subscription with a new one
- Debouncing HTTP requests using RxJS
Technical requirements
For the recipes in this chapter, make sure you have Git and Node.js installed on your machine. You also need to have the @angular/cli package installed, which you can do with npm install -g @angular/cli from your Terminal. The code for this chapter can be found at the following link: https://github.com/PacktPublishing/Angular-Cookbook/tree/master/chapter05.
Working with RxJS operators using instance methods
In this recipe, you'll learn to use RxJS operators' instance methods to work with streams. We'll start with a basic app in which you can start listening to a stream with the interval method. We'll then introduce some instance methods in the subscription to modify the output.
Getting ready
The project that we are going to work with resides in chapter05/start_here/rxjs-operators-instance-methods, inside the cloned repository.
- Open the project in Visual Studio Code (VS Code).
- Open the Terminal and run npm install to install the dependencies of the project.
- Once done, run ng serve -o.
This should open the app in a new browser tab. Tap the Start Stream button, and you should see something like this:

Figure 5.1 – The rxjs-operators-instance-methods app running on http://localhost:4200
Now that we have the app running, we will move on to the steps for the recipe.
How to do it…
We have an Angular app that has some things already set up. By tapping the Start Stream button, we can start viewing the stream output that is using the interval method from RxJS to create an Observable that outputs a sequence of numbers from 0 onward. We'll use some operators to show the elements from our inputStreamData array instead, which is the goal of this recipe. Let's begin.
- First, we'll use the map operator to make sure that we are mapping the numbers generated from the interval Observable to the valid indices of our array. For this, we'll update the app.component.ts file.
We have to make sure that the mapped numbers are not greater than or equal to the length of inputStreamData. We'll do this by taking a modulus on the number each time, using the map operator as follows:
import { Component } from '@angular/core';
import { interval, Subscription } from 'rxjs';
import { map } from 'rxjs/operators';
@Component({...})
export class AppComponent {
...
startStream() {
this.subscription = streamSource
.pipe(
map(output => output % this.inputStreamData. length),
)
.subscribe(input => {
this.outputStreamData.push(input);
});
...
}
If you tap the Start Stream button now, you'll see that the output we get is 0, 1, 2, 0, 1, 2... and so forth. This makes sure we can always get an item from the inputStreamData array using the number as an index:

Figure 5.2 – The stream outputs a 0,1,2.. sequence using the modulus on inputStreamData.length
- Now, we'll use another map method to fetch an element from the array for each of the stream's outputs, as follows:
startStream() {
const streamSource = interval(1500);
this.subscription = streamSource
.pipe(
map(output => output % this.inputStreamData. length),
map(index => this.inputStreamData[index])
)
.subscribe(element => {
this.outputStreamData.push(element);
});
}
Notice that we've renamed the parameter of the subscribe method as element instead of input. This is because we get an element in the end. See the following screenshot, demonstrating how the stream outputs the elements from inputStreamData using indices:

Figure 5.3 – The stream outputs elements from inputStreamData using indices
- Now, to make things more interesting, we'll create another stream that will emit cartoon titles using the same interval method approach, but with a 1000ms interval. Add the following code to your startStream method:
startStream() {
const streamSource = interval(1500);
const cartoonStreamSource = interval(1000)
.pipe(
map(output => output % this.cartoonsStreamData. length),
map(index => this.cartoonsStreamData[index]),
)
this.subscription = streamSource
.pipe(...)
.subscribe(...);
}
- We'll also create stream data named cartoonStreamData (used in the previous code) in the AppComponent class as a property. The code should look like this:
export class AppComponent {
subscription: Subscription = null;
inputStreamData = ['john wick', 'inception', 'interstellar'];
cartoonsStreamData = ['thunder cats', 'Dragon Ball Z', 'Ninja Turtles'];
outputStreamData = [];
...
}
- Now that we have the cartoonsStreamData stream data in place, we can also add that to our template so that we can show it on the view as well. The children of the <div class="input-stream"> element in app.component.html should look like this:
<div class="input-stream">
<div class="input-stream__item" *ngFor="let item of inputStreamData">
{{item}}
</div>
<hr/>
<div class="input-stream__item" *ngFor="let item of cartoonsStreamData">
{{item}}
</div>
</div>
- Now, we'll use the merge (instance) method to combine the two streams and add an element from the respective stream data array when the streams emit a value. Interesting, right?
We'll achieve this using the following code:
...
import { map, merge } from 'rxjs/operators';
export class AppComponent {
...
startStream() {
...
this.subscription = streamSource
.pipe(
map(output => output % this.inputStreamData. length),
map(index => this.inputStreamData[index]),
merge(cartoonStreamSource)
)
.subscribe(element => {
this.outputStreamData.push(element);
});
}
}
Important note
The usage of the merge method as an instance method is deprecated in favor of the static merge method.
Great! You have now implemented the entire recipe, with an interesting merge of two streams. The following screenshot shows the final output:

Figure 5.4 – Final output of the recipe
Let's move on to the next section to understand how it all works.
How it works…
The map operator provides you the stream's output value, and you're supposed to return a value that you want to map it to. We made sure that we converted the autogenerated sequential numbers to the array's indices by taking a modulus of the array's length. Then, we used another map operator on top of these indices to fetch the actual element from the array. Finally, we created another stream and used the merge method to combine the outputs of both streams and add this to the outputStreamData array.
See also
- Catch the Dot Game—RxJS documentation (https://www.learnrxjs.io/learn-rxjs/recipes/catch-the-dot-game)
- RxJS map operator documentation (https://www.learnrxjs.io/learn-rxjs/operators/transformation/map)
- RxJS merge operator documentation (https://www.learnrxjs.io/learn-rxjs/operators/combination/merge)
Working with RxJS operators using static methods
In this recipe, you'll learn to use RxJS operators' static methods to work with streams. We'll start with a basic app in which you can start listening to a stream with the interval method. We'll then introduce some static methods in the subscription to modify the output, to see it on the user interface (UI). After that, we'll split the streams using the partition static operator. And finally, we'll be merging the partitioned streams using the merge static operator to see their output.
Getting ready
The project for this recipe resides in chapter05/start_here/rxjs-operators-static-methods.
- Open the project in VS Code.
- Open the Terminal and run npm install to install the dependencies of the project.
- Once done, run ng serve -o.
This should open the app in a new browser tab, and you should see something like this:
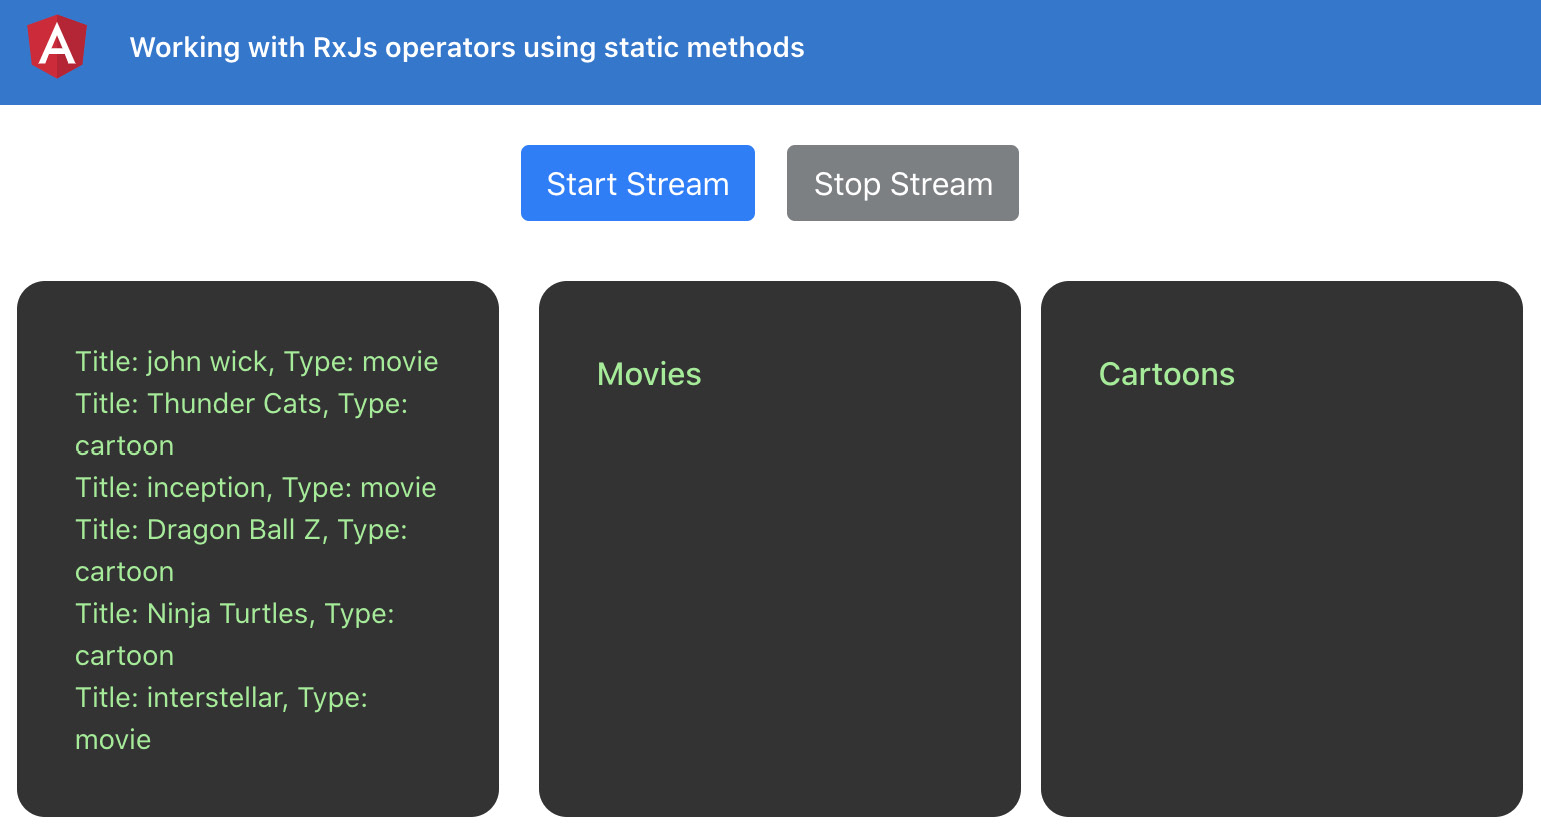
Figure 5.5 – The rxjs-operators-static-methods app running on http://localhost:4200
We also have the following data, which is composed of both movies and cartoons, and this is what we'll get as the output of the streams:
combinedStreamData = [{
type: 'movie',
title: 'john wick'
}, {
type: 'cartoon',
title: 'Thunder Cats'
}, {
type: 'movie',
title: 'inception'
}, {
type: 'cartoon',
title: 'Dragon Ball Z'
}, {
type: 'cartoon',
title: 'Ninja Turtles'
}, {
type: 'movie',
title: 'interstellar'
}];
Now that we have the app running locally, let's see the steps of the recipe in the next section.
How to do it…
We have an Angular app in hand that has some data in an array called combinedStreamData. By tapping the Start Stream button, we can start viewing the output of the stream in both the Movies output section and the Cartoons output section. We'll use the partition and merge operators to get the desired output and also to show the count of movies and the cartoons shown on output at the moment. Let's begin.
- First, we'll import the partition and merge operators from RxJS (unlike how we imported it from rxjs/operators in the previous recipe). The import should look like this in the app.component.ts file:
import { Component } from '@angular/core';
import { interval, partition, merge, Subscription } from 'rxjs';
- Now, we'll create two properties, movies and cartoons, in the AppComponent class, one to hold the movies and one to hold the cartoons:
import { Component } from '@angular/core';
import { interval, partition, merge, Subscription } from 'rxjs';
import { map, tap } from 'rxjs/operators';
export class AppComponent {
…
outputStreamData = [];
movies= []
cartoons= [];
startStream() {
}
...
}
- And now, we'll use the appropriate variables in the template for movies and cartoons, as follows:
<div class="cards-container">
<div class="input-stream">
...
<div class="output-stream">
<h6>Movies</h6>
<div class="input-stream__item" *ngFor="let movie of movies">
{{movie}}
</div>
</div>
<div class="output-stream">
<h6>Cartoons</h6>
<div class="input-stream__item" *ngFor="let cartoon of cartoons">
{{cartoon}}
</div>
</div>
</div>
- We'll now use the partition operator to create two streams out of the streamSource property. Your startStream method should look like this:
startStream() {
const streamSource = interval(1500).pipe(
map(input => {
const index = input % this.combinedStreamData. length;
return this.combinedStreamData[index];
})
);
const [moviesStream, cartoonsStream] = partition(
streamSource, item => item.type === 'movie'
);
this.subscription = streamSource
.subscribe(input => {
this.outputStreamData.push(input);
});
}
Now that we have the streams split up, we can merge those to subscribe to a single stream, push to the appropriate output array, and just log the value to the console as the output.
- Let's merge the streams now, and we'll add them to the appropriate output array using the tap operator, as follows:
startStream() {
...
this.subscription = merge(
moviesStream.pipe(
tap(movie => {
this.movies.push(movie.title);
})
),
cartoonsStream.pipe(
tap(cartoon => {
this.cartoons.push(cartoon.title);
})
),
)
.subscribe(input => {
this.outputStreamData.push(input);
});
}
With this change, you should be able to see the correct value in the appropriate container—that is, whether it is a movie or a cartoon. See the following screenshot, which shows how the partitioned streams emit values to the appropriate Observables:

Figure 5.6 – Partitioned streams outputting data to the appropriate views
- Finally, since we have merged the stream, we can use console.log to see each value being output. We'll remove the outputStreamData property from AppComponent and use a console.log statement instead of pushing to outputStreamData in the subscribe block, as follows:
...
@Component({...})
export class AppComponent {
...
outputStreamData = []; ← Remove
movies = [];
cartoons = [];
ngOnInit() {}
startStream() {
const streamSource = interval(1500).pipe(
map(...)
);
const [moviesStream, cartoonsStream] = partition(...);
this.subscription = merge(
moviesStream.pipe(...),
cartoonsStream.pipe(...)
).subscribe((output) => {
console.log(output);
});
}
...
}
As soon as you refresh the app, you should see the logs on the console, as follows:

Figure 5.7 – Logs on console for each output in the subscribe block from the merged streams
Great! You now know how to use static operators from RxJS (specifically, partition and merge) to work with streams in real-life use cases. See the next section on how this works.
How it works…
RxJS has a bunch of static operators/methods that we can use for our particular use cases. In this recipe, we used the partition operator to create two different streams based on the predicate function provided as the second argument, which returns an array with two Observables. The first one will contain all values that satisfy the predicate, and the second one will contain all values that don't satisfy the predicate. Why did we split the streams? Glad you asked. Because we needed to show the appropriate outputs in different output containers. And what's GREAT is that we merged those streams later on so that we only had to subscribe to one stream, and we could then unsubscribe from that very stream as well.
See also
- RxJS map operator documentation (https://www.learnrxjs.io/learn-rxjs/operators/transformation/map)
- RxJS merge operator documentation (https://www.learnrxjs.io/learn-rxjs/operators/combination/merge)
- RxJS partition operator documentation (https://www.learnrxjs.io/learn-rxjs/operators/transformation/partition)
Unsubscribing streams to avoid memory leaks
Streams are fun to work with and they're awesome, and you'll know much more about RxJS when you've finished this chapter, although problems occur when streams are used without caution. One of the biggest mistakes to do with streams is to not unsubscribe them when we no longer need them, and in this recipe, you'll learn how to unsubscribe streams to avoid memory leaks in your Angular apps.
Getting ready
The project for this recipe resides in chapter05/start_here/rxjs-unsubscribing-streams.
- Open the project in VS Code.
- Open the Terminal and run npm install to install the dependencies of the project.
- Once done, run ng serve -o.
This should open the app in a new browser tab, and you should see something like this:
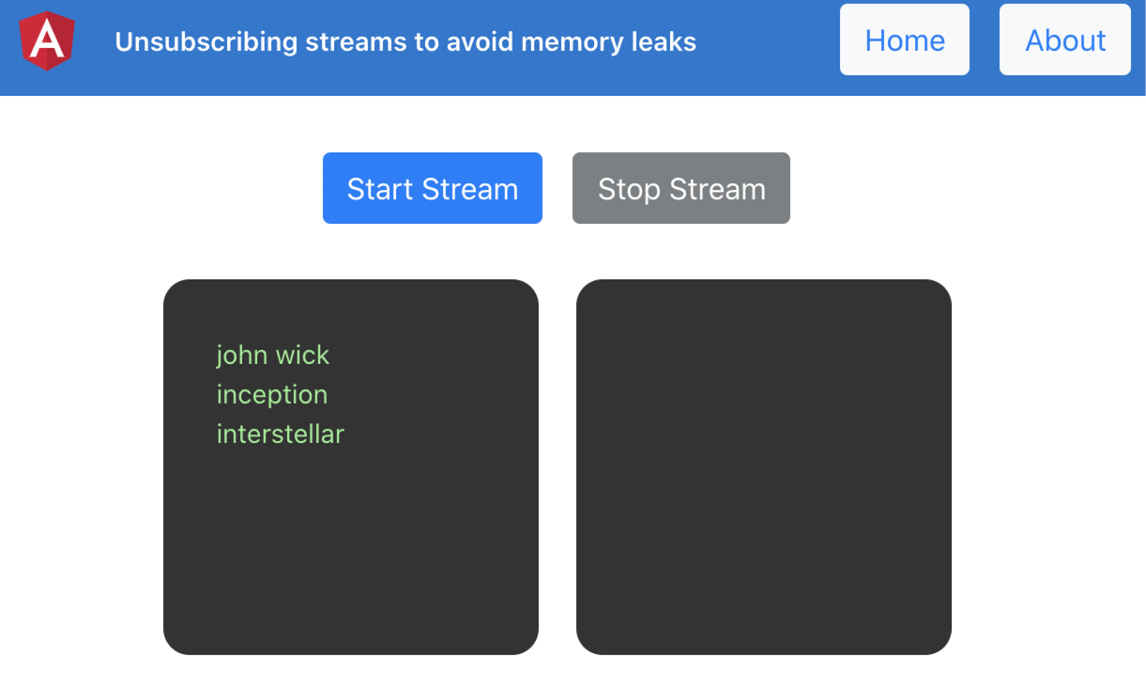
Figure 5.8 – The rxjs-unsubscribing-streams app running on http://localhost:4200
Now that we have the app running locally, let's see the steps of the recipe in the next section.
How to do it…
We currently have an app with two routes—that is, Home and About. This is to show you that unhandled subscriptions can cause memory leaks in an app. The default route is Home, and in the HomeComponent class, we handle a single stream that outputs data using the interval method.
- Tap the Start Stream button, and you should see the stream emitting values.
- Then, navigate to the About page by tapping the About button from the header (top right), and then come back to the Home page.
What do you see? Nothing? Everything looks fine, right? Well, not exactly.
- To see whether we have an unhandled subscription, which is an issue, let's put a console.log inside the startStream method in the home.component.ts file—specifically, inside the .subscribe method's block, as follows:
...
export class HomeComponent implements OnInit {
...
startStream() {
const streamSource = interval(1500);
this.subscription = streamSource.subscribe(input => {
this.outputStreamData.push(input);
console.log('stream output', input)
});
}
stopStream() {...}
}
If you now perform the same steps as mentioned in Step 1, you'll see the following output on the console:

Figure 5.9 – The rxjs-unsubscribing-streams app running on http://localhost:4200
Want to have some more fun? Try performing Step 1 a couple of times without refreshing the page even once. What you'll see will be CHAOS!
- So, to solve the issue, we'll use the simplest approach—that is, unsubscribing the stream when the user navigates away from the route. Let's implement the ngOnDestroy lifecycle method for that, as follows:
import { Component, OnInit, OnDestroy } from '@angular/core';
...
@Component({
selector: 'app-home',
templateUrl: './home.component.html',
styleUrls: ['./home.component.scss']
})
export class HomeComponent implements OnInit, OnDestroy {
...
ngOnInit() {
}
ngOnDestroy() {
this.stopStream();
}
startStream() {
const streamSource = interval(1500);
this.subscription = streamSource.subscribe(input => {
this.outputStreamData.push(input);
console.log('stream output', input)
});
}
stopStream() {
this.subscription.unsubscribe();
this.subscription = null;
}
}
Great! If you follow the instructions from Step 1 again, you'll see that there's no further log on the console once you navigate away from the Home page, and our app doesn't have an unhandled stream causing memory leaks now. Read the next section to understand how it works.
How it works…
When we create an Observable/stream and we subscribe to it, RxJS automagically adds our provided .subscribe method block as a handler to the Observable. So, whenever there's a value emitted from the Observable, our method is supposed to be called. The fun part is that Angular doesn't automatically destroy that subscription/handler when the component unmounts or when you have navigated away from the route. That's because the core of Observables is RxJS, not Angular, and therefore it isn't Angular's responsibility to handle it.
Angular provides certain lifecycle methods, and we used the OnDestroy (ngOnDestroy) method. This is because when we navigate away from a route, Angular destroys that route, and that's when we would want to unsubscribe from all streams we have subscribed to.
There's more…
In a complex Angular app, there will be cases where you'd have more than one subscription in a component, and when the component is destroyed, you'd want to clean all those subscriptions at once. Similarly, you might want to unsubscribe based on certain events/conditions rather than the OnDestroy lifecycle. Here is an example, where you have multiple subscriptions in hand and you want to clean up all of them together when the component destroys:
startStream() {
const streamSource = interval(1500);
const secondStreamSource = interval(3000);
const fastestStreamSource = interval(500);
streamSource.subscribe(input => {...});
secondStreamSource.subscribe(input => {
this.outputStreamData.push(input);
console.log('second stream output', input)
});
fastestStreamSource.subscribe(input => {
this.outputStreamData.push(input);
console.log('fastest stream output', input)
});
}
stopStream() {
}
Notice that we're not saving the Subscription from streamSource to this.subscription anymore, and we have also removed the code from the stopStream method. The reason for this is because we don't have individual properties/variables for each Subscription. Instead, we'll have a single variable to work with. Let's look at the following recipe steps to get things rolling.
- First, we'll create a property in the HomeComponent class named isComponentAlive:
...
export class HomeComponent implements OnInit, OnDestroy {
isComponentAlive: boolean;
...
}
- Now, we'll import the takeWhile operator from rxjs/operators, as follows:
import { Component, OnInit, OnDestroy } from '@angular/core';
import { interval } from 'rxjs/internal/observable/interval';
import { Subscription } from 'rxjs/internal/Subscription';
import { takeWhile } from 'rxjs/operators';
- We'll now use the takeWhile operator with each of our streams to make them work only when the isComponentAlive property is set to true. Since takeWhile takes a predicate method, it should look like this:
startStream() {
...
streamSource
.pipe(
takeWhile(() => !!this.isComponentAlive)
).subscribe(input => {...});
secondStreamSource
.pipe(
takeWhile(() => !!this.isComponentAlive)
).subscribe(input => {...});
fastestStreamSource
.pipe(
takeWhile(() => !!this.isComponentAlive)
).subscribe(input => {...});
}
If you press the Start Stream button right now on the Home page, you still won't see any output or logs because the isComponentAlive property is still undefined.
- To make the streams work, we'll set the isComponentAlive property to true in the ngOnInit method as well as in the startStream method. The code should look like this:
ngOnInit() {
this.isComponentAlive = true;
}
ngOnDestroy() {
this.stopStream();
}
startStream() {
this.isComponentAlive = true;
const streamSource = interval(1500);
const secondStreamSource = interval(3000);
const fastestStreamSource = interval(500);
...
}
After this step, if you now try to start the stream and navigate away from the page, you'll still see the same issue with the streams—that is, they've not been unsubscribed.
- To unsubscribe all streams at once, we'll set the value of isComponentAlive to false in the stopStream method, as follows:
stopStream() {
this.isComponentAlive = false;
}
And boom! Now, if you navigate away from the route while the streams are emitting values, the streams will stop immediately as soon as you navigate away from the Home route. Voilà!
See also
- Read about RxJS Subscription (https://www.learnrxjs.io/learn-rxjs/concepts/rxjs-primer#subscription)
- takeWhile docs (https://www.learnrxjs.io/learn-rxjs/operators/filtering/takewhile)
Using an Observable with the async pipe to synchronously bind data to your Angular templates
As you learned in the previous recipe, it is crucial to unsubscribe the streams you subscribe to. What if we had an even simpler way to unsubscribe them when the component gets destroyed—that is, letting Angular take care of it somehow? In this recipe, you'll learn how to use Angular's async pipe with an Observable to directly bind the data in the stream to the Angular template instead of having to subscribe in the *.component.ts file.
Getting ready
The project for this recipe resides in chapter05/start_here/using-async-pipe.
- Open the project in VS Code.
- Open the Terminal and run npm install to install the dependencies of the project.
- Once done, run ng serve -o.
This should open the app in a new browser tab. As soon as the page is opened, you should see something like this:

Figure 5.10 – The using-async-pipe app running on http://localhost:4200
Now that we have the app running locally, let's see the steps of the recipe in the next section.
How to do it…
The app we have right now has three streams/Observables observing values at different intervals. We're relying on the isComponentAlive property to keep the subscription alive or make it stop when the property is set to false. We'll remove the usage of takeWhile and somehow make everything work similarly to what we have right now.
- First, remove the subscription property from the home.component.ts file and add an Observable type property named streamOutput$. The code should look like this:
...
import { Observable } from 'rxjs';
...
export class HomeComponent implements OnInit, OnDestroy {
isComponentAlive: boolean;
subscription: Subscription = null ← Remove this;
inputStreamData = ['john wick', 'inception', 'interstellar'];
streamsOutput$: Observable<number[]> ← Add this
outputStreamData = []
constructor() { }
...
}
With this change, the app would break because of some missing variables. Fear not! I'm here to help you.
- We'll now combine all the streams to give out a single output—that is, the outputStreamData array. We'll remove all the existing .pipe and .subscribe methods from the startStream() method, so the code should now look like this:
import { Component, OnInit, OnDestroy } from '@angular/core';
import { merge, Observable } from 'rxjs';
import { map, takeWhile } from 'rxjs/operators';
...
export class HomeComponent implements OnInit, OnDestroy {
...
startStream() {
const streamSource = interval(1500);
const secondStreamSource = interval(3000);
const fastestStreamSource = interval(500);
this.streamsOutput$ = merge(
streamSource,
secondStreamSource,
fastestStreamSource
)
}
...
}
With this change, the linters will still complain. Why? Because the merge operator combines all streams and outputs the latest value. This is a Observable<number> data type, instead of Observable<string[]>, which is the type of streamsOutput$.
- Since we want to assign the entire array containing every output emitted from the streams, we'll use a map operator and add each output to the outputStreamData array, and return the latest state of the outputStreamData array, as follows:
startStream() {
const streamSource = interval(1500);
const secondStreamSource = interval(3000);
const fastestStreamSource = interval(500);
this.streamsOutput$ = merge(
streamSource,
secondStreamSource,
fastestStreamSource
).pipe(
takeWhile(() => !!this.isComponentAlive),
map(output => {
this.outputStreamData = [...this. outputStreamData, output]
return this.outputStreamData;
})
)
}
- Remove the stopStream method from the HomeComponent class since we don't need it anymore. Also, remove its usage from the ngOnDestroy method.
- Finally, modify the template in home.component.html to use the streamOutput$ Observable with the async pipe to loop over the output array:
<div class="output-stream">
<div class="input-stream__item" *ngFor="let item of streamsOutput$ | async">
{{item}}
</div>
</div>
- To verify that the subscription REALLY gets destroyed on component destruction, let's put a console.log in the startStream method inside the map operator, as follows:
startStream() {
const streamSource = interval(1500);
const secondStreamSource = interval(3000);
const fastestStreamSource = interval(500);
this.streamsOutput$ = merge(
streamSource,
secondStreamSource,
fastestStreamSource
).pipe(
takeWhile(() => !!this.isComponentAlive),
map(output => {
console.log(output)
this.outputStreamData = [...this. outputStreamData, output]
return this.outputStreamData;
})
)
}
Hurray! With this change, you can try refreshing the app, navigate away from the Home route, and you'll see that the console logs stop as soon as you do that. Do you feel the achievement we just got by removing all that extra code? I certainly do. Well, see in the next section how it all works.
How it works…
Angular's async pipe automatically destroys/unsubscribes the subscription as soon as the component destroys. This gives us a great opportunity to use it where possible. In the recipe, we basically combined all the streams using the merge operator. The fun part was that for the streamsOutput$ property, we wanted an Observable of the output array on which we could loop over. However, merging the stream only combines them and emits the latest value emitted by any of the streams. So, we added a .pipe() method with the .map() operator to take the latest output out of the combined stream, added it to the outputStreamData array for persistence, and returned it from the .map() method so that we get the array in the template when we use the async pipe.
Fun fact—streams don't emit any value unless they're subscribed to. "But Ahsan, we didn't subscribe to the stream, we just merged and mapped the data. Where's the subscription?" Glad you asked. Angular's async pipe subscribes to the stream itself, which triggers our console.log as well that we added in Step 6.
Important note
The async pipe has a limitation, which is that you cannot stop the subscription until the component is destroyed. In such cases, you'd want to go for in-component subscriptions using something such as the takeWhile/takeUntil operator or doing a regular .unsubscribe method yourself when the component is destroyed.
See also
- Angular async pipe documentation (https://angular.io/api/common/AsyncPipe)
Using combineLatest to subscribe to multiple streams together
In the previous recipe, we had to merge all the streams, which resulted in a single output being last emitted by any of the streams. In this recipe, we'll work with combineLatest, which results in having an array as an output, combining all the streams. This approach is appropriate for when you want the latest output from all the streams, combined in a single subscribe.
Getting ready
The project that we are going to work with resides in chapter05/start_here/using-combinelatest-operator, inside the cloned repository.
- Open the project in VS Code.
- Open the Terminal and run npm install to install the dependencies of the project.
- Once done, run ng serve -o.
This should open the app in a new browser tab, and you should see something like this:

Figure 5.11 – The using-combinelatest-operator app running on http://localhost:4200
Now that we have the app running locally, let's see the steps of the recipe in the next section.
How to do it…
For this recipe, we have an app that displays a box. The box has a size (width and height), a border radius, a background color, and a color for its text. It also has four inputs to modify all the mentioned factors. Right now, we have to apply the changes manually with the click of a button. What if we could subscribe to the changes to the inputs and update the box right away? That's what we're going to do here.
- We'll begin by creating a method named listenToInputChanges, in which we'll subscribe to the changes for each of the inputs and combine those streams using the combineLatest operator. Update the home/home.component.ts file, as follows:
...
import { combineLatest, Observable } from 'rxjs';
...
export class HomeComponent implements OnInit, OnDestroy {
...
ngOnInit() {
...
this.applyChanges();
this.listenToInputChanges(); ← Add this
}
listenToInputChanges() {
combineLatest([
this.boxForm.get('size').valueChanges,
this.boxForm.get('borderRadius').valueChanges,
this.boxForm.get( 'backgroundColor').valueChanges,
this.boxForm.get('textColor').valueChanges
]).subscribe(() => {
this.applyChanges();
});
}
...
}
- Remember that not unsubscribing streams is a BAD idea? And that's what we have here: a subscribed stream. We'll use the async pipe instead of the current Subscription used in the home.component.ts file. For that, let's create an Observable property named boxStyles$ and remove the boxStyles property. Then, assign the stream from combineLatest to it, as follows:
...
import { map} from 'rxjs/operators';
...
export class HomeComponent implements OnInit, OnDestroy {
...
boxStyles: {...}; ← Remove this
boxForm = new FormGroup({...});
boxStyles$: Observable<{
width: string,
height: string,
backgroundColor: string,
color: string
borderRadius: string
}>;
...
listenToInputChanges() {
this.boxStyles$ = combineLatest([...]). pipe(map(([size, borderRadius, backgroundColor, textColor]) => {
return {
width: `${size}px`,
height: `${size}px`,
backgroundColor,
color: textColor,
borderRadius: `${borderRadius}px`
}
}));
}
...
}
- We need to remove the setBoxStyles() and applyChanges() methods and the usages of the applyChanges() method from the home.component.ts file. Update the file, as follows:
export class HomeComponent implements OnInit, OnDestroy {
...
ngOnInit() {
...
this.applyChanges(); ← Remove this
this.listenToInputChanges(); ← Add this
}
...
setBoxStyles(size, backgroundColor, color, borderRadius) {...} ← Remove this
applyChanges() {...} ← Remove this
...
}
- We also need to remove the usage of the applyChanges() method from the template as well. Remove the (ngSubmit) handler from the <form> element in the home.component.html file so that it looks like this:
<div class="home" [formGroup]="boxForm" (ngSubmit)="applyChanges()" ← Remove this>
...
</div>
- We also need to get rid of the submit-btn-container element from the home.component.html template as we don't need it anymore. Delete the following chunk from the file:
<div class="row submit-btn-container" ← Remove this element>
<button class="btn btn-primary" type="submit" (click)="applyChanges()">Change Styles</button>
</div>
If you refresh the app, you'll notice that the box doesn't show at all. We'll fix this in the next step.
- Since we're using the combineLatest operator when the app starts, but we don't have it triggered because none of the inputs have changed, we need to initialize the box with some initial values. To do so, we'll use the startWith operator with the initial values, as follows:
...
import { map, startWith } from 'rxjs/operators';
@Component({...})
export class HomeComponent implements OnInit, OnDestroy {
...
ngOnInit() {
this.listenToInputChanges();
}
listenToInputChanges() {
this.boxStyles$ = combineLatest([
this.boxForm
.get('size')
.valueChanges.pipe(startWith(this. sizeOptions[0])),
this.boxForm
.get('borderRadius')
.valueChanges.pipe(startWith( this.borderRadiusOptions[0])),
this.boxForm
.get('backgroundColor')
.valueChanges.pipe(startWith( this.colorOptions[1])),
this.boxForm
.get('textColor')
.valueChanges.pipe(startWith( this.colorOptions[0])),
]).pipe(
map(...);
}
ngOnDestroy() {}
}
- Now that we have the boxStyles$ Observable in place, let's use it in the template instead of the boxStyles property:
...
<div class="row" *ngIf="boxStyles$ | async as bStyles">
<div class="box" [ngStyle]="bStyles">
<div class="box__text">
Hello World!
</div>
</div>
</div>
...
And voilà! Everything works perfectly fine now.
Congratulations on finishing the recipe. You're now the master of streams and the combineLatest operator. See the next section to understand how it works.
How it works…
The beauty of reactive forms is that they provide much more flexibility than the regular ngModel binding or even template-driven forms. And for each form control, we can subscribe to its valueChanges Observable, which receives a new value whenever the input is changed. So, instead of relying on the Submit button's click, we subscribed directly to the valueChanges property of each form control. In a regular scenario, that would result in four different streams for four inputs, which means we would have four subscriptions that we need to take care of and make sure we unsubscribe them. This is where the combineLatest operator comes into play. We used the combineLatest operator to combine those four streams into one, which means we needed to unsubscribe only one stream on component destruction. But hey! Remember that we don't need to do this if we use the async pipe? That's exactly what we did. We removed the subscription from the home.component.ts file and used the .pipe() method with the .map() operator. The .map() operator transformed the data to our needs, and then returned the transformed data to be set to the boxStyles$ Observable. Finally, we used the async pipe in our template to subscribe to the boxStyles$ Observable and assigned its value as the [ngStyle] to our box element.
Important note
The combineLatest method will not emit an initial value until each Observable emits at least one value. Therefore, we use the startWith operator with each individual form control's valueChanges stream to provide an initial emitted value.
See also
- combineLatest operator documentation (https://www.learnrxjs.io/learn-rxjs/operators/combination/combinelatest)
- Visual representation of the combineLatest operator (https://rxjs-dev.firebaseapp.com/api/index/function/combineLatest)
Using the flatMap operator to create sequential HTTP calls
The days of using Promises were awesome. It's not that those days are gone, but we as developers surely prefer Observables over Promises for a lot of reasons. One of the things I really like about Promises is that you can chain Promises to do things such as sequential HTTP calls. In this recipe, you'll learn how to do the same with Observables using the flatMap operator.
Getting ready
The project that we are going to work with resides in chapter05/start_here/using-flatmap-operator, inside the cloned repository.
- Open the project in VS Code.
- Open the Terminal and run npm install to install the dependencies of the project.
- Once done, run ng serve -o.
This should open the app in a new browser tab, and you should see something like this:
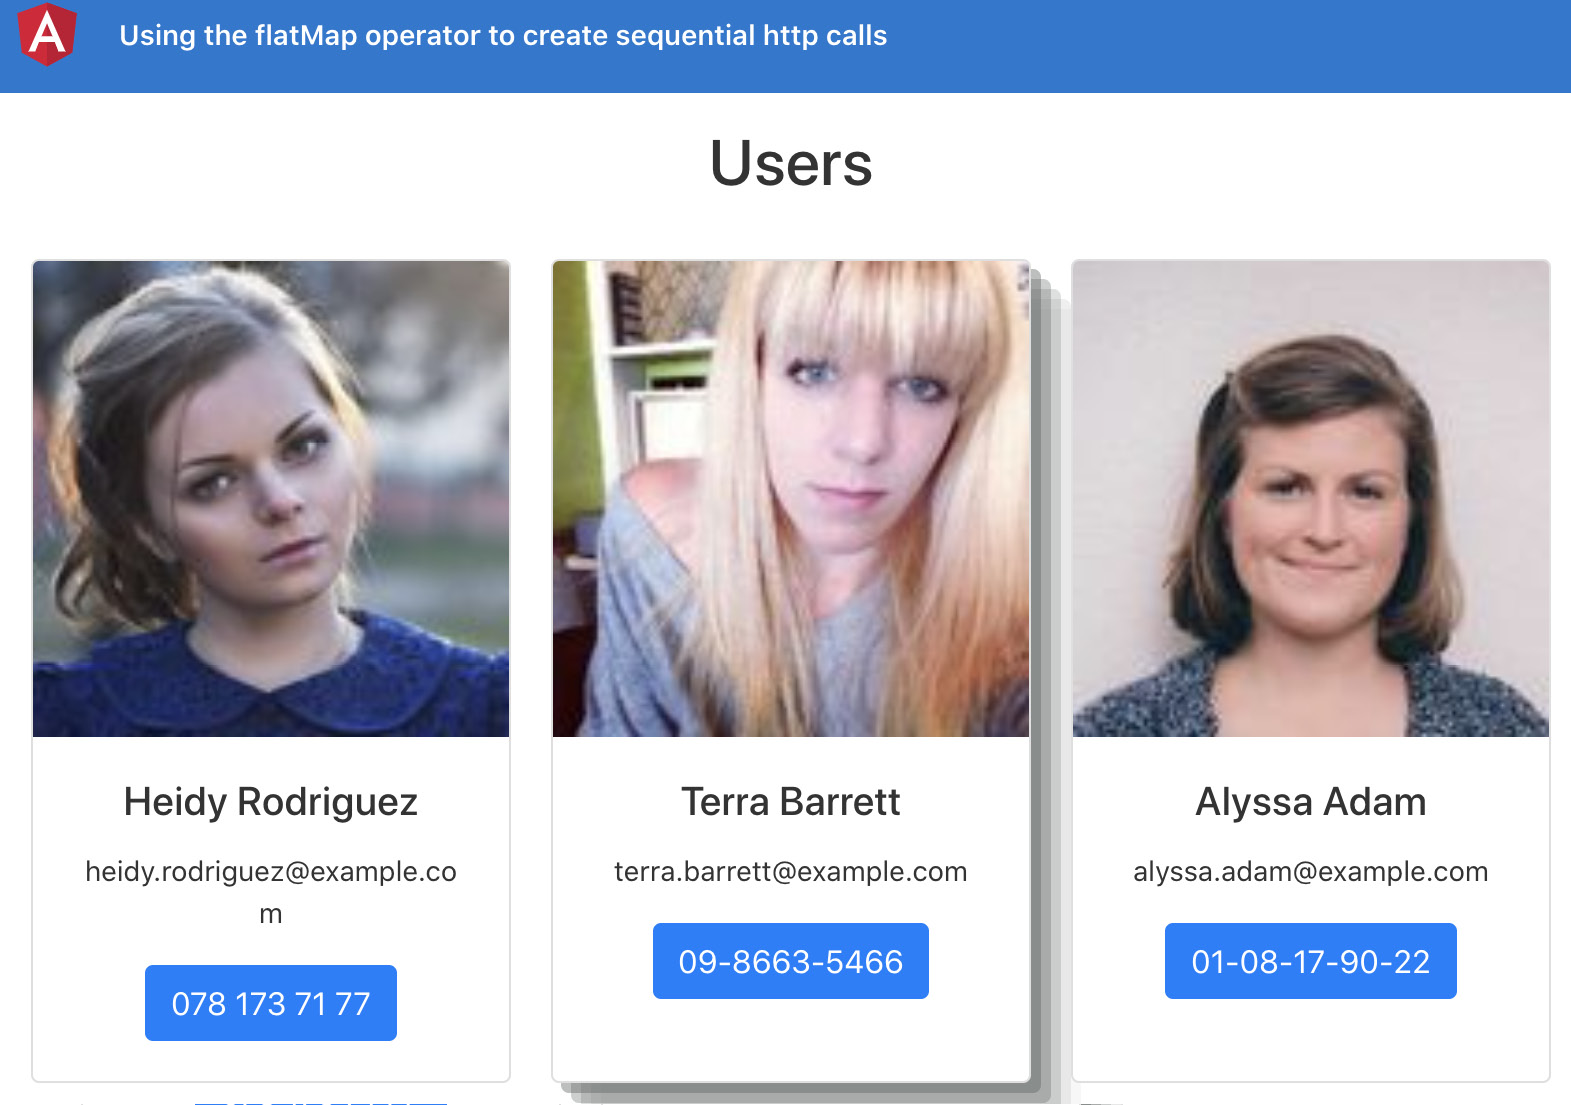
Figure 5.12 – The using-flatmap-operator app running on http://localhost:4200
The app right now seems perfect, actually. Nothing suspicious, right? Well, not exactly. Follow these steps to find out what is wrong.
- Open Chrome DevTools.
- Go to the Network tab and simulate the Slow 3G network, as follows:

Figure 5.13 – Simulatina slow 3G network in Chrome DevTools
If you tap on any card from the home page, you should reach the particular user's details page.
- Refresh the app now, see the Network tab, and you can see the HTTP calls executing in parallel, as follows:

Figure 5.14 – Parallel calls loading data asynchronously
The problem is that we're not sure which data would come first due to both HTTP calls executing in parallel. Therefore, the user might see similar users before the main user is loaded. Let's see how to avoid this.
How to do it…
In order to fix the issue that our similar users can be loaded before our main user, we'll have to sequentially load the data and show the appropriate content respectively, and while the content is loading, we'll show a loader. Let's get started.
- First, let's modify our user-detail/user-detail.component.html file to show the loader while we're loading and while we load the similar users as well. The code should look like this:
<div class="user-detail">
<div class="main-content user-card">
<app-user-card *ngIf="user$ | async as user; else loader" [user]="user"></app-user-card>
</div>
<div class="secondary-container">
<h4>Similar Users</h4>
<div class="similar-users">
<ng-container *ngIf="similarUsers$ | async as users; else loader">
<app-user-card class="user-card" *ngFor="let user of users" [user]="user"></app-user-card>
</ng-container>
</div>
</div>
</div>
<ng-template #loader>
<app-loader></app-loader>
</ng-template>
If you refresh the app, you should see both loaders appearing before the calls are made.
We want to make the calls sequential, and for that, we can't have the streams directly bound to Observables in the UserDetailComponent class. That is, we can't even use the async pipe.
- Let's convert the Observable properties to regular properties in the UserDetailComponent class, as follows:
...
export class UserDetailComponent implements OnInit, OnDestroy {
user: IUser;
similarUsers: IUser[];
isComponentAlive: boolean;
...
}
You should already have the app breaking as soon as you save this aforementioned change.
- Let's use the new variables that we modified in the previous step inside our template. Modify the user-detail.component.html file, as follows:
<div class="user-detail">
<div class="main-content user-card">
<app-user-card *ngIf="user; else loader" [user]="user"></app-user-card>
</div>
<div class="secondary-container">
<h4>Similar Users</h4>
<div class="similar-users">
<ng-container *ngIf="similarUsers; else loader">
<app-user-card class="user-card" *ngFor="let user of similarUsers" [user]="user"></app-user-card>
</ng-container>
</div>
</div>
</div>
...
- Finally, let's use the flatMap operator now to execute the calls sequentially and to assign the received values to the appropriate variables, as follows:
...
import { takeWhile, flatMap } from 'rxjs/operators';
export class UserDetailComponent implements OnInit, OnDestroy {
...
ngOnInit() {
this.isComponentAlive = true;
this.route.paramMap.pipe(
takeWhile(() => !!this.isComponentAlive),
flatMap(params => {
this.user = null;
this.similarUsers = null;
const userId = params.get('uuid');
return this.userService.getUser(userId)
.pipe(
flatMap((user: IUser) => {
this.user = user;
return this.userService. getSimilarUsers(userId);
})
);
})
).subscribe((similarUsers: IUser[]) => {
this.similarUsers = similarUsers;
})
}
...
}
And yes! If you now refresh the app, you'll notice that the calls are sequential as we first get the main user, and then the similar users. To confirm, you can open Chrome DevTools and see the network log for the application programming interface (API) calls. You should see something like this:

Figure 5.15 – API calls executing synchronously
Now that you've finished the recipe, see the next section on how this works.
How it works…
The flatMap operator takes the output from the previous Observable and is supposed to return a new Observable back. This helps us to sequentially execute our HTTP calls to be sure that the data is loaded according to its priority, or our business logic.
Since we wanted to execute the calls whenever a new user is selected, which can happen from the UserDetailComponent class itself, we put a flatMap operator on the route.paramsMap directly. Whenever that happens, we first set the user and similarUsers properties to null. "But why?" Well, because if we're on the UserDetailsComponent page and we click on any similar user, the page wouldn't change since we're already on it. This means the user and similarUsers variables will still contain their previous values. And since they'll have values already (that is, they're not null), the loader will not show in that case on tapping any similar user. Smart, right?
Anyways, after assigning the variables to null, we return the Observable back from the this.userService.getUser(userId) chunk, which results in executing the first HTTP call to get the main user. Then, we use a pipe and flatMap on the first call's Observable to get the main user, assign it to the this.user chunk, and then return the Observable from the second call—that is, the this.userService.getSimilarUsers(userId) code. Finally, we use the .subscribe method to receive the value from getSimilarUsers(userId) and once the value is received, we assign it to this.similarUsers.
See also
- flatMap/mergeMap documentation (https://www.learnrxjs.io/learn-rxjs/operators/transformation/mergemap)
Using the switchMap operator to switch the last subscription with a new one
For a lot of apps, we have features such as searching content as the user types. This is a really good user experience (UX) as the user doesn't have to press a button to do a search. However, if we send a call to the server on every keyboard press, that's going to result in a lot of HTTP calls being sent, and we can't know which HTTP call will complete first; thus, we can't be sure if we will have the correct data shown on the view or not. In this recipe, you'll learn to use the switchMap operator to cancel out the last subscription and create a new one instead. This would result in canceling previous calls and keeping only one call—the last one.
Getting ready
The project that we are going to work with resides in chapter05/start_here/using-switchmap-operator, inside the cloned repository.
- Open the project in VS Code.
- Open the Terminal and run npm install to install the dependencies of the project.
- Once done, run ng serve -o.
This should open the app in a new browser tab, and you should see something like this:

Figure 5.16 – The using-switchmap-operator app running on http://localhost:4200
Now that we have the app running locally, open Chrome DevTools and go to the Network tab. Type 'huds' in the search input, and you'll see four calls being sent to the API server, as follows:

Figure 5.17 – A separate call sent for each input change
How to do it…
You can start typing into the search box on the home page to see the filtered users, and if you see the Network tab, you'll notice that whenever the input changes, we send a new HTTP call. Let's avoid sending a call on each keypress by using the switchMap operator.
- First, import the switchMap operator from rxjs/operators in the home/home.component.ts file, as follows:
...
import { switchMap, takeWhile } from 'rxjs/operators';
- We will now modify our subscription to the username form control— specifically, the valueChanges Observable to use the switchMap operator for the this.userService.searchUsers(query) method call. This returns an Observable containing the result of the HTTP call. The code should look like this:
...
ngOnInit() {
this.componentAlive = true;
this.searchForm = new FormGroup({
username: new FormControl('', [])
})
this.searchUsers();
this.searchForm.get('username').valueChanges
.pipe(
takeWhile(() => !!this.componentAlive),
switchMap((query) => this.userService. searchUsers(query))
)
.subscribe((users) => {
this.users = users;
})
}
If you refresh the app now, open Chrome DevTools, and check the network type while typing 'huds', you'll see that all the previous calls are canceled and we only have the latest HTTP call succeeding:
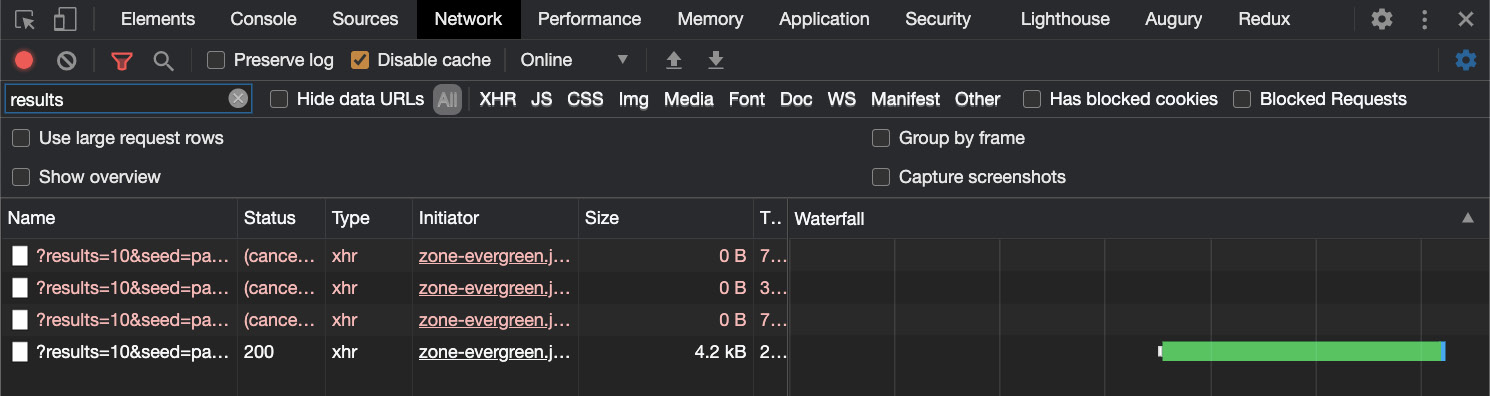
Figure 5.18 – switchMap canceling prior HTTP calls
Woot! We now have only one call that'll succeed, process the data, and end up in the view. See the next section on how it works.
How it works…
The switchMap operator cancels the previous (inner) subscription and subscribes to a new Observable instead. That's why it cancels all the HTTP calls sent before in our example and just subscribes to the last one. This was the intended behavior for our app.
See also
- switchMap operator documentation (https://www.learnrxjs.io/learn-rxjs/operators/transformation/switchmap)
Debouncing HTTP requests using RxJS
In the previous recipe, we learned how to use the switchMap operator to cancel previous HTTP calls if a new HTTP call comes. This is fine, but why even send multiple calls when we can use a technique to wait a while before we send an HTTP call? Ideally, we'll just keep listening to duplicate requests for a period of time and will then proceed with the latest request. In this recipe, we'll be using the debounceTime operator to make sure we're only sending the HTTP call when the user stops typing for a while.
Getting ready
The project that we are going to work with resides in chapter05/start_here/using-debouncetime-operator, inside the cloned repository.
- Open the project in VS Code.
- Open the Terminal and run npm install to install the dependencies of the project.
- Once done, run ng serve -o.
This should open the app in a new browser tab, and you should see something like this:

Figure 5.19 – The using-debouncetime-operator app running on http://localhost.4200
Now that we have the app running, open Chrome DevTools, go to the Network tab, and then type 'Irin' in the user search bar. You should see something like this:

Figure 5.20 – A new call being sent to the server on each keyboard input
Notice how the third call's response comes after the fourth call? That's the issue we're trying to solve by using some sort of debounce.
Let's jump into the recipe steps in the next section.
How to do it…
As we see when we type into the search box on the home page (that is, whenever the input changes), we send a new HTTP call.
In order to make sure we only send one call when the search input is idle after typing, we'll put a debounceTime operator on the this.searchForm.get('username').valueChanges Observable. Update the home/home.component.ts file, as follows:
...
import { debounceTime, takeWhile } from 'rxjs/operators';
...
export class HomeComponent implements OnInit, OnDestroy {
...
ngOnInit() {
...
this.searchForm.get('username').valueChanges
.pipe(
takeWhile(() => !!this.componentAlive),
debounceTime(300),
)
.subscribe(() => {
this.searchUsers();
})
}
searchUsers() {...}
ngOnDestroy() {}
}
And that's it! If you type 'irin' in the search input while inspecting the Network tab, you should see only one call being sent to the server, as follows:
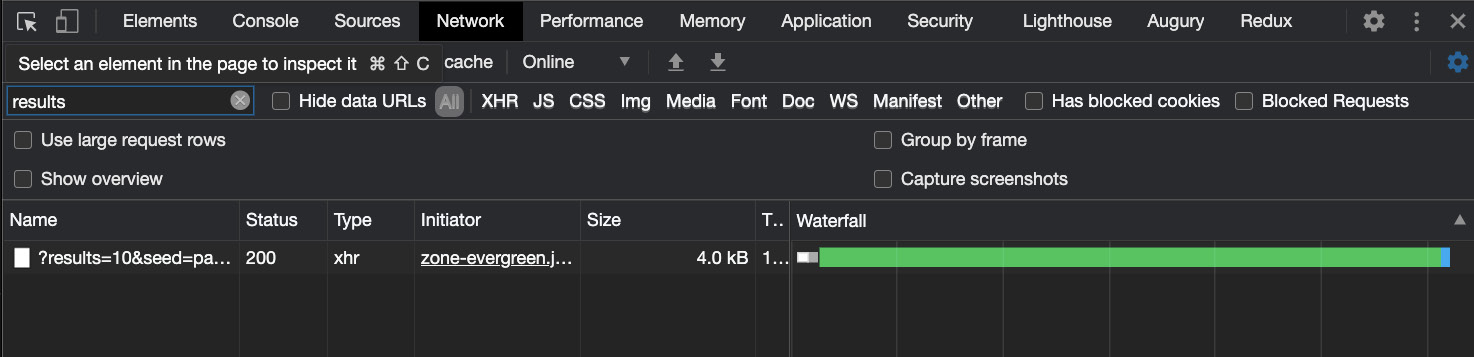
Figure 5.21 – debounceTime causing only one call to be sent to the server
See the next section to understand how it all works.
How it works…
The debounceTime operator waits for a particular time before emitting a value from the source Observable, and that too only when there's no more source emission at hand. This allows us to use the operator on the input's valueChanges Observable. When you type something in the input, the debounceTime operator waits for 300ms to see if you're still typing. And if you've not typed for those 300ms, it moves forward with the emission, causing the HTTP call at the end.
See also
- debounceTime operator documentation (https://rxjs-dev.firebaseapp.com/api/operators/debounceTime)
- debounce operator documentation (https://rxjs-dev.firebaseapp.com/api/operators/debounce)
- delay operator documentation (https://rxjs-dev.firebaseapp.com/api/operators/delay)