Lesson Files | Soundtrack Pro book files > 05_Projects&Media > 5-1 TD Start, 5-5 TD Final |
Time | This lesson takes approximately 90 minutes to complete. |
Goals | Open a clip in the Waveform Editor |
Explore the Waveform Editor interface | |
Apply Fade In and Fade Out actions to a file | |
Work with the audio Stretching tool | |
Copy, paste and silence parts of a Waveform | |
Create a customized sound effect |
If you’ve enjoyed the lessons up to this point, this one ought to make your inner sound designer very happy. It’s not just a tour of Soundtrack Pro’s powerful Waveform Editor. It’s more like an off-road safari where you’ll discover wild sound design features and arm yourself with a host of new graphical editing tools to stretch, process, alter, and customize sound effects.
Your assignment, should you choose to accept it, is to enhance the soundtrack of a real-world trailer for Teton Gravity Research’s exciting new film, Tangerine Dream. Not only will you modify existing sound files, but you’ll also combine audio files to create new effects. Along the way you’ll also learn to navigate the Waveform Editor’s interface while picking up more sound design tricks and shortcuts.
After this lesson, you’ll never see sound the same way again. And you’ll never have to settle for a conservative-sounding, all-natural audio file when your project demands something special. So here you go—and by all means do try this at home.
You’ll begin this lesson by opening and playing the 5-5 TD Final project located in the 05 Projects&Media folder. Once you’ve seen and heard the final version, you’ll open the 5-1 TD Start project and save it in the My Soundtrack Pro projects folder on your desktop.
Quit all open applications, except for Soundtrack Pro.
Close any open Soundtrack Pro projects, except for the project 5-5 TD Final.
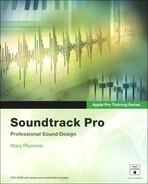
Open the multitrack project 5-5 TD Final, if it’s not already open.
The TD (Tangerine Dream) project was sent to Soundtrack Pro from Final Cut Pro and includes one video clip, all of the dialog clips, plus 16 orange scoring markers. Scoring markers are created in Final Cut Pro and cannot be deleted, edited, or moved in Soundtrack Pro. These scoring markers were added during the video editing process to mark specific places that needed sound effects. The music file at the bottom of the Timeline was created in a separate Soundtrack Pro project and mixed before importing it into this project as a single stereo file.
Click the Zoom button on the Utility window to fit the Video tab in the screen. Watch the video once with the finished sound design.
Fun stuff! The challenge with a project like this is to make the sound design as exciting as the X-treme footage in the trailer, without making it distracting.
Press F1 to return to the Standard layout.
Mute the Music for Trailer track at the bottom of the Timeline and play the project again.
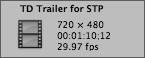
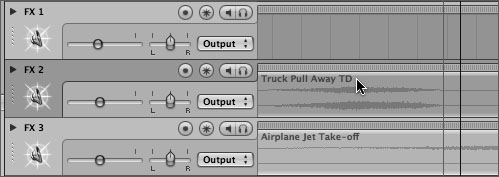
This time, watch the playhead as it scrubs across the different effects on the FX 1, FX 2, and FX 3 tracks.
All of the raw sound effects came from the Soundtrack Pro content. However, many of them have been modified in the Waveform Editor to make them fit better with the images onscreen.
Now that you know what you’re aiming for, let’s open the Start version of the project and get this sound design safari under way.
Press Cmd-W to close the current project.
Press Cmd-O and open the 5-1 TD Start project located in the
Save the project uncollected in the My Soundtrack Pro projects folder on your desktop.
Note
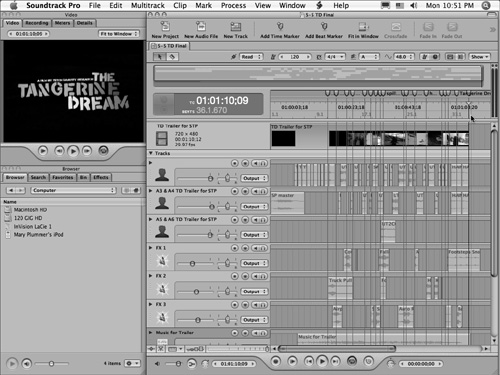
If you check the Details tab or look at the video track header, you’ll see that the video for this project is in the NTSC broadcast standard with a frame size of 720 × 480, 29.97 fps, and a length 00:01:10;12.
In Lesson 1, “Working with the Interface,” you briefly opened a file in the Waveform Editor and reversed the audio. This time, you’ll get a chance to pause and explore the interface before editing the actual files. First, you’ll need to create an audio file project that will open in the Waveform Editor.
Press Return to move the playhead to the beginning of the project in the Timeline.
Press Shift-M to move to the first marker (20;08).
Press the up arrow key to zoom in until you can read the names of the first three scoring markers.

Each of the scoring markers is named for the effect that should occur around that frame in the Timeline.
Some of the effects need to be placed more exactly than others. For example, the sound of a truck moving doesn’t need to sync specifically to an exact frame, nor does the sound of a plane taking off or a cow mooing. However, the sound of a skier falling and bouncing off a rock before plummeting over a snowy bank should match the action. (When you get to that part of the trailer, you’ll create a specialized sound effect.) For now, let’s focus on opening the Truck Pull Away file as an audio file project in the Waveform Editor.
As you know, there are two types of projects in Soundtrack Pro. There are multitrack projects, which you’ve been working with since the first lesson, and audio file projects. The difference between them is fairly self-explanatory. Multitrack projects include multiple tracks of audio that you edit, arrange, and mix in the Timeline. Audio file projects contain one audio file and are modified in the Waveform Editor.
There are two ways to open an audio file in the Waveform Editor. First, you can open it as a file, which saves the changes to the actual audio file. This method is referred to as destructive editing because once you change the original audio file, you can’t go back. The other option is to open the file as an audio file project, which is non-destructive and allows you to make changes to the audio while leaving the original file intact.
All of the sound effects you’ll be working with in this lesson come from the Soundtrack Pro content. Rather than destructively edit the actual audio files, you’ll create audio file projects that work in the Waveform Editor.
Soundtrack Pro supports a variety of file formats that can be opened in the Waveform Editor including: Audio file project, AIFF, WAV, MP3, AAC (except protected AAC files), Sound Designer II, NeXT sound files, and QuickTime movie files. In this book, you’ll be working with AIFF files, which can also be used in Final Cut Pro.
For this exercise, you will open the Truck Pull Away file in the Waveform Editor and modify the waveform. Then you’ll save the changed audio file. The Truck Pull Away file is on the FX 2 track and starts at the truck pulls away marker.
There are three ways to open a clip as an Audio File Project in the Timeline:
Select the clip and choose Clip > Open as Project...
Ctrl-click and choose Open as Project from the shortcut menu
Double-click the clip in the Timeline and select the Create audio file project (edit non-destructively) option from the Double-Click Preference dialog
Let’s go with the third option and double-click.
Double-click the Truck Pull Away clip in the Timeline.
The Double-Click Preferences dialog opens.
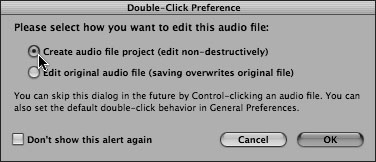
Make sure the Create audio file project (edit non-destructively) radio button is selected and then click OK.
Note
The default double-click preference in Soundtrack Pro is to create an audio file project. You can change the double-click behavior in General Preferences.
A Create Audio Project window opens.

This window allows you to name the audio file project and save it to a specific location. For this exercise, you’ll save the project as Truck Pull Away TD (for Tangerine Dream) to distinguish it from the original file. You’ll also save it in the same location as your multitrack project.
Type TD after the name Truck Pull Away in the Save As field.
The audio file project you create will now be called Truck Pull Away TD.
Choose the My Soundtrack Pro projects folder from the Where pop-up menu.
This pop-up menu sets the designation of the saved audio file project.
Note
If you need to navigate beyond the condensed view in the Create Audio Project window, you can click the downward pointing triangle button on the right side of the Save As field to expand the window view. You can also condense the view anytime by clicking the upward pointing triangle button once the window has been expanded.
Click Save to save the audio file project and open it in the Waveform Editor.
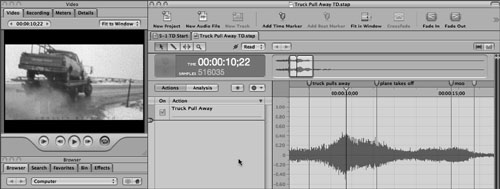
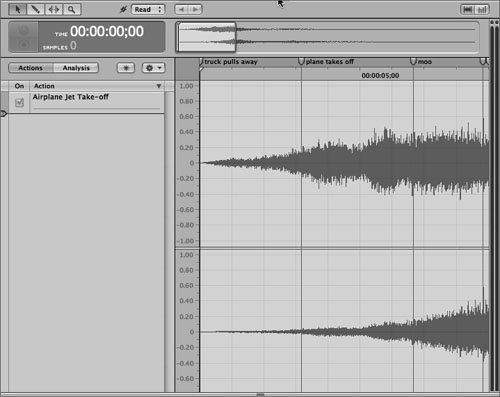
The Waveform Editor has many of the same features as the Timeline, such as a playhead, ruler, track controls, transport controls, and Time display. In the next series of exercises, you’ll explore some of the features unique to the Waveform Editor, as well as some familiar features that work the same as the Timeline.
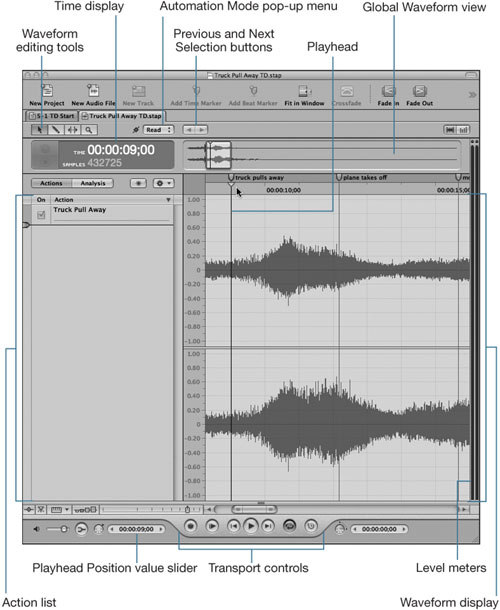
Waveform editing tools: Includes the Selection, Sample Edit, Audio Stretching, and Zoom tools for graphically editing audio files.
Automation Mode pop-up menu: Allows you to choose the automation mode for recording automation to the file. You’ll learn more about recording automation in Lesson 8, “Mixing Audio Tracks in Soundtrack Pro.”
Previous and Next Selection buttons: Allow you to move backward and forward through selections you’ve made in the Waveform display.
Time display: Shows the current position of the playhead, just as the Time display in the Timeline does.
Global Waveform view: Shows you a miniature view of the entire waveform and the playhead position, so that you can move quickly to different parts of an audio file.
Waveform display. (and editing area): Allows you to see and select parts of the waveform of the audio file (or its frequency spectrum, in Spectrum view).
Level meters: Show the levels of the audio file as it plays.
Transport controls: Contains transport buttons to control playback and the position of the playhead, and turn recording on or off. These are the same transport controls that are in the Timeline.
Playhead: Shows the part of the audio file currently playing.
Actions and Analysis buttons: Shows either the Action list and related controls or the Analysis Type, Parameter, and Analysis Results lists and related controls.
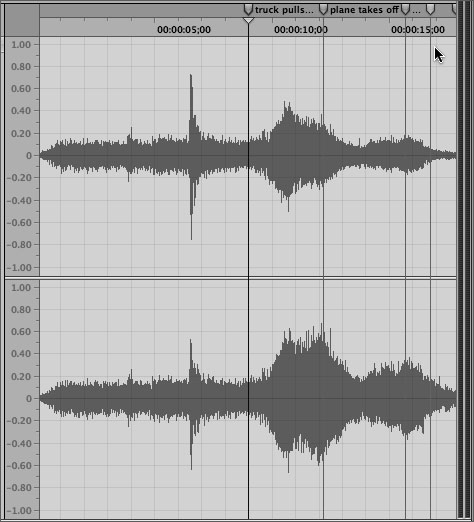
There are two audio waveforms showing in the Waveform display area because the file you are working with is a stereo audio file. All stereo files are the combination of the left and right channels of audio. If you open a mono audio file you’ll see only one audio waveform.
Before you dive in to the interface and start zooming and navigating around, it’s a really good idea to know where you are so that you don’t get lost. Sure, the audio file project only contains one audio file, but it’s a biggie, over 100 seconds long, and you’re only working with around 10 seconds of it in the Timeline.
When you open an audio file project, it references the whole audio file, not just the part that you use in the Timeline. Gray markers, indicating the beginning and end of the clip in the Timeline, only appear if there is not already a scoring marker at the first or last frame of the clip.
Tip
To see a file’s length and other properties, you can click the Details tab in the Utility window or simply press Cmd-I. On the Details tab, click the File button to view the file’s details, including Length in seconds.
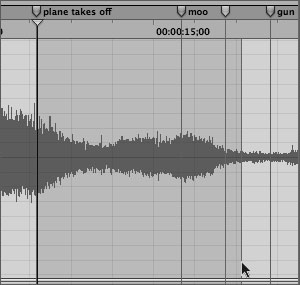
Fortunately, the audio file project opens with the playhead on the truck pulls away scoring marker at the beginning of the clip in the Timeline. Also, the portion of the audio visible in the Timeline fits within the Waveform display area of the Waveform Editor. Orange scoring markers from the Timeline also appear in the Waveform Editor as a reference. In this case, the clip starts at a scoring marker, so let’s use that marker to identify the beginning of the audio file showing in the Timeline.
Press Cmd-−– (minus) to zoom out of the Waveform display one level.
The playhead is still on the truck pulls away marker, and now you can clearly see the gray marker that indicates the end of the clip in the Timeline.
Press Shift-M three times to move the playhead three markers forward (to the gray marker).
Press Shift-Z or click Fit in Window on the toolbar.
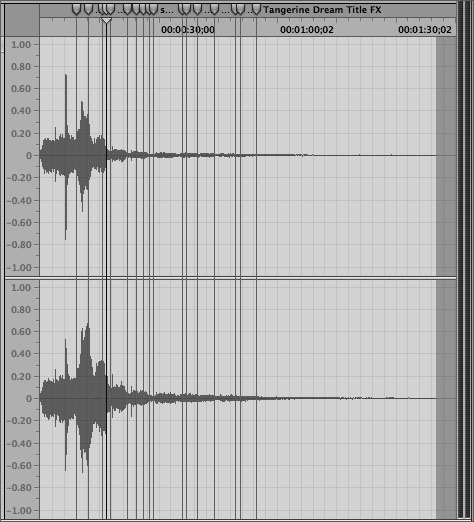
Whoa. There is a lot of waveform with markers showing when you zoom all the way out.. If not for the gray marker, you might not have any idea where you are in reference to the clip in the Timeline that you set out to modify.
Press the up arrow key several times to zoom back into the playhead position (gray marker).
Press Option-M three times to move the playhead left to the truck pulls away marker.

Now you should be able to clearly see both the truck pulls away marker, and the gray marker revealing the end of the clip.
So, you’ve just learned hands-on that zooming in and out with the up and down arrow keys and navigating with markers work the same in the Waveform Editor. You also know how to orient yourself, even within a really large audio file. Now, you can move on with the other interface features.
You can play an audio file in the Waveform Editor by clicking the Play/Pause button in the transport controls or simply pressing the spacebar. As the waveform plays, you’ll see the corresponding video clip playing in the Video tab. Since the clip was originally opened in the Timeline, it references the multitrack project’s video.
Press the spacebar to play the audio file in the Waveform Editor and pause after the playhead passes the gray marker.
Notice that the truck sound works well with the tow truck pulling away in the video clip.
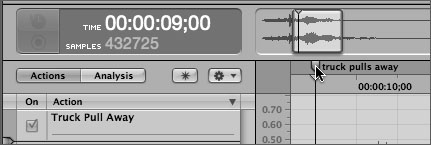
Move the playhead back to the truck pulls away marker.
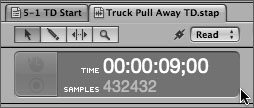
Look at the Time display in the top-right corner of the Project window to see that the current playhead position is 9;00.
Press the right arrow key to move the playhead one second forward to the right.
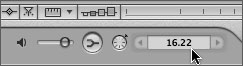
The right or left arrow moves the playhead one second to the right or left at this zoom level. If you zoom in further, it will move one frame left or right, or zoom out fully to move multiple seconds at a time. You can also move the playhead using the Playhead Position value slider in the bottom-left corner of the window.
Click the Playhead location slider and type 16.22 (16 period 22), then press Return to move the playhead to that frame, which also happens to be the gray marker.
There you have it. Playing and navigating the playhead is easy enough, and should feel a lot like working in the Timeline.
Another terrific navigational tool in the Waveform Editor is the Global View because it gives you the overall map of the waveform and shows which portion you are currently looking at in the Waveform display area. The Visible Area rectangle is located near the beginning of the audio file and includes only what you can currently see below.

Drag the Visible Area rectangle to the right to change your view of the waveform.
Press Shift-Z to fit the waveform horizontally to the display area.

The Visible Area rectangle expands to show the entire waveform, as does the Waveform display.
Press the up arrow key twice to zoom in to the playhead in both the Global view and the Waveform display area.
Drag the Visible Area rectangle to the left until you can clearly see both the truck pulls away marker and the gray marker in the Waveform display area. It should look just like it did when you started this exercise.
Tip
Make a habit of glancing at the Global view whenever you first open a file in the Waveform Editor. It’s like looking at the “you are here” spot on a map of the waveform. That way you have an idea of where you started and which portion of the waveform you’re actually working on in case you lose your position somewhere along the way.
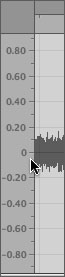
There are four different units of measure that can be used in the Waveform Editor. Whether you measure yourself in inches or centimeters, you’re still the same height—what changes is simply the way it’s being recorded. The same goes for measuring the waveform in the Waveform Editor. Most of the time waveforms are measured by a Normalized scale, with 0 (zero) in the center of the waveform, 10 as the highest amount, and –10 as the lowest amount. Soundtrack Pro also offers Sample Value, Percent, and Decibels units for measuring with the Sample ruler.
Unlike the horizontal Time ruler at the top of the window, the Sample ruler is vertical and is located on the left side of the Waveform display area. Since this is a stereo file, there are separate rulers for the left channel (top) and right channel (bottom).
Look at the current Sample ruler which is set to the default Normalized scale.
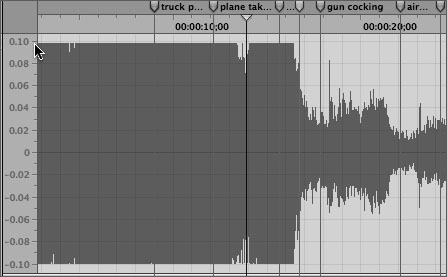
Press Ctrl–down arrow several times to zoom all the way out so that you can see the full Normalized scale with 10 at the top and –10 at the bottom.

The waveform looks significantly smaller. Does that also mean it is quieter if you play it?
Press Option-M three times to move the playhead back to the truck pulls away marker.
Press the spacebar and play a few seconds of the audio file to test the volume.
It should sound exactly the same as it did before. The waveform only appears to be smaller because you are zoomed out away from it. It’s like watching a football game from the blimp.
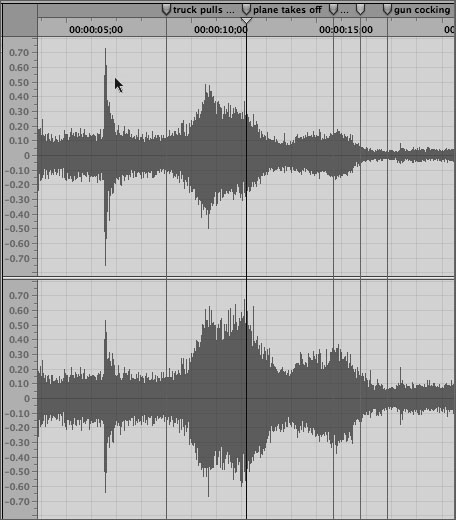
Press Ctrl–up arrow several times to zoom in on the most detailed increments (.10 to –.10) in the Sample ruler.
Press Ctrl–down arrow to zoom out until the highest and lowest peaks in the waveform are visible in the display area.
Next you’ll change the unit of measure on the ruler to Sample Value, Percent, and Decibels see the different ruler choices.
Choose View > Sample Ruler Units > Sample Value, or Ctrl-click the Sample ruler and choose Sample Value from the shortcut menu.

The waveform doesn’t change, but Sample ruler units change to Sample Values.
Change the Sample ruler units to Percent and then to Decibels.
Change the ruler one last time back to Normalized.
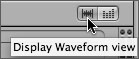
You can also view an audio file’s frequency spectrum rather than its waveform. To change the display area from waveform view to frequency spectrum view, simply click the Spectrum view button.
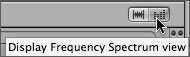
Click the Display Frequency Spectrum view button in the top-right corner of the Waveform Editor to display the frequency spectrum view.
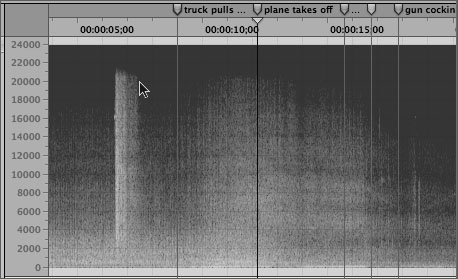
The display area changes to the frequency spectrum. The vertical ruler now shows the different frequencies from highest to lowest.
Click the Waveform view button to return the display area to the waveform view.
Move the playhead to the truck pulls away marker and zoom horizontally until you can see both the truck pulls away marker and the gray marker above the Time ruler.
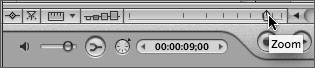
Feel free to use the Zoom slider at the bottom of the window to adjust the horizontal zoom scale, or use the up and down arrow keys. You can also use the Global view if needed.
Okay, you’re comfortable with the basic interface and can find your way back to the starting zoom levels and marker positions. That means you’ve made it through the Waveform Editor readiness preparedness section of the lesson and you’re ready for the more exciting stuff, actually editing waveforms.
In the previous lesson you edited clips in the Timeline by resizing them, splitting them, or slicing them with the Razor tool. Those editing techniques change the length of the clip in the Timeline, but they do not affect the audio file’s waveform itself. The Waveform Editor differs because it is designed to do exactly what its name suggests, edit waveforms. This type of editing is referred to as processing audio files. The individual changes that you make to the file are recorded as actions in the Action list. In the next series of exercises you’ll learn how the Waveform Editor works as you process a series of sound effects with progressively more challenging techniques.
The first step in editing a waveform is selecting the part of the file that you’d like to edit. It’s simple enough once you get the hang of it.
Move the pointer over the Waveform display anywhere in the middle between the upper and lower waveforms.
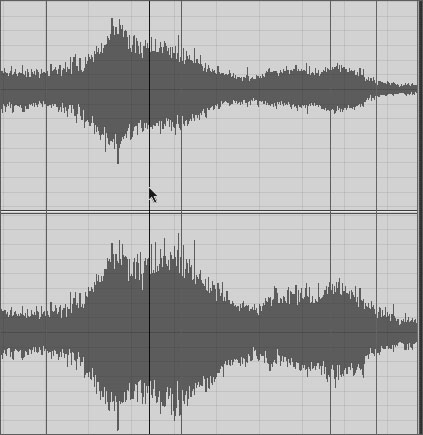
Click-drag the middle of the display to select a section of the waveform.
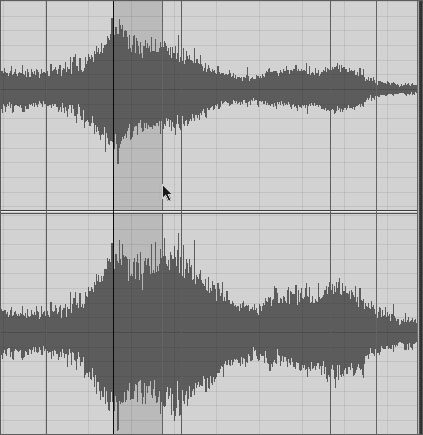
The selected area is highlighted blue. Notice that the selection includes the upper and lower waveforms. That is because you selected from the middle between the waveforms.
Press the spacebar to play the selection.
The playhead cycles over and over within the selection, similar to the playback region in the Timeline.
Click anywhere on the display to clear the selection.
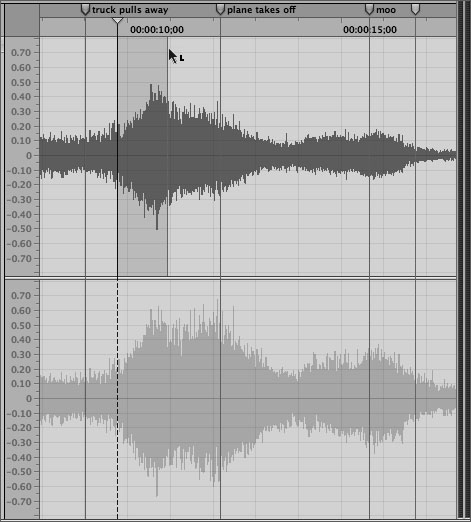
Move the pointer toward the top of the Waveform display, above the upper waveform until you see a small L appear next to the pointer.
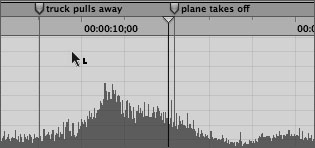
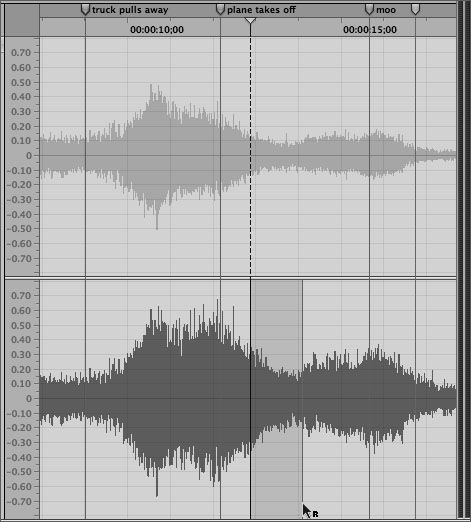
The upper waveform is the left audio channel, so the L indicates that you are selecting only the left channel. The bottom of the display selects only the right channel and shows an R near the pointer.
Click-drag the playhead near the top and select a section of the left channel waveform only.
Click-drag the playhead near the bottom of the display to select the right channel waveform only.
Click again anywhere in the display area to clear the selection.
Besides click-dragging the display area, you can also select between markers, one frame or second at a time, or the entire file. Let’s start with selecting between markers.
Double-click the middle of the display between the truck pulls away and plane takes off markers.
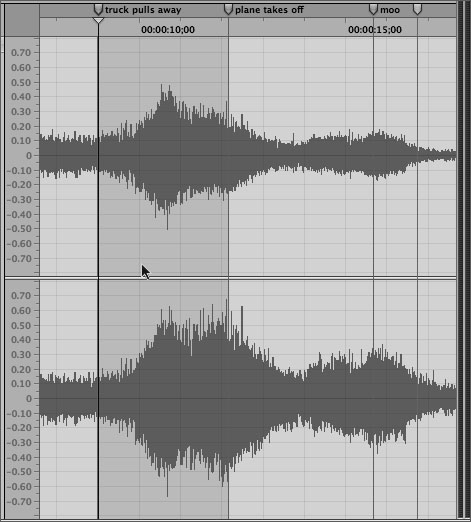
The selection includes only the waveform between the markers.
Press Cmd-A to select the whole waveform.
Click the head of the truck pulls away marker to clear the selection without moving the playhead.
The playhead should still be at the marker position (09;00). Suppose you want to select exactly one second starting at the truck pulls away marker? You could drag, but the easiest way is to press Shift–right arrow, which automatically begins the selection at the playhead position and extends it one gridline to the right. At the current zoom level, one gridline is one second.
Press Shift–right arrow.
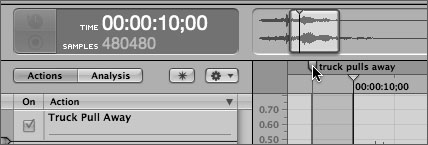
The playhead moves one second to the right (10;00) and selects the waveform between the starting position and the ending position one second later. Don’t clear the selection. You’ll use it in the next exercise.
Look at the Selection Length value slider in the bottom-right corner of the window.
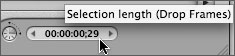
It shows that the selection is 29 frames in length, which is one second in NTSC Drop-frame timecode (29.97 fps).
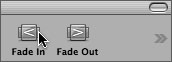
Once you’ve selected part of the waveform, you can apply many types of actions, ranging from fades to professional effects. In this exercise, your goal is to apply both a Fade In and a Fade Out to the waveform. You can do so by clicking the Fade In and Fade Out buttons on the Toolbar at the top of the window or by choosing Process > Fade In or Fade Out. Next you’ll use one method to apply the Fade In and the other to apply the Fade Out.
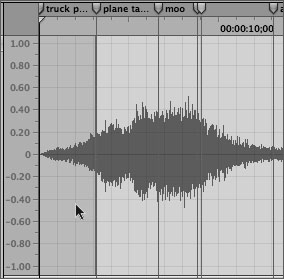
Click the Fade In button in the top-left corner of the toolbar.
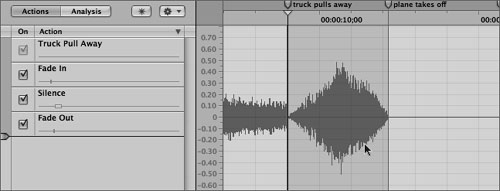
The selected part of the waveform now shows that the beginning of the selection starts at 0 (zero) and tapers as the amplitude (height of the wave) gets higher until the end of the selection is at the original level. You can actually see the audio Fade In on the waveform. You’ll also notice a Fade In action in the Action list.
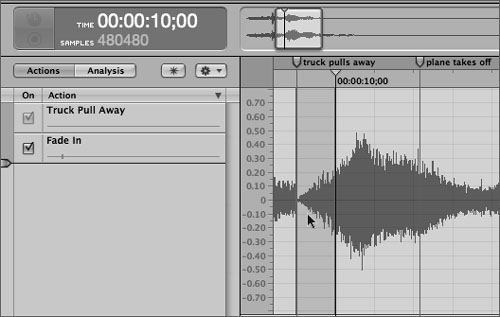
Press the spacebar to play the selection and hear the Fade In.
Next you’ll add a Fade Out that ends at the gray marker.
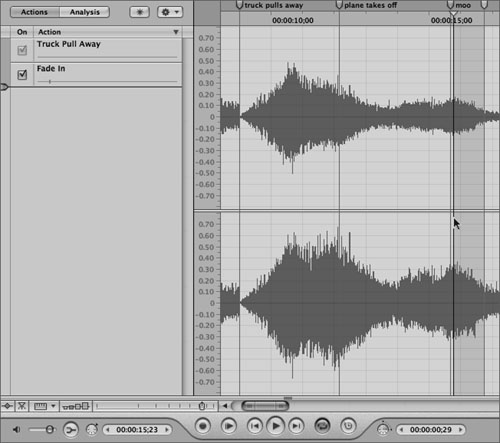
Press Shift-M several times to move the playhead to the gray marker.
The Shift–left arrow shortcut won’t work here to select one second earlier because the gray marker isn’t recognized as a snapping point for selections or clips. Instead, you’ll drag the playhead left while watching the Selection Length value slider until you reach your goal.
Click-drag the pointer from the gray marker to the left until the Selection Length value slider shows 29 frames.
Choose Process > Fade Out to apply the action.
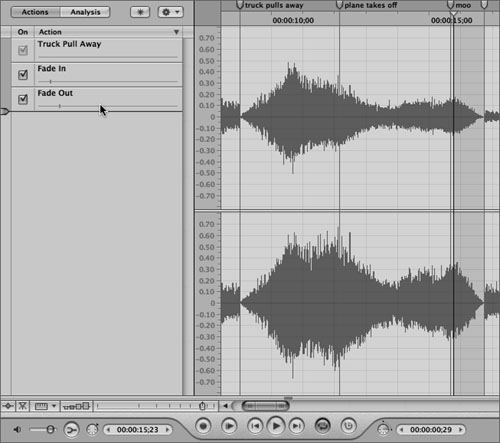
The waveform tapers down as it fades out at the gray marker. There is also a Fade Out action in the Action list.
Press Cmd-S to save your changes to the audio file project.
The Shift key allows you to extend a selection in several ways. You can Shift-drag to extend the selection or double-click the next selection to include it. Since there are two scoring markers between the current selection and the truck pulls away marker, let’s use the latter method for more precision.
Shift–double-click the display area between the moo and plane takes off markers.
The selection extends to include that area.
Shift–double-click the display area between the plane takes off and truck pulls away markers to include that area as well.
Press the spacebar to play the selection and hear the sound fade in and fade out, noticing how well it works with the video clip.
Pause playback when you’ve seen and heard enough.
Well, what did you think? The sound fades in and out all right. There’s just one big problem. The truck sound effect is way too long, and it doesn’t work at all with the shots of the cows or the camel. The truck sound needs to end by the time the shot of the truck fades out. Looks like you’ll need to modify the Fade Out and cut some of the excess audio.
Actions applied in the Waveform Editor are not only powerful but also an extremely flexible way to edit audio. You can add or delete actions, re-order them, and change them at will. For this exercise, you’ll delete the Fade Out action, select the audio that you don’t want to include in the Timeline and delete it, then add a new Fade Out in the appropriate place in the video so that the audio fades out when the shot of the truck fades out.
Clear the current selection.
Select the Fade Out action in the Action list.
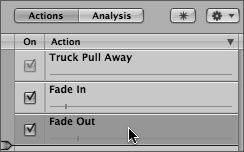
The Fade Out action is deleted from the list, and the Fade Out no longer appears on the waveform at the gray marker.
Move the playhead to the plane takes off marker.
This is a frame where the truck shot is fully faded out visually, and the plane shot has not yet started to fade in visually.
Drag the playhead to the right to create a selection a little beyond the gray marker.
Note
Technically, the clip in the Timeline ends at the gray marker. But selecting the waveform a little beyond that marker won’t affect the clip in the Timeline. Rather, it will ensure that you select everything you need before deleting part of the waveform.
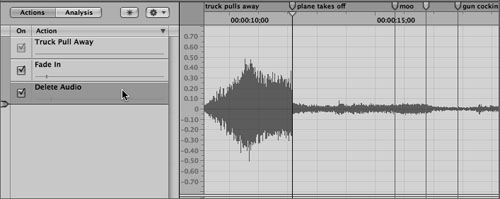
Press Delete.
Hmm. The selected waveform was deleted, but the remaining audio moved to the left and you still have the same issue—audio where you don’t want it. Apparently, deleting was not the answer. That’s because, just like in Final Cut Pro, the Waveform Editor’s Delete key performs what is called a ripple delete, removing the selection and pulling the remaining audio to the left to fill the deleted space. But what you really wanted to do was silence that portion of the clip, which you’ll do in the next exercise.
Select the Delete Audio action and press the Delete key.
Here you’re essentially deleting a Delete Audio action. The playhead may have moved to the beginning of the file.
Drag the Visible Area rectangle in the Global view to the right until the Waveform display includes the truck pulls away and gray markers.
We still need to ensure that there is no audio in between the plane takes off and gray markers, so in this exercise, you’ll apply a Silence action using another very handy feature in the Waveform Editor. The Previous and Next selection buttons, located above the Global Waveform view, let you move back and forth between selections and navigate through your selection history.
Click the Previous selection button.
The selection should reappear between the plane takes off and gray markers.
Choose Process > Silence or press Cmd-Delete to silence the selection.
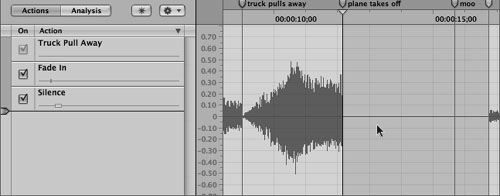
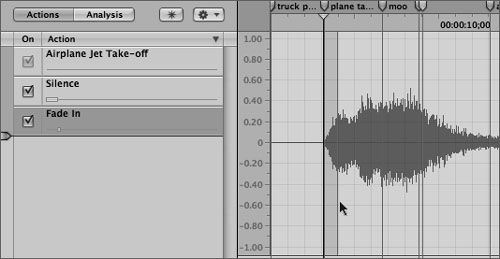
Mission accomplished. A Silence action is added to the Action list and a flat line appears in the waveform, indicating no wave activity or dead silence—like a flat line on a heart monitor.
It’s time to put your new waveform selection skills to the test. First create a selection that lasts one second (29 frames) and ends at the plane takes off marker. Then apply a Fade Out action. Finally, create a selection between the truck pulls away and plane takes off markers. Play the selection to see how it works with the video. Once you’ve previewed the selection, don’t forget to save your changes to the audio file project. Have fun!
Now that you’ve edited the audio file project, you should listen to the changes in the Timeline. In fact, it’s already there waiting for you to hear it. Whenever you open a file from the Timeline and save it as an audio file project, the project replaces the original clip in the Timeline. Take a look and you’ll see that the 5-1 TD Start project is still open. All open projects (multitrack, or audio file) are accessible with tabs at the top-left corner of the Project window, just below the toolbar.

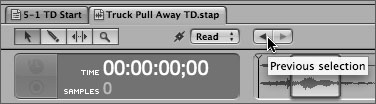
Locate the two project tabs.
The .stap file extension on the Truck Pull Away tab stands for Soundtrack Pro audio file project. Multitrack projects have an .stmp file extension for Soundtrack Pro multitrack project.
Click the 5-1 TD Start tab to move that project to the front of the Project window.
Select the Truck Pull Away TD clip, if it’s not already selected, and press Option-Z to fit the clip to the window.
The name of the clip is Truck Pull Away TD, the same name as the audio file project.
Create a playback region from the truck pulls away marker to the moo marker.

Press the spacebar to listen to the playback region, and then pause playback.
Nice work with the truck sound. Time to move on to the airplane clip, but first, you should always close an audio file when you’re finished with it.
Click the Truck Pull Away TD tab to make it active.
Choose File > Close Tab or press the shortcut Cmd-W to close that tab.
Your next editing goal will be to create an audio file project from the Airplane Jet Take-Off clip and modify it in the Waveform Editor so that it works better with the video. Instead of double-clicking this clip to open it as a project, let’s use the shortcut menu.
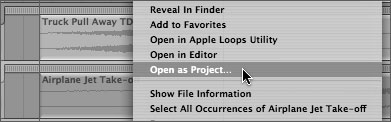
Ctrl-click the Airplane Jet Take-Off clip and choose Open as Project from the shortcut menu.
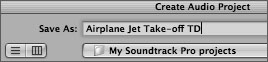
The Create Audio Project window opens.
Type TD at the end of the name in the Save As field and save the project in the My Soundtrack Pro projects folder.
The new audio file project opens in the Waveform Editor.
Before you actually change the waveform, this is a good time to get acquainted with the Waveform Editor’s four graphical editing tools: Selection, Sample Edit, Audio Stretching, and Zoom.
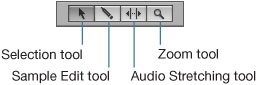
You’re already familiar with the Selection tool, which you used to edit the previous audio file project. The Sample Edit tool allows you to edit a waveform with precision at the sample level. If you zoom all the way into a waveform, you’ll see the actual digital samples used to create the file. Samples are the building blocks of digital audio. It’s like viewing objects at the subatomic level.
Press the up arrow key repeatedly to zoom in to the waveform as far as possible.

The dots that you see are the digital samples.
Press Cmd-I or click the Details tab, and then click the File button on the Details tab to see the bit depth and sample rate for this file.
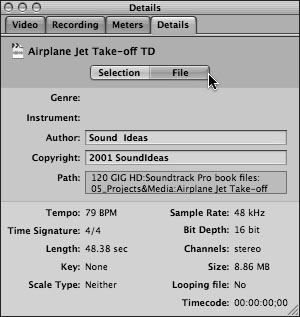
This project uses the same bit depth and sample rate—16 bit and 48 kHz—as Final Cut Pro.
Press Cmd-1 to return to the Video tab on the Utility window.
Click the Sample Edit tool, which is the second tool from the left and looks like a pencil.
Move the Sample Edit tool over the samples in the Waveform display area.
Click the Sample Edit tool near any of the samples, and drag the tool to draw a new waveform.
Press Cmd-Z to undo any changes you made to the waveform at the sample level.
Click the Selection tool, and then click anywhere in the display area to clear any selections your experimentation may have created.
Press Shift-Z to fit the waveform to the window.
The biggest problem with the jet plane sound effect is that the sound of the plane taking off is too long. Fortunately, the Audio Stretching tool can adjust the length of the audio waveform. Since it only resizes from the right edge of a selection (the end of the waveform), it’s a good idea to first decide where the waveform should begin. In this exercise, you’ll use some of your new skills to silence the beginning of the waveform and add a Fade In at the plane takes off marker. Once the beginning of the waveform is completed, you’ll be ready to use the Audio Stretching tool in the next exercise.
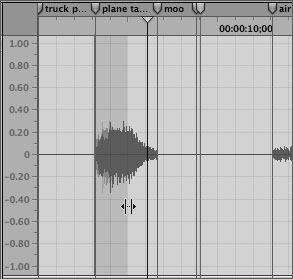
Press the up arrow key once to zoom in one level horizontally.
Double-click the display area between the first two markers to select that section of the waveform.
Choose Process > Silence or press Cmd-Delete to silence the selection.
Move the playhead to the plane takes off marker.
Type 29 in the Selection Length value slider, and press Return to select 29 frames starting at the marker.
Save your progress.
Now the waveform is ready to use the Audio Stretching tool.
Using the Audio Stretching tool, you can shorten the length of the waveform so that you’ll get the full “take-off” part of the waveform in a much shorter amount of time. This will also make it sound like the plane is moving really fast, which works fine with this X-treme film trailer. First you’ll use the Selection tool to select the portion of the waveform that you’d like to stretch—about 10 seconds of the file from the plane takes off marker through the fattest part of the waveform. Then you’ll use the Audio Stretching tool to stretch the waveform within a selection to make it shorter without changing the pitch.
Move the playhead to the plane takes off marker, if it’s not already there.
Type 10.00 (10 period 00) in the Selection Length value slider and press Return.
The first 10 seconds of the file have been selected. The Selection Length value slider changes to 9;29, which is equivalent to 10 seconds in NTSC drop-frame timecode.
Play the selection once to see and hear how it works with the video.
Clearly the plane taking off sound is too long for the video.
Click the Audio Stretching tool, which is the third tool from the left.
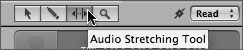
Remember that the Audio Stretching tool only works from the end of the waveform, not the beginning.
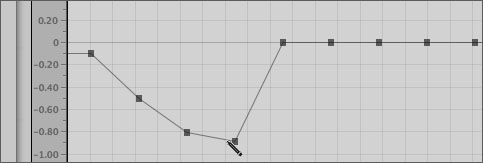
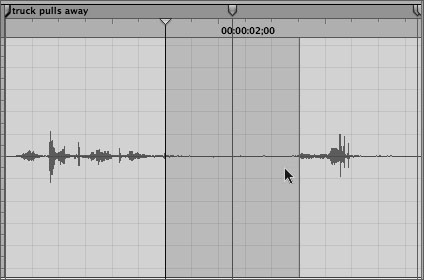
Move the Audio Stretching tool over the right edge of the selection and click-hold the edge of the selection.
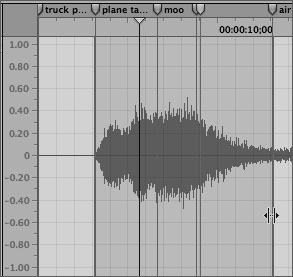
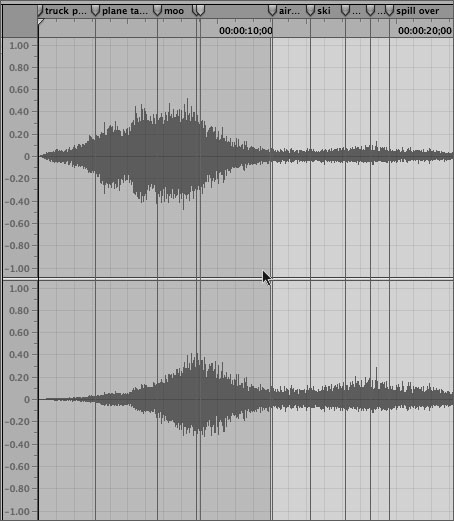
Drag the right edge of the selection to the moo marker.
Note
Be sure to drag from the middle of the display so that you stretch both the left and right channels of the stereo file. Although the figure above only shows the left channel, both are affected when you use the Audio Stretching tool.
The waveform within the selection compresses so that it ends at the moo marker.
Play the newly stretched selection.
It ends sooner and is faster, but it’s still too long. Sounds like another stretch job to me. Let’s stretch it to about half the current size.
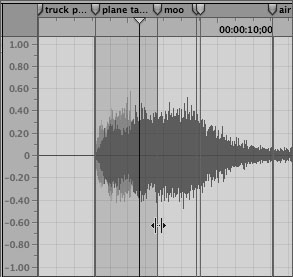
With the Audio Stretching tool, click the right edge of the current selection and drag to the left about halfway between the plane takes off and moo markers.
The waveform stretches again to fit the current selection.
Play the selection to hear the result.
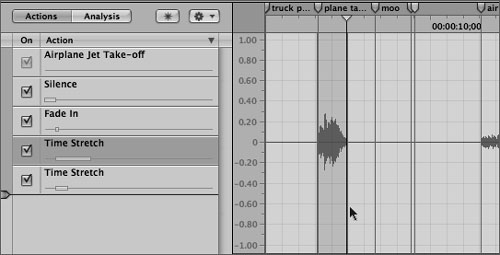
Perfect. Notice that there are two separate Time Stretch actions in the Action list.
Save your audio file project.
Click the 5-1 TD Start tab or the 5-2 TD Add Stretch tab, depending on which version of the multitrack project you are working on.
The multitrack project appears in the Project window.
Play the project playback region to hear the truck and plane effects.
The timing is good and the effects work, but the volume is too low on the plane effect, so let’s fix that next.
You can always go back and change an audio file project. In this exercise, you’ll go back to the Airplane Jet Take-off TD audio file project and adjust the amplitude of the waveform. The depth or intensity of a sound is called its amplitude, and is expressed in decibels (dB). Human ears can hear amplitude as the volume or loudness of a sound. The range of audible loudness is roughly 0 to 130 dB. The higher decibel levels are actually painful to human ears.
In Soundtrack Pro, amplitude is displayed visually by the height of the waveform: The higher the amplitude, the louder the audio waveform will be perceived. You can adjust amplitude with a simple action available in the process menu, or by using the keyboard shortcut Shift-Cmd-L.
Click the Airplane Jet Take-off TD tab or double-click that project in the Timeline to view the audio file project in the Waveform Editor.
Select all of the Airplane Jet Take off waveform, if it is not already selected.
You can also click the Previous Selection button.
Choose Process > Adjust Amplitude or press Shift-Cmd-L.
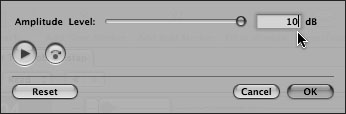
The Adjust Amplitude control opens. The control shows the default level of 0 dB, which indicates there has been no change to the default levels. The 0 dB in the Amplitude Level field does not show the actual value of the waveform’s amplitude, only the amount that it is adjusted.
Type 10 in the Amplitude Level field and click OK to raise the amplitude of the waveform by 10.000 dB.
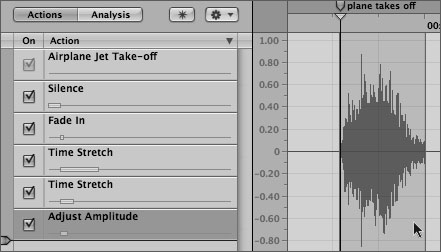
The amplitude of the waveform increases by 10 dB.
Play the selection to hear how it sounds with the adjusted amplitude.
Click the tab for the multitrack project, and play the playback region to hear the effect.
Sounds great. Good enough to flatten.
Tip
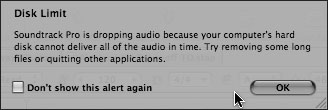
If a Disk Limit dialog appears while you are playing the multitrack project, it indicates that your hard disk can’t deliver all the audio in time. Mute the top 3 dialog tracks to save processing for the sound effects tracks. You can always unmute them later, or you can solo the FX 2 and FX 3 tracks to play only those tracks. Another way to optimize the processing is to flatten the actions of an audio file project in the Waveform Editor, which you’re about to do in the next exercise..
Click the audio file project’s tab to return to the project in the Waveform Editor.
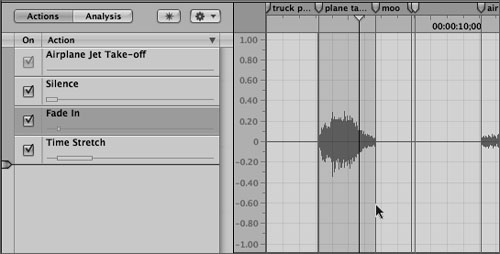
Actions are very flexible and powerful, but they can also take a lot of processing power to play. If you’re satisfied with the changes that you’ve made to an audio file project and you’d like to free up the computer’s processor, you can flatten the actions in your project to a single action. Flattening actions renders the actions into the file, reducing the file size and complexity so that your project takes up less room—just like when you flatten a beach ball so you can fit it in your beach bag. You can always blow up the beach ball again, but once you’ve flattened the actions there’s no going back. All existing actions are removed from the Actions list and you can no longer reorder or edit their settings.
Click the Actions pop-up menu above the Action list.
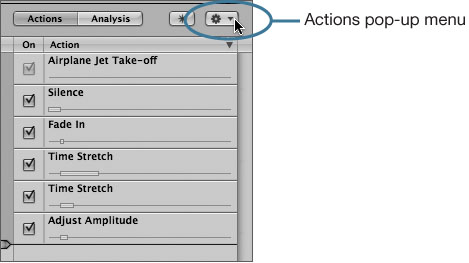
Choose Flatten all actions from the pop-up menu.
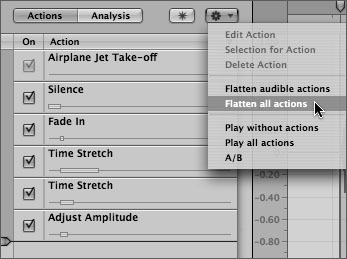
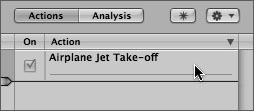
The actions flatten and become part of the file within the project. All that is left in the Action list is the name of the audio file.
Select the last 15 frames of the visible waveform and add a Fade Out to clean up any rough endings.
Choose Flatten all actions again to flatten the Fade Out.
Save your project and close the audio file project.
Play the current play range in the multitrack project to hear the changes.
Clear the playback region in the Time ruler.
Save the multitrack project.
The Waveform Editor also allows you to cut, copy, and paste portions of a waveform just as you would words in a word processor or clips in the Timeline. In fact, the shortcuts are the same as in virtually any of the Apple Pro applications.
In the next series of exercises, you’ll cut and paste an audio waveform to fix the timing of footsteps with the video. Then you copy and paste audio from several different waveforms to create an entirely new sound.
The first step in editing the waveform is to open the file and save it as an audio file project. You’ll be working with the Footsteps Snow Scuff clip on the FX 1 track.
Move the playhead to the second green Time marker at 01:01:03:00 in the Timeline.
Press the up arrow key several times to zoom in to that area of the Timeline.
Double-click the Footsteps Snow Scuff clip.

Click OK in the Double-Click Preferences dialog to open it as an audio file project.
Type TD after the name of the clip in the Save As field, and click Save.
The new audio file project opens in the Waveform Editor.
Press Shift-Return to play the clip from the beginning and listen to it as you watch the accompanying video of two skiers walking in the snow.
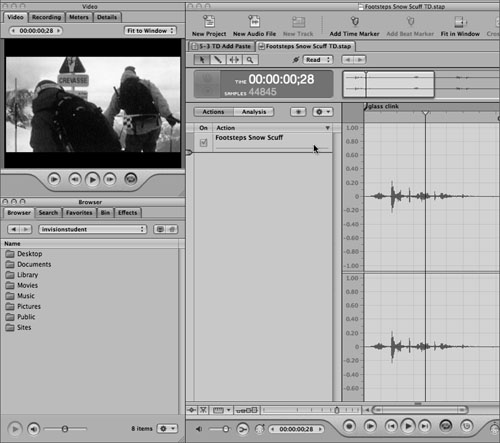
As you can see and hear, the footsteps match okay at the beginning, but not for the full clip of the skiers walking. Foley effects often fit well, but in this case, you’ll need to copy and paste a few footsteps to make it even better.
It might be helpful to set a marker in the Time ruler where you’d like to hear a footstep sound. You can set markers in the Waveform Editor the same way you set them in the Timeline—the only difference is that you can only set the type of markers that match the time format for the audio file. Since this is a time-based (timecode) non-looping audio file, you can only set a time marker (M).
Press Shift-Return to play the beginning of the clip again, but this time, pause playback as soon as you see a skier step without hearing a sound to go with it.
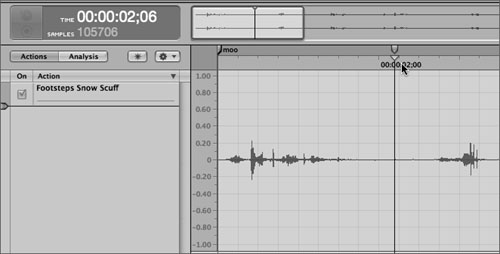
It seems that the skier in the red jacket takes a silent step around 2;06.
Press Cmd–right arrow or Cmd–left arrow as needed to move the playhead one frame at a time around 2;06 to see the movement of the skier.
Move the playhead to 2;06 and press M to set a marker.
Press the down arrow key once to zoom out one level and locate the gray marker that indicates the end of the clip in the Timeline.
Next, you’ll copy a footstep from the waveform on the right side of the gray marker.
In this exercise you’ll select one of the two nearest footsteps at the right of the gray marker and copy it to the clipboard.
Move the playhead to the gray marker (3;27).
Press the spacebar and listen to the first two steps.
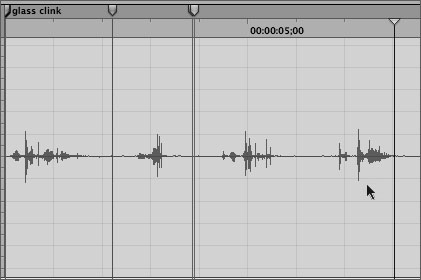
The first step is fine, but the second one sounds a little heavier, like someone stepping down with the extra weight of a ski. You can choose either footstep for this exercise. I’ll use the second step in the figures.
Drag the Selection tool over one of the footstep waveforms to select it.
Be sure to include the entire waveform from before it starts to after it ends to make sure you select the entire thing.
Press Cmd-C or choose Edit > Copy, to copy the selection to the clipboard.
Now that you’ve copied the selection to the clipboard, you can move the playhead to the position where you’d like to paste the clip. You don’t actually want to paste on the marker because that would start the stepping sound after the skier starts to step. Instead, paste the middle of the waveform around the marker.
Your goal is to paste the copied waveform into the empty waveform space between the first two stepping sounds. To paste in a specific area without affecting the rest of the waveform, you’ll need to make a selection where you’d like to paste. This is referred to as a paste over edit, similar to an overwrite edit in Final Cut Pro. If you paste in the waveform without making a selection, the pasted clip is inserted into the waveform and moves the rest of the waveform down to accommodate. Pasting without a selection is similar to an insert edit in Final Cut Pro.
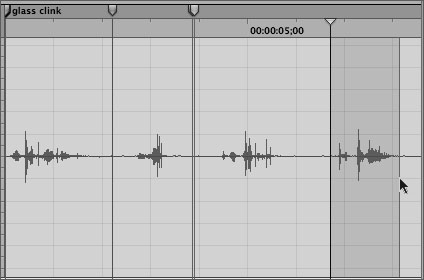
Create a new selection in the empty waveform space around the green marker. Make the selection approximately the same length as the selection that you copied.
Press Cmd-V to paste the copied waveform into the selection.
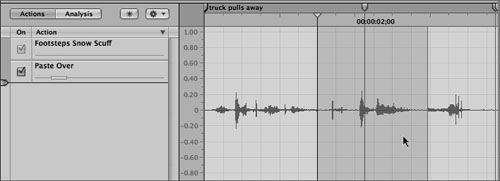
The pasted waveform appears in the selection area, and a Paste Over action appears in the Action list.
Click anywhere in the display to clear the selection.
Press Shift-Return to play the file from the beginning, watching the video as you play the newly modified footsteps.
It’s good. The steps work well with the picture. However the audio level could use a little amplitude adjustment.
It’s time to apply more of your new skills to select the waveform between the first two scoring markers and raise the amplitude by 10 dB. Once you’ve selected the waveform, choose Process > Adjust Amplitude, or press Shift- Cmd-L. Save the edited audio project, close the tab, and play that section of the multitrack project to see how it turned out. The footsteps are subtle, but they add to the overall soundtrack. Once you’ve played that section of the Timeline, save the multitrack project.
The grand finale of this waveform safari is to create a customized crash-scream-hit effect by copying parts of two different files into another. First, you’ll create an audio file project, and then open two other files from the Media and Effects Manager.
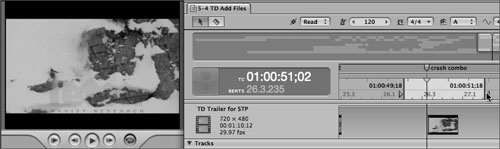
Move the playhead to the crash combo marker (51;02) in the Timeline, and zoom in a level or two for a clear view of the marker.
Locate the Auto Crash Metal 2 clip on the FX 1 track that starts at the marker.

This is the clip you’ll be customizing as an audio file project.
Create a playback region a little before the crash combo marker to the end of the Auto Crash Metal 2 clip.
Play it to see and hear the current effect.
Ouch. The skier hitting the rock before falling over the ledge looks painful, and the current auto crash sound effect certainly echoes that feeling. Sure, it’s not really an auto crash, but often in sports films, especially X-treme sports, sound editors take a few audio liberties with effects. This is one of those times.
Double-click the Auto Crash Metal 2 clip and save it as Auto Crash Metal 2 TD in the My Soundtrack Pro projects folder.
In this exercise, you’ll locate and open a body hit and a scream file. Unlike the audio file projects, you won’t save these files as audio file projects because you aren’t changing them. All you’re doing is opening them and copying some of the waveform.
Click the Search tab and select the Sound Effects category from the Keywords pop-up, if it is not already selected.
Type Body Hit into the Search text field.
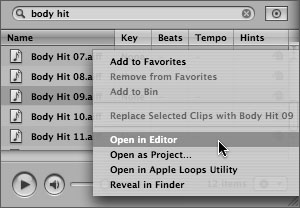
There are 12 different Body Hit files to choose from.
Click the first file in the list, Body Hit 01, to hear the file. Press the down arrow key to move to the next file in the list until you have previewed all 12 files.
All of them are good, but I’m partial to the ones with an extra bone-crunching umph at the end. (Use your imagination when listening to sound effects—it comes with the job.) For now we’ll go with Body Hit 09, and you can always rebuild the effect with any file you choose after the lesson.
Ctrl-click the Body Hit 09 file on the Search tab and choose Open in Editor from the shortcut menu.
Tip
Opening a file in the editor, without opening it as an audio file project, means you will be working with the actual file. Any changes you make to the file will permanently (destructively) change the audio file. So be careful. If you think you might accidentally mess up the original file, you can always open it as a project instead.
Body Hit 09.aiff opens in the editor.
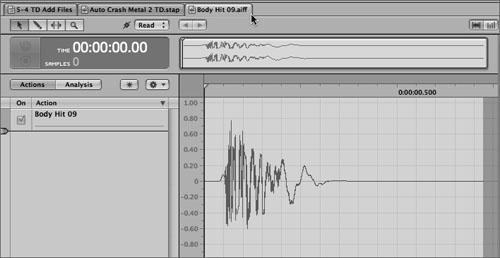
Notice that the tab shows an .aiff file extension, which means it is the actual file, not an audio file project. One file open, one to go.
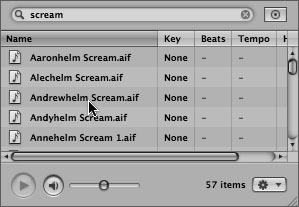
Type scream in the Search Text field.
Soundtrack Pro comes with over 50 scream files. Curiously, they all seem to be named after a person, followed by the word helm. Curiously, many of the first names of the scream files in the list correspond with the brilliant Soundtrack Pro team at Apple. The helm is most likely an audio homage to the famous Wilhelm scream often used by Hollywood sound editors.
With so many screams to choose from, why not audition them all—or at least several of them—with the crash and the video clip?
Click the Auto Crash Metal 2 TD.stap tab to make the audio file project active.
Note
Among sound editors and sound designers in Hollywood, one of the most famous and cliché sound effects is the Wilhelm scream. It was originally recorded by Warner Brothers for the film Distant Drums directed by Raoul Walsh in 1951. It appeared again in The Charge at Feather River (1953), where it was heard when a soldier named Private Wilhelm (played by Ralph Brooke) was shot in the leg with an arrow. The scream was so distinctive that it was recognized by sound editors and dubbed the “Wilhelm” scream after the character. Since then, the Wilhelm scream has appeared in many features including the Star Wars films, the Raiders of the Lost Ark series, and even animated films like Aladdin. You can find volumes about this on the Internet, including a QuickTime video with samples from different movies using the Wilhelm scream. Check it out at http://download.theforce.net/video/wilhelm_27mb.mov.
Press the spacebar to begin playback of the project.
While the project is playing, select the first scream in the list to audition it with the video and the crash sound. Press the down arrow key to audition as many screams as needed until you find one you like best. My choice is the Tomhelm Scream file because it sounds more like someone wiping out, rather than someone who sees something really scary.
Ctrl-click the scream of your choice and choose Open in Editor.
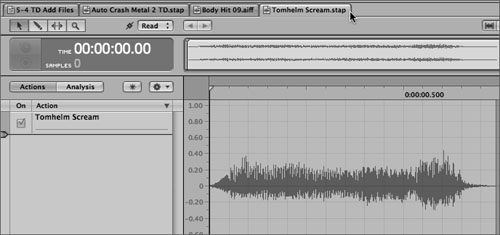
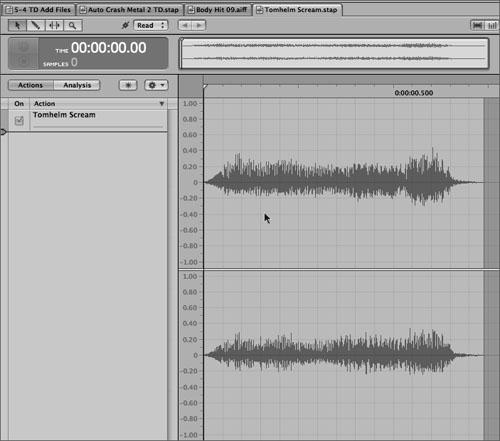
The file opens in the Waveform Editor.
The last step in creating the crash-hit-scream effect is to select the audio files you’d like to combine and paste them one at a time as a mix into the Auto Crash Metal 2 TD audio file project. This is not an ordinary paste insert or paste over procedure. Pasting one waveform into another without overwriting the original waveform is a Paste Special feature. Let’s start with the scream.
Double-click the scream file to select the entire waveform.
Press Cmd-C to copy the selected waveform.
Click the Auto Crash Metal 2 TD tab to make the audio file project active.
Double-click the display area of the auto file project to select the entire thing.
Choose Edit > Paste Special > Paste Mix, or press Shift-Cmd-V.
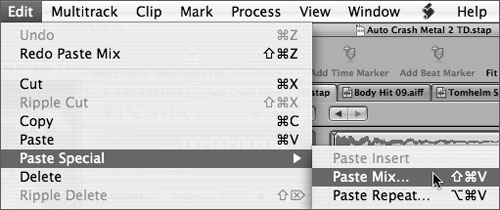
A Paste Mix control appears.
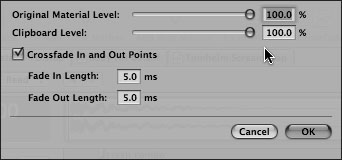
You can use the Paste Mix control to adjust the volume levels of the Original Material (Auto Crash Metal 2) and the Clipboard Level (scream file). The scream probably shouldn’t overpower the crash, so how about leaving the Original Material Level at 100% and lowering the Clipboard Level to around 60%?
Drag the Clipboard Level slider to around 60% or type 60 in the Clipboard Level field.
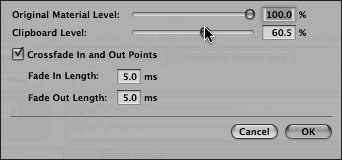
Click OK to paste the mix of the scream waveform with the crash waveform.

The waveforms combine to create something new.
Play the project to hear the mixed waveform.
Good stuff, and works well with the video.
It’s your turn to perform one more paste mix. Click the Body Hit 09 tab, select the whole waveform, and copy it. Then select the audio file project tab and paste mix the waveform to the current mix. Feel free to adjust the mix levels however you like by double-clicking the Paste Mix action and changing the settings. Save the Auto Crash Metal 2 TD audio file project once you’re finished.
Now that you’ve completed creating your custom effect, you can save it with a different name to make part of your own collection in Lesson 10, “Exporting, Managing Media, and Preferences.” Also, now is a good time to close the other open files in the Waveform Editor.
Click the tab for the scream file and close it.
Click the Body Hit 09 tab and close it.
There should only be two tabs remaining, the audio file project tab, and the multitrack project tab.
Click the Auto Crash Metal 2 TD tab if it is not already active.
Choose File > Save As to open the Save As window.
Change the name to Crash-Hit-Scream and save it in the My Soundtrack Pro projects folder.
Close the audio file project.
The renamed project is saved in your projects folder. The original audio file project is in the Timeline.
Press the spacebar and watch the playback region in the Timeline and enjoy your sound-designed custom effect.
Save the final changes to the project.
That concludes this lesson, but should spark your imagination on the many ways you can use the Waveform Editor to modify your audio clips. While the multitrack project is open, feel free to try out your new techniques with some of the other sound effects. Several have filters applied to them, which you’ll learn how to do yourself in the next lesson.
More Info
For more information about the film Tangerine Dream, or to see the actual trailer, go to: http://tetongravity.com.
Waveform Editor | |
|---|---|
Shift-Cmd-V | paste mix |
Shift-Cmd-L | adjust amplitude |
Delete | ripple delete |
Cmd-Delete | silence |
copy | |
Cmd-V | paste over selection, paste insert if nothing selected |
Cmd-Z | undo previous step |
Cmd-A | select all |
Shift–right arrow | selects one gridline to the right |
Shift–left arrow | selects one gridline to the left |
Navigation | |
Cmd–right arrow | moves playhead one frame to the right |
Cmd–left arrow | moves playhead one frame to the left |
Shift-M | moves to the next marker |
Option-M | moves to the previous marker |
Zooming | |
Up arrow | zooms in horizontally in the display area |
Down arrow | zooms out horizontally in the display area |
Ctrl–up arrow | zooms vertically in to the waveform |
Ctrl–down arrow | zooms vertically out of the waveform |
Shift-Z | fits the waveform to the display area |
Option-Z | fits the selection to the display area |