
On iOS, we have the option to use Apple ARKit for spatial anchoring, for devices that support this technology. In this section, we will implement the project on iOS using ARKit. We will not use Vuforia at all, rather, we will modify the project version completed in Chapter 6, How to Change a Flat Tire (also where this chapter started at the beginning), and develop it into an AR-only app using the Unity ARKit plugin.
This version will behave very similarly to the Vuforia one, but we do not need to use image targets (user defined or otherwise). We can skip those previous steps that handle capturing and tracking the user defined target, and replace them with a simple button to let the user set the AR graphic position.
We've listed all the steps to build the project as follows, even when identical to the ones shown earlier in the chapter. This time, for expediency, we'll only list them without a lot of explanation and screen captures. Please review the previous corresponding topics if necessary.
As before, we'll have two modes: regular 2D screen view and AR view mode. There will be an AR Mode button to toggle between the views. The non-AR view is the one we built in the previous chapter. The AR mode will hide the 2D content, show the device's video feed, and add 3D graphics to it.
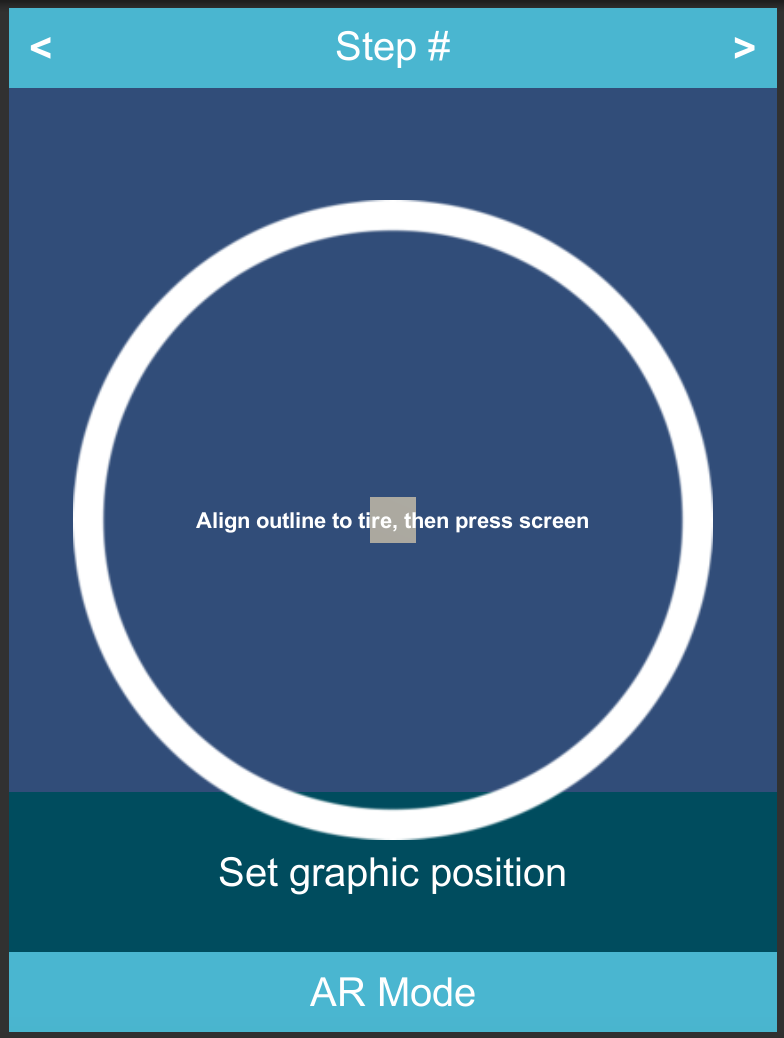
When in AR mode, there will be another mode: anchor mode, activated by pressing the Set position button. When setting the position, we'll display an AR prompt--a circle--to assist the user with registering the AR graphic with the automobile tire in real life. The buttons and modes are shown in the following table:
|
2D mode |
AR mode |
Anchor mode |
|
|
AR Mode button (ARButton object) |
Turn on AR mode |
Turn off AR mode |
Turn off AR mode |
|
Set Position button (AnchorButton object) |
disabled |
Turn on Anchor mode |
disabled |
|
Press screen prompt with circle (ARPrompt object) |
disabled |
disabled |
Sets position and Turn off Anchor mode |
To give you a heads up with what we're going to build, the following screenshot shows the screen space UI we will have when we are done (all the elements are visible; at runtime specific elements will show only for specific modes):
And the following screenshot shows the scene Hierarchy we will have when we are done:

Let's get started!