
Continuous feedback plays a major role in improving the quality of an application. A timely feedback mechanism improves customer satisfaction and reduces the time it takes to address any user concerns. A live dashboard displaying the status of the activities and a collaboration platform for requirements brainstorming are equally important. This chapter looks at some of these features available in Azure DevOps to meet these needs.
Dashboards
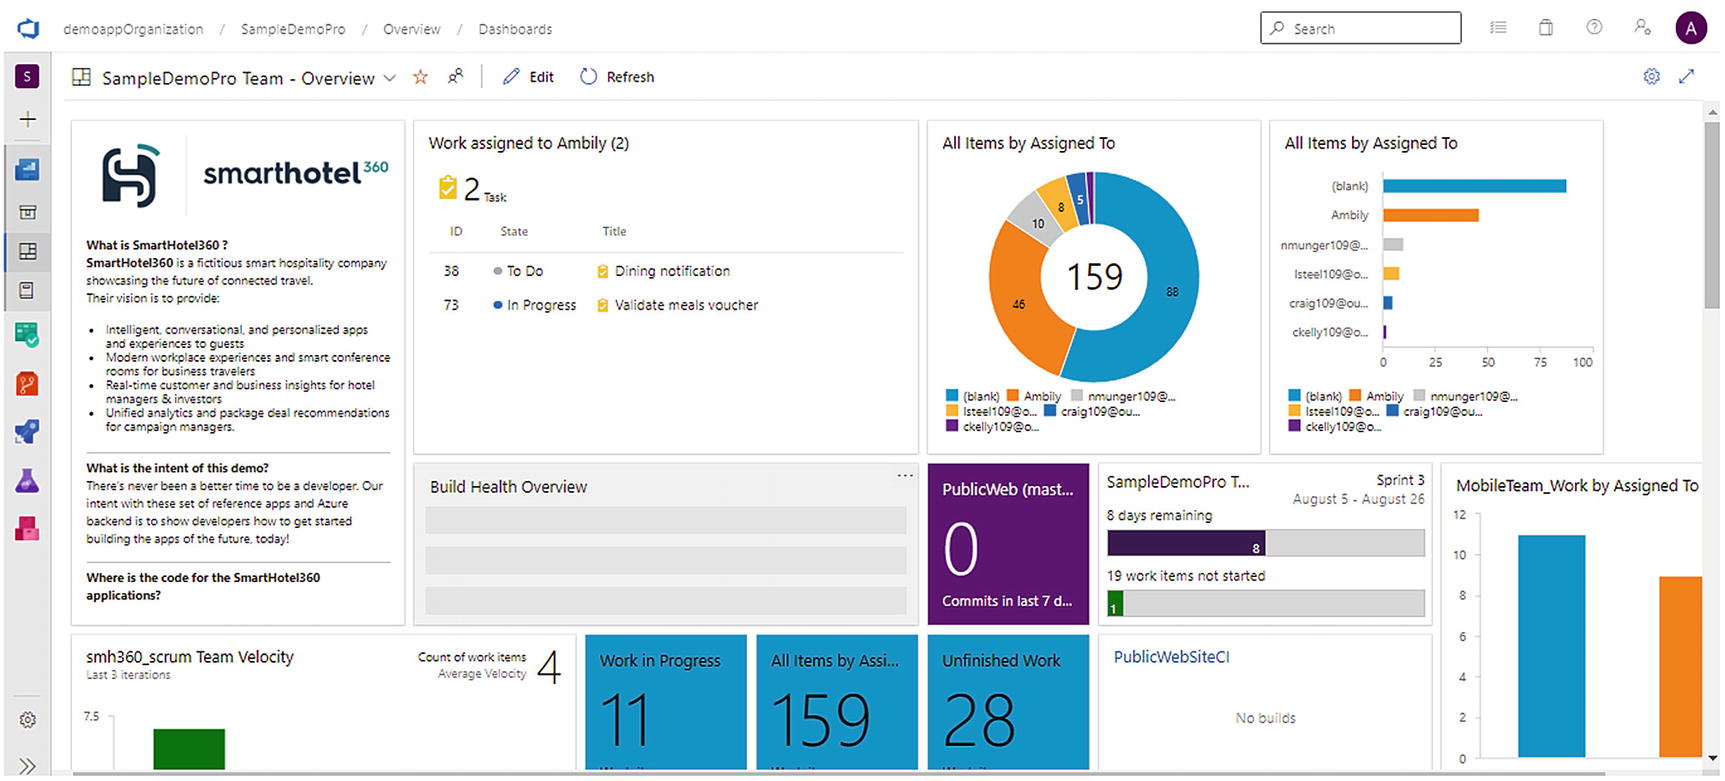
Sample dashboard
Add to Favorite: Use this option to mark the current dashboard as a favorite.
Team Profile: Use this option to view the team profile, which lists the boards, backlogs, sprints, dashboards, and team members in the current team.
Edit: Use this option to edit the current dashboard. The user can add new widgets from the Marketplace or realign the existing widgets. To realign the widgets in the dashboard, the user can drag each of them after selecting the Edit option and drop them in a target place. This will automatically realign the entire grid displaying the dashboard widgets. Edit opens the Add Widget list on the right side so the user can select from an existing list of widgets. The user can refer to the list of available widgets in the Visual Studio Marketplace (https://marketplace.visualstudio.com/).
Refresh: Use this option to refresh the data displayed in each widget. Data refresh can be done automatically using the Settings option.
Settings: Use this option to open the settings, which allows the user to change the name of the dashboard, provide a description, and control the security, as shown in Figure 7-2. Also, the user can set the automatic refresh of the dashboard to every five minutes.

Dashboard settings

Widget options

Configuring a widget

Querying a widget
Any modifications in the query will impact the dashboard automatically. Moreover, this view provides various options to export the query result, copy the query URL, and so on.

Widget from Marketplace
Even though the complete chart is not based on any specific defined query in the project, the user can navigate to a custom query by selecting one of the chart legends or blocks. This custom query will list the work items specific to that legend only.
Wiki
A wiki addresses the detailed documentation requirements of a project. A wiki can be used to capture the requirements in detail, architecture design documentations, coding standards, flow diagrams, minutes of meetings, new feature requirements, and so on. This collaboration platform enables users to collaborate on the wiki pages using the discussion boards.
A user can create a project wiki using one of the two options available: Create project wiki or Publish code as wiki.
Publishing Code as a Wiki

Wiki creation
Edits in the wiki will be reflected in the file, and vice versa. Once the wiki is published, the user can unpublish the wiki to remove it from the project. Also, the user has an option to rename a wiki to update the name.

Wiki pages
Add sub-page: Use this option to add a child page to the existing page.
Copy page path: Use this option to copy the path of the wiki page, which can be shared over email and other mediums.
Move page: Use this option to move the current page to another location.
Edit: Use this option to edit the page.
Delete: Use this option to delete the page.
Open in new tab: Use this option to open the page in a new tab.
This view shows the selected page content on the right side along with the last edit detail. There is an option to add comments at the end of each page, where stakeholders can share their comments on the content and can have discussions about a specific point. Moreover, in addition to the content, there are options to edit the page, print the page, link work items, view revisions, and delete pages. If the wiki is linked to a requirement or is explaining a task, then the wiki page will be linked to the corresponding work items to establish proper traceability. Once they are linked, the corresponding work item details will appear on top of the wiki.
Editing a Wiki
Editing a wiki
Headings: The first icon on top of the editor provides three heading options.
Bold: Use this option to bold the selected text.
Italics: Use this option to apply italics to the selected text.
Link: Use this option to add a link to the text.
Code: Use this option to insert code into the wiki page.
Bulleted list: Use this option to create a list of items using bullets.
Numbered list: Use this option to create a list of items using numbers.
Task list: Use this option to create a list of tasks.
Table: Use this option to add a table by selecting the columns and rows.
Disable word wrap: Use this option to disable word wrap in the editor; this will add a horizontal scroller for the editor, if there are any long lines added.
Disable synchronized scrolling: Use this option to sync the scrolling of the editor and preview the view in a synchronized manner.
Add work item: Use this option to add a work item reference using a numbered work item ID.
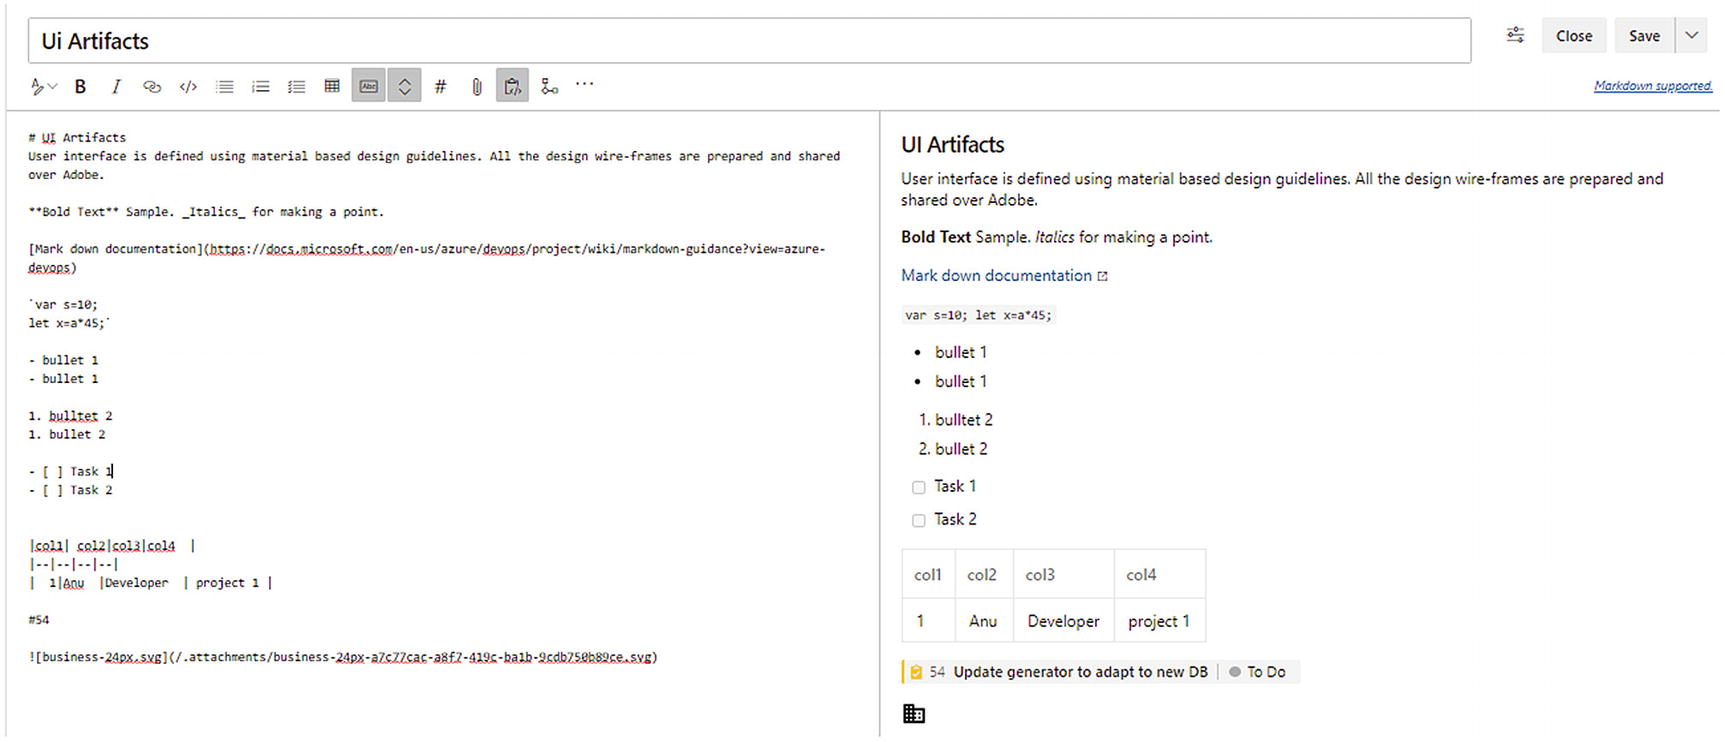
Insert a file: Use this option to insert a file. If the file is a picture file, it displays the image in the editor. In Figure 7-9, the user inserted an image of a business icon.
Paste as HTML: This option allows the user to copy and paste the content as HTML. By default, the editor converts all HTML content and renders the result in the wiki. If the user wants to display the HTML tags, then use this option. See Figure 7-10.

Pasting as HTML
Insert Mermaid Diagram: Use this option to insert a diagram that explains the requirements in detail using a class diagram, sequence diagram, or flowchart. A Mermaid diagram supports a list of diagrams, which can be constructed using Mermaid Markdown; for more information, refer to https://mermaidjs.github.io.

Table of Contents: Use this option to insert a table of contents based on the headings in the current wiki page. In Figure 7-12, there are two headings available on the page.

Creating a table of contents
Video: Use this option to insert a video into the wiki from YouTube or a Microsoft stream. Copy the iFrame tag from YouTube and insert it. See Figure 7-13.

Inserting a video
Insert YAML tag: This will insert the sample YAML tags at the beginning of the wiki, which the user can change. See Figure 7-14.

Inserting YAML tags
Formulas: Use this option to insert formulas into the wiki page. See Figure 7-15.

Formulas
Mention: Use this option to add reference to a team member using @.
Query results: Use this option to include the result of a selected query as part of the wiki. See Figure 7-16.

Adding query results
Using all these options, users can define some great content and collaborate over the wiki using the discussion option available on each page.
Discussions or Comments

Comment area on a wiki

Adding a reaction
User Settings

User settings
Preview features: Use this option to list all the preview features, enabling the user to enable and disable any of them.
Profile: Use this option to update the profile name, email, and other details.
Time and Locale: Use this option to modify the preferred language, data and time pattern, and time zone.
Notifications: Use this option to list the notifications enabled for the current user. The user can disable and manage the notifications from this view.
Theme: This provides two options: the Dark and Light themes.
Usage: Use this option to view a usage report for the specific user.
Personal access tokens: Personal tokens can be used instead of password-based integration from external systems such as Git.
SSH Public Keys: Connect to your Git repos through SSH public keys when you can’t use the recommended Git credential managers or personal access tokens to securely connect to Azure DevOps.
Alternate Credentials: Use this option to create alternate credentials to access the Git repository.
Authorizations: Use this option to give applications and providers access to the DevOps resources.
Continuous Feedback
Continuous feedback is one of the most important phases in a DevOps implementation. Continuous feedback ensures the proper flow of feedback from different stages of the application execution life cycle. In the implementation time, based on the maturity of the unit test scripts and feedback, feedback is shared with the developer as part of unit test execution. The quality assurance team, which is part of the sprint team, plays an important role in identifying the defects associated with the sprint implementations at an early stage and providing feedback in the form of bugs. User acceptance testing (UAT) means testing the sprint deliverables or release deliverables by end users or business stakeholders; this provides another level of feedback.
Once the application moves to the production environment, it is important to set up continuous feedback on the overall environment in the execution life cycle to improve the application quality. Different monitoring tools such as Splunk, App Dynamic, and so on, are used to monitor the production systems. These tools capture the application issues as well as the environment issues. Moreover, most of these monitoring tools support customization in terms of analyzing the logs and deriving meaningful insights, setting up automatic notifications, logging tickets directly to an integrated ticketing tool with detailed information, and so on.
Azure Application Insights
Application Insights and Azure Monitors are used mainly to monitor Azure-hosted applications and other resources. Application Insights can be integrated into Azure DevOps to log the observations as tasks or bugs in the system.
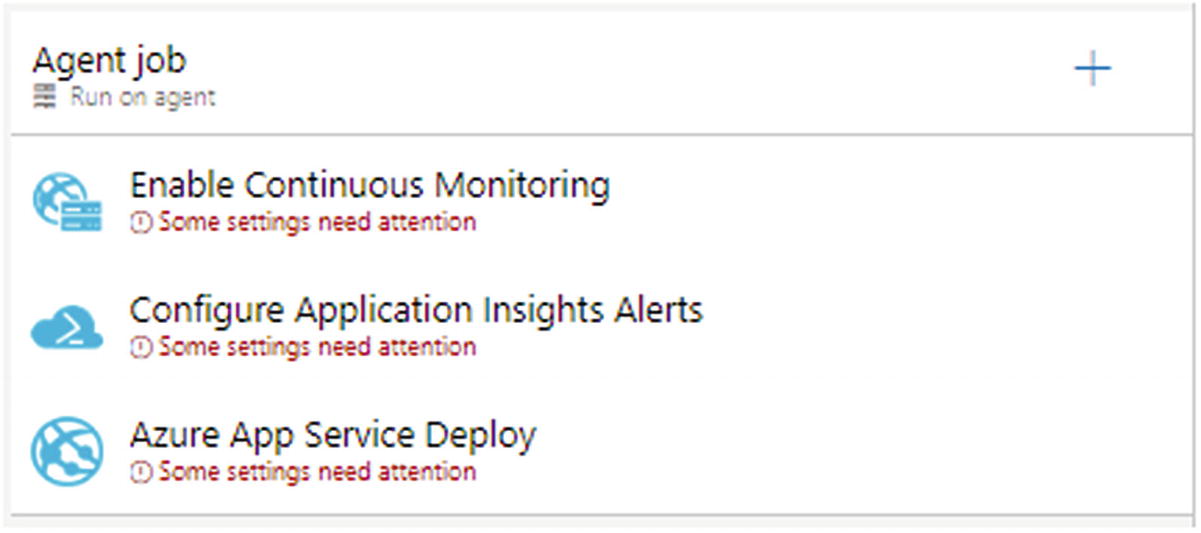
Application Insights can be integrated from the Azure release pipeline using the default template: “Azure App Service deployment with continuous monitoring”.
App Insights, release tasks

App Insights, DevOps integration
Summary
A wiki provides a collaboration platform for users to work together and drive new requirements and other documentations. Dashboards provide live updates about the project execution status. Continuous feedback plays an important role in fine-tuning the product quality. Azure DevOps provides a handful of features to support the collaboration, reporting, and integration needs as part of an Agile project execution.