The versioning of code is important in a DevOps implementation. Version control systems enable you to collaborate with team members by tracking and controlling changes within your code. Most version control systems provide the basic features required for working with team members in parallel on the same codebase or file. These features include versioning code, rolling back to previous versions, comparing versions to identify the changes, and so on.
This chapter focuses on version control systems, branching and merging strategies, and the associated functionalities.
Repos
Repositories define the source code management component of Azure DevOps. You can configure multiple repositories in a team project to manage the different source code related to a project. For example, a team can plan for a repo for the UI application and have another repo for API development.
Initial repo setup
The team can set up the repo by importing an existing repo from another repository directly or by pushing an existing project from a system using the command line.
- 1.
Open a command prompt (Start ➤ cmd).
- 2.
Navigate to the folder containing the source code of the project.
Git should be installed before cloning or pushing the Git repository. Download Git from https://git-scm.com/download/win and install it to proceed.
- 3.
Initialize the Git repository using this:
git init - 4.Once the repository is initialized, link the local Git setup to the Azure “remote” repo so they can communicate, by adding origin to the git remote command.git remote add origin https://[email protected]/authorambily/SampleProject/_git/SampleProject
- 5.
Once the repo is linked with Azure DevOps, push the existing code from the local version to the remote version using the git push command. You will see the code in the Azure repository called SampleProject.
git push -u origin –allThis may prompt you to provide your Azure DevOps credentials to continue.
- 6.
If you get the following error message, set up the branch corresponding to our repo.
No refs in common and none specified; doing nothing.
Perhaps you should specify a branch such as 'master'.
Everything up-to-date
To fix the previous error, clone the Azure DevOps repository again using the git clone command.git clone https://[email protected]/authorambily/SampleProject/_git/SampleProject - 7.
Navigate to our project folder using cd SampleProject.
- 8.
Set the username and password, if they’re not detected automatically, using the Git global settings commands.
git config --global user.email [email protected]git config --global user,name "Ambily" - 9.
Add the existing content to the local Git repository using this:
git add . - 10.
Once the content is added, commit the changes to the local repository using this command:
git commit -m "first file update" - 11.
Once the local codebase is ready to be merged with the centralized repository, push the code using the git push command.
git push

Repo files

Changes using the browser editor
Branching and Merging
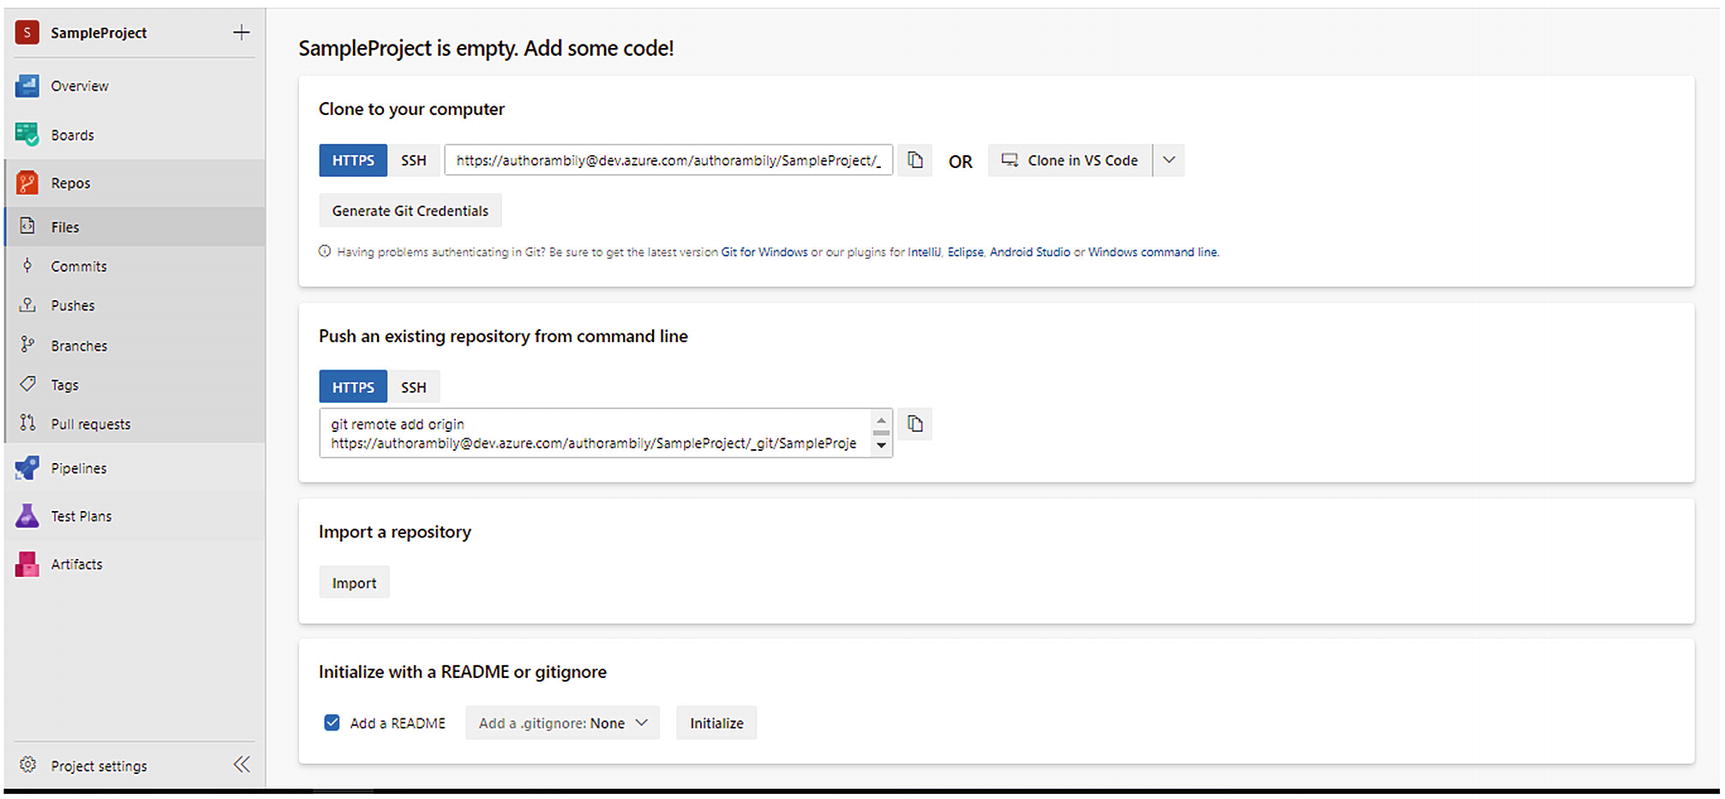
Before proceeding, let’s explore the concepts associated with repos and branches. By default, every repo will have one branch associated with it: the master. As per industry practices, the master branch code should be the same as the code released to production. Developers will work in a separate branch created from the master, normally called the dev branch. Based on the branching and merging policy of the organization, the number and names of branches will vary. For example, some organizations use a separate branch called the release branch for deployment to production.
Branching strategies and merging should be defined and documented to control the release activities associated with the project. Along with branching and merging, tags can be used to track intermediate patch releases and hotfixes.
The development team to work parallel in different features
Multiple teams like production support and developers to work independently
Proper control on release management
Branch, push, and pull
It is recommended that developers push the code to the remote repository every day to avoid a lot of conflicts as part of the merge changes. But, in some cases, developers will continue to work on the local copy for a longer duration or work offline in local Git branches to complete the implementation of the feature. Once the feature implementation is completed, the developers will push the changes to the remote repository. Developers use different branches in the local Git setup to manage the codebase and feature implementations. For example, the developer working on a feature may need to work on a production bug as part of a hotfix. In this case, the developer can configure a different branch to handle the requirement and bug fixes.
Microsoft’s recommendation on a branching strategy is available at https://docs.microsoft.com/en-us/azure/devops/repos/git/git-branching-guidance?view=azure-devops.
Project Repo

Options at the repo level
Clone: This option allows you to clone the repo into the local system using HTTPS or SSH. Also, it provides an option to open the repository directly in Visual Studio.
Fork: This allows you to create a copy of the existing repository in a current or different project.
New: This option allows you to add new files and folders directly into the repo through the browser.
Upload file(s): This uploads one or more files from the local system to the Azure repo.
Download as Zip: This downloads the repository as a zip folder to the local system.
Hide files tree: This hides the file tree to get more screen space for the files list.
Other options available for each file listed in the file tree are Edit, Rename, Delete, and Download.
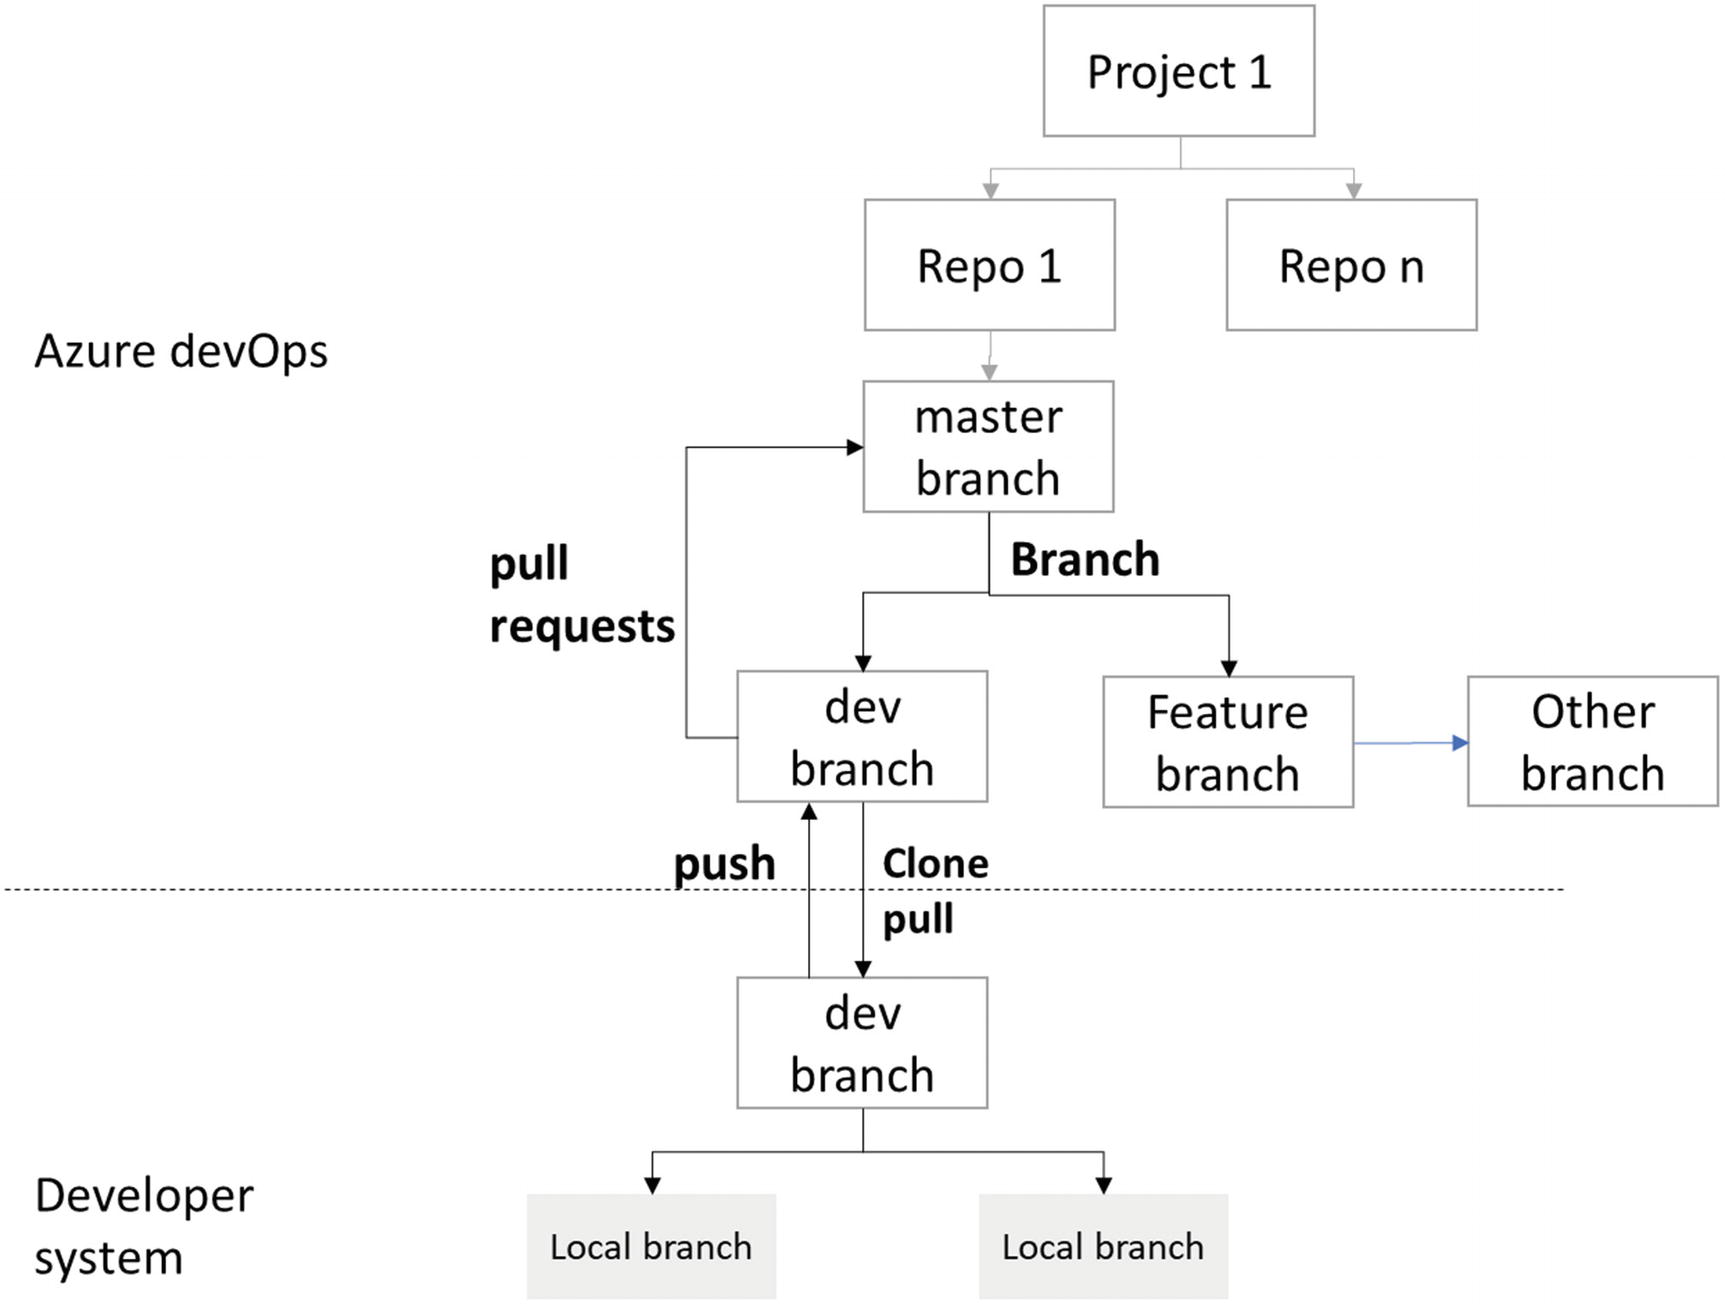
File history
Commit history
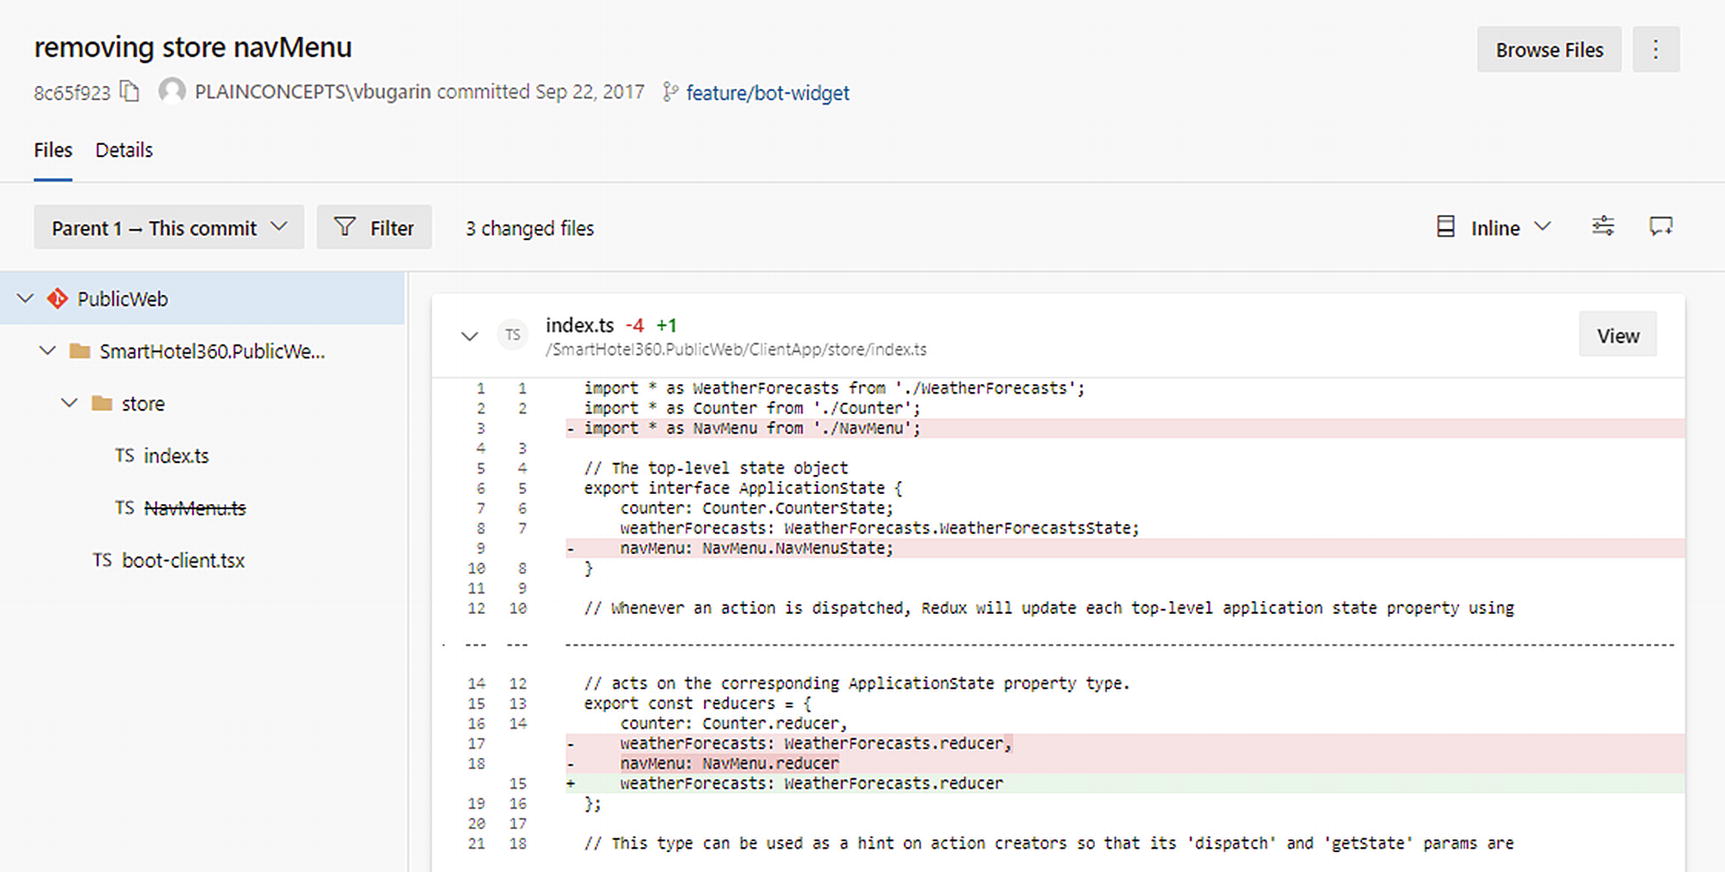
There are number of filtering options available on top of the changes to drill down to the changes. Moreover, there is an option (![]() ) at the top right to add a global comment to the commit. This option can be used to provide review comments or changes to the commit.
) at the top right to add a global comment to the commit. This option can be used to provide review comments or changes to the commit.
Branch and Tags
Branch and tag options

Creating a new branch
Moreover, the system allows you to link one or more work items to the new branch, as shown in Figure 4-9. If your branching policy is to create a new branch for each feature, then link the new feature to the new branch.
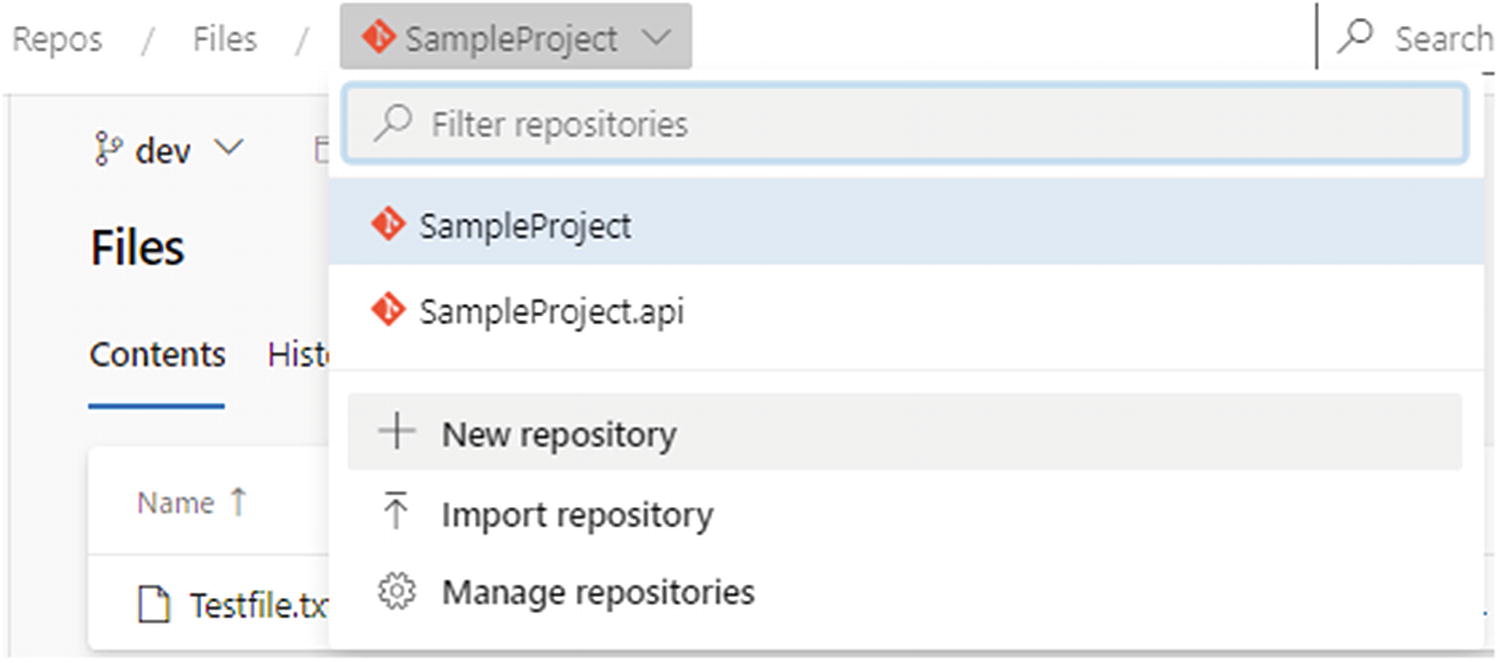
Creating a new repo
The “Manage repositories” option takes the user to Project settings ➤ repositories, which we discussed in Chapter 2. The “Import repository” options allows you to clone or import repositories from other systems such as GitHub or from another organization or project.
Commits
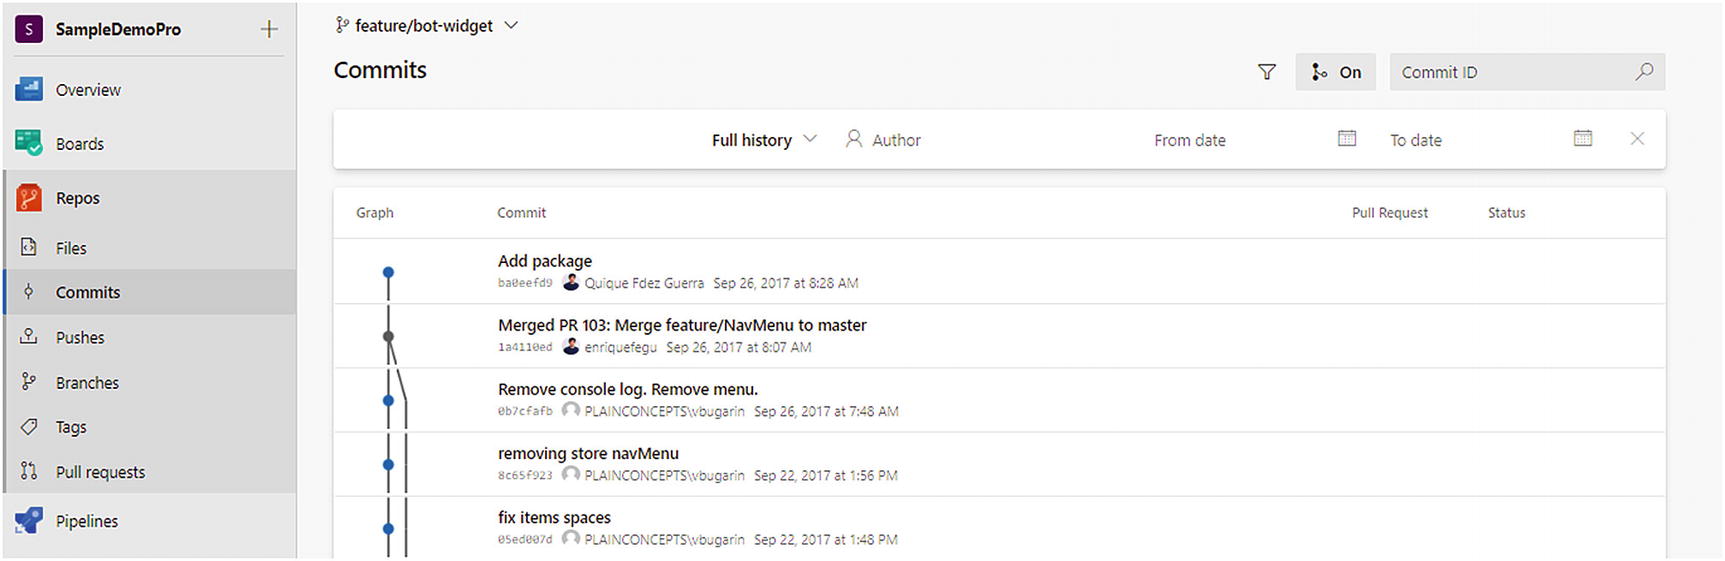
Commits section
Using the Graph option on the top, the user can toggle the commit graph. The user can search using the commit ID, if available. Click the commit to view the files and associated changes.
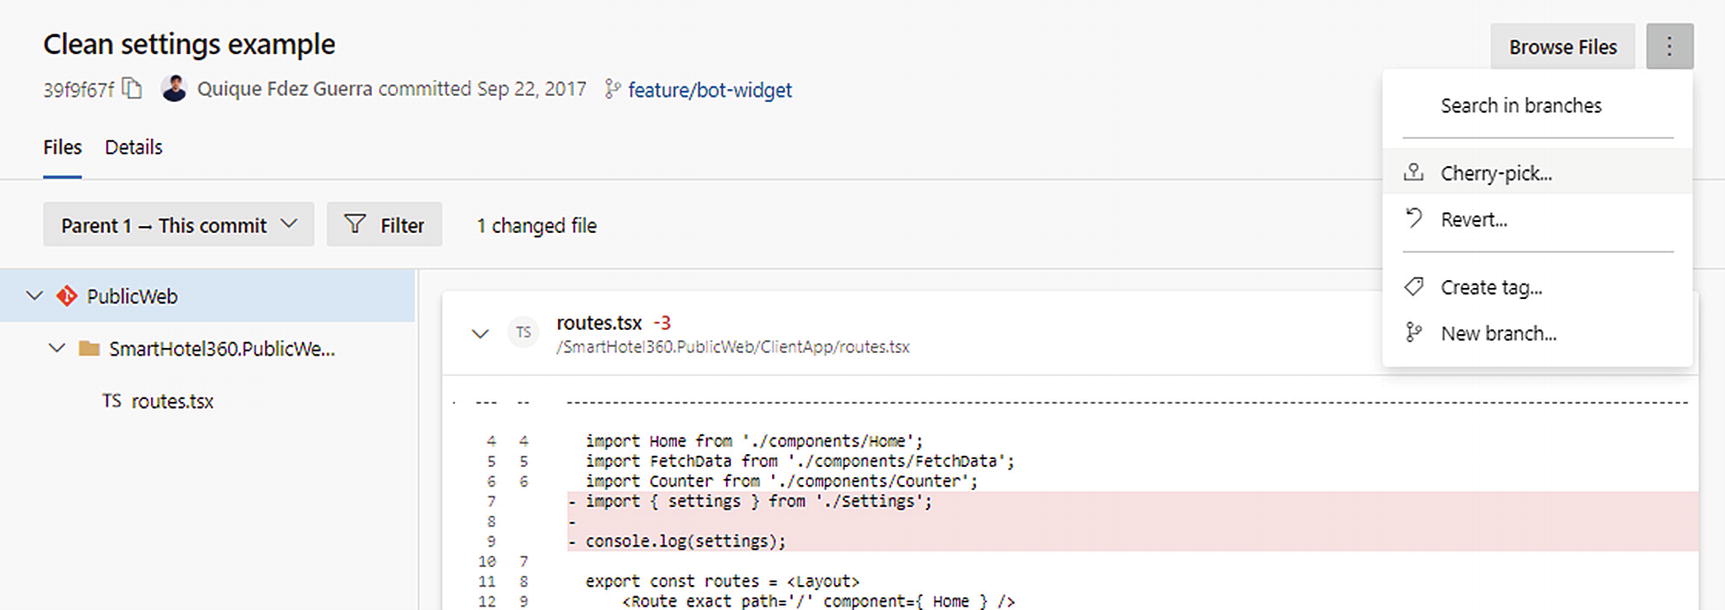
Commit details
Cherry-pick: Git’s cherry-pick operation is for applying the changes to a different branch that is not the parent of the current branch. For example, if you have made some changes in a release branch as part of a production issue fix and want to apply it in a feature branch, you can cherry-pick the commit from the release branch and apply it directly to the feature branch. The system will not apply the change directly to the feature branch; instead, it creates a new branch out of the feature branch, applies the new commit, and asks for a pull request to merge it to a feature branch. This way, Azure DevOps protects the feature branch codebase from any unwanted cherry-pick merges. Pull requests can be further enhanced by multiple code reviewers or approvals.
Revert: This option reverts the changes done as part of this commit operation. The Revert operation also creates a new branch from the current branch without the selected commit and asks the user to create a pull request to merge it back.
Pushes
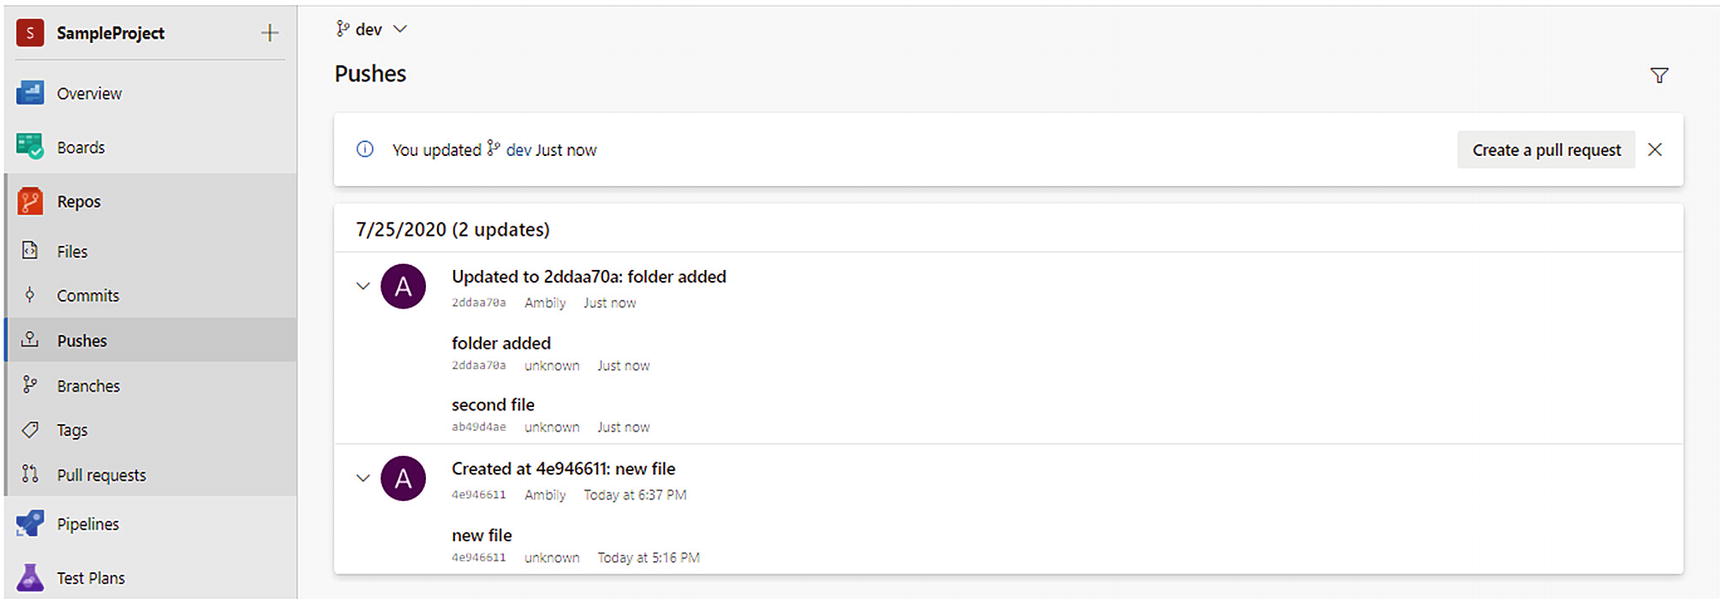
Pushes
In Figure 4-13, there are two pushes; one has one commit, and the other has two. The user can click the push item and view the changed files and corresponding changes. As discussed in the “Commits” section, you can revert the change, cherry-pick the commits, or create a new branch from the change.
Moreover, the Pushes view provides an option to raise a pull request to merge the commits with another branch. We will look at pull requests in the next section.
Branches
Mine: This lists all the branches created by the user.
All: This lists all the branches related to the repo.
Stale: This lists the branches without any commit or activities in the last three or more months. This will help in tracking the unused repos and remove them. See Figure 4-14.

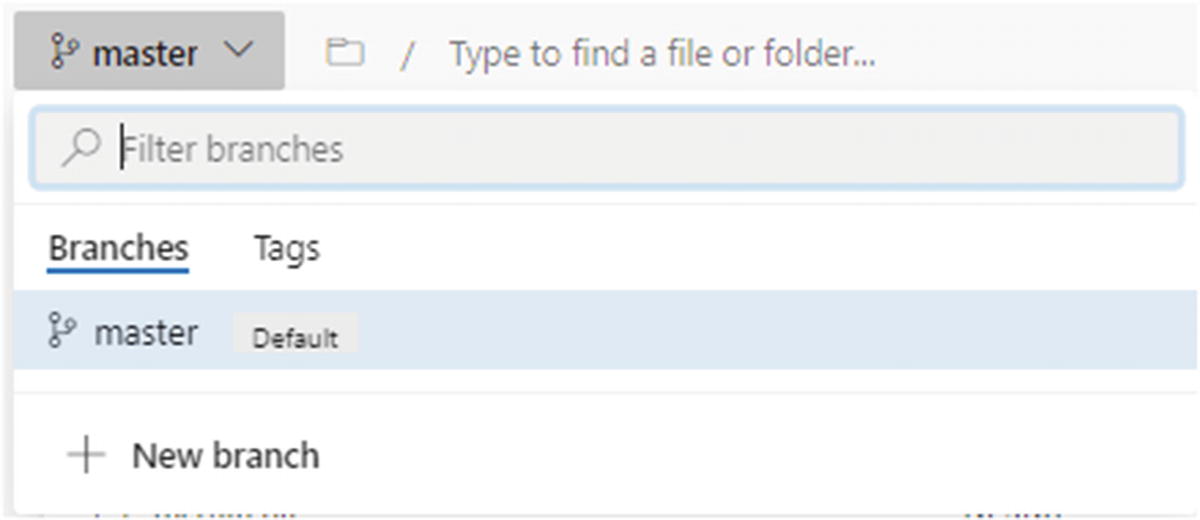
Branches and options
Along with the branch names, these other details are displayed: the last commit, who authored the commit, the date of the commit, and the pull request details. Moreover, the user can view the branch status with respect to the master branch; the Ahead data shows the number of commits that have not been merged with the master branch or parent branch, and Behind shows the number of commits that need to be merged into this branch. The “Add to favorite” option is available for each branch so the user can select a favorite branch.
New Branch: This creates a new branch based on the existing branch.
New pull request: This creates a new pull request to merge the changes with another branch.
Delete Branch: This deletes the branch.
View files: This lets you view files associated with the branch.
View history: This lets you view the commit history.
Compare branches: This compares two branches.
Set as compare branch: This marks one base branch for comparison.
Set as default branch: This sets the default branch.
Lock: This locks the branch and prevents any updates to the commit history or any new updates from others. Only the locked user will be able to perform activities on the branch. This feature can be used to freeze a feature branch to complete the feature implementation.
Branch policies: This defines the branch policies using Project settings ➤ repositories ➤ branch, as discussed in Chapter 2.
Branch security: This defines the branch security corresponding to each group and users. This option also allows you to receive an email with a detailed report about the branch security.
Tags

Tags
New Branch: This creates a new branch out of the tag.
Download as Zip: This downloads the tagged codebase as a zip file.
View files: This allows you to view the files marked with this tag.
View history: This makes the history of the codebase tagged using the specified tag.
Delete tag: This deletes the existing tag.
Set as compare tag: This uses the tag as a base tag for comparison.
Pull Requests

Pull requests
Select “New pull request” to create a pull request to merge the changes from any of the branches to the master or to another branch, as shown in Figure 4-17.

New pull request
Once the PR is created, reviewers can view it and select Approve. The user can select Set auto-complete, Complete, or Abandon for the PR based on the review.

Pull request: approval
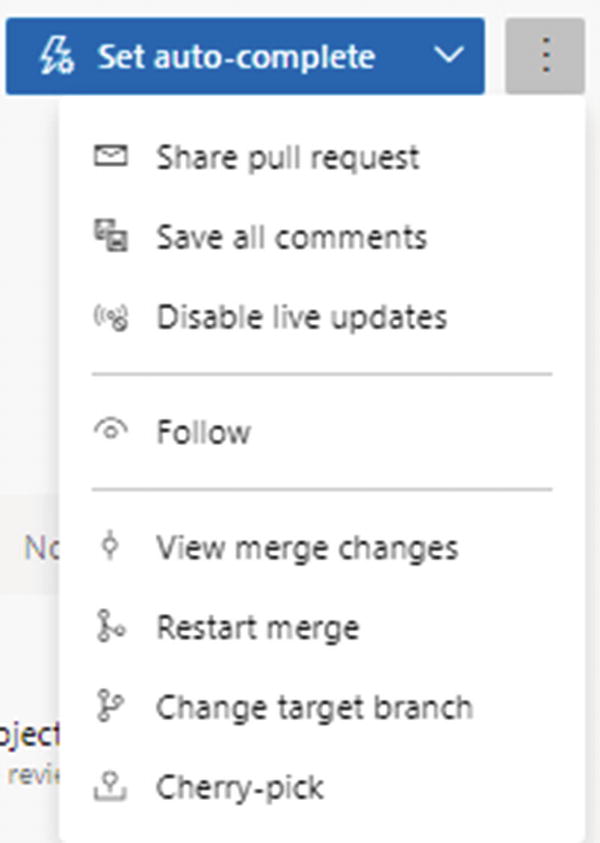
Pull request options
Share pull request: This allows you to share the PR over email. This option helps you share additional information with reviewers, if required.
- Save all comments: Review comments are added in the PR for tracking. By default the comments appear as Active with edit, delete, and like options, as shown in Figure 4-20. Users can respond to the comments or mark them with a status such as Pending, Resolved, Won’t fix, and Closed.
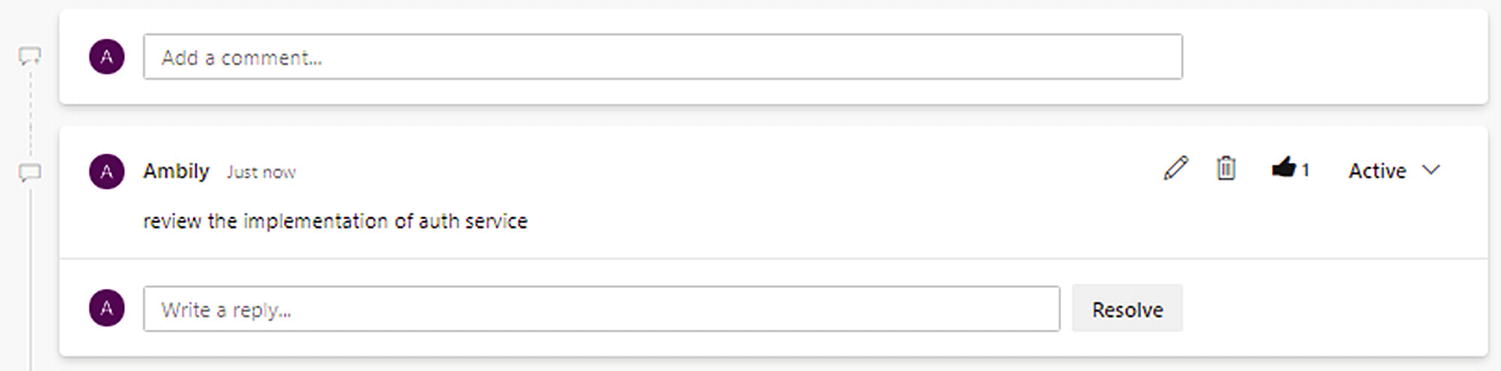 Figure 4-20
Pull request comments
Disable live updates: This disables the live updates.
Follow: Follow the PR to get notified on new comments and activities.
View merge changes: View the changes after the merge.
Restart merge: Restart the merge operation based on the fixes done by the developer to incorporate the review comments.
Change target branch: Change the target branch.
Cherry-pick: Cherry-pick the changes to another branch.

Pull request: merge options
Merge (default): This merges the codebase along with all the commits.
Squash commit: This merges the codebase as a single commit to target branch. In this case, the target branch is not aware of the commits that happened to the source branch and isn’t tracking the commit comments.
Rebase and fast-forward: This merges the target changes to the source and rebases the target from the source and fast-forwards it.
Semi-linear merge: This rebases the source commits onto the target and merges the two parents.
Working with Visual Studio

Team Explorer
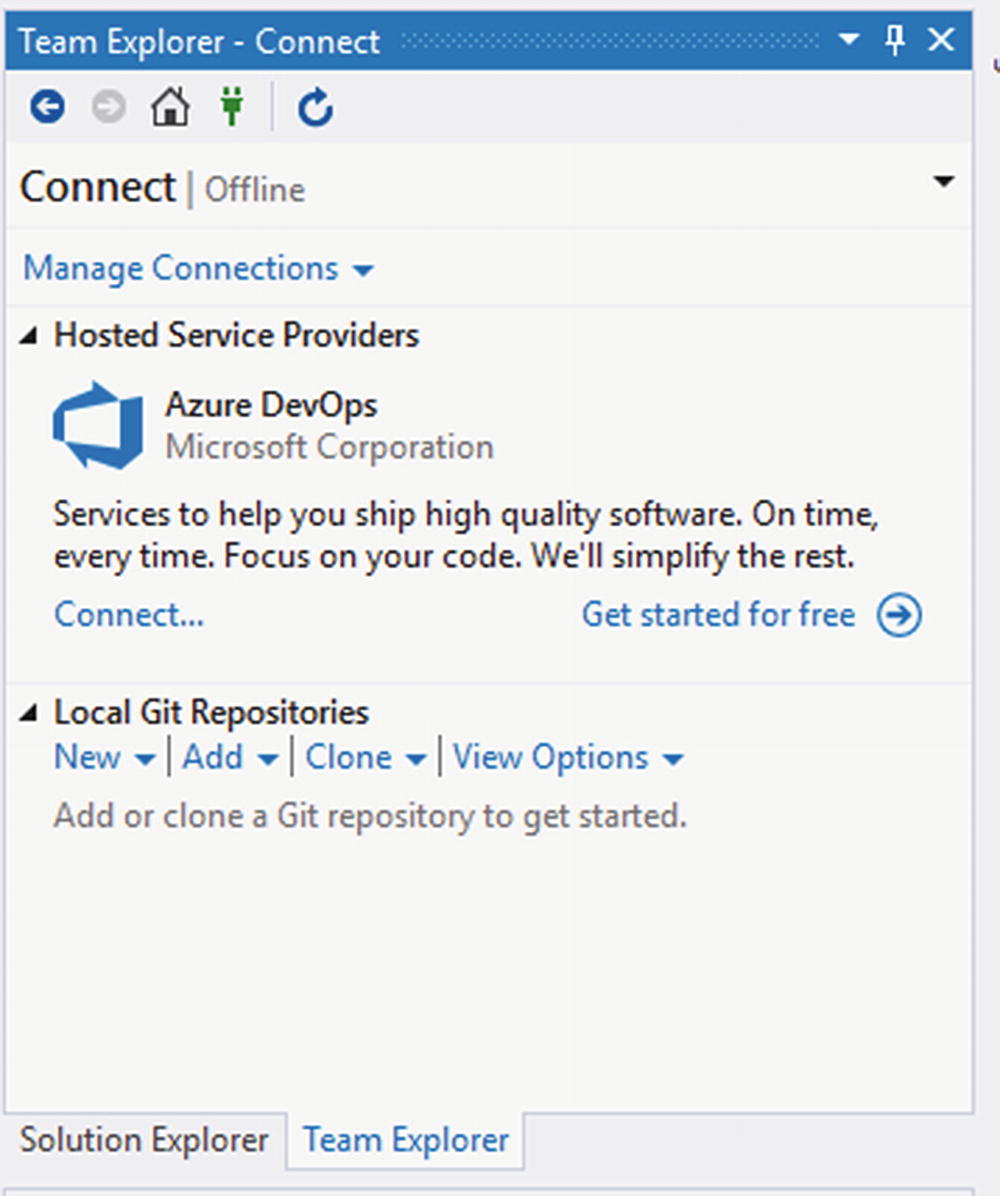
Team Explorer, Manage Connections menu
Click the Connect link under Azure DevOps to connect to the DevOps repo that is configured. The system will prompt you for your DevOps credentials to connect to the respective organizations. Once the credentials are validated, the system will populate all the organizations where the user has access to connect.

Connecting to a project

Azure DevOps operations
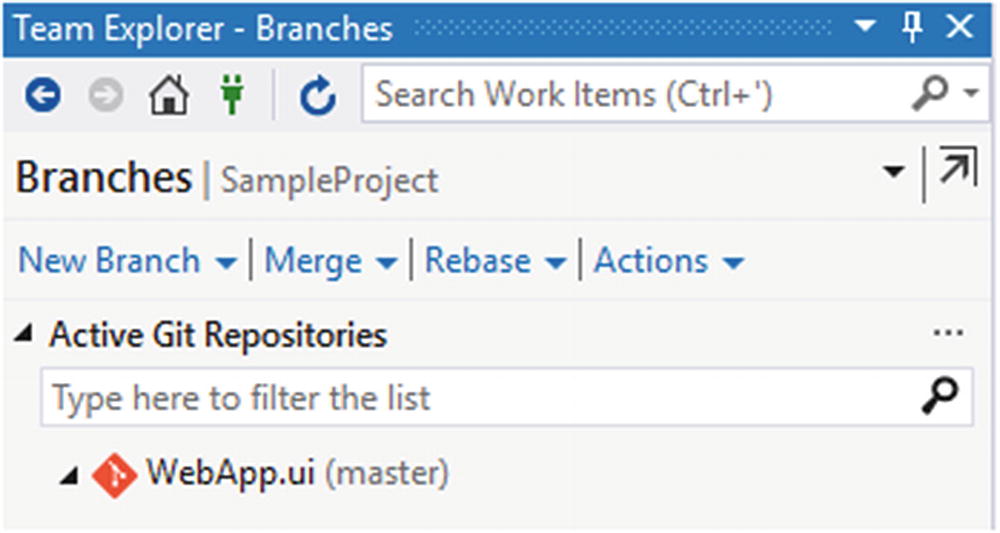
Team Explorer, Branches
The New Branch option helps in creating a new branch, whereas Merge allows you to merge the code from two branches. Rebase will override the existing branch code with the selected branch. Figure 4-26 shows these branch-related options.

Team Explorer, Synchronization menu
Fetch: This fetches the remote changes but does not apply them to any local branch. After selecting Fetch, invoke Merge to merge the remote changes with the local repo.
Pull: This is a combination of Fetch and Merge, where the system gets the changes from the remote repo and merges them with the local copy.
Push: This pushes the local changes to the remote server.
Sync: This is again a combination of Pull and Push, where the system pulls the remote changes and pushes the local changes back.

Git operations
Working with Visual Studio Code

Azure Repo extensions

TFVC location

VS Code status bar

Azure DevOps connect options
Follow the steps to connect to Azure DevOps. Note that this extension or TFVC support is limited to local workspaces. This option supports local branch management and also has direct integration with the Azure DevOps servers.
Working with Git Bash
Git Bash is similar to the standard command prompt, where Git commands can be executed. Along with Git command support, Git Bash has a wrapper over the standard command line and supports Linux commands. If you are from a Linux background and want to use similar commands, then use Git Bash to manage the Git repos.
Use this command to list the branches available:
git branchorgit branch -a
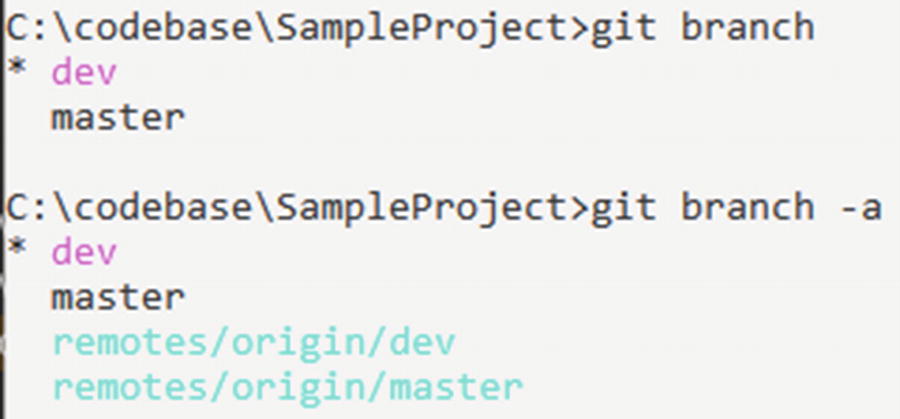
Git branches
Use this command to change to another branch:
git switch <<branch>>Use this command to check out a branch:
git checkout <<branch>>Use this command to show the status of the working branch:
git status
Sample Application
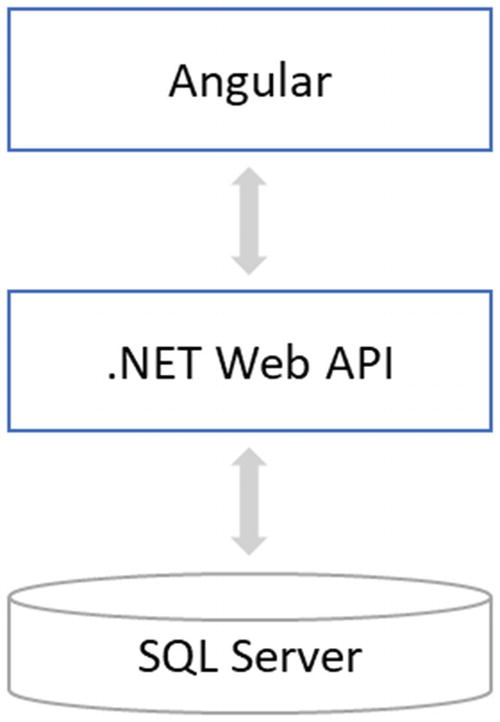
Sample app
The Angular development will be done using the Visual Studio Code IDE, and the .NET API will use Visual Studio as the integrated development environment (IDE). SQL Server database can also be added to the source repo using the database project templates available in Visual Studio.
Version Controlling an Angular App
- 1.
Create a team project in the Azure DevOps service using Git as the version control system.
- 2.
Configure a repo for adding an Angular app.
- 3.Clone the empty repo to the local system using the git clone command.git clone https://[email protected]/authorambily/SampleApp/_git/angularapp
Instead, you can push an existing repository from your system using the following:
- 4.
Navigate to the newly created repo, as shown here:
cd angularapp - 5.
Create a new Angular app using ng, as shown here:
ng new <<appname>> - 6.
Add all the newly created files into Git using the following:
git add . - 7.
Commit the newly added files or changes, as shown here:
git commit -m "first version" - 8.
Push the changes to the remote repo, as shown here:
git push
If the repo was initiated with ReadMe.md, then do a pull before push, as shown here:
Create the dev branch from the master branch, using the Azure DevOps portal.
Check out the dev branch.
git checkout dev
This may lead to the following error:
error: pathspec 'dev' did not match any file(s) known to git
Verify the branch.
git branchModify the application to implement a feature or bug fixes.
Commit the changes properly to the local repository. to stage the changes
git add .git commit -m "commit comment"Once the implementation completes, push to the remote repository.
git push origin dev
To https://dev.azure.com/authorambily/SampleApp/_git/angularapp
! [rejected] dev -> dev (fetch first)
error: failed to push some refs to 'https://dev.azure.com/authorambily/SampleApp/_git/angularapp'
hint: Updates were rejected because the remote contains work that you do
hint: not have locally. This is usually caused by another repository pushing
hint: to the same ref. You may want to first integrate the remote changes
hint: (e.g., ‘git pull ...’) before pushing again.
hint: See the ‘Note about fast-forwards’ in ‘git push --help’ for details.

Merging conflicts
Accept Current Change: This option accepts the local changes.
Accept Incoming Change: This option accepts the remote changes.
Accept Both Changes: This option accepts the remote as well as local changes.
Compare Changes: This option compares the changes and makes a decision manually.
Refer to the merge strategies at https://git-scm.com/docs/merge-strategies to understand the different strategies and their usage.
Version Controlling the .NET API
APIs or the middle layer of an application will be developed using any of the IDEs such as Eclipse or Visual Studio. .NET APIs are generally developed using Visual Studio, which supports direct integration with Azure DevOps. Refer to the section “Working with Visual Studio” to version control the .NET API using Azure DevOps and VS.
Summary
Version control and branching strategies define the development and release management of a project. Based on the branching strategy, the team works on different branches in parallel to complete the development, production support, and feature releases. The build and release setups are also dependent on the way the version control management system is configured with the branching strategies.