In Chapter 4, you learned how certain properties in CSS are inherited and how the cascade determines which style rules are the most important. In this and subsequent chapters, I begin an in-depth look at the individual properties of CSS and how these come together to style a document.
In this chapter, I look specifically at properties that manipulate the presentation of text. You can manipulate text in a variety of ways, from the length of space between letters in words of text, to the length of space between the words of a sentence, to the spacing between sentences in a paragraph, to how much space is used to indent the text contained in a paragraph.
I cover the various CSS text-manipulation properties:
The
letter-spacingproperty and how it is used to add or subtract space between the letters that make up a wordThe
word-spacingproperty and how it is used to add or subtract space between the words of a sentenceThe
text-indentproperty and how it is used to indent the text of a paragraphThe
text-alignproperty and how it is used to align the text of a documentThe
text-decorationproperty and how it is used to underline, overline, and strikethrough textThe
text-transformproperty and how it is used to capitalize text or convert text to uppercase or lowercase lettersThe
white-spaceproperty and how it is used to control the flow and formatting of text
The text manipulation properties of CSS allow you to design the layout of a document in much the same way as you use a word processing application.
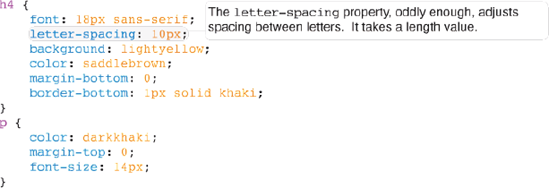
The letter-spacing property, as I have demonstrated briefly in previous chapters, controls the amount of space between the letters. The following table shows its allowable values.
Property | Value |
|---|---|
letter-spacing | normal | <length> Initial value: normal |
The letter-spacing property is a simple property that accepts a length as its value. A<length> value is any length value supported by CSS, as I discussed in Chapter 2. A normal value is the default value, and is determined by the font that's being used. This value is equal to a zero length value.
Figure 5-1a shows an example of the letter-spacing property.
In Figure 5-1a, you see how the letter-spacing property would be specified; Figure 5-1b shows the corresponding markup.
Figure 5-1c shows the rendered output of the CSS in Figure 5-1a and the markup in Figure 5-1b in the Safari browser.
The letter-spacing property may have either a positive or negative value. When given a negative value, letters are rendered closer together. Figure 5-2a shows an example of this.


The CSS in Figure 5-2a is combined with the markup in Figure 5-2b.
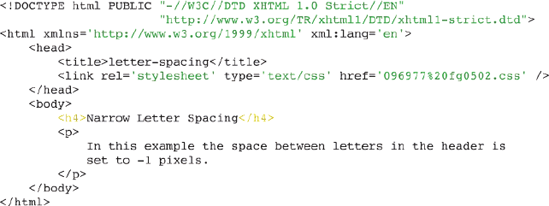
Figure 5-2c shows the rendered output of Figures 5-2a and 5-2b.

As you can see in Figure 5-2c, the letters of the paragraph are condensed together because the value of the letter-spacing property is a negative value.
You can use the letter-spacing property to add or subtract space between letters. In the following example, you try the letter-spacing property out for yourself.
Try It Out: The letter-spacing Property
Example 5-1. To see the letter-spacing property in action, follow these steps.
Enter the following markup:
<!DOCTYPE html PUBLIC "-//W3C//DTD XHTML 1.0 Strict//EN"
                      "http://www.w3.org/TR/xhtmll/DTD/xhtmll-strict.dtd">
<html xmlns='http://www.w3.org/1999/xhtml' xml:lang='en'>
    <head>
        <title>letter-spacing</title>
        <link rel='stylesheet' type='text/css' href='Example_5-1.css' />
    </head>
    <body>
        <h4>Letter Spacing</h4>
        <p>
            The <span class='code'>letter-spacing</span> property can take either a
            positive or negative length value.  The higher the value, the
            <span class='higher'>farther apart the letters</span>; the lower the
            value, <span class='lower'>the closer together the letters</span>.
        </p>
    </body>
</html>
Save the preceding markup as
Example_5-1.html.Enter the following CSS:
body {
    font: 14px sans-serif;
}
h4 {
    border-bottom: lpx solid green;
    margin-bottom: 3px;
}
P {
   margin: 0;
}
.code {
   font-family: monospace;
}
.higher,
.lower {
    letter-spacing: 5px;
    background: lavender;
    color: midnightblue;
}
.lower {
     letter-spacing: −lpx;
}
Save the preceding CSS as
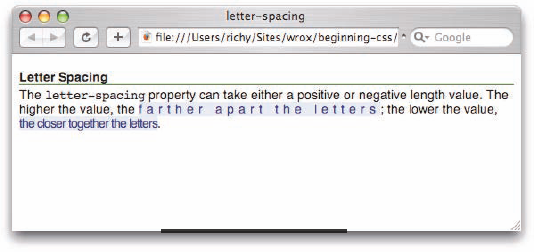
Example_5-1. css.The preceding example results in the rendered output in Figure 5-3.
How It Works
In Example 5-1, you typed in an example of the letter-spacing property, so that you could see it work in a browser for yourself. You applied two relevant style sheet rules. The first rule refers to elements with class names higher and lower. Both elements initially receive a letter-spacing value of five pixels, a lavender background, and midnightblue text. The letter-spacing value of five pixels causes the letters to be spaced farther apart.
.higher,
.lower {
    letter-spacing: 5px;
    background: lavender;
    color: midnightblue;
}
In a subsequent rule, you apply another letter-spacing value for the element with class name lower; it receives a value of negative one pixel. This causes the letters in that element to be spaced close together. This new rule overrides the letter-spacing style set in the previous rule for elements with class name lower.
.lower {
    letter-spacing: −lpx;
}f
In the next section, I present a property similar to the letter-spacing property, the word-spacing property.
The word-spacing property, in essence, functions identically to the letter-spacing property. However, (of course) instead of controlling the space between letters, the word-spacing property controls the space between words. The following table shows its allowable values.
Property | Value |
|---|---|
word-spacing | normal | <length> Initial value: normal |
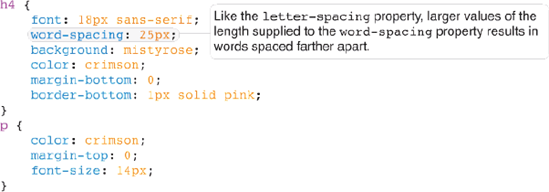
To demonstrate the effect of the word-spacing property, consider the style sheet rule in Figure 5-4a.
The style sheet in Figure 5-4a is coupled with the markup in Figure 5-4b.
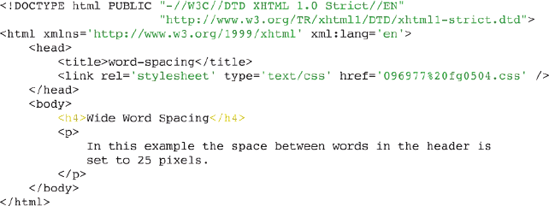
Figure 5-4a and Figure 5-4b together result in the output shown in Figure 5-4c; 25 pixels of space now separate each word of the <h4> element.

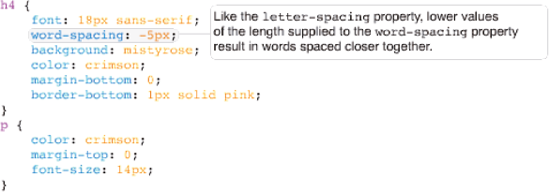
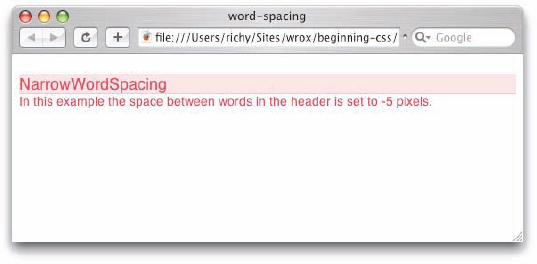
Additionally, like the letter-spacing property, the word-spacing property can contain a negative value. If given a negative value, the effects are less space between each word. This is demonstrated in CSS in Figure 5-5a.
Again, the CSS in Figure 5-5a is combined with the markup in Figure 5-5b.
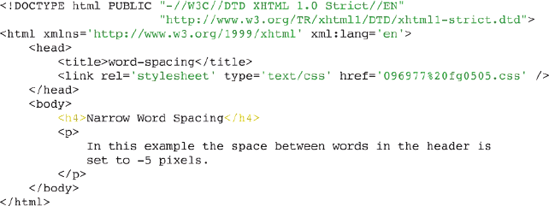
The CSS in Figure 5-5a and the markup in Figure 5-5b result in the output depicted in Figure 5-5c.
As you did with the letter-spacing property in Example 5-1, in the following Try It Out you experiment with the word-spacing property for yourself.
Try It Out: The word-spacing Property
Example 5-2. To see the word-spacing property in action for yourself, follow these steps.
Enter the following markup into your text editor:
<!DOCTYPE html PUBLIC "-//W3C//DTD XHTML 1.0 Strict//EN"
                      "http://www.w3.org/TR/xhtmll/DTD/xhtmll-strict.dtd">
<html xmlns='http://www.w3.org/1999/xhtml' xml:lang='en'>
    <head>
        <title>word-spacing</title>
        <link rel='stylesheet' type='text/css' href='Example_5-2.css' />
    </head>
    <body>
        <h4>Word Spacing</h4>
        <p>
            The <span class='code'>word-spacing</span> property can take either a
            positive or negative length value.  The higher the value, the
            <span class='higher'>farther apart the words</span>; the lower the
            value, <span class='lower'>the closer together the words</span>.
        </p>
    </body>
</html>]
Save the preceding markup as
Example_5-2.html.Enter the following CSS into your text editor:
body {
    font: 14px sans-serif;
}
h4 {
    border-bottom: 1px solid pink;
    margin-bottom: 3px;
}
p {
    margin: 0;
}
.code {
    font-family: monospace;
}
.higher,
.lower {
    word-spacing: 15px;
    background: mistyrose;
    color: crimson;
}
.lower {
    word-spacing: −5px;
}
Save the preceding CSS as
Example_5-2.css.The preceding markup and CSS results in the output shown in Figure 5-6.

How It Works
In Example 5-2, you experimented with the word-spacing property. Example 5-2 is nearly identical to Example 5-1, the only difference being that you are modifying the space between words, rather than the space between letters. Following is a recap of the relevant rules.
The first rule you applied to elements with class names higher and lower, just as you did in Example 5-1. This time you applied the word-spacing property with a value of 15 pixels, meaning that 15 pixels of space separate the words contained within the element. This is coupled with a mistyrose background, and crimson text.
.higher,
.lower {
    word-spacing: 15px;
    background: mistyrose;
    color: crimson;
}
Then, in a subsequent rule you applied a different word-spacing value to elements with a lower class name. This time space is subtracted from between words, five pixels in fact.
.lower {
    word-spacing: −5px;
}
Now that you have seen how to control the space between letters and words, the next section describes how to indent text within a paragraph.
Indenting text in CSS is done using the text-indent property. The text-indent property identifies the first line of text of a paragraph and inserts the specified length before the first line of text, thus indenting the text. The following table shows this property's allowed values.
Property | Value |
|---|---|
text-indent | <length> | <percentage> |
Initial value: 0 |
The text-indent property accepts either a normal length value or a percentage value. Figure 5-7a demonstrates the text-indent property with a normal length value in pixels applied.

Figure 5-7a is combined with the markup in Figure 5-7b.

Figure 5-7c shows the result of the preceding rule and markup.
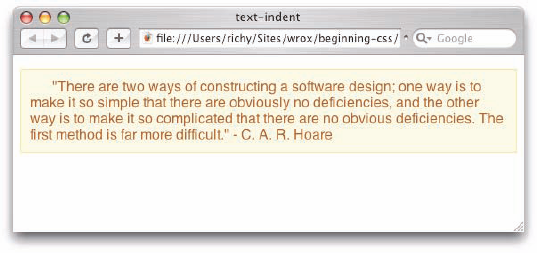
Figure 5-7 demonstrates the most common use of the text-indent property, with a normal length value, used to indent the text of the target element. The text-indent property can also accept a percentage width. This is demonstrated in the rule in Figure 5-8a.
Figure 5-8a is combined with the markup from Figure 5-7b, to get the output you see in Figure 5-8b.
The percentage width assigned by the text-indent property depends on the width of the <p> element's parent element. In this example, the parent element is the <body> element. By default, the <body> element's width expands horizontally, filling the entire browser window.

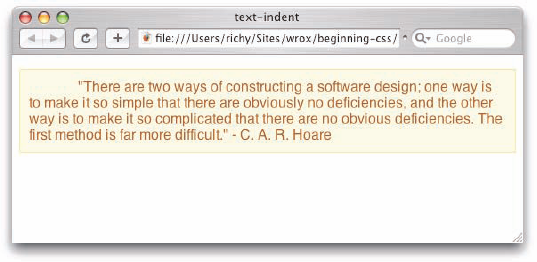
For instance, if the <p> element were to be assigned a fixed width of 200 pixels, since the indentation for the <p> element is based on the width of the <body> element, which is more than 200 pixels, let's say for this example it's 800 pixels wide. Given a 10% indention, the indention of the first line of the <p> element would be 80 pixels, rather than 20 pixels, since 10% of 800 is 80.
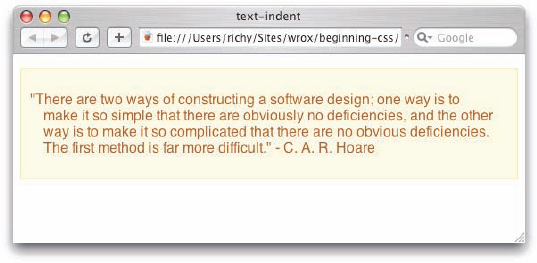
Like the letter-spacing and word-spacing properties, the text-indent property can also accept a negative value. Figure 5-9a shows an example of the text-indent property with a negative value.

The CSS rule in Figure 5-9a is combined with the markup from Figure 5-7b. Safari (or your browser of choice) gives you the output in Figure 5-9b.
Figure 5-9b shows that the text is shifted the other way.
Now that you've seen some examples of the text-indent property, in Example 5-3, you experiment with it for yourself.
Try It Out: Applying the text-indent Property
Example 5-3. To experiment with the text-indent property, follow these steps.
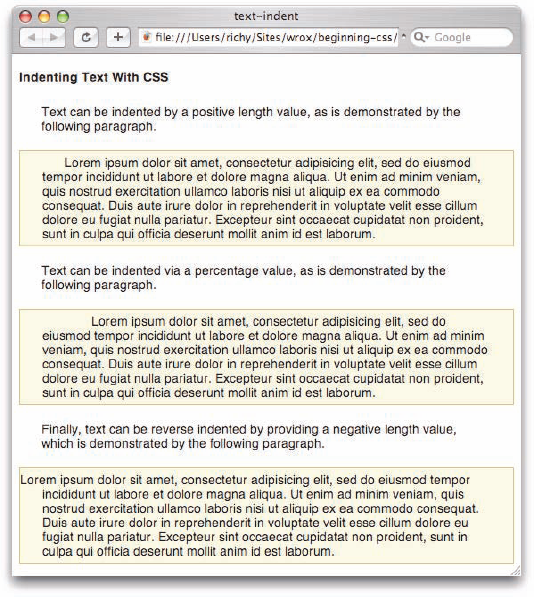
Enter the following markup into your editor. (Don't want to type out the "lipsum" dummy text? Visit
http://www.lipsum.com/.)<!DOCTYPE html PUBLIC "-//W3C//DTD XHTML 1.0 Strict//EN" "http://www.w3.org/TR/xhtmll/DTD/xhtmll-strict.dtd"> <html xmlns='http://>>>.>3.org/1999/xhtml' xml:lang='en'> <head> <title>text-indent</title> <link rel='stylesheet' type='text/css' href='Example_5-3.css' /> </head> <body> <h4>Indenting Text >ith CSS</h4> <p> Text can be indented by a positive length value, as is demonstrated by the follo>ing paragraph. </p> <p class='indent-example' id='indent'> Lorem ipsum dolor sit amet, consectetur adipisicing elit, sed do eiusmod tempor incididunt ut labore et dolore magna aliqua. Ut enim ad minim veniam, quis nostrud exercitation ullamco laboris nisi ut aliquip ex ea commodo consequat. Duis aute irure dolor in reprehenderit in voluptate velit esse cillum dolore eu fugiat nulla pariatur. Excepteur sint occaecat cupidatat non proident, sunt in culpa qui officia deserunt mollit anim id est laborum. </p> <p> Text can be indented via a percentage value, as is demonstratedby the following paragraph. </p> <p class='indent-example' id='indent-percentage'> Lorem ipsum dolor sit amet, consectetur adipisicing elit, sed do eiusmod tempor incididunt ut labore et dolore magna aliqua. Ut enim ad minim veniam, quis nostrud exercitation ullamco laboris nisi ut aliquip ex ea commodo consequat. Duis aute irure dolor in reprehenderit in voluptate velit esse cillum dolore eu fugiat nulla pariatur. Excepteur sint occaecat cupidatat non proident, sunt in culpa qui officia deserunt mollit anim id est laborum. </p> <p> Finally, text can be reverse indented by providing a negative length value, which is demonstrated by the following paragraph. </p> <p class='indent-example' id='indent-reverse'> Lorem ipsum dolor sit amet, consectetur adipisicing elit, sed do eiusmod tempor incididunt ut labore et dolore magna aliqua. Ut enim ad minim veniam, quis nostrud exercitation ullamco laboris nisi ut aliquip ex ea commodo consequat. Duis aute irure dolor in reprehenderit in voluptate velit esse cillum dolore eu fugiat nulla pariatur. Excepteur sint occaecat cupidatat non proident, sunt in culpa qui officia deserunt mollit anim id est laborum. </p> </body> </html>Save the preceding markup as
Example_5-3.html.Enter the following CSS into your text editor:
body {
    font: 14px sans-serif;
}
P {
    padding: 5px 25px;
}
p#indent {
    text-indent: 25px;
}
p#indent-percentage {
    text-indent: 10%;
}
p#indent-reverse {
    text-indent: −25px;
}
p.indent-example {
    background: lightyellow;
    border: lpx solid darkkhaki;
}
Save the preceding CSS as
Example_5-3. css.The CSS and markup of Example 5-3 result in the output you see in Figure 5-10.
How It Works
In Example 5-3 you tried three different methods of indenting text via CSS's text-indent property. Following is a review of the relevant styles you applied.
In the first rule in which you applied the text-indent property, you applied a length value of 25 pixels.
p#indent {
    text-indent: 25px;
}
In the second rule you indented the text 10% of the parent element of the <p> element with id name indent-percentage, which would be the <body> element. So the 10% value is 10% of the width of the <body> element.
p#indent-percentage {
    text-indent: 10%;
}
In the third rule, you reverse indented the <p> element with id name indent-reverse, which resulted in the first line being indented 25 pixels to the left.
p#indent-reverse {
    text-indent: −25px;
}
In the next section, I discuss the text-align property.
The purpose of the text-align property is simple: It aligns text! The following table outlines each of the possible values for the text-align property.
Property | Value |
|---|---|
text-align | left | right | center | justify Initial value: left |
The text-align property should be fairly straightforward and obvious in its purpose. Figures 5-11a, 5-11b, and 5-11c demonstrate what the different keyword values of the text-align property do.

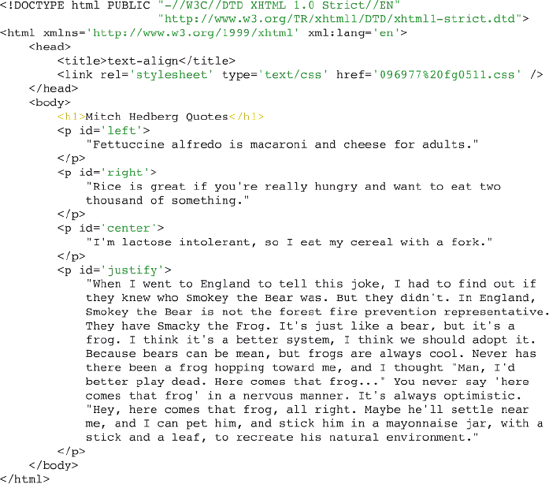
The CSS in Figure 5-11a is combined with the markup in Figure 5-11b.
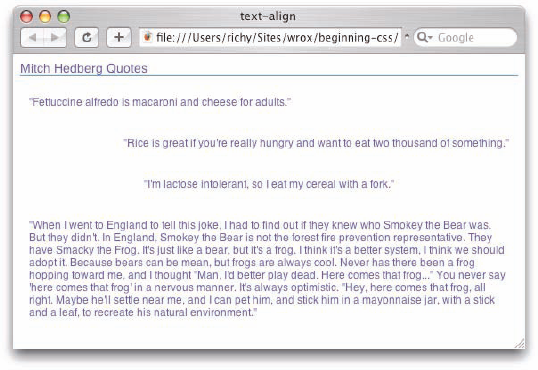
The CSS and markup from Figures 5-11a and 5-11b result in the output observed in Figure 5-11c.
In Figure 5-11c, there are no surprises; left aligns text left, right, to the right, and center to the middle. You may not, however, be familiar with the justify keyword. In Figure 5-11c, you can see that the text is lined up on the left and on the right; spacing between words on the line is adjusted automatically so that both the beginning and the end of each line are lined up. To put this in perspective, Figure 5-12 shows the same code, but with the text-align: justify; declaration removed.

In Figure 5-12 you can see that the ends of each line are no longer lined up.
The text-decoration property applies underlining, overlining, and strikethrough to text. The following table outlines the text-decoration property and the values it allows.
Property | Value |
|---|---|
text-decoration | none | [ underline | | overline | | line-through | | blink Initial value: none |
Safari and IE do not support the
blinkkeyword.
Because this property is a little more complicated than those covered previously, a simple explanation of its use is warranted.
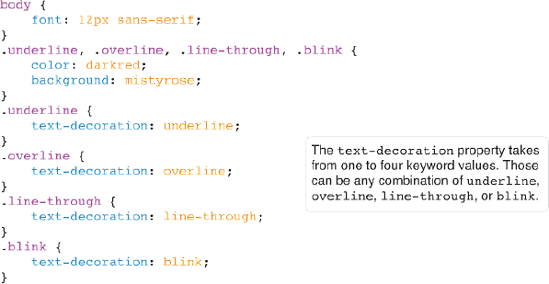
To demonstrate the various styles available using this property, consider the example in Figure 5-13a.
The CSS in Figure 5-13a is combined with the markup in Figure 5-13b.
Figure 5-13c shows the various effects provided by the text-decoration property as specified by the preceding code.
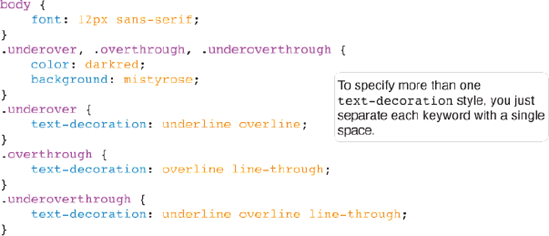
However, this is not all that is possible with the text-decoration property. This notation
[ underline || overline || line-through || blink ]
means that the text-decoration property can accept one or more of these values. To specify more than one value, each value is separated by a single space. Take for example the code in Figure 5-14a.


The CSS in Figure 5-14a is combined with the markup in Figure 5-14b.

The code in Figures 5-14a and 5-14b result in the output shown in Figure 5-14c.

The notation for the text-decoration property indicates that it can accept up to four values. Those values can be any combination of underline, overline, line-through, and blink. The values none or inherit can be used instead of any of those four values; so if either the value none or inherit is used, only that lone value may appear.
Try It Out: Applying the text-decoration Property
Example 5-4. To experiment with the text-decoration property, follow these steps.
Enter the following markup into your text editor:
<!DOCTYPE html PUBLIC "-//W3C//DTD XHTML 1.0 Strict//EN"
                      "http://www.w3.org/TR/xhtml1/DTD/xhtml1-strict.dtd">
<html xmlns='http://www.w3.org/1999/xhtml' xml:lang='en'>
    <head>
        <title>text-decoration</title>
        <link rel='stylesheet' type='text/css' href='Example_5-4.css' />
    </head>
    <body>
        <h4>CSS's text-decoration Property</h4>
        <p>
            CSS supports four text-decoration styles, officially. Those are
            <span class='underline example'>underline</span>,
            <span class='overline example'>overline</span>,
            <span class='line-through example'>line-through</span>,
            and <span class='blink example'>blink</span>. IE and Safari do not
            support the extremely useless <span class='blink example'>blink</span>
            keyword.
        </p>
        <p>
            It is also possible to combine text-decoration styles. You can
            for instance <span class='underover example'>underline and overline
            text</span>, <span class='underthrough example'>underline and
            line-through text</span>, or <span class='overthrough example'>overline
            and line-through text</span>, though it is unlikely you'd ever want to.
        </p>
    </body>
</html>
Save the preceding markup as
Example_5-4.html.Enter the following CSS into your text editor:
body {
    font: 14px sans-serif;
}
P {
    padding: 5px 25px;
    background: lightblue;
    border: lpx solid black;
}
span.underline {
    text-decoration: underline;
}
span.overline {
    text-decoration: overline;
}
span.line-through {
    text-decoration: line-through;
}
span.blink {
text-decoration: blink; } span.underover { text-decoration: underline overline; } span.underthrough { text-decoration: underline line-through; } span.overthrough { text-decoration: overline line-through; } span.example { background: mistyrose; }Save the preceding CSS as
Example_5-4. css.The aforementioned CSS and markup result in the output in Figure 5-15.

How It Works
In Example 5-4 you applied various styles of the text-decoration property. The first four rules are pretty straightforward; you created a separate rule for each of the four individual styles of the text-decoration property, underline, overline, line-through, and blink.
span.underline{
    text-decoration: underline;
}
span.overline {
    text-decoration: overline;
}
span.line-through {
    text-decoration: line-through;
}
span.blink {
    text-decoration: blink;
}
In the next three style sheet rules, you applied some combinations of styles. The text-decoration property allows you to specify more than one style at the same time, if you have need of doing that. Each keyword value must be separated by a single space.
span.underover {
    text-decoration: underline overline;
}
span.underthrough {
    text-decoration: underline line-through;
}
span.overthrough {
    text-decoration: overline line-through;
}
In the next section, I discuss the text-transform property, which allows you to control the case of text via CSS.
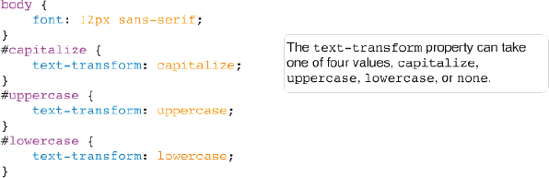
The text-transform property exists purely to manipulate the case of text, for instance, to capitalize or make all characters uppercase or all characters lowercase. The following table shows the text-transform property and its possible values.
Property | Value |
|---|---|
text-transform | capitalize | uppercase | lowercase| none Initial value: none |
Consider the CSS in Figure 5-16a.
This CSS is combined with the markup in Figure 5-16b.

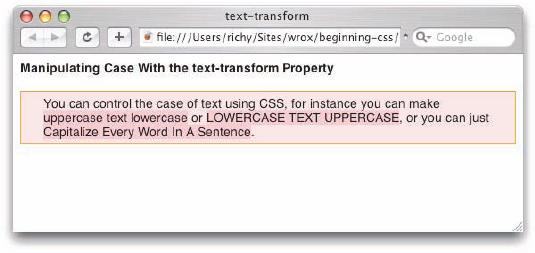
Figure 5-16c shows that the text-transform property overrides the case of the text, no matter how it appears in the source code.

In the first paragraph, even though in the source the sentence appears in all lowercase, if you apply the text-transform: capitalize; declaration, each word of the sentence is capitalized. Likewise, in the next paragraph, even though the source code contains all lowercase letters, with the addition of the text-transform: uppercase; declaration, each word of the sentence appears in all uppercase letters in the rendered output. In the last paragraph, each word appears in uppercase in the markup source code, but with the addition of the text-transform: lowercase; declaration, each word of the sentence appears in all lowercase in the actual output rendered by the browser.
Now that you've seen an example of what the text-transform property does, in the following example you try out the text-transform property for yourself.
Try It Out: Apply the text-transform Property
Example 5-5. To get a feel for the text-transform property, follow these steps.
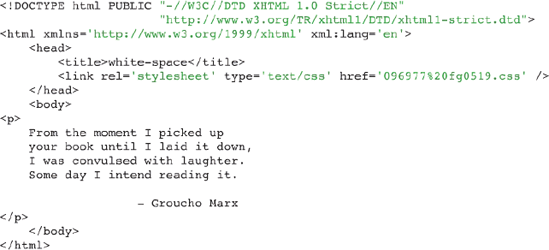
Enter the following markup into your text editor:
<!DOCTYPE html PUBLIC "-//W3C//DTD XHTML 1.0 Strict//EN"
                      "http://www.w3.org/TR/xhtmll/DTD/xhtmll-strict.dtd">
<html xmlns='http://www.w3.org/1999/xhtml' xml:lang='en'>
    <head>
        <title>text-transform</title>
        <link rel='stylesheet' type='text/css' href='Example_5-5.css' />
    </head>
    <body>
        <h4>Manipulating Case With the text-transform Property</h4>
        <p>
            You can control the case of text using CSS. For instance,
            you can make <span class='lower example'>UPPERCASE TEXT
            LOWERCASE</span> or <span class='upper example'>lowercase
            text uppercase</span>, or you can just
            <span class='capitalize example'>capitalize every word
            in a sentence</span>.
        </p>
    </body>
</html>
Save the preceding markup as
Example_5-5.html.Enter the following CSS into your text editor:
body {
    font: 14px sans-serif;
}
P {
    padding: 5px 25px;
    background: mistyrose;
    border: lpx solid orange;
}
span.lower {
    text-transform: lowercase;
}
span.upper {
    text-transform: uppercase;
}
span.capitalize {
    text-transform: capitalize;
}
span.example {
    background: pink;
}
Save the preceding CSS as
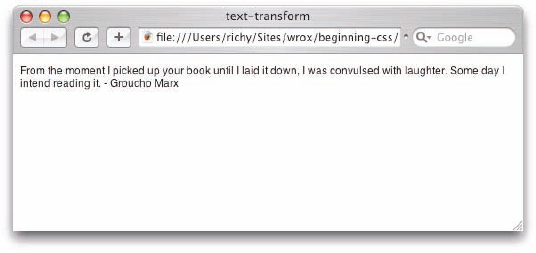
Example_5-5. css.The aforementioned CSS and markup result in the output in Figure 5-17.
How It Works
In Example 5-5, you tried out the different methods that CSS provides for manipulating the case of text in a document. Following are the relevant three rules. In the first rule, you made the uppercase text in the <span> element with class name lower, lowercase.
span.lower {
    text-transform: lowercase;
}
In the second rule, you made the lowercase text in the <span> element with class name upper all uppercase.
span.upper {
    text-transform: uppercase;
}
In the third rule, you capitalized each word of the all-lowercase text in the <span> element with class name capitalize.
span.capitalize {
    text-transform: capitalize;
}
In the next section, I present CSS's white-space property, which controls whether or not spaces and line breaks in the source code are recognized, and whether or not text wraps automatically.
The white-space property allows you to control text formatting in the source code of the web document. The following table outlines the possible keyword values of the white-space property as of CSS 2.
Property | Value |
|---|---|
white-space | normal | pre | nowrap |
Initial value: normal |
IE 6 and IE 7 support
white-space: pre;only in standards rendering mode. For more information on rendering modes, see Chapter 7, "The Box Model."
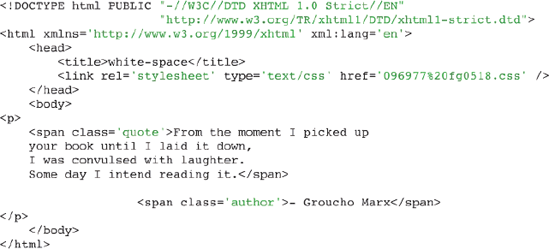
Figure 5-18a is an example of the white-space: pre; declaration.
I've specified a monospace font for clarity. The CSS in Figure 5-18a is combined with the markup in Figure 5-18b.

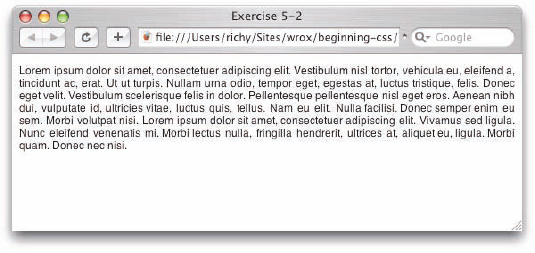
The result looks like Figure 5-18c.

In the source code for the output shown in Figure 5-18c, I've added spaces before each line and line breaks. With the white-space: pre; declaration, those spaces and line breaks are preserved in the browser's rendered output.
By default, the browser will collapse the extra spaces between words and ignore the line breaks, which is the behavior of the white-space: normal; declaration. The white-space: pre; declaration preserves that extra space and keeps the line breaks where they appear in the source code. Under normal circumstances, if there is too much text to appear on a single line, the extra text overflows onto the following line or lines. The white-space: nowrap; declaration prevents that overflow from happening and forces the text to stay on one line, unless an HTML line break <br /> element is encountered. That forces a line break. Figure 5-19a is an example of this.

The CSS in Figure 5-19a is combined with the markup in Figure 5-19b.
Figure 5-19c shows that the text has flowed off the screen to the right because there is more text than can fit on the screen.
Compare the output in Figures 5-18c and 5-19c to that in Figure 5-20 where no white-space property is applied. That is, applying the white-space: normal; declaration is the same as applying no white-space property, because normal is the initial value of the white-space property.

Now that you've had an overview of what the white-space property is, the following Try It Out gives you an opportunity to test the white-space property for yourself.
Try It Out: Applying the white-space Property
Example 5-6. Follow these steps to see the white-space property in action for yourself.
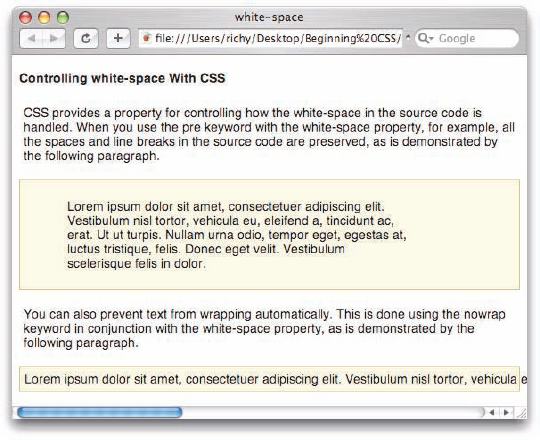
Enter the following markup into your text editor. Again, the dummy text in the example can be copied from
http://www.lipsum.com/.<!DOCTYPE html PUBLIC "-//W3C//DTD XHTML 1.0 Strict//EN" "http://www.w3.org/TR/xhtmll/DTD/xhtmll-strict.dtd"> <html xmlns='http://www.w3.org/1999/xhtml' xml:lang='en'> <head> <title>white-space</title> <link rel='stylesheet' type='text/css' href='Example_5-6.css' /> </head> <body> <h4>Controlling white-space With CSS</h4> <p> CSS provides a property for controlling how the white-space in the source code is handled. When you use the pre keyword with the white-space property, for example, all the spaces and line breaks in the source code are preserved, as is demonstrated by the following paragraph. </p> <p id='pre' class='example'> Lorem ipsum dolor sit amet, consectetuer adipiscing elit. Vestibulum nisl tortor, vehicula eu, eleifend a, tincidunt ac, erat. Ut ut turpis. Nullam urna odio, tempor eget, egestas at, luctus tristique, felis. Donee eget velit. Vestibulum scelerisque felis in dolor. </p> <p> You can also prevent text from wrapping automatically. This is done using the nowrap keyword in conjunction with the white-space property, as is demonstrated by the following paragraph. </p> <p id='nowrap' class='example'> Lorem ipsum dolor sit amet, consectetuer adipiscing elit. Vestibulum nisl tortor, vehicula eu, eleifend a, tincidunt ac, erat. Ut ut turpis. Nullam urna odio, tempor eget, egestas at, luctus tristique, felis. Donee eget velit. Vestibulum scelerisque felis in dolor. </p> </body> </html>Save the preceding markup as
Example_5-6.html.Enter the following CSS into your text editor:
body {
    font: 14px sans-serif;
}
p {
    padding: 5px;
}
p#pre {
    white-space: pre;
}
p#nowrap {
    white-space: nowrap;
}
p.example {
    background: lightyellow;
    border: 1px solid darkkhaki;
}
Save the preceding CSS as
Example_5-6.css.The aforementioned CSS and markup result in the output in Figure 5-21.
How It Works
In Example 5-6 you tried out two keywords of the white-space property. Following is a review of the two relevant rules. In the first rule, you applied the pre keyword of the white-space property. The pre keyword causes all spacing and line breaks in the source code to be preserved in the rendered output.
p#pre {
    white-space: pre;
}
In the second rule, you applied the nowrap keyword of the white-space property, which prevents the text of the <p> element with id name nowrap from wrapping.
p#nowrap {
    white-space: nowrap;
}In this chapter, I discussed a variety of CSS text-manipulation properties, which include the following:
The
letter-spacingproperty, which is used to specify the length of space between lettersThe
word-spacingproperty, which is used to specify the length of space between wordsThe
text-indentproperty, which is used to indent textThe
text-alignproperty, which is used to align the text of a documentThe
text-decorationproperty, which is used to apply decorative styling to text, such as underlining, overlining, strikethrough, or blinking textThe
text-transformproperty, which is used to control the case of text regardless of what case is used in the document's source codeThe
white-spaceproperty, which is used to control text formatting as it relates to how the text appears in the document's source code
Chapter 6 continues along the same vein of text manipulation, with a discussion of the font properties in CSS.
If you wanted to reduce the spacing between letters, how would it be done? Provide an example declaration.
How would you produce the output you see in Figure 5-22? Provide the declaration.
When indenting text in a paragraph, how is a percentage value calculated?
What are the keywords that CSS offers for changing the case of text within an element?
If you wanted to preserve line breaks and spacing as formatted in the source code, what would the CSS declaration be?
What browsers do not support the annoying
blinkkeyword?If you wanted to put a line over a section of text, rather than underlining it, what property and keyword would you use?