
Networking, Bluetooth, and Social
We live in a world that is getting more and more connected, in terms of both people and products. Social networking sites abound—Facebook, Twitter, Google Plus, and LinkedIn, to name a few. Mobile social apps, such as Instagram, WhatsApp, and WeChat, have seen historic user growth. The wearable technology and Internet of Things, a term used to denote the “advanced connectivity of devices, systems, and services” (http://en.wikipedia.org/wiki/Internet_of_Things), are regarded as the next wave of technology after phases such as the PC, Internet, and mobile. Devices such as smartphones, tablets, and many Bluetooth-based classic and smart devices can all be connected to help us lead better lives. How Glass can join this connected world, using Bluetooth and other networking technologies, is the topic of this chapter.
Common solutions with step-by-step tutorials and working code to be covered include the following:
- How to make common HTTP requests from Glass to send and receive data
- How to do socket programming to let Glass exchange data with smartphones and tablets (iOS and Android) while Glass is connected to wi-fi
- How to use Bluetooth Classic (also known as Classic Bluetooth) to let Glass do data transfer with other Android devices while your Glass is not connected with wi-fi
- How to allow Glass to act as a Bluetooth Low Energy (BLE) client and get data from a BLE device
- How to use Classic Bluetooth and socket programming to receive data from Android and iOS devices, which have better support for Bluetooth Low Energy
- How to share your Glass picture to your WhatsApp and WeChat friends using Apple push notification and an iOS app
In this chapter, you’ll see some iOS and Android projects and code other than Glass apps. In a connected world, apps running on different platforms often need to work together to accomplish something impossible for a stand-alone app. Smartphones, tablets, and Glass can be used as hubs and gateways to send the data from your connected devices and sensors to the cloud for further analysis. I won’t cover the cloud part here, but you’ll see many examples of how devices connect and transfer data to each other.
If you’re not familiar with HTTP and its GET and POST methods, you should check out some online tutorials (for example, www.w3schools.com/tags/ref_httpmethods.asp) first. There are two main ways to develop HTTP clients in Android: DefaultHttpClient and HttpURLConnection. Both of them work well in Glass. DefaultHttpClient works best with earlier versions of Android (API level 8 or earlier), and HttpURLConnection is the best for API level 9 or newer. A more detailed comparison of the two methods is available at http://android-developers.blogspot.com/2011/09/androids-http-clients.html.
Actually, you have already used both methods in previous apps. For example, in the VideoSearchActivity.java file of MyVideoApps in Chapter 5, DefaultHttpClient is used to query YouTube’s data API, which returns a JSON object. In the SearchActivity.java file of SmartCamera in Chapter 4, HttpURLConnection is used to upload a picture taken on Glass to Google for image search. For your convenience, I’ll show you simple yet complete code samples to make HTTP GET and POST requests, including file uploading, from Glass, all using the preferred HttpURLConnection class, which you should also use for your new Glass apps.
Before getting started, follow the same steps from previous chapters to create a new Glass app, called NBSocial, based on GlasswareTemplate. Then create three new menu options in MenuActivity.java and add their string definitions in strings.xml.
            case R.id.httpget:
                Intent intent = new Intent(this, HTTPRequestActivity.class);
                intent.putExtra( "WHAT", "GET" );
                startActivity(intent);
                return true;

            case R.id.httppost:
                Intent intent2 = new Intent(this, HTTPRequestActivity.class);
                intent2.putExtra( "WHAT", "POST" );
                startActivity(intent2);
                return true;

            case R.id.httpupload:
                Intent intent3 = new Intent(this, HTTPRequestActivity.class);
                intent3.putExtra( "WHAT", "UPLOAD" );
                startActivity(intent3);
                return true;

    <string name="httpget">HTTP GET</string>
    <string name="httppost">HTTP POST</string>
    <string name="httpupload">HTTP UPLOAD</string>
Create a new Activity subclass file called HTTPRequestActivity.java. Don’t forget to add its activity declaration in AndroidManifest.xml. If you’re a little lost, you may want to go back to previous chapters or check out the complete source code for the chapter from the book’s source code.
Add the code in Listing 7-1 to HTTPRequestActivity.java to implement an HTTP GET request to my demo web site at http://morkout.com, which just returns some simple text.
Listing 7-1. Making an HTTP GET Request in HTTPRequestActivity.java
TextView mTvInfo;
String mWhat;
HttpURLConnection mUrlConnection;
String mResult;

public void onCreate(Bundle savedInstanceState) {
    super.onCreate(savedInstanceState);

    setContentView(R.layout.main);
    mTvInfo = (TextView) findViewById(R.id.info);
    Intent intent = getIntent();
    mWhat = intent.getStringExtra("WHAT");
    mTvInfo.setText("Making HTTP "+ mWhat + " request...");
    new HTTPRequest().execute();
}

// Async task class to make HTTP Get, Post and upload

private class HTTPRequest extends AsyncTask<Void, Void, Void> {
    @Override
    protected Void doInBackground(Void... arg0) {
        try {
            if (mWhat.equalsIgnoreCase("GET")) {
                // get json via YouTube API
                URL url = new URL("http://morkout.com");
                mUrlConnection = (HttpURLConnection)
                        url.openConnection();
                InputStream in = new BufferedInputStream(
                        mUrlConnection.getInputStream());
                int ch;
                StringBuffer b = new StringBuffer();
                while ((ch = in.read()) != -1) {
                        b.append((char) ch);
                }

                mResult = new String(b);
            }
        } catch (Exception e) {}
        return null;
    }

    @Override
    protected void onPostExecute(Void result) {
        super.onPostExecute(result);
        mTvInfo.setText(mResult);
    }
Don’t forget to add <uses-permission android:name="android.permission.INTERNET"/>to your AndroidManifest.xml file. Now run the app and tap to select HTTP GET. You’ll see the message “Making HTTP GET request. . .,” followed by the GET result, as shown in Figure 7-1.
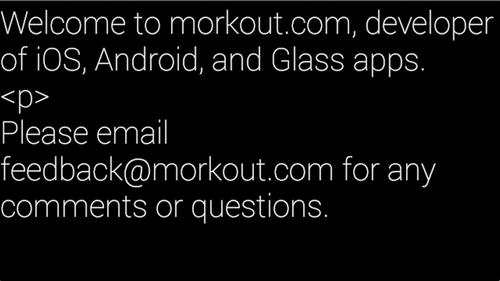
Figure 7-1. HTTP GET request response
So, with just a few lines of code, you can make an HTTP GET call and get its returned result.
Note You cannot perform the request or, generally speaking, a networking operation on an app’s main thread because the main thread is for UI and you always want to keep a responsive UI. In fact, your Glass app will throw an exception and crash if you try to run the networking code in the main thread (for more information on the topic, see www.androiddesignpatterns.com/2012/06/app-force-close-honeycomb-ics.html). That’s why you should run your HTTP request code in an AsyncTask.
Similarly, you can make an HTTP POST request with DefaultHttpClient. Simply add the code in Listing 7-2 after the if statement in doInBackground of Listing 7-1.
Listing 7-2. Making an HTTP POST Request in HTTPRequestActivity.java
else if (mWhat.equalsIgnoreCase("POST")) {

    URL url = new URL("http://morkout.com/glass/posttest.php");
    mUrlConnection = (HttpURLConnection) url.openConnection();
    mUrlConnection.setRequestMethod("POST");
    String urlParameters = "[email protected]&name=Jeff
                Tang&pwd=1234567&vcode=2014";
    OutputStreamWriter writer = new
        OutputStreamWriter(mUrlConnection.getOutputStream());
    writer.write(urlParameters);
    writer.flush();

    InputStream in = new BufferedInputStream(
                mUrlConnection.getInputStream());
    int ch;
    StringBuffer b = new StringBuffer();
    while ((ch = in.read()) != -1) {
        b.append((char) ch);
    }

    mResult = new String(b);

    in.close();
    writer.close();
}
The server code posttest.php, if you are curious, is extremely simple, used here only for demo purposes (you don’t need to implement this; it’s set up on my demo server morkout.com).
<?php

$email = $_REQUEST["email"];
$pwd = md5($_REQUEST["pwd"]);
$name = $_REQUEST["name"];
$vcode = md5(uniqid(time()));

echo "POST returns: email=$email, pwd=$pwd, name=$name, vcode=$vcode";

?>
Run the app and select HTTP POST this time. You’ll see after “Making HTTP Post request . . .” the message shown in Figure 7-2.
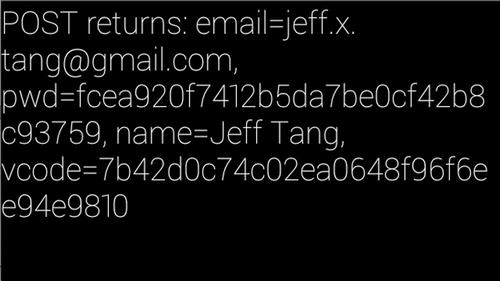
Figure 7-2. HTTP POST request response
The code in Listing 7-3 shows how to implement file uploading using HttpURLConnection. First copy an image file called marchmadness.png from the project’s asset file to Glass’s external storage directory using the same copyAsset method you used in Chapter 5; then send the file to the server and display the response message from the server.
Listing 7-3. HTTP File Uploading in HTTPRequestActivity.java
else if (mWhat.equalsIgnoreCase("UPLOAD")) {
    int serverResponseCode = 0;
    File sourceFile = new File(copyAsset("marchmadness.png"));
    DataOutputStream dos = null;
    String lineEnd = "
";
    String twoHyphens = "--";
    String boundary = "*****";
    int bytesRead, bytesAvailable, bufferSize;
    byte[] buffer;
    int maxBufferSize = 1024 * 1024;
    int REQUEST_SUCCESS_CODE = 200; // for all possible response codes and messages, see http://www.w3.org/Protocols/rfc2616/rfc2616-sec10.html

    FileInputStream fileInputStream = new FileInputStream(sourceFile);
    URL url = new URL("http://www.morkout.com/glass/upload.php");

    mUrlConnection = (HttpURLConnection) url.openConnection();
    mUrlConnection.setRequestMethod("POST");
    mUrlConnection.setRequestProperty("Content-Type", "multipart/form-data;boundary=" + boundary); // Content-Type has to be set like this to support HTTP file uploading, which originates from HTML form-based file uploading

    mUrlConnection.setRequestProperty("Filedata", sourceFile.getName()); // "Filedata" needs to match the server code that handles file uploading. For example, in PHP, $_FILES["Filedata"]["tmp_name"] is used to access the uploaded file

    dos = new DataOutputStream(mUrlConnection.getOutputStream());
    dos.writeBytes(twoHyphens + boundary + lineEnd);
    dos.writeBytes("Content-Disposition: form-data; name=Filedata;filename="+ sourceFile.getName() + lineEnd);
    dos.writeBytes(lineEnd);

    bytesAvailable = fileInputStream.available();
    bufferSize = Math.min(bytesAvailable, maxBufferSize);
    buffer = new byte[bufferSize];
    bytesRead = fileInputStream.read(buffer, 0, bufferSize);
    while (bytesRead > 0) {
        dos.write(buffer, 0, bufferSize);
        bytesAvailable = fileInputStream.available();
        bufferSize = Math.min(bytesAvailable, maxBufferSize);
        bytesRead = fileInputStream.read(buffer, 0, bufferSize);
    }
        dos.writeBytes(lineEnd);
        dos.writeBytes(twoHyphens + boundary + twoHyphens + lineEnd);

        // Responses from the server (code and message)
        serverResponseCode = mUrlConnection.getResponseCode();
        String serverResponseMessage = mUrlConnection.getResponseMessage();

        if(serverResponseCode == REQUEST_SUCCESS_CODE) {
            InputStream is = mUrlConnection.getInputStream();
            int ch;
            StringBuffer b = new StringBuffer();
            while ((ch = is.read()) != -1) {
            b.append((char) ch);
            }

            final String uploadedFilename = b.toString();
            mResult = "uploaded file at http://www.morkout.com/glass/uploads/ " + uploadedFilename;
        }
        is.close();
        fileInputStream.close();
        dos.close();
The server code upload.php is also pretty straightforward. (Again, this is just for reference; you don’t need to set up your web server or implement this code.)
<?
if (!isset($_FILES["Filedata"]) || !is_uploaded_file($_FILES["Filedata"]["tmp_name"]) || $_FILES["Filedata"]["error"] != 0) {
    echo 0;
}
else {
    $uploaded_filename = "glassupoad-" . md5($_FILES["Filedata"]["tmp_name"] . uniqid("")) . ".jpg";
    move_uploaded_file($_FILES["Filedata"]["tmp_name"], "uploads/" . $uploaded_filename);
    echo $uploaded_filename;
}
?>
Run the app and select HTTP UPLOAD, and you’ll see the uploaded file URL on your Glass, as shown in Figure 7-3. It will be something like http://www.morkout.com/glass/uploads/glassupoad-075cb1d03db3e039cbb5643ac1ea2740.png.
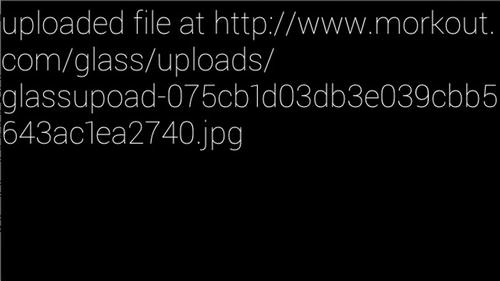
Figure 7-3. HTTP file uploading response
You can easily replace the code that copies a file from the project’s asset folder with code that uses a picture taken on your Glass and then upload the picture to your server for further processing or sharing. You’ll see how this works for sharing your Glass pictures with your WhatsApp or WeChat friends later in the chapter.
Now that you have the working code running on Glass that does the most common HTTP client tasks, the next step is to go a little lower level. Socket programming is a powerful networking solution that may work best for your own client-server requirements, such as a chat app or a Bluetooth-based app.
If you use Glass indoors, most likely you’ll have wi-fi connection for your Glass. In the section, I’ll show you how to let your Glass communicate with other smartphones and tablets via wi-fi.
Note To test the socket examples with Glass, ideally you need to have another Android or iOS device, but you can also use an Android virtual device or iOS simulator on your computer. Make sure you connect your Glass and other device (smartphone or tablet) or computer to the same wi-fi network.
Glass Client vs. Android Server
Let’s first run a socket client on Glass talking to a socket server running on another Android device (real or virtual). In the Glass project NBSocial, create a new activity file, called SocketClientActivity.java, with the code in Listing 7-4.
Listing 7-4. Socket Client Code in SocketClientActivity.java
public class SocketClientActivity extends Activity implements Runnable {
    private TextView mTvInfo;
    String mResult;
    Socket mClientSocket;

    @Override
    public void onCreate(Bundle savedInstanceState) {
        super.onCreate(savedInstanceState);
        setContentView(R.layout.main);
        mTvInfo = (TextView) findViewById(R.id.info);
        mTvInfo.setText("Connecting to server ...");
        Thread thread = new Thread(this);
        thread.start();
    }

    @Override
    protected void onStop() {
        super.onStop();
        try {
            if (mClientSocket != null) mClientSocket.close();
        }
        catch (IOException e) {
            e.printStackTrace();
        }
    }

    public void run() {
        // This is the IP address of Android server running on an actual device or virtual device on computer. It's likely to be different on your device and if so, you should replace this with your IP
        String serverIP = "192.168.1.9";

        // This is the server socket port that client will connect to. It should be the same as in SocketServerActivity.java in Listing 7-5.
        int port = SocketServerActivity.PORT;
        try {
            mClientSocket = new Socket(serverIP, port);
            BufferedReader input = new BufferedReader(new InputStreamReader(mClientSocket.getInputStream()));
            mResult = input.readLine();
            runOnUiThread(new Runnable() {
                public void run() {
                    // This is used to get client's connection info including IP address
                    WifiManager wim= (WifiManager) getSystemService(WIFI_SERVICE);
                    List<WifiConfiguration> l =  wim.getConfiguredNetworks();
                    WifiConfiguration wc = l.get(0);
                    mTvInfo.setText("CLIENT IP: " + Formatter.formatIpAddress(wim.getConnectionInfo().getIpAddress()) + ", connected to " + mClientSocket.getRemoteSocketAddress() + ", received: "+mResult);
                }
            });

            PrintWriter out = new PrintWriter(mClientSocket.getOutputStream(), true);
            // add the number received from server by 50 and send to server
            out.println(Integer.parseInt(mResult)+50);
            mClientSocket.close();
        }
                catch(IOException e) {
                    final IOException ex = e;
                    runOnUiThread(new Runnable() {
                        public void run() {
                            // let users know if socket exception occurs
                            mTvInfo.setText(ex.getMessage());
                        }
                    });
                }
        }
}
Now create a new Android app called SocketAndroidApp and add a file called SocketServerActivity.java with the code in Listing 7-5. Then copy the SocketServerActivity.java file to NBSocial to make the client app use the port defined in the server app (I have int port = SocketServerActivity.PORT; in Listing 7-4). Similarly, copy SocketClientActivity.java from NBSocial to AndroidSocketApp. In the next section, you’ll see Glass acting as a server and another Android device acting as a client.
Listing 7-5. Socket Server Code in SocketServerActivity.java
public class SocketServerActivity extends Activity implements Runnable {
    public final static int PORT = 6604;
    private TextView mTvInfo;
    private ServerSocket mServerSocket;
    private Socket mClientSocket;
    String mResult;

    @Override
    public void onCreate(Bundle savedInstanceState) {
        super.onCreate(savedInstanceState);
        setContentView(R.layout.main);
        mTvInfo = (TextView) findViewById(R.id.info);
        Thread thread = new Thread(this);
        thread.start();
    }

    @Override
    protected void onStop() {
        super.onStop();

        try {
            if (mClientSocket != null) mClientSocket.close();
            if (mServerSocket != null) mServerSocket.close();
        }
        catch (IOException e) {
            e.printStackTrace();
        }
    }

    public void run() {
        try {
            serverSocket = new ServerSocket(PORT);
            while(true)
            {
                mServerSocket = new ServerSocket(PORT);
                runOnUiThread(new Runnable() {
                    public void run() {
                        WifiManager wim= (WifiManager) getSystemService(WIFI_SERVICE);
                        List<WifiConfiguration> l =  wim.getConfiguredNetworks();
                        WifiConfiguration wc = l.get(0);
                        mTvInfo.setText(mTvInfo.getText() + "

Server IP: " + Formatter.formatIpAddress(wim.getConnectionInfo().getIpAddress())  + ". Waiting for client on port " + PORT);
                    }
                });
                mClientSocket = mServerSocket.accept();

                runOnUiThread(new Runnable() {
                    public void run() {
                        mTvInfo.setText(mTvInfo.getText() + "
Just connected from client" + mClientSocket.getRemoteSocketAddress());
                    }
                });

                OutputStream oStream = mClientSocket.getOutputStream();
                PrintWriter out = new PrintWriter(oStream, true);
                BufferedReader input = new BufferedReader(new InputStreamReader(mClientSocket.getInputStream()));

                out.println(2014);
                mResult = input.readLine();

                runOnUiThread(new Runnable() {
                    public void run() {
                        mTvInfo.setText(mTvInfo.getText() + "
Sent: 2014. Received: "+mResult);
                    }
                });

                mClientSocket.close();
                mServerSocket.close();
            }
        }
        catch(SocketTimeoutException s)
        {
            runOnUiThread(new Runnable() {
                public void run() {
                    mTvInfo.setText("Socket timed out!");
                }
            });
        }
        catch(IOException e)
        {
            final IOException ex = e;
            runOnUiThread(new Runnable() {
                public void run() {
                    mTvInfo.setText(ex.getMessage());
                }
            });
        }
    }
}
In Listings 7-4 and 7-5, after a socket connection is established between a client and a server, the server sends the number 2014 to the client. The client adds 50 to it and returns 2064 to the server.
The layout/main.xml file for both NBSocial and SocketAndroidApp has just a simple TextView.
<?xml version="1.0" encoding="utf-8"?>
<LinearLayout xmlns:android="http://schemas.android.com/apk/res/android "
    android:orientation="vertical"
    android:layout_width="fill_parent"
    android:layout_height="fill_parent"
    >
<TextView
    android:id="@+id/info"
    android:layout_width="fill_parent"
    android:layout_height="wrap_content"
    android:text="@string/info"
    />
</LinearLayout>
Now in NBSocial, add two new menu entries in menu.xml, add the string definitions for socketclient and socketserver to strings.xml, and add the two activities in AndroidManifest.xml.
        case R.id.socketclient:
            Intent intent4 = new Intent(this, SocketClientActivity.class);
            startActivity(intent4);
            return true;

        case R.id.socketserver:
            Intent intent5 = new Intent(this, SocketServerActivity.class);
            startActivity(intent5);
            return true;

<string name="socketclient">SOCKET CLIENT</string>
<string name="socketserver">SOCKET SERVER</string>
In AndroidSocketApp’s AndroidManifest.xml file, make SocketServerActivity your MAIN action.
<activity
    android:name=".SocketServerActivity"
    android:label="@string/app_name" >
    <intent-filter>
        <action android:name="android.intent.action.MAIN" />

        <category android:name="android.intent.category.LAUNCHER" />
    </intent-filter>
</activity>
Note If you don’t have a Nexus or other Android phone or tablet, you can easily test the code here using a Nexus 7 emulator from Eclipse on your computer. Just make sure your computer and Glass are on the same wi-fi network.
Finally, make sure both your Glass and Android device are connected to the same wi-fi network and change the serverIP value in NBSocial’s SocketClientActivity.java file from 192.168.1.9 to your Android device’s IP or, if you use simulator (Android virtual device), your computer’s IP address. (You can find the IP address in Settings by selecting Wi-Fi and then your connected wi-fi network name.)
Now run the server app on your non-Glass Android device first. You’ll see a message like “Server IP: 192.168.1.9. Waiting for client on port 6604.” Start the Glass app NBSocial and select “SOCKET CLIENT.” You’ll see on your Glass a message similar to “CLIENT IP: 192.168.1.9, connected to /192.168.1.8:6680, received: 2014,” as shown in Figure 7-4.
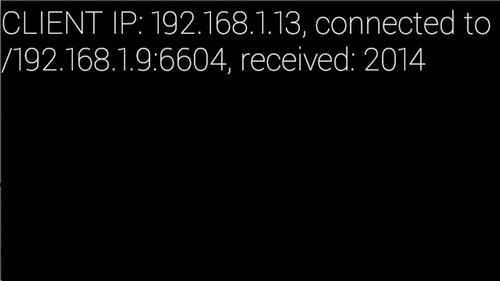
Figure 7-4. Glass client message
On your Android device you’ll see new message like “Just connected from client/192.168.1.13:60787. Sent: 2014. Received: 2064,” followed by “Server IP: 192.168.1.9. Waiting for client on port 6604” again. The server code is in a loop that keeps waiting for a new client connection after a connection is established, data gets exchanged, and both client and server sockets are closed. You can swipe down on Glass to exit the client activity and then select SOCKET CLIENT to connect to the Android server again. Figure 7-5 shows the server messages.
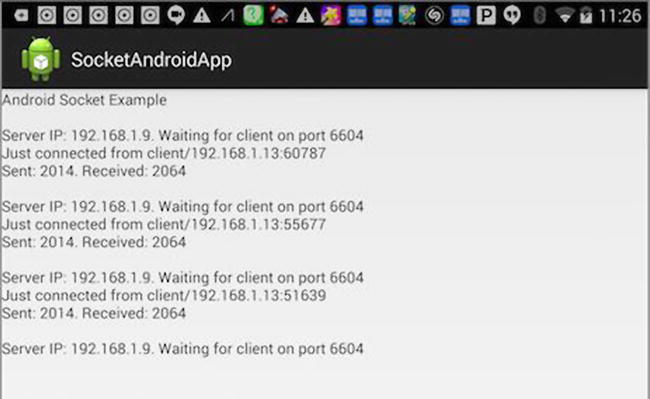
Figure 7-5. Android server messages
If your Glass and Android device are not on the same wi-fi network and Glass cannot reach the Android device’s IP address, you’ll see on Glass a “No route to host” exception, as shown in Figure 7-6.
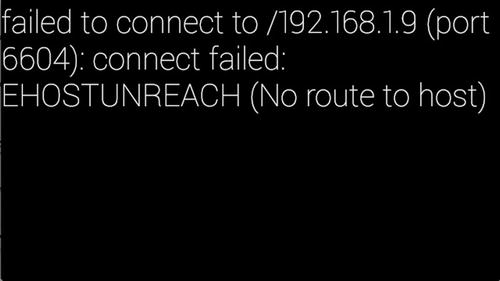
Figure 7-6. Glass unable to reach Android device’s IP address
If your Glass and Android device are on the same wi-fi but the Android server app is running on a different port or is not running, you’ll see the message shown in Figure 7-7.
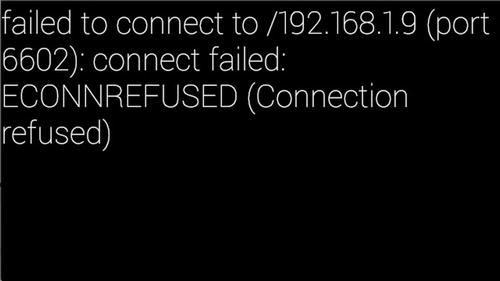
Figure 7-7. Glass unable to connect to server’s port
Based on the simple client and server interaction between Glass and another Android device shown here, you can build much richer interaction for your own apps.
Glass Server vs. Android Client
The steps to build a Glass server and an Android client are similar. You just need to run the NBSocial app on Glass first, select SOCKET SERVER, and then replace SocketServerActivity in your Android app’s AndroidManifest.xml file with SocketClientActivity (make sure you set serverIP in AndroidSocketApp’s SocketClientActivity.java file to your Glass’s IP address, shown earlier as “client IP” in Figures 7-4 and 7-5). Then run the app on Android. You’ll see on Android a message similar to Figure 7-4. Figure 7-8 shows a message similar to what you’ll see on Glass.
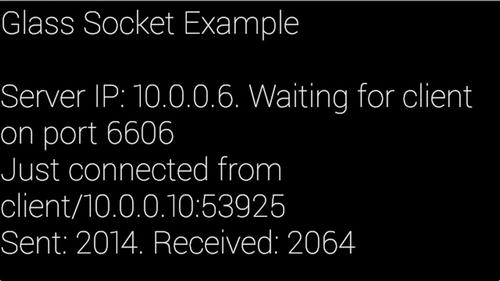
Figure 7-8. Glass socket server log message
If you’re also an iOS developer, you may be interested to know how to let Glass talk to an iOS device. The good news is that using a C-level socket, you can easily connect to Glass as a client or server. There are some open source Objective-C socket libraries you can use too. Listing 7-6 is the code snippet that you can use on your iOS app to act as a socket server (the complete iOS project, called SocketiOSApp, is included in the book’s source code) to talk to the Glass socket client, as shown earlier in Listing 7-4.
Listing 7-6. iOS Socket Server Code to Talk to Glass Client
- (IBAction)socketTapped:(id)sender {
[self runSocketServer];
}
- (void) runSocketServer {
int listenfd = 0;
__block int connfd = 0;
struct sockaddr_in serv_addr;
__block char sendBuff[1024];
__block NSString *info;
listenfd = socket(AF_INET, SOCK_STREAM, 0);
memset(&serv_addr, '0', sizeof(serv_addr));
memset(sendBuff, '0', sizeof(sendBuff));
serv_addr.sin_family = AF_INET;
serv_addr.sin_addr.s_addr = htonl(INADDR_ANY);
serv_addr.sin_port = htons(6606);
bind(listenfd, (struct sockaddr*)&serv_addr, sizeof(serv_addr));
listen(listenfd, 10);
_lblInfo.text = @"Waiting for client on port 6606";
dispatch_async(dispatch_get_global_queue(0, 0), ^{
struct sockaddr_in client_addr;
socklen_t addrlen=sizeof(client_addr);
connfd = accept(listenfd, (struct sockaddr*)&client_addr, &addrlen);
write(connfd, "2014 ", 5);
char recvBuff[1024];
int n = read(connfd, recvBuff, sizeof(recvBuff)-1);
recvBuff[n] = '�';
struct sockaddr_in localAddress;
socklen_t addressLength = sizeof(localAddress);
getsockname(connfd, (struct sockaddr*)&localAddress, &addressLength);
info = [NSString stringWithFormat:@"SERVER IP: %@, connected from %@, received: %s",
[NSString stringWithCString:inet_ntoa(localAddress.sin_addr) encoding:NSUTF8StringEncoding],
[NSString stringWithCString:inet_ntoa(client_addr.sin_addr) encoding:NSUTF8StringEncoding],
recvBuff];
close(connfd);
close(listenfd);
dispatch_async(dispatch_get_main_queue(), ^{
_lblInfo.text = [NSString stringWithFormat:@"%@ %@", _lblInfo.text, info];
});
});
}
After the iOS app runs on an iOS device or simulator, you tap or click the “run as server” button shown in Figure 7-9 to start the socket server. A UILabel is used to show the information “Waiting for client connection. . ..” Then you use the iOS device’s IP, or computer’s IP if you use the iOS simulator, to set serverIP in NBSocial’s SocketClientActivity.java file. Run the Glass app and then choose SOCKET CLIENT, and you’ll see the same numbers, 2014 and 2064, sent between your iOS app and Glass app. Figure 7-9 shows the server log in the iOS simulator.
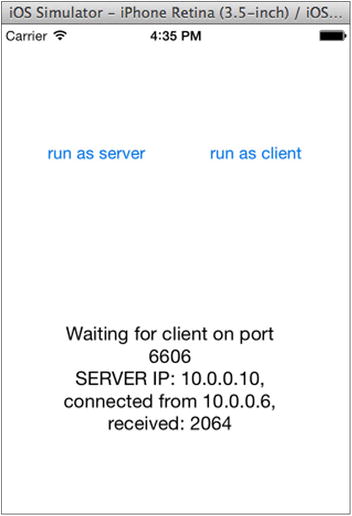
Figure 7-9. iOS socket server log message
Glass Server vs. iOS Client
Listing 7-7 shows the iOS code that acts as a socket client to communicate with the Glass server code shown earlier in Listing 7-5.
Listing 7-7. iOS Socket Client Code to Talk to Glass Server
- (IBAction)clientTapped:(id)sender {
    [self runSocketClient];
}

- (void) runSocketClient {
    int sockfd = 0, n = 0;
    char recvBuff[1024];
    struct sockaddr_in serv_addr;

    memset(recvBuff, '0',sizeof(recvBuff));
    if((sockfd = socket(AF_INET, SOCK_STREAM, 0)) < 0)
    {
        printf("unable to create socket
");
        return;
    }

    memset(&serv_addr, '0', sizeof(serv_addr));

    serv_addr.sin_family = AF_INET;
    serv_addr.sin_port = htons(6604); // replace 6604 with Glass server port defined in "public final static int PORT = 6604;" of SocketServerActivity.java

    // Replace "10.0.0.6" with your Glass IP
    if(inet_pton(AF_INET, "10.0.0.6", &serv_addr.sin_addr)<=0)
    {
        printf("inet_pton error occurred
");
        return;
    }

    if( connect(sockfd, (struct sockaddr *)&serv_addr, sizeof(serv_addr)) < 0)
    {
        printf("unable to connect
");
    }

    if ( (n = read(sockfd, recvBuff, sizeof(recvBuff)-1)) > 0)
    {
        recvBuff[n] = 0;
        char result[1024];
        sprintf(result, "%d
", atoi(recvBuff)+50);
        write(sockfd, result, 5);

        // get server IP address
        struct sockaddr_in localAddress;
        socklen_t addressLength = sizeof(localAddress);
        getsockname(sockfd, (struct sockaddr*)&localAddress, &addressLength);

        _lblInfo.text = [NSString stringWithFormat:@"CLIENT IP: %@, connected to %@, received: %s",
                         [NSString stringWithCString:inet_ntoa(localAddress.sin_addr) encoding:NSUTF8StringEncoding],
                         [NSString stringWithCString:inet_ntoa(serv_addr.sin_addr) encoding:NSUTF8StringEncoding],
                         recvBuff];
        close(sockfd);
    }
}
Run the NBSocial app on Glass, select SOCKET SERVER, and then run the iOS app (make sure in Listing 7-7 to use your Glass’s IP and port). Tap or click the “run as client” button shown in Figure 7-10 to connect to the Glass socket server. After data exchange, you’ll see on Glass the message shown earlier in Figure 7-8, and you’ll see on an iOS device or in the simulator the message shown in Figure 7-10.
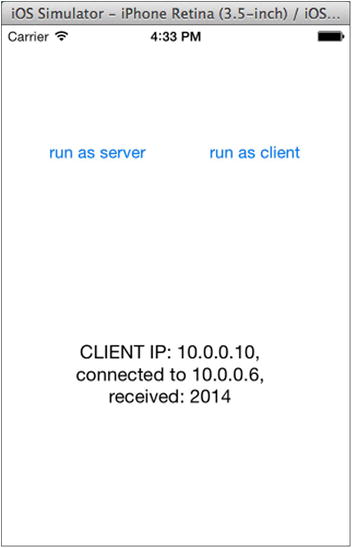
Figure 7-10. iOS socket client log message
Let’s move on to another interesting topic that can be useful when you don’t have wi-fi available and you still want to transfer data between your Glass and other Android/iOS devices, or even some smart sensors.
If you have used Glass for a while, chances are you have paired your Glass with your iPhone or Android phone via Bluetooth, which allows Glass to be able to access your smartphone’s cellular data while wi-fi is not available or to accept phone calls made to your smartphone.
You may also have used some Bluetooth devices such as headsets, earphones, speakers, or heart rate monitors. How do you let Glass use Android Bluetooth APIs to talk to other Bluetooth devices? It turns out there are two types of Bluetooth technologies with different Bluetooth API support in Android and Glass: Classic Bluetooth (also known as Bluetooth Classic) and Bluetooth Low Energy (also known as Bluetooth Smart). Classic Bluetooth is typically used for a high volume of data, such as audio and video streaming or Internet access. Bluetooth Low Energy is primarily for small sensor devices such as health or temperature monitors that need low power and small intermittent data transfers. Bluetooth Low Energy is one of the essential technologies for the hot Internet of Things trend. Android developer’s site has pretty good API documentation and sample code on both Classic Bluetooth and Bluetooth Low Energy: http://developer.android.com/guide/topics/connectivity/bluetooth.html. In this section, I’ll focus on how to make Glass exchange data via both Bluetooth technologies with other Bluetooth-enabled devices, including smartphones, tablets, and a popular Polar heart rate monitor.
If you haven’t already, you should review the Android developer site’s API documentation on Bluetooth first (again, http://developer.android.com/guide/topics/connectivity/bluetooth.html), or you could be lost. In this section, I’ll show you how Glass can act as a Classic Bluetooth client and talk to another Android app as a Classic Bluetooth server, and the other way around (Glass as a server and another Android app as a client).
Follow these steps to add the Classic Bluetooth feature to the Glass app NBSocial, which allows you to transfer a large file between Glass and another Android device:
- Create two new menu entries in NBSocial by updating res/menu/main.xml and res/values/strings.xml and update MenuActivity.java.
<item
    android:id="@+id/cbtclient"
    android:title="@string/cbtclient" />

<item
    android:id="@+id/cbtserver"
    android:title="@string/cbtserver" />
*****
<string name="cbtclient">CBT CLIENT</string>
<string name="cbtserver">CBT SERVER</string>

*****
        case R.id.cbtclient:
            Intent intent6 = new Intent(this, ClassicBluetoothClient.class);
            startActivity(intent6);
            return true;

        case R.id.cbtserver:
            Intent intent7 = new Intent(this, ClassicBluetoothServer.class);
            startActivity(intent7);
return true; - Add the following content to AndroidManifest.xml:
<uses-permission android:name="android.permission.BLUETOOTH" />
<uses-permission android:name="android.permission.BLUETOOTH_ADMIN" />
    <activity
        android:name="com.morkout.nbsocial.ClassicBluetoothClient"
        android:enabled="true"
        android:label="@string/app_name" >
    </activity>
    <activity
        android:name="com.morkout.nbsocial.ClassicBluetoothServer"
        android:enabled="true"
        android:label="@string/app_name" >
The BLUETOOTH permission is needed to perform any Bluetooth communication, including requesting a connection, accepting a connection, and transferring data. The BLUETOOTH_ADMIN permission is needed to initiate Bluetooth device discovery or change Bluetooth settings.
- Create a new Activity file called ClassicBluetoothServer.java in NBSocial with the code in Listing 7-8.
Listing 7-8. Classic Bluetooth Server Code
public class ClassicBluetoothServer extends Activity {

    public final static String TAG = "ClassicBluetoothServer";
    BluetoothAdapter mBluetoothAdapter;
    BluetoothServerSocket mBluetoothServerSocket;
    public static final int REQUEST_TO_START_BT = 100;
    public static final int REQUEST_FOR_SELF_DISCOVERY = 200;
    private TextView mTvInfo;

    UUID MY_UUID = UUID.fromString("D04E3068-E15B-4482-8306-4CABFA1726E7");

    @Override
    public void onCreate(Bundle savedInstanceState) {
        super.onCreate(savedInstanceState);
        setContentView(R.layout.main);
        mTvInfo = (TextView) findViewById(R.id.info);

        // initialize BluetoothAdapter, for API 18 or above
        final BluetoothManager bluetoothManager =
            (BluetoothManager) getSystemService(Context.BLUETOOTH_SERVICE);
        mBluetoothAdapter = bluetoothManager.getAdapter();

        if (mBluetoothAdapter == null) {
            return;
        } else {
            if (!mBluetoothAdapter.isEnabled()) {
                Intent enableBtIntent = new Intent(BluetoothAdapter.ACTION_REQUEST_ENABLE);
                startActivityForResult(enableBtIntent, REQUEST_TO_START_BT);
            } else {
                new AcceptThread().start();
            }
        }
    }

    // the thread that waits for Bluetooth client connection
    private class AcceptThread extends Thread {
        private BluetoothServerSocket mServerSocket;

        public AcceptThread() {
            try {
                // client should use the same MY_UUID to make connection request
                mServerSocket = mBluetoothAdapter.listenUsingRfcommWithServiceRecord("ClassicBluetoothServer", MY_UUID);
            }
            catch (IOException e) {
                Log.e(TAG, e.getMessage());
            }
        }

        public void run() {
            BluetoothSocket socket = null;
            while (true) {
                try {
                    runOnUiThread(new Runnable() {
                        public void run() {
                            mTvInfo.setText(mTvInfo.getText() + "

Waiting for Bluetooth Client ...");
                        }
                    });
                    // blocking call
                    socket = mServerSocket.accept();

                } catch (IOException e) {
                    Log.v(TAG, e.getMessage());
                    break;
                }

                if (socket != null) {
                    new ConnectedThread(socket).start();

                      try {
                          mServerSocket.close();
                    } catch (IOException e) {
                        Log.v(TAG, e.getMessage());
                    }
                    break;
                }
            }
        }
    }

    // the thread that sends file to client
    private class ConnectedThread extends Thread {
        private final BluetoothSocket mSocket;
        private final OutputStream mOutStream;
        private int bytesRead;
        final private String FILE_TO_BE_TRANSFERRED = "marchmadness.png";
        final private String PATH = Environment.getExternalStorageDirectory().toString() + "/nbsocial/";

        public ConnectedThread(BluetoothSocket socket) {
            mSocket = socket;
            OutputStream tmpOut = null;

            try {
                tmpOut = socket.getOutputStream();
            } catch (IOException e) {
                Log.e(TAG, e.getMessage());
            }
            mOutStream = tmpOut;
        }

        // save as the function in MyVideoApps in Chapter 5
        String copyAsset(String filename) {
             ...
        }

        public void run() {
            byte[] buffer = new byte[1024];
            if (mOutStream != null) {
                // copy a file from app asset folder
                File myFile = new File( copyAsset("marchmadness.png") );
                FileInputStream fis = null;

                try {
                    fis = new FileInputStream(myFile);
                } catch (FileNotFoundException e) {
                    Log.e(TAG, e.getMessage());
                }
                BufferedInputStream bis = new BufferedInputStream(fis);
                runOnUiThread(new Runnable() {
                    public void run() {
                        mTvInfo.setText(mTvInfo.getText() + "
before sending file "+  PATH + FILE_TO_BE_TRANSFERRED
                            + " of " + new File(  PATH + FILE_TO_BE_TRANSFERRED ).length() + " bytes");
                    }
                });
                // use standard streaming code to send socket data
                try {
                    bytesRead = 0;
                    for (int read = bis.read(buffer); read >=0; read = bis.read(buffer))
                    {
                        mOutStream.write(buffer, 0, read);
                        bytesRead += read;
                    }

                    mSocket.close();
                    runOnUiThread(new Runnable() {
                        public void run() {
                            mTvInfo.setText(bytesRead + " bytes of file " +  PATH + FILE_TO_BE_TRANSFERRED + " has been sent.");
                        }
                    });

                } catch (IOException e) {
                    Log.e(TAG, e.getMessage());
                }
            }
            // wait for new client connection
            new AcceptThread().start();
        }
    }
} - Create another Activity ClassicBluetoothClient.java in NBSocial with the code in Listing 7-9. Note that to test the Bluetooth client and server communication using Glass and another Android device, you’ll need to create a new Android app (called AndroidBluetooth in the book’s source code) and copy the two files in Listings 7-8 and 7-9 to the app. You’ll find more on this after this step.
Listing 7-9. Classic Bluetooth Client Code
public class ClassicBluetoothClient extends Activity {

    public final static String TAG = "ClassicBluetoothClient";
    public static final int REQUEST_TO_ENABLE_BT = 100;
    private BluetoothAdapter mBluetoothAdapter;
    private TextView mTvInfo;
    private UUID MY_UUID = UUID.fromString("D04E3068-E15B-4482-8306-4CABFA1726E7");  // notice this UUID is the same as the server's
    private final static String FILE_PATH_RECEIVED = Environment.getExternalStorageDirectory().getPath()  +"/filefromCBTserver";

    // NOTE!!! you need to replace this with your own device name
    private final static String CBT_SERVER_DEVICE_NAME = "Jeff Tang's Glass";

    @Override
    public void onCreate(Bundle savedInstanceState) {
        super.onCreate(savedInstanceState);
        setContentView(R.layout.main);
        mTvInfo = (TextView) findViewById(R.id.info);
        mTvInfo.setText("Classic Bluetooth Client");

        final BluetoothManager bluetoothManager =
            (BluetoothManager) getSystemService(Context.BLUETOOTH_SERVICE);
        mBluetoothAdapter = bluetoothManager.getAdapter();
        if (mBluetoothAdapter == null) {
            return;
        }
        else {
            if (!mBluetoothAdapter.isEnabled()) {
                Intent enableBtIntent = new Intent(BluetoothAdapter.ACTION_REQUEST_ENABLE);
                startActivityForResult(enableBtIntent, REQUEST_TO_ENABLE_BT);
            }
            else{
                // two ways to find and connect to server
                // discover new Bluetooth devices
                discoverBluetoothDevices();

                // find devices that have been paired
                getBondedDevices();
            }
        }

    }

    @Override
    protected void onActivityResult(int requestCode, int resultCode, Intent data) {
        if (requestCode == REQUEST_TO_ENABLE_BT) {
            discoverBluetoothDevices();
            getBondedDevices();
            return;
        }
    }

    void discoverBluetoothDevices () {
        // register a BroadcastReceiver for the ACTION_FOUND Intent
        // to receive info about each Bluetooth device discovered.
        IntentFilter filter = new IntentFilter(BluetoothDevice.ACTION_FOUND);
        registerReceiver(mReceiver, filter);
        mBluetoothAdapter.startDiscovery();
    }

    // for each device discovered, the broadcast info is received
    private final BroadcastReceiver mReceiver = new BroadcastReceiver() {
        public void onReceive(Context context, Intent intent) {
            String action = intent.getAction();
            // When discovery finds a device
            if (BluetoothDevice.ACTION_FOUND.equals(action)) {
                // Get the BluetoothDevice object from the Intent
                BluetoothDevice device = intent.getParcelableExtra(BluetoothDevice.EXTRA_DEVICE);

                String name = device.getName();
                // found Glass or an Android device running server
                if (name != null && name.equalsIgnoreCase(CBT_SERVER_DEVICE_NAME)) {
                    new ConnectThread(device).start();
                }
            }
        }
    };

    protected void onDestroy() {
        unregisterReceiver(mReceiver);
        super.onDestroy();
    }

    // bonded devices are those that have already paired with the current device sometime in the past
    void getBondedDevices () {
        Set<BluetoothDevice> pairedDevices = mBluetoothAdapter.getBondedDevices();
        if (pairedDevices.size() > 0) {
            for (BluetoothDevice device : pairedDevices) {
                if (device.getName().equalsIgnoreCase(CBT_SERVER_DEVICE_NAME)) {
                    new ConnectThread(device).start();
                    break;
                }
            }
        }
        else {
            Toast.makeText(ClassicBluetoothClient.this, "No bonded devices", Toast.LENGTH_LONG).show();
        }
    }

    private class ConnectThread extends Thread {
        int bytesRead;
        int total;
        private final BluetoothSocket mmSocket;
        public ConnectThread(BluetoothDevice device) {
            BluetoothSocket tmp = null;
            try {
                tmp = device.createRfcommSocketToServiceRecord(MY_UUID);
            } catch (IOException e) {
                Log.v(TAG, e.getMessage());
            }
            mmSocket = tmp;
        }
        public void run() {
            try {
                // blocking call to connect to server
                mmSocket.connect();
            } catch (IOException e) {
                Log.v(TAG, e.getMessage());
                try {
                    mmSocket.close();
                } catch (IOException closeException) { }
                return;
            }
            manageConnectedSocket(mmSocket);
        }

        // receive file from server
        private void manageConnectedSocket(BluetoothSocket socket) {
            int bufferSize = 1024;
            byte[] buffer = new byte[bufferSize];
            FileOutputStream fos = null;
            BufferedOutputStream bos = null;

            try {
                InputStream instream = socket.getInputStream();
                fos = new FileOutputStream( FILE_PATH_RECEIVED );
                bos = new BufferedOutputStream(fos);
                bytesRead = -1;
                total = 0;
                while ((bytesRead = instream.read(buffer)) > 0) {
                    total += bytesRead;
                    bos.write(buffer, 0, bytesRead);
                }
                bos.close();
                socket.close();
            } catch (IOException e) {
                try {
                    socket.close();
                    bos.close();}
                catch (IOException e2) {
                    Log.e(TAG, "socket close exception:", e2);
                }
            }
        }
    }
} - Create a new Android app called AndroidBluetooth, and copy the ClassicBluetoothClient.java and ClassicBluetoothServer.java files from NBSocial to AndroidBluetooth. Update the AndroidBluetooth app’s AndroidManifest.xml file to include the two Bluetooth permissions and make ClassicBluetoothClient the app’s MAIN LAUNCHER activity (ideally, the app should present a UI to let you choose whether to run it as a client or server).
- In your Android device’s settings, choose Bluetooth and pair the device with your Glass. This is optional but recommended; if you don’t pair your devices in advance, Glass can still discover your Android device and prompt you if you want to pair, but this later process is not very reliable and may not work all the time. Also remember to change CBT_SERVER_DEVICE_NAME in ClassicBluetoothClient.java to your actual Glass name, shown in your Android device Bluetooth settings’ Paired Devices list. Figure 7-11 shows the Bluetooth settings on my Nexus 7 tablet.
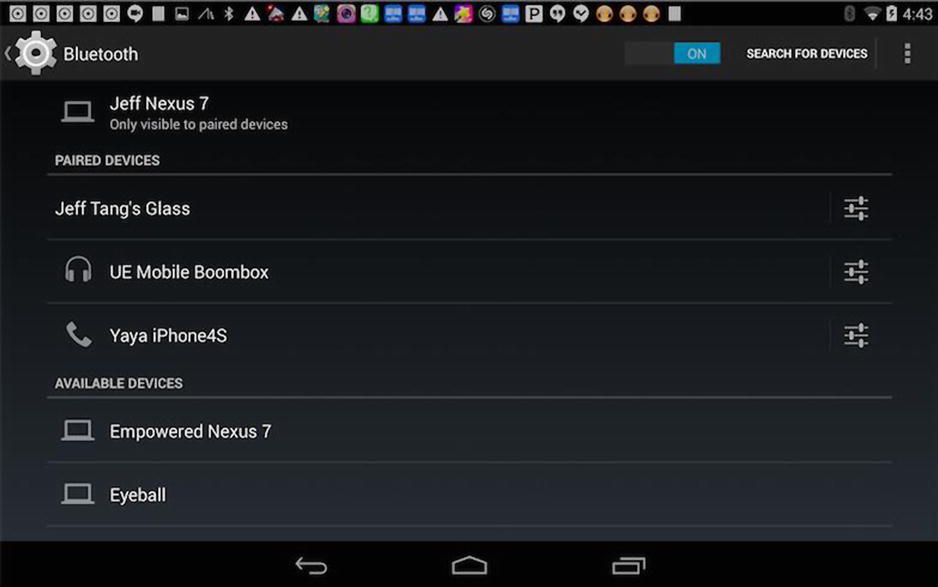
Figure 7-11. Pairing Android device with Glass via Bluetooth
- Run the Glass app NBSocial and select CBT SERVER to run the Bluetooth server. Then start the AndroidBluetooth app on your Android device, and you’ll see the marchmadness.png file gets transferred via Classic Bluetooth from your Glass to your Android device, saved as /sdcard/filefromCBTserver in your Android device. Figure 7-12 shows what you see on your Glass.
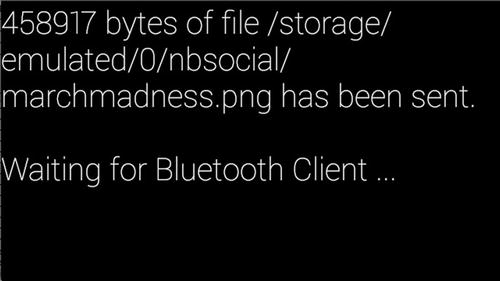
Figure 7-12. Sending file from Bluetooth server to client
- Similarly, you can run the server on your Android device and client on your Glass. First, change AndroidBluetooth’s AndroidManifest.xml file to set ClassicBluetoothServer as its LAUNCHER activity. Then start the app on your Android device, run NBSocial on your Glass app, and select CBT CLIENT. You’ll see the marchmadness.png file gets transferred via Classic Bluetooth from your Android device to Glass, saved as /sdcard/filefromCBTserver in your Glass.
Here are a few points to note about the code in Listings 7-8 and 7-9:
- The same universally unique identifier (UUID) is used in both the client’s createRfcommSocketToServiceRecord call and the server’s listenUsingRfcommWithServiceRecord call. By matching the UUID, the server accepts the client’s connection request. You can use a command-line tool called uuidgen to generate a unique UUID for your own app (for more information, see the “About UUID” note at ).
- After a paired device is found, new ConnectThread(device).start(); is called, which uses createRfcommSocketToServiceRecord to create a socket and the socket’s connect method to establish a socket connection with the server.
- After a connection request from the client is accepted by the server, the standard socket programming that you saw earlier can be used to transfer data between the client and the server. Here you transfer a relatively large file instead of some short text characters.
You can think of many use cases, such as audio or video streaming, that require a large amount of data transfer between Glass and smartphones or tablets based on Classic Bluetooth. Other use cases would require small but crucial data transfer between Glass and smart sensors, which is the next topic.
Bluetooth Low Energy
BLE is also called Bluetooth Smart, and it’s poised for explosive growth. More than 1 billion BLE devices in healthcare, sports, fitness, security, toys, home entertainment, and many other areas were shipped in 2013. BLE is an essential communication technology in all kinds of smart devices because of its low cost, widely adopted standard, and, of course, low energy. It is of essential importance to wearable computing, which is believed to be the next big thing after PC, Internet, and mobile computing. Apple has supported BLE in all its products since iPhone 4s and iOS 5. Google started the BLE support in Android 4.3, API Level 18.
Before proceeding, you have to check out the great Android BLE API guide at http://developer.android.com/guide/topics/connectivity/bluetooth-le.html to get yourself familiar with key BLE terms and concepts and sample Android code. Three most important BLE terms are generic attribute profile (GATT, such as the Heart Rate Profile), service (such as the Heart Rate Monitor service), and Characteristic (such as the Heart Rate Measurement characteristic). Each GATT can have one or more services, and each service can have one or more characteristics from which BLE client reads data. The BLE API guide also shows you how to set up BLE, find BLE devices, connect to a GATT server, read BLE attributes, and receive GATT notifications when a characteristic changes, but it doesn’t offer a direct and simple example to get data you’re interested from a BLE device. This is what I’ll do in this section; I’ll show you how to let Glass act as a BLE client and read heart rate data from a popular BLE sensor, the Polar H7 Heart Rate Sensor, available for purchase at http://amzn.to/1h6RjLY.
Reading Heart Rate from Glass
The complete code is in the NBSocial app of the book’s source code. The BLEClientActivity.java and BluetoothLeService.java files cover the process of finding the Polar H7 BLE device, connecting to its heart rate service, and reading from the service’s heart rate measurement characteristic.
- In BLEClientActivity’s onCreate, the following code checks for BLE support and initializes the Bluetooth adapter, before starting the device scan process:
// determine whether BLE is supported on the device
if (!getPackageManager().hasSystemFeature
            (PackageManager.FEATURE_BLUETOOTH_LE)) {
    Toast.makeText(this, "BLE not supported.", Toast.LENGTH_SHORT).show();
    finish();
}

// Initializes a Bluetooth adapter
final BluetoothManager bluetoothManager = (BluetoothManager)
        getSystemService(Context.BLUETOOTH_SERVICE);
mBluetoothAdapter = bluetoothManager.getAdapter();
if (mBluetoothAdapter == null) {
    Toast.makeText(this, "Cannot initialize Bluetooth adapter", Toast.LENGTH_SHORT).show();
    finish();
    return;
}

mTvLog.setText("Initialized Bluetooth adapter");

mHandler = new Handler();
scanPolarH7(true); - A specific UUID for the Polar H7 device is used to start the BLE device scan because in this app you’re interested only in getting the heart rate (specific UUIDs for HEART_RATE_SERVICE_UUID and HEART_RATE_MEASUREMENT_CHARACTERISTIC_UUID are defined in SampleGattAttributes.java).
private void scanPolarH7(final boolean enable) {
    if (enable) {
        // Stops scanning after a pre-defined scan period.
        mHandler.postDelayed(new Runnable() {
            @Override
            public void run() {
                mScanning = false;
                mBluetoothAdapter.stopLeScan(mLeScanCallback);
                invalidateOptionsMenu();
            }
        }, SCAN_PERIOD);

        mScanning = true;
        UUID[] uuids = new UUID[1];
        uuids[0] = UUID.fromString(SampleGattAttributes.HEART_RATE_SERVICE_UUID);
        // use a UUID array to search for specific services
        // callback is used to get device info when one is found
        mBluetoothAdapter.startLeScan(uuids, mLeScanCallback);
    } else {
        mScanning = false;
        mBluetoothAdapter.stopLeScan(mLeScanCallback);
    }
} - If you found a device with the requested UUID, you show the device name on Glass. Then connect to the device’s GATT, passing a GATT callback.
private BluetoothAdapter.LeScanCallback mLeScanCallback =
        new BluetoothAdapter.LeScanCallback() {

    @Override
    public void onLeScan(final BluetoothDevice device, int rssi, byte[] scanRecord) {
        runOnUiThread(new Runnable() {
            @Override
            public void run() {
                mTvLog.setText("Found Device: " + device.getName());

                if (mScanning) {
                    mBluetoothAdapter.stopLeScan(mLeScanCallback);
                    mScanning = false;
                }
                mDeviceName = device.getName();
                mDeviceAddress = device.getAddress();
                mBluetoothGatt = device.connectGatt(BLEClientActivity.this, true,
                     mGattCallback);
            }
        });
    }
}; - In the GATT callback, after successful connection to the device, you broadcast the connected intent.
private final BluetoothGattCallback mGattCallback = new BluetoothGattCallback() {
    @Override
    public void onConnectionStateChange(BluetoothGatt gatt, int status, int newState) {
        String intentAction;

        if (newState == BluetoothProfile.STATE_CONNECTED) {
            intentAction = BluetoothLeService.ACTION_GATT_CONNECTED;
            broadcastUpdate(intentAction);
        } else if (newState == BluetoothProfile.STATE_DISCONNECTED) {
            intentAction = BluetoothLeService.ACTION_GATT_DISCONNECTED;
            broadcastUpdate(intentAction);
        }
    }

    private void broadcastUpdate(final String action) {
        final Intent intent = new Intent(action);
        sendBroadcast(intent);
    }
    ...
} - In the broadcast receiver, you search for the specific HEART_RATE_SERVICE_UUID and HEART_RATE_MEASUREMENT_CHARACTERISTIC_UUID IDs and then read the heart rate data from the characteristic.
private final BroadcastReceiver mGattUpdateReceiver = new BroadcastReceiver() {
    @Override
    public void onReceive(Context context, Intent intent) {
        final String action = intent.getAction();
        if (BluetoothLeService.ACTION_GATT_CONNECTED.equals(action)) {
            mConnected = true;
            mTvLog.setText("Connected");
            invalidateOptionsMenu();
        } else if (BluetoothLeService.ACTION_GATT_DISCONNECTED.equals(action)) {
            mConnected = false;
            mTvLog.setText("Disconnected");
            invalidateOptionsMenu();
            clearUI();
        } else if (BluetoothLeService.ACTION_GATT_SERVICES_DISCOVERED.equals(action)) {
            // find our interested service and characteristic (HEART_RATE_SERVICE_UUID and HEART_RATE_MEASUREMENT_CHARACTERISTIC_UUID)
            for (BluetoothGattService gattService : mBluetoothGatt.getServices()) {
                String uuid = gattService.getUuid().toString();
                if (!uuid.equalsIgnoreCase(SampleGattAttributes.HEART_RATE_SERVICE_UUID))   continue;

                List<BluetoothGattCharacteristic> gattCharacteristics =
                        gattService.getCharacteristics();
                ArrayList<BluetoothGattCharacteristic> charas =
                        new ArrayList<BluetoothGattCharacteristic>();

                // Loops through available Characteristics.
                for (BluetoothGattCharacteristic gattCharacteristic : gattCharacteristics) {
                    charas.add(gattCharacteristic);
                    HashMap<String, String> currentCharaData = new HashMap<String, String>();
                    uuid = gattCharacteristic.getUuid().toString();
                    Log.i(TAG, "characterstic:"+uuid);

                    if (!uuid.equalsIgnoreCase(SampleGattAttributes.HEART_RATE_MEASUREMENT_CHARACTERISTIC_UUID)) continue;

                    if (mBluetoothAdapter == null || mBluetoothGatt == null) {
                        return;
                    }

                    int flag = gattCharacteristic.getProperties();
                    int format = -1;
                    if ((flag & 0x01) != 0) {
                        format = BluetoothGattCharacteristic.FORMAT_UINT16;
                    } else {
                        format = BluetoothGattCharacteristic.FORMAT_UINT8;
                    }
                    final int heartRate = gattCharacteristic.getIntValue(format, 1);

                    mTvLog.setText(heartRate);
                    break;
                }
                break;
            }
        }
    }
};
If you run the NBSocial app on Glass now, you’ll see a new menu item called BLE CLIENT. Don’t forget to wear your Polar H7 device first. Now select BLE CLIENT, and you’ll see on your Glass device messages that say “found Polar device” and “connected,” and the actual heart rate Glass reads from the device.
Note Debugging with a BLE device on Glass and Android devices can be a pain sometimes. The support for BLE in Glass is not reliable, and the BLE devices such as Polar H7 can get into the state of not operating correctly, in which case you’ll have to remove the battery and wait for some time before putting it back and hope it’ll work again.
As of March 2014 when the first draft of this section was written, Glass supported only Android 4.0.3, API Level 15, so I presented two workarounds to let Glass get updates from the Polar H7 BLE device: using an Android device with Android version 4.4.2 and using an iOS device with iOS 7. Now with the release of Android 4.4.2 and API Level 19 on Glass (BLE requires Android 4.3 and API Level 18), it seems that the workarounds are not needed anymore. But I decided to keep the content for two considerations:
- The support for BLE in Glass is still not reliable, while the support for BLE in other Android devices such as Samsung S4 and in iOS devices is excellent.
- This is a good example of showing how to use the connectivity technology you saw earlier in the chapter (socket and Classic Bluetooth) to achieve the goal of an overall better solution. Let other devices with better support for BLE get the data and then use socket or Classic Bluetooth to send Glass the data.
Using Android Device as Delegate
Overall, the Nexus 7 tablet is a great Android tablet for development and daily use. But it can be a real pain when developing and testing BLE apps, if you’re not aware that its support for BLE is unstable, even with the latest Android 4.4.2 and API Level 19. The Samsung Galaxy S4 has much better support for BLE. That’s why the official Android app in Google Play, called Polar Beat - Fitness Coach, from the manufacturer of the Polar H7 sensor runs only on the Samsung Galaxy S4. I hope the next upgrade of Glass will fix the issues so it can connect, disconnect, and reconnect with BLE devices and discover the services and characteristics reliably and consistently.
Follow these steps to use Glass, acting as a Classic Bluetooth client, to read your heart rate using the Polar H7 sensor:
- Import the Android project called BLEServiceWithSocketAndCBServer in the AndroidBLESample-ModifiedWithSocketServerAndClassicBluetoothServer folder of the book’s source code. The project is based on the sample BLE project located at <adt-directory>/sdk/samples/android-19/connectivity/bluetooth/BluetoothLeGatt/BluetoothLeGatt and modified to make it act as a Classic Bluetooth server.
- Modify NBSocial’s ClassicBluetoothClientActivity.java file to keep receiving the heart rate data. The completed source code is in the HeartrateClassicBluetoothClient.java file of the NBSocial app.
- Set up and wear your Polar H7 sensor, run the BLEServiceWithSocketAndCBServer app on Samsung Galaxy S4, and see your heart rate updates.
- Run the NBSocial Glass app and select the BL HEART RATE menu item. After your Glass connects to the Samsung Galaxy S4, if everything works, you’ll see your heart beat updates in your Glass, as shown in Figure 7-13.

Figure 7-13. Getting heart rate updates from iOS to Glass via a socket
I can disclose a little personal information here: Most of the time while I am writing the book, my heart rate is between 55 and 65. When I sneeze in the allergy season, the rate goes up to 70 something. When I do push-ups after the team I picked in my NCAA bracket loses, it can go all the way up to 160. During the last seconds of the final game of the Spurs vs. Thunders series or while I was fighting some frustrating issue of being unable to pair with the Polar device, I wish I could have seen my heart rates!
Using iOS Device as a Delegate
The steps for building an iOS app that talks to the Polar H7 sensor and then lets your Glass app talk to the iOS app via a socket to get the heart rate information are as follows:
- Follow the excellent iOS BLE tutorial at www.raywenderlich.com/52080/introduction-core-bluetooth-building-heart-rate-monitor to build your iOS app.
- Use your C socket code to make the app a socket server and keep reading and sending heart rate, available in the getHeartBPMData method of HRMViewController.m, to a connected socket client. The complete iOS project called HeartMonitor is in the iOSHeartMonitor-ModifiedWithSocketServer folder of the book’s source code.
- Modify NBSocial’s SocketClientActivity.java file to keep receiving the heart rate data. The completed source code is in the HeartrateSocketClientActivity.java file of the NBSocial app.
- Wear your Polar H7 Heart Rate Sensor. Run the iOS app in an iPhone 4s, 5, 5s, or iPod touch (third-generation or newer) and see your heart rate updates. Make sure the serverName and port values in HeartrateSocketClientActivity.java match the IP address of your iOS device and the serv_addr.sin_port in the HRMViewController.m file of the HeartMonitor project. Then run the Glass app and select SOCKET HEART RATE. You should see your heart rate values on your Glass, also similar to what Figure 7-13 shows.
If you follow the previous steps and check out the iOS BLE tutorial, you know what a BLE peripheral is. It’s just any BLE device (like Polar H7) that has some data to send to a BLE client, also known as BLE central. A BLE central, such as the Glass, Android, and iOS apps you saw earlier in this section, connects to and requests data from a BLE peripheral. As of Android 4.4.2, you can only write BLE central, not peripheral. iOS has better and more reliable API support for BLE, and you can easily create a BLE peripheral by following another good tutorial at and the GitHub project at https://github.com/orepereira/CoreBluetooth.
What this means is if you want to take advantage of some new iOS sensors, you can build a BLE peripheral app and publish services and characteristics for Glass to discover and get data from. If Glass cannot talk reliably and directly to an iOS peripheral (or any BLE device as a BLE peripheral), you know what to do: Just let Glass talk to an iOS or another Android device such as the Samsung Galaxy S4 via a socket or Classic Bluetooth, which works as a delegate to send Glass the data of interest.
Other Tips
If you’re new to Classic Bluetooth or BLE, you may find it confusing sometimes how to pair Glass with a Bluetooth device. The truth is that with Classic Bluetooth, you have to pair another Bluetooth device, for example Google Glass, smartphone, or tablet, from your non-Glass Bluetooth device’s (most likely a smartphone or tablet) Bluetooth settings. With BLE, you don’t see the BLE devices in your smartphone or tablet’s Bluetooth settings; you discover and add the devices from your app.
Also, by default, Glass can only be discovered, meaning it can be seen and initiated for pairing only by your phone or tablet. To make Glass be able to go search and connect to other Classic Bluetooth devices, such as a Bluetooth keyboard or Logitech Boombox speaker, you can follow the steps in this Google I/O video: https://www.youtube.com/watch?v=OPethpwuYEk&feature=youtu.be&t=7m35s. Although the video is called Voiding Your Warranty: Hacking Glass, the part that makes your Glass discover other Bluetooth devices only requires you to install two apps and then use your familiar Android Settings app to pair your Glass with a device such as the Boombox speaker, which obviously cannot pair with your Glass proactively.
Going Social
On February 19, 2014, Facebook acquired WhatsApp, the world’s most popular messaging app with 450 million users, for a stunning $19 billion. WeChat, WhatsApp’s China-based competitor, has about 300 million users. It seems to make sense to share a picture taken on your Glass to your WhatsApp or WeChat friends. The bad news is that as of now, both companies have only iOS/Android API/SDK support, which requires a native WhatsApp or WeChat app to be installed and used for sharing. The good news is that before a native WhatsApp or WeChat Glass app is available, you can use what you have learned in this chapter to connect Glass with an iOS/Android device, which acts as a delegate to share the content on Glass to your friends on WhatsApp or WeChat.
In this section, I’ll show a new way to connect Glass and iOS for social sharing. The reason iOS was chosen instead of Android is that as of June 1, 2014, WhatsApp offers the official integration documentation only for iOS (https://www.whatsapp.com/faq/iphone/23559013). The technique I’ll use is the Apple Push Notification Service, a service offered by Apple that can send notifications to an app without requiring the app to keep pulling for updates. The following is the workflow: First Glass uploads a picture to the server. Then it makes an HTTP GET request to your server, triggering a push notification sent to your iOS device, which then triggers the WhatsApp or WeChat app installed on the iOS device for user confirmation of the content to be shared and giving the choice of whom to share with.
Follow these steps to update your Glass app and create a corresponding iOS project. If you’re not an iOS developer, you may want to skip the iOS part, but at least you’ll get an idea of what can be done to make Glass more connectable.
- Go back to the SmartCamera project in Chapter 4. In ImageViewActivity.java, which is used by ZoomActivity.java to upload or e-mail a picture taken after zooming, add the following code in onOptionsItemSelected:
case R.id.wechat:
    shareTo = "wechat";
    new SharingTask().execute();
    return true;

case R.id.whatsapp:
    shareTo = "whatsapp";
new SharingTask().execute(); - Add a new AsyncTask to make an HTTP GET call (the uploadFile method is defined in Listing 7-3).
private class SharingTask extends AsyncTask<Void, Void, Void> {
    @Override
    protected void onPreExecute() {
        super.onPreExecute();
    }

    @Override
    protected Void doInBackground(Void... arg0) {
        try {
            String uploadedFilename = uploadFile(mPictureFilePath);
            new URL("http://www.morkout.com/iapps/social/notif.php?shareto="
                    + shareTo + "&uname=jeff&imagename="
                    + URLEncoder.encode(uploadedFilename, "UTF-8")).openConnection();
        } catch (IOException e) {
            Toast.makeText(ImageViewActivity.this, e.getMessage(), Toast.LENGTH_LONG).show();

        }
        return null;
    }

    @Override
    protected void onPostExecute(Void result) {
        super.onPostExecute(result);
    }
} - The server notif.php file is based on the tutorial at , which is called to send an Apple push notification to a registered iOS device, with the payload defined like this:
$payload['aps'] = array('alert' =>$uname . ' sharing a Google Glass picture ', 'shareto' => $shareto, 'imagename' => $imagename, 'badge' => 1, 'sound' => 'default'), - Create a new iOS project and follow the previous WhatsApp documentation URL and the WeChat SDK installation guide at to configure the project.
- Create an Apple push provisioning profile to be used by your iOS project.
- Add the iOS code in Listing 7-10 in the iOS project’s AppDelegate.m.
Listing 7-10. iOS Code That Gets Push Notification and Launches WhatsApp/WeChat App to Share Glass Image
- (void)application:(UIApplication *)application didReceiveRemoteNotification:(NSDictionary *)userInfo
{
    NSString *message = nil;
    NSString *imagename = nil;
    NSString *shareto = nil;
    id payload = [userInfo objectForKey:@"aps"];
    if ([payload isKindOfClass:[NSString class]]) {
        message = payload;
    } else if ([payload isKindOfClass:[NSDictionary class]]) {
        message = [payload objectForKey:@"alert"];
        imagename = [payload objectForKey:@"imagename"];
        shareto = [payload objectForKey:@"shareto"];
    }

    if ([shareto isEqualToString:@"wechat"]) {
        // with ext, error sending the message (wechat server issue! ok next morning); without ext, wechat doesn't even get launched
        WXMediaMessage *msg = [WXMediaMessage message];
        msg.title = message;
        msg.description = @"Tap to see image shared from google glass";

        // tap this on iPhone, WeChat will open this link
        WXWebpageObject *ext = [WXWebpageObject object];
        ext.webpageUrl = [NSString stringWithFormat:@"http://www.morkout.com/iapps/social/uploads/%@", imagename];
        msg.mediaObject = ext;

        SendMessageToWXReq* req = [[SendMessageToWXReq alloc] init];
        req.bText = NO;
        req.message = msg;
        req.scene = WXSceneSession; // WXSceneTimeline;
        req.text = message;
        [WXApi sendReq:req];
    }
    else if ([shareto isEqualToString:@"whatsapp"]) {
        NSURL *url = [NSURL URLWithString:[NSString stringWithFormat:@"http://www.morkout.com/iapps/social/uploads/%@", imagename]];
        NSData *data = [NSData dataWithContentsOfURL:url];

        NSArray *dirPaths = NSSearchPathForDirectoriesInDomains(NSDocumentDirectory, NSUserDomainMask, YES);
        NSString *docsDir = [dirPaths objectAtIndex:0];
        NSString *glassimage = [[NSString alloc] initWithString: [docsDir stringByAppendingPathComponent:@"glass.wai"]];
        [data writeToFile:glassimage atomically:YES];

        NSURL *imageFileURL = [NSURL fileURLWithPath:glassimage];

        _documentController = [UIDocumentInteractionController interactionControllerWithURL:imageFileURL];
        _documentController.delegate = self;
        _documentController.UTI = @"net.whatsapp.image";
        [_documentController presentOpenInMenuFromRect:CGRectZero inView:_firstVC.view animated:YES];
    }
}
Now install and run your iOS app on an iOS device. Then start the SmartCamera app on Glass, select Zoom, and take a picture. In the next picture view screen, tap to choose either WhatsApp or WeChat to share. Your picture will be uploaded to my demo server, and an Apple push notification will be sent to your iOS device, which will parse the notification payload to get the uploaded image URL and open the iOS WhatsApp or WeChat app, based on your selection, with the picture attached. After you choose the friends to share, your Glass picture will be shared to them right away.
The whole process may look a little complicated, but after you get everything set up correctly, it takes only seconds to share a picture taken on your Glass with your friends on WhatsApp or WeChat.
Summary
In this chapter, I first covered how to implement the basic HTTP GET, POST, and file uploading operations using the recommended HttpURLConnection class. Then I discussed how to accomplish low-level socket programming and let Glass talk with another Android or iOS device for data exchange, both as a client and as a server. After that, I illustrated in detail how to use Classic Bluetooth for communication between Glass and another Android device, without the need of wi-fi. I then introduced the exciting topic of BLE support and how to let Glass act as a BLE client and also how to use the Samsung Galaxy S4 smartphone or an iOS device as a bridge between Glass and BLE devices. Finally, I showed you how to use Apple’s push technology to let you share your new picture taken on Glass with your WhatsApp or WeChat friends in seconds.