
A fresh Ubuntu installation is reasonably complete. The included applications and tools form a comprehensive computer system that can be used for all basic daily computer use and more. But Ubuntu’s software repositories are home to thousands more software packages that can transform your computer into a powerful tool to boost your productivity. The possibilities are nearly endless.
One of the strengths of the default software—from the Firefox Web browser to the Thunderbird email client to the LibreOffice office suite—is familiarity. This world-class software is common on Windows and Mac computers and is familiar enough even if you haven’t used it before. Instead of focusing on the default applications, this chapter covers additional software that can enhance the most common tasks that users will want to accomplish: from advanced email management to note-taking, time management, organization, file backup, and working with web apps and mobile apps. Each is available through Ubuntu Software .
Writing Documents Without Distractions Using FocusWriter
Writing is one of those activities that is really personal. There are a lot of different ways of writing, and every writer has his own preferences and rituals. Personally, I like to write outlines and notes with a fountain pen in a notebook, which is how this very book started out. Then, I like to switch to a word processor for most of the actual writing. LibreOffice is a great way to format documents, and I used it exclusively to write this book. But the features and toolbars can also be distracting.
A lot of creative writers prefer to use simplified writing environments. Early word processors were very simple with little to no interfaces for menus, toolbars, and status bars (sometimes referred to as “chrome”). While pressing F11 in Text Editor and Ctrl+Shift+J in LibreOffice or opening a terminal and running nano (see Chapter 5) will reduce distractions, there’s a purpose-built word processor that’s designed with writers in mind.

A screenshot of the focus writer application with paragraphs written in it.
FocusWriter provides a distraction-free environment for writing
The lack of other windows and indicators allows you to focus on your writing without distractions. Basic shortcut keys for copying and pasting work, as well as formatting with the usual shortcut keys such as Ctrl+B for bold text, Ctrl+I for italic text, and so on. The word processor keeps track of your word count and time spent writing, and also allows you to set an alarm or timer to help you keep track of your progress. This is perfect for using the Pomodoro technique or setting up a word count goal for events such as National Novel Writing Month.
Despite the empty look of the writing area, FocusWriter does have an interface that appears as needed. By bringing the mouse up to each edge of the screen, you will access a different interface feature. In the application, only one feature is visible at a time. The composite screenshot below (see Figure 3-2) displays all edges at once, for illustrative purposes.
The top of the screen contains the menus and a fully customizable toolbar. You can rearrange and add or remove toolbar buttons and labels in the menu system under Settings ➤ Preferences… ➤ Toolbar.
The left side of the screen shows a scene selector with all “scenes” present in the current document. Scenes are separated by “##” on a single line per standard writing convention, but the scene separator is easily customized in the preferences as well. For example, I prefer “-*-” in my own writing, and you can change the divider to anything that works for you. The scene selector allows you to quickly jump between portions of your document. The right side of the screen displays a standard scroll bar and can be used to manually scroll through your document.

A screenshot of the focus writer application has a toolbar at the top with different tools that include file, edit, format, tool, settings, and help.
Each edge of the screen provides a different tool for working with your documents
Because the interface is so simple, it is worth reviewing FocusWriter’s settings . You can have FocusWriter highlight the current line your cursor is on or the surrounding lines, and there are very flexible statistic and daily goal settings that you can customize to your needs. There’s even a “Typewriter sounds ” feature that plays the sound of a typebar hitting paper when you type letter keys and a carriage return and bell when you press Enter. Combined with a suitable theme, you can really make your own distraction-free writing environment!
FocusWriter is a fun and easy way to cut out distractions and write creatively. With a little background music or white noise and a serene landscape background, the only thing missing to fuel your writing time is a mug of tea or coffee.
Managing Your Personal Finances Using HomeBank
Managing money is a major life skill, and it’s a lot easier if a computer can do all the math for you. There are several financial management programs available in Ubuntu, but one of the simplest to use is HomeBank .

A screenshot of the home bank application. It has different sections with information on your accounts with type, a scheduled transactions list, and a pie chart of the spending.
A high-level overview of your current account balance and recent spending
When you first run HomeBank , you’ll see a welcome dialog. Creating a new file will walk you through entering your personal information and your first account. “Accounts” can track any type of money, whether it is cash at hand, money stored in a bank account, or the monetary value of an asset or liability. You can also set up accounts to be excluded from the budget or reports if you want to track something separately.
Once you have HomeBank set up, running the application will show the main window. It shows all of your accounts sorted by category, with the bank-reconciled and current balances as well as a balance that includes transactions you’ve entered but which take place in the future. It also shows a pie chart of your spending by category, which you can adjust to show for the last month, the current month to date, by quarter, rolling 30, 60, or other day period, and otherwise customize to your preferences. At the bottom of the screen, you’ll see upcoming transactions that are scheduled as bills.

A screenshot of the edit transaction dialog box in the home bank application. It has options to edit the date, amount, account, payment, info, payee, category, status, memo, and tags under the expense tab.
Entering transactions works just like a standard check register
HomeBank also allows you to set up your budget expectations with the budget dialog, and you can adjust budget amounts for each category on a month-to-month basis. The main window offers several reports, and clicking the respective toolbar button will display a report window. By default it shows an informative but bland list view, but you can choose between various chart views for each report.
An extremely useful feature of HomeBank is the ability to view a vehicle cost report. This allows you to track not only repair and maintenance costs but also your fuel economy. Be sure to use Edit ➤ Preferences from the menu, select “Locale,” and choose “Use miles for meter” and “Use gallon for fuel” under “Measurement units” if you want to view your fuel economy in terms of miles per gallon.
Altogether, HomeBank is a simple yet powerful way to track your finances. While smart spending practices are still your responsibility, having your spending data and friendly reports available will help you keep on track of your money and stick to your financial goals.
Managing Your Professional Email, Contacts, and Calendar Using Evolution
Evolution is a deluxe email and personal information management software in Ubuntu. In addition to email, it also manages your contact list, calendar appointments, and to-do lists as well. It is equivalent to Microsoft Outlook and is very similar in organization. For many years it was the default email manager in Ubuntu, but it was replaced by Thunderbird in an effort to make the default desktop more simple and lightweight. However, if you can make use of the extra functionality in Evolution, you will find that this application will make your life a lot more simple.
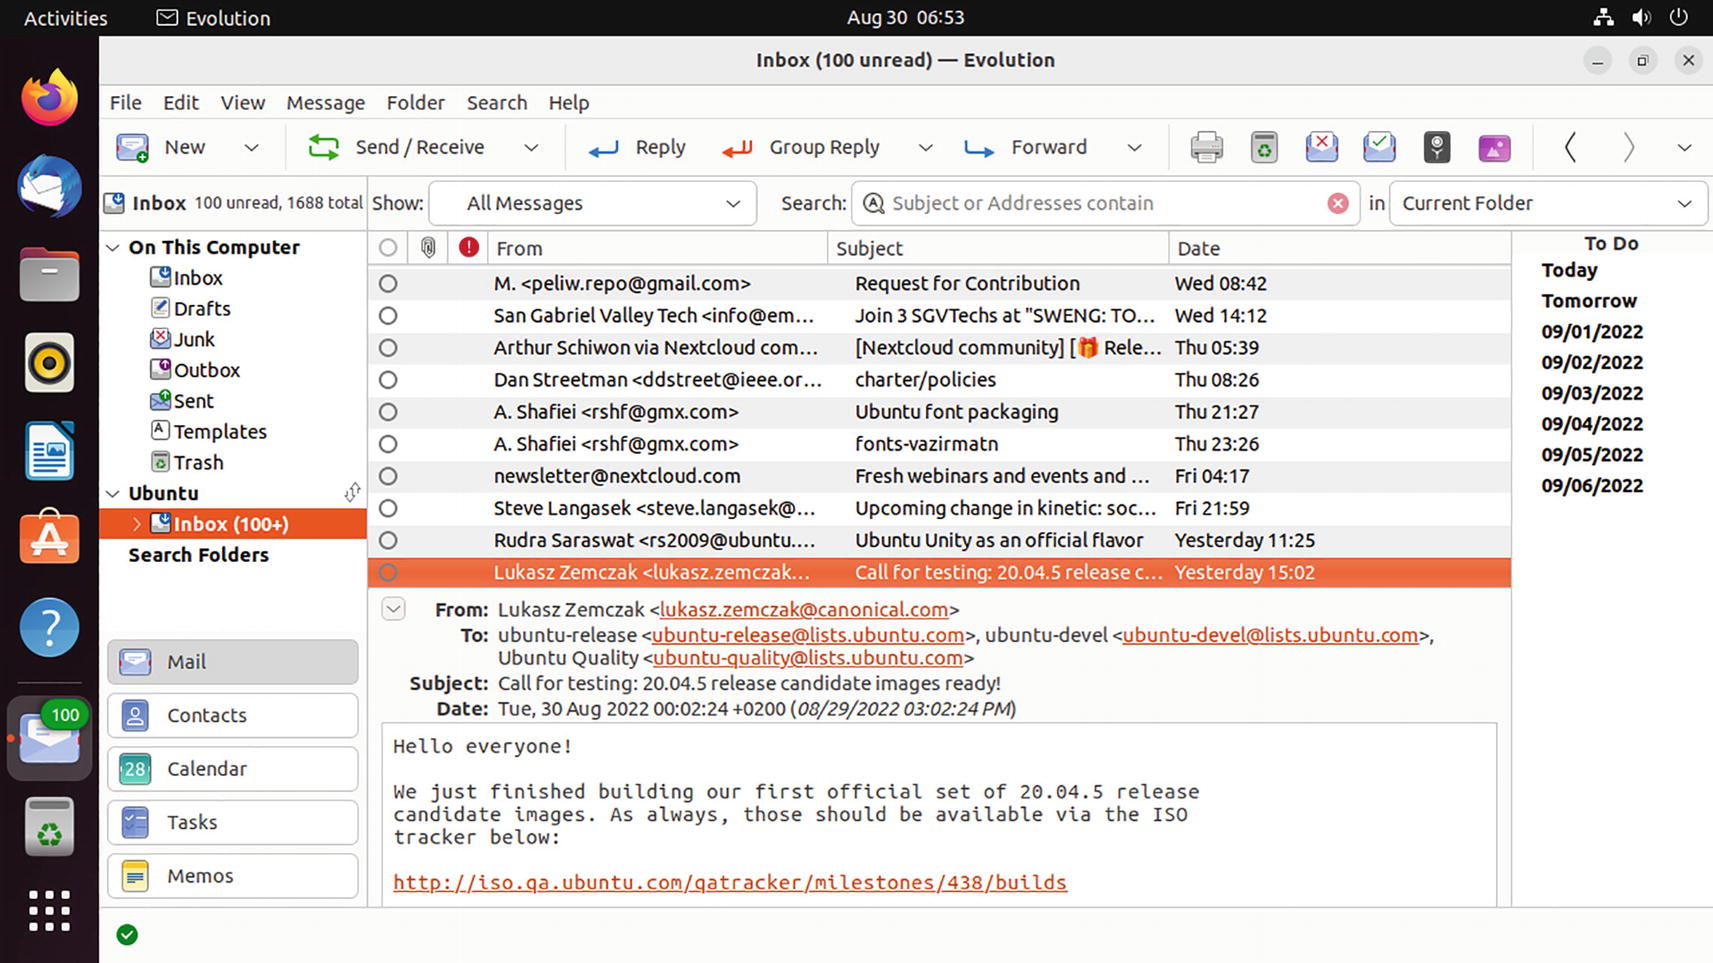
A screenshot of the evolution application in Ubuntu. It has the inbox opened with several emails. It also has options for contacts, calendar, tasks, and memos.
Evolution is a very capable email and personal information manager
Evolution can handle multiple email accounts from different servers, and each account has its various folders listed on the left side of the window. The right side of the window has the message list for the currently selected folder and a preview pane for the current message below the message list. The message view is particularly useful because it groups email by reply in a threaded view, which you can toggle on or off by choosing the menu option View ➤ Group By Threads or pressing Ctrl+T. This is very handy for mailing lists or long email discussions on a single topic.
On the bottom left of the window, you’ll see buttons that allow you to switch to other modes as well. Evolution supports multiple contact lists, calendars, a task list, and various memos and to-do lists.
Contact view lists your contacts, and you can track user details both locally and by syncing them with online address books provided by Google, LDAP servers, or over WebDAV. This allows you to utilize your phone and work contacts while keeping them separate from each other. Clicking the down arrow to the right of the “New” button on the contacts view allows you to create a new address book, and the “Type” drop-down menu allows you to choose an online data source for your address book.

A screenshot of the calendar section of the evolution application. It allows you to view, and edit appointments as well as schedule tasks.
Calendar view shows schedules from multiple calendars side by side
The nice thing about Evolution’s multiple calendar support is that you can easily import shared calendars as well. This lets you view your friends’ or coworkers’ public calendars and coordinate your schedules. You can easily display or hide any calendar’s appointments by clicking the check box beside the calendar on the left-hand side of the window.
The monthly thumbnail calendar lets you navigate to dates quickly, and dates with appointments are displayed in bold. You can change the Calendar view from day, work week, week, month, or agenda-style list by clicking the toolbar buttons. The task list on the right can be resized with the drag handle to make more room for the Calendar view, or removed by using the menu option View ➤ Layout ➤ Show Tasks and Memos pane.
Task view lets you set up working tasks that you can schedule start and due dates for, record priorities and notes, and eventually mark canceled or completed. Tasks can easily be marked completed by clicking the check box next to a task on either the calendar or task view.
Memo view is similar to task view except there is no priority or completion status. Memos are virtual sticky notes you can use to keep miscellaneous information around. They can be searched or printed from this view.
One very nice feature of Evolution that isn’t available by default is the ability to connect to a Microsoft Exchange server. This allows it to function as a drop-in replacement for Microsoft Outlook for business use, and you can send and accept appointments via email. When you search for “Evolution” in Ubuntu Software and click on its entry, you will see that the software detail page has a header called “Add-ons” which lists “Exchange Web Services” as one of the additional Evolution features. You can select the check box next to the add-on and enter your password when prompted to install it automatically, or you can install the package evolution-ews via the command line. The next time you launch Evolution and click the down arrow next to “New” on the toolbar and choose “Mail Account,” the Evolution mail configuration assistant’s “Receiving Email” page will have “Exchange Web Services” as an option in the server type list. After you enter your username and paste the URL for the web email portal under “Host URL,” you can click the “Fetch URL” button to fill in the OAB URL field and continue setting up your email account as normal.
Evolution is a heavy-duty email client that can be used to manage your email; schedule appointments with yourself and other; take advantage of your existing Google and work email, calendars, and address books; and keep track of work tasks and other information. If you are used to Microsoft Outlook, then Evolution can smooth your transition over to Ubuntu. You can even manage your work email in Outlook and your personal email in Thunderbird if you prefer—both programs coexist peacefully on the same computer.
Managing Your Calendar with Thunderbird
Thunderbird is a nice, simple messaging client. Famous for email, it also handles Usenet, RSS, and instant messaging as well. Most computer users use online calendaring tools via their web browser, but it can be extremely convenient to have this tool on your desktop as well. If Evolution is too heavy for your comfortable use, you can use the default calendar functionality in Thunderbird instead.
The calendar plug-in for Thunderbird is called Lightning , which was so popular that Thunderbird adopted it and includes it by default. It adds the “Events and Tasks” menu to the tab bar and a “Today Pane” and dedicated Calendar and Tasks tabs to Thunderbird. You can toggle the Today Pane on and off from the bottom right corner of the Thunderbird window, and you can open the Calendar and Task tabs by clicking the respective icon on the left side of the Thunderbird window just under the menu bar.

A screenshot of the calendar tab in Mozilla Thunderbird. Schedules of multiple calendars are synchronized.
Calendar view shows schedules from multiple calendars side by side
To add your personal Google Calendar, right-click in the calendar list, and choose “New Calendar….” Select “On the network” and click “Next,” and then type your Google account into the “Username” field. The “Location” field will automatically fill in with “gmail.com,” and you can simply click the “Find Calendars” button. A new window will appear and ask you for your Google account and password. Enter this information and follow the prompts to sign in, and then click “Allow” when Google asks you to grant Thunderbird permission to access your Google account. Thunderbird will show a list of your calendars from Google, and you can choose which ones to integrate into Thunderbird. You can click the “Properties” button to change the calendar name, its color, and how frequently Thunderbird will check for updates. Once you have selected the calendars you want and click “Subscribe,” the calendars will be added to Thunderbird, and your appointments will be synchronized to your computer. From then on, when you create a new event and select your Google calendar during creation, the event will appear on the Web and any other device where you use your Google account.
Lightning is a great Thunderbird feature that adds basic calendar support to the email client. You can use it to manage your appointments and keep your schedule synchronized across all of your devices.
Integrating Your Online Accounts with Ubuntu
Now that most home computers are connected to the Internet, online services have become a routine part of computing for many of us. Working online allows us to talk and share photos with our friends, keep track of and share Google Drive documents from any online computer, and sync our calendars with the Web.
Ubuntu supports various online accounts that integrate with some of its default applications. For instance, you might use Flickr to share photos with friends, or Google Docs to collaborate on documents, or Google Calendar or Nextcloud to manage your schedule. Adding your online accounts to Ubuntu allows you to bring your online data to your computer seamlessly. Ubuntu’s Online Accounts manager allows for easy online data integration. Simply click the System menu in the top-right corner of the screen, click “Settings” in the menu, and then click the Online Accounts section (see Figure 3-8). The top of the right-hand area displays all currently configured accounts, and various types of accounts you can connect to are displayed underneath.

A screenshot of the online accounts option in settings. It offers online services in one place and integrates them into your Ubuntu desktop.
Ubuntu brings your online accounts directly to your desktop
Each online account can actually integrate with your desktop in various ways. A Flickr account integrates with Shotwell. This means that when you add your Flickr account to Ubuntu, when you’re organizing your photos with Shotwell, you can send them to your Flickr account directly from Shotwell.
Google is another example of a service that has many different services. Adding your Google account will give you access to your Google Drive files in Files. You’ll be able to publish photos in Shotwell to your Google Photos account by selecting a photo or photos and clicking the “Publish” button on the toolbar. Ubuntu also synchronizes your Google Calendar events. When you click the clock at the top center of your screen, the calendar will show dates with events from your Google Calendar along with events you’ve added in Evolution or Thunderbird. If you have Evolution installed, your Gmail email and contacts along with your calendar will be automatically integrated into Evolution with no further setup.

A screenshot of the Nextcloud account dialog box in online accounts. It has sliders for calendar, contacts, and files along with an option to remove account.
You’re in control of the data you share with your computer and online
Clicking on an account shows the various types of date that Ubuntu applications can use. Your Google Calendar data will appear in the clock menu, but without Evolution installed, Ubuntu won’t use your Gmail data. So if you don’t already have it, you might choose to install Evolution or disable Gmail integration. (Mozilla Thunderbird does not use Ubuntu Online Accounts integration and works independently.)
This integration technology provides seamless integration of local and online data in Ubuntu, and makes working with your data fast and easy to find.
Organizing Your Thoughts with Mind-Mapping Software Using Freeplane
Mind-mapping software is a great way to organize thoughts and notes in a structured manner that is still flexible enough to experiment and brainstorm. This category of software is increasingly popular in creative circles, and is a great way to explore an idea because you can begin thinking in broad terms and then come back to each category and focus on more specific concepts.

A screenshot of the free plane functions in mind map mode of the free plane application. It has advanced formatting options to edit with.
Freeplane has many advanced formatting options available

A screenshot of the free plane application in mind map mode. It has a variety of teas depicted through branches under the tea tab.
You can organize any kind of information using Freeplane
Removing a node is as simple as clicking or hovering your mouse over it so a blue border appears and pressing the Del key. A confirmation window will pop up and ask if you really want to delete the node. Deleting a node will also delete all child nodes it contains.
You can edit nodes as well. Selecting a node by clicking or hovering allows you to rename it. Dragging a node to a different node will attach it as a child to the new node. Right-clicking on a node allows you to set a lot of different options. Exploring the documentation will help illustrate the possibilities (pressing F1 brings up a very comprehensive tutorial), but you can add or remove various predefined icons, change the formatting or style, and even export a branch as a new mind map if you decide you want to expand on a concept more fully on its own.
A nice thing about Freeplane is that it has a large number of export options. You can export a mind map as an HTML, XHTML, or Java applet for adding to a website, an OpenOffice.org Writer file that can be opened in LibreOffice, an image, and many other formats. This makes sharing mind maps with others extremely easy.
Freeplane is a nonconventional organizational and planning tool that is useful for keeping track of projects, Internet research, and organizing all manner of research for authors of both fiction and nonfiction. It may just be the tool that helps channel your creativity.
Personal Wiki Note Taking Software Using Tomboy
Everyone likes to keep notes handy. These simple reminders can be practically anything—lists, memos, or tiny documents that are not quite worthy of text or LibreOffice files because they are small or somehow related. Just as sticky notes are a way of life for some, keeping notes on the computer brings a new level of convenience to the desktop.

A screenshot of the Ubuntu desktop screen. It has various windows of the tomboy application like welcome, start here, and tomboy search with a menu for font selection.
Tomboy lets you create simple notes that can link to each other
This note taking software is easy to use. The “Search” window displays all notes sorted by notebook, and you can use the search bar to search the full text of any note. At any time, pressing Ctrl+N will create a new note. Then, you can click on the blue, underlined title at the top of the note to change its name. The first line of any note will become its title, and it may take a couple of seconds for this to reflect in the formatting. Typing underneath the title will let you create the body of the note, which can be formatted by choosing a format and typing, or selecting regions of text and clicking the “Text” button in the toolbar (see Figure 3-13) to choose your formatting, which is indicated by the “abc” icon. The shortcut keys for formatting are mostly standard, but you can view them in the “Text” formatting menu for reference.
One of the unique features of Tomboy is the ability to link notes together. You can select text and click the “Link” button in the toolbar (represented by a dotted downward arrow) to immediately create a new note with the title of the text you selected. This note is linked to the previously selected text and can be opened again by simply clicking the link. This allows you to expand on ideas in unlimited detail and keeps individual notes simple while making it easy to organize collections of notes.
Notes can further be sorted into notebooks, which provide for further organization. Simply clicking the “Notebook” button in the toolbar of any note allows you to select an existing notebook or create a new notebook. Lastly, notes can be exported to HTML format by clicking the gear icon on the note toolbar and then shared via email or on the Web.
Tomboy also includes a dedicated indicator applet so that it stays running even after you close the last note. You can use this menu in the top right side of the screen to quickly create a new note or open a recently opened note.
Keeping track of the little pieces of information we gather throughout the day can be tricky. Tomboy helps you organize and manage this information and keep notes cross-referenced with a simple, easy-to-use note editor with powerful formatting and simple linking between notes.
Installing Additional Language Support
One of the easiest features to take for granted is language support . Anyone who speaks English is pretty lucky in that most computer software is written entirely in English by default. But anyone who is bilingual is aware at how different menus, terms, concepts, and even simple text can be from one language to another.

A screenshot of the Ubuntu desktop screen has 3 windows of applications in a foreign language.
Even the familiar becomes strange when it’s in an unfamiliar language
One last thing to remember is that using Ubuntu in a different language is a fantastic way to practice your language skills, and the language tools and text entry will assist you whenever you are working in multiple languages.
Language support in Ubuntu covers a variety of areas, and they are all important. The foremost, naturally, is translated and localized software. Figure 3-13 shows Ubuntu as it appears in German. The web browser shows Suche oder Adresse eingeben instead of “Search or enter an address.” The menus are all in German: Datei instead of “File,” Bearbeiten instead of “Edit,” and so on. LibreOffice names new documents Unbenannt 1 instead of “Untitled 1.” Fonts capable of displaying a language’s native script are so important that while the Ubuntu font supports the extended Latin, Greek and ancient Greek, and Cyrillic alphabets, other fonts fill in where needed for other languages.

2 adjacent screenshots of the formats application. One has the United States selected under common formats, while the other has Germany selected. It changes the values in dates, times, dates and times, numbers, measurement, and paper under preview.
Locales affect numbers, dates, calendars, measurement units, and currencies
The last component of language support is text input. At a basic level, this means various keyboard layouts to support the hundreds of physical keyboard designs available throughout the world and at various times in computing history. The Spanish keyboard has an Ñ key, and the top letter row of a German keyboard starts with QWERTZ instead of QWERTY and has keys for Ä and ß. The top letter row of Greek keyboards starts with ;ΣΕΡΤΥ instead of QWERTY. A matching keyboard layout means that the characters that appear on your screen match the characters printed on your keyboard keys. The input indicator on the top right of the screen shows the current layout, if more than one has been configured. “en” for English, “de” for German, and so on. Clicking on the indicator allows you to select between installed layouts or show the currently selected keyboard layout. This is valuable because it may not match your physical keyboard at all. (Or, sometimes worse, it may almost match your physical keyboard layout, but have some surprises around the edges!)
Configuring Language Support
You can check your current language support and add or remove additional languages by launching “Language Support ” from the application grid. The Language Support window appears and displays “Checking available language support” as Ubuntu verifies the language tools available for your language and locale. For instance, an Ubuntu system installed with English (United States) support is missing spelling dictionaries and locale format settings for Australian, British, Canadian, and South African English. Running Language Support will declare that “This language support is not installed completely,” and clicking “Details” will show the software packages required to complete language support. You can install the extra software or click the “Remind Me Later” button. If you do not install these extra languages, the extra English locales will not be fully available, but of course this can be ignored unless you wish to use them.
After language support has been verified, the Language Support window is available. It displays all installed languages in order of preference, with the current setting displayed in black. You can drag and drop languages to order them in preference. The first language will be used for the computer interface, and any untranslated portions of a program will be displayed in the next available language in order of preference. There may be a brief delay when you make a change. These changes will take effect the next time you log into your desktop, but do not require a reboot. Your language settings only affect your session while you’re logged in, but you can apply your settings to the entire system if you are an administrative user. This will localize the computer startup and login screen, but other user accounts will retain their current language settings. You will need to enter your password to authorize the change.
Clicking “Install/Remove Languages...” will allow you to add or remove support by language, which will install the associated locale settings as well. The new window lists all supported languages, and you can use each language’s check box to select or unselect it. Click “Apply” to automatically download the translations, locales, and any necessary fonts and remove any unselected languages. You will need to enter your password to download and install the new software.
The Regional Formats tab on the Language Support window allows you to select the locale settings for your computer. This affects all sorts of formatting (see Figure 3-14, although the Language Support window shows a slightly condensed view), and the drop-down list will display all regions currently available for the installed languages. This can be set up independently of the display language and will only affect your account. You can likewise make this change system-wide with the “Apply System-Wide” button and your password.
Configuring Your Input Sources Settings
Input sources affect how you use your keyboard to enter text into the computer. In the most straightforward setup, you can simply select the layout that matches your keyboard so that the character printed on any given key matches the character that appears on your screen when you press it. Certain languages with complex scripts have more elaborate text entry systems called Input Method Editors. Other keyboards have special keys or features. However you prefer to enter text, Ubuntu has a setting for you. You can launch “Settings” from the application grid or from the System menu at the top right of your screen. Then, scroll down and click the “Keyboard” option from the left.

A screenshot of the keyboard options under settings. It has English, German, and Japanese as input sources. Under input source switching, it has the option to use the same source for all windows and switch input sources individually for each window.
The Text Entry window and input indicator allow for quick keyboard adjustments
Certain languages have complex scripts. Japanese, for example, has two syllabaries and a logographic script that contain well over 50,000 characters between them. These would not all fit on a standard desktop keyboard. Complex languages often use an Input Method Editor to assist a user in entering text.
Input Method Editors are installed along with language support (so make sure you do install the language first), and can be selected as an input source in the Text Entry screen. Japanese support, for example, installs the Mozc Input Method Editor. Entering text is specific to each language Input Method Editor, but for illustrative purposes, we will look at Mozc for entering Japanese (Figure 3-16). Many languages have multiple Input Method Editors, so don’t be afraid to try each one and find which works best for you.

A screenshot of the notepad application in Ubuntu has support for a foreign language.
Mozc allows for quickly entering Japanese text phonetically
In Japanese, you can greet someone by saying “こんにちは,” which you would recognize as “konnichiwa” if you heard it said out loud. Using Mozc, you can write each syllable phonetically, and as you type “kon,” “ni,” “chi,” and “ha,” each syllable is transformed into the appropriate hiragana character. (Knowing the linguistic reason that the particle wa is spelled “ha” is unfortunately your responsibility.) You can press Tab to cycle through various alternatives, or space to cycle through extended transliteration options. When the correct word is highlighted, you can press Enter and the text entry is confirmed.
Typing in other scripts can be changed via the input indicator menu or a hovering preferences toolbar that appears as you type. Typically, kanji can be entered by typing a word and pressing Space. This will highlight the entire word, and pressing Space again will bring up a dictionary with various options. Space will continue to cycle through the listed alternatives. For instance, typing “ohayou” and then pressing Space twice will result in “お早う” (see Figure 3-16), which is a formal way of writing “ohayō” with both hiragana and kanji characters. The Input Method Editor includes a dictionary that contains these mappings.
Adjusting Special Character Entry
There is one more fantastically useful feature for some users who have one keyboard layout but sometimes need to write in a language with characters not supported by the current layout. This can be accessed by launching Settings, going to “Keyboard,” and scrolling to the bottom of the right area of Settings. This allows for customization of two different special keys called Alternative Characters (or AltGr) and Compose. You can bind these functions to any key you choose. Caps Lock, Right Ctrl, Right Alt, and the Menu key are very popular choices. Because the Compose key is most useful to me, I personally prefer to bind it to Right Alt.
Some International English keyboards have a physical AltGr key, usually located on the Right Alt key. It allows for quick input of special characters, so that AltGr+s might type ß, or AltGr+$ might type €. These characters will be indicated on your keyboard accordingly—usually on the top or bottom right corner of the key.
The Compose key, however, is a feature from early 1980 DEC terminals and Sun keyboards and allows for simple mnemonic entry of special characters. This ranges from letters to symbols to punctuation. Pressing Compose places the computer in character compose mode, and then the next two letters will create a “composed” character if valid (or produce no input if invalid). For example, Compose, a, e produces the æ in Old English hwæt. Compose, n, ~ produces the ñ in Spanish sueño. Compose, a, ', produces the á in Spanish sábado. Compose, o, ", produces the ö in Köln. Compose, -, l produces £ and Compose, =, c produces €. A little bit of practice will save a lot of time for those who are learning a new language or simply occasionally need a character not found on the keyboard in front of them. For instance, Compose, <, " and Compose, >, " produce typographically correct quotes as used around “this” word instead of the straight quotes produced by the " key on its own. Compose followed by three hyphens (-) produces an em dash (—).
You can learn more about the AltGr and Compose key by visiting the Ubuntu documentation at https://help.ubuntu.com/community/ComposeKey and view a list of supported Compose key sequences at https://help.ubuntu.com/community/GtkComposeTable .
Installing Language Fonts
By default, Ubuntu ships with fonts capable of displaying most modern languages and installing language support will bring in any additional fonts necessary. But there are two packages that can quickly add additional language support so that you never end up seeing a Unicode error box on a web page.
The first font is called “Ancient Scripts ,” and this provides everything from ancient hieroglyphic and cuneiform script support to musical notation, various symbols, and Emoji support.
The second is called “GNU Unifont ” and has a character for every visible Unicode character in the Basic Multilingual Plane. This acts as a fallback font so that it will display any time your computer tries to display characters that are not provided by any other font.
Press Enter, and you will be asked for your password. You will not see letters or asterisks (*) while you type. Press Enter again, and you will see a list of additional packages to be installed and a prompt asking whether you want to continue. Press Enter to accept the default of “yes,” and the fonts will be downloaded and installed automatically. Once you see the command prompt again, close the Terminal. The next time you launch an application, it should display any Unicode character.
Whether you are monolingual, learning a new language, or comfortable with many languages, the language display and input support in Ubuntu are world class. Your computer experience will be comfortable, familiar, and convenient in the world’s most popular languages.
Keeping Track of Your Personal Time Management Using Hamster

A screenshot of the hamster application. It has time stamps for day-to-day activities like reading emails, lunch, Ubuntu community catchup, and more.
Hamster keeps track of your activities throughout the day
Hamster can be installed via Ubuntu Software . It may be labeled “hamster-snap ” because Ubuntu Software tends to favor snap packages in its listings. Select hamster-snap. If you prefer to use the version that ships with Ubuntu, you can click the “Source” menu in Ubuntu Software’s header bar and choose “ubuntu-jammy-universe,” or you can install the snap package.
The goal of Hamster is to record your activities and their duration. In Figure 3-17, several activities have been recorded and Hamster is tracking a server maintenance activity.
Activities are started by clicking the + button in the header bar, typing in a description, such as “reading emai.,” and pressing Enter or clicking Save. An activity can be associated with a category, and this can be indicated with the at (@) symbol. For instance, “reading email” is unsorted, but “reading email@Work” would be categorized under work. This allows you to record doing the same activity for different purposes. The window lists today’s activities and summarizes the amount of time spent on each category under the list. Tags can also be used to further describe an activity.

A screenshot of the update activity dialog box in hamster. It has the options for c m d line, description, start, end, category, activity, and tags.
Hamster has a weekly overview where you can quickly edit activity details
Clicking the date in the header bar displays several view options for today’s date, the current week or month, and a calendar picker where you can choose a custom date range. Selecting one of these options will display activities within the date range as well as a bar graph of time tracked at the bottom of the window as well. You can also edit any activity entry here. Clicking the bar graph at the bottom of the window will expand the overview and list various activities along with bar graphs that show the amount of time spent on each in relation to each other.
These overviews are very handy, and you can also use the bar menu ➤ Export... option to save the displayed overview to an HTML file. This pleasant-looking report is perfect for sharing with clients or team members.
Edit ➤ Tracking Settings allows you to customize your overviews and activity entry. By default, Hamster counts a new day as starting at 5:30 a.m., which is perfect for night owls who work into the night, but you can change this time. The “Categories and Tags” tab lets you quickly add, remove, recategorize, or rename activities and categories to help speed up activity entry.
Hamster is a very unobtrusive way to keep track of your time at and away from the computer, and its flexibility ensures that no matter why or how you wish to track your time, you’ll be able to fit it into your workflow.
Organizing Collections of Books, Movies, Games, and More Using Tellico
Most of us have collections of things of one kind or another. Whether it’s art, books, movies, video games, or more, there’s nothing better than being able to admire a lovely collection of things that have special significance. On the other hand, it can be pretty hard to keep track of large collections, and that’s where Tellico is ready to help fill in.
Tellico was originally written by its author to manage his books, but has since grown to allow for virtually any kind of collection. Right out of the box, it also comes with profiles for comic books, videos, music, coins, stamps, cards, wine, and board games, and you can create custom collections as well. If you need to keep track of it, you can do it with Tellico.

A screenshot of the edit entry dialog box in the Tellico application. It has the title, the fellowship of the ring with entries in author, binding, subtitle, editor, purchase date, and price.
Tellico allows you to manage each item in a collection and track details as well
You can also use Tellico to keep track of items you lend out. By selecting one or more items and right-clicking on them, you can choose “Check-out...,” which will bring up a Loan window. You can enter a name, loan and due dates, and a note. Once it is returned, you can select the items and use the “Collection ➤ Check-in” menu option to mark the items as returned.
It’s the unfortunate reality for anyone who tracks collections that adding a new item is exciting, but the data entry required to track an existing collection in a new application is staggering. Tellico makes this easier in several ways. First, it can import data from many different file types. File ➤ Import shows a list, but CSV data can be easily imported and mapped to fields, and Tellico can import entries from GCstar, Alexandria, Goodreads, and many more.
Tellico also has a list of online databases for each default collection type. By right-clicking an entry and choosing “Update Entry,” you can choose between various databases to complete the information in the entry. Using the Open Library, for instance, can get author, publisher, genre data, and even cover art. This quickly and easily allows you to fill in the gaps when building a collection.

A screenshot of the collection fields dialog box of the Tellico application. It has options for current fields, field properties, value options, and field options.
Each collection’s fields can be completely customized
All of this information can be sorted in various ways, and reports can be generated and saved as HTML files or printed. This is useful for making your own checklists or sharing your collection via email or on the Web.
Keeping track of your favorite collections is made easy and simple with Tellico . The combination of common collection profiles, the ability to import details from online sources, and the flexibility of customized fields all combine to make tracking your collections almost as much fun as collecting them.
Managing Your Ebook Library Using Calibre
The digital revolution has transformed many industries, and the book publishing industry is no different. With the advent of electronic publishing, traditional and independent publishers and authors can all publish ebooks. The publishing industry has also standardized around the EPUB format , while Amazon instead opted to extend the old MOBI ebook format. Classic books and new works alike are available in these and other formats, and ebook software is not only available for computers and smartphones, but dedicated reading devices with both e-ink and LCD displays are available. Reading has never been more accessible, but keeping track, managing, and backing up all of your ebooks can be daunting. Calibre can manage your ebook library across your computer and your reading devices.

2 adjacent screenshots of calibre application. One has a list of ebooks stored in the device, while other has a list of ebooks in the library.
Calibre manages both your computer and your device’s ebook libraries

A screenshot of the ebook viewer application. It has the ebook, A Toast to Being Human, opened in a new window.
Calibre includes a sophisticated ebook viewer in addition to library management
If it were only an ebook library management system and ebook viewer, Calibre would be extremely useful. But two other features set it apart. The first is the ability to convert an ebook into various other formats. Whether Kindle, EPUB, MOBI, LIT, PDF, or TXT, Calibre can convert into 17 different formats, and will also “smarten” punctuation to convert straight quotes to curly or “smart” quotes and other such modifications (or unsmarten it, at your preference), set fonts, detect document structure, clean up internal HTML and CSS markup, and otherwise create very nice ebooks even from plain text files. It even knows which formats are supported by which devices, so it can convert on the fly when copying to an ebook reader—but only when necessary.
The second feature that sets Calibre apart is an ebook editor that is simple but very easy to use. You can adjust the text, formatting, headings, tables of contents, chapter divisions, metadata, and all other information in a specific version of an ebook, and you can use this to jazz up public domain books from Project Gutenberg that may be available only in plain text, repair ebooks with formatting errors, or even polish your own ebooks.
Calibre lets you manage your digital library whether you have a vast collection or are just starting out. You can copy and convert books, edit your books, and make the most of your electronic library. This is the ideal solution for enjoying your ebooks on any device.
Printing Labels and Cards Using gLabels
Among the many revolutions that home computers were set to kick off, desktop publishing and printing was one of them. Quite a few programs became quite popular in the 1990s with the advent of high-DPI color dot-matrix printers, and homemade labels and greeting cards were born. While greeting card shops didn’t exactly go out of business, being able to pick up a template for business cards, mailing labels, or stickers and print to them is an incredibly simple way to give a project a high-quality, professional touch. gLabels can get you started in a hurry.

A screenshot of the select product dialog box in g labels 3 application. It has the option for avery l 4787 self-adhesive name badges selected under the search all tab.
gLabels supports over 10,000 commercial card and label templates out of the box
The tools are relatively simple, and you can add text, rectangles, lines, circles/ellipses, images, and barcodes to a label. gLabels supports SVG vector graphics, so you are free to design complex graphics in a dedicated program like Inkscape, leaving gLabels for simple positioning and formatting. This lets gLabels remain simple and easy to work with. You can also import photos or other graphics.
When the project has been created, it will show an outline of the label, with a “safe area” outlined in red around the edges. The area outside of the red line is called a “trim area.” For consistent results, you’ll want to keep all important designs and text inside the red safe area and out of the trim area to compensate for slight alignment changes between your printer as well as the cut of the template.
To add an element, simply click the corresponding button on the toolbar, and then click the label. You can reposition any object just by clicking on it and dragging it to the desired location, and you can use the resize handles to control the size. Holding the Ctrl key as you click a corner handle will preserve the object’s aspect ratio so that a circle or image doesn’t become distorted.

A screenshot of the g labels 3 application. It has various tools that can be used to create a badge.
A simple “write your name” badge takes two minutes to design
Aside from static elements, gLabels also supports data merging, and this allows you to take data from CSV files or your Evolution address book and use them to print custom information on each card. To set this up, use the Objects ➤ Merge properties menu option. Just pick your data format and then choose the data file with the Location option. The Merge Properties window will display a list of records and the field name and data that go along with each record. You can use the “Record/Field” name in text or barcode elements to print that information for each record on the screen. This is perfect for ID badges, mailing labels, moving box labels, and all kinds of other printables that change. You can use LibreOffice Calc to create the list and then export it as a CSV for gLabels.
gLabels may not usher in a new era of desktop printing, but it is an extremely simple and reliable way to handle printing on most of the templates you’ll find in stores. It makes short work of any simple design work and uses more powerful programs like Inkscape for more complex designs. No matter your need, gLabels will get the job done.
Backing Up and Restoring Personal Files Using Déjà Dup

A screenshot of the tab titled overview has the option, create my first backup and restore from a previous backup with an illustration of a safe on the left.
The first time you run Déjà Dup, it guides you to create a new backup or restore from an old one

A screenshot of the back up dialog box in the backups application. It has options to add or remove folders to back up and folders to ignore.
Backup options are simple, and the backup settings window is friendly to use
The first setting is “Folders to Back Up.” By default, Déjà Dup will only save your home folder. This also saves everything inside your home folder, including your documents, pictures, music, videos, and personal application settings. It does not include your Steam library and any installed Steam games and save files, which you can back up and manage with the Steam client, but this is a noteworthy exception because it is preconfigured but not visible. Backing up your home folder is the best option unless you have specific needs, and will generally protect all of your files on your computer. If you want to add more folders such as different internal drives, you can click the “+” button and select more folders to back up. You can remove any folder by clicking the “-” button to the right of it in the list. These settings only affect future backups and do not remove files or folders from an existing backup.
If you install Steam by downloading a .deb file from its website or from the Ubuntu repositories (“Steam installer”), your Steam games will not be backed up. But if you install “Steam (Early Access)” from Canonical, your games will be installed in a different location that is not automatically excluded. If you would like to exclude Steam games from the snap package, add “~/snap/steam/common” to your “Folders to Ignore” list.
The next setting is “Folders to Ignore,” and by default it includes your Trash folder and Downloads folder. Note that Folders are separated by a forward slash (/) and tilde (~) stands for your home folder. These are typically good folders to ignore, but you can remove “~/Downloads” if you would like to back up downloaded files you haven’t gotten around to sorting yet, and you can add extra folders to ignore if you wanted to exclude folders with large files, such as your Videos folder, either because they are not important to backup or if you would like backups to finish more quickly. You are responsible for backing up any important files or data in the folders listed in this option.
“Storage Location” is very important. By default, it will choose “Google Drive,” which requires additional software to use, and a folder with your computer name as a placeholder. You will probably want to change this to a different location before you start backing up files. It is important to keep your backups on a different physical hard drive (not partition) than your primary files. By storing your files on an external hard drive or a remote network location, you can create an off-site backup that allows you to recover data in the case of computer failure or physical damage. The “Storage location” drop-down list will display any attached external hard drives as well as various network options such as Windows Share or SSH for storing a backup on other machines you own. You can also use the command line (see Chapter 6) to install the package python3-pydrive to add Google Drive support. In most cases, you can simply choose an external hard drive. Any folder name will do, but I recommend using the name of your computer. This allows you to use the same hard drive to back up multiple computers.
The last option allows you to require a password to restore your files. This allows you to password-protect your backup so that you don’t have to worry about anyone accessing your personal files. Déjà Dup will remember your password for future backups, but anyone trying to restore your backup on a different user account or computer will not be able to see the contents of the backup without entering the password first. While this is a smart security precaution, you can also just choose the “Allow restoring without a password” option to simplify the restore process in the future.

A screenshot of the backing up dialog box in the overview tab of the backups application. It has a progress bar with options to cancel or resume later.
Déjà Dup starts protecting your files the moment you finish setting up your backup policy
The first time you back up your files, Déjà Dup will perform a full backup. This means that all files in your folder will be backed up. Although your backup is compressed, this process can take quite some time. After this full backup is complete, for future backups, Déjà Dup will scan your existing backup and only backup files that have changed in some manner. This is called an incremental backup and is much faster and smaller. This makes the most of your backup storage space, but requires the original full backup and each subsequent incremental backup in order to recover your data. Once a month, Déjà Dup will perform another full file backup. This minimizes the dependency chain of backups to help protect against file corruption. As the last step in the backup process, Déjà Dup automatically runs a recovery test to ensure that the backup was successful.
Once your backup has finished, Déjà Dup will allow you to back up your files at any time or restore deleted or changed files from your backup. But the overview window shows a “Back up automatically” option. This sets up Déjà Dup to automatically start a backup every 7 days. You can also use the Menu ➤ Preferences option to choose between weekly and daily backups. This allows you to balance the need for fresh backup data with the slight performance hit that running a backup can cause. Preferences also lets you choose whether or not your backups are kept for 6 months, for a year, or forever. Déjà Dup will not automatically delete old backups unless there is no more space available for newer backups. The “Folders” tab under Preferences allows you to fine-tune the folders included or excluded in your backup settings.
Restoring Files

A screenshot of the restore tab in the backups application. It has various files and folders with an option to restore.
You can recover missing files with a right-click and a menu command
Once you click “Restore,” Déjà Dup will ask whether you want to restore your files to their original locations (this is perfect for restoring files on a new computer or Ubuntu install) or you can restore your backup to a specific folder. This is a good way to recover your files from a different computer without overwriting any files on the new computer. It is also a useful way to fully test an existing backup. Click “Restore” in the header bar to begin restoring your selected files from your backup. Once the restore operation has completed, Déjà Dup will let you know whether the restore succeeded or failed, and you can use the Files application to access your successfully restored files.
To have safe, reliable backups, your backups must be performed regularly and at least one backup should be off-site. Déjà Dup helps make this simple and automatic. While the best backup is the one you never have to use, you can be sure that your files are safe with Ubuntu.
Capturing Screenshots and Recording Your Desktop Using GNOME Screenshot and Kazam
Being able to record your desktop is useful for many things, from saving error messages for technical support personnel to creating a tutorial video to teach others how to perform a task, to taking a screenshot of your desktop background to share with others. No matter the reason, you can take screenshots out of the box with Ubuntu, and Kazam offers desktop recording and advanced screenshot options.
GNOME Screenshot

A screenshot of the G N O M E panel with options for selection, screen, and window. It has 5 application windows in the background.
GNOME screenshots are easy to make for windows, full screens, or just portions of a screen
Pressing PrtScrn will offer a variety of options, including whether or not to grab the entire screen, or just the current window. You can also choose whether or not the mouse pointer should be displayed in the final screenshot with the pointer icon at the bottom right of the screenshot control window. The GNOME Screenshot window will disappear when you click the round “Take Screenshot” that looks like a round shutter button. Once the screenshot has been taken, the captured area will flash white, and the screenshot will be placed in your clipboard as well as saved in your ~/Pictures/Screenshots folder. If you use the video icon in the bottom left of the screenshot control, GNOME will record your screen until you click the red duration timer next to the system menu and will be saved in the ~/Videos/Screencasts folder.
Kazam
Kazam is a very useful tool that performs both screenshots and desktop recording. It is popular with Ubuntu developers for demonstrating new software and features to new users. It also has some convenient shortcut keys for controlling its operation.

A screenshot of the Kazam application has 2 windows for Kazam and Kazam Preferences. The screencast tab under preferences has the option for framerate, record with, automatic file saving slider, directory, and filename prefix.
Kazam allows you to record your desktop in various video formats
Just like GNOME Shell , Kazam can record an entire single screen, multiple monitors, a single window, or a specific area of the screen. You can also choose whether to capture the mouse cursor as well as audio played through the speakers. Kazam can also record the microphone so that you can narrate the screencast as you record it. Each of these options is available from the main Kazam window and can be turned on or off individually. This is especially useful for creating demonstrations for others. Be sure to record a small video to test that the sound is being captured correctly. You can adjust the capture sources via the Preferences window. In the main window, you can also configure a delay between when you click “Capture” and Kazam begins recording your screen. Once you click “Capture,” the Kazam window will disappear and a countdown will appear on the screen.
Once your desktop is being recorded, you can simply control your computer as usual until you are ready to finish recording. You can then use the Kazam indicator menu at the top right of your screen to pause or finish recording. Once you finish recording, Kazam will ask if you want to edit your recording or save it for later. If you are not sure whether a specific video editor has been installed, you will want to save the file instead.
Screenshots work similarly with Kazam , and the main advantage of Kazam over GNOME Shell is that it will show you the current dimensions of the selected area and let you resize the selected recording area until it is just right before you press Enter to confirm the selection and start the recording.
Together, GNOME Screenshot and Kazam provide flexible ways to record your computer use. Whether you’re saving a screenshot for future reference or helping others by providing assistance, recording your screen is simple in Ubuntu.
Summary
As powerful as Ubuntu is straight out of the box, Ubuntu Software provides thousands of applications to make you more productive and efficient as you work. I hope that these applications give you a head start as you familiarize yourself with Ubuntu. After all, the quicker you’re able to finish your work, the sooner you can relax and enjoy spending time on your computer.