
At last we come to the command line! That most powerful and often feared topic of all new Linux users. Fairly or unfairly, the command line has a reputation for being arcane and difficult to use. And it is a half-truth: a lot of arcane utilities have stuck around—and indeed, any Unix or Linux guru can perform magic inside a terminal window. But the other half of this truth is that the most common commands are simple and easy to use, and the command line is therefore both powerful and comfortable.
If you’ve gone through the earlier chapters, you’ve seen how comprehensive and easy Ubuntu is with pretty much no command-line usage. For daily use, it’s pretty simple to get by without ever opening a terminal window or editing a configuration file. Yet if you search the Internet or Ask Ubuntu for solutions to common problems, you’ll usually find advice in the form of commands to run on the command line . This seems to conflict with what I just said in the first sentence of this paragraph, but when you understand how the command line works, it makes perfect sense.
When specific actions need to be performed in a precise way, it’s very difficult to explain how to perform each step graphically to someone who isn’t familiar with a user interface. On the other hand, with specific commands it is possible to make a computer do precisely what is asked. Giving command-line options virtually guarantees that each step is performed in an exact manner. Unfortunately, this also gives rise to the rumor that Ubuntu or Linux can’t be used without utilizing the command line, and that scares off a lot of users. Fortunately, the simple fact that we’re all the way into Chapter 6 and have already seen tons of practical applications proves that the command line is optional. But for as optional as the command line is for everyday use, it’s not unimportant, either. The command line also functions as a way to get work done even when something goes wrong.
Computers aren’t intelligent or smart. They’re fancy calculators that can’t do anything without a list of instructions. And when they operate, they only do what you say, not what you mean. A terminal window is your chance to tell Ubuntu exactly what to do, and have Ubuntu do it. In this chapter, we’ll look at some very specific tasks that are best done on the command line. They’re very simple and extremely useful at the same time. And toward the end of the chapter, we’ll take a look at less serious tasks and more fun ones. With luck, you’ll find that some of these programs are useful or fun. At the very minimum, you’ll understand why many Ubuntu users prefer to use a command-line interface in certain circumstances. Even if you decide not to use the command line in the future, you’ll at least see that the command line isn’t scary after all.
Introduction to the Command Line
The command line may seem daunting. But the basic commands are very straightforward and easy to remember. This section will teach you a bit about the command line as well as some basic ways to navigate your way around a terminal interface. I’m not going to attempt to teach you all about the command line ! That would be a book in and of itself. But I’ll teach you what you need to know to understand what’s happening in the rest of this chapter. It’s my hope that if you are intrigued by what we do cover together, you’ll pick up a dedicated book on the subject.
The Ubuntu command line is part of a facet of computer history that stretches back to the 1960s, and more directly from the Multics and Unix operating systems. In the earliest days of command-line interfaces, computer mainframes filled half a room, and user terminals in the same building were hardwired back to the mainframes. The earliest terminals were teletypewriters. You’d type in your command, which was electronically sent to the mainframe, and the resulting output was sent back to your “teletype machine,” which typed out the results on printed paper, just like a typewriter. These mechanical terminals were eventually replaced by electronic video terminals (sometimes fondly called “glass teletypes”), which were text-only video displays with built-in keyboards. Today, you run a “terminal emulator” to access the command line. Now you have some context to the brevity of Linux commands and their output. Incidentally, those old teletype machines and video terminals are still compatible with Linux computers.
Accessing the Command Line
There are two different ways to access a command-line interface in Ubuntu, and they function identically. The most common way is simply running “Terminal” from the Activities overview. This will launch GNOME Terminal in a window. For a more immersive view, you can maximize the terminal window. This gives you all the power of the command line with all the power of the modern graphical desktop, such as antialiased fonts and desktop notifications. F11 toggles full-screen mode and is more immersive still.
The other method is to switch to one of your computer’s other virtual consoles . Unbeknownst to you, this entire time you’ve been working on either virtual console 2 or 7, which displays your graphical interface. As the name implies, there are six other virtual consoles at your disposal. To switch out of the graphical interface and into a text interface, press Ctrl+Alt+F3 to switch to an unused virtual console, which is labeled “tty3” (an abbreviation for teletype 3; see the previous note for the historical reference). From here you can use Alt+Left or Alt+Right to switch to the previous or next virtual console , or Alt+Fn, where “Fn” is F1 through F7 to access another virtual console. Note that you need to add Ctrl to the Alt-Fn shortcut when you’re already in the graphical interface but don’t need it when you’re not. This is a fun way to limit yourself to text only if you’re learning to use the command line, but also useful if for some reason your graphical interface isn’t working or freezes and you still want to use your computer. It also mimics what you’ll see if you install Ubuntu server edition on a computer or in a virtual machine. Each console is independent, and any programs you start will keep running no matter which virtual console is active.
Your display server determines if it’s using virtual consoles 1 for the welcome screen and 2 for your desktop session, or virtual console 7 for everything. But virtual consoles 3, 4, and 5 should also be free, no matter what graphics system your computer is using.
To log in, simply type your username and press Enter. Then, you’ll see a password prompt. Enter your password and press Enter. The password prompt won’t give any indication that you’re typing. This is a security feature that prevents others from seeing the length of your password and makes your password more difficult to guess.
The Ubuntu Command Line
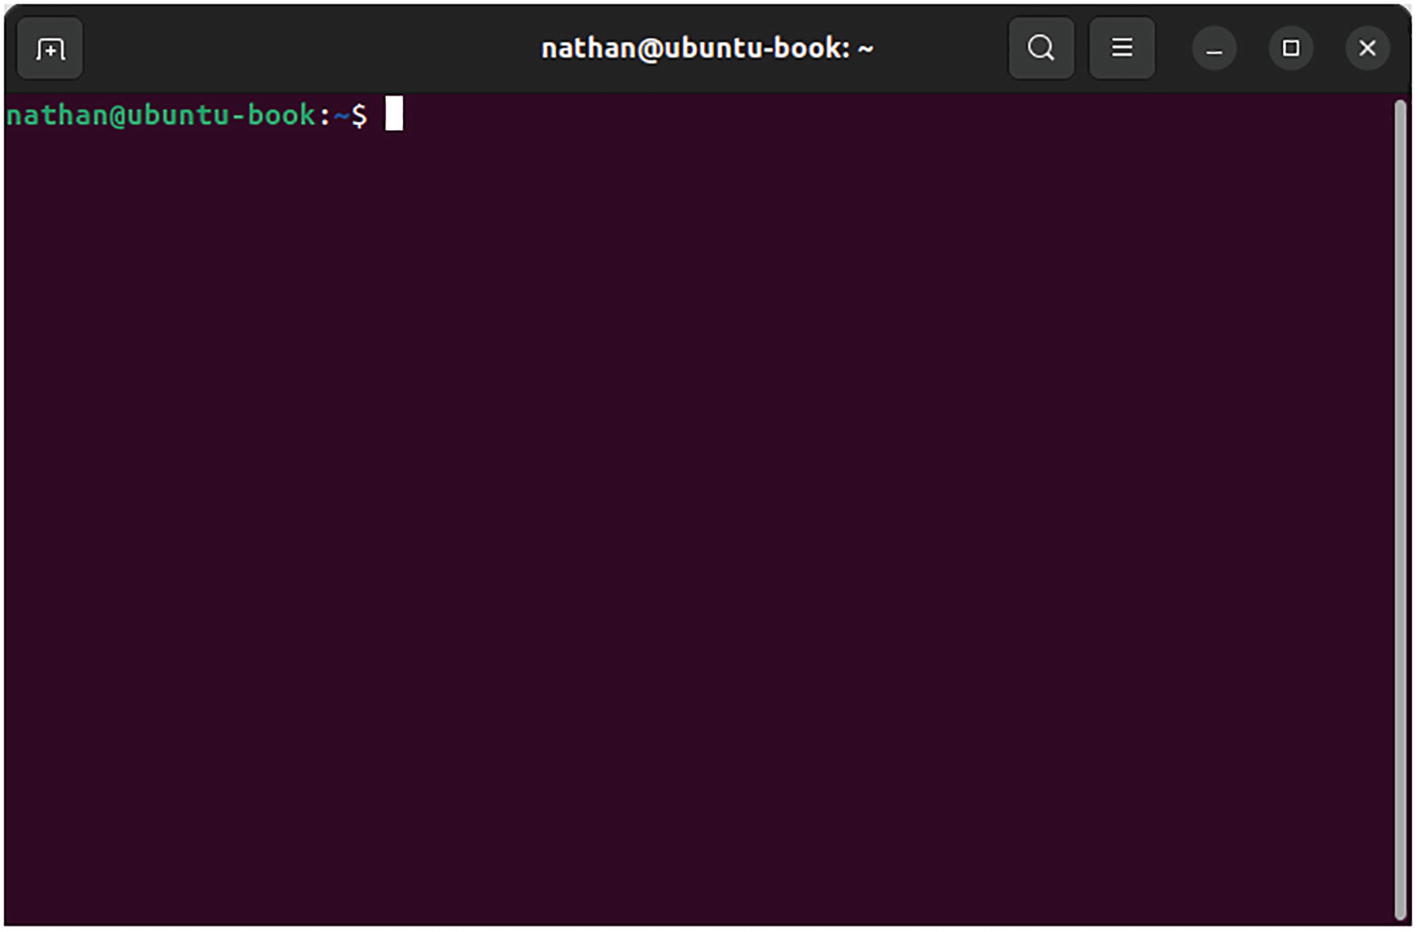
A screenshot of the Ubuntu window with a line of command. The command reads nathan, at, ubuntu, hyphen, book, space, colon, tilde, dollar.
This is your standard Ubuntu terminal window with a bash command prompt
The command prompt displays the current logged in username, separated from the computer’s hostname with an @ sign, all in bright green. Because you can connect to other Unix and Linux machines over the network, this is a useful reminder of which computer you are controlling. A colon (:) separates the hostname from the current working directory, which is in bright blue, and finally a dollar sign ($) announces the end of the prompt. Your cursor shows up on the same line, after the dollar sign, and your Ubuntu system waits patiently for your command.
You work with the command line by typing a command, and if you need to tell the command anything before it gets started—such as the name of a file—that extra information is called an “argument .” You separate that from the command with a space before typing it in, followed by another space if you are providing multiple arguments. When you have typed the entire command, you press Enter to tell the computer to run it. You can also specify options in some cases. These are usually preceded by a hyphen (-). Traditionally, an option with a long name is preceded by two hyphens (--). For example, a command might have “-f” or “--find” as synonyms for the same option. Don’t worry too much about these details. They’ll make sense as you work with specific command line applications.
You can always type the command “clear” and press Enter to erase the terminal window to make the display less cluttered. The shortcut key Ctrl+L also performs the same function. Ubuntu will erase the screen and print your command prompt and any partial command you’ve typed at the top of the screen. You can type “exit” and press Enter to close your Terminal window or log out of the computer (at a virtual console or remote session) when you are finished. If you close the Terminal window using the red X icon in the title bar, Ubuntu will prompt you if a command is still running, so that you can decide to wait for it to finish or interrupt the command immediately.
Working with Files and Directories (Folders)
In the terminal, files are shown in light gray, but directories are bright blue. Executable commands such as programs or scripts would be bright green. I can view the contents of a different directory in two different ways. I can type a space after “ls” and name the directory, or I can change my current working directory and type “ls” again.
Short names for common directories
Directory | Shortcut | Meaning |
|---|---|---|
Home | ~ | Expands to home directory (e.g., /home/nathan). |
Current | . | Refers to the current working directory. |
Parent | .. | Refers to the directory containing the current directory. |
Root | / | The root directory contains all other directories. |
Running Commands
You can type the name of any command on your system, and it will run when you press Enter. Even if you type “firefox” and press Enter, for example, if you are using a Terminal window on your graphical desktop, Firefox will open a new window to display graphics, and you will see any console messages in the terminal window where it is running. (Some “warning” and “info” messages are normal and no cause for alarm.) You will not be able to type new commands until Firefox exits (or at least until you read the later section on multitasking!).
Once a command has finished, bash will print a new command prompt and again patiently wait for your next command. Computers don’t experience boredom, so you should never feel too pressured to take your time or to double-check a command before pressing Enter. Most text commands tend to do exactly what you say without further confirmation and only print feedback if there was some kind of error. This can be confusing if you don’t expect it, but the command line assumes that you mean what you say.
In Ubuntu, most of your commands are in the /usr/bin folder or other standardized locations. When you type a command and hit enter, your system will look through a list of folders one by one for that command and run the first match it finds. This list of folders is called the “system path,” and it allows you to quickly run commands no matter what directory you’re working. As a security measure, Ubuntu only looks in the system path when you type a command. (Otherwise, a software archive might contain a malicious ls command. You unpack the archive and then type “ls” to see the directory listing, but you’ve accidentally run the malicious program instead!) To run a specific command that is located outside of the system path, you’ll need to give the full path to the command. For instance, I have a nice white noise generator command that I saved in a file in my Documents directory called “spacedrive .” To run it, I can type in “/home/nathan/Documents/spacedrive” and press Enter, which will let Ubuntu know exactly where to look. But if I just type “spacedrive” and press Enter, Ubuntu will not find the command and I’ll get an error, even if I’m in my Documents directory , because it isn’t in the system path. Sometimes you’ll want to run a script in the same directory. You can use a period (.) to specify the current directory. So if I’m already in my Documents directory (“cd ~/Documents”), I can run “./spacedrive” and the script starts right up!
If you create a directory in your home directory called “bin,” Ubuntu will add it to your system path the next time you log in. You can put any scripts you write there and run them with just their name. You can run “mkdir ~/bin” at the command line or use Files to create the directory. The next time we see the spacedrive script in Chapter 6, I’ll have moved it to ~/bin.
One last hint is to look at the documentation if you find yourself with questions about how to use a command. There is a lot of help available, and you can usually type “-h” or “--help” after a command to see a summary of command usage and options. You can also read the manual—or “man page”—of a command to get more detailed information. For example, to find out all about the “ls” command, you can type “ls –help” for a usage summary or type “man ls” and read the comprehensive manual (press “q” to quit man and return to the command line). It explains each option in detail, and is the best way to learn new ways to use commands. The manual is designed to be a reference guide, so you don’t need to memorize every option a command can use. If you want to do something but aren’t sure what the command is called, you can search the manuals of commands installed on your system with “apropos” and a keyword related to your intent. For example, “apropos edit” will return a list of man pages with “edit” in the command name or short description. You can scroll through the list (there will be a lot of false positives) and when you find a command that looks interesting, read the man page for that command. It’s a great way to explore and learn right from the command line.
Redirecting Output
Most command-line applications print their output to the terminal as text. One of the most convenient things about using the command line is that you can copy and paste output to save for later. But sometimes you’ll know in advance that you want to save the output of a program to a file, or you’ll want to send the output of one command to another command for processing. This is an iconic feature of Unix that has served Linux very well, and is one of the nicest things about using the command line.
You can redirect the output of a command to a file by using the greater than (>) sign. For example, if you run “ls ~ > homefiles.txt”, the shell will take the output from ls and place it in the file “homefiles.txt” in the current folder. You can then open up that file in a text editor, or send it to a friend in an email. You should exercise caution, because using > to save output will replace any existing file with the same name. Using two greater than signs (>>) will create the file if it doesn’t exist, and append (add on to the end) of the file if it does exist.
One way that redirection comes in handy is using the command “grep” to search and display specific information to save you from having to search or scroll through large amounts of data (we’ll use grep in an example later). You could save the command’s output to a temporary file, but you can use a special character called a pipe (|) to skip that step. When you pipe the output of one command into another program, they both run in parallel, and any output of the first command is treated as input by the second command. You can connect several commands together at one time in this manner, so if you decide to study the command line in the future, you will get a lot of mileage out of this. But for the purposes of this quick introduction, I simply want you to recognize that when you see a pipe, you’re asking the second command to process the results from the first command.
See What’s Running on Your Computer
Computers are great multitaskers. Almost immediately after the boot process begins, they’re doing more than one thing at once. Technically, a single computer processor can only run one instruction at a time (although multicore processors can cheat this a little). But computer time is measured in billions of operations per second, and a “multitasking ” operating system’s job is to schedule tiny little chunks of programs to run, one after the other. Because this all happens faster than human perception, it appears to us as though computers are doing many different things at the same time. Ubuntu gives you access to the same information about which programs are running that Ubuntu itself has. Since Ubuntu has to keep track of all of your programs, there are a few different ways that you can view this information as well.
The four columns are simple. PID is the “process ID” for a line. Every time a process starts, it’s assigned a number. The first process that Linux starts during bootup is the “init” system, which starts (or initializes) every other process, so it’s assigned process id (PID) 1, and the PID goes up by one every time a new process is started. You can use the PID to force a process to shut down with the “kill” command, but it isn’t important otherwise. TTY shows the name of the terminal a process is running on. This was more important in the days when many users connected to a single mainframe, but is still useful when monitoring a server that many users connect to over the network. TIME shows the cumulative amount of time that the program has used the computer’s processing power instead of waiting on standby. It’s measured in hours-minutes-seconds (if there are four numbers listed, the first one specifies days). The last, CMD, shows the name of the running command.
BSD provides a little more information than traditional Unix does. It displays the percentage of computer processing and memory utilization for each process, the virtual and physical memory being used, the current “state” of the process, the time the process was started, and COMMAND displays not just the command name but also the rest of the command line used to start it as well. The details aren’t important right now, but you should know that sometimes the display will change and it’s nothing to be surprised or worried about. There are a lot of additional options you can use, but “ps aux” displays all processes running by all users on the computer, and this is a good way to see literally everything that’s running on your system. You can use it to see what processes are running and which user they are running under.
This is a lot of information packed into a small amount of space, and every last detail is left as an exercise for the reader (running “man top” will display a very detailed manual). But generally, the top section of the screen shows information about the computer itself, and the bottom section shows the running processes under all usernames, sorted from the highest computer utilization to the lowest. This program keeps running until you tell it to stop, and is interactive. You can use the arrow keys to scroll the display up, down, left, and right, and the PageUp and PageDown keys work as well.
The list of processes updates every 3 seconds, and you’ll typically use this to find the culprit if a program is causing your computer to run slowly by checking which programs have a high value under the %CPU or %MEM columns. From there you could use the PID of that process to terminate the program, although you should be careful to only terminate programs that you yourself are running or that you know are stuck. Terminating “apt-get” or “dpkg” during a software update could cause major problems. Terminating “firefox” if it’s stuck, however, shouldn’t cause problems. When you are finished using top, you can press the “q” key to cause it to quit and return to the command prompt.
You can terminate a process using its PID by using the “kill” command, followed by a space and the PID . This sends a signal to the process that means “please stop running,” and this is similar to clicking the “Close” button on a title bar. A program might finish its current task or ask you if you would like to save before actually closing. But if a program is really stuck, it may not be able to respond. In that case, “kill -9” followed by a space and the PID will cause Ubuntu to forcibly terminate the program. This guarantees results. Why didn’t I give a full command-line example as usual? Because PIDs are different every time, and if you type in an example from a book, there’s no telling what (if anything) might be running with the example PID on your system. So be sure to check carefully before using the “kill” command!
Multitask on the Command Line
Unix was a multitasking operating system long before interactive graphical user interfaces were common. In order to run multiple programs at once without actually using different terminals, there are a few different ways to stop the current program, ask a program to continue running in the background, and change which program is running in the foreground. Bash , your command shell, handles these requests.
There are two jobs listed, and the “current” job is marked with a plus (+) sign. If we don’t specify a specific job number, any job control command will take effect on the current job. To indicate a job number, put a percent (%) sign before it. To go back to the man page for top so that it’s running in the foreground again, either “fg” or “fg %2” would work. Because job 2 is the current job, specifying its job number to the fg command with “%2” is optional. On the other hand, if I wanted top to continue running in the background, I could run “bg %1”, and top would begin processing again, but I would still be at the command prompt. I could continue working with other programs until I was ready to bring top back to the foreground again by running “fg %1”.
If you run this command, you’ll see that ps actually printed to the terminal before it quit. (You may need to press Enter once more to see a command prompt.) Commands running in the background can still print plain text messages. And these job management commands work with all programs, not just text-based command line programs. For instance, you can run the graphical benchmark program “glxgears” in a terminal window. A new window will open, but every 5 seconds the program will print graphics performance statistics to the terminal. By pressing Ctrl+Z in the terminal window, you will suspend the job, and the graphical output will stop. Typing “bg” will cause the program to work in the background, and the processing will start up again. This makes glxgears a perfect program to test out suspending, backgrounding, and foregrounding jobs.
If you’ve ever wondered how computer users multitasked before graphical interfaces came along, now you have the answer in the Unix and Linux worlds. And being able to suspend and resume programs can be very useful, especially when you’re still getting familiar with the command line and want to reference documentation or check files or running programs.
Diagnose a Connection to a Server
Network connectivity can be one of the most difficult problems to troubleshoot, but two command-line tools can quickly give you information about your network pathway to another computer. Simple to use and understand, one is the first thing that network professionals go to when they can’t connect to a computer, and the other will give you more information about the route your data takes through the network.
For each echo request, it prints the echo size, the reverse domain name and IP address of the target system (e.g., many websites redirect requests to different computers for load balancing), a sequence number, the “time to live” value set on the outgoing request, and the time it took to receive a response. Once it’s finished, it shows the number of echo requests (packets) sent, received, and how many packets were lost, as well as statistics for the round-trip time (rtt) measured in milliseconds (ms).
While network troubleshooting is its own book, if you get a response back, you’ll know that data can flow back and forth over the network between the target computer and your computer. This means that no matter what else is or isn’t working, the network itself isn’t to blame. You can use the “icmp_seq” number to see if packets are coming in out of order. If random packets are coming in late, that means the network route between the two computers is unstable. This isn’t a problem for web pages or downloads, but it is a problem for games and voice or video chat. If the response time is long or varies wildly between packets, or if there are a lot of “lost” packets, this can indicate network path, router, or server problems as well, and sometimes bad network cables.
If you run ping and nothing is displayed, press Ctrl+C after 5–10 seconds. If ping displays 100% packet loss, then either the remote computer is configured to ignore echo requests, there is no network route between you and the remote computer, or the remote computer is offline. While this is not proof that the remote computer is offline, it’s a great way to check for a connection between your computer and your router or your computer and another computer on your same network at home or work.
Type your password when prompted, and press Enter. Ubuntu will provide a list of additional software that will be installed along with the software. Simply press Enter at the confirmation prompt to accept the default of “Yes,” and Ubuntu will download and install the software.
This shows me each network router between me and my destination, and gives me information about the network health of each. The two most important columns are the percentage of lost echo requests (Loss%) and the average response time in milliseconds (Avg). From this I can see if there are any problem points along the way. In this example, I can see that the first four hosts are the path my requests take inside the local network, and the fifth host is where the data hits the Internet and travels to London where the Ubuntu website is hosted. I can tell that the network is very fast on my local network but slows down considerably on the public Internet. I can also see that host 6 is losing packets, but the other hosts do not appear to be. (This isn’t immediate cause for alarm—in general this happens all the time and computers resend important data if it is not received.) If I were having trouble loading the Ubuntu website, this would suggest that the web server is fine but data is being lost along the way. But if I was not losing packets and had a low response time (under maybe 400 ms) all the way until the last host which had very high packet loss or response times, that would suggest that the web server itself was the problem. When you are done testing the network pathway, you can press “q” to quit mtr .
Both ping and mtr are extremely useful tools that are the same ones that network technicians use to help diagnose and troubleshoot network performance on the job, and a full analysis and understanding would take a little bit of study. But even a cursory knowledge of what to look for can verify strong or weak network connections and show you where problems lie.
View Information About the Operating System
There are times when you need specific, detailed information about your computer, and this is another example of where command-line use really excels. On the terminal, you can request certain information, or filter out irrelevant information—all more quickly than you could with a graphical tool.
Determine Your Distribution and Version
Sometimes you have access to a computer, but because you didn’t install the operating system yourself, you aren’t sure exactly what version of Linux is running. You might be able to recognize the distribution by the default wallpaper or the interface, but unfamiliar or heavily modified operating systems will still pose a challenge. One simple command-line tool is common across many different versions of Linux , and can help to answer this question.
While CentOS is a very popular Red Hat-based server operating system with some significant differences from Ubuntu (particularly how to install software and where network settings are stored), you’ll be able to apply your Ubuntu experience in most cases, and you’ll know what to search for on the Web when investigating any puzzling differences.
Determine Your Architecture and Kernel Version
Sometimes you need to know what version of the Linux kernel your computer is running, or whether your installed system is 32-bit or 64-bit. This can be useful when downloading third-party software, for example. You might also want to double-check that you have the proper operating system installed, since it isn’t possible to change the operating system without a full reinstallation. Although it’s simple enough to click the gear menu and choose “About This Computer” and read the value given after “OS type,” this works in all versions of Linux regardless of your choice (or lack of) desktop environment.
Since Ubuntu 18.04 LTS, only a 64-bit desktop image has been available. Ubuntu Server is also 64-bit only on IBM PC-compatible machines but is still available as 32-bit for older Raspberry Pi systems.
The command “uname” stands for “Unix name” and tells you about the operating system kernel that’s running. By itself, it simply tells you the name of the current running operating system, but running “uname -r” will display the kernel version number (the “release”), and “uname -m” will display the machine hardware name. “uname -a” will display all available information, but if you are looking for something specific, it’s easier to read if you only ask for the information you want.
Running “uname -m” will display “i686” or “armv71” if you’re running the 32-bit version of Ubuntu and “x86_64” or “aarch64” if you’re running the 64-bit version of Ubuntu. While 64-bit software requires a 64-bit operating system, the 64-bit version of Ubuntu can also run 32-bit applications. So if your computer supports 64-bit software, you should probably have 64-bit Ubuntu installed. If you have a Raspberry Pi Model 3B, then you can use the 32-bit version of Ubuntu if you are constantly running low on memory.
This repeats four times because I have a quad-core processor, and grep returns each line that contains a match. It would take some time for you to find “lm” there on the second line, but here it’s highlighted in bright red. If you’re running 32-bit Ubuntu and have a 64-bit processor and at least 4 GB of RAM, you might want to consider installing the 64-bit version of Ubuntu instead. But with these commands you’ll understand your computer and software better.
Add New Users via Command Line
Each user on an Ubuntu system has his own username, password, and home folder. This gives each user a little privacy and the ability to customize the system to his own preferences. And while every user can run the software installed by Ubuntu Software, each application stores its settings in the current user’s home folder. Creating a new user account to allow someone to log in is simple to do from the command line with the “adduser” command .
This change takes effect the next time the account logs in, so if Alexander were already logged in, he would have to log out before he could use sudo on the command line or confirm administrative tasks on the desktop.
With the adduser and passwd commands, it’s easy to create new user accounts and set up passwords and administrator rights in seconds. If you spend time working on server tasks, you’ll find that these tools make adding users effortless.
Check Your Disk Space
You can use the command line to very quickly find out information about the amount of disk space you have available and how much is being utilized. This is faster than using the Disk Usage Analyzer because the commands are short and you can specify exactly what you want to know.
This is a nice summary of all mounted file systems, including some temporary ones used by the Ubuntu kernel. The system file system is 125 GB, and whether you want to know which device it’s running on, whether it contains 33 GB of data or has 87 GB free, or just a quick percentage utilized, everything’s right here. The last line contains information on the external drive, which has 83GB available and is mounted at “/media/nathan/My Passport.” This is plenty of space for running backups, and I know where to find those files. The file systems that don’t start with /dev are used by Ubuntu and can be ignored.
The period (.) represents the current folder, which is “/home/nathan/Pictures.” The summary at the bottom shows that the current folder uses 677 MB, but adding up each of the totals comes to 934 MB. This seems wrong, until you notice that “/home/nathan/Pictures/2012” is empty except for the “06” folder inside it, which is again empty except for the “10” folder inside that contains the actual photos. The size of each folder includes the contents of the folders inside, but the summary at the bottom is correct.
“df -H” and “du --si” display decimal storage units that match Ubuntu’s graphical applications that work with storage sizes. But if you prefer binary storage units such as KiB, MiB, and GiB, you can use “df -h” and “du -h” instead.
These two commands give you a quick look at how your computer’s storage space is being used, both at the overview level and the specific level as well. These are also tools that are helpful not only on a desktop system, but when working with servers.
Edit Text Files
When spending time in a text-based interface, it makes sense to talk about editing text files . Traditionally, Unix and Linux programs have used text files to store their configuration settings. This allowed the file to be human readable and easy to set up, plus easy to change using text manipulation tools and input redirection using scripts. Today, many programs still store their settings as text files for the same reasons. Many documents were written in text files as well. With certain well-known exceptions, they are compatible with practically every operating system and easily shared with others. Formatting can be added with special markup such as TeX, HTML, and Markdown. There are many different text editors , and each has its own fans, but the easiest to start out with is definitely nano .
Text editor choice tends to be contentious because people can spend a lot of time working with them. So it’s important to pick one that works best for your needs. This is so subjective, however, that countless debates have been fought (and still rage on) over the legendary One True Text Editor. Emacs and vi have steep learning curves but are rewarding. Just know that comparisons online tend to be charged!

A screenshot of the G N U nano window. The screen displays editable text with information on shortcut keys at the bottom.
nano is an easy way to edit text files, with onscreen shortcut guides
Using nano is straightforward. You type and your text appears on the screen. To move the cursor and scroll through help files, the arrow keys and Page Up and Page down keys work in addition to the shortcuts listed on the screen. You can use Ctrl+C to print the current position of your cursor in the file on the status line. This can help you orient yourself in a large file.
If you are using nano to edit a configuration file, you will note that it doesn’t wrap lines at the end of the screen but instead uses a dollar sign ($) to show that a line continues to the right of the screen. Placing your cursor on such a line allows you to scroll to the right with the right arrow or End key. The first character on the line will change to $ to indicate that the line extends to the left side of the screen. Configuration file entries must be on one line, so this helps ensure that they are being displayed properly.
If you are writing a document, however, you may want the display to wrap. You can press Alt+$ to turn on “soft” line wrapping. This allows you to see an entire line at once by displaying it on multiple lines without using actual end-of-line characters. This is useful when you are writing in text mode but will import your text to a word processor or other format when you are done.
One other useful feature about nano is that it understands some common text and configuration file formats, such as HTML, Python code, TeX documents, and many more. If you edit a file with an extension of “.html” or “.py,” for instance, nano will color-code the text to help you identify keywords, variables, and string literals, and notice other formatting issues that help protect against missing quotation marks or brackets. This can greatly enhance your editing experience without getting in your way.
When you are ready to save a file, press Ctrl+O to write the file out to disk. If you specified a file on the command line, nano will suggest the same file name and pressing Enter will overwrite it. The bottom two lines of the screen display several options as well. Entering a file name and pressing Alt+B will create a backup file, which will copy the original contents of the file to a new file with a tilde (~) at the end before saving your changes to the original file name. By default, Files will not display backup files ending in tilde, but ls on the command line will. Pressing Ctrl+X will exit nano, which will prompt you to save a file if you have made any changes.
Editing text files is an important task on the command line, and there are dozens of different text editors designed to make this easy and efficient. Starting out, nano is a pleasant tool to use and is present by default on Ubuntu. You can use it to write anything, and it is a lightweight editor that loads instantly. Whether it’s your first command-line text editor or your favorite, nano will serve you well.
Read Email
Type your password when prompted, and press Enter. Ubuntu will provide a list of additional software that will be installed along with the software. Simply press Enter at the confirmation prompt to accept the default of “Yes,” and Ubuntu will download and install the software.
One legacy of Alpine is that while it is extremely configurable, it also expects certain information to be entered using specific formatting. The sheer number of configurations can be intimidating as well. The first thing you will need to know is your mail server details. This can be as simple as looking in Thunderbird or Evolution. You’ll need your IMAP server and username to receive email, and your SMTP server and username to send email. You can always set up incoming mail and set up outgoing mail later.
To run Alpine, simply type the command “ alpine ” and press Enter. A welcome message will be displayed on the first run only, and you can press E to exit the greeting and show the main menu. At the top of the menu, it will show you the current folder—INBOX by default—and the number of unread messages. Each command can be activated by its shortcut key or by using the arrow keys to highlight a command and pressing Enter. The bottom two lines in the terminal show other commands that can be activated. First, you’ll want to press S to enter setup. Then, press C to enter the configuration settings.
This is the standard format for specifying IMAP folders, and you can use it to point to folders for your sent mail folder (referred to in Alpine as “Fcc” or “file carbon copy”).

A screenshot of the Ubuntu alpine inbox mail window. The screen displays a list of email messages and the shortcut keys at the bottom.
Email without distractions, the way it was in the mid-1990s. Only now with Unicode support
You can use the arrow keys to move the cursor up and down, and press Enter to read a message. The spacebar scrolls down one page and the minus (-) key scrolls back up one page. Note that messages are listed in order from the oldest at the top to the newest at the bottom. In addition to the Enter key, you can also use the greater than sign (>) to access an email or item and the less than sign (<) to go up one level again. Press C to create a new email or “r” to reply to the highlighted message. The bottom two lines of the screen show you a full list of commands, and you can cycle between the displayed commands by pressing the “o” key. Typing a question mark (?) will bring up the help file and will automatically jump to help on the highlighted object. This is especially useful in the settings screens.
When composing email messages, Alpine uses the pico text editor, and this is the program that inspired the GNU nano editor that you may already be familiar with. Commands are listed at the bottom of the screen, and Ctrl+X will send your email once you are finished writing it. Ctrl+C will cancel the email. The bottom of the screen will prompt you to confirm your actions.
Another interesting way that workflow differed in the past is that actions require extra confirmation. From the message index, you can press D to delete a message, but they are marked as deleted and remain in your inbox. This gives you time to change your mind and press U to undelete them. It is not until you press X to “expunge” your folder that the deleted messages are actually removed. On any of the menus or folder or message lists, you can press Q to be prompted to quite Alpine.
The full-screen text-based email interface in Alpine gives a classic, retro feel that evokes the standard behaviors of mainframes and terminals. What’s best of all is that it remains a very classic, efficient way to work with email today. The straightforward presentation and the text-based interface is more than able to stand in for more popular graphical email clients today.
Browse the Web
Some 25 years later, it’s hard to remember just how much the World Wide Web changed the Internet and the world at large. Online information retrieval systems used to be built to work with only specific software, and the information retrieved was often only accessible on the same computer architecture with the same authoring software. The Web changed all of that, with a flexible document language that allowed hypertext links to other documents. Because everything was primarily text-based, the documents could be displayed on any computer. These unique properties caused the Web to overtake other potential systems (particularly gopher) and grow into the phenomenon it is today.
Type your password when prompted, and press Enter. Ubuntu will provide a list of additional software that will be installed along with the software. Simply press Enter at the confirmation prompt to accept the default of “Yes,” and Ubuntu will download and install the software.

A screenshot of the Google E links window. The screen displays the Google search page. The search tab highlights the images option on the top.
Google wasn’t around before 1998, but the Yahoo! and Alta Vista search engines looked much like this
The top line of the display is the title bar, and displays the title of the web page you are viewing as well as your current position, which is shown in screens full of text. You can press Escape or click on the top line with your mouse to display the menu bar. Clicking on the menu options will open each menu, or you can use the arrow keys to navigate the menus. In all menus and dialog boxes, the highlighted letter of each option can be used to activate that option, and most menu items will display a shortcut key on the right that can be pressed without entering the menus.
The monochrome, plain interface of ELinks cuts out distractions, and most commands are accessible with a single press of the keyboard. But it’s possible to make ELinks much more attractive as well. Open the menu by pressing Escape, type “s” to open the “Setup” menu, then type “t” to open the “Terminal Options” window. Then, you can use the mouse or keyboard to enable color mode. If you are using ELinks in Ubuntu while using GNOME Terminal or Console, you should enable “256 colors” mode. If you are using ELinks using a virtual terminal, only 16 colors are supported. You can move the cursor with the arrow keys and activate a selection by pressing Enter, and activate the changes by typing “o” for “OK.” Or you can click directly on each option to activate it. Once you test the settings out, you can go back to the Terminal Options menu and click “Save” or type “v” to save your changes. ELinks will load saved settings the next time it is run.

2 adjacent screenshots. Ubuntu P C operating system window on the left highlights the download option and the Firefox web browser window on the right provides the link to download Ubuntu.
Carefully designed web pages like the Ubuntu site are usable even in text-only form
Once you’ve mastered the basics, ELinks has most of the features you’d expect in a modern web browser. The bookmark manager can be accessed by typing “s” and bookmarks can be visited, added, deleted, and more. Choosing “Add” will bring up a dialog box with the current page’s title and address filled in. The main surprise is that the move feature requires individual bookmarks to be selected before they can be moved. Bookmarks can be selected by highlighting them with the arrow keys and pressing the Insert key. Selected bookmarks will be marked with an asterisk (*).
ELinks also has tab support. Typing “t” opens a new tab and asks for a web address. Typing “T” while a link is selected will open that link in a background tab. Once more than one tab is visible, the tab bar appears above the status bar. It lists all open tabs and highlights the current tab. Clicking on a tab name with the mouse switches to that tab, and the less than (<) and greater than (>) keys can be used to display the previous and next tab, respectively. Typing “c” closes the current tab. Documents will load in the background, so tabs are a great way to load a new page while you are still reading the current page.

A screenshot of the Ubuntu E links window. A popup dialog box titled unknown type provides multiple options for an Ubuntu I S O file.
Elinks has a built-in download manager to handle saving large files
While this covers most of the common features of ELinks , the documentation is easy to read, and Section 3 gives an overview of the user interface along with details on everyday usage, followed by detailed descriptions of the bookmark and tabs features in Sections 4 and 5. You can read the ELinks manual online at http://elinks.or.cz/documentation/html/manual.html-chunked/index.html .
Browsing the Web has come a very long way in the last 25 years, and ELinks is an enhancement of the early text-based browser interfaces. Not only is it useful for testing websites for accessibility and screen reader compatibility, but its speed and bookmark manager make it an interesting way to do research without distracting graphics. Mouse support and a powerful download manager help make it even more approachable for new users.
IRC
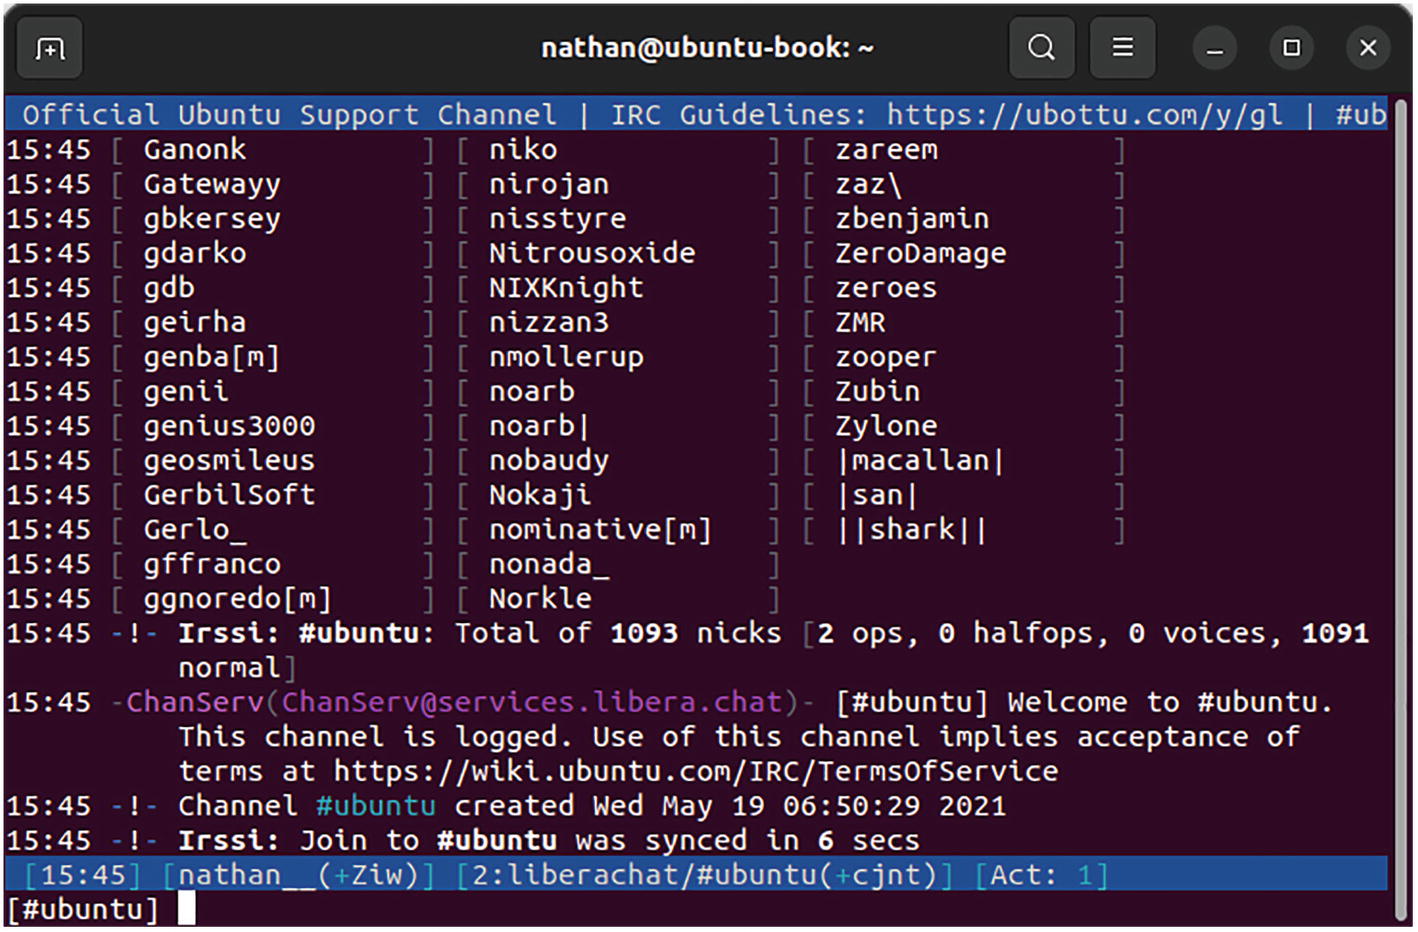
A screenshot of the official Ubuntu support window. The screen displays the I R C platform on Ubuntu with a timeline of chats and commands.
IRC offers a place for Ubuntu users to discuss Ubuntu and offer each other support
IRC servers allow users to log in and join other users in “channels” to discuss various topics. Each IRC server has its own administrators and rules of conduct. Servers can be linked together to form an IRC network. Connecting to any server on a network allows you to communicate with other users on the same network. Ubuntu uses the Libera Chat network for official channel hosting, and connecting to irc.ubuntu.com will cause your IRC client to connect to a random Libera Chat server around the world.
IRC clients display server messages in a live window at the top of the screen, and the bottom line is an input area where commands and messages can be edited before being sent with the Enter key. Commands begin with a slash (/) character on the first line, and any command not used by the client is sent to the server for processing. Any line not beginning with a slash is sent to the active IRC channel for others to read.
Connecting to a Server
The “irssi” command starts the irssi IRC client . The first time irssi is run, it will display a message that points you to www.irssi.org/ to find the “startup-HOWTO” under the site’s “Documentation” section. This file assumes the user is already familiar with other IRC clients but also gives some useful advice about configuring the software. Irssi also lists the two commands necessary to connect to Libera Chat (/connect liberachat) and join the official support channel (/join #ubuntu).
If your Ubuntu login is in use on Libera Chat or you want to use a different nick, you can change the nick setting in irssi by typing “/set nick” followed by a space and the new nick. Irssi will remember this setting in the future when you connect to a server.
Once you have set up your nick, you can join a channel. If you are new to IRC, you can find a list of Ubuntu-related channels at https://wiki.ubuntu.com/IRC/ChannelList . The Ubuntu support channels are good ways of getting technical support, but are busy and messages scroll by very quickly. The Ubuntu discussion channels are good places to chat with others on various Ubuntu and non-Ubuntu–related topics, and the Ubuntu team channels are places where work is actively done on Ubuntu, usually during Western European business hours. The local Ubuntu channels are run by Local Community teams, and are a good way to meet other Ubuntu users near you.
IRC channel names begin with a hash sign (#), and you can join a channel by typing “/join” followed by a space and then typing the channel name. For example, typing “/join #ubuntu-offtopic” will join the #ubuntu-offtopic channel. A new “window” will open in irssi, and you will see the channel topic and a list of users currently in the channel. Once you have joined the channel, you will see messages from other users. You can type a message and press Enter to send it to the channel. You can leave a channel by typing “/part” and pressing Enter.
This will appear in a new irssi window. To close a nonchannel window, you can type the “/win close” command.
Irssi uses separate windows to manage each channel. Window 1 is the status window and displays miscellaneous messages from the IRC server. The other windows display messages from channels or other users. You can switch windows by holding the Alt key while typing the number of the window. If this does not work, you can press and release the Escape key and then type the number of the window.
Ending your time on IRC is simple. “/part” can be used to close any channel, but “/disconnect” will close your connection with the IRC server. You can exit irssi with the “/quit” command.
IRC Etiquette
Every IRC network is independent and has its own rules, but IRC has been around for a very long time, and there are certain conventions that are unique to communicating this way. They can catch you by surprise at times, but here are some pointers that will help you while using the Ubuntu channels on Libera Chat.
The most important thing to remember is that most channels are run independently from the IRC network they are on. An IRC network might have certain guidelines—for example, Libera Chat exists to support Free and Open Source software development. Individual channels may have additional guidelines. In particular, IRC is known for being very irreverent, snarky, and sometimes hostile. The official Ubuntu channels all enforce the Ubuntu Code of Conduct and welcome new users.
IRC is an asynchronous communication method. That means that while real-time conversation isn’t uncommon, a lot of IRC users will keep their client connected while they are away and check in periodically. This is called “idling” in channel and means that not all of the users shown are actually paying attention to the channel. If you have a support question, but see no other messages, you can leave your IRC client running and check in later to see if there are responses. It may even take hours, but if someone knows an answer, they will see your message when they return to their computer. It may seem counterintuitive, but it’s better to ask a question in the public channel instead of sending a private message to an active user. He or she may be busy or may not have an answer, but the public message will be seen by more users.
A side effect of this is that other users generally won’t tell you if they don’t know an answer to a question. This doesn’t mean you are being ignored, but it does mean that they are being “polite” by staying quiet and allowing others to answer. Asking the same question repeatedly is seen as quite rude. On the other hand, many questions are very common. Sometimes asking a question will cause another user to type a “bot command” that causes an automated response, such as a pointer to another channel. This isn’t meant to be dismissive, but is a way to quickly provide you with standard information.
Many IRC users consider it rude to send a private message to someone you don’t know. While the /query command is useful and is a good way to continue off-topic conversations outside of a channel, it’s best to ask permission before using it to contact someone new.
Some channels are workplaces. Ubuntu developers live all over the world, and while the #ubuntu-devel channel is a very friendly place that is exciting to watch, sometimes developers are hard at work discussing the tasks they are working on. Sometimes when an active conversation is in progress, off-topic chatter can be a distraction. #ubuntu-offtopic is a channel that is always safe for random topics.
No matter the IRC channel, it’s helpful to read the channel topic and spend time observing the local “culture” and seeing how members treat each other. This will help you fit in and can prevent misunderstandings. For more information about the conduct expected while in official Ubuntu IRC channels and interacting with the community, please see https://wiki.ubuntu.com/IRC/Guidelines . It covers a lot of specific Ubuntu etiquette in detail.
Play Text-Based Games
Type your password when prompted, and press Enter. Ubuntu will provide a list of additional software that will be installed along with the software. Simply press Enter at the confirmation prompt to accept the default of “Yes,” and Ubuntu will download and install the software.

A screenshot of virtual raindrop symbols on the display screen. The octagons and squares are scattered on the screen as raindrops.
This is pretty close to what “rain” looked like on a real terminal, long ago
There are many other curious utilities as well. All of them can be ended immediately with Ctrl+C. The “bcd,” “ppt,” and “morse” commands translates typed input into computer punch cards, older paper tape, or morse code. You can create large banners that could be printed on an old line printer or dot-matrix printer using continuous feed paper with “printerbanner”. “arithmetic” and “quiz” are memory tests. The command “pom” prints the current phase of the moon.
Other programs are full-fledged games. The “backgammon” game simulates the famous board game, and even contains rules and a tutorial you can use to learn to play. The game “monop” is very similar to a certain real estate board game, with the same rules, and can be played with multiple players. “canfield”, “cribbage”, and “go-fish” are the popular card games of the same name, and “hangman” and “worm” are other famous games. Notably, “worm” is the famous growing snake game made popular on early cell phones, but it moves much more slowly and is less stressful.
Other games are more elaborate. “ tetris-bsd ” is a falling block game, and used to require a fast modem to play. In the mid-1990s, some Linux installers would take an hour or more to install the operating system once it started copying packages. Some of them provided a running copy of this game on a second virtual console which could be played while you waited.
One of the most interesting games is Adventure, which is famous as the first interactive text adventure game to use natural language input. Running “adventure” places you on a path in the woods, between a brick shed and a stream. By typing in movement directions such as “north” or “go building,” the computer describes your surroundings. You can pick up and use items, and by following the stream south, you reach a grated entrance to Colossal Cave, filled with treasure, mystery, and danger. By exploring and solving puzzles, you progress through the game. It’s worth playing, because it is the direct ancestor of later graphical adventure games such as Beneath A Steel Sky featured in Chapter 4. A later text adventure game is also included, called “battlestar.” It has a very distinct feel from Adventure and is interesting in its own right.
Adventure’s cave is very closely based on Bedquilt Cave in Kentucky, but another very popular style of game became popular in 1980. A game called “Rogue” allowed you to explore a series of dungeon levels that were randomly generated with each game. Others wrote copies of this game, adding features or taking inspiration from other sources. The most widespread clone or “rogue-like” game was called Hack. Running “hack” drops you into a dungeon with a pet. Together you must explore to the bottom of the dungeon to find a mysterious amulet, and survive the climb back to the top. The game prints a map of your surroundings represented by text characters, and you are only aware of objects in your line of sight, causing the game to expand and unfold as you explore. You’ll need to use the “?” key to access the in-game help to teach you the movement keys and other actions available.

A screenshot of the Ubuntu window displays the net hack game. The display screen presents a series of designs using dots, lines, and hashtags.
Nethack dungeons are revealed as you explore—as are the true natures of the items you find
Type your password when prompted, and press Enter. Ubuntu will provide a list of additional software that will be installed along with the software. Simply press Enter at the confirmation prompt to accept the default of “Yes,” and Ubuntu will download and install the software.
Hack and Nethack use symbols to stand in for many different objects. You can use the slash (/) key to display a prompt where you can type a symbol and see what it stands for. In Nethack, you can use the cursor to highlight and identify an object on the map instead of typing the symbol. As you explore, you’ll find many items that you can use. Armor can be worn; weapons can be wielded. And as you move, you’ll need to eat and drink. Food can be eaten and water drank, but your supplies will wear thin. Sometimes you’ll find shops where you can buy items. Most of the time your adventurer will die suddenly. But each new game promises a unique experience, and plenty of surprises.
The bsdgames package fits a lot of entertainment into 2.5 MB of disk space. Some games stand the test of time, and others are now more interesting as peeks into an earlier time. But they shaped the free time and culture of the early Unix users that predated Linux and Ubuntu. And they are fun rewards for learning to use the command line.
Summary
The Linux command line isn’t as difficult or scary as it’s made out to be. While full mastery takes time and patience, there are many tasks that are easier or faster when performed with a text interface. Many commands offer easy-to-read output, and the results can be copied and saved or sent to a file or another program for further processing. And you can use the command line to tell the computer exactly what you want it to do, often saving time and frustration. When you’re comfortable on the command line, you have the ability to take advantage of a new way to interact with your computer whenever it is more convenient.