
Views
Objects such as buttons, labels, text boxes, and switches
Segues

The three parts of an iOS app user interface
The Single View App template that we used to create an app in Chapter 1 consists of a single view and no objects. Since there’s also only one view, there are no segues because segues connect two views together to show the order that each view appears when the app runs.
Programmatically
Visually
Programmatically means writing code to do everything. In the case of creating objects that appear on a view, this means writing Swift code to define the object you want to display, its size, its position on the view, and any other custom settings such as its color.
Visually means using the mouse to drag and drop objects on a view. After placing an object on a view, you can then modify its size, position, or any other attribute without writing any code at all.
You can use one or both methods, but it’s generally best to use one method for consistency. Also while you can create an entire user interface by writing code (programmatically), it’s generally best not to do so because the less code you write, the easier it will be to modify and debug your program. The goal of programming is to write as little code as possible that does as much as possible.
- 1.
Open your MyFirstApp project (or create a new Single View App iOS project).
- 2.
Click the ViewController.swift file in the Navigator pane. The middle Xcode pane displays the contents of the ViewController.swift file.
- 3.Modify the code in the ViewController.swift file so it looks like this:import UIKitclass ViewController: UIViewController {override func viewDidLoad() {super.viewDidLoad()let label = UILabel()label.frame = CGRect(x: 125, y: 125, width: 200, height: 80)label.text = "This is a label"view.addSubview(label)let button = UIButton()button.frame = CGRect(x: 125, y: 300, width: 80, height: 80)button.setTitle("Button", for: .normal)button.setTitleColor(UIColor.blue, for: .normal)view.addSubview(button)}}
- 4.Choose Project ➤ Run or press Command + R. Xcode loads the Simulator program that lets you simulate an iOS device. When your app loads in the Simulator, it will display a label and a button as shown in Figure 2-2.
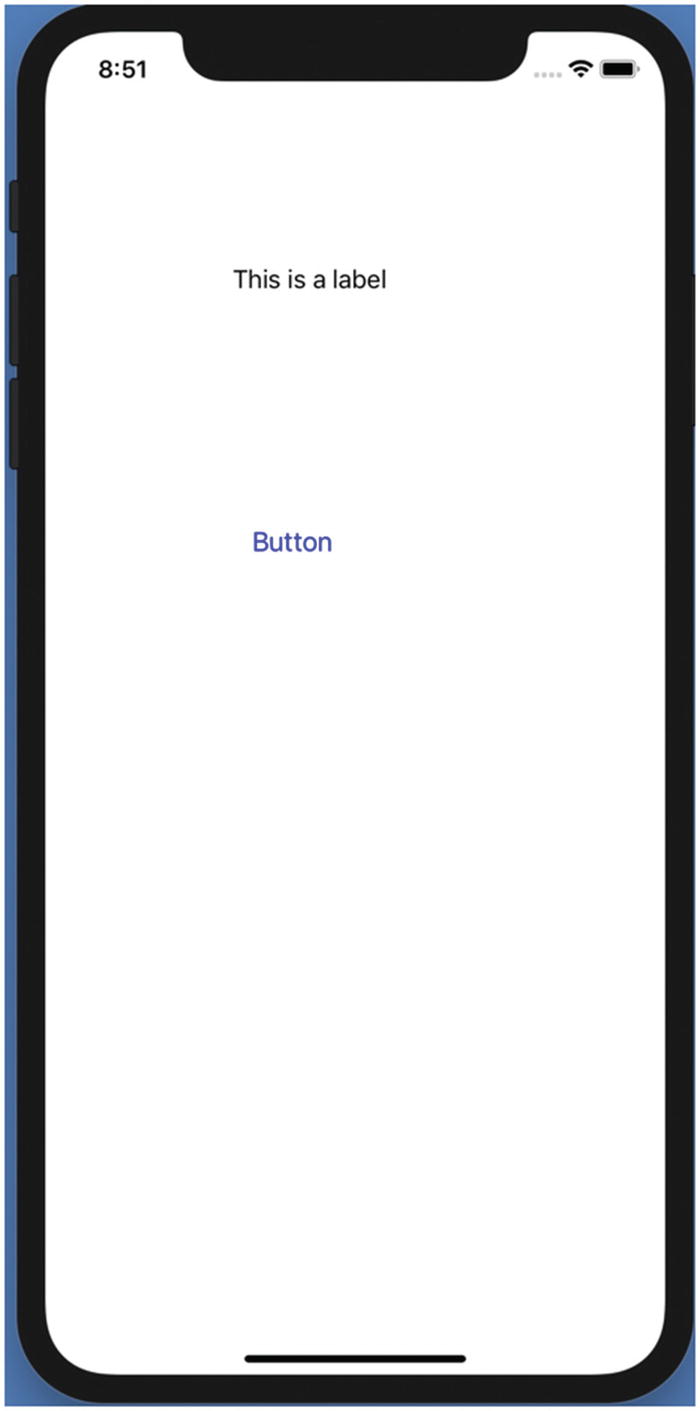 Figure 2-2.
The user interface displaying a label and a button, created programmatically
- 5.
Choose Simulator ➤ Quit Simulator or press Command + Q. The Xcode window appears again.
The first line of code defines the label to appear 125 points from the left side of the screen and down 125 points from the top of the screen. It also defines the width of the label to be 200 and the height to be 21.
The second line of code defines the button to appear 125 points from the left side of the screen and down 300 points from the top of the screen. It also defines the width of the button to be 80 and the height to be 30.
- 1.
Click the ViewController.swift file in the Navigator pane. The middle Xcode pane displays the contents of the ViewController.swift file.
- 2.Modify the ViewController.swift file so it looks like this:import UIKitclass ViewController: UIViewController {override func viewDidLoad() {super.viewDidLoad()}}
- 3.
Click the Main.storyboard file in the Navigator pane. Xcode displays the storyboard that contains the user interface, which consists of a single, blank view.
- 4.Click the Library icon. The Objects Library window appears, listing all the different objects you can add to your user interface as shown in Figure 2-3.
 Figure 2-3.
The Objects Library lets you choose an object to place on a view
- 5.Scroll through the Objects Library list until you find Label, or just click in the search field at the top of the Objects Library window, type label, and press ENTER. The Objects Library window displays the Label object as shown in Figure 2-4.
 Figure 2-4.
Searching for a Label object in the Objects Library window
- 6.
Drag and drop the Label object from the Objects Library window to the view. As you drag the label, the Objects Library window disappears. When you release the left mouse button, the label appears on the view. We can resize and move the label to position it, but if you want to define precise values, you’ll need to use the Inspector pane.
- 7.
Click the label to select it. Handles appear around the label to show it’s selected.
- 8.
Choose View ➤ Inspectors ➤ Show Attributes Inspector (or click the Show the Attributes Inspector icon at the top of the Inspector pane).
- 9.Click in the text field that appears above the Color popup menu and type This is a label and press ENTER as shown in Figure 2-5. The Attributes Inspector pane lets us customize the text in a label. Now let’s define the label’s size and position.
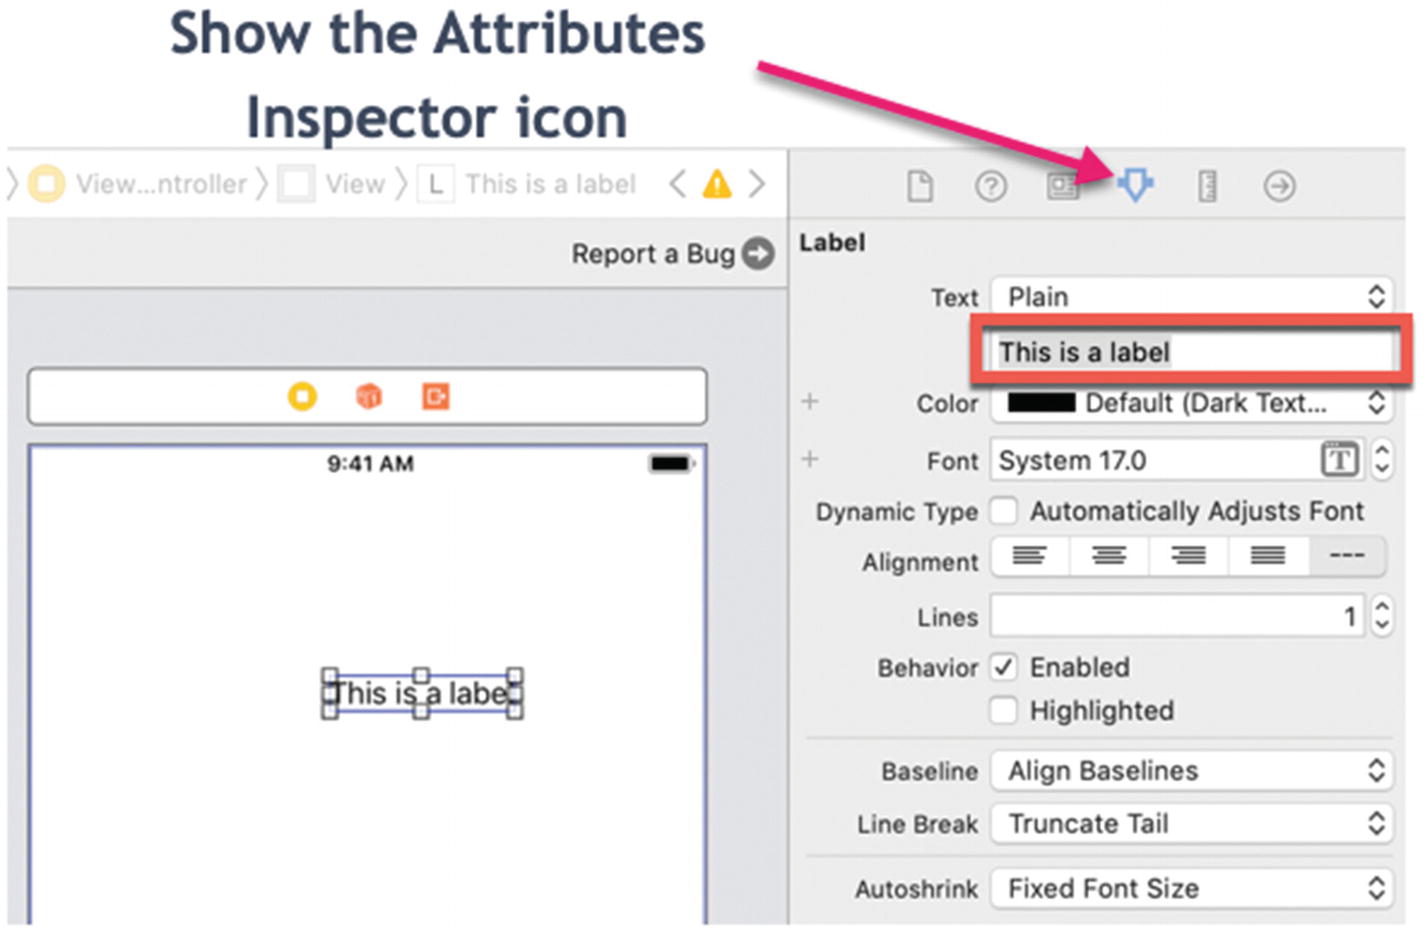 Figure 2-5.
Customizing the text that appears on a label using the Attributes Inspector pane
- 10.
Choose View ➤ Inspectors ➤ Show Size Inspector (or click the Show the Size Inspector icon). The Size Inspector pane appears.
- 11.
Click in the X text field and type 125. Then click in the Y text field and type 125.
- 12.Click in the Width text field and type 200. Then click the Height text field and type 21. Press ENTER. This defines the size and position of the label as shown in Figure 2-6.
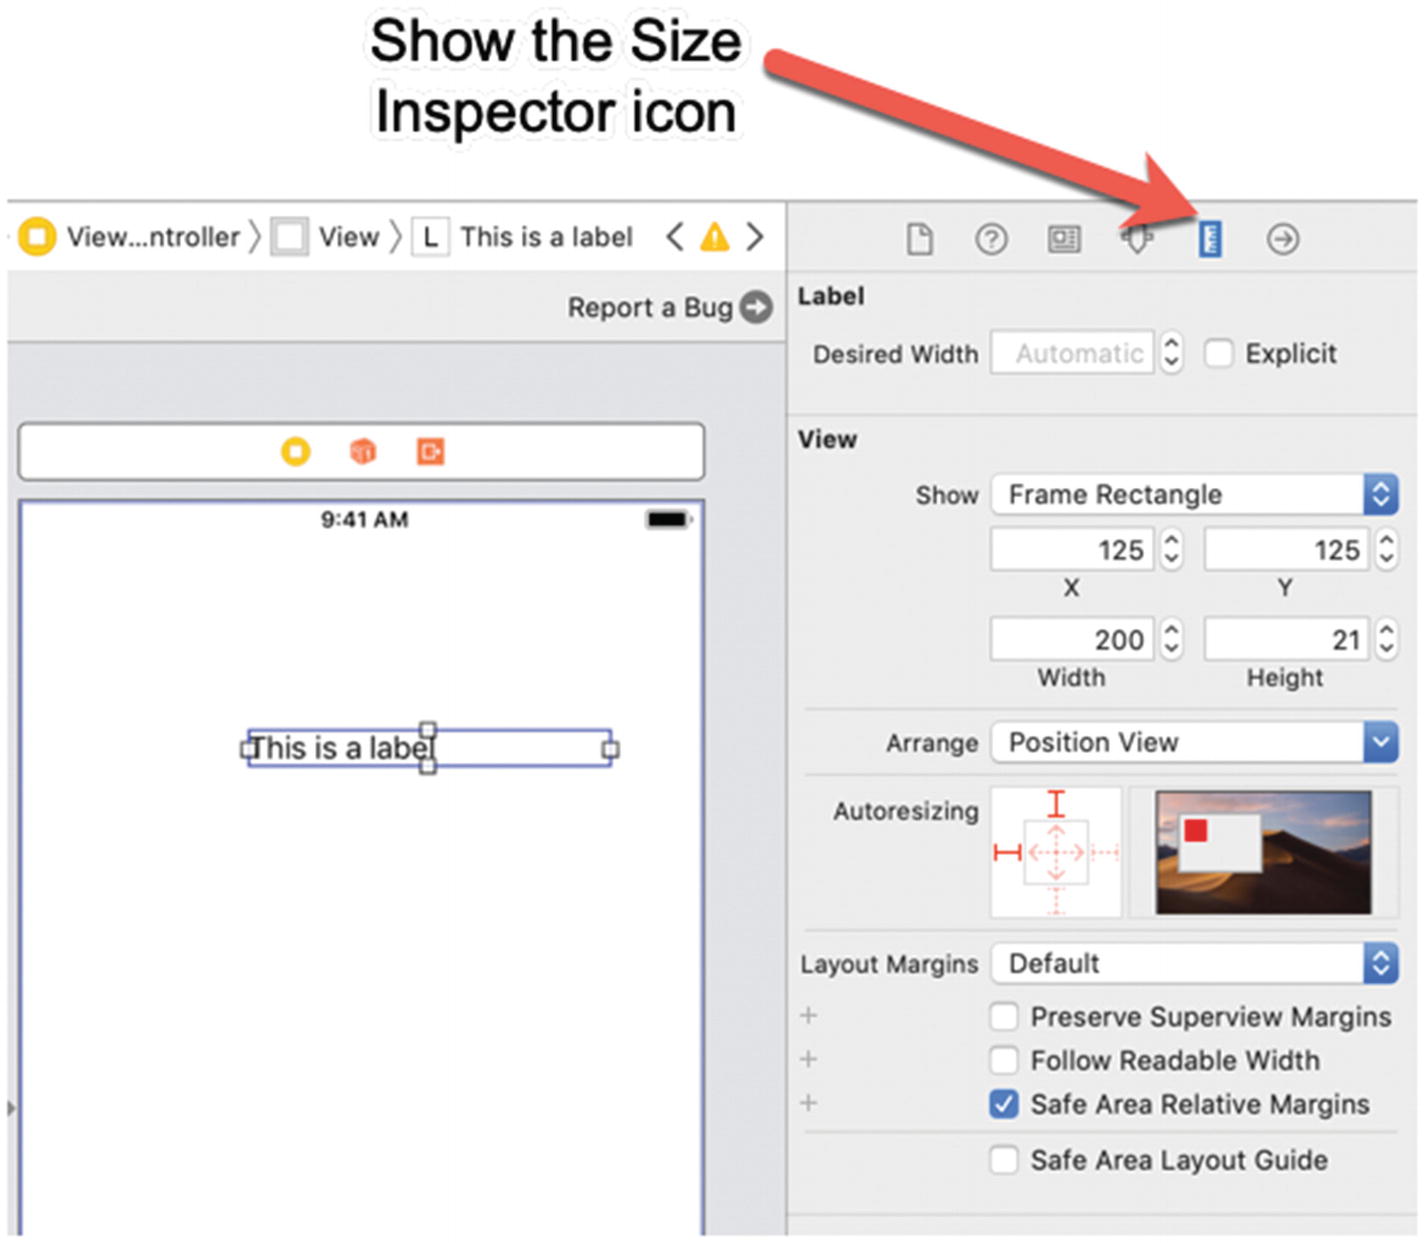 Figure 2-6.
Defining the size and position of a label using the Size Inspector pane
- 13.
Click the Library icon. The Objects Library window appears, listing all the different objects you can add to your user interface (see Figure 2-3).
- 14.Scroll through the Objects Library list until you find Label, or just click in the search field at the top of the Objects Library window, type button, and press ENTER. The Objects Library displays the Button object as shown in Figure 2-7.
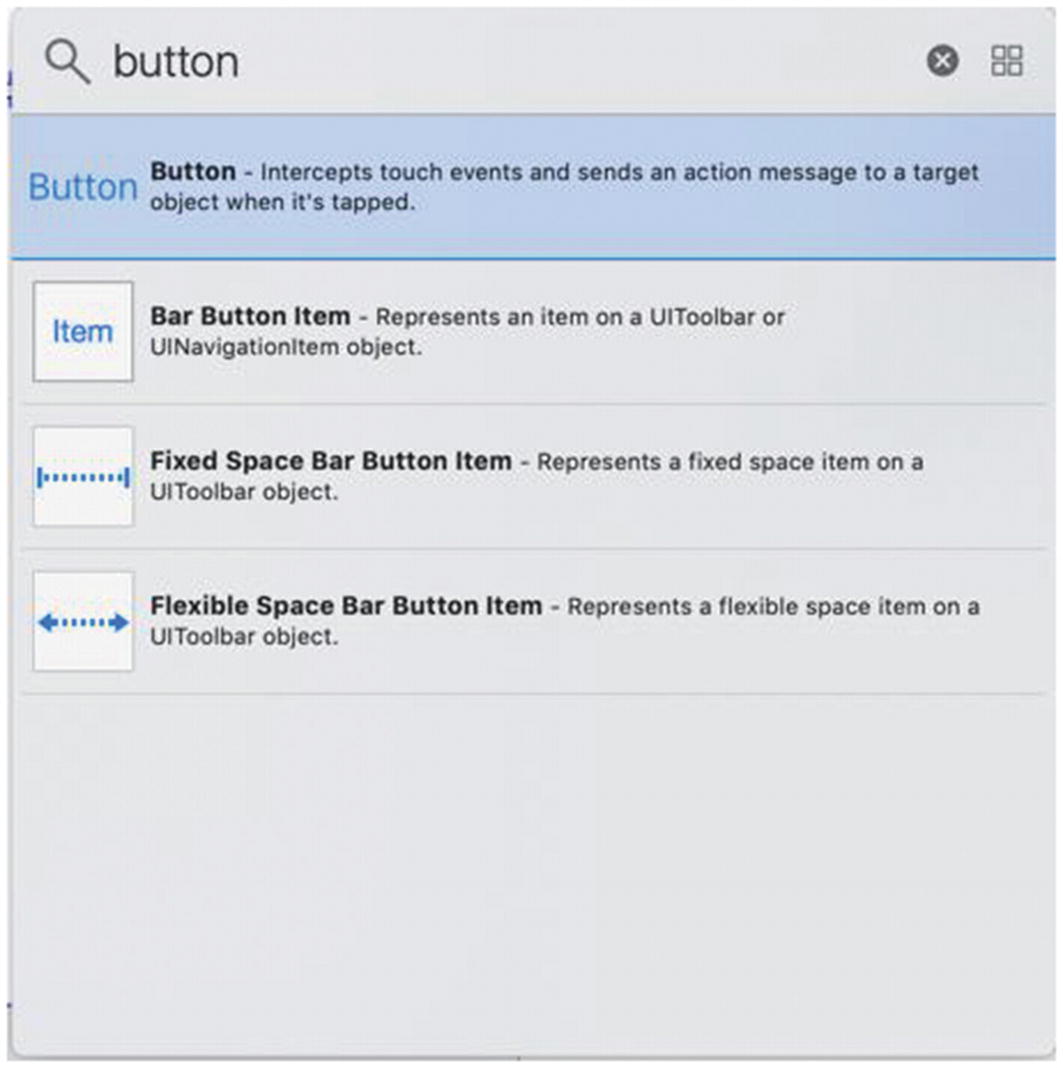 Figure 2-7.
Searching for a Button object in the Objects Library window
- 15.
Drag and drop the Button object from the Objects Library window to the view. As you drag the button, the Objects Library window disappears. When you release the left mouse button, the button appears on the view.
- 16.
Click the button to select it. Handles appear around the button to show it’s selected.
- 17.Choose View ➤ Inspectors ➤ Show Attributes Inspector (or click the Show the Attributes Inspector icon at the top of the Inspector pane). Notice that the Attributes Inspector pane already displays the word “Button” on the button and displays it in blue as shown in the Text Color popup menu in Figure 2-8.
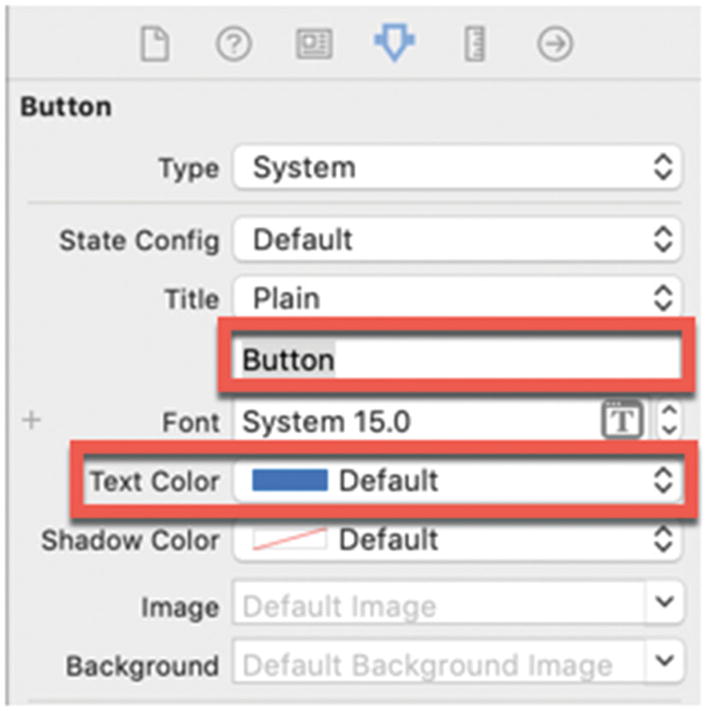 Figure 2-8.
Customizing the text and color that appears on a button using the Attributes Inspector pane
- 18.
Choose View ➤ Inspectors ➤ Show Size Inspector (or click the Show the Size Inspector icon). The Size Inspector pane appears.
- 19.
Click in the X text field and type 125. Then click in the Y text field and type 300.
- 20.
Click in the Width text field and type 80. Then click the Height text field and type 30. Press ENTER. This defines the size and position of the button.
- 21.
Choose Project ➤ Run or press Command + R. Xcode loads the Simulator program that lets you simulate an iOS device. When your app loads in the Simulator, it will display a label and a button.
- 22.
Choose Simulator ➤ Quit Simulator or press Command + Q. The Xcode window appears again.
- 23.
Choose File ➤ Save to save your project.
Notice that when you create objects on the user interface programmatically, you had to write code to do everything from creating the object to defining its size and position, to placing it on the view. On the other hand, designing a user interface visually means dragging and dropping objects on a view and then resizing or moving them using the mouse. Then to define the appearance, exact size, and position of an object, you can open the Attributes Inspector and Size Inspector to choose specific values.
Many Xcode projects combine both methods for creating a user interface. While it’s generally easier to create user interfaces visually, you need to be familiar with writing code to create user interfaces programmatically because you may see this in projects created by others.
Learning About Views and Class Files
The most important part of any app’s user interface is a view, which displays information on an iOS device’s screen. The simplest app contains just one view but most apps contain multiple views. You can easily add or delete views from a project. While a view contains user interface objects such as buttons and text fields, you may wonder how does a view store data that a user might type in from the user interface. The answer is that each view needs a class file that contains Swift code that can store data and handle interactions such as the user tapping a button.
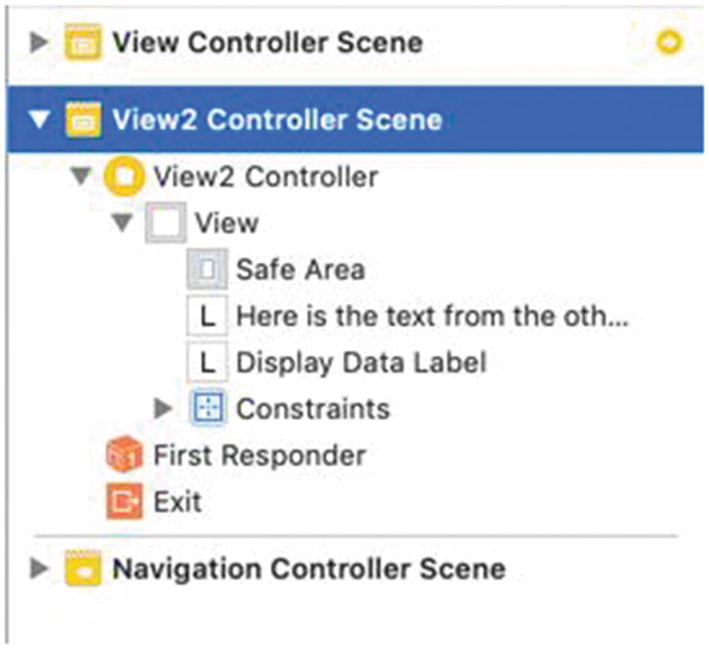
The Document Outline makes it easy to find and view scenes

You can select a controller in the Document Outline or in the storyboard
Within each controller is typically a view, which defines what appears on the screen when the app runs. Objects such as buttons or labels appear on the view, so if you delete a view, you also delete any objects stored on that view.
- 1.Click the AppDelegate.swift file in the Navigator pane. Xcode’s middle pane displays the contents of the AppDelegate.swift file. You’ll notice several functions already created for you that contain no code. These functions let you handle different conditions when your app runs:
didFinishLaunchingWithOptions – Runs after your app starts
applicationWillResignActive – Runs before your app no longer remains the active app on the screen
applicationDidEnterBackground – Runs as soon as your app is pushed into the background so the user can use a different app
applicationWillEnterForeground – Runs right before your app becomes active again on the screen
applicationDidBecomeActive – Runs after the app becomes active on the screen
applicationWillTerminate – Runs right before your app closes
In many cases, you won’t need to write code for all of these functions. For example, you may want your app to save data before it closes (applicationWillTerminate) and then you may want your app to retrieve data again when it first starts (didFinishLaunchingWithOptions). The AppDelegate.swift file is where you write Swift code to control your app’s behavior.
- 2.
Click the Main.storyboard file in the Navigator pane. Xcode displays your user interface. Make sure the Document Outline appears. (You can toggle between showing and hiding the Document Outline by choosing Editor ➤ Show/Hide Document Outline or by clicking the Document Outline icon.)
- 3.
Click the controller icon either in the Document Outline or in the storyboard (see Figure 2-10).
- 4.Choose View ➤ Inspectors ➤ Show the Identity Inspector, or click the Show the Identity Inspector icon at the top of the Inspector pane. Notice that the Class text field displays the text ViewController as shown in Figure 2-11. This name refers to the ViewController.swift file in the Navigator pane and links the controller to the file named ViewController.swift. You can always change the name of your files, but if you change a file name, you must also make sure any controllers use the correct file name.
 Figure 2-11.
The Identity Inspector lets you link .swift files to a controller
- 5.Choose View ➤ Inspectors ➤ Show Attributes Inspector, or click the Show the Attributes Inspector icon as shown in Figure 2-12.
 Figure 2-12.
The Attributes Inspector lets you customize how the scene appears
- 6.Click View in the Document Outline. Notice how the Attributes Inspector pane now displays different options for customizing the view as shown in Figure 2-13.
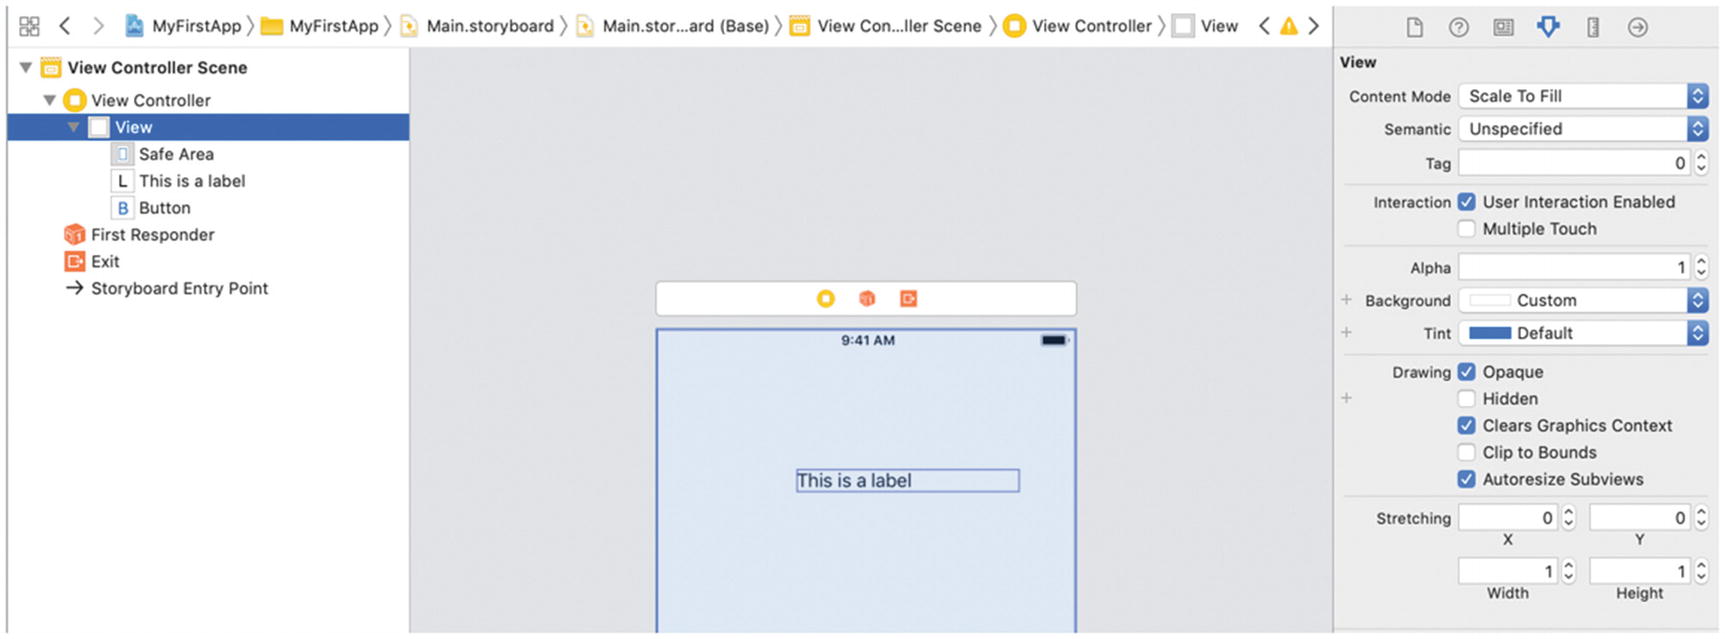 Figure 2-13.
The Attributes Inspector lets you customize how the view appears
- 7.Click the label in the Document Outline. (You can also select the label by clicking it directly in the storyboard.) Notice how the Attributes Inspector pane now displays options for customizing the label as shown in Figure 2-14.
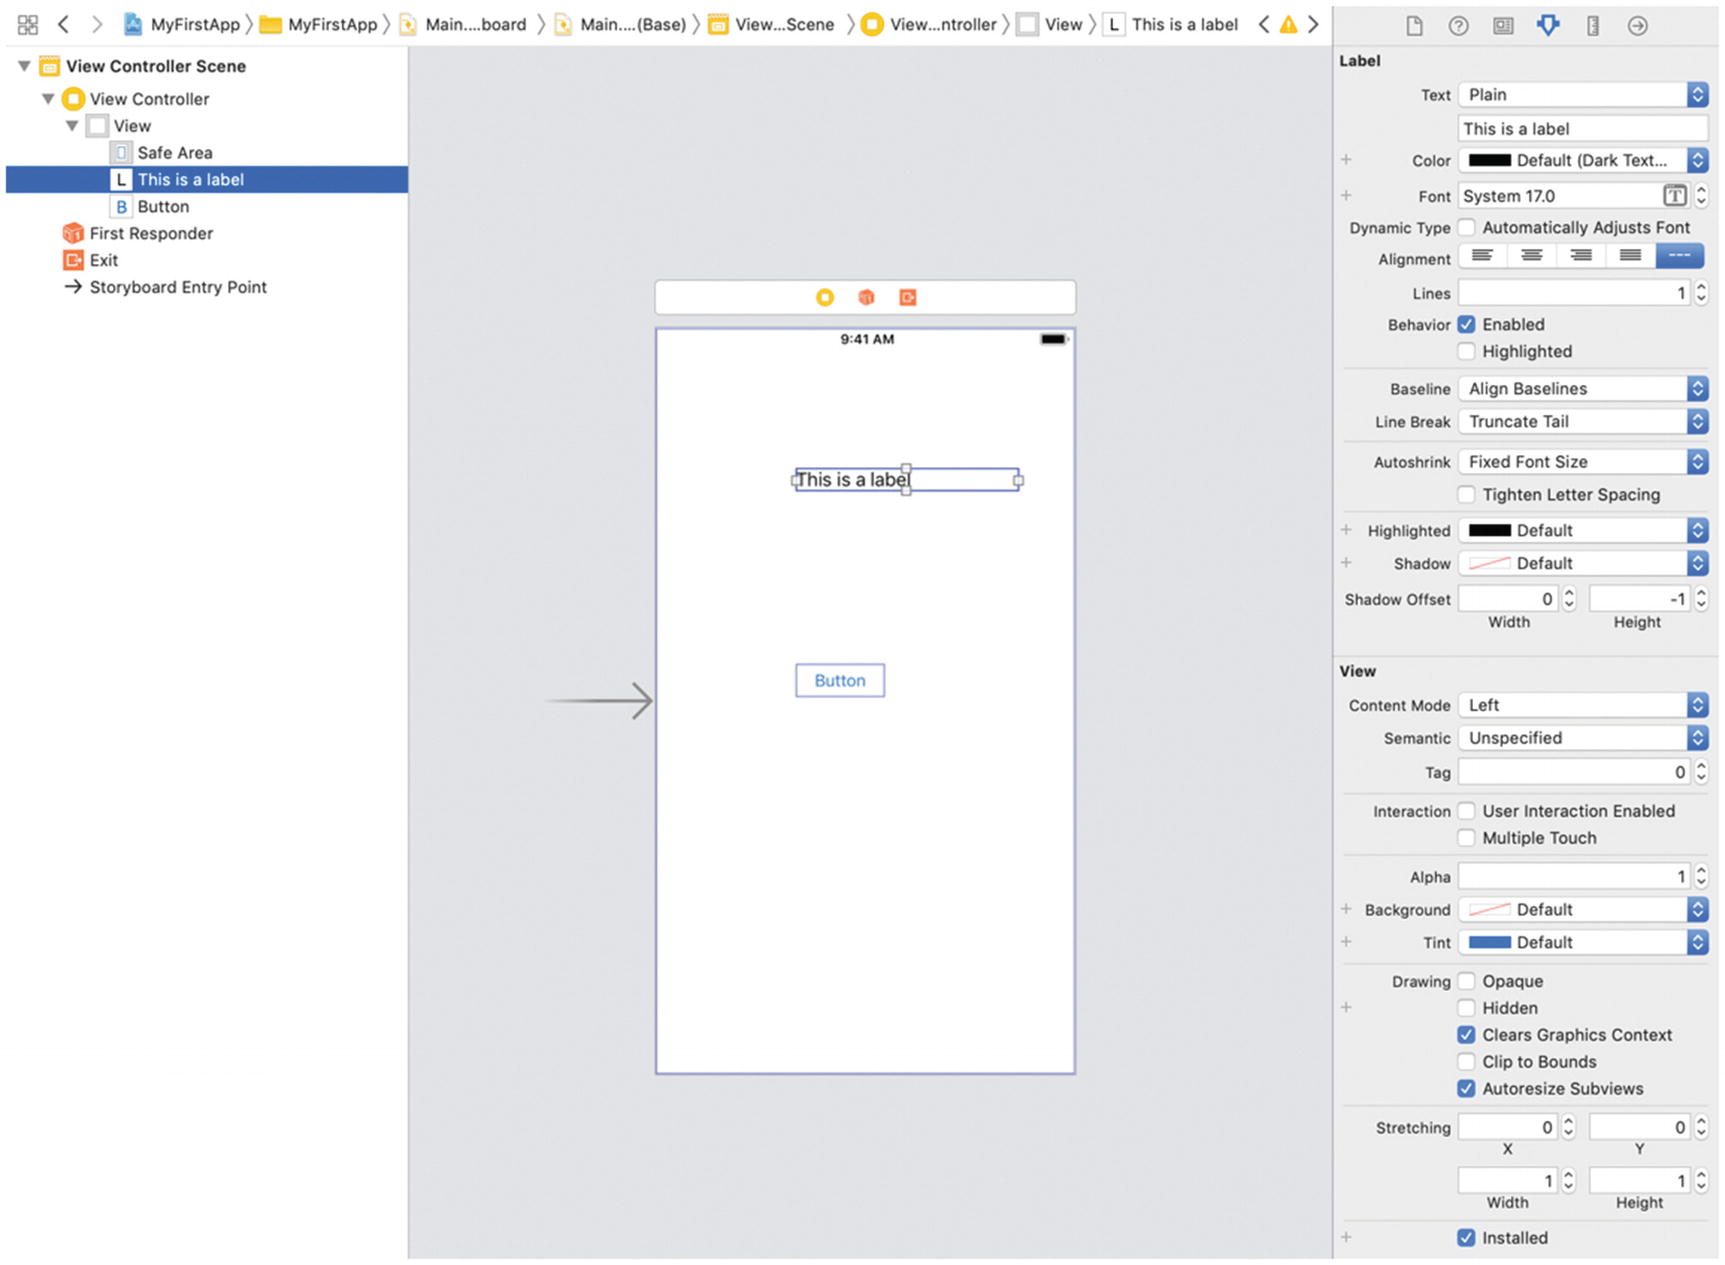 Figure 2-14.
Displaying the Attributes Inspector for a label
- 8.Click the button in the Document Outline. (You can also select the button by clicking it directly in the storyboard.) Notice how the Attributes Inspector pane now displays options for customizing the button as shown in Figure 2-15.
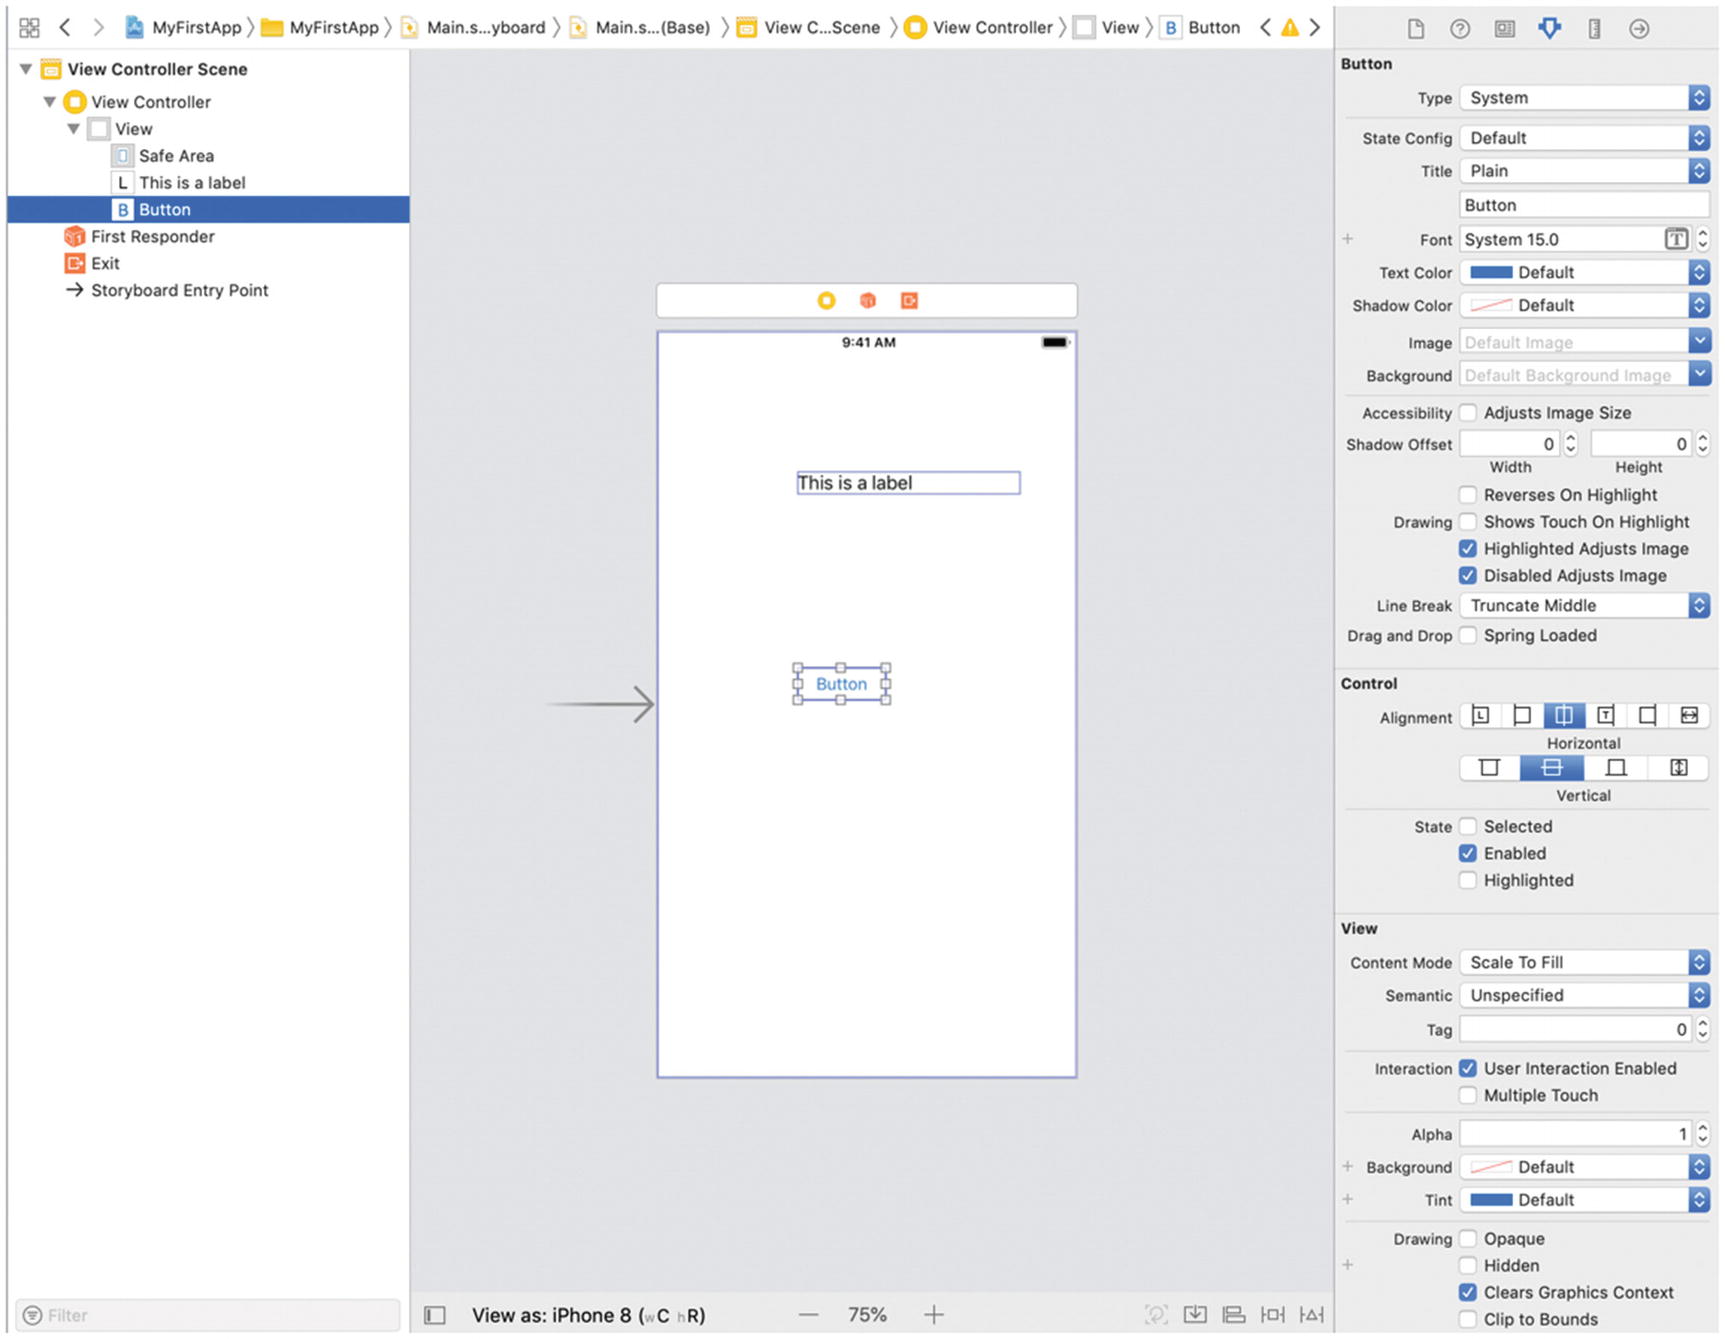 Figure 2-15.
Displaying the Attributes Inspector for a button
At this point you’ve seen how to use the Document Outline and the different Inspector panes. The main point is that every storyboard scene has a controller, and every controller needs to be linked to a .swift file. In our Single View App, we just have a single scene.
The controller is given a generic name of View Controller and it’s linked to a .swift file called ViewController.swift. When creating your own app, you’ll likely want to give both your controller and its linked .swift file a more descriptive name.
- 1.
Click the Main.storyboard file in the Navigator pane.
- 2.
Make sure the Document Outline appears by choosing Editor ➤ Show Document Outline or click the Document Outline icon.
- 3.Click a controller displayed in the Document Outline and press ENTER. Xcode highlights the controller name as shown in Figure 2-16. Now you can edit the controller name by using the arrow keys or BACKSPACE and DELETE keys.
 Figure 2-16.
You can edit a controller name in the Document Outline by pressing ENTER
Selecting items and pressing ENTER also lets you change the names of files displayed in the Navigator pane or in the macOS Finder as well.
Working with Different Screen Sizes
When you design a user interface, you have to choose the iOS device screen and orientation such as an iPhone 8 in portrait orientation or an iPad in landscape orientation. Since your iOS app might be run on different iOS devices, you need to test your app on all different screen sizes and orientations.
Click the “View as:” text at the bottom of the Xcode window and choose a different iOS device screen size and orientation.
Choose a different iOS device and orientation for the Simulator to mimic.
Preview your views in Xcode.
The first option (clicking the “View as:” text) lets you quickly switch between different iOS screen sizes and orientations. The second option (using the Simulator) lets you test your app as if it were running in an actual iOS device.
- 1.
Make sure you have loaded your MyFirstApp project in Xcode.
- 2.
Click the Main.storyboard file in the Navigator pane. Xcode displays the storyboard of your project.
- 3.Click the “View as:” text at the bottom of the Xcode window to display the different iOS device and orientation options as shown in Figure 2-17.
 Figure 2-17.
Choosing a different iOS device screen size and orientation
- 4.Click an iPad Pro icon. Notice that Xcode changes the storyboard to match the size of an iPad Pro screen as shown in Figure 2-18. (You may need to click the minus sign icon to lower the magnification so you can see the entire iPad Pro screen.)
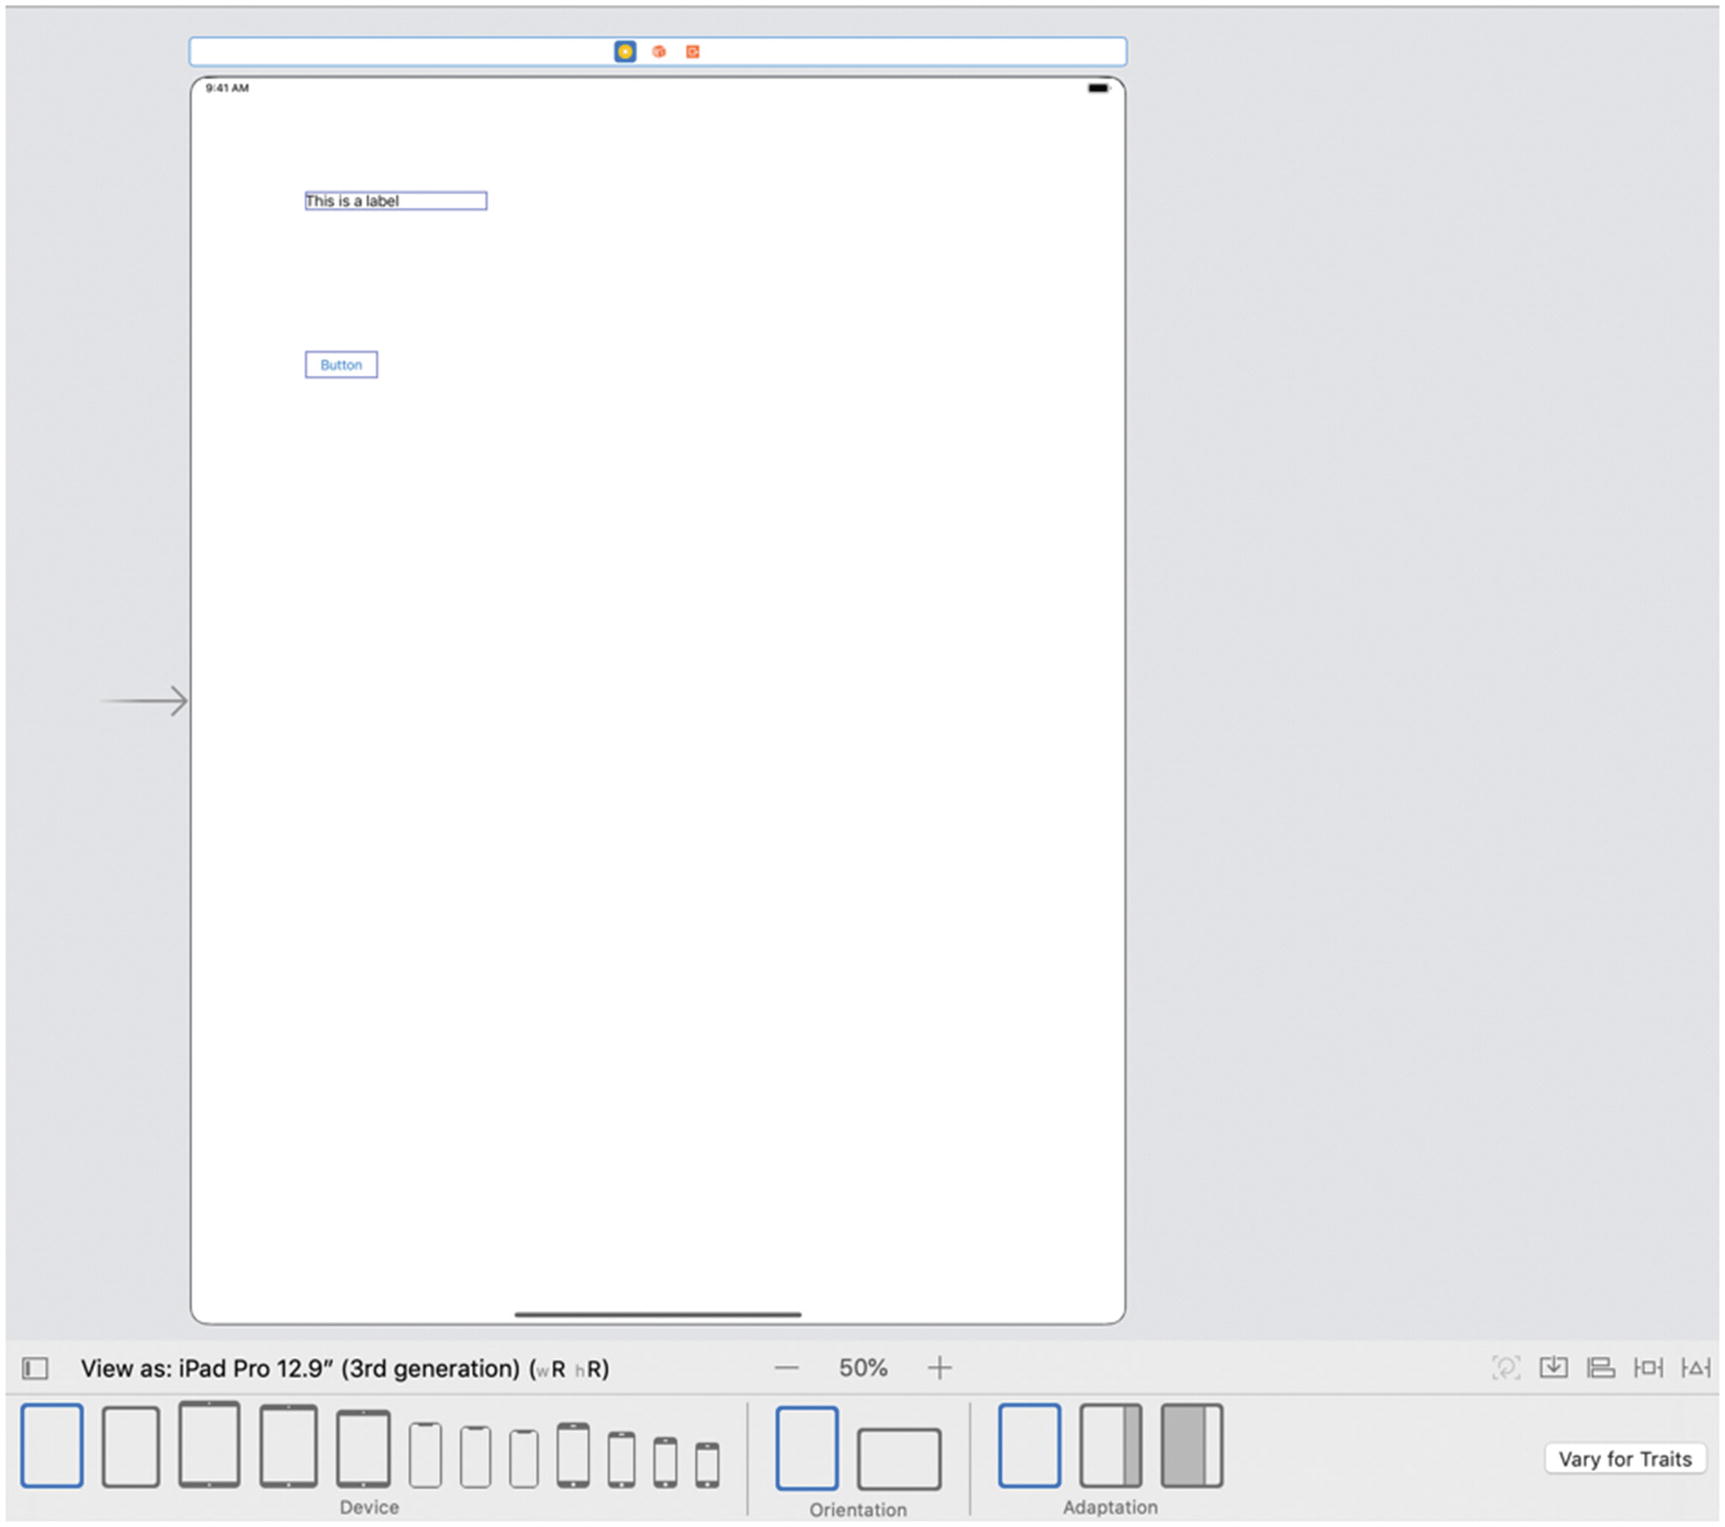 Figure 2-18.
Viewing the app user interface on an iPad Pro screen
- 5.Click the smaller iPhone SE icon. Notice how Xcode now displays your user interface to show how it would appear on the smaller iPhone SE screen as shown in Figure 2-19.
 Figure 2-19.
Viewing the app user interface on a smaller iPhone SE screen
- 6.Look in the upper left corner of the Xcode window for the name of your project (MyFirstApp) followed by the name of an iOS device such as iPhone XR as shown in Figure 2-20.
 Figure 2-20.
Identifying the type of iOS device the Simulator will mimic
- 7.Click the name of the currently displayed iOS device in the upper left corner of the Xcode window. A menu of different iOS devices appears as shown in Figure 2-21.
 Figure 2-21.
Viewing different iOS devices for the Simulator to mimic
- 8.
Click a different iOS device than the one currently displayed in the upper left corner of the Xcode window such as iPad Air or iPhone 8 Plus. Once you choose an iOS device for the Simulator to mimic, you need to run the Simulator.
- 9.
Choose Product ➤ Run, press Command + R, or click the Run icon. The Simulator window appears, mimicking your chosen iOS device.
- 10.Click the Hardware menu and you’ll see options to change the orientation of the iOS device such as Rotate Left or Rotate Right as shown in Figure 2-22.
 Figure 2-22.
The Hardware menu of the Simulator program
- 11.
Choose Simulator ➤ Quit Simulator. The Xcode window appears again.
By viewing your user interface in different iOS device screen sizes and orientations, you can make sure your app appears correctly. Since you likely won’t have every possible iOS device available to test your app on, you’ll have to rely on Xcode and the Simulator program to help you verify that your app looks the way it should no matter what screen size and orientation a user might have.
Previewing the User Interface
Another way to see how your app will look on different iOS device screen sizes is to use the Preview feature. This lets you select a controller in the storyboard and then see how that controller will look in different types of iOS devices.
- 1.
Make sure you have loaded your MyFirstApp project in Xcode.
- 2.
Click the Main.storyboard file in the Navigator pane.
- 3.Choose View ➤ Assistant Editor ➤ Show Assistant Editor or click the Assistant Editor icon. Xcode displays the Main.storyboard file side by side with the ViewController.swift file as shown in Figure 2-23.
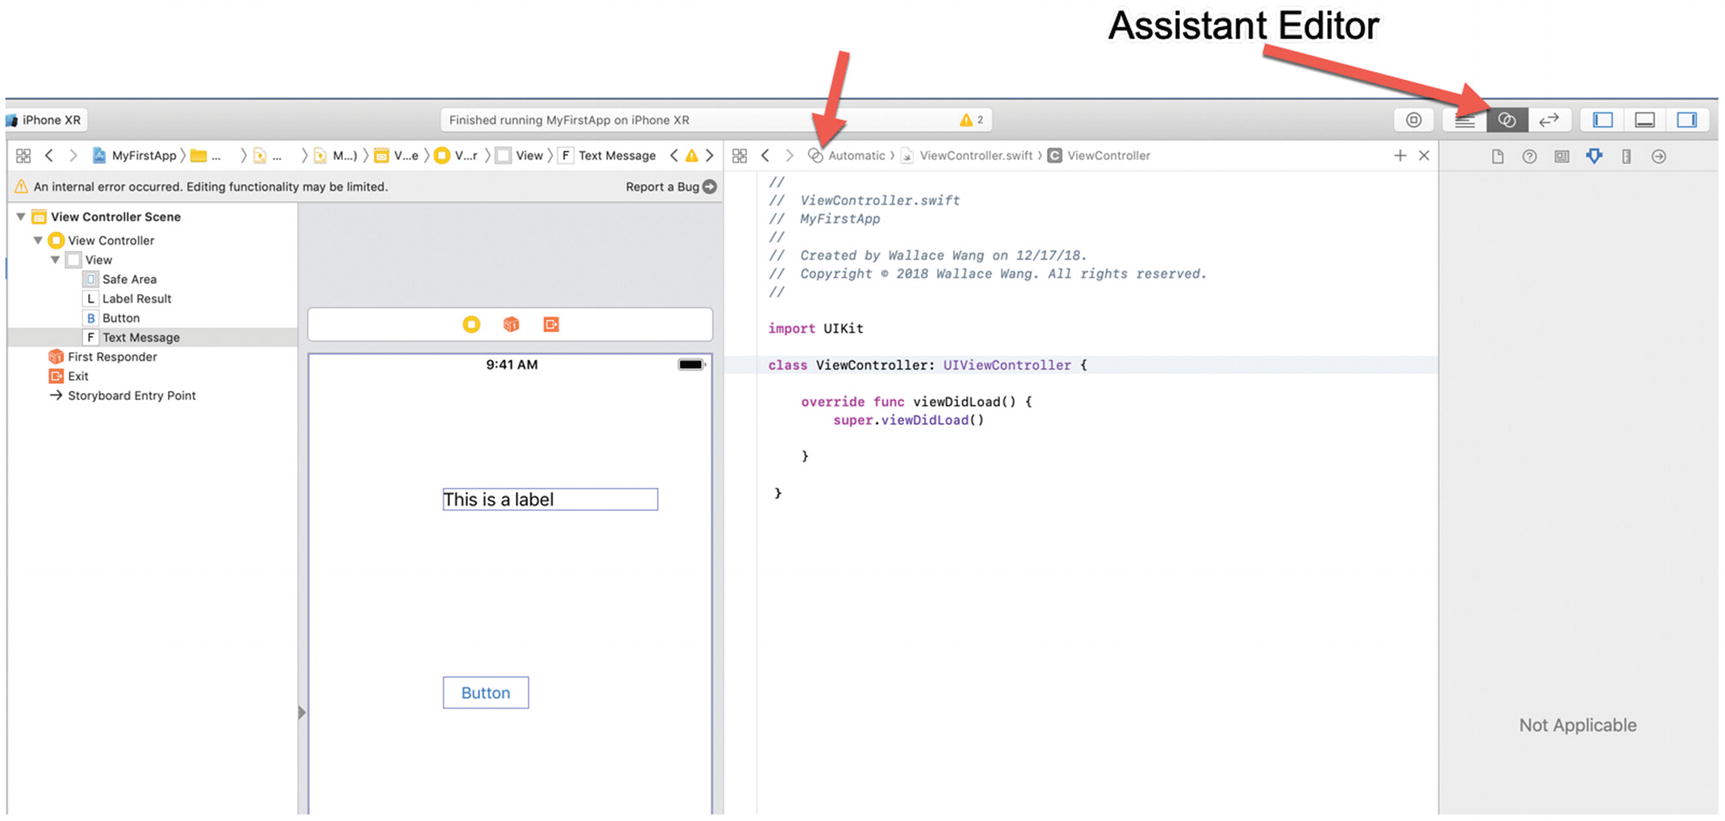 Figure 2-23.
Opening the Assistant Editor
- 4.Click the double circles that appear at the top of the .swift file. A menu appears as shown in Figure 2-24.
 Figure 2-24.
Displaying the double circle menu
- 5.Choose Preview ➤ Main.storyboard (Preview). Xcode displays your user interface in the current iOS device you’ve chosen as shown in Figure 2-25.
 Figure 2-25.
Previewing a user interface
- 6.Click the Add Device icon (+). A menu appears, listing all the different iOS devices you can choose as shown in Figure 2-26.
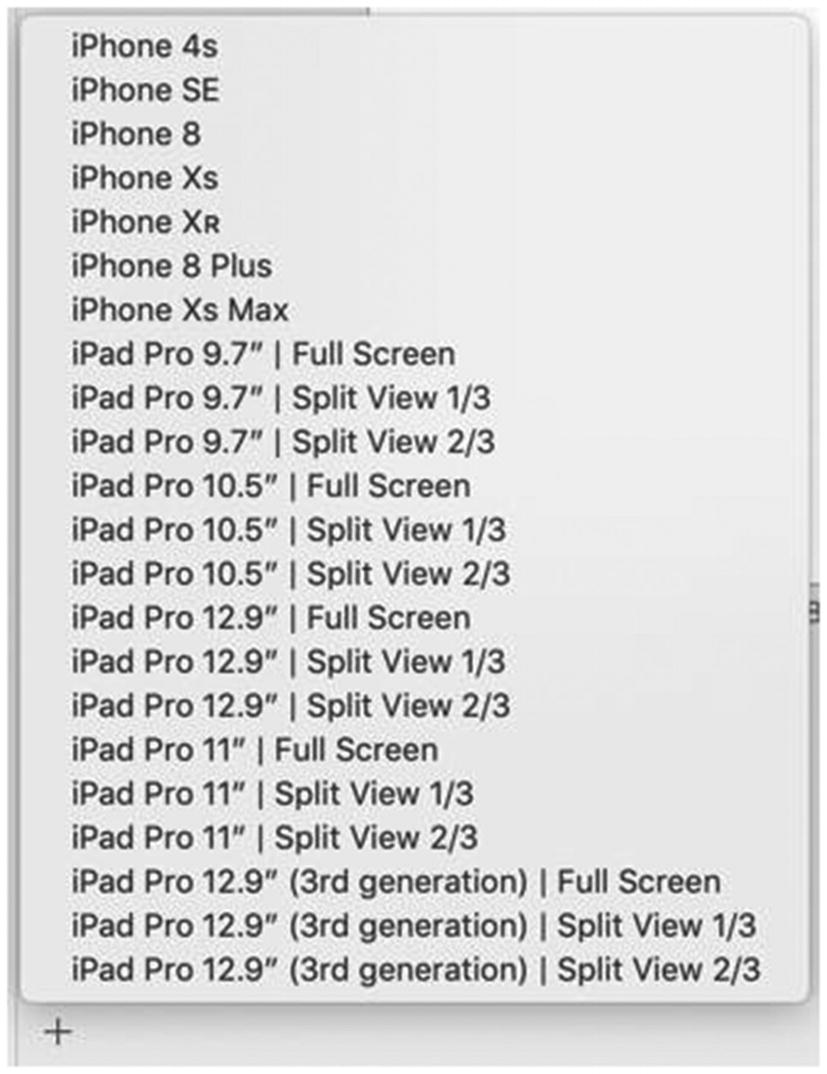 Figure 2-26.
The Add Device icon displays a menu listing different iOS devices to preview a user interface
- 7.Click an iOS device such as an iPad Pro. The Preview pane shows what your user interface would look like in your chosen device as shown in Figure 2-27.
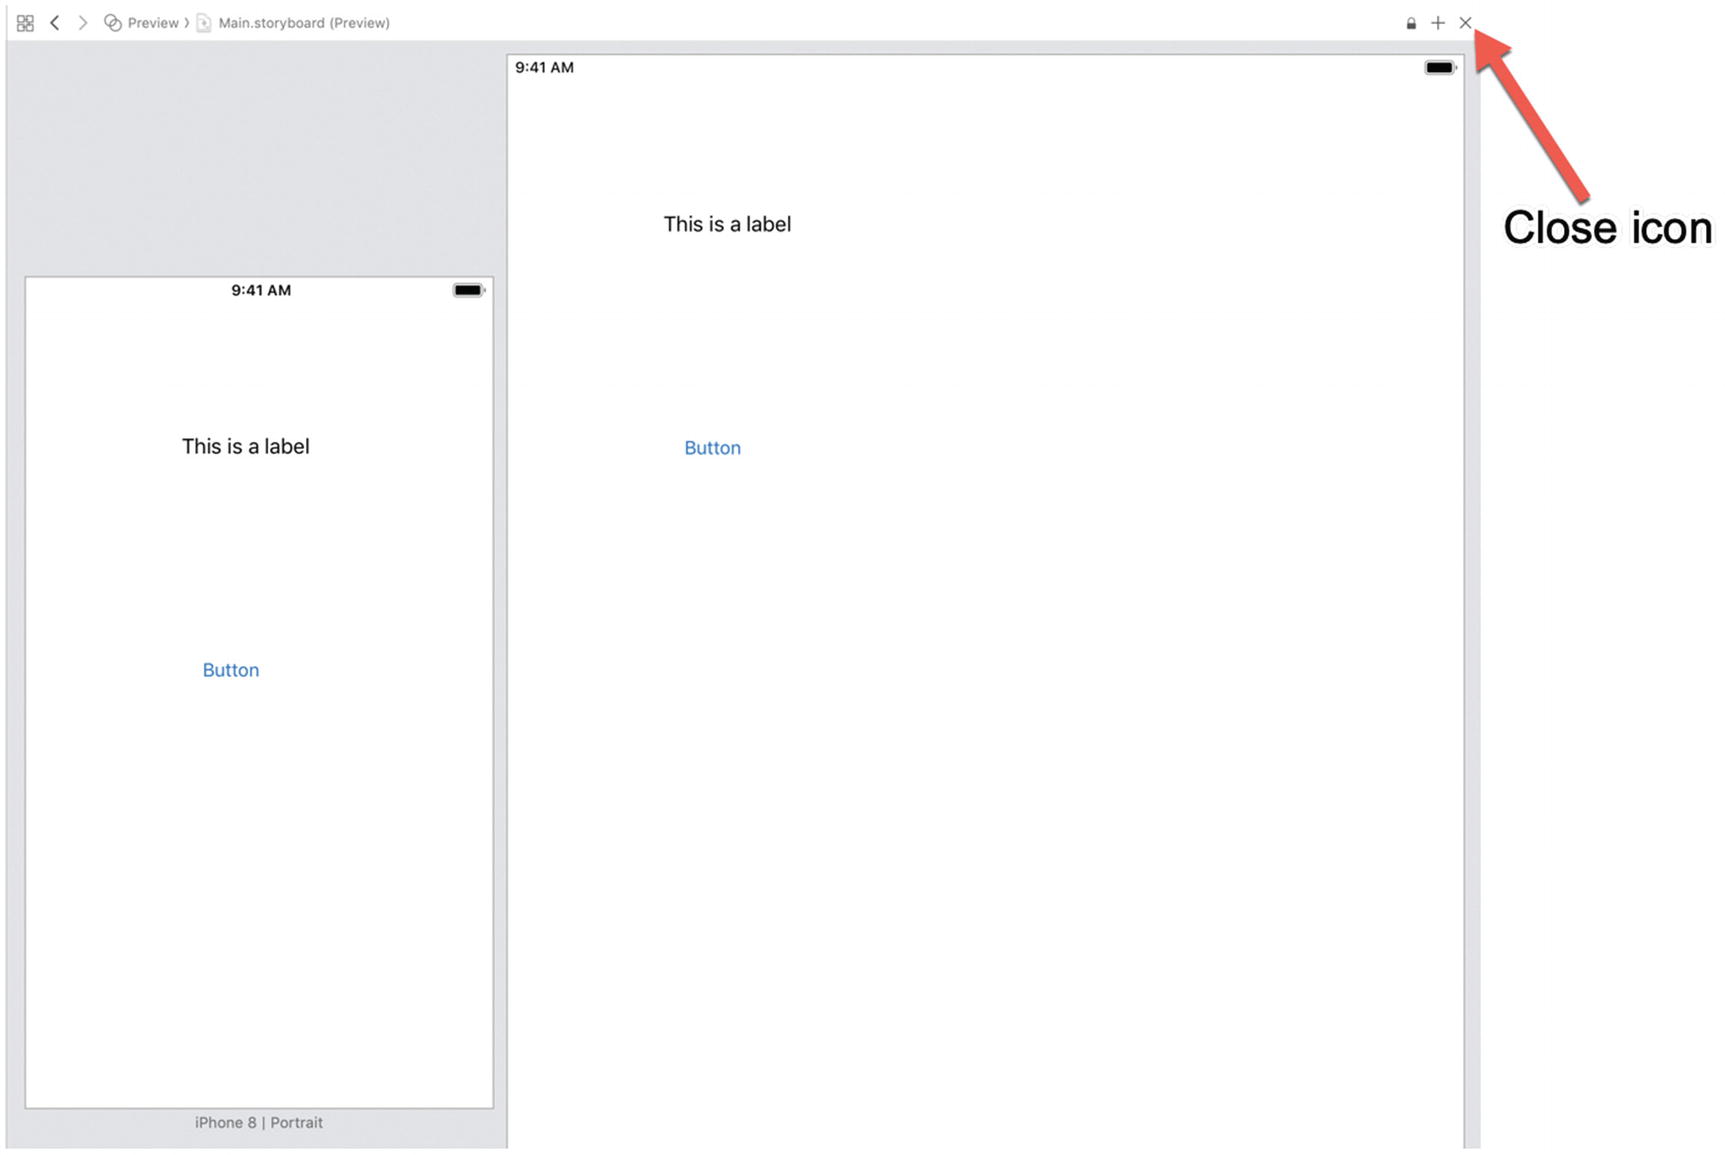 Figure 2-27.
Displaying previews on multiple iOS devices
- 8.
Click a preview and press BACKSPACE or DELETE to remove it.
- 9.
Click the Close icon in the upper right corner of the Preview pane to make the Preview pane disappear.
By using the Preview pane, you can see how your user interface will look on different size iOS devices. Even better, you can compare different size screens side by side.
Summary
Every app needs a user interface. That user interface gets stored in a storyboard that consists of one or more views where a view represents information displayed on a single screen. You can add objects on a view such as buttons, text fields, labels, and sliders. If you have two or more views, you’ll also need segues to connect views, showing the order that they appear to the user.
You can add objects to a view programmatically (by writing code) or visually. Programmers often use both methods to design their user interface. You can customize objects (buttons, labels, text fields, etc.) either through code or through the Inspector pane. Each view in your storyboard needs to be linked to a .swift file.
Since iOS apps can run on different types of devices, you need to make sure your app looks good no matter what the screen size or orientation might be. To help you view your app’s user interface in different screen sizes and orientations, you can change the iOS device screen size that Xcode uses to display your storyboard.
Another way to test your app’s user interface in different screen sizes is to run the Simulator program and define it to mimic different iOS devices such as an iPad Pro or an iPhone 8. If you want to compare how your app will look on different iOS device screens, you can use the Preview feature.
User interfaces represent what users see, so it’s important that your user interface always looks good no matter what type of iOS device the user runs it on.