Introduction to Lighting
IT MAY SEEM REDUNDANT if we say that lighting is a very important step in film production. But, again, we are not exaggerating when we say the lighting team is responsible for the success or failure of a project.
Again, this is so because building the lights for a film is really complex and its result is directly visible for the viewer. We can allow an unnoticed error in rigging or animation but visual errors in light, texturing, materials, and other similar areas will be very obvious to the viewers.
Lighting a film is a kind of art that requires some skills but is so rewarding at the end. We should be aware of this. We could have a great scene with very detailed characters and wonderful animation, but if lights are not managed in great detail, the whole project will be ruined.
We already know that every scene in Blender is affected by several laws and properties from materials, lights, textures, environment, and world settings. But what are the elements affecting lights in Blender?
- World: The color of the ambience is very important to set the right lights.
- Ambient occlusion: This option is necessary to give some realism to the scene.
- Indirect light: Like in the real world, objects' color will be affected by surrounding objects' colors.
- Lamps: Depending on the lamps setup, we will have very different results.
- Engine: Obviously, depending on the render engine selected the whole result will vary, for example, from Blender Internal to Cycles.
We won't talk about the technical laws of lighting because this requires a lot of effort that is not needed right now. We need to know how important it is to set up the right lighting in film productions, why many good projects were ruined because of a poor interpretation of this element and why many small and modest projects were a completely success because of the right use of compositing and lighting.
Even if we don't need to know all the technical laws, we must know that as with any other element in render processing, a bad use of its settings could end in never-ending renders because of the amount of ambient occlusion, ray tracing, or calculation on indirect lighting. Therefore, it's a good idea to use the Blender Internal render because this simplifies all these processes to avoid calculating the real physics for lighting.
If we have to talk about how to set up lights in Blender, we could come up with something simple in three or four steps. For example, select the type of lamp we want to use, position the light and direction, select the color of the light, and modify values like energy.
In fact, it's more complex than this of course, but we will use those steps as the starting point to know how the lights are managed in Blender.
11.1 Lamps
In this panel, we can select between different lamp types. We have to know that depending on the selected type, we will have different options and controls.
The available lamp types in Blender are Point, Sun, Spot, Hemi, and Area.
From this panel, we could modify the light color and apply the energy value. The energy value is equivalent to the amount of light the lamp emits.
The light type also depends on the Falloff selected. Available values for the falloff are Lin/Quad Weighted, Custom Curve, Inverse Square, Inverse Linear, and Constant. This value is also dependent on the Distance value. The falloff property is only available for Point and Spot lamp types.
We also have some options to enable us to refine our light setup, like Negative to cast the negative light, allow Blender to use lamp on those objects in the same layer with This Layer Only, create Specular highlights, or enable Diffuse shading (Figure 11.1).
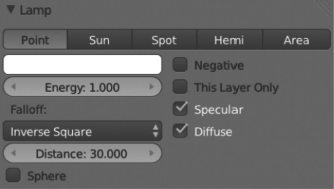
Different types of lamps we can use in Blender. Each one contains its own properties and results vary one from the other.
11.2 Shadow
If we talk about lights, we have to talk about shadows. To produce a convincing project, we have to set up a balanced system between lights and shadows.
In this Blender panel, we can choose if we do not want to use shadow at all with No Shadow or use ray tracing to cast shadows with Ray Shadow button.
If we have Ray Shadow selected, then we can select the color of the shadow being cast by the lamp. In the same way, we can play with Sampling properties like the number of samples, size, or method being used—Adaptive QMC that is faster for processing or Constant QMC that generates less noise.
This panel will not be available if we select a Hemi lamp (Figure 11.2).
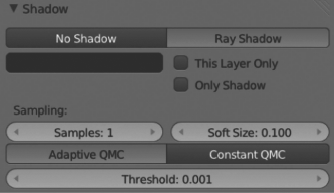
The shadow panel where we can modify and adapt the shadows of the scene. If we play with lights, we need to take shadows into account.
11.3 Environment Light
We could think about the environment light as a property that provides light in all directions, wrapping the whole scene. This light is calculated in the same way as the Ambient Occlusion (AO) with the small but important difference that Environment lighting checks the ambient value of the material shading properties, indicating the amount of color the material receives.
We can also select the color of the environment light projected and the energy value. The available options for environment light color are Sky Texture, Sky Color, and White (Figure 11.3).

With the environment light, we manage the whole light on the scene. As we know, it manages the light provided in all directions over the scene.
11.4 Ambient Occlusion
The AO is a very interesting ray-tracing calculation that makes renders look great. This is not a very technical explanation but the fact is the AO does not exist in real life, so it just simulates a nonphysical effect to make renders look better.
The thing we must understand is that AO doesn't have anything to do with lights, because it even works if we don't have any lamp on our scene but it's commonly used together with lamps to improve renders' appearance.
The AO is located in the World context and requires the ray-tracing option enabled in the Shading panel of the Render context.
Then, we can play with the AO color that is located in the World panel of the world context. This makes Blender use that color for the AO calculation.
In this panel, we have some properties to play with. We can adjust the Factor value and the method to mix the material shading between Add or Multiply (Figure 11.4).

Even though the ambient occlusion does not exist in real life, it is a very common feature to improve the final renders' look.
11.5 Resolving Issues with Lights
When we work with lights, it's usual to set up a trial-and-error environment, so we can modify and adapt our lighting environment properties later. But it's also common to have some issues with the lighting environment in film production.
While producing the RAT bProficiency project, we had several issues with lighting, probably because we were relative beginners in film production but we finally managed to solve them. We don't mean they were the best solutions, because we could probably have made them look better, but we did solve some issues with very practical fixes.
We have to admit that we were using a very messy environment light, because it was our first experience as shown in Figure 11.5.
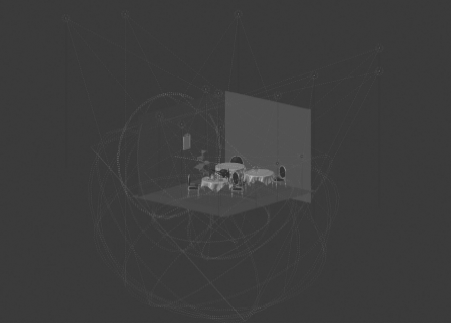
A completely messy environment light for the RAT bProficiency project. Even though it was a beginner project, it ended up with Platform Michelangelo Studio.
We had to solve, for example, an issue with the lighting over the table where everything looked a bit gray. We couldn't manage to have a nice and warm ambience over the table. We finally came up with the solution of adding an object, basically a lamp, and use a Point lamp as shown in Figure 11.6.
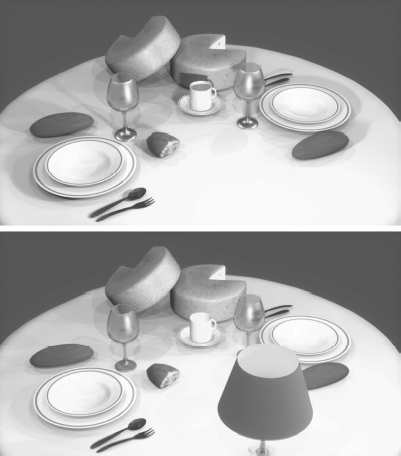
Issue fixed with a point lamp. Notice the bottom picture makes the lamp to raytrace lamp object making the material simulate a warm scene.
Notice the picture at the bottom makes the object's shadows a bit smooth, integrating each to the other while the picture at the top looks harder. Notice the shadow of the cup over the cheese.
This is a very rare issue but be sure that the most famous film production deals with these kind of issues during production. Setting up a really nice environment light is a very hard task but as important as any other such animation. In fact, we could say, even more important because, as mentioned earlier in this book, the visual aspects will be the first contact with the final user.
Those visual aspects the final user has access to at first glance are very valuable to determine a complete success or a failure (Figure 11.7, Figure 11.8 and Figure 11.9).
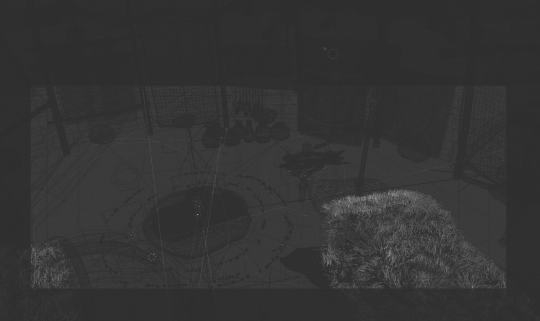
Environment light for the Big Buck Bunny open movie developed by the Blender Institute. Notice the point lamps used in the middle of the scene grouped in a circle shape.
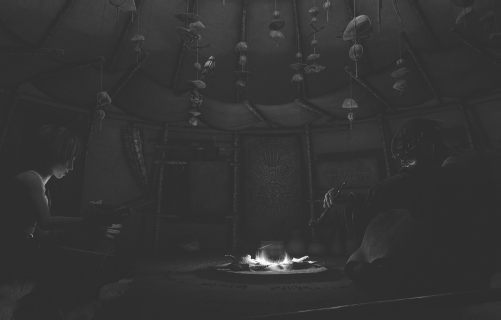
Environment light for the shaman scene in the Sintel open movie developed by the Blender Institute. Notice, we have here some interesting point and spot lamps dispersed over the scene to create the warm ambience.