
After the app has been developed and tested, it’s time to publish it to app stores. In this chapter, we’ll discuss tasks related to app publish. An app needs to have proper icons and splash screens. Ionic provides a way to generate these icons and splash screens. Ionic Deploy is the tool to deploy new versions with live updates. Ionic Monitor can capture error logs generated in apps for error diagnostics.
Icons and Splash Screens
Before the app can be published, we need to replace the default icons and splash screens. Ionic can generate icons and splash screens from source images to create images of various sizes for each platform. We only need to provide an image for the icon and another image for the splash screen, then Ionic can generate all necessary images. Source images can be .png file, .psd file from PhotoShop or .ai file from Adobe Illustrator.
For icons, the source image should be file icon.png, icon.psd or icon.ai in the directory resources of the Ionic project. The icon image should have a size of at least 192 x 192 px without the round corners. For splash screens, the source image should be file splash.png, splash.psd or splash.ai in the directory resources. The splash screen should have a size of at least 2732 x 2732 px with the image centered in the middle.
Generate resources
Generated icons and splash screens are saved to the subdirectory ios and android of the directory resources.
Deploy to Devices
We can deploy the app to a device for testing. For iOS, open the generated project in the directory platforms/ios with Xcode and use Xcode to deploy to the device. For Android, open the generated project in the directory platforms/android with Android Studio to deploy to the device.
Ionic CLI commands ionic run ios and ionic run android can also be used to deploy apps to the device.
Ionic Deploy
After we publish the app’s first version to app stores, we need to continuously release new versions to the users. Usually, these new versions need to go through the same review process as the first version, which may take a long time to finish. This can delay the delivery of new features and bug fixes. For Cordova apps, since the majority code is written in HTML, JavaScript, and CSS, it’s possible to perform live updates without installing new versions. These static files can be replaced by the wrapper to update to the new versions. Ionic Pro provides the deploy service to perform live deployments.
Ionic Pro uses a Git-based workflow to manage app updates. The command ionic link will prompt to set up the Git repository. Just follow the instructions displayed when running ionic link to finish the setup. Here we use Ionic Pro as the Git repository. A new Git remote called ionic is added to the repository, and we can push the current code to this remote. After the link, the file ionic.config.json is updated to include the property pro_id.
“background” mode checks for updates when the app is opened from a completely closed state. It will download the update in the background when the user is using the app. The update is applied when the app is closed and opened the next time.
“auto” mode checks for updates when the app is opened from a completely closed state. It will wait on the splash screen until the update is downloaded and applied. This mode forces users to always use the latest version.
“none” mode doesn’t download or apply updates automatically. The entire update process is managed by you using the plugin API. This is not recommended as it may break the app with broken updates. Using background and auto mode won’t have this issue as the updates in these two modes are done in the native layer.
After a commit is pushed to the Git repository, a new build will run. You can check the builds in the tab Builds. For each build, it can be manually deployed to a channel. A channel can also be configured to auto-deploy builds in a Git branch.
View and Share with Ionic View
We can easily view and share the app with Ionic View ( https://ionicframework.com/pro/view ). Ionic View is an app created by Ionic that allows users to view Ionic apps without installing them. It’s very easy to share the app with others. The viewer needs to have Ionic View app installed. In the Ionic Pro dashboard, clicking the button Share app shows the dialog to share the app.
Monitoring
Source maps are required to provide stracktraces that map back to the original TypeScript code. Source maps can be uploaded using the command ionic monitoring syncmaps or manually on the app’s dashboard. Source maps files can be found in the directory www. Source map files for all modules need to be uploaded.
CustomErrorHandler
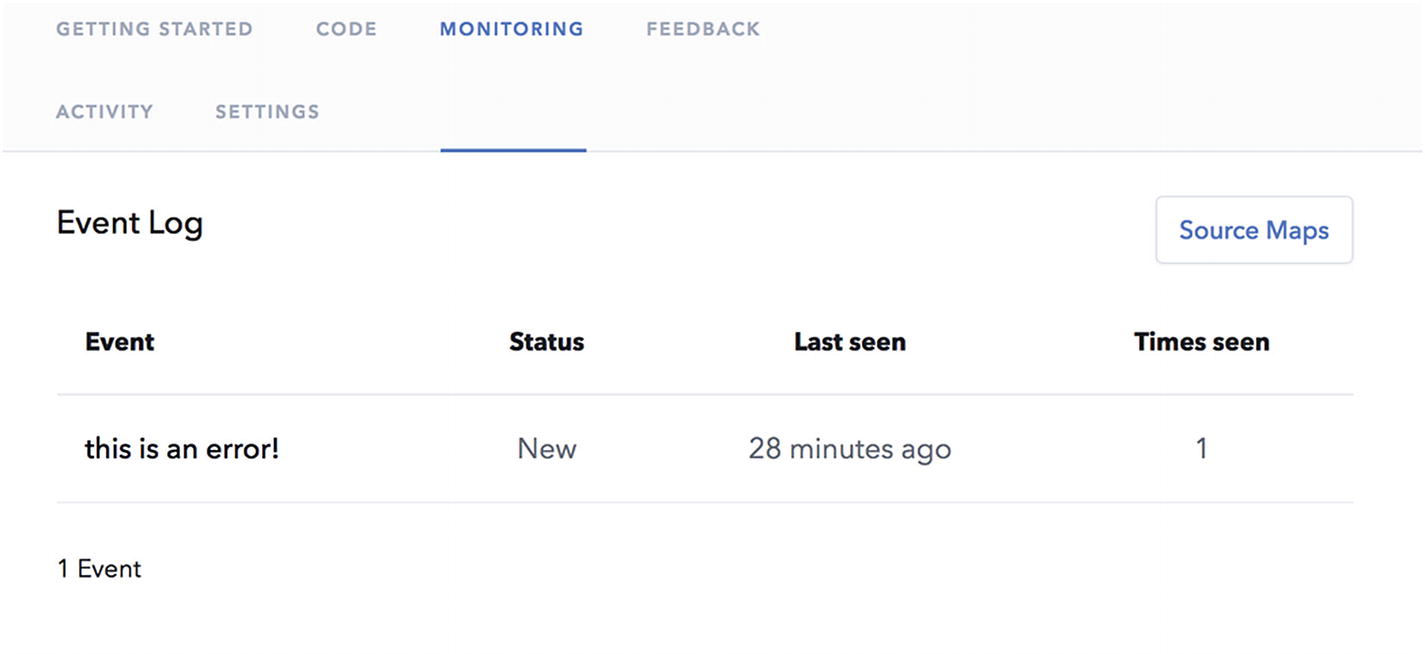
Errors in Ionic Pro dashboard
Summary
In the last chapter of this book, we discussed some important topics about publishing the app to app stores, including adding icons and splash screens and using Ionic Pro to perform live updates to published apps.
In this book, we used the Hacker News app as the example to demonstrate the whole life cycle of building mobile apps with Ionic 4 and Firebase. We started with the introduction of hybrid mobile apps and programming languages, frameworks, libraries, and tools used in the development; then we implemented different user stories. During the implementation, we discussed details about Ionic 4 components and Firebase. We also covered some advanced topics of Ionic 4. Toward the end, we discussed some nonfunctional topics, including end-to-end tests, continuous integration, and app publish. After reading this book, you should be able to build your own mobile apps with Ionic 4 and Firebase.