
B
The Sentinel Project Build
You too can build the original Sentinel prototype yourself. In fact, I’ll tell you how. However, before you trot out to buy supplies, there are a few points you ought to know. Mainly that you’ll need to take the batteries out of this thing or it won’t be living on the base for too long—the weight will eventually bend the base’s clamp off from the disproportionate weight of the batteries. Solving this problem is as easy as making a lithiumion battery modification so I’ll show you how it was originally done and then guide you through that important modification.
The Sentinel Project used Adobe Flash and Adobe AIR as the core platform. Flash and its development language Actionscript require a book much longer than this one and way more in-depth. So, if you know Flash, feel free to try out the code, which you can download from autonerfblaster.com and test your might. If you don’t know Flash, it’s totally cool. Stick with this book and Processing—it’s way easier than doing it with Flash!
One other thing: unlike the rest of this book, which left your blasters able to revert to their original duty, performing this modification will result in your stand and battery tray not being usable as they were originally intended. If you want to keep using your NERF Vulcan as is, you should stop now.
Instructions for the Prototype Build
So you want to do this thing old school, eh? Here’s the parts list:
• Servos (2×)
– Hitec HS-311 and Hitec HS-5645MG
• NERF Vulcan
• Webcam
• Wood (2 × 4) and nails
• Duct tape
• USB cable A and B
• Arduino board
• Jumper wires
• Washers and screws of matching sizes
• Computer running Windows XP, Windows 7, or Mac OS X 10.5 or later
For tools, you’ll need
• Hammer
• Phillips-head screwdriver and/or drill
• Duct tape
Software:
• Adobe Flash CS5 or later. There’s a 30-day trial online from Adobe. You also can use the free Actionscript editor FlashDevelop, but you won’t be able to change most of the graphics because they are embedded in the source.
• Serproxy, TinkerProxy, or similar serial to socket server for sending data back and forth between the Arduino board and the application. More alternatives can be found here: http://arduino.cc/playground/Interfacing/SerialNet.
Building the Base
The base was constructed with scrap 2 × 4 boards and created in the shape of an I-beam, as seen in Figure B-1. The servo was wedged in between the two center 2 × 4s on a piece of wood that was the exact width of the servo. This creates a snug fit and didn’t even require the servo to be permanently mounted; it’s merely wedged in there. Check it out in Figure B-2.

FIGURE B-1 The I-beam base from the Sentinel Project.

FIGURE B-2 The servo isn’t mounted in any way—it’s merely wedged between the 2 × 4 boards and sitting on top.
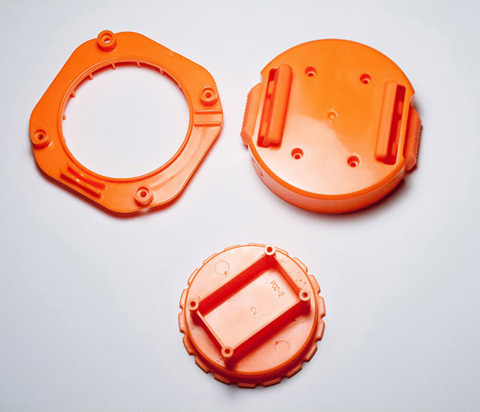
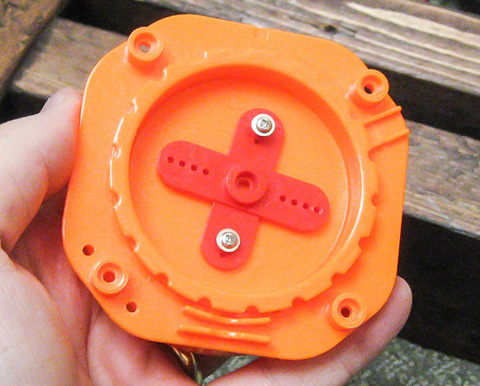
Now here’s the tricky part—the Vulcan comes with a swivel stand that needs to be modified to attach to the base. You’ll need to disassemble the blaster and then file down the edges that make the clicking sound when it turns. I used a drill and a razor blade. Be careful no matter how you file it down. Once everything is disassembled, you’ll have three parts, as shown in Figure B-3. You can discard the legs that make up the stand because they aren’t needed. You’ll also need to get a servo horn and screw it into the base, which is not an easy task. The alignment of the servo horn must be in the exact center of the swivel stand so that it can rotate easily and not collapse on itself when it rotates, as shown in Figure B-4. Once the servo horn has been screwed into the base, you can place it in the stand.
Now is when the washers come in. The washers will ensure that the weight of the blaster is on the stand, not the servo. This is the same principle that the DDP-155 from Servocity solves—albeit ours is homegrown and not as pretty. It’s uncertain how many washers will be needed because it’s unknown what differences you have in your setup, so make sure that there are plenty of washers on hand. Stack the washers up until they meet the base of the swivel stand. Now start screwing in the screws to the base. See Figure B-5 for a detailed view. You might need a drill to get them started depending on the softness of your wood. When done, make sure that you can rotate the swivel base. You should be able to hear the servo motors moving as you rotate the stand. If there’s no sound or resistance felt when turning, it’s not secured properly. Try again until you can hear the servo motors moving when you rotate the base by hand.
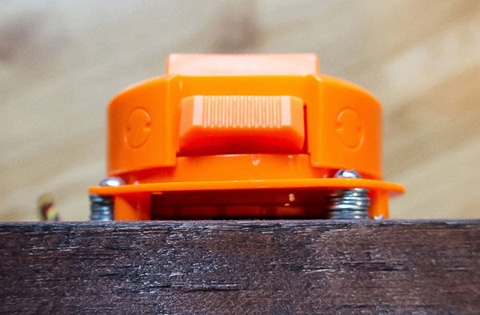
FIGURE B-5 A slew of washers offsetting the weight from the blaster to the stand and not putting any stress on the servo.
Place the Vulcan on the new swivel stand. Note that the Vulcan is back-heavy due to needing six D-cell batteries. That’s over 2 pounds of unneeded weight! The stand will hold that weight for a short time, but after a few days the stand will become bent and not hold the weapon anymore. There are a few options at this point:
• Do the battery modification described in Chapter 7.
• Remove the battery sled and use alligator clips to connect the positive/negative ends of the sled to the positive/negative ends of the inside battery sled holder.
• Leave the batteries in, and pray that it holds together or try to counterweight the front of the blaster to distribute the weight. This is not recommended.
In the original build, the battery tray was wired to an external power source. Take a look at Figure B-6 for the deets. Again, this is similar to the soldering for the lithium-ion battery modification—just that wires in this case connect to an adapter that goes to a wall wart power supply.

FIGURE B-6 The battery tray’s positive/negative ends soldered to wires that lead to an adapter for external power. The lithium-ion battery modification is recommended in lieu of this method.
Finally, perform the same trigger adaptation as described in the book, and you’re done with the physical build. Attach the servo wires to your Arduino board, and power up Flash or Processing to keep it going. Congratulations, Mr. Old School, you did it!