
1
Tinkering
I know why you’re here. You want to make a fully automated NERF® blaster. We’ll get to that soon, but there’s something important we need to address first. Before we can even think about rolling up our sleeves and creating this sweet NERF cannon, you’re going to have to leave something behind.
If you’re like me, and I suspect you are, your parents and maybe even a teacher or two told you on more than one occasion to quit wasting time messing with things—digging inside them, taking them apart, repairing them, or flat-out destroying them. A little something affectionately called tinkering.
The process of tinkering is nowhere near a waste of time. Not even close. In fact, tinkering gave the world some of its greatest inventions—light bulbs, telephones, and that little thing we call the World Wide Web. Sure, some people may think that you’re wasting time, but what you’re doing could be the “Next Big Thing.” Tinkering is the bridge from big ideas to big discoveries (such as jeans that don’t fade) or really big stuff (such as a full-time paying job). Tinkering fuels curiosity and shows you how things work.
Tinkering Is Not a Waste of Time
Tinkering is healthy. It means that you want to understand how something works. Tinkering leads to discovery and newfound knowledge.
Back in the 1950s, dads were tinkering (and hiding from moms) in the engine of the family car so that it would go faster, go louder, or simply just go again to work the next morning. While they were outside souping up the station wagon, in the living room, kids were designing, building, and destroying structures with toy construction sets such as Tinkertoys and Lincoln Logs. In the 1960s and 1970s, budding scientists threw methods and formulas by the wayside and freely explored (and exploded) many a home chemistry set just to see what might happen. In the 1980s and 1990s, Lego bricks brought budding tinkerers whole new worlds of their own making. Castles, cities, and space scenes sprang from simple, little colored bricks spurred only by imagination (and sometimes step-by-step instructions). Lego’s follow-up Technic series turned tinkerers into engineers, creating moving, functional projects from kits. The only limits? Your imagination and available cash.
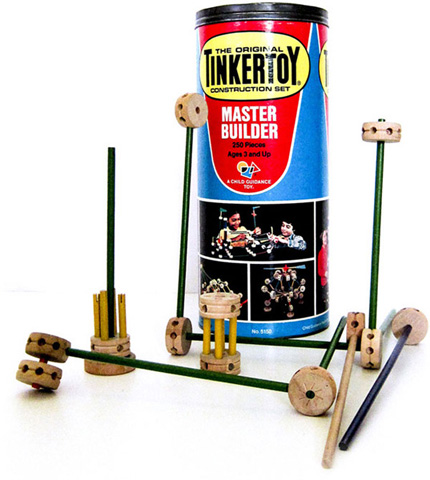
Today’s tinkerers are again charting new ground and often doing so from their bedrooms. The tools are still pieces—inexpensive yet powerful circuit boards and components—that combine to create tomorrow’s technological advances. So while times have certainly changed, tinkering is the same as it ever was. You’re creating for fun, but the activity often can spark unexpected, innovative results. They don’t call the things in Figure 1-1 Tinkertoys for nothing.
This book is easy to follow and easy to understand, so don’t worry that it’ll be too difficult or over your head. It won’t. Everything you need to get moving will be supplied—instructions, documentation, code, photos, and links. You only need two things to kick off your new tinkering escapade—enthusiasm and interest.
On the other hand, if you’re “l33t,” read on. I’ll provide alternate routes to help you level up your project and turn it in different directions. Pun intended.
Now that you understand what tinkering is (awesome) and isn’t (a waste of time), let’s power on. Before we focus on the NERF, let’s explore a few experiences of tinkering and how they get you from where you are to where you really, really want to be.
Tinkering with Game Boy Advance
When Nintendo came out with the Game Boy Advance—a portable video game system with Super Nintendo–quality graphics—it had one painfully obvious problem. There was no backlight! This meant that in low-light situations (such as under the covers when you were supposed to be asleep), you couldn’t see the screen. The oversight so annoyed Nintendo customers that they crafted their own do-it-yourself (DIY) work-around: a non-Nintendo after market kit. With the kit, frustrated gamers had the ingredients and plans to install a custom backlight into the Game Boy Advance. More important, they now could see games in the dark.
I was one of those annoyed customers who purchased the kit. I didn’t have a clue what I was in for with the project. All I knew? I needed a Game Boy that worked in the dark. So I followed the instructions. I cut into the plastic housing and made room for more wires, switches, and the backlight. I soldered wires together, inserted the backlight, and put it all back together. It was a little scary. I had just torn apart something I loved, so I let out a huge sigh of relief as I watched it power on successfully. Even though the instructions laid out exactly what needed to be done, exploration of the guts of the Game Boy Advance and integration of new components was a huge step for me in learning and tinkering.
NOTE In later chapters, I’ll discuss cracking open NERF blasters and exploring their guts. And we’ll also spend time on skills such as soldering, a necessary evil every good tinkerer needs to be armed with.
Tinkering with MAME Arcade
One tinkering rite of passage for many budding creators is crafting a Multiple Arcade Machine Emulator (MAME) cabinet. With it, you have the freedom to play arcade games the way Namco intended—with the fidelity of knobby joysticks, red buttons, trackballs, spinners, and light blasters. And without the need to cash in for a roll of quarters every time you want to play Pac-Man or Galaga.
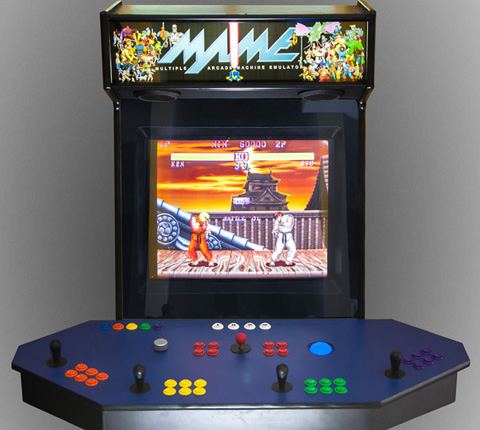
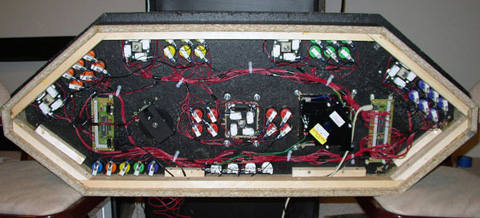
A friend built the MAME cabinet in Figure 1-2, and it sets most other MAME cabinets to shame. It has the capacity for up to four players, a raster monitor, and a coin door—the whole enchilada. The result is ultra rewarding, but getting there is no cakewalk. The MAME cabinet project includes carpentry, extensive wiring, drilling, nailing, gluing, software configuration, and much, much more. (Check out Figure 1-3 for a glimpse of the guts.) On top of that, the expense of building one will raise your wife/significant other/mom’s eyebrow when you add in must-have bells and whistles.
While we won’t be constructing an arcade cabinet, we will address creating controls in Chapter 4. You’re going to need to know how to control your NERF blaster’s position and firing using a joystick and push button, right? You bet you are.
Tinkering with 3D
Tinkering isn’t just working with what you have—tinkering creates new things, too. Like nanobots. There are nanobots in my company’s logo. Awesome nanobots. So awesome I wanted to actually hold one or at least have one peering at me on my desk at all times. Why? Why not!?
Making things that don’t exist takes a little magic called 3D printing. The “printer” is actually a replicator, such as the one in Figure 1-4, that takes a three-dimensional (3D) representation of an object and creates the object in a tangible form via a computer-controlled nozzle (Figure 1-5) that lays down thin strips of plastic-like resin. The resulting form emerges and takes the shape of the source model.
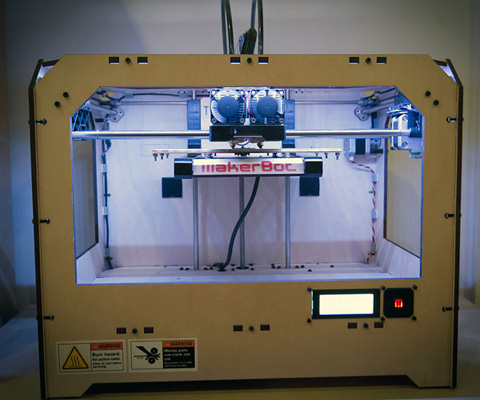

Figure 1-6a is a preview of the nanobot model—or source model—on the computer. Below it is the fully formed nanobot (Figure 1-6b), which has been spray-painted with a lovely metallic paint to up the awesome ante.

When tinkering, you may need to fabricate objects—such as nanobots—to see your design realized. For our needs, however, we’ll look at ways that we can augment our project to make it more stable, such as creating a stand for our camera or Arduino board.
Tinkering with Arduino
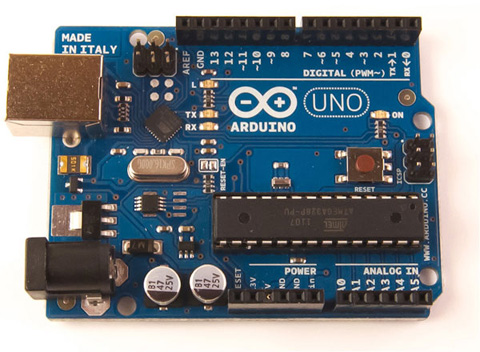
Affordable, easy-to-use microcontroller boards such as Arduino (Figure 1-7) have launched a skyrocketing movement of do-it-yourselfers (DIYers), hackers, makers, and tinkerers—like you. An Arduino is easily programmable and can communicate and interact with a variety of components such as sensors, light-emitting diodes (LEDs), liquid-crystal displays (LCDs), and motors.
How is Arduino used in the real world? Here’s a creative example: Albion Café in London uses an Arduino to let customers know when fresh bread is coming out the oven. The café’s bakers use BakerTweet—powered by an Arduino board, LCD display, and Wi-Fi connection—to notify Twitter followers of hot news, specials, and breads. Bakers simply turn a dial to choose from a list of prepopulated selections and press a button to send that selection to Twitter. BakerTweet’s simple, intuitive interface streamlines customer communication while allowing café employees to focus on the tasks at hand rather than the technology. Check out the finished device and the work-in-progress at bakertweet.com.
NOTE An Arduino powers the heart of the autonomous NERF blaster we’re going to create. In a few chapters, I’ll discuss how Arduino programming, in addition to connecting sensors, can detect anyone or anything that comes near your blaster. The opportunities that result from that information right there? Endless!
Tinkering Can Get You a Job
After all that, do you still think tinkering could be a waste of time? Let’s take a look at something the entire country can relate to—finding a job opportunity.
Recently, tech giant Apple advertised an opening for a user-interface designer/prototyper on its website, apple.com. Let’s take a look at some of the qualities the company was looking for and how your experience as a tinkerer might just draw the company’s attention.
• Responsibilities. “Invent—We come up with novel ideas for how new hardware technologies can improve the user experience. You should have a passion for building new things and running with ideas.” You are about hack a NERF cannon and make it do things it only dreamed of.
• Required skills. “Several programming languages including Processing.” Processing is what you’ll be using to drive the main application and communicate with the Arduino board.
• Nice-to-have experience. “Includes Arduino and rapid prototyping.” Zing! You are going to use both of those to turn a NERF blaster into an autonomous cannon.
So, in short, Apple digs tinkerers, and Apple’s not the only one. Lots of other high-tech companies are looking for the kinds of original thinking and inventiveness that are the hallmark of the tinkerer.
In this tinkering quest—and the other projects you’re bound to dream up—don’t worry about those folks who say you’re just wasting time. You’re not. Tinkering, while it might appear frivolous, actually can pay off and pay off big.
So don’t be afraid to tinker. Void the warranty. Crack open electronics, fiddle with them, and see how they work. You may even make something work better! One piece of advice, though: Be sure to take the time to write down where everything goes so that you can put it back together again.