
In our lab, we simulate a small organization and the base of IT services of any organization information infrastructure is the ability to exchange information between users. Usually, the interaction between users is organized on the basis of e-mail, which has become the de facto standard. So, we cannot miss the e-mail service. As a solution to organize e-mail, we will consider free software hMailServer.
hMailServer is a free e-mail server for the Windows platform. It runs as a Windows service and includes administration and backup tools. It supports mail protocols IMAP, POP3, and SMTP. To store the settings and indexes hMailServer uses a database such as MySQL, MS SQL, or PostgreSQL, e-mail messages are stored on the hard drive in the MIME format.
hMailServer supports all the basic functions, such as multi-domain, aliases, and mailing lists. User authentication can be performed using the local user database or through Active Directory.
Well, let's start to install hMailServer, but before we start we need to configure our DNS server.
To be able to receive e-mails, we must set up MX records for our domain. The MX records are entries in the DNS server that tells other computers on the net which computer (hostname) is hosting the e-mail service for our domain.
We can do this in the DNS management snap-in of our domain controller, which serves as our additional DNS server. So, let's interact with the domain controller and start the DNS snap-in by selecting the DNS item in the Administrative Tools folder of the Start menu.
In the DNS tree on the left-hand side panel of the opened snap-in, expand the Forward Lookup Zones item corresponding to our domain controller (DC). Now, select the item that's our domain (lab.local). In the right-hand side panel, we can see a list of DNS records that exist at this moment. Now, we should check for the existing DNS A-record of the server on which we will install hMailServer. If such a record does not exist, let's add it. Right-click to open the context menu and select New Host (A or AAAA)… for creating a DNS A-record. In the opened window, we have to enter the name of our mail server and its IP address that will be pointed by the name. Then, click on the Add Host button.
In our case, we deploy the mail server on the domain controller host, so our option looks like this:
|
Name |
FQDN |
IP address |
|---|---|---|
|
|
|
10.0.0.2 |
After creating the DNS A-record of the mail server or if A-record already exists, we should add MX-record. We can to do this like we added A-record, but select the New Mail Exchanger (MX)… item instead of New Host (A or AAAA)…. In the window that opens, we should leave the Host or child domain textbox blank and enter the name of our mail server (in our case mail.lab.local) in the FQDN of mail server textbox.
The result will be something like this:
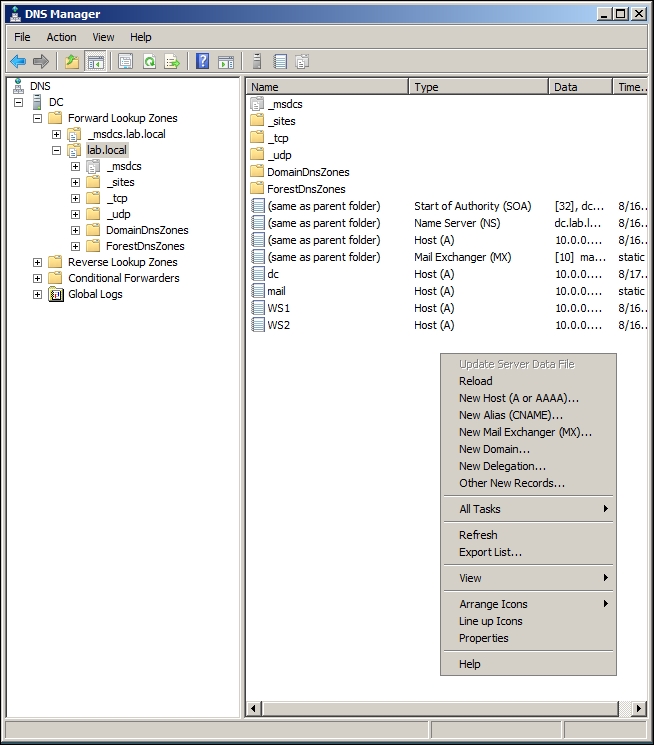
DNS zone contents
So it is time to install hMailServer. The latest version can be downloaded from the website (https://www.hmailserver.com/download). The installation process is simple. Run through the installation wizard and it should not cause problems. At the end of the installation, the existing wizard will prompt for an administrator password.
Start hMailServer Administrator (management console) and create a new connection to localhost. After hMailServer Administrator is launched and the connection to a server is established, configure our mail server for our domain (lab.local). It takes a bit of time and consists of the following basic steps:
- In the Domains tab, click on the Add button. In the page that opens, enter the name of our domain (
lab.local) in the Domain textbox and click on the Save button. A new domain will be added. - Let's click on the Accounts subitem of the domain tree and click on the Add button on the right-hand side panel (account's page).
- In the page that opens, go to the Active Directory tab, we should check the Active Directory account option and enter the domain and user name of the existing domain user for whom we create the mail account. In the General tab, we should enter the address of the mailbox for the current account in the Address textbox.
- Click on the Save button.
- Now on the list of accounts, we have ready sample user mail boxes:

Mail accounts list
- Go to Settings | Protocols | SMTP | Delivery of email and in the hostname setting, enter the hostname of our server (
mail.lab.local).
Now, we have a working mail server ready and we can use configured mail client software for sending and receiving mail messages.
Next, you should walk through the mail server settings for creating hardening configuration. You can do, for example, the following:
- Change standard ports of SMTP, POP3, and IMAP protocols and set connection security for using SSL/TLS based on the security certificate, which can be created on our certification authority (described earlier)
- Set to use only TLSv1.2
- Create a backup copy
- Configure a built-in anti-spam subsystem
Note
More information about hMailServer is available at https://www.hmailserver.com/documentation/latest/?page=overview.
Now that we have created a working instance of a mail server, other possibilities can be explored.