
5. Telephotos
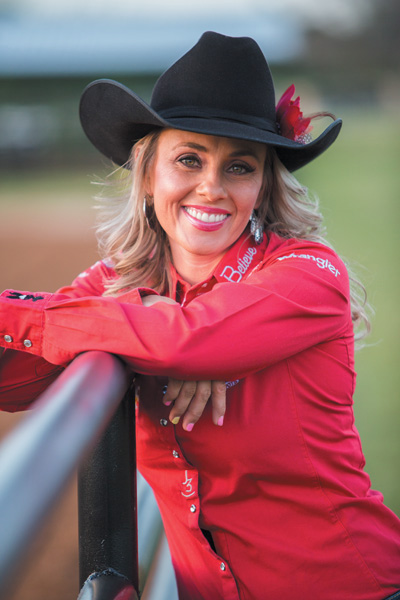
ISO 200 • 1/500 sec. • f/5.6 • 400mm
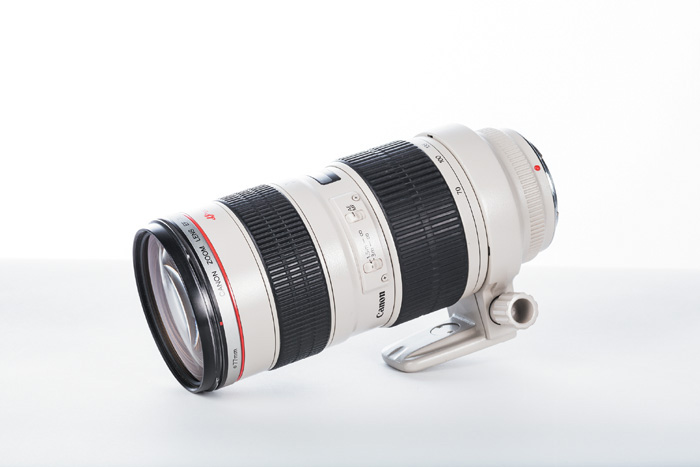
The big glass
“Whoa!” That’s usually the response I get from folks when I show up to photograph a local sporting event with a large, white-barreled telephoto lens in tow. It doesn’t matter which telephoto lens it is—they all draw attention. But that’s not what the longer lenses in the Canon lineup are for. Sure, they may attract a few more eyes than the average standard lens, but they also fulfill a useful purpose in the photographer’s camera bag: Literally, they are for reaching out.
Go Big or Go Home
Telephoto focal lengths generally start at 105mm and, for Canon, reach 800mm (although there are a few discontinued and very elusive EF 1200mm f/5.6L lenses out there). Generally speaking, telephotos are heavier and larger than other Canon lenses, although some non-L-series telephotos are similarly sized as L-series standard lenses. Telephotos are bulky, but with that size comes a world of focal lengths perfect for a variety of special purposes (Figure 5.1). The longer the focal length, the more specialized a lens becomes, and while not any one lens is completely relegated to a particular type of photography, we can look at popular uses for some lenses and focal lengths.
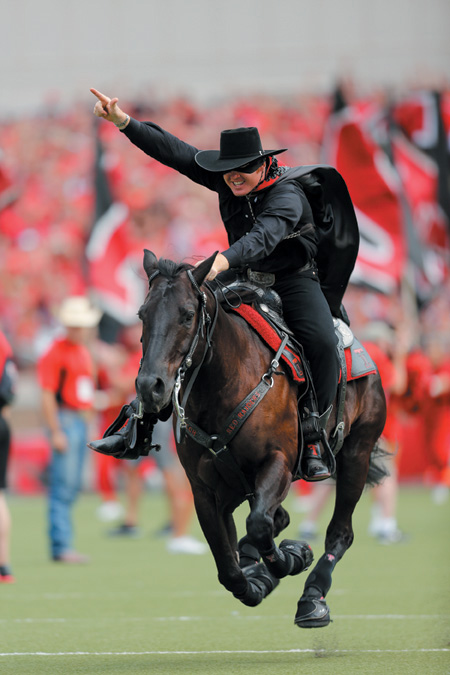
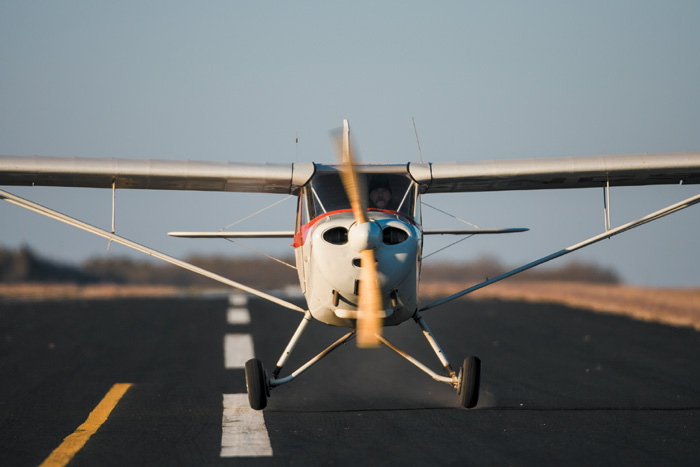
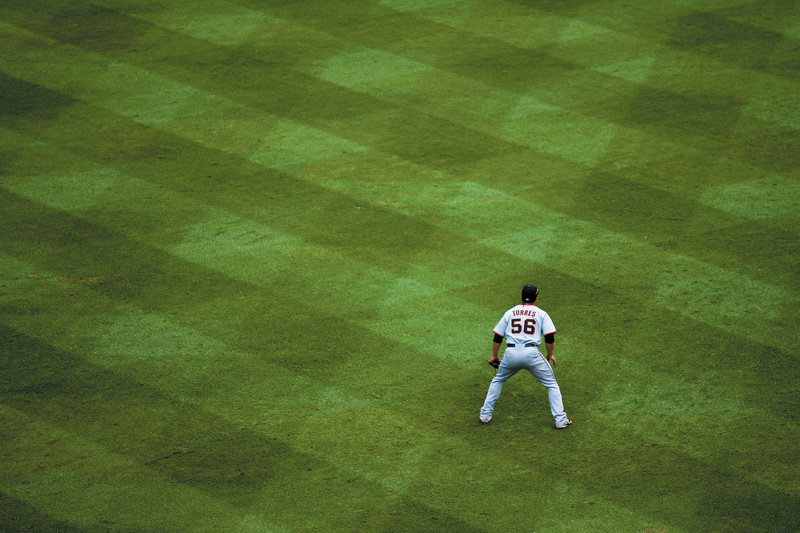
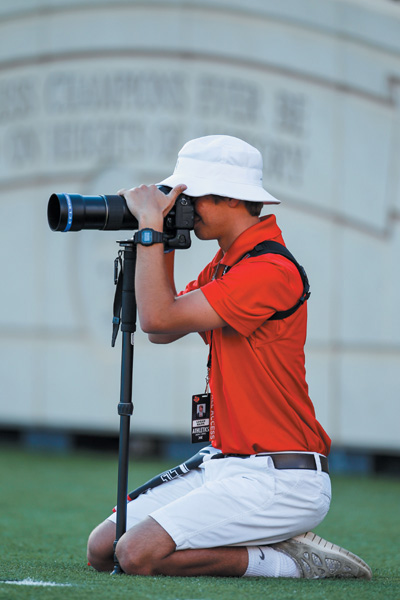
ISO 200 • 1/800 sec. • f/2.8 • 400mm
Figure 5.1 The sports-photography world wouldn’t be the same without the 400mm focal length.
Medium Telephoto Zooms and Primes
As part of many photographers’ trinity of lenses, a medium telephoto holds a special place in the camera bag. A medium telephoto zoom makes for a nice lens purchase after the initial camera and standard zoom lens, when a photographer wants to reach out a little farther than his standard zoom allows. Probably the most popular segment of the telephoto lenses and focal lengths Canon offers, medium telephotos typically range from 70mm to 200mm. Canon makes several variations on this range. Some of the more popular lenses include the EF-S 55–250mm f/4–5.6 IS for crop-sensor camera bodies and the EF 70–300mm f/4–5.6 IS and EF 70–200mm f/2.8L IS. These lenses are so popular that Canon makes several versions that differ on aperture size, glass quality, and Image Stabilization capability.
Why are these lenses in such demand? Medium telephotos (zoom or prime) are extremely useful lenses for just about any genre of photography. A 70–200mm or 70–300mm lens can be used creatively and effectively for everything from landscape (Figure 5.2) to portrait photography (Figure 5.3), from photojournalism (Figure 5.4) to sports and wildlife (Figure 5.5). Throw on an extension tube or two and you have a great macro lens (Figure 5.6). (We’ll talk more about macro lenses in Chapter 9.)
ISO 100 • 1/5 sec. • f/22 • 98mm
Figure 5.2 Longer focal lengths allow you to concentrate on composition that is not necessarily right in front of you.
ISO 100 • 1/80 sec. • f/2.8 • 100mm
Figure 5.3 The compression at long focal lengths helps bring many elements together in an environmental portrait.

ISO 100 • 1/1000 sec. • f/2.8 • 135mm
Figure 5.4 Telephotos often keep the photographer from intruding on the authentic unfolding of events (and they keep her safer from potential danger).
ISO 100 • 1/1600 sec. • f/2.8 • 200mm
Figure 5.5 Telephoto lenses work well for wildlife and sports photography.
ISO 200 • 1/400 sec. • f/2.8 • 180mm
Figure 5.6 An affordable extension tube can turn a telephoto lens into a very effective macro lens.
For Portraits: 85mm, 135mm, or 200mm?

ISO 400 • 1/100 sec. • f/2.8 • 135mm
Figure 5.7 The 135mm is a nice alternative to the 85mm or 70–200mm lens for many portrait shooters. Although longer than 85mm, 135mm still keeps you at a nice talking distance from the subject.
ISO 100 • 1/500 sec. • f/2.8 • 200mm
Figure 5.8 I favor 200mm for many portraits due to its ability to bring an abstract background seemingly close to the subject.
ISO 100 • 1/40 sec. • f/2.8 • 200mm
Figure 5.9 At 200mm, this bridal headshot easily isolates the subject’s face from a potentially distracting background.
Folks buying an EF-S 55–250mm f/4–5.6 IS or an EF 70–300mm f/4–5.6 IS to photograph their children playing sports are happily surprised when they see how functional the lens is for portraits. Landscape photographers employ these focal lengths for a number of reasons, including quasi-macro work (zooming in from a long distance on something small, such as a flower) and creating patterns and textures in long shots with compression (see later in the chapter).
Sports photographers use these lenses to concentrate on action that gets within a range too tight for their super-telephoto lenses. And just about every photographer enjoys being able to throw a background out of focus easily when zoomed into a subject and using a wide-open aperture (Figure 5.10). Medium telephotos are extremely versatile lenses, just as long as the shooter accommodates for the extra focal length, which is greater than on most standard zooms.
ISO 400 • 1/500 sec. • f/2.8 • 165mm
Figure 5.10 The shallow depth of field, resulting from a long focal length and wide maximum aperture, highlights the subject and combines it with a colorful, aesthetically pleasing background.
300mm: A Bit More Reach
There was a point in my career when I honestly didn’t know what to do with 300mm. I knew it was the long end of the popular EF 70–300mm lenses, but I didn’t have much use for it in my landscape work, and it was a tad bit too long for my portraiture work (the lens put me too far from subjects). At 200mm, I could be productive, but not at 300mm. As it turns out, my problem had to do with how I was seeing my images before making them, and to some degree, the content I was shooting.
In the grand scheme of telephoto focal lengths, 300mm is just a bit more reach than 200mm. But in that distance, the lens goes from being an all-around image maker to somewhat of a specialty lens. It’s not so specialized that it can only be used for one thing, like wildlife, but this long focal length moves into super-telephoto range. When I started photographing animals (Figure 5.11) and sports (Figure 5.12) and started concentrating on landscape composition that took full advantage of the long focal length’s great compression (Figure 5.13) and ability to isolate individual subjects (Figure 5.14), I entered into another world of photography.
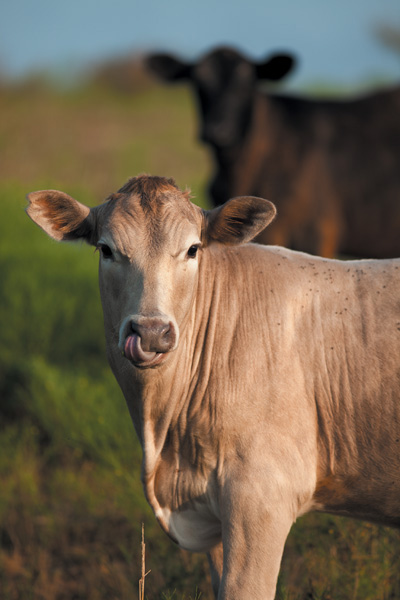
ISO 100 • 1/500 sec. • f/4 • 300mm
Figure 5.11 With more compression than 200mm, a 300mm lens readily pulls the background and foreground together, adding the brown calf as another point of interest in the frame.
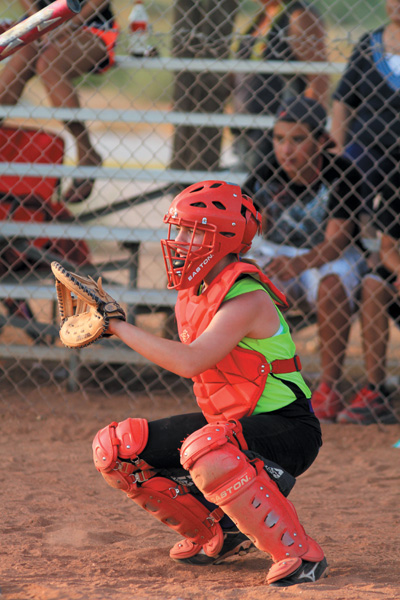
ISO 320 • 1/400 sec. • f/4 • 300mm
Figure 5.12 Little League baseball is a great environment for the 300mm focal length. The photographer can get closer to the action than he can at college or professional sports events, which generally require at least 400mm.
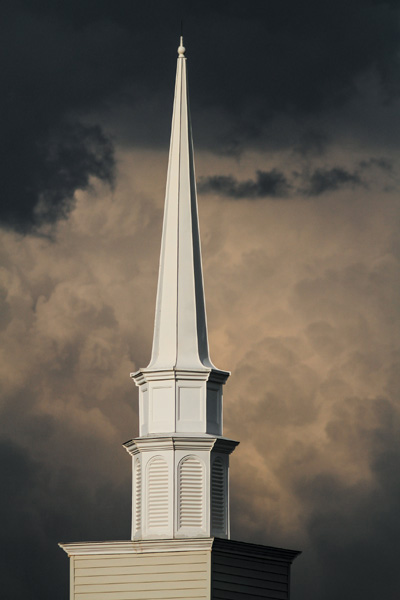
ISO 200 • 1/8000 sec. • f/4 • 300mm
Figure 5.13 A large thunderstorm brewing miles away from the church creates an ominous background for the steeple.
ISO 100 • 1/500 sec. • f/4 • 300mm
Figure 5.14 Pushed in tight, 300mm is a great focal length for isolating subject matter against a soft background.
Many popular starter telephoto lenses include 300mm, such as the EF 70–300mm assortment mentioned in the previous section, as well as the more expensive EF 28–300mm f/3.5–5.6L IS, the EF 100–400mm f/4.5–5.6L IS, and the new (and very pricey) EF 200–400mm f/4L IS. I personally like the EF 300mm f/4L IS. Although pricier than the zoom lenses, it is tough as nails, extremely sharp, and very light, especially compared to its heavyweight cousin, the EF 300mm f/2.8L IS. I primarily use it for sports and some wildlife, and occasionally landscapes.
400mm: The Ultimate Telephoto?
Designated as the little guy in the super-telephoto range, the 400mm is often considered the ultimate telephoto lens. I would not call it an all-around lens, but it is one of the most useful lenses for wildlife and sports (especially sports).
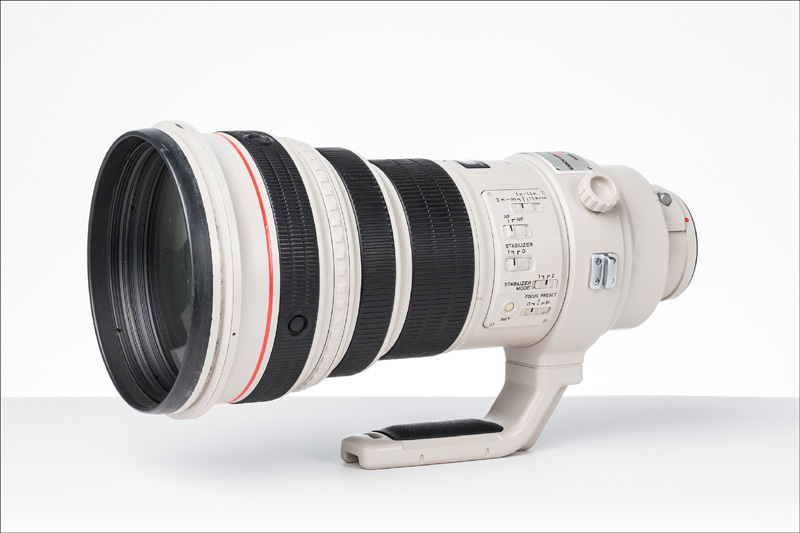
The EF 400mm f/2.8L IS
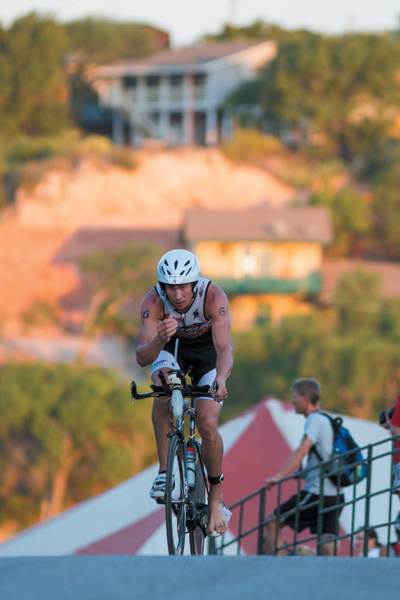
Every other Saturday in the fall, I pack up my camera bags and head up to Texas Tech’s football stadium. As 60,000 fans fill the seats, roughly 40 photographers start preparing for the game on the field. All of a sudden, you see numerous large, white lenses placed on monopods. Possibly the most iconic lens in sports, the EF 400mm f/2.8L IS is noticeable by fans and shooters alike (Figure 5.15). And it is a performer. Fast to autofocus, it is the optimum chunk of glass for sports when paired with a camera that has a great autofocus system (Figure 5.16). For the focal length, the EF 400mm f/2.8L IS also has an outrageously fast aperture (Figure 5.17) for extremely low depth of field. This comes in handy when shooting sports in dimly lit environments, such as most high school football and soccer fields. The shallow depth of field is nice, but the wide aperture opening is more about getting the fastest shutter speed possible with all of the light hitting the sensor (Figure 5.18).
ISO 400 • 1/1600 sec. • f/2.8 • 400mm
Figure 5.16 The 400mm f/2.8’s quick ultrasonic motors ensure snappy autofocus when engaged on quick subject matter.
ISO 100 • 1/2500 sec. • f/2.8 • 400mm
Figure 5.17 At f/2.8, the background fades into an abstract indication of the environment in which the rider is competing.
ISO 3200 • 1/1250 sec. • f/2.8 • 400mm
Figure 5.18 Under dim stadium lighting, f/2.8 apertures are almost necessary given the low amount of light for fast shutter speeds on high action.
Shop around
There’s only one big disadvantage of the EF 400mm f/2.8L IS: It is super expensive! As of this writing, a new EF 400mm f/2.8L IS will set you back US$11,500. The other disadvantage is its weight—something Canon is tackling in its latest version of the lens.
A 400mm f/2.8L really is for those committed to professional photography (or for those with deep pockets who appreciate high-quality gear). I know I couldn’t do without one when shooting sports. Fortunately, Canon makes a few more lenses reaching 400mm that are less expensive without sacrificing build quality or the premium L glass. Two zoom lenses offer great focal length flexibility, the EF 200–400 f/4L IS and the EF 100–400 f/4–5.6L IS. A recent Canon addition, the 200–400mm is a powerhouse for wildlife and sports photographers; however, its price point is not far below that of the EF 400mm f/2.8L IS. Even though some folks do not like the push-pull zoom feature of the 100–400mm, it does offer the most flexibility of the lenses that reach 400mm.
Two other 400mm prime lenses are also worth considering: the EF 400mm f/4 DO IS and the EF 400mm f/5.6L. The DO in the former stands for Diffractive Optics, which means it is a much smaller and lighter lens than most 400mm packages, and the optics in it reduce the occurrence of chromatic aberration (color fringing). The EF 400mm f/5.6L is the least heavy of the 400mm lenses and also the most affordable (priced around US$1,500). As much as I like shooting the EF 400mm f/2.8L IS, it’s just not feasible to carry it around except for sporting events and some wildlife photography. This is when I turn to the EF 400mm f/5.6. Sure, it is two stops slower and does not have Image Stabilization, but it is sharp as a razor and doesn’t take up near as much room. In fact, I bought both the EF 300mm f/4L IS and the EF 400mm f/5.6L at the same time years ago to have great hiking telephotos (Figure 5.19), and I did it for a fraction of what it costs to buy the 400mm f/2.8L.
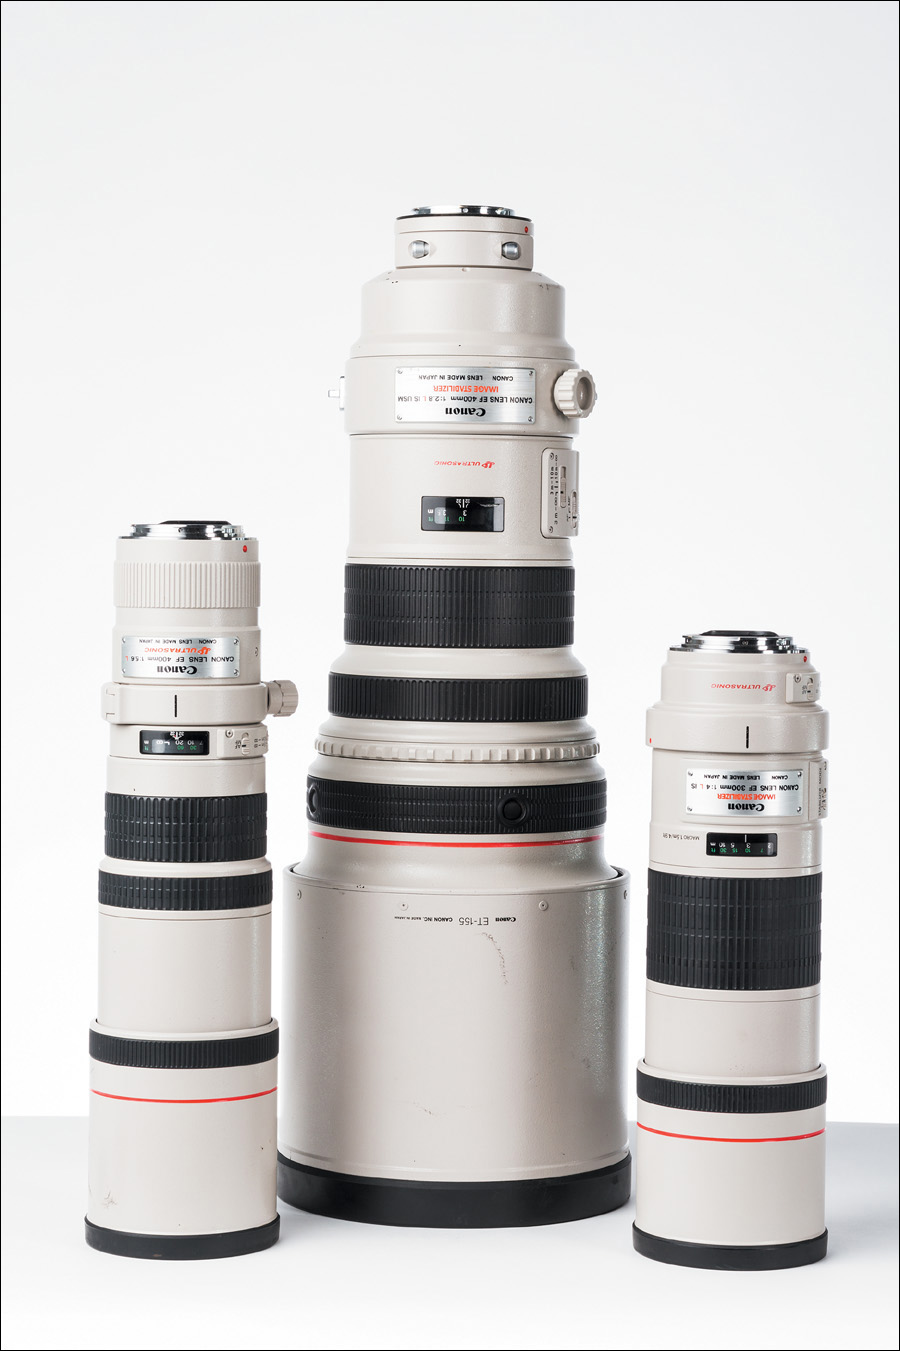
Figure 5.19 The EF 400 f/5.6L (left), the EF 400mm f/2.8L (middle), and the EF 300mm f/4L IS (right)
500mm, 600mm, and 800mm: Extremely Long Glass
In my short, three-season tenure of photographing NCAA football, I’ve seen a lot of 400mm f/2.8 lenses. However, I’ve only seen two photographers—two Sports Illustrated shooters—come on the field with anything longer. They both carried not only 400mm f/2.8s but a 500mm and a 600mm. You can also assume they each had an assistant to carry the load. With 400mm lenses, the nice images start at about the 50-yard line if you are standing in the end zone, but these guys could shoot clear down the field without a problem. Shooting with lenses over 400mm allows you to get close to the action without getting trampled or run over (Figure 5.20).
ISO 400 • 1/1000 sec. • f/5.6 • 500mm
Figure 5.20 Shooting with extremely long glass often means being able to position yourself where you could not with shorter focal lengths.
I’m bunching Canon’s EF 500mm f/4L IS, EF 600mm f/4L IS, and EF 800mm f/5.6L IS together in a section because of their increasingly specialized use. They are heavy, a bit unwieldy for most folks, and like the EF 400mm f/2.8L IS, very expensive. The question to ask yourself is, “Can I use a 500mm, 600mm, or 800mm lens enough in my work to justify its US$10,000+ price tag?” Although many of us would like to answer, “YES!,” I imagine it might be difficult to do so.
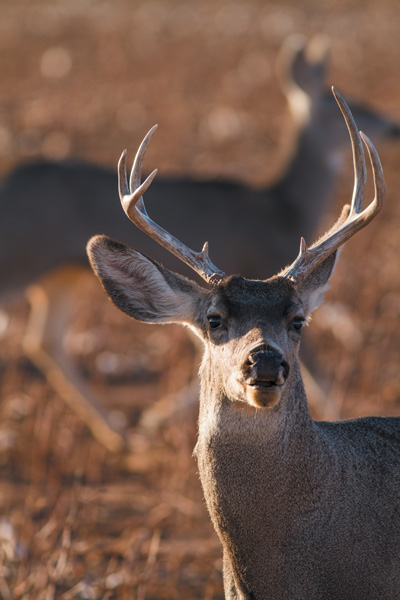
All that said, these lenses are highly functional for the right shooters, such as wildlife photographers. I know wildlife photographers who swear by their EF 500mm f/4L IS lenses for capturing everything from rabbits to deer to bears (Figure 5.21). Wildlife photography is hard work outside the zoo, and the incredible reach each of these lenses offers is suitable for animals that can be a bit unpredictable or skittish.
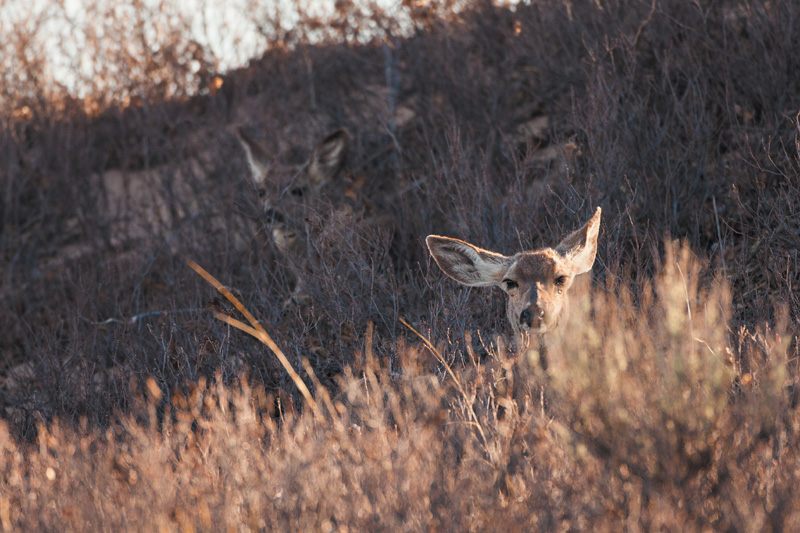
ISO 200 • 1/500 sec. • f/4 • 500mm
Figure 5.21 Many large-mammal wildlife photographers list the 500mm focal length as their favorite due to the wariness of their subject matter.
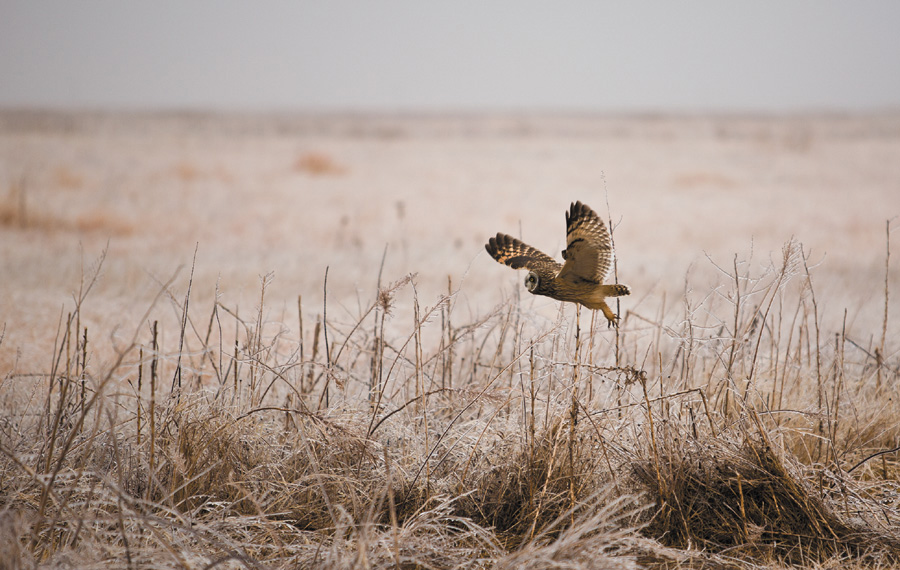
Bird photographers are especially drawn to these longer focal lengths due to the size of—and distance from—their subject matter (Figure 5.22). A super-telephoto lens lets a photographer shoot in tighter on wildlife from a distance, making for more authentic images of the animals. It also makes it easier to photograph potentially dangerous animals, such as bears or lions, safely.
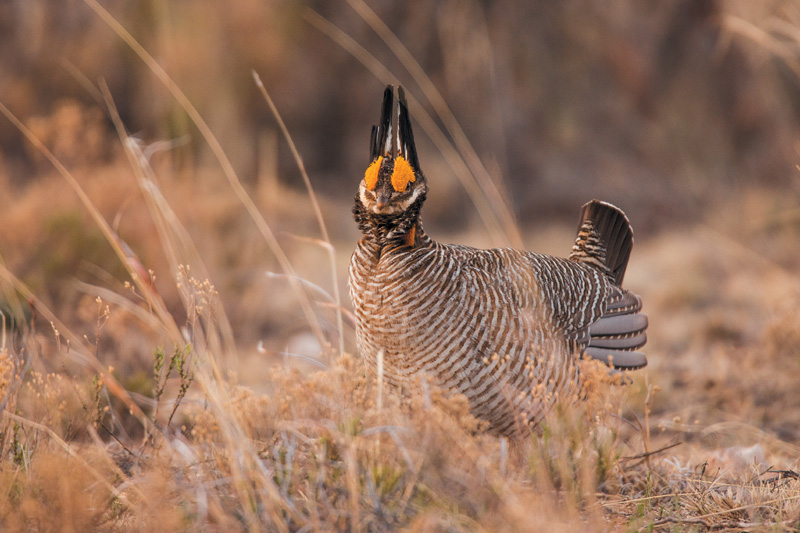
ISO 800 • 1/500 sec. • f/4 • 500mm
Figure 5.22 Photographing animals like the small and skittish lesser prairie chicken is all but impossible without focal lengths longer than 400mm.
Composing With Telephotos
I often find it difficult to compose well when using telephoto and super-telephoto lenses—it’s simply hard to see composition at longer distances. The following are a few compositional tips to keep in mind when sizing up a long-lens frame.
Think Simplicity
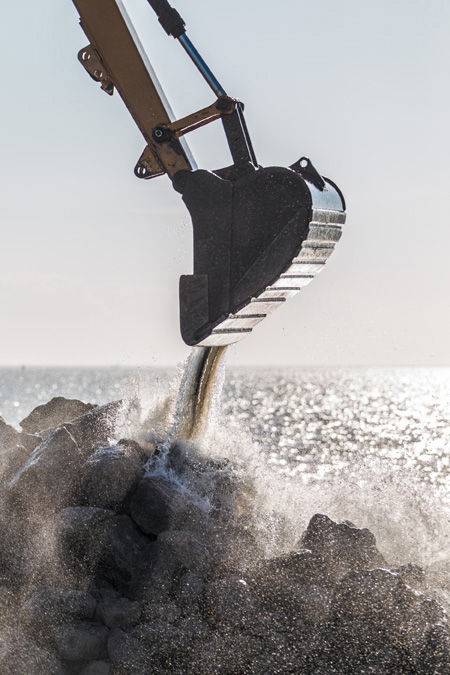
Telephotos force you to think more simply about the images being made (Figure 5.24). Take a look at some of your favorite images made at long focal lengths like 200mm, 300mm, or longer. Chances are, they are not overly complex with many different definable subjects, and they might even contain a bit of mystery as to the context in which they were shot. In fact, telephoto lenses force us to heavily consider what must be left out of the frame in order to bring attention to what should be in it. Simplification is a good thing to consider at all focal lengths.
ISO 200 • 1/1250 sec. • f/8 • 200mm
Figure 5.24 Instead of trying to capture the entire machine, isolating and focusing only on the bucket makes for a much simpler but more dramatic shot of this reef rebuilding machine.
Learn to isolate
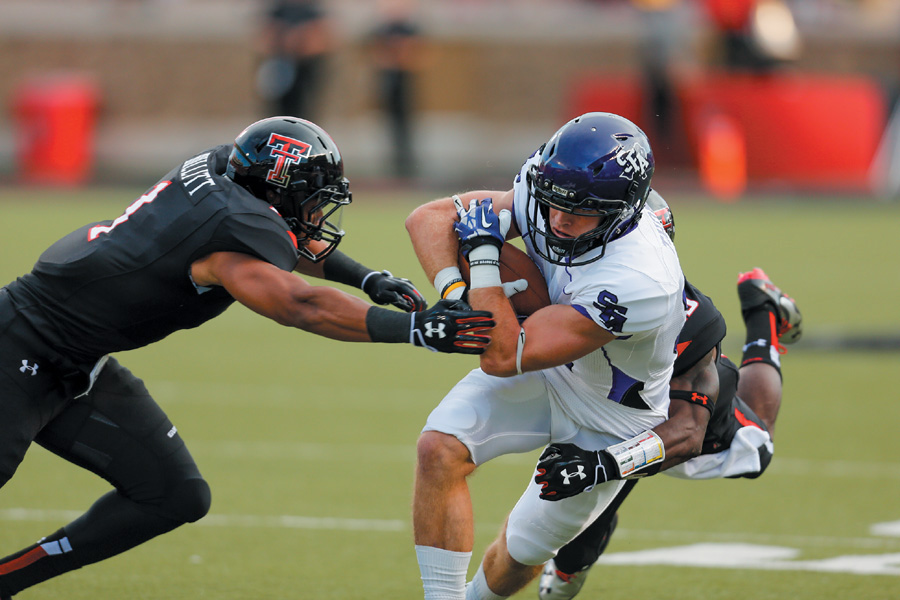
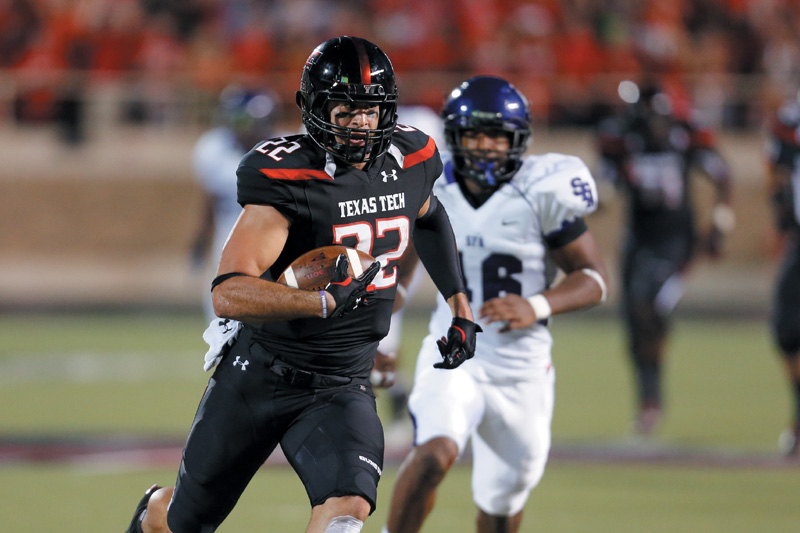
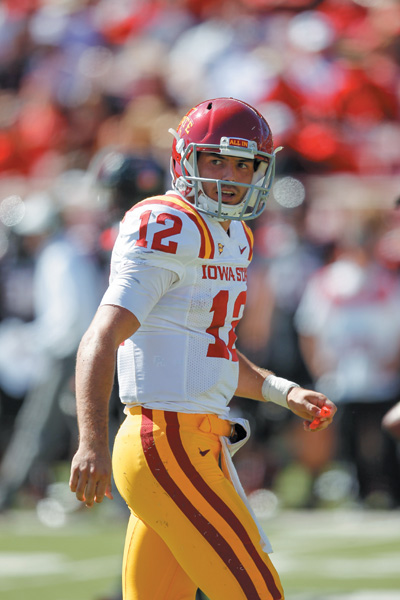
Telephoto lenses are good for mitigating distraction simply because they’re too long to include everything. Decide what needs to go and what needs to stay. This is about making certain subject matter shine. Take sports photography, for example. Agencies often send photographers lists of players on which to concentrate, particularly if they are being considered for professional play. These agencies not only want action shots (Figure 5.25), but they also want what they call portraits (Figure 5.26), which are shots of the players standing or walking on the field. A long lens, such as an EF 400mm f/2.8L IS, is perfect for excluding anyone else close to the subject of interest from the frame. Telephotos are great at blurring the background in wildlife shots as well, no matter how fast the maximum aperture may be (Figure 5.27).

ISO 100 • 1/1000 sec. • f/2.8 • 400mm
Figure 5.25 An isolated action shot of a football player draws attention to only the subject of interest, emphasizing his athleticism.
ISO 100 • 1/1250 sec. • f/2.8 • 400mm
Figure 5.26 A fairly standard sports portrait of a player on the field
ISO 100 • 1/250 sec. • f/5.6 • 400mm
Figure 5.27 De-cluttering an image is as simple as opening the aperture all the way. Even so, the background still contributes to the story of the image.
Because the focal plane is farther away when the subject is far away from the camera, the background remains more in focus (Figure 5.28). The closer the subject, the more isolating you can make the shot (Figure 5.29). In this case, the lens is saying, “Look at this!” Shots like these are fun to make, and they are extremely useful for portraiture and editorial purposes.
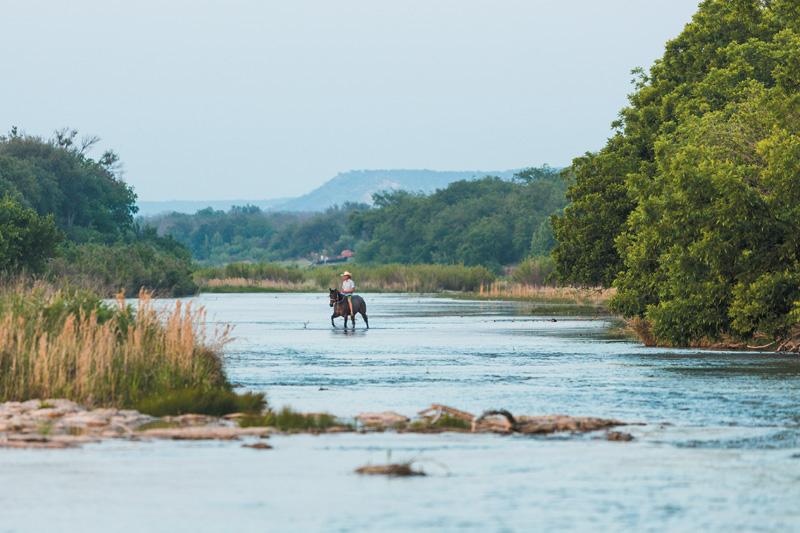
ISO 400 • 1/160 sec. • f/5.6 • 200mm
Figure 5.28 A cowboy walks his mount across the river a fair distance from the camera, and much of the background is in focus.

ISO 400 • 1/640 sec. • f/2.8 • 200mm
Figure 5.29 When you zoom closer, the background moves more into a visual abstraction of the environment. Yet, it is still a major part of the image’s overall readability.
Pay attention to the background
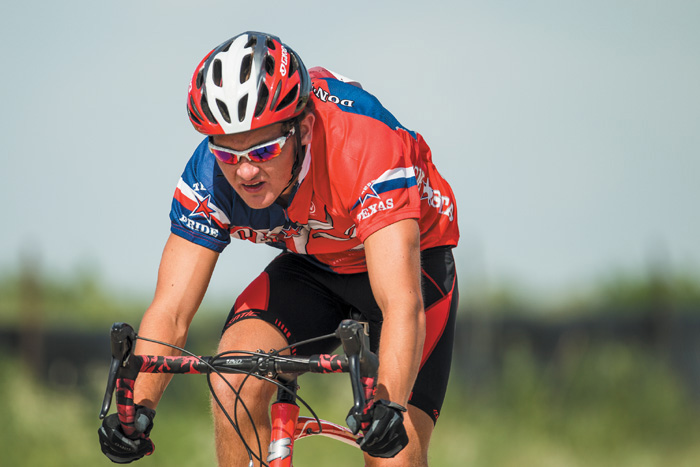
Throwing a background out of focus is one of the surest ways to make a subject pop in an image, but too bright of a background can distract from a dimly lit subject (Figure 5.30), and that same subject can fade into a very dark background (Figure 5.31). A blurred background is nothing more than light values. Either moving your own position or moving the subject against a new, nondistracting background can overcome light values that are bothersome in your shot. It’s always a good idea to consider the tonal values of what is behind the subject (Figure 5.32).
ISO 200 • 1/200 sec. • f/4 • 300mm
Figure 5.30 The bright canyon wall behind the cyclist overrides the eye’s ability to maintain constant focus on the shadowed rider.

ISO 200 • 1/25 sec. • f/4 • 105mm
Figure 5.31 The subject’s dark hair makes the outline of his head disappear into the black background.
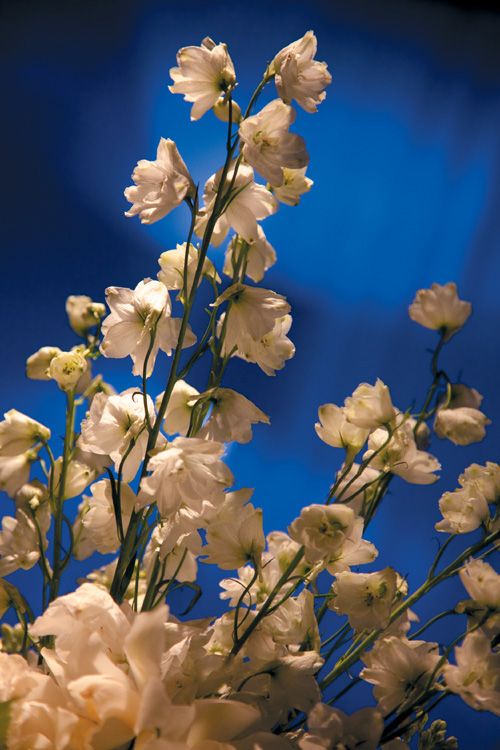
ISO 1600 • 1/160 sec. • f/4 • 105mm
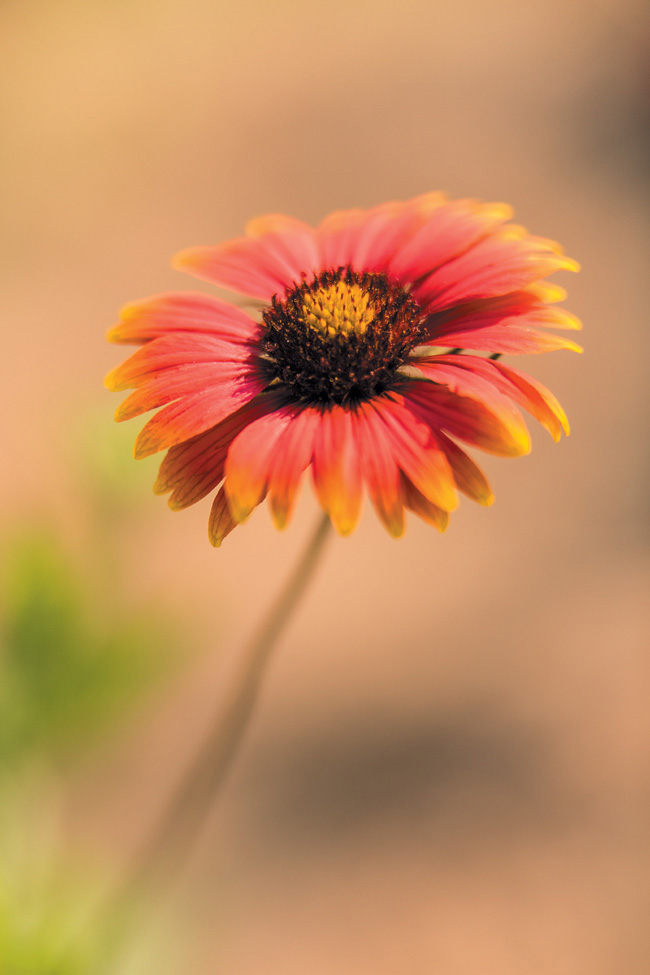
Figure 5.32 The flowers in this wedding reception balanced well against a blue-lit wall thrown out of focus in the background.
Context vs. decontextualization
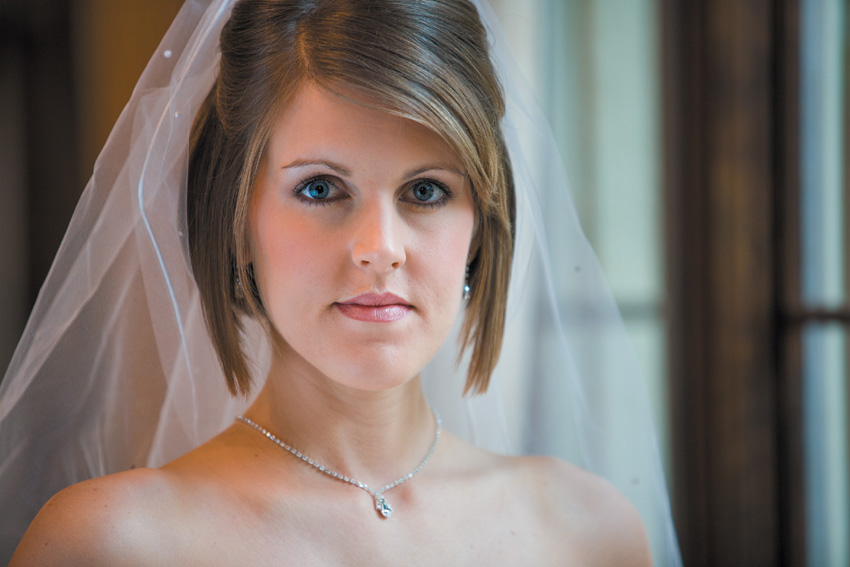
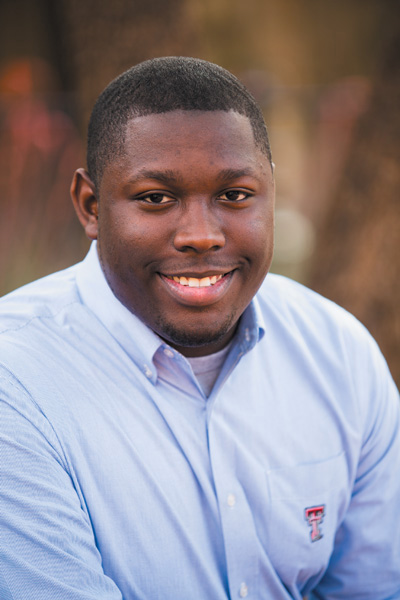
Consider how the strength of the bokeh (the degree to which a background is out of focus) has an effect on an image’s meaning. With long lenses and wide-open apertures, it’s fairly easy to isolate the subject by using extremely shallow depth of field. However, it is just as easy to delete any kind of meaningful, storytelling context the background may provide for the shot. In some cases, this is the photographer’s intention. Head shots, for example, are supposed to focus on the person in them, not the background (Figure 5.33). These images demand the background just fade to a complementary shade of blurred color and light.
ISO 200 • 1/250 sec. • f/2.8 • 200mm
Figure 5.33 A headshot is all about the person in the frame, justifying a complete blurring of visual matter in the background.
Other shots may call for the background to play a bigger storytelling role. Tight portraits or close-ups of static subject matter may need the background to say something more than just blurred color and shapes (Figure 5.34). Photographers have a tendency to use the shallowest depth of field for shots like this.
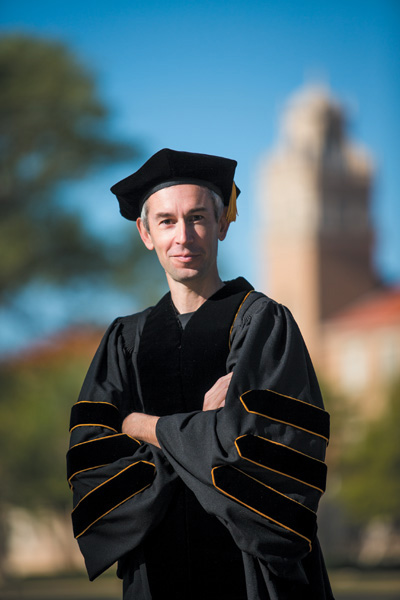
ISO 100 • 1/2000 sec. • f/2.8 • 190mm
Figure 5.34 Even at f/2.8, the distance of the primary subject and secondary subject (the tower) from the camera kept the background in focus enough to tie the graduate to an iconic feature of the university.
It may be to your advantage to increase the depth of field sometimes, to draw a stronger connection between subject and the environment serving as a background. Instead of shooting at f/2.8 (Figure 5.35), perhaps use f/5.6 or f/8 (Figure 5.36). You can produce an image that is aesthetically pleasing yet not decontextualizing. You may also choose to move the subject closer to the background instead of stopping the aperture down.
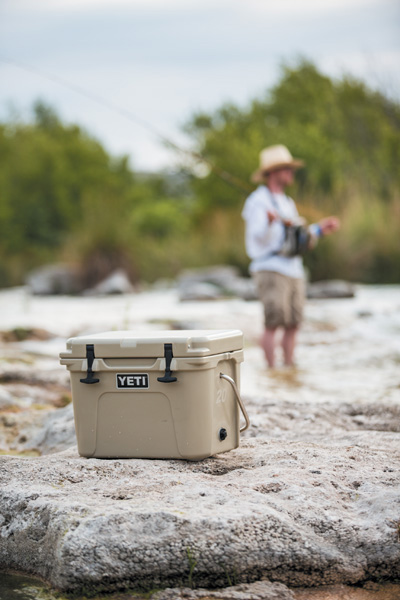
ISO 100 • 1/500 sec. • f/2.8 • 150mm
Figure 5.35 At f/2.8, the cooler stands out well, but parts of the subject—like the fly rod he is holding—get lost in the light values of the background.

ISO 100 • 1/60 sec. • f/8 • 160mm
Figure 5.36 Stopping down to f/8 brings the background more into focus, and the human subject immediately stands out against the vegetation farther back.
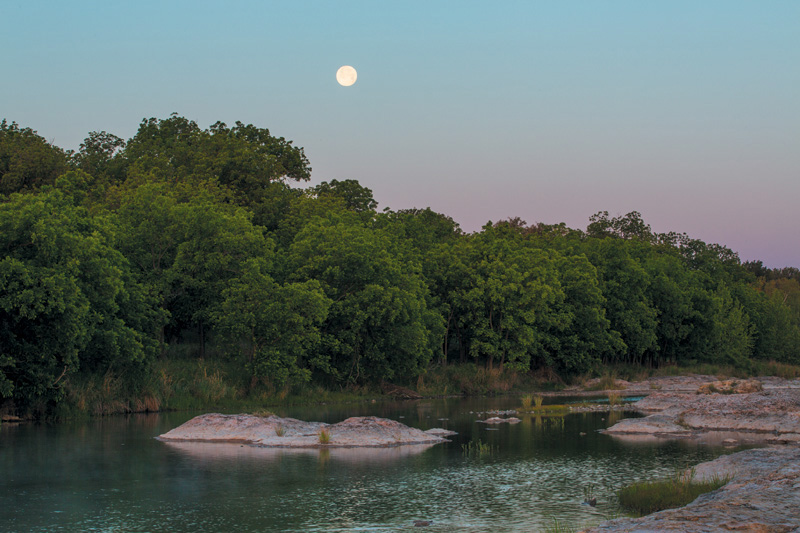
Compress
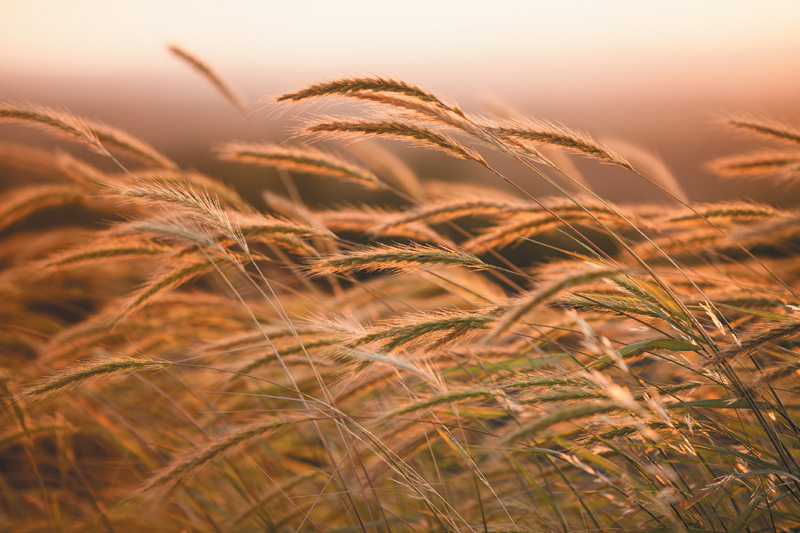
I described optical compression in Chapter 2, but it bears repeating that this is a visual element photographers should take advantage of when using longer focal lengths. Many of the interesting facets of the images in this chapter are a direct result of foreground and background being slammed together in varying degrees of compression (Figure 5.37). Learn to see how compression affects the images you want to make, helping you produce different looks for a subject. It will even help you make the most of unique atmospheric conditions, such as haze, fog, and water (Figure 5.38).
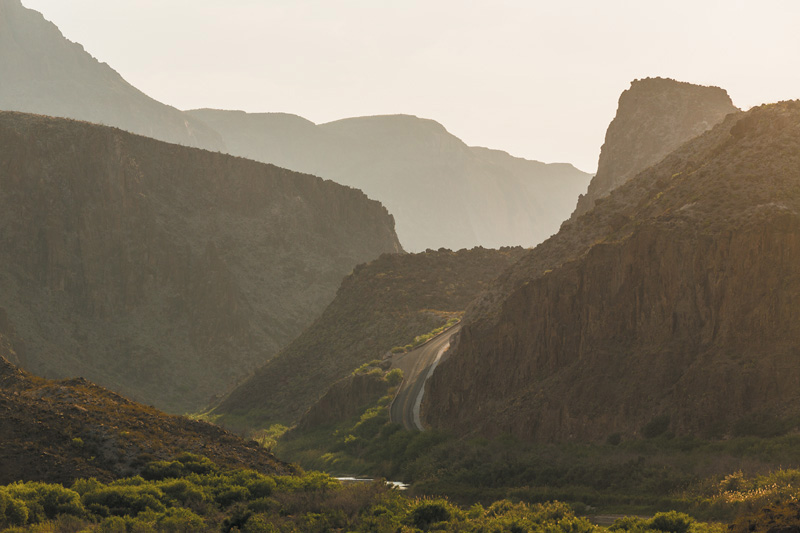
ISO 100 • 1/250 sec. • f/9 • 200mm
Figure 5.37 The mountains of Texas and Mexico along the Rio Grande seem dramatically close with a long focal length’s compression.
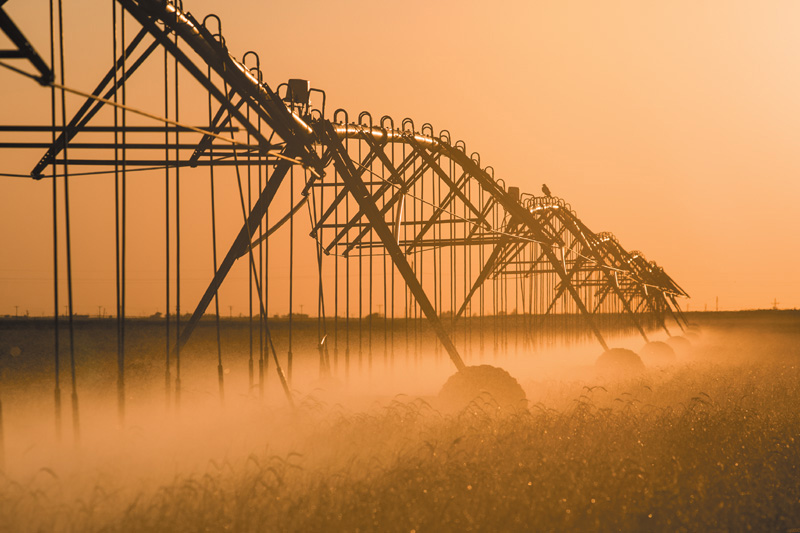
ISO 100 • 1/800 sec. • f/6.3 • 200mm
Figure 5.38 Certain subject matter can be made to look even more interesting with the right light and perspective, such as this tight shot of backlit irrigation water.
Look for Layers, Rows, and Patterns
One of my absolute favorite things to do with telephoto lenses is shoot repetition (Figure 5.39). I always have my eyes peeled for shapes and forms that occur in some sort of systematic fashion. I’m primarily drawn to three different visual elements that exhibit this repetition: layers, rows, and patterns.
ISO 200 • 1/400 sec. • f/4 • 82mm
Figure 5.39 Train your eye to look for repetitious subject matter, like this side of a building in New Orleans.
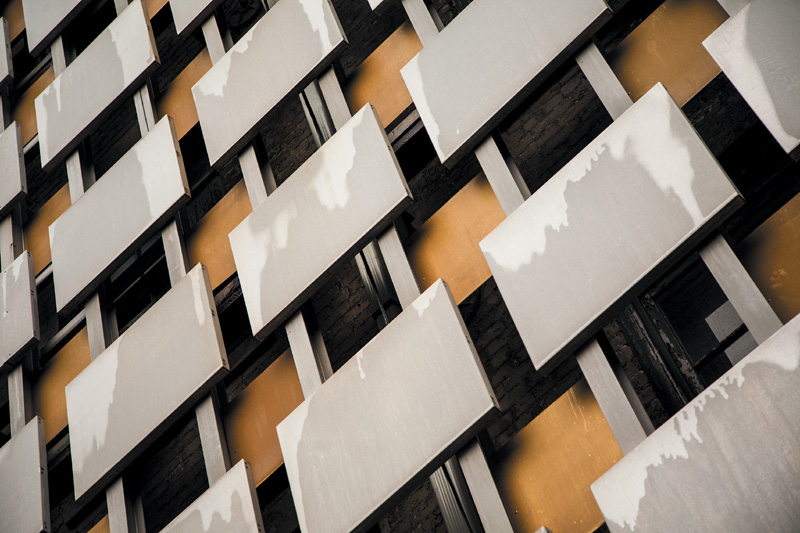
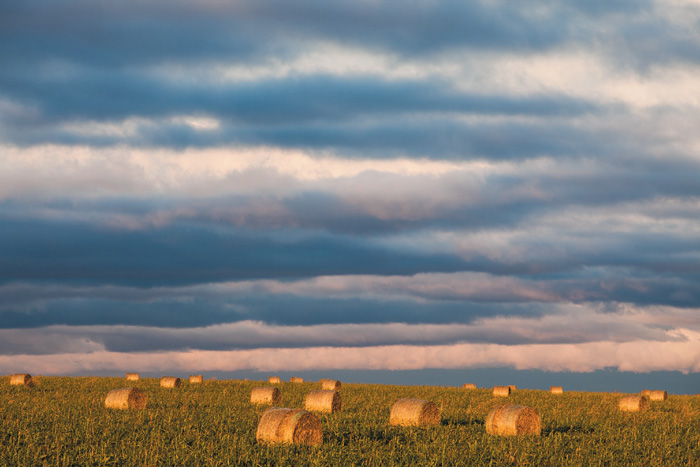
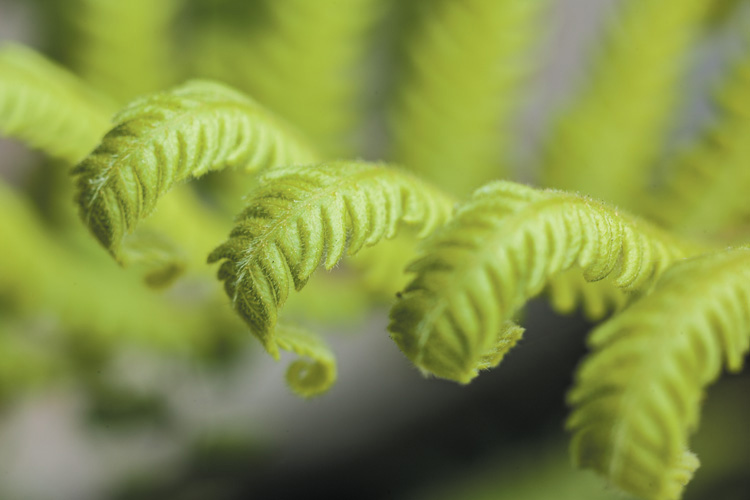
These elements can be found just about anywhere, such as a hayfield or the clouds in the sky (Figure 5.40), windows on a building (Figure 5.41), or a small plant outside your apartment door (Figure 5.42). Of course, you can make great shots of these elements at any focal length, but longer lenses let you see them in a variety of ways, and certainly in ways that can be more abstract. They allow you to compress layers and other repetitious elements, forcing the eye to immediately notice something it would not otherwise in passing (Figure 5.43).
ISO 200 • 1/125 sec. • f/9 • 200mm
Figure 5.40 The layered structure and colors of the sky are made even more interesting with a compressing focal length.

ISO 100 • 1/200 sec. • f/4 • 80mm
Figure 5.41 The human eye is attracted to patterns, like this wall of windows in Madrid’s Plaza Mayor.
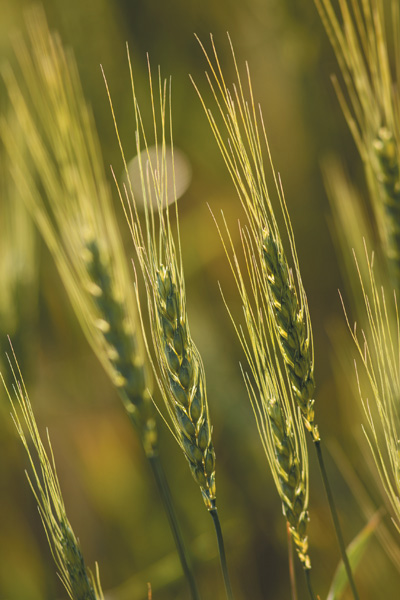
ISO 100 • 1/10 sec. • f/8 • 90mm
Figure 5.42 A macro shot of a fern reveals the patterned look of the plant.

ISO 100 • 1/800 sec. • f/2.8 • 400mm
Figure 5.43 Wide-angle lenses would not capture patterns like this small peloton, even if it were closer to the camera. The longer focal length’s compression helps the eye discern this layering of people and form.
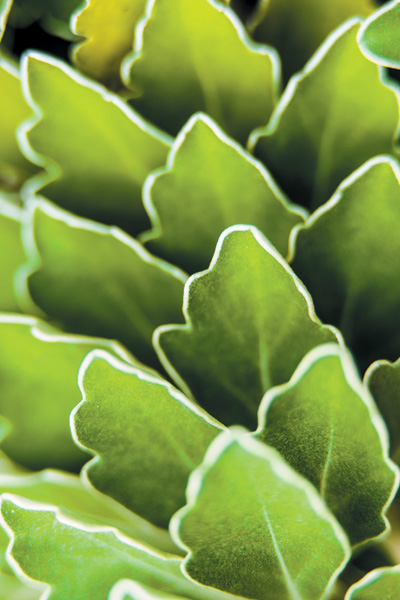
Repetitious shots like this can often be a mystery, and aside from the playfulness of these images, they allow the photographer to produce a sensory connection with the viewer. I often describe close-ups as those shots that make someone use their sense of touch imaginatively. Although we cannot replicate this sense with the camera, a tight shot of the patterned texture of a rocky ledge or a small succulent plant (Figure 5.44) can help someone imagine how that subject feels.
ISO 200 • 1/30 sec. • f/2.8 • 135mm
Figure 5.44 Green-and-white repetition, with just enough evidence of what the subject is, makes for a great close-up.
Longer lenses let the photographer draw the viewer’s eye to a pattern as if it were more important than the content itself (Figure 5.45). It is another interesting way of presenting subject matter, as well as a great way to create interest in other shots of the same subject or in the same story.
ISO 200 • 1/1250 sec. • f/2.8 • 200mm
Figure 5.45 Even though the outfielder is the primary subject of the shot, the patterned outfield makes the shot even more interesting.
Practice, Practice, Practice
To get acquainted with any of your lenses, practice is key. The longer and heavier the lens, the more time you need with it. This might mean taking regular walks or excursions with your camera. Here are a few things to work on and consider when mastering the long lens.
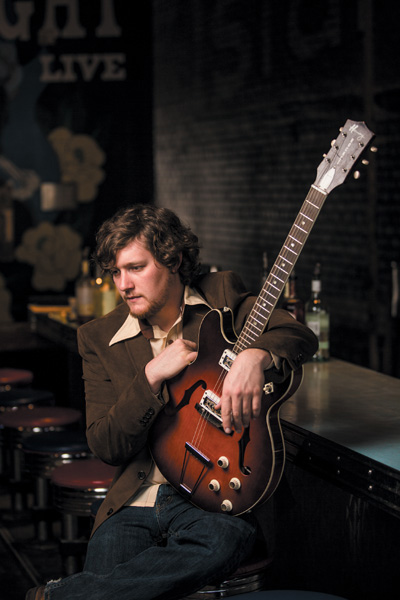
Minimum Sustaining Shutter Speed
In the first chapter, I covered minimum sustaining shutter speed—the slowest shutter speed you can use while handholding a camera and lens to achieve a sharp shot. Any slower shutter speed will result in a body-caused motion blur. Knowing your personal minimum sustaining shutter speed with every lens, especially telephotos, comes in handy (Figures 5.46 and 5.47).

ISO 100 • 1/50 sec. • f/2.8 • 165mm
Figure 5.46 This portrait is slightly out of focus, a result of shooting such a long focal length at a relatively slow shutter speed.

ISO 100 • 1/80 sec. • f/2.8 • 150mm
Figure 5.47 Using a bit shorter focal length and moving in close, I was able to sustain the focus of the portrait at just a notch faster shutter speed.
The surest way to find this out is to simply put a camera to your eye with your long lens on and make exposures with slower shutter speeds each time you snap a shot. Look at the shutter speed on the last shot in focus, and you’ll know your minimum sustaining shutter speed for that lens. If you are new to photography, this shutter speed will more than likely have a denominator that is close in numerical value to the focal length you used.
For example, if you are shooting with a 200mm lens, the theoretical minimum sustaining shutter speed would be 1/200 of a second. The idea is to shoot at that shutter speed, or faster, to avoid your body movement forcing a shot out of focus. The longer the lens, the faster the minimum sustaining shutter speed becomes.
Of course, with practice, any photographer can reduce the minimum sustaining shutter speed for any lens. Using the lens enough to be familiar with how it handles is one way. The other way is through increased stability.
Finding Stability
Reducing your minimum sustaining shutter speed is all about finding and increasing your stability. The sturdier you make your camera and lens, the more able you are to handhold them while still retaining focus.
The stance
Here’s a sure-fire way to immediately add stability to your shooting: Put your left hand under the lens, and lock your elbows onto the side of your body (possibly on the top of your hips) to provide support (Figure 5.48). Widen your feet, placing one in front of the other, and you’ve just made yourself a much more stable human platform. Let your own weight settle before shooting, and press the shutter button when you exhale (you may not be able to do this when shooting things in flight or extreme motion). All of this is about tuning your body to reduce the minimum sustaining shutter speed and ensure sharp images. Again, this technique is not exclusive to telephoto lenses, but it really starts to make a mark here.
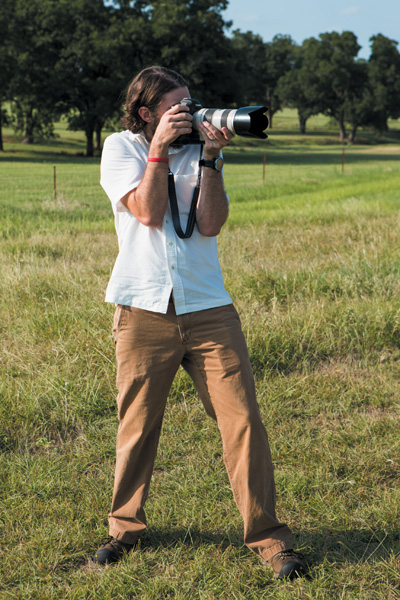
Figure 5.48 A stable stance: Place the lens on top of your left hand, lock both elbows into your body, and widen the position of your feet, one in front of the other.
Adding weight
Heavier lenses are often more stable to handhold than the featherweight alternatives, especially if your stance is set well. Many folks would say that the EF 300mm f/4L IS is more stable than a more-flexible EF 70–300mm f/4–5.6 IS. Why? The prime lens has a bit more heft to keep it from bobbing around with the movement of the supporting arm and hand. It makes sense that adding weight (to a point) makes a platform more stable.
So, what if you own a non-L-series telephoto lens that seems to jump around with the slightest movement of your hand or body? I have seen photographers tape small weights to their longer lenses. I even know one wildlife photographer who wraps one-pound ankle weights around the circumference of his EF 400mm f/5.6L with camouflage tape. You probably can’t put ankle weights around non-L-series telephoto zooms, and some lenses do not have enough room on the barrel for large weights, but there’s always a creative way to add more weight. There are no rules about how much weight to add. It is simply worth experimenting if you experience more than normal movement of the lens when you are shooting.
Tripods
There are times when the human platform is just not stable enough. Once you pass under the minimum sustaining shutter speed, it is time to put the camera and lens on a tripod. Here are a few tips to make the most out of stabilizing your tripod.
If you have a lens that has a tripod mount collar, use it (Figure 5.49). Lenses that have these, such as the EF 70–200mm f/2.8L, the EF 300mm f/4L IS, and the EF 400mm f/2.8L IS, are simply too heavy for the tripod to be connected to the camera. If the lens doesn’t break off the camera, the weight of the lens may tip the tripod over, or more likely, the instability of this kind of setup will rock the camera and lens up and down while you are trying to make a steady shot. If your lens did not come with a tripod mount collar or have room for one, it probably doesn’t weigh enough to cause this issue. Set the tripod legs apart as far as they will go at the height you have the tripod. The closer the legs are together for any height, the more likely the rig will tip over. Add the weight of any telephoto lens on top, and it will tip more quickly.
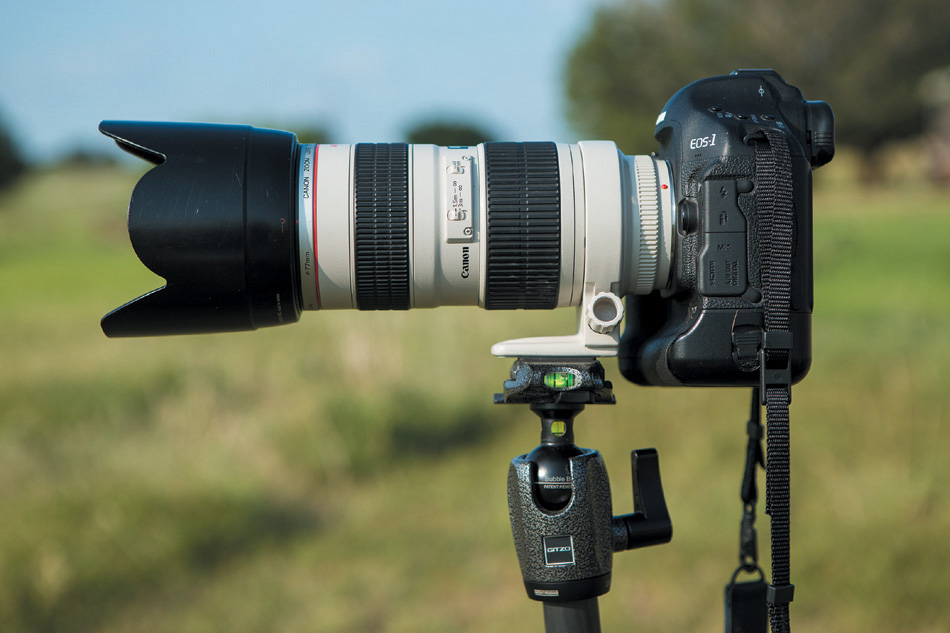
Figure 5.49 Using a tripod mount collar helps better balance the weight distribution of the camera and lens, resulting in less wobble and cleaner images.
Add weight to the tripod. Many tripods have hooks at the bottom of the center column. Hang your camera bag from this to further stabilize the platform (Figure 5.50). If you don’t have a bag or anything that can hang from this hook, use your body to add weight. Make sure your tripod legs are secure and will not slip, and while you are shooting, hold onto one of the legs, adding a bit of your own weight for stability. This works for fairly quick shutter speeds, but I wouldn’t trust your body for stability if your exposure is longer than, say, a second or two.

Figure 5.50 Hanging a bag from the middle column of a tripod is a great way to add weight for stability.
Also consider carbon. Carbon tripods are not heavy (quite the opposite), but they have one thing going for them in terms of stability that aluminum tripods don’t: Carbon legs translate less vibration than aluminum legs. There have been times when I became frustrated with my aluminum tripod in a river because I could feel the water moving by the tripod legs. The vibrations were stronger the closer I got to rapids. Carbon legs are helpful in these situations, and you can always add more weight. Carbon sticks are more expensive than aluminum sticks, but there are some great companies making affordable carbon gear. I use both aluminum and carbon tripods, with Manfrotto being my go-to for aluminum sticks. They also have relatively affordable carbon alternatives to some of their most popular aluminum tripods.
Monopods
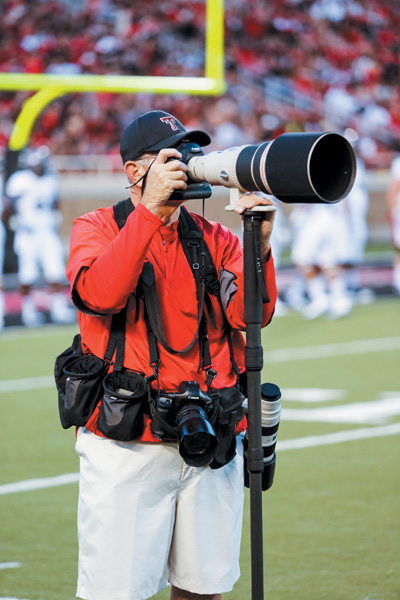
Let’s be honest here. Tripods can sometimes be a royal pain to lug around. Sometimes shooting doesn’t call for that much baggage and it needs to happen much quicker than setting up a tripod allows. Enter the monopod. With only one column of support, the monopod is more like an extension of your hand and arm, just more stable. Monopods really come in handy when you need to carry around a long lens for a long time—like an entire college football game—and avoid fatigue on the human platform. Certainly, they come in handy when the minimum sustaining shutter speed is breached, but their real purpose is for the long haul. We can certainly handhold a few shots with a big EF 500mm f/4L IS, but we would get real tired of holding it up.
Some folks like to use a monopod in place of a tripod. Make no mistake, they serve two different purposes, and they are not necessarily interchangeable. A tripod, in my opinion, is a photographic necessity. A monopod is necessary in certain types of photography (like sports and some wildlife) when the purpose of using one—endurance and efficiency—is paramount.
Chapter 5 Assignments
Telephoto focal lengths take the most effort to use effectively. It is not all about simply zooming into the action. They are also a bit touchy to handhold. Work through the following assignments to help you with both seeing through a telephoto lens and shooting without a monopod or tripod.
Go long!
Like I did in Chapter 3, I encourage you to take a photo walk with only one focal length. This time, rack your lens out to 200mm (if you have a lens that goes to 135mm instead, lock it there). This is a nice standard telephoto focal length that will force you to see the world around you in terms of compression and composition at a distance. Make images only at this focal length to become comfortable with the lens as well as to become more capable of previsualizing images at this focal length. If you have a zoom lens, it might be easy to just zoom in and out depending on your composition, but I encourage you to leave it where you started to train your eye. If you would like, take another photowalk using only 300mm, and another with 400mm if you have it. Unless you’re using telephoto focal lengths all of the time, it is difficult to see or imagine the shots you can make with them. This exercise, although simplistic, helps do just that.
Pick out patterns
While on that photowalk discussed above, look for repetitive patterns, rows, and layers to tighten in on and create images that attract the eye but do not necessarily give away the subject outright. If you are downtown, concentrate on the sides of buildings, windows that are lit well or reflect an interesting sky, manhole covers, or layers of people walking during rush hour. If in the wilderness, consider layers of plant leaves, trunks of trees, or boulders in a stream, and always be cognizant of the cloud structure in the sky.
Practice tracking
One of the hardest techniques to do without practicing is tracking a moving subject with a long lens, especially if said subject is moving fast. Work with another person—perhaps a runner or cyclist—and practice tracking her movement with a telephoto focal length of at least 200mm (go longer for a more challenging exercise). Switch the autofocus mode on the camera to one that constantly engages the autofocus system for movement (AI Servo). Have your subject move across your field of vision as well as toward and away from you at angles. Practice handholding the lens while you make shots of her, keeping only one autofocus point locked on her as much as possible. The closer the subject matter, the more challenging tracking becomes.
Share your results with the book’s Flickr group!
Join the group here: www.flickr.com/groups/canonlenses_fromsnapshotstogreatshots