
8. Best Practices
ISO 50 • 25 sec. • f/18 • 24mm
Lens care and tips for making better pictures
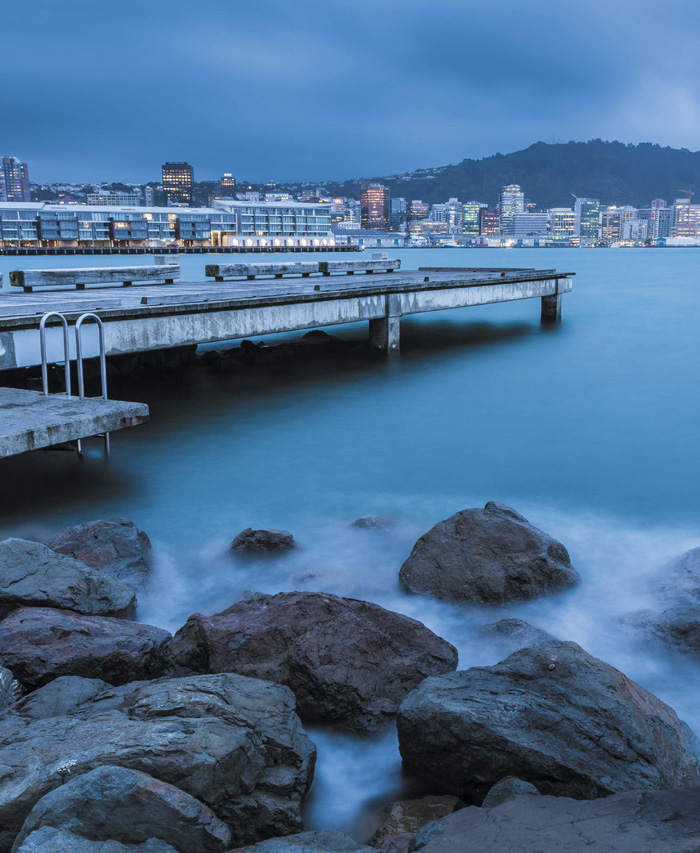
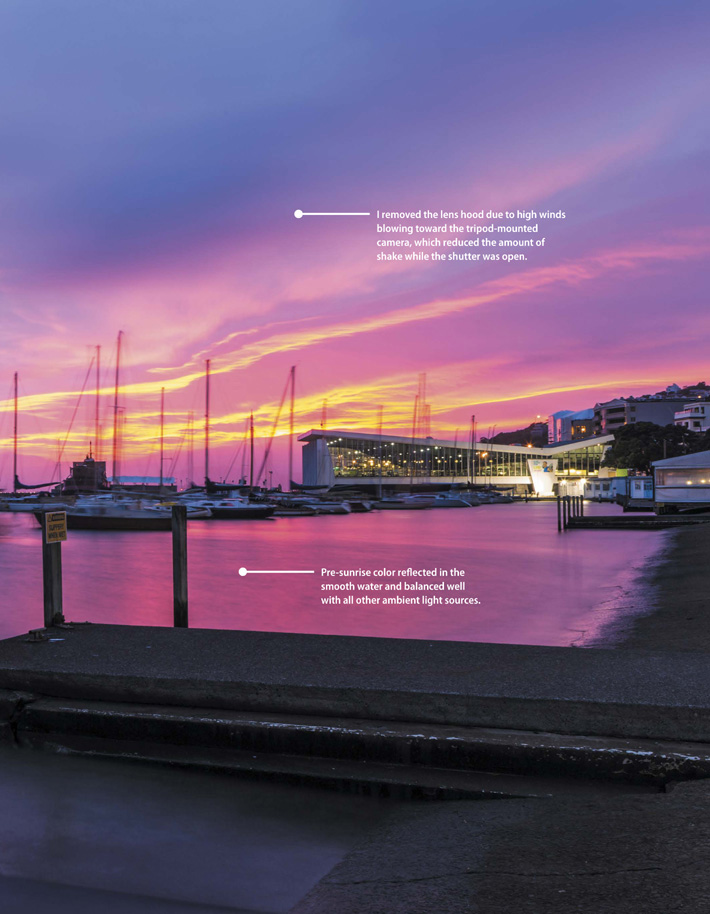
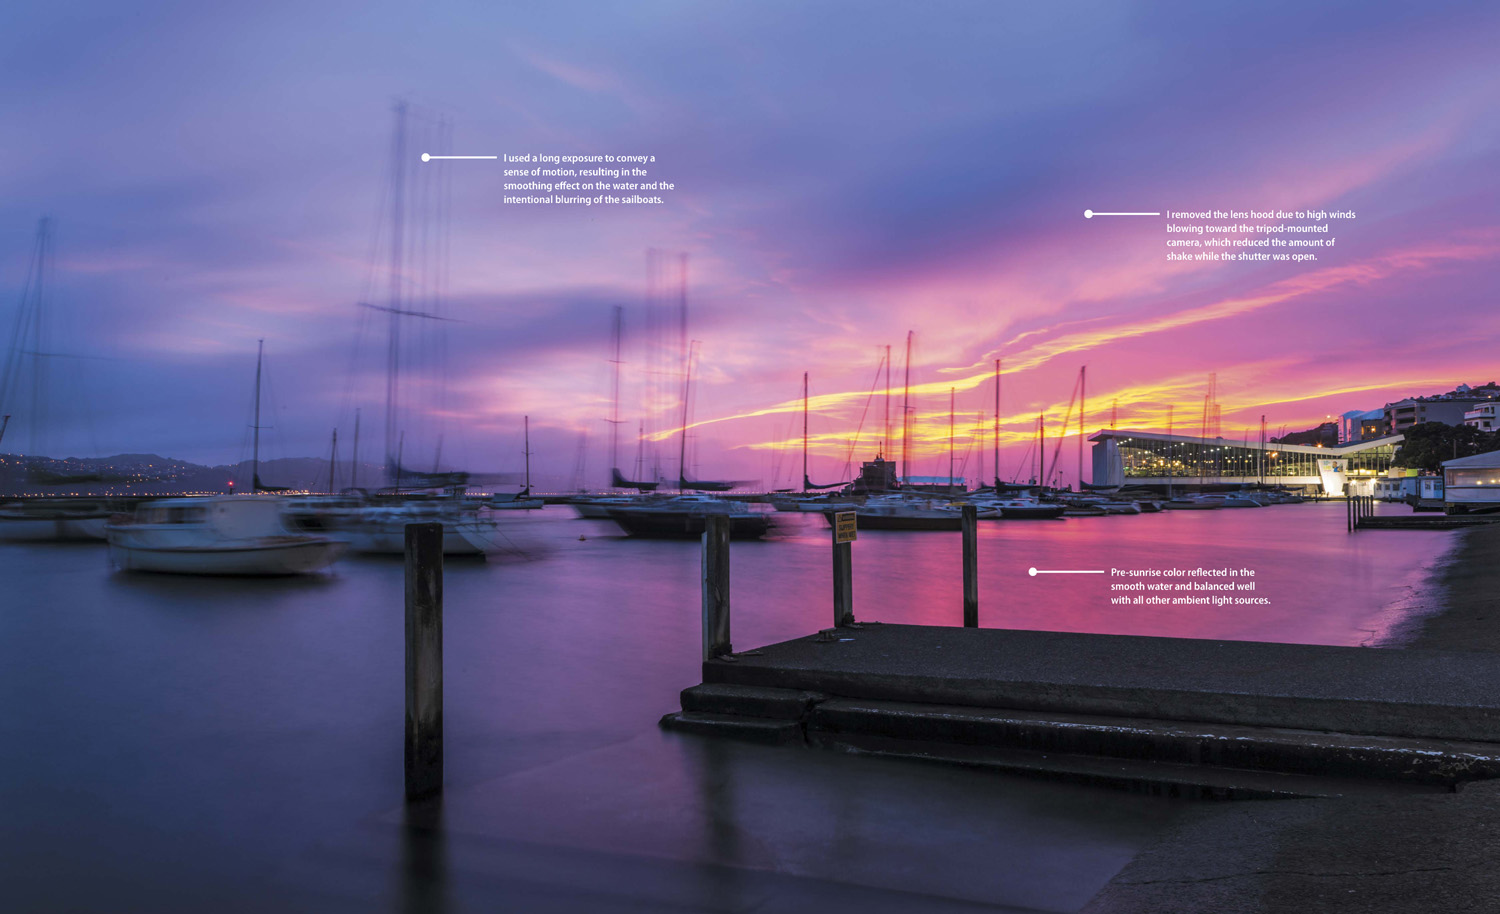
Imagine you are standing on the dock of a marina before sunrise, camera atop a tripod, and you’ve just lined up the perfect shot of boats. You want them to sway, so you plan a long exposure. You begin to shoot, using a shutter release. The first shot indicates a good exposure, an intentional blur of the boats, and the reflection of the sky is glorious. However, the shot is out of focus. A 30 mph wind is whipping straight at the camera, and the camera strap is knocking the camera around on the tripod. You wrap the strap around the tripod head’s base. The next shot is also out of focus. You put weight on the tripod but get another out-of-focus shot. You then realize the lens hood is catching the oncoming wind. Noticing no threat of lens flare, you remove it, and the resulting shot is a keeper.
The above scenario represents a number of best practices you can employ while working with an assortment of lenses in different shooting environments. This chapter runs through a few of these best practices, from maintenance to photographing different subject matter to techniques that are unique to the lenses (as opposed to the camera).

Maintenance and Good Habits
It pays to take care of your gear. Lenses are investments and deserve to be treated as such. From the photography student to the seasoned professional, those who take care of their lenses get the most mileage out of them.
Cleaning
Lenses get dirty. Keep them clean. It’s as simple as that. Lenses collect dust, and even mud when you stumble down a 12-foot-deep pipeline ditch (Figure 8.1). Do you have a lens that grinds a bit when you turn the zoom or focusing rings? If so, there is dust or sand inside those particular mechanisms.

ISO 400 • 1/6400 sec. • f/2.8 • 24mm
Figure 8.1 To get this shot, I slid down the embankment on my backside, dragging cameras and lenses in the dirt with me, necessitating a thorough cleaning after the shoot!
Cleaning cloths
A proper cleaning cloth for any lens is made of microfiber and large enough to cover more than just the lens element. You can pick one up at every camera or electronics store. Just make sure it is indeed for camera lenses. Microfiber (Figure 8.2) is incredibly soft, does not scratch the glass or important coatings on the outside of the elements, and is a magnet for dust. I recommend getting one at least the size of your hand so you don’t leave a thumbprint on the glass. Your fingers are especially oily, and when they come in contact with lens elements, try to clean the lens as soon as you can. A soft cotton T-shirt will also work. Never use anything polyester based, or tissues or paper towels.

Figure 8.2 Microfiber cloths are extremely lightweight and not abrasive to lens glass. I like to keep a few Spudz cloths attached to my camera bags.
Before wiping with a cloth, be sure the glass is free of any sand or other abrasive elements that can scratch the glass. Use a fine lens brush or air blower. With your cloth, wipe your lens’s glass in a circular motion, paying extra attention to the area where glass meets the lens construction (the edge of the element). Wipe both outer elements, being extremely careful not to touch either with your fingers, especially the rear element nearest the camera (this one gets tough to clean if it needs any more than just a blow of air and a wipe).
If you need to clean a dusty lens barrel, a lens cloth will work. However, if there are large chunks of dirt or mud (or any sticky material) on the barrel, dampen a normal cleaning cloth and use it to lightly loosen all of the grime. Make sure to wring the cloth out very well before using, lest you get water in the seams and seals around the zoom and/or focus rings and buttons. Keep in mind that this is just for the barrel. If you want to apply a cleaning solution to the front and rear elements, I suggest you use an optic-grade product.
Solutions
At times, using a cleaning solution to wipe up grimier spots on lens elements is essential. Use a methyl alcohol solution when cleaning your lens elements. It is best to dampen your lens cloth with a few drops of it and then wipe instead of applying the solution directly to your glass. This reduces the risk of liquid seeping in through the seam of the lens barrel and glass construction. Take your time and wipe gently. Applying too much pressure may cause some unseen obstruction to scratch the glass, or at the very least the coatings necessary for great color and contrast rendering. If you do not have any solution at the time you notice grime on your lens, you can also breathe softly on the glass, fogging it up, and then wipe gently.
Air blowers
It seems I have an air blower in every camera bag. I believe an air blower should never be too far out of reach for both camera bodies and lenses. There are several brands of air blowers, but I lean toward the Giottos Rocket Air Blaster because of its durable, rubberized construction and force (Figure 8.3). Although they seem more useful for cleaning camera sensors, air blowers are nice for blowing large pieces of dust off of lens elements, as well as blowing grime away from seams and buttons. As if you were cleaning the digital sensor on your camera, hold the surface you are blowing upside down so debris clinging to your lens will fall away from it (Figure 8.4).
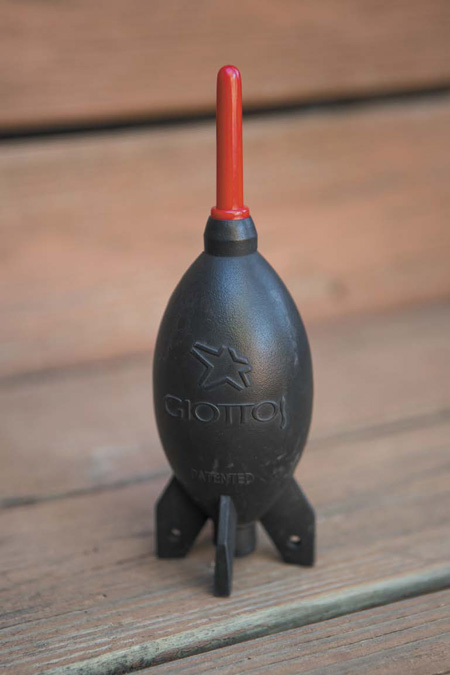
Figure 8.3 A rubber air blower, such as the Giottos Rocket Air Blaster, is an indispensable accessory.
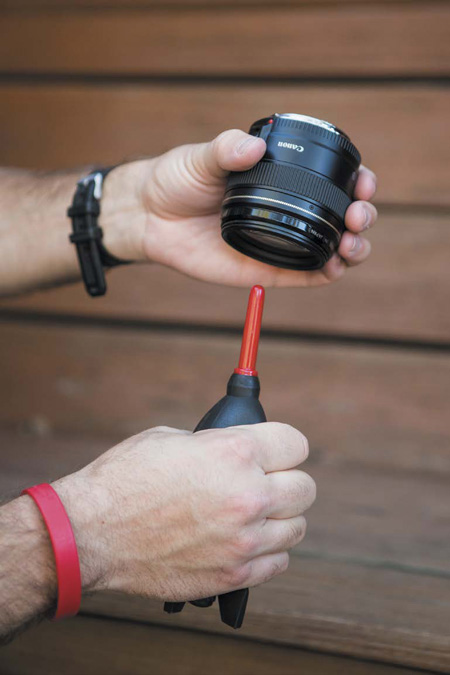
Figure 8.4 When using an air blower on your lenses, turn the surface upside down and blow upward, ensuring any debris on the glass or barrel falls to the ground.
When I do a thorough cleaning of all my gear, I use the air blower to knock the first layer of dust off. I often use the air blower in place of a soft lens brush. I never—and nor should you—use canned air to clean any of my gear, especially my lenses and camera sensors. Canned, or compressed, air often spits and spurts fluorocarbons onto your gear, and the last thing you want is some of this leaking into your lenses. You may never be able to get it out.
Storage
I cringe at how some of my students store their camera gear, haphazardly thrown into backpacks or slung low and loose around the body. I need to stress the importance of storage. There are always going to be instances when you don’t treat your gear with the utmost care, but hopefully this is when you’re in pursuit of making great images instead of just transporting the gear around town.
Choose the right bag
Bags are a touchy subject among photographers. Many of us have our favorite brands (mine is Think Tank Photo), we have different functional requirements, and we want bags to have just a little style. Regardless of your brand preference, I suggest that you really examine the structure of a bag before you purchase. If you are lucky enough to have a camera store in your city, pay it a visit and compare bags of different makes and price points.
Although lightweight, bags with thin, almost paperlike, internal dividers are not very protective. Nearly all camera bags these days come with moveable dividers, and some even come with extra dividers. It is nice to have a bag that can be configured to your needs yet keeps your gear secure in case of a fall (Figure 8.5).
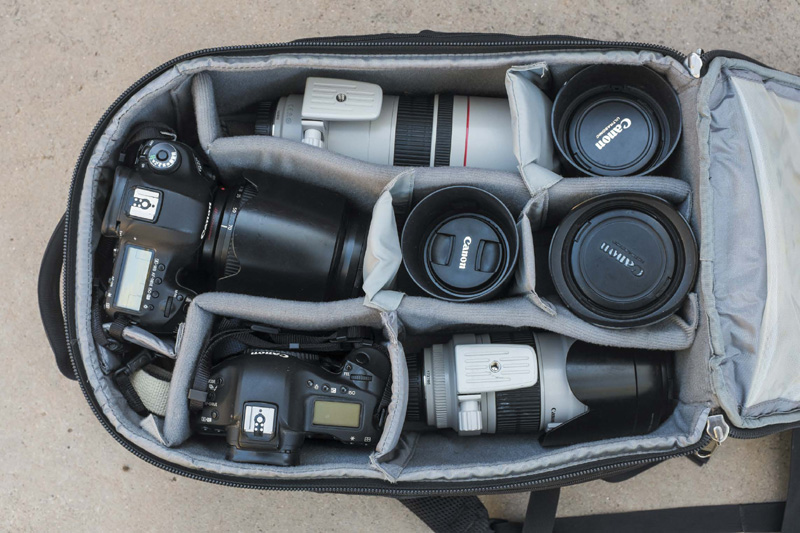
Figure 8.5 Ensure your camera bag has sufficient padding for transporting your lenses. This Think Tank StreetWalker Hard-Drive has thick but lightweight dividers. (I “Frankensteined” it with a couple Lowepro dividers as well.)
Also compare the bags’ zippers. One of the reasons I use Think Tank Photo is that they use sturdy zippers (Figure 8.6). The last thing I need is a zipper busting loose on my backpack, especially when it’s full of equipment and on my back.

Figure 8.6 They might seem unimportant, but stout, big zippers are one of my first considerations when shopping for new bags. You do not want your zippers failing when you are transporting your bag or accessing the gear inside.
If you are an outdoors photographer, consider getting a bag that has water-resistant or waterproof exterior features, such as special cloth materials, zippers, and covers (Figure 8.7). I often use a Lowepro Pro Trekker when taking long hikes with a lot of gear due to its superior internal padding and water-resistant zipper for the main compartment (Figure 8.8). Take it from someone who has dunked a camera bag full of gear in a river: This is a feature you want.
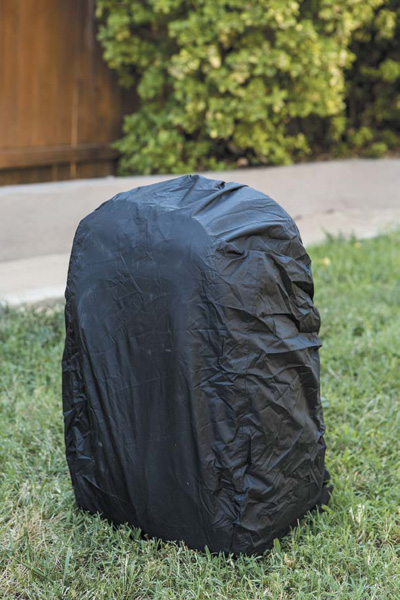
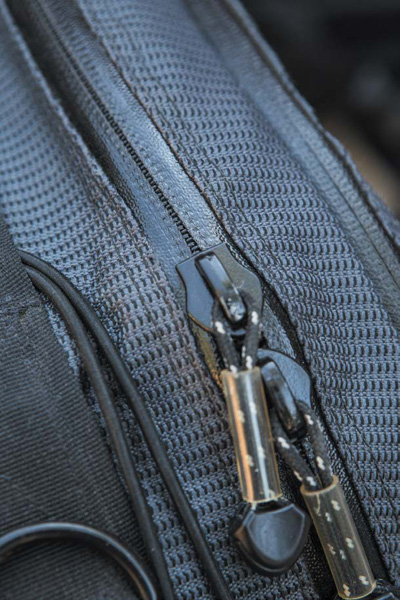
Figure 8.8 Many bags, including this Lowepro Pro Trekker, have water-resistant zippers. If you are photographing near or on water quite a bit, this is a valuable asset.
Some lenses, usually the higher-end L-series pieces, come in their own bags. These are nice for transport when you need to pack a lens in luggage, insulating it from other noncamera gear. However, they are not all that practical when you also own a good camera bag with internal dividers. (I never use the bags that come with my lenses.) The large telephotos come packaged in their own hard-shell cases, but most photographers will acquire bags to transport these lenses more efficiently. The bottom line is there are many camera-gear bags out there. Shop for durability, protection, and comfort (in that order).
Leave the lens on
I often see beginning photographers finish a shoot and then take their lens off their camera, put the body cap on the camera and the rear lens cap on the lens, and then put both in their bag separately. Some bags are designed to carry your gear like this, minimizing space needed for the bag itself (like the Think Tank Photo Shape Shifter in Figure 8.9). For the most part, I recommend keeping a lens on a camera. Why? Simply to keep the inside of the camera and the rear element of the lens cleaner. Every time you remove your lens from the camera, you invite dust to collect inside both pieces of gear. Clearly, you’ll need to change lenses, but limiting the number of times you do it reduces the chances of debris collecting on the camera’s sensor or rear lens element.

Figure 8.9 The Think Tank Photo Shape Shifter is a wonderful bag, but it doesn’t allow the camera and lens to stay connected during transportation.
As a side, it is also important to turn off your camera when changing lenses or taking one off to store the equipment. Leaving the camera on attracts static-friendly dust. Along the same lines, it is best practice to keep the camera facing downward when changing lenses.
Keep the lens cap on
One of the worst things you can do is lose a lens cap, a simple necessity (Figure 8.10). The lens cap is the number-one defense against fingerprint smears and small scratches. You might not need it when just photowalking around the city or out in the countryside, especially if you are using a lens hood, but it never hurts to put the cap on when you are hiking around rocky areas or stopping at the local pub for a pint.
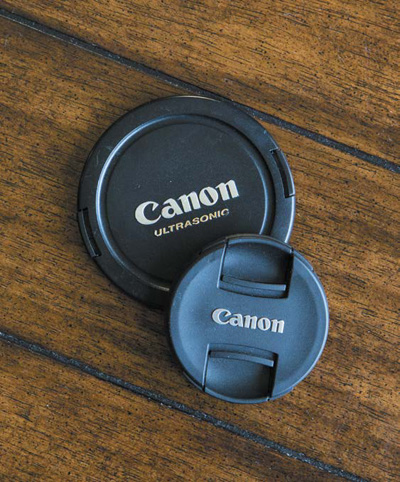
Figure 8.10 Keep your lens caps close. They are the first defense against nicks, scratches, and grimy fingers.
Be sure to store your lens with the cap on. Most camera bags are constructed with internal materials that will not hurt your outer lens elements, but that doesn’t keep you from putting in things (such as loose change) that might. Also, always remember where you put your lens cap. Every time I take off a lens cap, I put it in a pocket, usually my back pocket. I know that when it’s time to return the lens back to the bag, the lens cap is somewhere on my body.
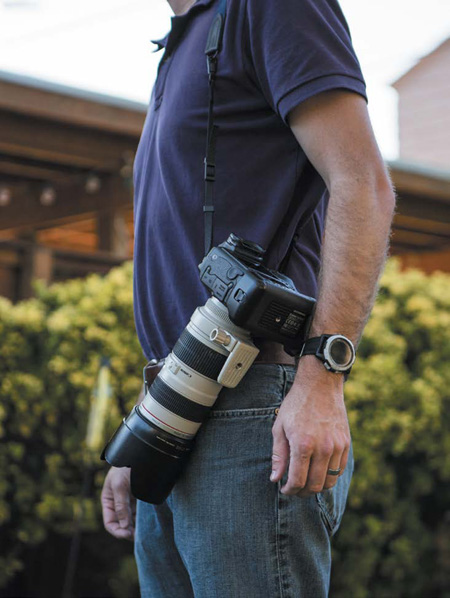
Reverse Your Carrying Position
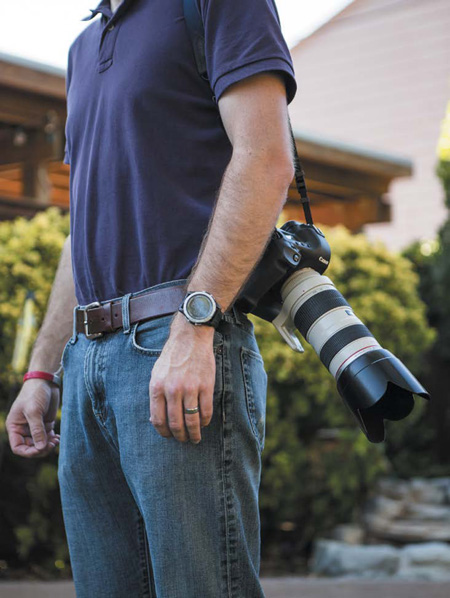
Figure 8.11 Slinging a camera on your shoulder with the LCD facing your body leaves the lens protruding from your side, making it prone to knocks.
Say no to the car
I’m going to be very blunt: Do not store your camera equipment in the car. Unfortunately, I know several people who have had their gear stolen. Vehicles are just too easy to break into, and it’s difficult to hide camera gear. If you live in a hot area, cars can become ovens as well. Although I don’t know of any instances when the heat of a parked car damaged gear, I can’t stand the idea of gear composed of silicon, glass, plastic, and glue sweltering in a hot vehicle.
So, what is the alternative if you have to leave your vehicle somewhere for a while? Carry your gear with you. Practice good judgment about your surroundings, but for the most part, you should just schlep your gear around.
Shooting Equipment and Techniques
When it comes to actually shooting with your lenses, the process seems pretty simple: Point the lens at what you want to capture, compose the shot, and snap. However, there is more to it, particularly in regard to maintaining focus and moving it with your subject matter (when shooting active subjects). Previous chapters discussed strategies and accessories for capturing great images with various types of lenses. The following section includes additional tips and suggestions for all lenses.
The Lens Hood
Part protector, part shooting necessity, the lens hood is the sister to the lens cap. Whereas all lenses come with lens caps, not all are packaged with a lens hood. I suggest getting a hood for every lens, for a number of reasons (Figure 8.13).
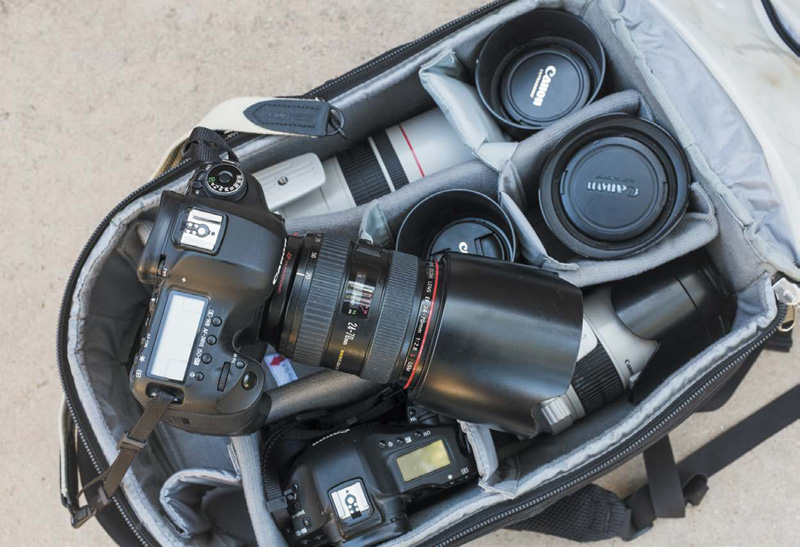
Figure 8.13 As bulky as some lens hoods are, like this one for the EF 24–70mm f/2.8L, a hood does more than just reduce the potential for flare. It is also a great shock absorber and lens guard.
Lens flare
Most people associate a lens hood with reducing lens flare. Lens flare is caused by direct light—mostly sunlight, but anything with a high-intensity spot characteristic—hitting the lens elements at extreme angles. Photographers whose work involves turning their lenses in the direction of the sun deal with flare most often. Flare creates visible spots or artifacts or a global haze in a shot. A lens hood helps reduce flare simply because it provides a shade to block the sunlight. Lens hoods range in size. Make sure you get one manufactured specifically for the lens on which you wish to use it; otherwise, the hood may show up in the frame!
Shock absorber
I use a lens hood every time I shoot mostly because it provides the lens (and camera) with a great shock absorber. A lens hood is round, protrudes from the end of the lens, has a wider circumference than the lens itself, and is made of strong plastic with a little bounce in it. I once dropped a camera and lens from the seat of an 18-wheeler truck, and because it landed first on the lens hood, the only damage was a scuff on the side of the lens hood. Don’t worry if the hood gets a few scratches or dings.
Shooting in the wind
As much as I love its simple functions, the lens hood is relatively worthless in high winds, especially when you need to shoot into those winds. The hood is basically a cup at the end of your lens, and it catches direct and cross winds like a sail. Whether you are handholding a shot or making one from a tripod, wind blowing hard against a lens hood can vibrate and destabilize a shot. Certainly, the faster the shutter speed, the more able you are to make a focused shot, but it may not be possible.
When shooting long exposures, the effect of the wind is amplified (Figure 8.14). During these times, simply take the hood off. The lens may still catch a little wind but not nearly as much. A hood for L-series lenses is often big enough that you can place it around your hand and wear it as a bracelet—just in case you might lose it.
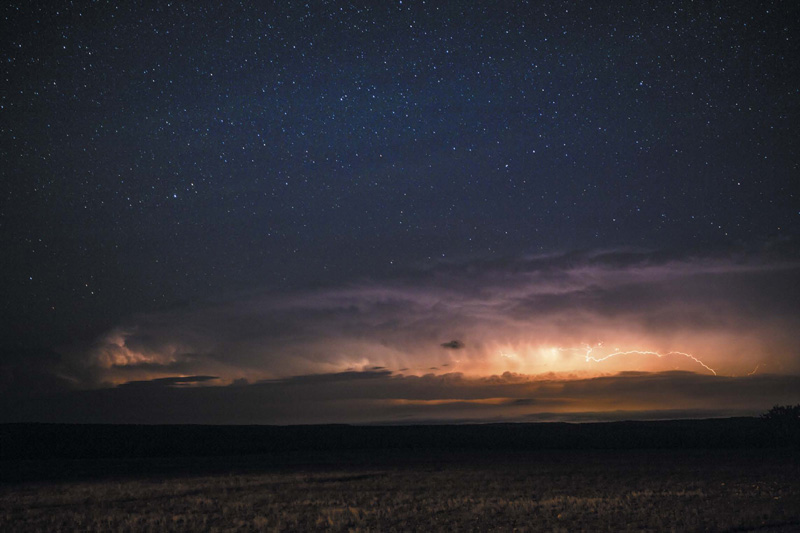
ISO 800 • 15 sec. • f/2.8 • 52mm
Figure 8.14 The wind was blowing so hard that the lens hood was like a small wind sail that shook the camera during the long exposure and knocked previous shots out of focus.
Image Stabilization
Image Stabilization (IS) is usually found on long prime lenses or zoom lenses that reach out past 100mm. However, the technology has trickled down into more standard zoom lenses as well. (You won’t see too many wide-angle lenses with Image Stabilization.) As mentioned in Chapter 1, Canon’s Image Stabilization can offer up to four stops of stabilization (Figure 8.15).
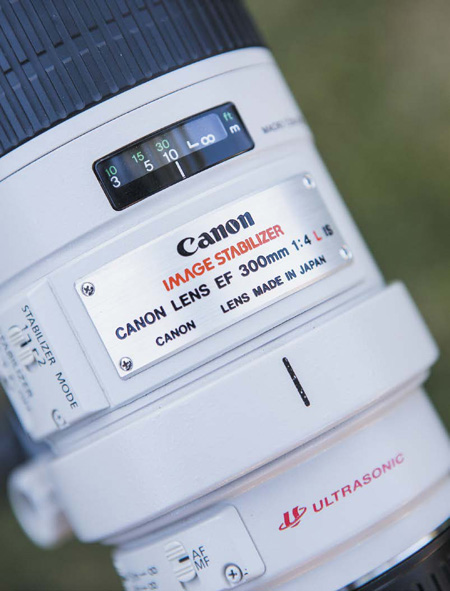
Figure 8.15 Canon lenses that feature Image Stabilization offer up to four stops of motion-caused blur reduction.
Sports and wildlife photographers, event photographers, and many others who shoot in dimly lit environments find Image Stabilization a lifesaver when using slow shutter speeds without a tripod or monopod. Landscape photographers, on the other hand, might have image-stabilized lenses but rarely engage the technology. Image Stabilization is best used when there is a threat of your body’s movement causing blur in your shots. IS excels when you shoot slower than your minimum sustaining shutter speed (Figure 8.16).

ISO 1600 • 1/60 sec. • f/4 • 300mm
Figure 8.16 For this image of photographer Jacob Copple and his subject, Image Stabilization allowed me to shoot much slower than my minimum sustaining shutter speed for a 300mm lens.
Image Stabilization also comes in handy when you are photographing in dark environments, with apertures closed down past maximum (Figure 8.17). Keep in mind, IS only helps you handhold slower shutter speeds. It has nothing to do with freezing the movement of your subject.

ISO 3200 • 1/50 sec. • f/4 • 300mm
Figure 8.17 Live theatrical and music performances with dim lighting are perfect subjects for activating Image Stabilization.
When shooting with fast shutter speeds for the lens you are holding, it might be best to disengage Image Stabilization (Figure 8.18). For example, let’s say you are handholding a 300mm focal length and shooting with a shutter speed of 1/640 of a second. More than likely, this is fast enough to handhold without using Image Stabilization. If engaged, IS may shift your composition a bit, and it can even drain your battery.

ISO 100 • 1/1600 sec. • f/2.8 • 400mm
Figure 8.18 Sports events often take place in bright light, allowing shutter speeds fast enough to negate Image Stabilization. In fact, IS may shift the image’s composition.
Likewise, if you are shooting from a tripod, Image Stabilization can often do more damage than good. IS can slightly recompose a shot that was meticulously set up on a tripod. The optics may shift from where you originally intended the frame to be. With longer exposures on a tripod, the IS function may even cause blur based on the amount of movement it makes. The solution? Turn Image Stabilization off when you put the camera on a tripod.
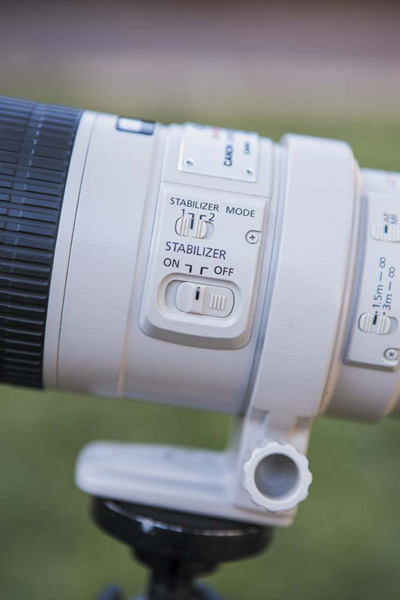
Figure 8.19 Switching between Image Stabilizer modes (on select Canon lens models) is easy, especially while shooting.
Tripods
The tripod—every photographer’s best friend and worst enemy. Best friend because there’s no better way to stabilize a camera and lens for a wide range of photographs. Worst enemy because it is such a pain in the posterior to carry around. Undoubtedly, the tripod is a worthy tool. There are a couple of lens-related considerations to keep in mind when shopping for and using tripods.
Construction
Whenever I’m asked for tripod suggestions, I always give the same advice: Look for sturdy legs and a sturdy head. Unfortunately, there are a lot of bad tripods out there. For example, the drugstore variety of tripods—made of lower-grade aluminum with a plastic head and mount that is moved up and down with a small plastic crank—are inexpensive for a reason. They are not sturdy platforms, and I have seen more than one break in a river and float downstream.
Tripods should not be an afterthought. By shopping around and spending just a few more dollars, a photographer can get an extremely stable tripod that will last. There are a number of tripod brands. I recommend Manfrotto for aluminum and Gitzo for carbon fiber, but you should compare different models. A nice set of aluminum legs and a strong head can cost as little as US$200. Aluminum is heavier than carbon fiber but less expensive (although carbon fiber is coming down in price).
I also advise shopping for legs and heads separately (but looking at the combos or kits in case there is one that contains the legs and head you want). This forces you to analyze the legs separately from the head, making sure both will hold up to the weight of heavy lenses.
There are two ways to mount your camera or lens onto a tripod: by screwing the gear directly onto a ball head—my preference (Figures 8.20 and 8.21)—or using some version of a quick-release (QR) plate that is first attached to the camera or lens and then attached or detached from the tripod head (Figures 8.22, 8.23, and 8.24). Regardless of which type of mount you use, make sure it is metal. Plastic mounts are flimsy and break easily. This is especially true of plastic quick-release plates that mount into plastic heads. Metal mounts can stand under pressure as you tighten your gear to them, resulting in a much more stable platform for heavier lenses.
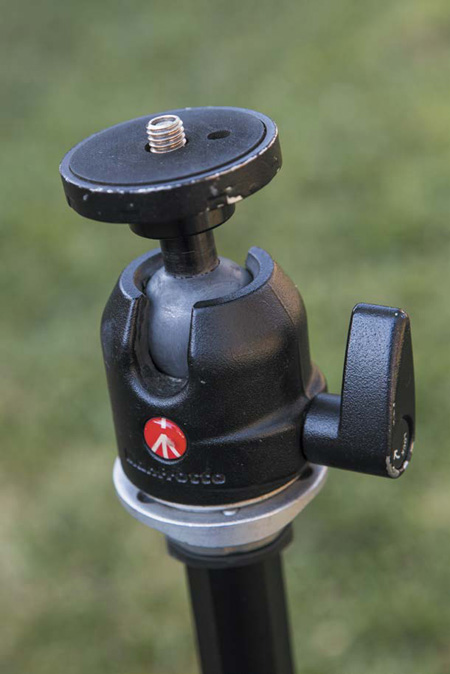
Figure 8.20 A Manfrotto 486 Compact Ball Head is a simple but sturdy head, known for its ease of use and reliability.
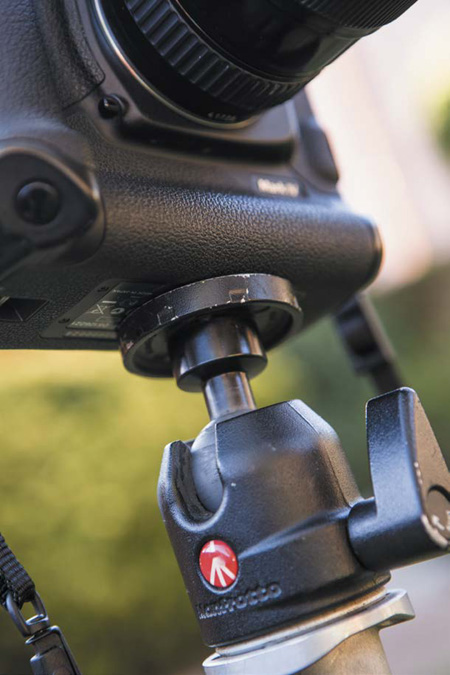
Figure 8.21 Traditional ball heads screw right into the bottom of the camera or lens tripod collar, making for a secure, albeit somewhat inefficient platform on which to mount your gear.

Figure 8.22 A quick-release (QR) tripod head, like this Gitzo Traveler version, is a popular style of head for photographers who need to work quickly.
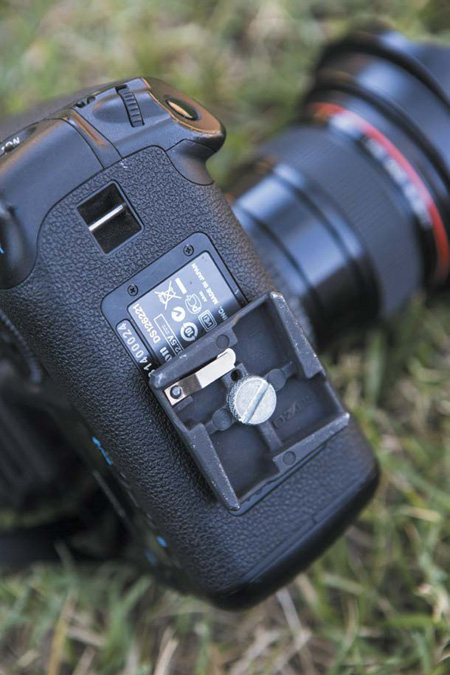
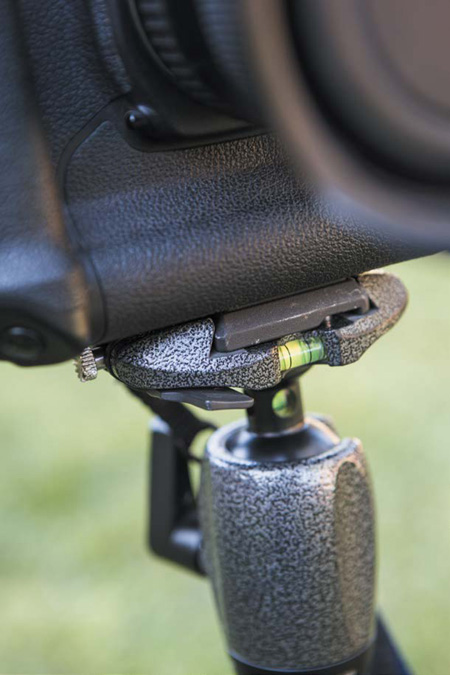
Figure 8.24 Make sure to test the sturdiness of the QR plate’s connection to the head on any tripod for which you are shopping. QR plates have a habit of becoming loose over time.
The mounts that allow you to screw the head directly into the camera or lens are arguably the sturdiest. Although it takes longer to mount the camera and lens to the tripod, once it is there, it is essentially a part of the entire platform. Landscape photographers value this type of mount since they are on a tripod a large percentage of the time. I appreciate the efficiency of the quick-release plate—and often use one with one of my tripods—but the QR mount tends to wobble more than a direct mount to a ball head after some use.
The longer-lens shake
To reiterate a point from Chapter 5, the longer the lens (physical length), the less stable it is on a tripod. When using a telephoto lens, it is best if you mount it by its own tripod collar as opposed to mounting the camera to the tripod. Most L-series telephoto lenses come with a tripod mount collar that can be used just like the mount on the bottom of the camera body (Figure 8.25). This results in a more balanced distribution of weight on the tripod.
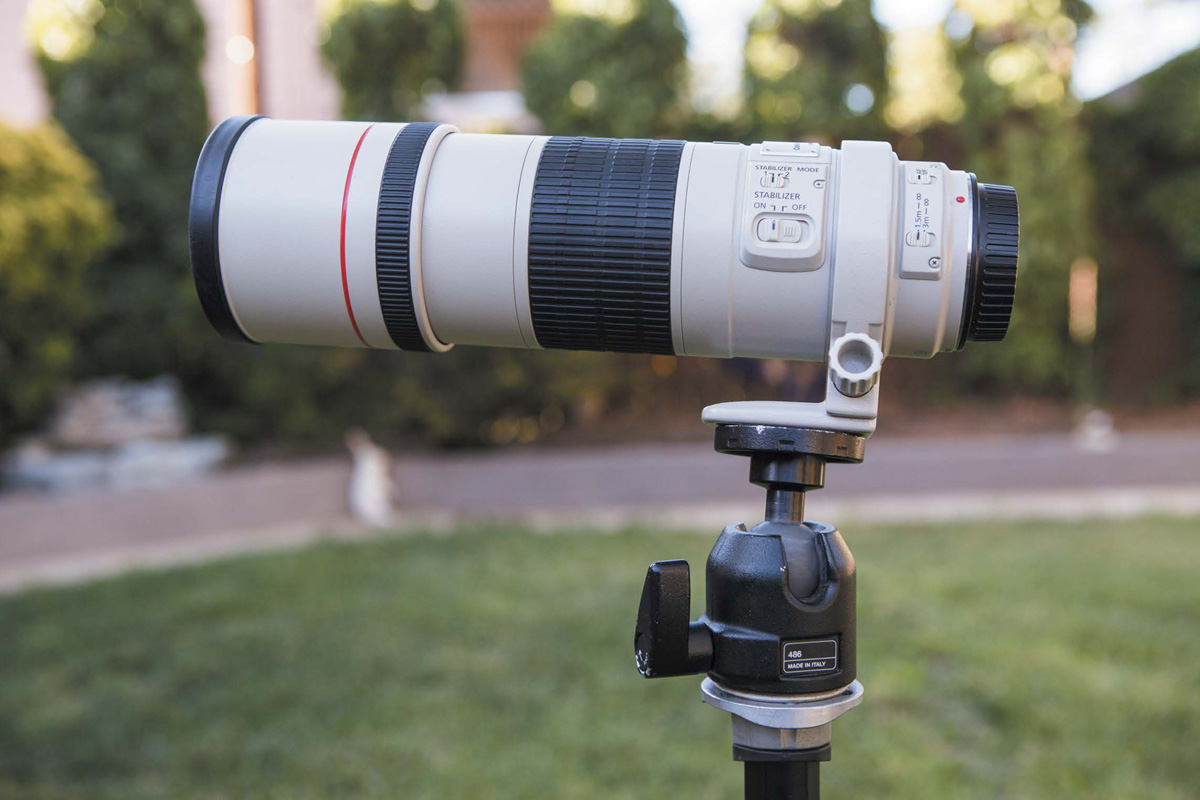
Figure 8.25 If your heavy telephoto lens includes a tripod collar, use it to secure the lens to the tripod. Don’t leave the weight of the lens hanging off the camera’s much-weaker lens mount.
A tripod mount collar also helps prevent the bounce that may occur when you mount a camera body attached to a long lens at the camera. The uneven, out-front weight of such a combo makes the head and camera body flex up and down, potentially bouncing a shot out of focus. Lenses that are not manufactured to mount with a collar, like the EF 70–300mm f/4–5.6 IS, are not considered heavy enough to create such a drastic bounce or flex of the camera and tripod head. However, I have seen these relatively lightweight lenses become more unstable on cheap, drugstore-variety tripods—one more reason to consider a heavier set of legs and head.
For extremely long and heavy lenses—such as the EF 400mm f/2.8L IS, the EF 500mm f/4L IS, and longer—special gimbal heads are often necessary to take on the extreme weight as well as offer superior stabilization and mobilization (Figure 8.26). Wildlife and bird photographers are attracted to these types of heads for their fluid motion, ease of use with heavier lenses, and quality construction. Some tripod and gimbal head setups do come at a price (they can cost into the thousands), but if you can afford to purchase a US$10,000+ lens, you will want to place it on the best platform possible.
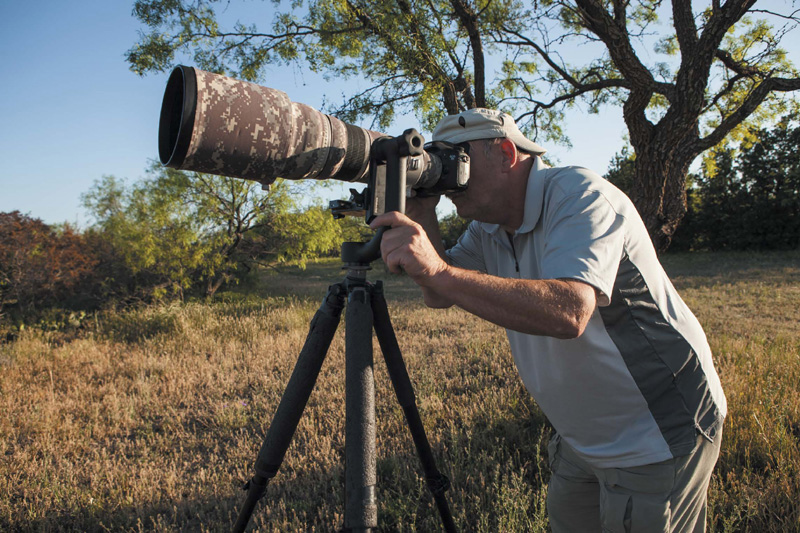
Figure 8.26 Gimbal heads are able to support and efficiently move a very heavy, tripod-mounted telephoto lens, and they are popular with many wildlife photographers.
Going Solar
Who says not to include the sun in your shots? Well, me, for the most part. However, there are a few creative ways of making such a bright, overbearing light source work inside your frame.
Flare
Lens flare comes in two basic varieties: visible artifacts and haze. Flare is caused by pushing a lens’s ability to focus light through its various lens elements. Many photographers are reluctant to include flare—especially artifacts—in their shots because of the potential negative impact on an image (Figure 8.27). Over the years, flare has become a bit cliché as well. However, sometimes it does have its purpose.
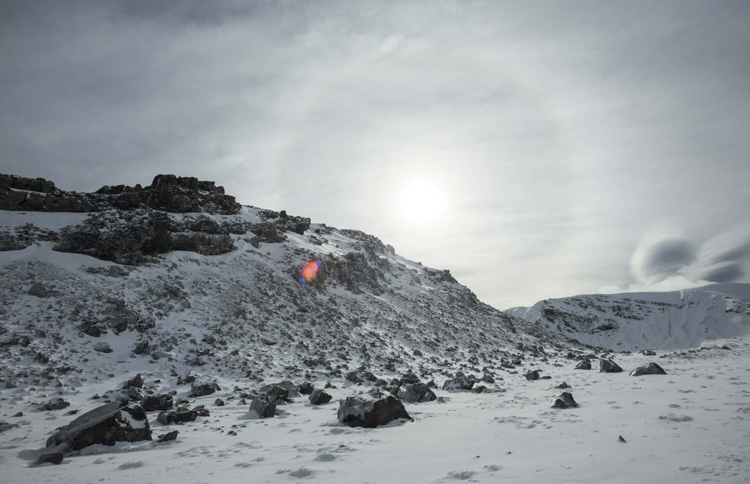
ISO 200 • 1/400 sec. • f/22 • 17mm
Figure 8.27 While attempting to capture a solar ring on an alpine hike in Tongariro National Park, New Zealand, I included a colorful yet annoying flare as a result of shooting directly into a cloud-covered sun.
Artifact flare can be used to stress extreme personality in a shot, as well as direct the eye to, or away from, something significant. Flare is sometimes used in sports shots and those expressing a characteristic of an environment, such as an oppressive desert climate or barren snowscape (Figure 8.28).
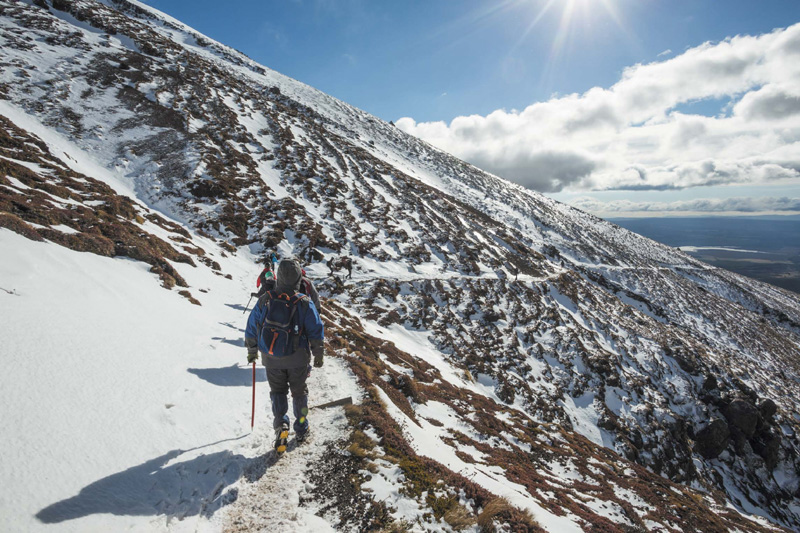
ISO 100 • 1/250 sec. • f/16 • 17mm
Figure 8.28 The flare in this shot, more of a starburst, coincides with the adventurous spirit of the hikers.
A haze effect is essentially one large flare artifact that covers an entire frame. A haze flare can often be an advantage, warming up an otherwise cool scene, and it is useful in toning a compressed, layered scene. Using flares is an aesthetic choice, but in my opinion, they work well in landscape photography (Figure 8.29). I have also seen them put to good use in portraiture (Figure 8.30).
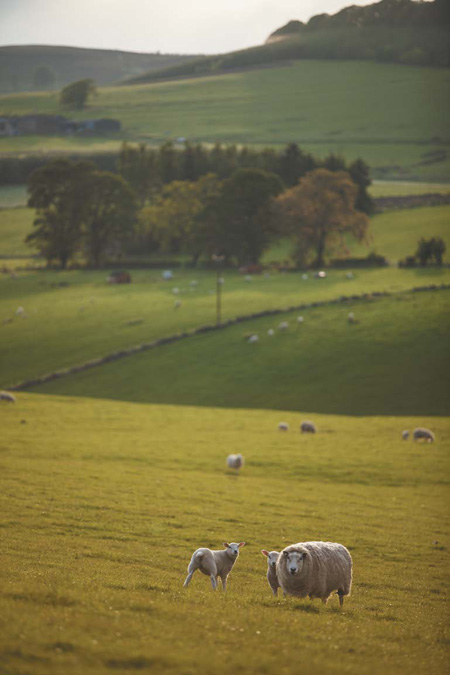
ISO 100 • 1/400 sec. • f/2.8 • 175mm
Figure 8.29 The subtle warmth of this Scottish countryside is due greatly in part to the late-evening flare covering the lens’s entire angle of view.

ISO 50 • 1/200 sec. • f/2.8 • 140mm
Figure 8.30 Although the subject is artificially lit, the warm haze that provides ambience to the shot is actually an encompassing flare caught late in the evening.
Starburst technique
There are starburst (or star, for short) filters that make every specular light in a frame shine like a star, but you can also create a starburst with the sun, a subject, and a lens (Figure 8.31).
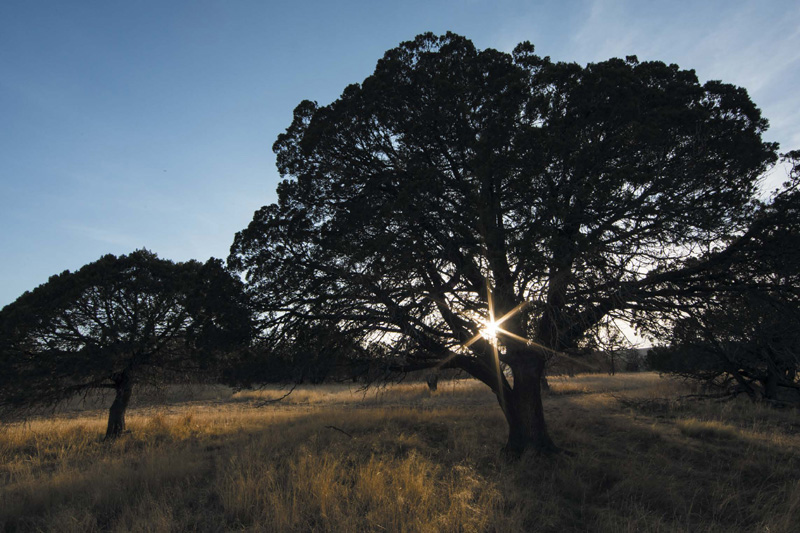
ISO 200 • 1/100 sec. • f/18 • 14mm
Figure 8.31 With a stopped-down aperture and subject matter obstructing the sun, a pristine starburst is but a shutter-click away.
The process is fairly simple. Find a subject and composition in which you would like to have a starburst accent the scene. The sun must be in the shot, so you will likely be shooting directly into it. The catch is to block much of the sun with the subject matter, such as a tree. Place the sun where branches meet the trunk of the tree or where they branch out even more, among the canopy. Let a bit of sun shine through to the lens right at the point where a branch meets another part of the tree at an angle.
This is where the lens comes into play. Set your aperture to f/8 or higher. This will help focus the sunlight and shape it into what looks like a multipoint starburst. The more closed down the aperture, the more focused the starburst; if the aperture is set wide open, the burst may be indistinguishable. It might take you a few shots to get it the way you want. Be careful not to employ this technique too much if you are shooting editorial work, for risk of being repetitious.
Shooting at Night
At night, light is a major consideration, especially how the light from sources not “on” during the day, such as stars, will look in your frame. You will need to expose for longer periods of time and/or turn up the ISO to capture light more quickly.
One important tip for using lenses at night: Get the shot set up before the light is gone. For example, you might have a great night shot set up among the stars with a bit of the horizon in it and some structure on the ground that you want the small amount of light to expose while the shutter is open. If it gets too dark before you set up, focusing where you want will be very difficult, given that focus works by detecting contrast in light values. If the focus sensor cannot detect an edge of a subject or the horizon, it makes an educated guess.
The following are a couple more tips for when you’re working the lens at night. Note that these have more to do with long exposures than anything else, and some of these issues have already been covered.
Which aperture?
Light at night is obviously dim compared to light during the day. Therefore, it is typical to leave the aperture more open than closed when shooting at night, especially if the night sky is your subject.
Stars are extremely dim to the camera’s sensor, simply because they are so far away. They may be very powerful, but the distance knocks their intensity out. I start my night sky exposures using an aperture of f/4 or f/5.6. This is particularly fitting for when I want to do extremely long exposures of over 5 minutes (Figure 8.32). At an ISO of 100, f/5.6 is open enough to let in a nice amount of starlight but closed down enough that over a long exposure the stars do not burn too long in one spot. However, it is worth knowing that the more closed down the aperture, the dimmer the overall exposure will be, especially the star trails.
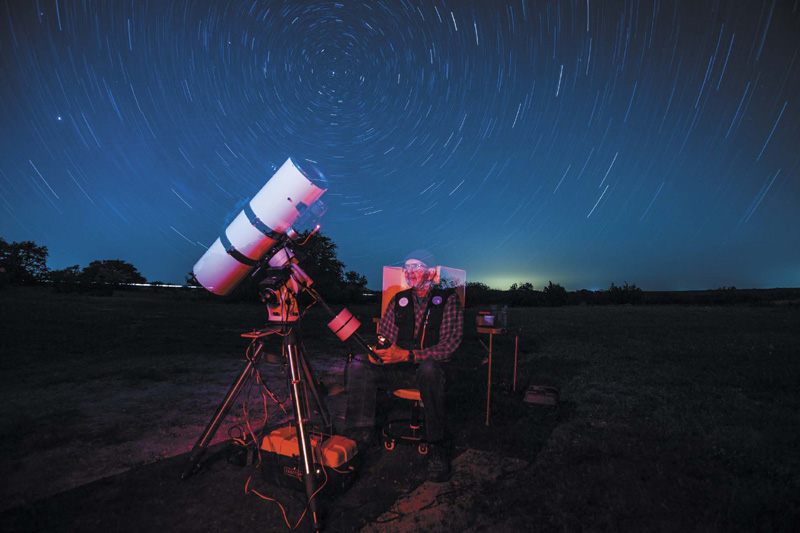
ISO 100 • 31 min. • f/4 • 17mm
Figure 8.32 Star trails are usually accomplished with a low ISO, a very long exposure (in excess of 5 minutes for long trails), and an aperture that is not completely wide open. Don’t forget a tripod!
If you want to go for those shots that expose the stars exactly where they are in the sky, instead of star trails, open up your aperture all the way, crank your ISO up, and shoot for around 30 seconds. I really enjoy lenses that open up to f/2.8 for this application, but f/3.5 is great as well. The key is to let in as much light as possible during that 30 seconds and burn the stars on the sensor before the earth rotates enough for trails to be created. That’s why the ISO is cranked high and the aperture wide open (Figure 8.33). Keep in mind that if there is any light near the horizon on which you are pointing, like the residue of a sunset or a city off in the distance, it will register more quickly using this technique.

ISO 1600 • 20 sec. • f/4 • 14mm
Figure 8.33 Capture the abundant night sky with a high ISO and an open aperture. Make sure to get out of town into dark-sky country, and set up before the sun goes down to avoid fumbling around for composition in the dark.
Distortion and the night sky
If you’re like me, you enjoy those wide-angle, expansive shots of the night sky. When just shooting the stars as they stand with high ISO and wide-open aperture, the distortion the lens creates is rarely recognizable, aside from any subject matter you might have composed in the foreground, such as a mountain or tower.
However, something very interesting happens when you point a wide-angle lens high into the night sky and shoot a long exposure (something long enough to render star trails, like 5 to 10 minutes). This setup may result in trails that arc like a rainbow and another set of trails that arc in a reverse rainbow above the aforementioned trails (Figure 8.34). This usually occurs with ultra-wide-angle focal lengths, such as 14mm. The double arc of trails is the result of the extreme curvature of the lens, where one set of trails curves away from the midpoint toward the horizon and one curves the other way. If the second arc of trails bothers you, angle the lens farther down toward the horizon, reducing the presence of this second arc.

ISO 100 • 28.5 min. • f/4 • 14mm
Figure 8.34 With an ultra-wide-angle lens pointed far enough up on a night sky, a long exposure will produce two arcs of star trails.
Pay Attention to Those Before You
It is important to keep our eyes and ears open to practices that will help us create better images and make sure our gear lasts for the long haul (like my tip from Alan Hess about how to carry your camera and lens when they’re slung across your shoulder). A great deal of information exists on the Internet in regard to maintaining and operating your equipment, but I advise you to also find someone local who has been shooting for some time (maybe a professional, maybe an experienced amateur or teacher) and form a relationship. Not only will you be creating community around your craft and passion, but you will also be gaining a resource for questions you have along the way.
Be open to discussion about some of the issues posed in this book. Everyone operates a bit differently, and you never know what you are going to learn. I know a wildlife photographer who adds ankle weights to lighter-weight telephoto lenses to stabilize them when he is handholding a shot. I never would have thought of that, but it makes sense. Through a relationship with an experienced photographer, you will always be able to glean best practices that might help you in your own image making.
Chapter 8 Assignments
Taking care of your lenses is essential. So is using them in ways that make for the best photographs. The first assignment highlights the importance of keeping your gear clean and operable. The second is a useful but often intimidating technique to perform when shooting with any lens.
Treat your lenses with care
Assess how you handle your lenses (and all of your gear, for that matter). Is it with care, or are you lax about wear and tear? Do you have the standard accessories for keeping your gear clean? This is a good time to take inventory. If you do not already own them, acquire a lens microfiber cloth, a reputable lens-cleaning solution, and an air blower (not compressed air).
Learn how to use them all. Ask your local camera-store representative to show you how to use each of the items, or lean on online resources, like B&H Photo, for proper care of your glass. Institute a regularly scheduled cleaning (either after every shoot or once a week if the shooting has been light or in clean environments).
Create a starburst
Making starbursts is fun, creative, and easy to accomplish. If you have never performed this technique, start on something small, like a backyard tree. Wait until late evening (or get up early) when the sun is closer to the horizon. Position the tree between you and the sun, and focus on its branches. Put the entire tree in the frame, or select a portion of its branches for your composition. Expose for the sky behind the tree, forcing you to silhouette the tree. Stop your aperture down to somewhere around f/11 or f/16.
The tricky part is placing the sun slightly behind a branch and slightly exposed to the lens. Use your Depth of Field Preview button to stop down your aperture while looking through the viewfinder, and as you position the sun behind parts of the tree, you should be able to see it burst as a star in your frame. Where it bursts is where you want it positioned. Typically, the more you stop down your aperture, the more focused the star becomes. Practice this at home, and then use walls of buildings in cities, water towers, mountains, even flowers! I can’t say starburst shots are in high demand, but they are certainly fun to make.
Share your results with the book’s Flickr group!
Join the group here: www.flickr.com/groups/canonlenses_fromsnapshotstogreatshots