
Now we are ready to set up our first Jenkins job. As discussed earlier, each job is created to perform certain specific tasks, which could be individual or could be in a pipeline.
According to Andrew Phillips, ideally, a pipeline breaks down the software delivery process into stages. Each stage is aimed at verifying the quality of the new features from a different angle to validate the new functionality, and to prevent errors from affecting your users. If any error is encountered, a feedback is returned in the form of reports, and it is ensured that the required quality of the software is achieved.
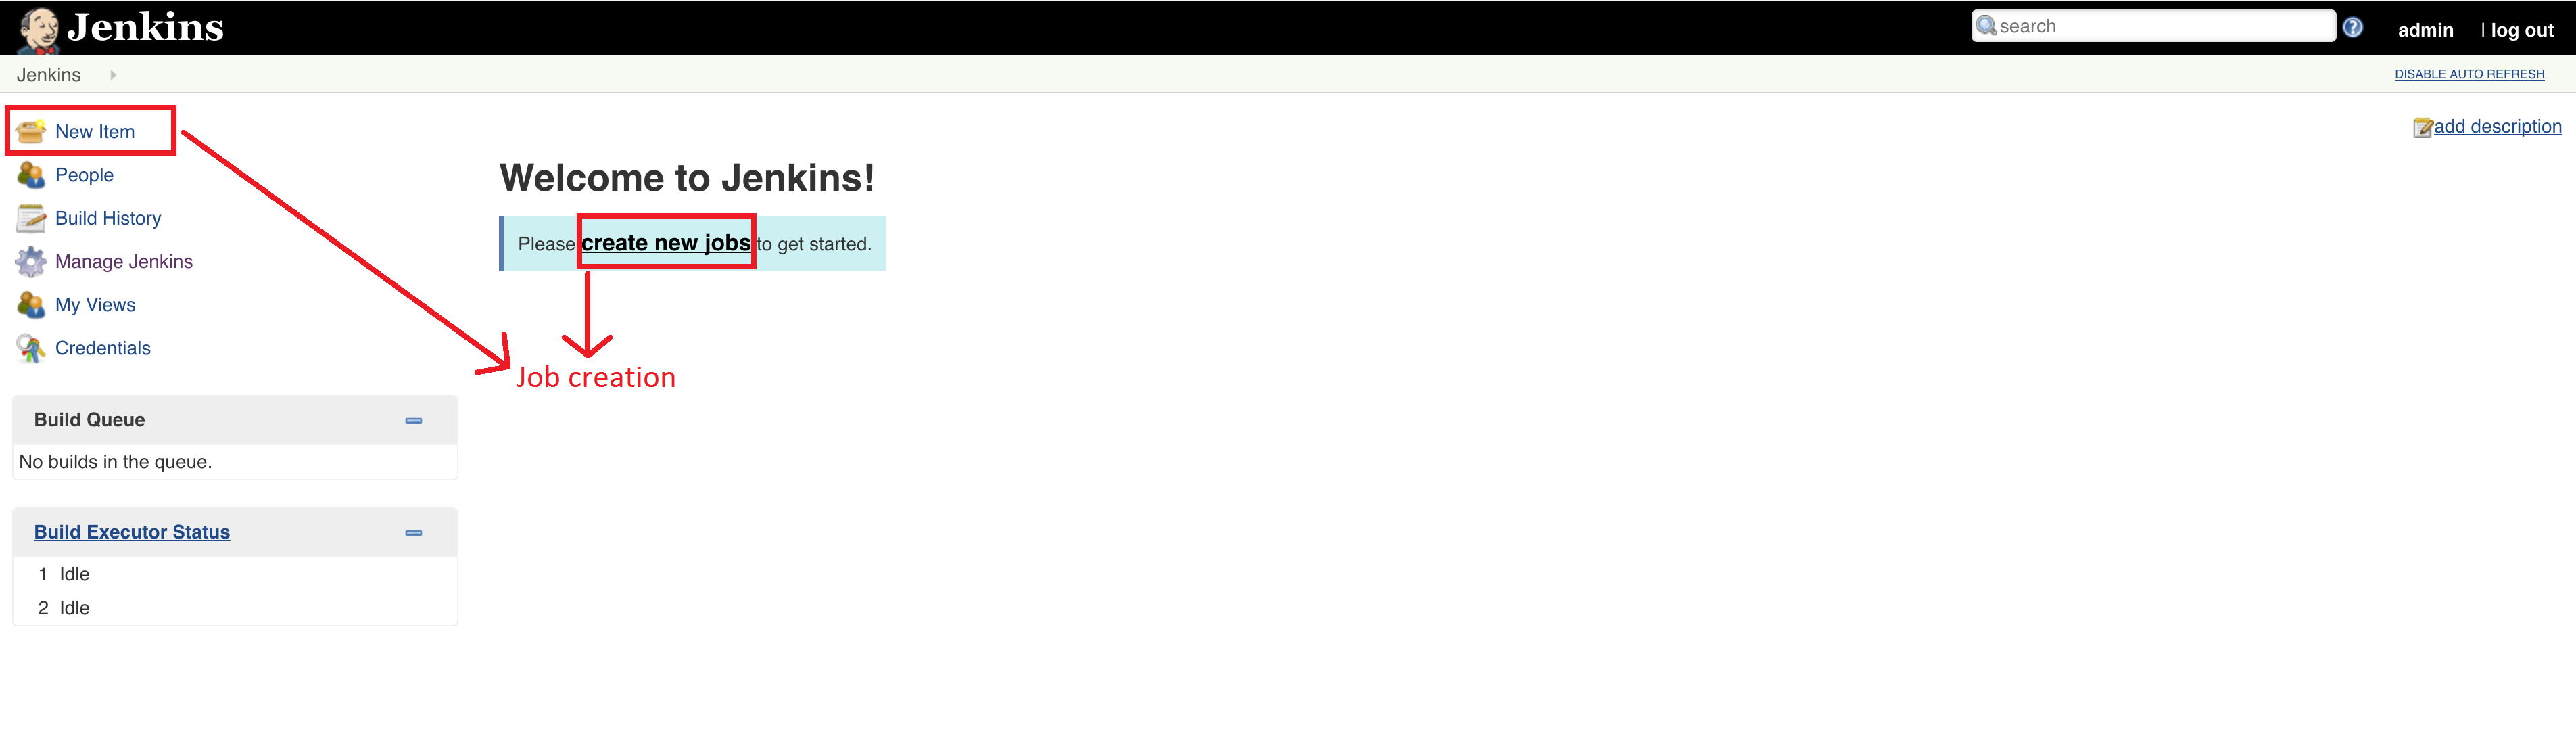
In order to initiate job creation, on the Jenkins home page, click on either New item on the left-hand side, or click on the create new jobs link in the right-hand side pane:
Once you click on it, it will open a wizard which will ask for your project/job name as well as the type of job you want to create, as shown in the following screenshot:
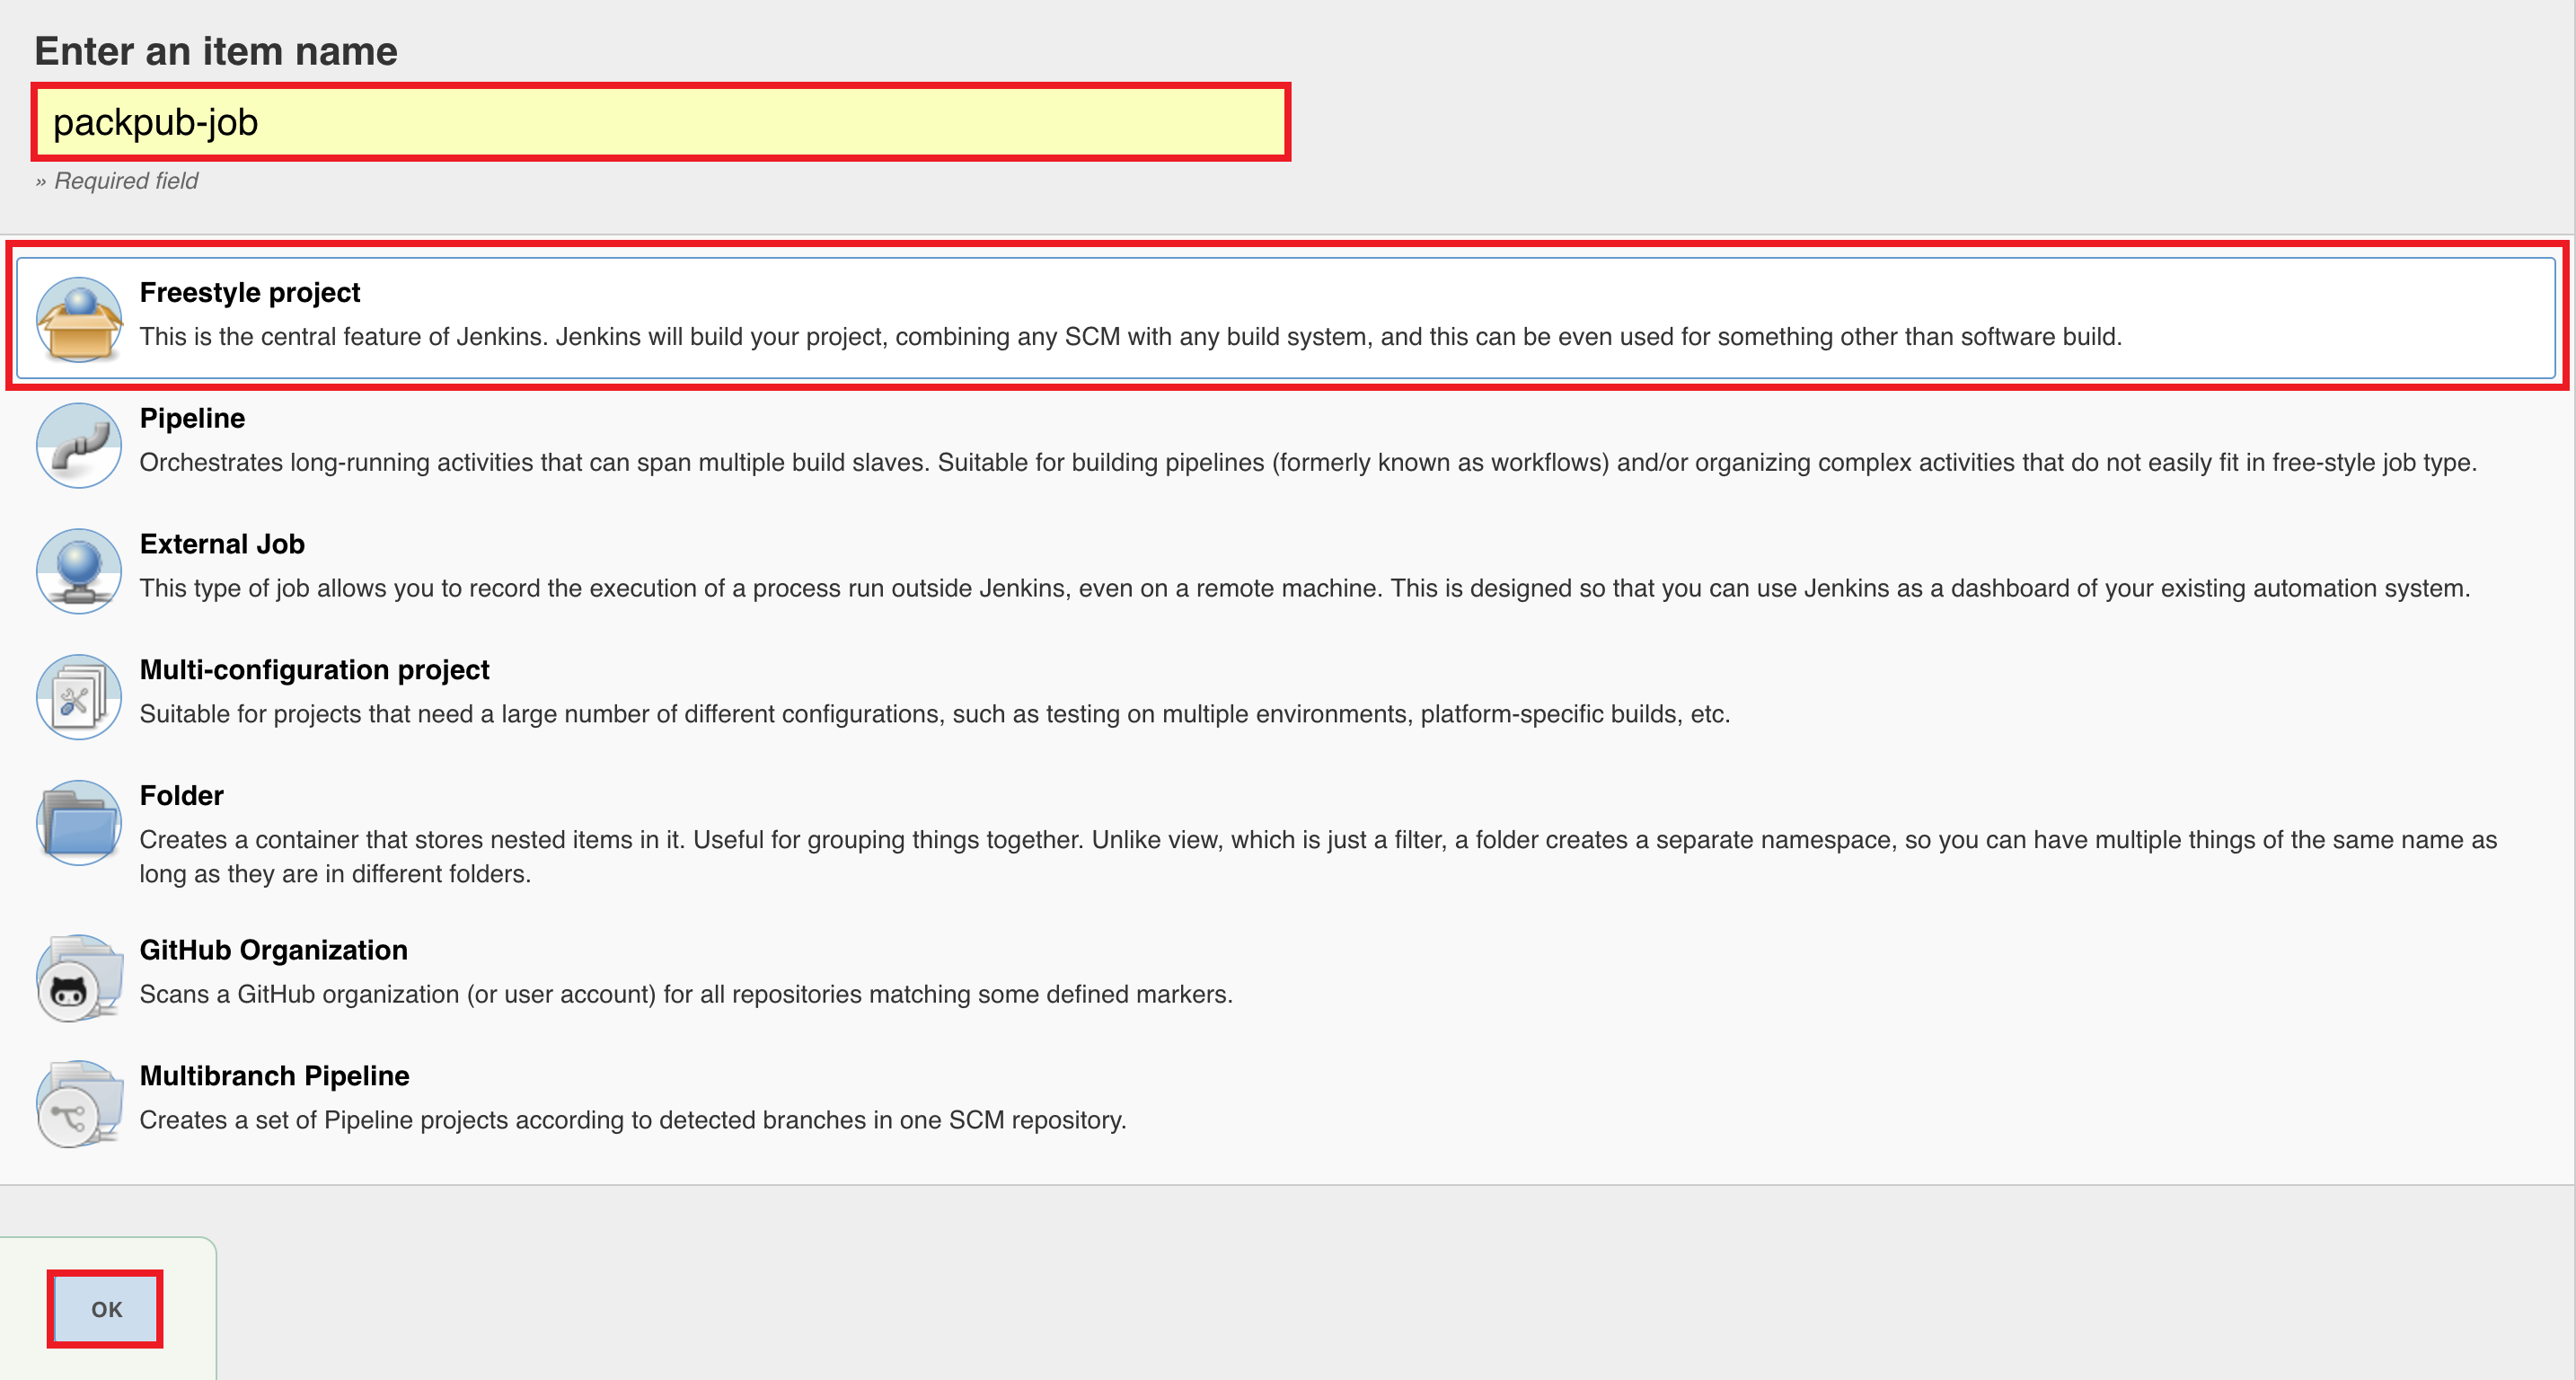
The description is already provided along with the project type to give us an overview of the different options available in Jenkins. These types need to selected, as they have different configurations based on the type.
Note that since we are working on the latest Jenkins version, it is possible that some of the project types might not be there in the older versions, so make sure you have the latest Jenkins installed.
For now, we will select the Freestyle project, specify a unique job name, and then click on OK to continue to configure our job. Once you click on OK, you will see the following page:

In the preceding page, you can define your job details such as Project name, Description, GitHub project, and so on.
Next, click on the Source Code Management tab; you will see the following screen:

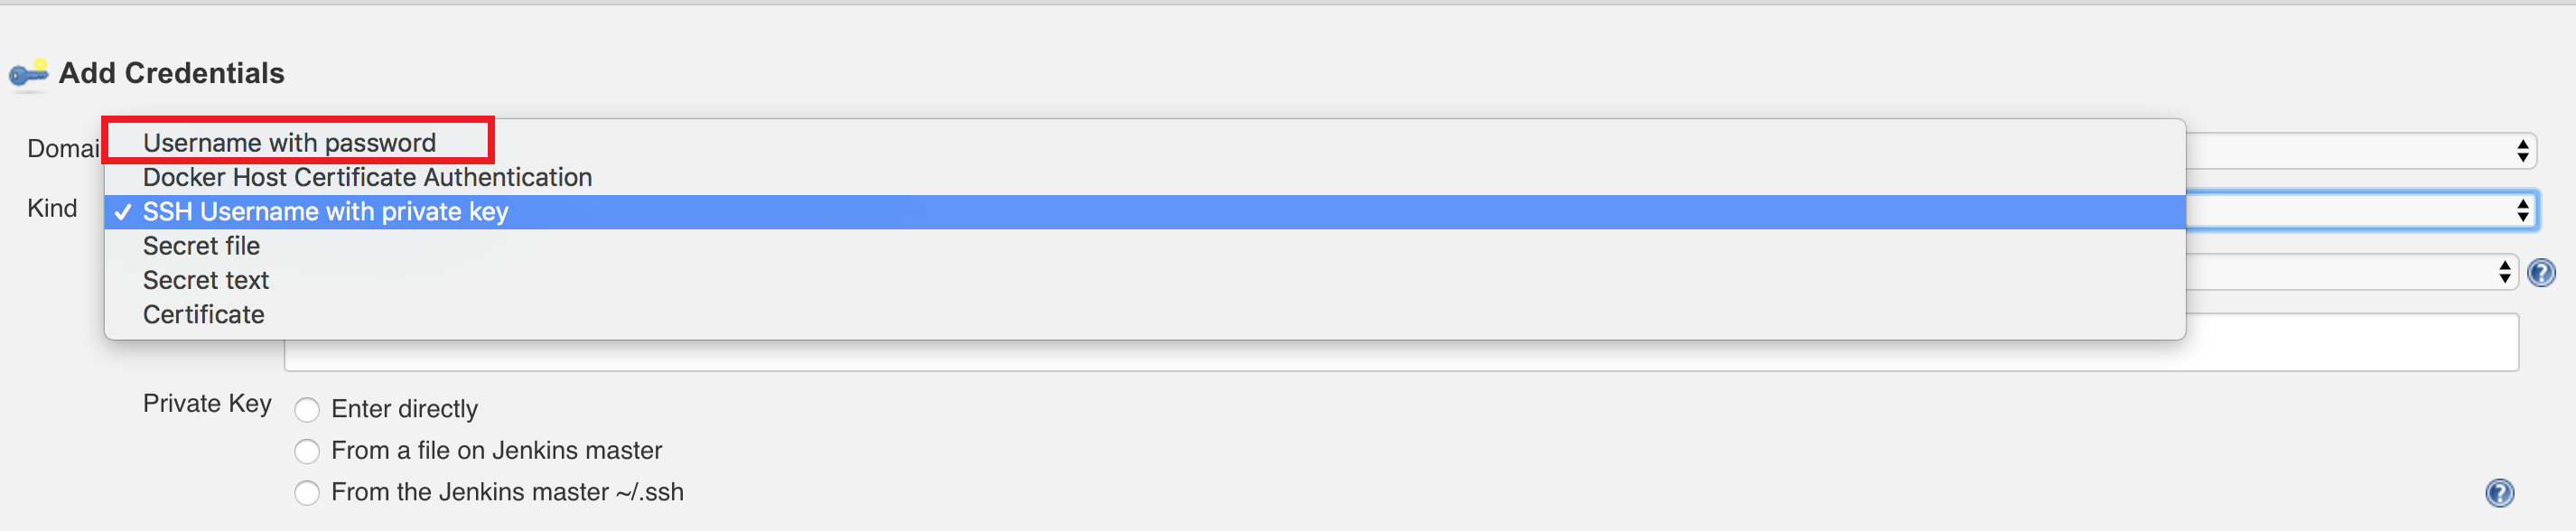
In this preceding section, you will define your source code details. You also need to set up the Jenkins user credentials if you haven't done so previously in the configuration section. Click on the Add button near credentials if it is not set up. It will open a popup, which will look something like this:

There are ways by which you can set up authentication for the mentioned user on the repository, which are defined in Kind (the drop-down menu):
It is important to note that Jenkins will immediately test the credentials against the repository URL mentioned. If it fails, it will show you the error as seen in this screenshot:

Assuming that the credentials match against the repository URL, let's move on to clicking the Build Trigger tab to scroll on it. The following screen shows the Build Trigger options which can be imposed on a job for continuous deployment:

This Build Trigger section is very important, as it determines how often your build should run, and also the parameters which trigger your build. For example, if you want to build your application after every Git commit, you can select the option Build when a change is pushed to GitBucket.
So, as soon as the developer commits any changes in the repository in a certain branch (generally, master), then this job gets triggered automatically. It's like a hook on top of your repository, and it keeps a track of the activities on it. Alternatively, if you want to build your application or run this job periodically, then you can specify the condition like this-- H/15 * * * *--in Poll SCM to schedule, which means that this job will run every 15 minutes. It is similar to a cron job, which we, usually, set up in Linux-based systems.
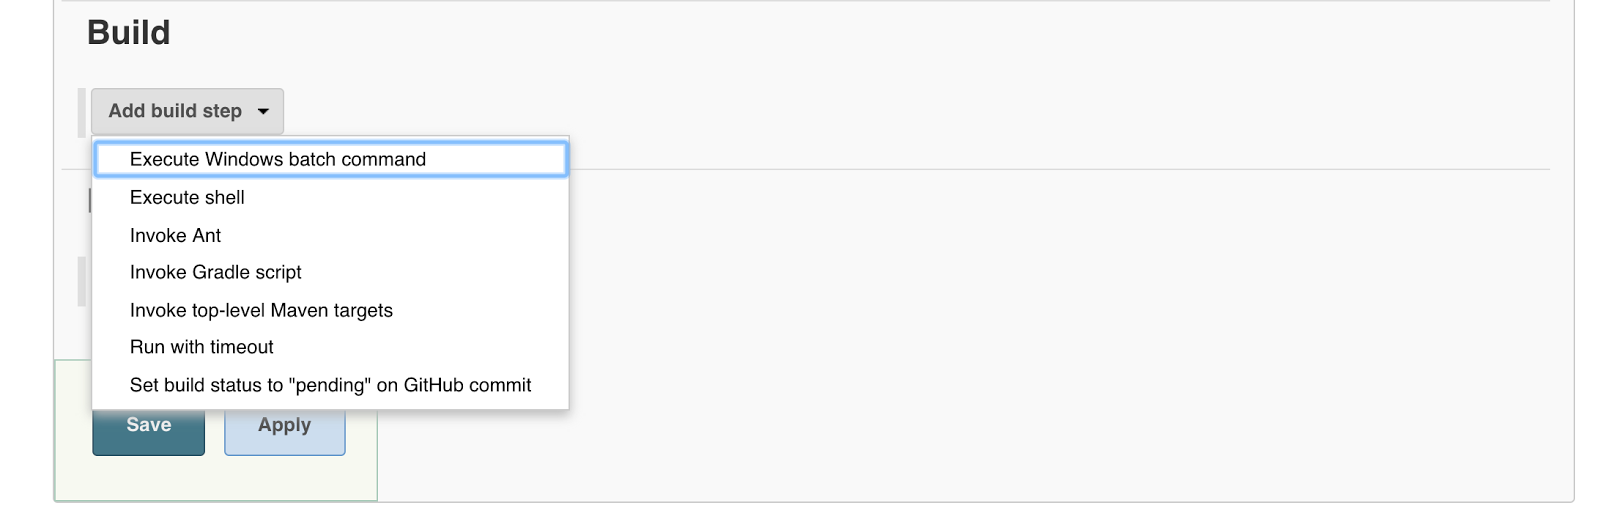
The next two sections, Build environment and Build, are defined for workspace-related tasks. Since we are dealing with a Python-based application, and we have already built our application, we can skip these sections for now. But if you have an application written in Java or a .NET application, you can go with the ANT and Maven build tools, and branch to build. Alternatively, if you want to build a Python-based application, then go for tools such as pyBuilder (http://pybuilder.github.io/). The following screen shows the build option:
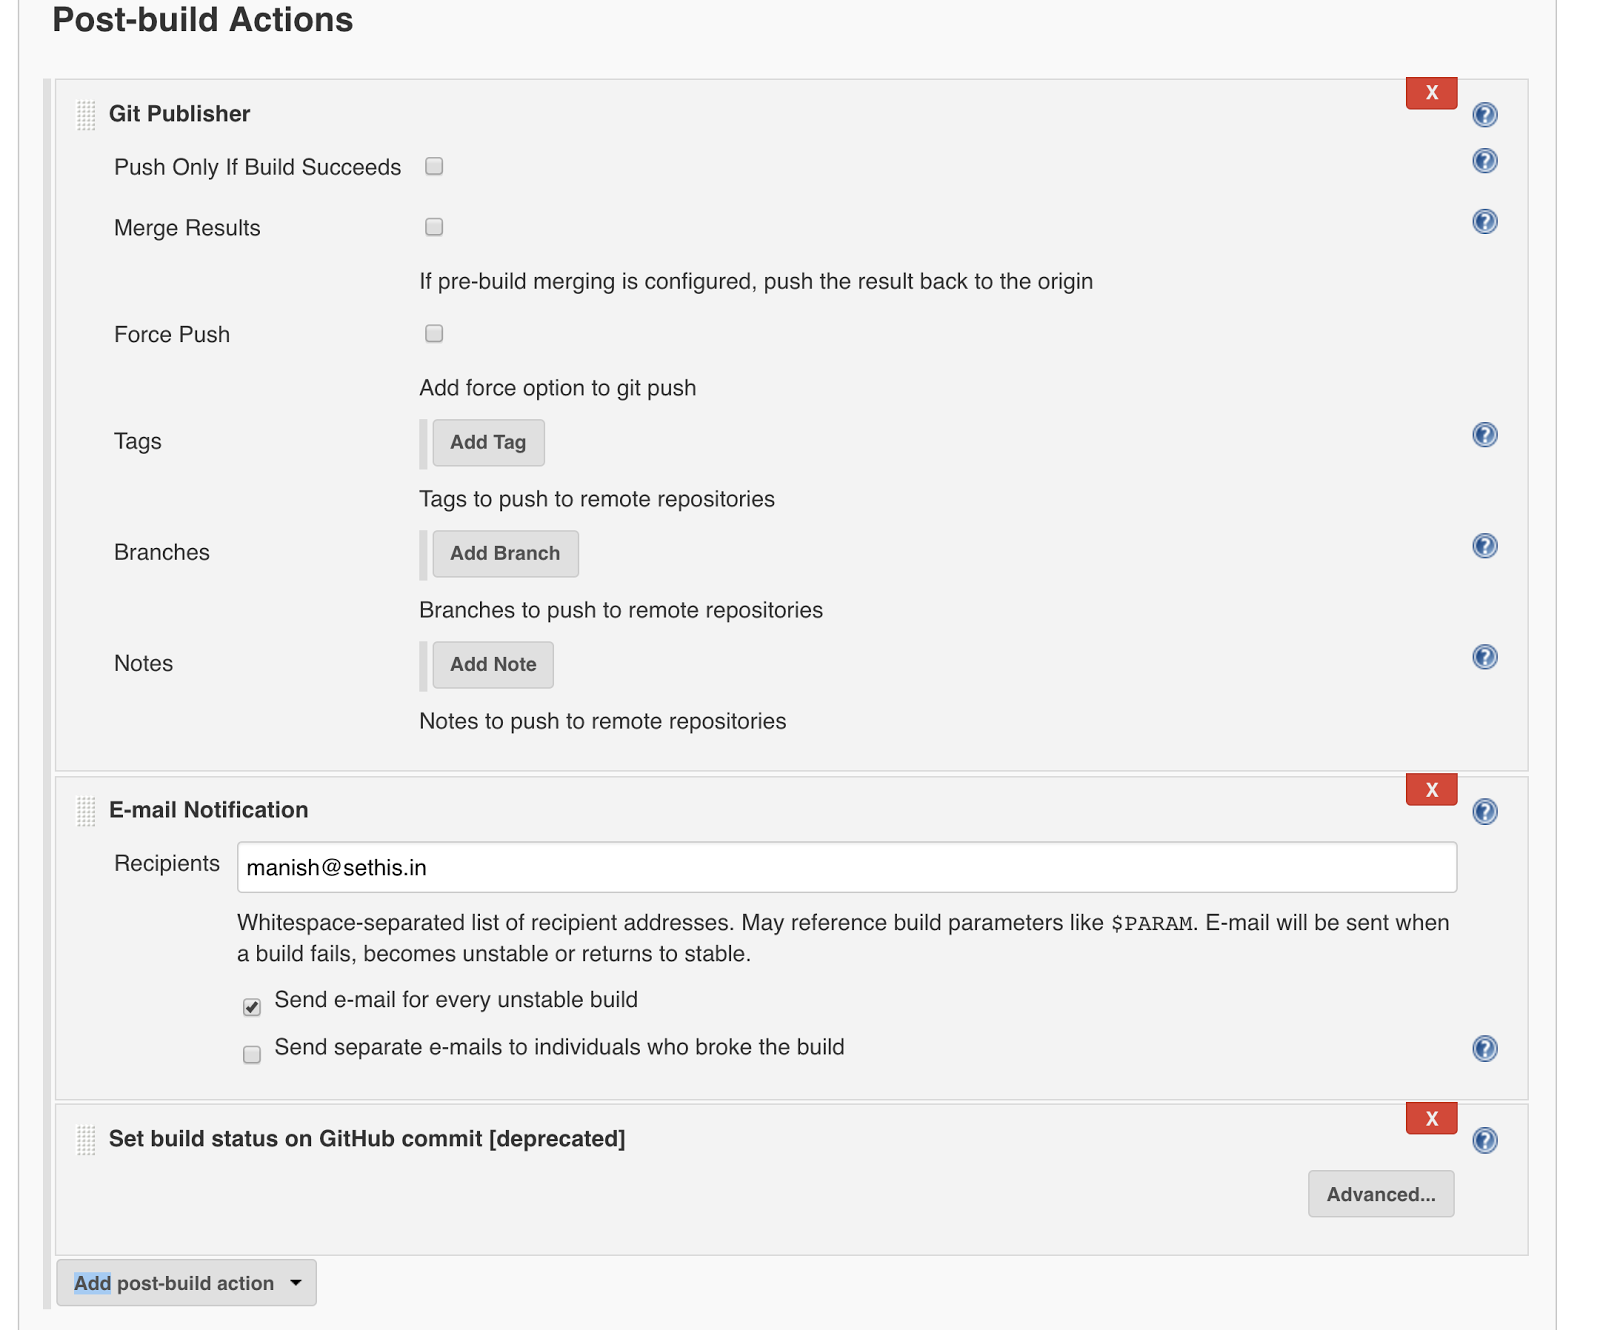
Once you are done, you can click on the next tab, which is Post-build Actions. This is used to define what needs to be done once the build is successful. Because of this section, Jenkins can also be used as a continuous deployment tool. So, in this post-build action, you can specify the platform where your application needs to be deployed, such as on an AWS EC2 machine, Code deploy, Azure VM, or others.
In the post-build section, in the context of continuous integration, we can also perform operations such as Git merge after a successful build, publish results on Git, and so on. Also, you can set up email notifications for your stakeholders to give them updates about the build results over email. See the following screenshot for more details:
That's all. Once you have filled the required details, click on Save to save the configuration. Now you are ready to build your application--click on the Build Now link in the left panel, as seen in the following screenshot:

That's all we have from Jenkins at this point of time in terms of job creation. However, we will be using Jenkins as a continuous delivery and continuous integration tool in the upcoming chapters, where we deploy our React application that we created in the previous chapters on different platforms such as AWS, Azure, or Docker. We will also see the integration of the AWS service with Jenkins to automate application delivery to the GitHub repository by a single commit.