
Even though you did most of the writing of your presentation in the outline, now that you see the text on the slides with your preferred slide design, you probably want to make some changes on the slides themselves.
In this chapter, you’ll learn how to edit and format text on the slides, add hyperlinks, and even add extra text to a slide for special purposes like adding captions to images. Finally, you’ll learn how to avoid a major presentation embarrassment: misspellings on your slides.

edit slide text
If you want to add text to a slide, move the mouse pointer over the text. The cursor will change into an I-beam. This indicates that you can click to set the insertion point where you wish to begin typing.

Click the mouse button, and add or delete text.
You can also use the I-beam cursor to select text inside a text placeholder. Click and drag over the text you want to select. Once it is selected, you can type to replace the selected text.

The most common reason to edit text on a slide is to make the text work better with your slide design, which usually means getting a line of text to break in a different spot. A line break is the point on a line at which the text wraps down to the next line.
For example, let’s look again at the title slide of my presentation. For this first slide, it would look better if none of the text in the subhead or my name covered up any of the organization’s logo.

To change the text so that it wraps more attractively, we’ll add manual line breaks to the text. Click to set the insertion point before the word where you want the break to happen.
You can’t just press Enter, because PowerPoint will think that you want to create a new paragraph, which on slides with bulleted text would result in a new bullet point. Instead, press Shift-Enter, which adds a line break without adding a paragraph break. On the next line, I deleted the comma and the space after my name and added a manual line break. The result is considerably more pleasing to the eye.


format slide text
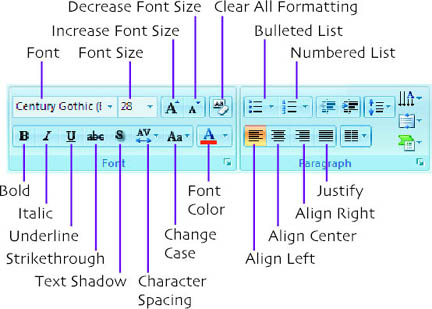
Another way to change the text on your slides is to change its formatting, including the size and look of the text, alignment, and spacing between the lines.
Most text changes are done in much the same way that you would do them in Word: Select the text, then make a choice from the Font or Paragraph groups of the Ribbon’s Home tab.

Then click the Italic button in the Font group on the Home tab.

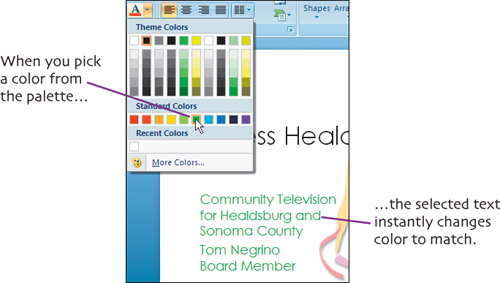
Changes applied with buttons (like the Italic button mentioned above) take effect after you click the button. But with controls that give you multiple choices, like the Font, Font Size or Font Color (shown below) menus in the Font group, PowerPoint shows you a live preview of the effect as you mouse over the choices. This is a big improvement over older versions of PowerPoint, because you can instantly see if you like a change, without having to lock it in. If you don’t like the look when you pick a menu choice, just move on to the next choice until you find the one you want.
align slide text
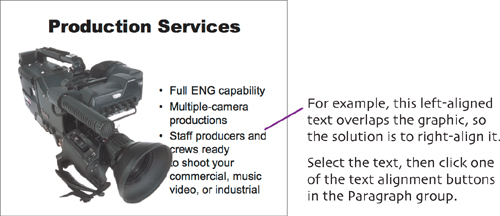
When you’re working with graphics, you may want to change text alignment in text boxes so that it works better with the image. Or you may decide that left-aligned or right-aligned text looks better on your title slide instead of the center alignment that is the setting on most design templates.

change line spacing
You can spread the line spacing on a slide if it is too tight for the content, or reduce the line spacing if you need to get a little more text on the slide.

Select all of the lines of indented text, then choose the Line Spacing menu in the Paragraph group. This menu has some default choices, but we want a bit more control, so choose Line Spacing Options. The Paragraph dialog appears.

Use the spacing controls, then click OK. The slide text changes to reflect your new line spacing.

use numbered lists
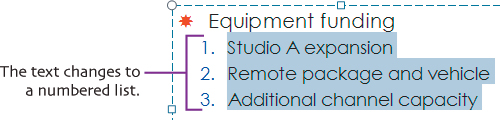
Bulleted lists are standard in presentations, but sometimes you want to show a process with a clear beginning and end. For that, a numbered list is better. You can easily change the bulleted list that PowerPoint gives you into a numbered list, and customize the numbering as you wish.
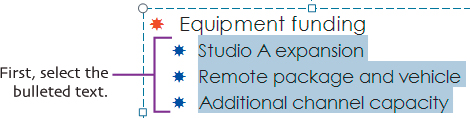
Click the Numbered List button in the Paragraph group of the Ribbon’s Home tab.

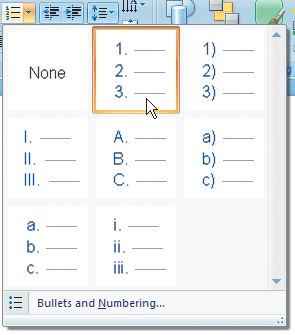
If you want a different numbering system (maybe you would prefer letters rather than numbers, e.g., A, B, C...), with the text still selected, click the down arrow next to the Numbered List button. From the resulting pop-up menu, choose a numbering system.
add hyperlinks
You’re already familiar with hyperlinks; they’re the underlined text that you click in a Web browser to take you to another Web page. You can use two kinds of hyperlinks in your PowerPoint presentations. The first kind, when clicked during your presentation, leaves PowerPoint, opens the Web browser on your machine, and brings you to the hyperlink’s destination. The other kind of hyperlink makes PowerPoint jump to a different slide in your presentation. Either kind of hyperlink only works while you are actually presenting; you don’t have to worry about accidentally opening your Web browser while you are working on your presentation.
If you type a Web address into the outline or a PowerPoint slide—such as www.peachpit.com—PowerPoint is smart enough to automatically turn it into a hyperlink. In many instances, that’s all you’ll need, because the link shows your audience the Web address you want them to use and also allows you to click it to display the site.

If you want text on your slide to be the link instead, follow these steps:


To make the other kind of hyperlink—the kind that jumps to a different slide in your presentation—follow these steps:

add text boxes
There are many reasons why you might want text on your slides that isn’t part of the outline, but most often you’ll want to add text to use as a label or caption for a picture. To add this text, you’ll first need to add a text box to the slide.

Click and drag where you want the new text box in order to define the shape of the new text box. When you release the mouse button, the text box appears with a blinking insertion point. Type the text you want in the new text box.

After you create the text box, you can apply any formatting you like to the text it contains, or adjust the position of the text box on the slide.
check your spelling
Aside from those dreams that you had when you were a kid that you were naked in front of your geometry class (uh, maybe that was just me), there’s nothing much more embarrassing than doing a presentation with a misspelled word. Your mistake is there for everyone to see, and it’s projected 10 feet wide, to boot! Avoid this nightmare by using PowerPoint’s spelling tools.
The nice thing is that PowerPoint is always watching you like a hawk as you write, looking for spelling mistakes. If it finds one, it puts a wavy red underline under the suspected mistake. To fix it, right-click the word. You’ll get a shortcut menu with one or more suggested corrections.

Choose the correction you want from the menu, and PowerPoint replaces the misspelling.
You can also check spelling throughout your whole presentation. Choose Tools > Spelling. The Spelling dialog appears, and finds the first questionable word.

In the Suggestions list, click the correct spelling, then click the Change button. If the word is correct (just not in PowerPoint’s dictionary), click Ignore. If you know the word is used more than once in your presentation, you can click the Change All or Ignore All button, which fixes or ignores all occurrences of the word. When the spelling check is complete, the Spelling dialog closes automatically, and PowerPoint displays an alert box, telling you that it is done.
extra bits
format slide text p. 46
• When you want to emphasize text, use italic rather than underline. People tend to interpret underlined text as a Web link.
• If you have applied multiple formatting changes to text and you want to make the same changes to other text, you don’t have to do all those formatting steps again. Instead, use the Format Painter in the Clipboard group of the Home tab, which copies text formatting. First, select the text that has the formatting you want to copy. Then click the  . Click the text you want the formatting copied to, and that text changes to match the first text formatting. If you want to use the Format Painter to apply formatting to more than one text selection, double-click the Format Painter button. This locks the tool on, and whatever text you select will take on the copied formatting. When you’re finished applying formatting, click the Format Painter button once to turn it off.
• If you want to change the fonts throughout your presentation, choose Home > Editing > Replace Fonts.

In the Replace Font dialog, pick the font you want to replace from the Replace pop-up menu, and the new font that you want to use from the With pop-up menu. This is a much faster way to change fonts throughout your presentation, rather than formatting text in individual text boxes.
align slide text p. 48
• Sometime it’s better to move a text placeholder on the slide, rather than mess with text alignment. See “adjust text location” in Chapter 4 for more information.
use numbered lists p. 50
• At the bottom of the pop-up menu, you can choose to open the Bullets and Numbering dialog. In this dialog, you can change the starting number of the list, which is handy when you’re continuing a list from a previous slide. You can also change the size of the number relative to the text, and change the number’s color.

• When you choose a numbering system, pick one that matches the flavor of your presentation. For example, in a formal presentation, you might want to consider using Roman numerals as the numbering system. But that would probably be inappropriate (not to mention pompous) in a presentation about softball teams. Whatever you choose, be consistent from slide to slide; you don’t want to use numbers (1, 2, 3...) on one slide and letters (A, B, C...) on the next.
add hyperlinks p. 52
• To remove a hyperlink, select the link, open the Insert Hyperlink dialog, and click the Remove Link button. The text of the link will remain, but it will no longer be a hyperlink.