
Guiding Questions
How can Flash be distributed?
How long does it take to deliver Flash applications?
How can Flash applications be delivered faster?
How can Flash be delivered with and through web pages?
In this chapter, distributing Flash files will be discussed. You will learn how to publish a Flash file, how to embed Flash files into a web page, how to write the html to connect to a Flash file, how to post a Flash file on a web server, and how to distribute a Flash file on CD-ROM.
Flash can delivery content with a minimal amount of bandwidth consumption. When you are ready to publish your application, you can obtain a detailed report on the bandwidth profile that your application will produce. When you test your movie, a .swf file is created. You can view the bandwidth profile from the .swf file interface (be sure to view it through the Flash Application Environment.
To view the Bandwidth Profiler, from the Menu bar of the .swf, select View and then Bandwidth Profiler.
Note: Each time you test a Flash movie (Ctrl + Enter) a .swf file is created that allows you to see what the final application will look like and how that application will perform. The Flash .swf files can be posted directly on a web server. However, there may be times when it is appropriate to publish files directly or they can be published to link through an .html file.
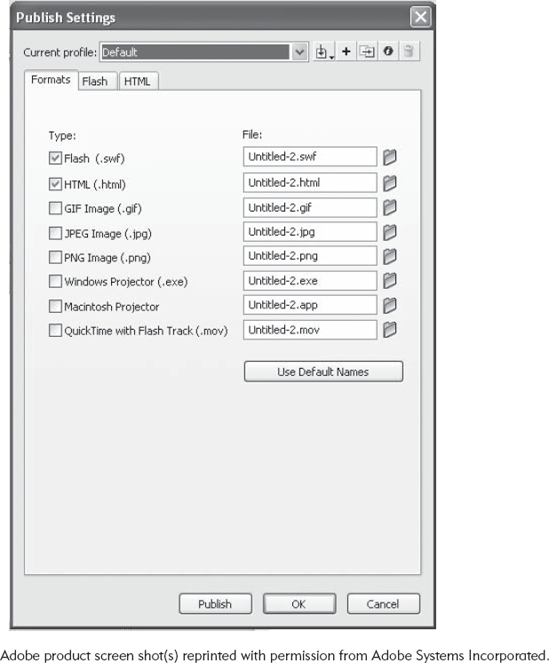
Note: Under the Format tab there are eight options (Figure 13.1). The first two are selected by default and will publish a .swf file and an .html file.
Note: The options Gif Image, JPEG Image, PNG Image publishes a single consolidated file of the application.
Note: the Windows and Macintosh Projector options produce a file that can be placed on a CD-ROM or executed directly from a PC or Macintosh without connecting through a web browser.
The Version pull-down menu (Figure 13.2) allows you to choose which version of Flash player needs to be used to view the .swf files once they are published. The latest version should generally be used unless you know a particular version is the only one available to your learners (this could happen if a user is working on a closed-system that is not connected to the Internet and cannot download the free updates to Flash player.
The load order pull-down menu allows you to tell Flash which layers should be downloaded and presented to the learner first. Remember that the layers near the top of the screen are "stacked" on top of the layers toward the bottom of the screen.
The ActionScript version describes which version of ActionScript is in use. The examples in this text all use ActionScript 2.0.
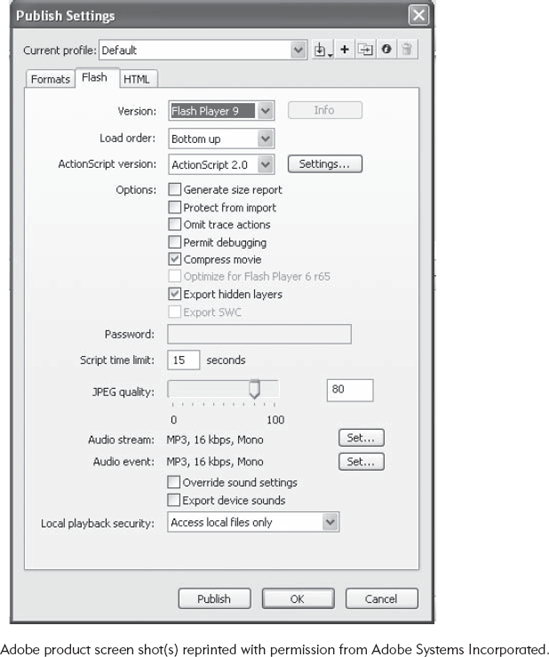
The checkboxes allow you to take specific actions and obtain specific information about the application as follows:
Generate size report: Tells you how large the application files are.
Protect from import: Prevents users from taking your .swf files and re-editing them in the Flash Development Environment.
Omit trace actions: "Trace" is a function that prints to the output screen. It is often useful for troubleshooting; however, you may want to hide the output from the learners.
Permit debugging: Flash has a "debugger" (a tool for solving programming problems) that can be used on .swf files. You may want to enable this function if you are having difficulty with your Action-Script running properly.
Compress movie: This checkbox gives you another opportunity to reduce the size of the .swf file.
Export hidden layers: Layers can be hidden or unhidden, but normally hidden layers are exported and viewable.
The Password text box allows you to put in a password for users to use to use some restricted functions (such as debugging).
The Script Time limits the time that Flash gives to ActionScript to function. Leave it at its default setting.
JPEG quality allows you to further compress the application. However, if quality images are critical for you learners to be able to understand the application's content, then be careful not to reduce the quality too much.
The Audio settings allow you to modify the type and quality of the audio. A low setting will reduce the bandwidth required.
The HTML tab allows you to set parameters regarding HTML, including size and alignment.
The template pull-down menu (Figure 13.3) allows you to see the all of the output choices. In most cases, you will choose Flash only; however, if you will be tying the application to a learning management system, then you will need to select the AICC or SCORM options.
Check the Detect Flash Version to have Flash automatically check the version the learner is using. If learners don't have the version you require, a web page will be presented to them with a link to Adobe that allows them to download the required version.
The Dimensions pull-down allows you to adjust the size of the files that you create.
The Playback checkboxes allow you to control when an application begins and how the learner can control that starting time.
The Quality pull-down menu adjust the degree of anti-aliasing. Aliasing can be thought of as the distortion created by sampling. This distortion can be compensated with by anti-aliasing. Anti-aliasing is processor intensive, so if you choose High quality, be sure the learners are using computers with plenty of processing power.
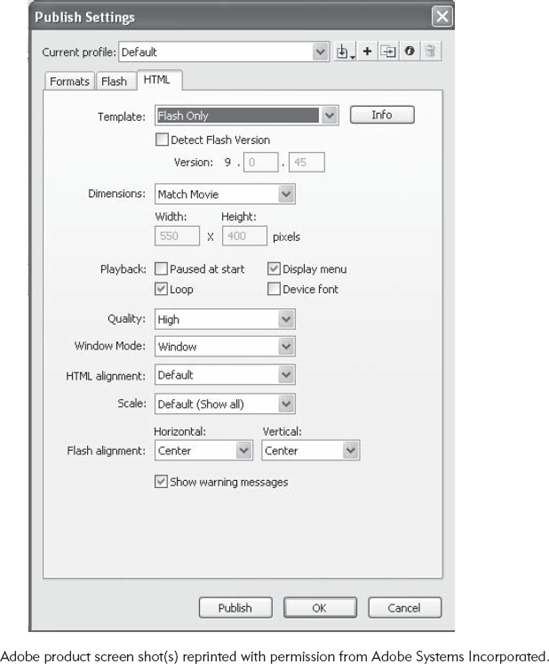
The Window Mode pull-down menu allows you to select how the .swf file interacts with the HTML page. The default setting is Window, which places the window on top.
The HTML alignment pull-down menu determine the position of the .swf in a browser.
The Scale pull-down is useful if you have chosen a percentage in the Dimensions pull-down; it allows some control over the display.
The Show Warning Messages checkboxes will show a message if there is any conflict within the HTML code.
Note: Changing any of these options overrides settings in the made during the development of the application, so it is best to keep the settings at their default unless you have a specific reason for changing them.
In addition to the original Flash application file (.fla), the publishing function (Figure 13.4) creates the .swf file, an .html file that will embed the .swf file, and AC_RunActiveContent.js JavaScript that is necessary for some run content within some browsers.
It is important to upload all of these files that in the same folder on a web server (you do not need to post the .fla file). You will use the .html file to give to the learner. For example, www.mywebserver.edu/Flash/publishtest.htm will take you to the files described above.
Web server management is beyond the scope of this text. However, it should be noted that the files created through publishing should work on any standard web server. The one modification that may need to be implemented is the declaration of the MIME (Multipurpose Internet Mail Extensions) type. The MIME type for Flash files should be set to the .swf file extension. Without the .swf MIME type declared, the server and browsers will not know how to process the Flash format. Contact your server administrator for more details. In most cases, the MIME type will have been set appropriately and you will not have to change any settings.

If you have already created a web page in which you would like to embed a .swf, you should follow the same procedure as above; however, once you have published the files mentioned above, discard the .html file. Place the .swf in the same folder as your web page and add the following html to your code:
<object data="publishtest.swf" type="application/x-shockwave-flash"
width="500" height="500">
      <param name="movie" value="publishtest.swf"/>
</object>
Be sure to modify the name of the .swf files and to replace the width and height with appropriate pixel sizes.