Turning a color image into dramatic black and white can yield an eye-catching end result.
The simplest way of turning an image into black and white is to decrease the Saturation in the Quick Color palette. However, the results can look a bit lifeless.

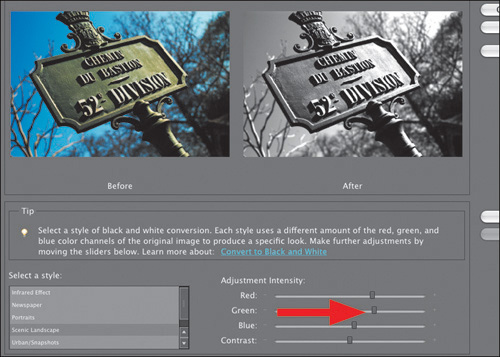
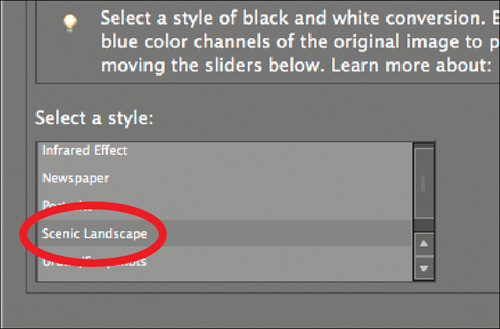
Instead, select Enhance > Convert to Black and White. To heighten the dramatic impact of your image, you can darken or lighten the original colors by using the Adjustment Intensity sliders.
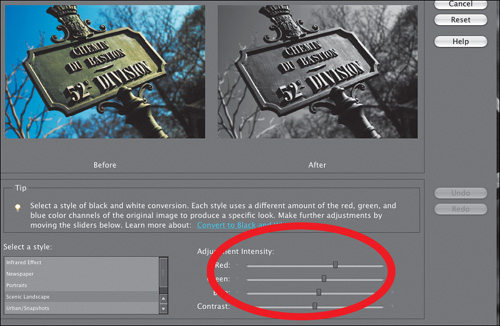
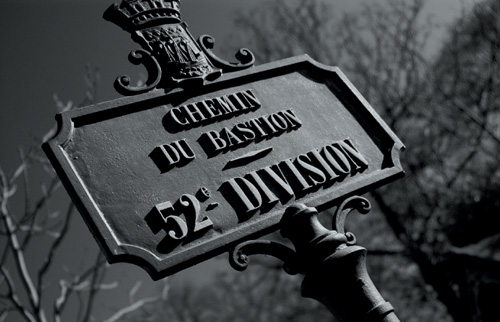
To create more contrast between the original balance of blue and green, increase the amount of green, as shown above. The green sign now looks lighter in comparison.


A high-contrast print can knock out unwanted details and color and make a more dynamic end result.
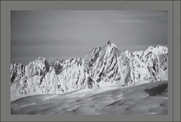
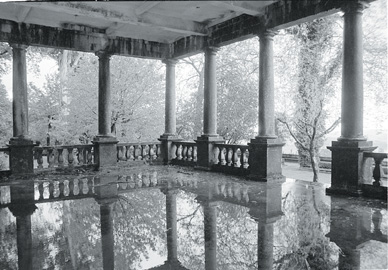
Believe it or not, the starting point to this project is a color image, shown above left. Shot on a rainy day, the original shot contains almost no color, so we’re going to convert it to black and white to make it look more interesting. Start the edit by selecting Enhance > Convert to Black and White and choosing the Increase Contrast Style preset. An italic S-shaped curve appears; we will edit this further in the next step.

Although the curve in Photoshop Elements can only be edited with four different methods—highlights, midtones, midtone contrast, and shadows—you can still create a high-contrast result. Move the sliders until the S shape of the curve starts to look like the example above. The more upright the italic ‘s’ shape becomes, the more contrast you’ll see in the image. If you go too far, click the Reset button in the dialog box.


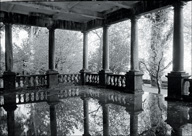
By removing the deep blacks and bright whites from your image, you can make a delicate low-contrast print.
This is the perfect kind of image to convert into a low-contrast print. With just a slight contrast, the delicate shapes and texture of the flower head will really be enhanced by the technique.

In the Convert to Black and White dialog, choose the Scenic Landscape preset style, as shown above. This will create a tiny increase in contrast that will be pulled back in the next edit.


Snow scenes always seem to turn out gray rather than pristine white, but you can bring back the sparkle of a high-key subject.
This example, shown above, is a typical snow scene exposure, in which the camera meter has forced bright whites into a murky gray tone. Our task is to make them as bright as they were at the scene.

Open the Levels dialog and move the tiny white highlight triangle, as shown above, to the foot of the black graph shape. This will remap the highlights and remove the muddy gray from the image.

Next, select Enhance > Convert to Black and White and click on the Vivid Landscapes style, as shown above left. This will apply a preset punchy contrast value to your image.

If you had any strong colors in your original image, you can darken or lighten them by using the Adjustment Intensity sliders, as shown above.

Camera light meters can’t capture the subtleties of moody lighting in a single exposure, so you have to edit the atmosphere back in.
All camera light meters make exposures by finding a compromise between the light and dark areas in your chosen scene. Yet sometimes the results are brighter than you really want.

Start by selecting the Enhance > Adjust Color > Remove Color command, as shown above. This will drain away the color and prepare the image to be darkened.


For complex editing tasks, a combination of both high- and low-contrast effects can make a huge difference.
This high-contrast original, shown above, proved to be a difficult image to edit, with complex shapes and borders making selection nearly impossible.
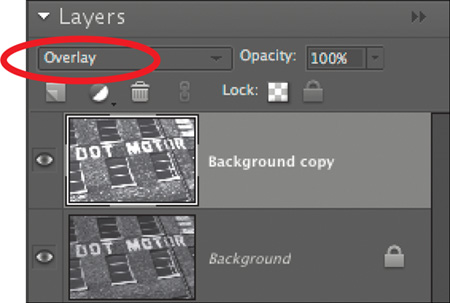
The simplest way to mix high and low contrast is to create two versions of the image, then mix them together. Start with a Layer > Duplicate Layer command, as shown above.

Next we need to turn the Duplicate layer into a negative by selecting Command/Ctrl+I. The image will reverse, with whites now black and blacks now white, as shown above.

Still on the Duplicate layer, open your Levels dialog and move both Output Levels sliders toward the center to lower the contrast, as shown above.


To make your black-and-white prints stand out from the rest, why not mimic a traditional film processing technique?
Start off experimenting with the presets in the Convert to Black and White dialog, as shown above. Aim to create a conversion with some contrast, but without losing all signs of detail in the darker and lighter areas of your image. The example shown above was converted using the Newspaper preset.

Rather than risk applying a texture to the original Background layer, it’s best to keep this edit separate. Select Layer > Duplicate Layer, until your Layers palette looks like the one above.

Working on the duplicate layer, select Filter > Artistic > Film Grain. In the Film Grain dialog, as shown above, aim for a mid-sized Grain value of 5, together with 10 Intensity.