
You’ve come this far. Now it’s time to send your masterpiece out into the world.
Final Cut Express has a variety of output options. How do you choose the right one? The best output format for your Final Cut Express project depends on where you plan to take it next.
Will you distribute your program as a DVD?
Do you need a broadcast-quality master?
Are you going to distribute it on VHS tape?
Are you preparing a webcast?
How about “all of the above”?
This chapter walks you through FCE’s output options and helps you decide which one will deliver what you need.
In the first part of this chapter, you’ll learn about two methods for outputting your project to tape: recording Timeline playback and printing to video.
The second part of the chapter is devoted to file export options. You can export just the editing and clip information from a sequence as a formatted text file. You can also use the file export options to convert your FCE sequence or clip to another digital format for use in computer-based media.
One of the beautiful things about digital video is the wide variety of output options available to you—right on your desktop.
Final Cut Express is designed to support external video monitoring at any time using your camcorder or deck, so you can always record FCE’s output. You don’t need to process your FCE material unless you are exporting your sequence in a computer-compatible format.
Final Cut Express offers two tape output modes:
Recording Timeline Playback: One of the easiest ways to record Final Cut Express’s output to video tape is simply to start recording on your video deck or camcorder; then play your sequence in the Timeline. For more information, see “Recording Timeline Playback” later in this chapter.
Print to Video: Use Print to Video to output a Final Cut Express sequence or clip to video tape. The Print to Video function lets you configure pre- and post-program elements such as color bars and a 1-kHz tone, leader, slate, and countdown. Print to Video’s Loop feature allows you to print your sequence multiple times automatically.
You don’t need device control to use Print to Video. Use Print to Video if you want to make a video tape copy of your FCE sequence that includes customized pre-program elements, or if you want to loop your sequence.
Before you record FCE’s output on video tape, make sure that your recording device is connected and receiving video and audio output from FCE, and that the sequence or clip you’re outputting is set up correctly.
Use this setup checklist for both tape output modes:
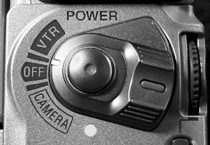
Make sure your camcorder or deck is set to VTR (or VCR) mode (Figure 19.1). Final Cut Express can’t record to devices set to Camera mode.
Make sure your video camcorder or deck is receiving output from Final Cut Express. Check the external video settings for your current Easy Setup. Your external video settings should send FCE’s video signal to the external video device you want to record to (Figure 19.2). Enable the video output feed to your camcorder or deck by choosing View > Video Out > Apple FireWire.
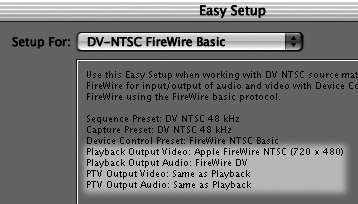
Figure 19.2. The last four settings in the Easy Setup window (highlighted here) indicate the video and audio output settings for this Easy Setup. The two PTV settings indicate video and audio output routing during a Print to Video operation. The settings shown here route video and audio output to your FireWire cable for playback and for PTV.
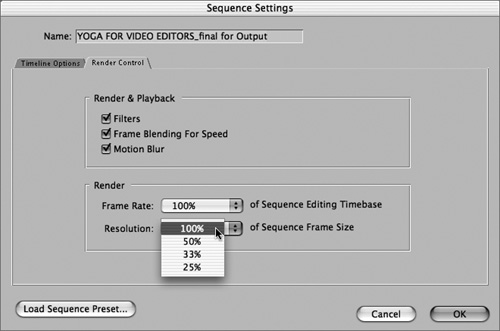
Check the render quality settings for your sequence on the Render Control tab of the Sequence Settings window.
Both of FCE’s tape output modes print the sections of your selected sequence or clip that don’t require rendering at High playback quality, regardless of the video quality you selected for real-time playback (Figure 19.3), but you do have a choice of image quality settings for the rendered material in your sequence. The render quality settings on the Render Control tab of the Sequence Settings window (Figure 19.4) are the settings that will be used for rendering prior to your output operation. For more information, see “Controlling playback and rendering quality” in Chapter 18.
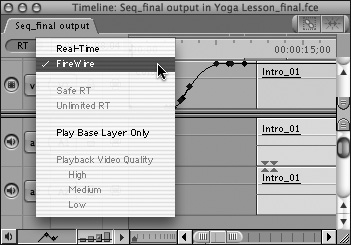
Figure 19.3. When FireWire output is selected, both RT and Video Playback quality options are dimmed. By default, FCE’s FireWire output mode plays back non-rendered sections of your selected sequence or clip at High playback quality, overriding the image quality you selected for real-time playback in the Playback Video Quality section of the Timeline’s RT pop-up menu.
If you want to print only a selected portion of a sequence or clip, open the clip or sequence and then set In and Out points to specify the portion you want to record (Figure 19.5).
You should enable the Report Dropped Frames During Playback preference on the General tab of the User Preferences window. Feedback on dropped frames is especially critical during final output.
If you enable dropped-frames reporting and find you’re dropping frames in your external output during playback, you might try this first: Disable the Mirror on Desktop option on the A/V Devices tab of the Audio/Video Settings window. You’ll immediately free up some performance power for the Print to Video functions.
See “Optimizing Performance” in Chapter 2 and “Is Your System Capture-Ready?” in Chapter 5 for more tips on eliminating dropped frames by improving FCE’s performance.
Test your setup by recording a section of your show to tape. Play back the test recording and scrutinize the results in your external monitoring setup. Do the rendered sections of the program match quality with the rest of the footage? Are your titles crisp? Are your video levels within the recommended brightness range for your output format, or has your video image developed hot spots? Is the audio playback level healthy but not overmodulated? Are both stereo tracks balanced properly and panned correctly? A little extra care and patience now, when you’re producing your final product, will protect all the care and patience you’ve lavished on your project so far.
If you are receiving Final Cut Express’s output in your video camcorder or deck, you don’t need to use Print to Video to record your FCE sequence to tape. Print to Video provides mastering options (color bars, slate, and so on). Otherwise, recording Timeline playback directly provides exactly the same output quality, and you may find it more convenient.
To record Timeline playback onto tape:
Cue your video tape to the point where you want to start recording.
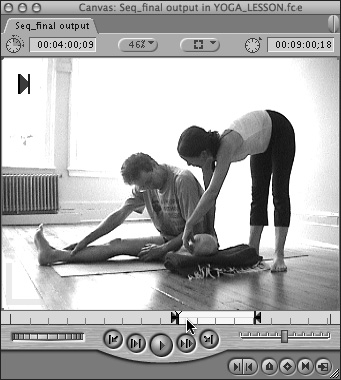
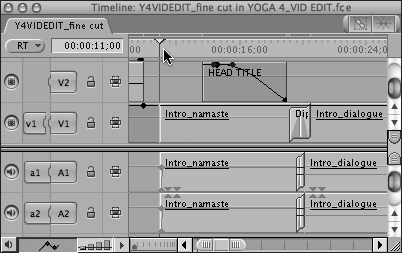
Cue your sequence in the Timeline (Figure 19.6).
Render any unrendered sections of your sequence. Unrendered material appears as blue, unrendered graphics when you record Timeline playback to tape.
Start recording on your video deck.
Choose Mark > Play and then select a play option from the submenu (Figure 19.7).
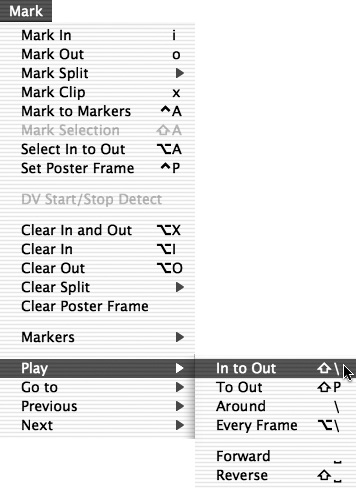
Figure 19.7. Choose Mark > Play and then select a play option from the submenu. In to Out plays only the portion of your sequence between the In and Out points.
Final Cut Express plays the contents of the Timeline as you specified and then holds on the final Timeline frame marked for playback. A freeze-frame is recorded on your tape until you stop recording.
Stop recording on your deck when Timeline playback is done.
The Print to Video command is the correct choice when you want to make a video tape copy of a Final Cut Express sequence or clip that includes pre-program elements, such as color bars, slate, and countdown. Print to Video is also your best choice if you want to loop playback and print multiple passes of your sequence on the same tape. If you have a controllable camcorder or deck, you can set up your Device Control preset so that FCE controls your deck during a Print to Video operation, but you don’t need a deck that supports device control to use Print to Video. For information on hardware setup, see Chapter 2, “Installing and Setting Up.”
If you don’t need customized pre-program elements at the beginning of your dub, playing your sequence in the Timeline and recording the output directly may give you satisfactory results and save you some time as well. See “Recording Timeline Playback” earlier in this chapter.
The Print to Video dialog box (Figure 19.8) displays a list of formatting options. Select the elements you want to include in your video tape copy. You can specify durations for all options.
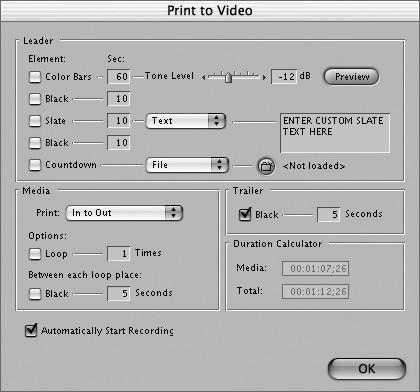
Figure 19.8. Select the pre-program elements you want to include in your video tape copy from the Print to Video dialog box.
Leader: Select the pre-program elements you want to include in your video tape copy. Your pre-program sequence will be assembled in the same order that the elements are listed in the dialog box, which is why there are two separate Black options. Check the elements you want to include and then specify a duration (in whole seconds) for each option in the field next to the option. These elements must be rendered before printing to video can begin.
Color Bars: Check this box to include color bars and a 1-kHz tone, preset to –12 dB, before the beginning of the sequence or clip.
Tone Level: If necessary, adjust this slider to change the level of the preset –12-dB, 1-kHz audio reference tone. Note that this slider does not adjust the output level of your audio track, just the level of the reference tone.
Black: Check this box to add black frames between the color bars and the slate.
Slate: Check this box to include the slate information specified in the Slate Source pop-up menu in the adjoining field.
Slate Source pop-up menu: Select a source for the information that appears on your slate. You can specify the sequence or clip name, a file on disk, or multiple lines of custom text.
Black: Check this box to include black frames between a slate and a countdown (or before the beginning of the sequence or clip, if you aren’t adding a slate and a countdown).
Countdown: Check this box to add a 10-second countdown before the sequence or clip (Figure 19.9). Choose FCE’s built-in 10-second SMPTE standard countdown or use the corresponding pop-up menu and Browse button to specify your own custom countdown file.
Media: Specify the material you want to include in the program section of your tape copy. You can print an entire sequence or clip or only a marked portion. You can also loop the sequence or clip selection and insert black at the end of each loop.
Print pop-up menu: Choose Entire Media if you want to print the entire sequence or clip. Choose In to Out if you want to print a portion of the selected item. Specify the portion to be printed by setting In and Out points in the sequence or clip.
Loop: Check this box to print your selection multiple times.
Times: Specify the number of repetitions for Loop.
Black: Check this box to insert black frames between repetitions for the duration specified in the Black field.
Trailer: Check the Black box to add a black trailer at the end of the printed sequence or clip; then specify the duration in the Seconds field. If you are looping the sequence or clip, the trailer appears after the last repetition.
Duration Calculator: These fields display the total duration of all the media you selected to print, as you have specified it.
Automatically Start Recording: Check this box to enable FCE to automatically place your deck or camcorder into Record mode during a Print to Video operation. If you leave the box unchecked, you’ll be prompted to put your deck into Record mode manually.

Tip
Be sure your tape is long enough to record the entire program running time as calculated by the Duration Calculator. Most tape stock has a little extra capacity over the program length printed on the packaging, but it’s a good idea to respect the official program-length capacity.
To print a sequence or clip to video without device control:
Read and follow the setup process described in “Setting up for recording to tape” earlier in this chapter.
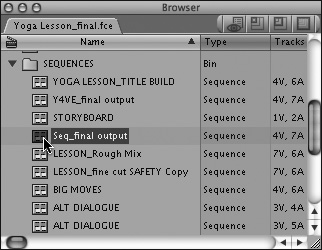
In the Browser, select the sequence or clip you want to print (Figure 19.10). Open the sequence and make the Timeline active.
Choose File > Print to Video.
The Print to Video dialog box will appear.
Select the program elements you want to include in your program. Refer to the “Print to Video settings checklist” earlier in this chapter for explanations of your options. If you need to change any of the settings, do so now.
Click OK (Figure 19.11).
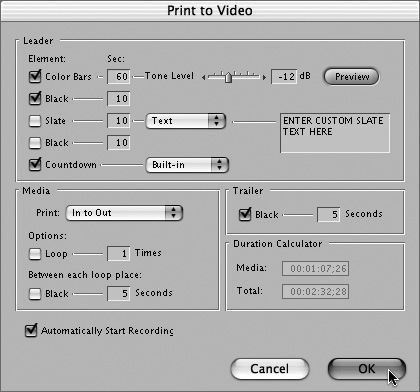
Figure 19.11. Select the pre-program elements you want to include in your video tape copy and then click OK.
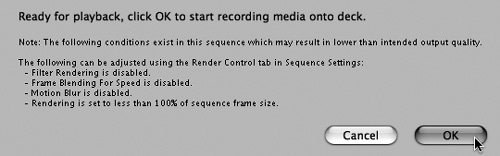
If the sequence you select needs to be rendered before it can be printed, FCE automatically renders any unrendered sequence material, plus any additional program elements you’ve specified. When the rendering is complete, FCE displays a dialog box telling you to go ahead and start recording on your video deck. If render quality settings on this sequence’s Render Control tab specify less than full quality, FCE will display this helpful advisory dialog box (Figure 19.12). Click OK to proceed with the Print to Video operation.
Start recording on your video deck or camcorder, and when the device is up to speed, click OK to start playback of your Final Cut Express sequence.
When your program material has finished printing, stop recording on your deck or camcorder. Final Cut Express doesn’t provide any end-of-process beep (the large black box disappears from the screen, and the interface returns), so check in at the scheduled end-of-program if you plan on recording unattended.
Play back your recorded sequence and check the quality.
Tips
If you don’t specify a post-program black trailer, Final Cut Express will hold on the last frame of your sequence, creating a freeze-frame that will be recorded onto your tape until you stop recording.
Once the Print to Video process is complete, you’ll have access to the render files created for Print to Video in your regular Timeline version of the sequence.
HDV users take note: Because FCE uses AIC, an intermediate codec, to handle HDV footage inside the application, all HDV projects must be rendered before they can be output back to tape in HDV format. Apple recommends that you take extra care to avoid any possible interruption in this rendering process. HDV users should read Apple’s Knowledge Base Article 300775, Final Cut Express HD: Tips for HDV Print to Video. This Kbase article provides a checklist of activities that could possibly interrupt your HDV Print to Video operation, and suggests ways to avoid trouble.
To print a sequence or clip to video with device control:
Load the tape to which you want to record into your deck or camcorder and cue the tape to the point where you want recording to start. If you are starting your recording at the beginning of a tape, be sure to record a few seconds of black at the very head of the tape.
Follow steps 1 through 4 in the preceding section, “To print a sequence or clip to video without device control.” When the Print to Video dialog box appears, be sure to select Automatically Start Recording to enable FCE’s device control over your camcorder or deck (Figure 19.13); then click OK.

Figure 19.13. In the Print to Video dialog box, check Automatically Start Recording to enable FCE’s device control over your camcorder or deck.
If your selected settings will output video or audio at less than full quality, FCE will display an advisory dialog box. Click OK to proceed with the Print to Video operation.
When the sequence rendering is complete, Final Cut Express will automatically place your video deck in Record mode and then start playback. When the recording is complete, FCE will stop recording on your deck, the large black box will disappear from the screen, and the interface will return.
If you want to convert a Final Cut Express sequence to another digital format for use in computer-based media, exporting is the right choice. You can also export sound files, snippets of clips, or single-frame images. Final Cut Express offers a variety of export formats.
When you export, Final Cut Express uses QuickTime’s compression codec and file format conversion features to generate a media file on your hard drive in the format you choose.
Here’s how FCE’s export options are organized:
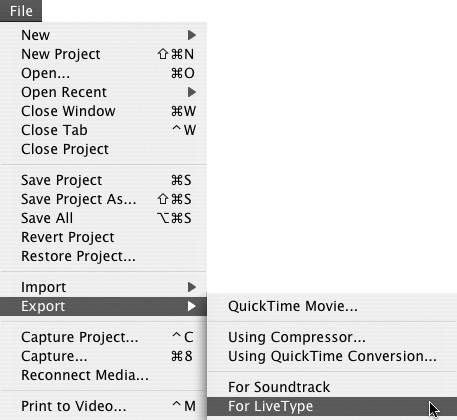
When you choose File > Export, you’ll see two QuickTime media export options: QuickTime Movie and Using QuickTime Conversion. (Figure 19.14).
Figure 19.14. When you choose File > Export, you’ll see FCE’s palette of media export options. LiveType and Soundtrack export options will appear only if FCE detects those applications on your computer.
The Export > QuickTime Movie command streamlines your export configuration chores by offering very limited settings options (Figure 19.15). Use Export > QuickTime Movie to export your sequence as a single movie using the same format settings as your sequence or to export a reference movie for use in another compression program, such as Apple’s Compressor.
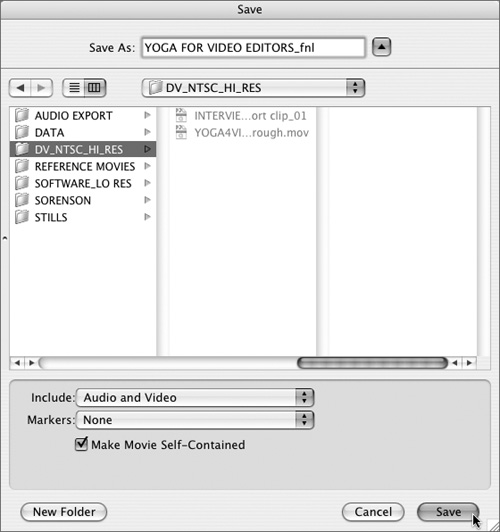
Figure 19.15. Use Export > QuickTime Movie to export your sequence as a single movie using one of your Sequence presets or to export a reference movie for use with iDVD, DVD Studio Pro, or a third-party compression program.
QuickTime Movie is also the correct export choice if your export destination is iDVD or DVD Studio Pro.
The Export > Using QuickTime Conversion command gives you access to the full range of QuickTime-supported file formats. Export > Using QuickTime Conversion is your starting point when you want to export anything from still images to compressed audio files.
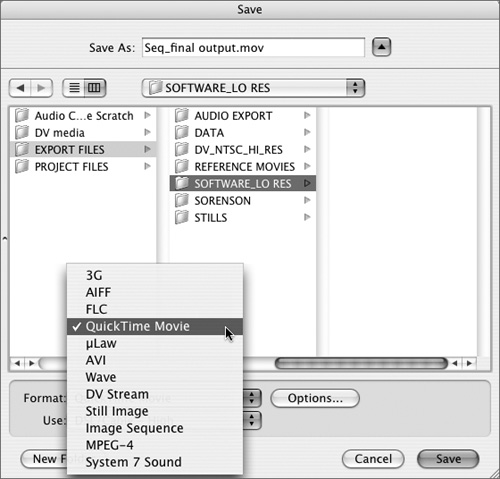
One of the QuickTime format options, QuickTime Movie format (Figure 19.16), is a good choice for producing highly compressed QuickTime movies or media files in full-resolution, uncompressed formats. QuickTime Movie format also offers video filters that you can apply as you export a sequence.
These export options’ settings are preset to offer streamlined export paths to Apple’s family of special-purpose applications. These export options appear in the Export menu only if FCE detects the application on your computer:
Export > Using Compressor opens your selected clip or sequence in Compressor as a reference movie.
Export > For Soundtrack generates a file optimized for use in Soundtrack by automatically including any scoring markers you’ve set in your sequence.
Tips
When you export a clip or sequence, Final Cut Express includes only the material between the In and Out points. You can set In and Out points to select a portion of your clip or sequence, but be sure to clear In and Out points before you export if you want to export the entire clip.
Chapter 37 of Apple’s Final Cut Express Help PDF devotes 26 pages to the export of various QuickTime file formats—recommended reading for FCE users faced with an export format decision.
The two tables that follow provide a sketch of the codecs and file formats you are most likely to use with Final Cut Express and the way they’re most commonly used. Note that these tables do not contain a complete list of QuickTime formats and codecs, and the summary of uses and characteristics is not comprehensive. Table 19.1 lists the codecs most commonly used with Final Cut Express. Table 19.2 lists the most commonly used file formats. A complete list is available at the QuickTime web site, at
www.apple.com/quicktime/products/qt/specifications.html.Table 19.1. Some Useful QuickTime Codecs
FILE FORMAT
TYPE
USED FOR
ALPHA CHANNEL?
Sorenson
A/V
CD-ROM
No
Cinepak
A/V
Older CD-ROM
No
Quick Time Fast Start
A/V
Web movies
No
QuickTime Streaming
A/V
Web movies
No
Animation
V
High-res digital export
Yes
M-JPEGA/M-JPEG B
V
Compressed files for editing
No
MPEG-4
A/V
Web streaming
No
DV-NTSC/DV-PAL
A/V
Importing DV into FCE
No
MPEG-2
V
DVD video
No
Table 19.2. Some Useful QuickTime File Formats
FILE FORMAT
TYPE
USED FOR
ALPHA CHANNEL?
COMPRESSION?
QuickTime Movie
A/V/Graphic/+
Cross-platform multimedia
Yes
Available
DV stream
A/V
iMovie DV media files
No
Yes
JPEG
Graphic
Graphics, video still frames
No
Available
Photoshop
Graphic
Multilayered graphics
Yes
No
PICT
Graphic
Mac format
Yes
Available
PNG
Graphic
Graphics
Yes
No
TIFF
Graphic
Graphics
Yes
Available
AIFF
A
Common audio format
N/A
Available
WAVE
A
Windows audio format
N/A
No
The Export > QuickTime Movie command is the right choice when you want to export a sequence using the same sequence settings you used in the project.
The Save dialog box for the Export QuickTime Movie function opens with your current Sequence preset already loaded. Specify whether to include audio or video, or both; then specify your marker export preference, and you’re done.
QuickTime Movie is the only export format that offers the option of exporting your sequence as a QuickTime reference movie.
Because the QuickTime Movie format supports the export of both chapter markers and reference movies, it’s the right export choice when you want to use iDVD or DVD Studio Pro to create a DVD of your FCE project.
To export a clip or sequence as a QuickTime movie:
Do one of the following:
Select a clip or sequence in the Browser.
In the Timeline, open the sequence you want to export.
Set In and Out points in your clip or sequence to mark the section you want to include in the exported file. If you want to export the entire item, clear any In and Out points from the item before export (Figure 19.17).
Choose File > Export > QuickTime Movie.
The Save dialog box appears. This is your opportunity to review and confirm the export format settings.
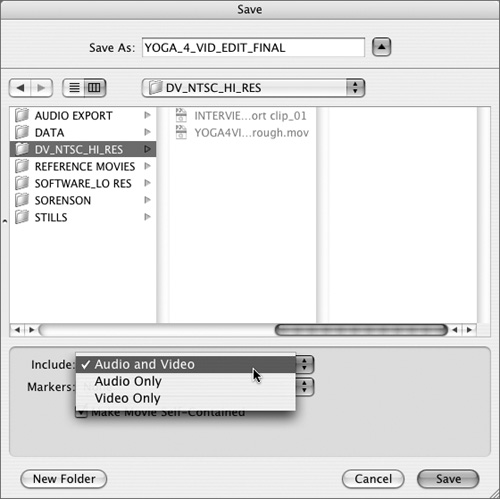
From the Include pop-up menu, choose Audio and Video, Audio Only, or Video Only (Figure 19.18).
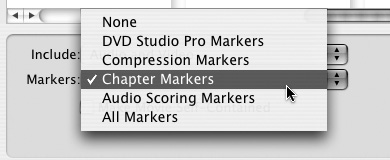
If you want to export markers along with your file, select the type of markers you want to export from the Markers pop-up menu (Figure 19.19).
Do one of the following:
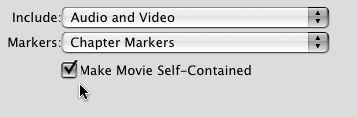
Select Make Movie Self-Contained to export a QuickTime movie that duplicates all audio, video, and render files in one self-contained media file (Figure 19.20).
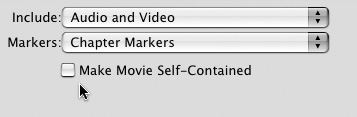
Leave Make Movie Self-Contained unchecked to export a reference movie—a small movie file that contains only pointers to the original audio, video, and render files.
Type a name for your file in the Save As field and select a destination folder; then click Save.
Tip
If your clip or sequence doesn’t have an audio track, select Video Only from the Include pop-up menu. Even empty audio tracks will increase the file size of your exported clip.
To export a Final Cut Express movie for use in iDVD or DVD Studio Pro:
Follow steps 1 through 4 in the previous task, “To export a clip or sequence as a QuickTime movie.”
If you want to export chapter markers along with your file, choose Chapter Markers from the Markers pop-up menu.
Do one of the following:
Select Make Movie Self-Contained to make a stand-alone file that can be used with iDVD or DVD SP on this or another computer.
Leave Make Movie Self-Contained unchecked to export a reference movie—a small movie file that contains only pointers to the original audio, video, and render files—which can be used only with a copy of iDVD or DVD SP that is located on the same computer as your Final Cut Express project (Figure 19.21).
In the Save dialog box, type a name for your file in the Save As field and select a destination folder; then click Save.
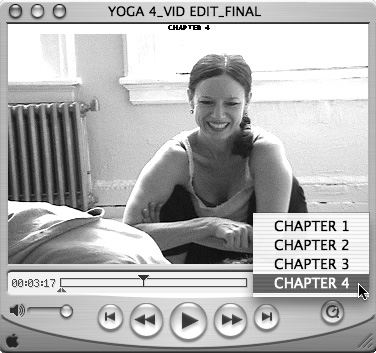
The exported movie contains any sequence markers you have designated as chapter markers (Figure 19.22).
Tips
If you’re exporting a sequence for use in iDVD or DVD SP, remember that only sequence markers (and not clip markers) may be successfully exported as chapter markers. To learn how to set sequence markers, see “Using Markers in the Timeline and the Canvas” in Chapter 10.
Name and number your chapter markers as you add them so you can easily spot any errors.
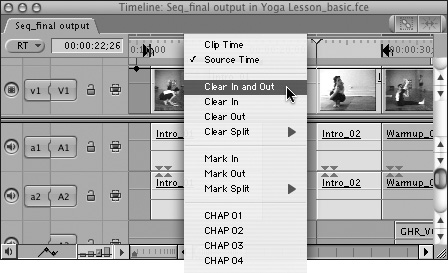
Here’s a quick way to review your chapter markers before you export: Control-click the Timeline ruler to see a pop-up menu of sequence markers in the current sequence (Figure 19.23).

The Export > Using QuickTime Conversion option gives you access to the full range of QuickTime-supported file formats. Use this option to convert your FCE media to any of the following:
Compressed QuickTime movies (use the QuickTime Movie format)
Uncompressed, full-resolution file formats that include an alpha channel
Still images in a variety of graphics file formats
Audio tracks in a variety of compressed and uncompressed formats
To export a clip or sequence in another QuickTime format:
Do one of the following:
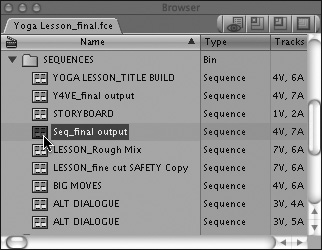
Select a clip or sequence in the Browser (Figure 19.24).
In the Timeline, open the sequence you want to export.
Set In and Out points in your clip or sequence to mark the section you want to include in the exported file. If you want to export the entire item, clear any In and Out points from the item before export.
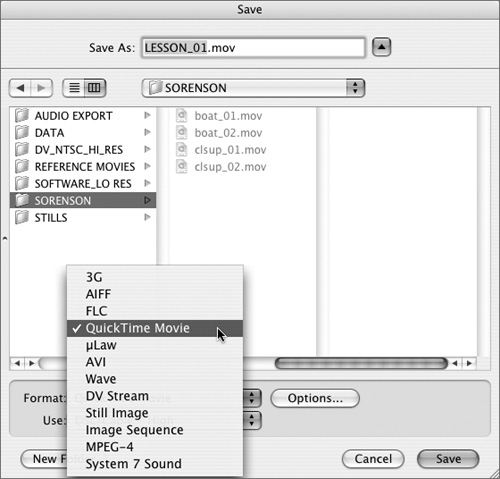
Choose File > Export > Using QuickTime Conversion (Figure 19.25).
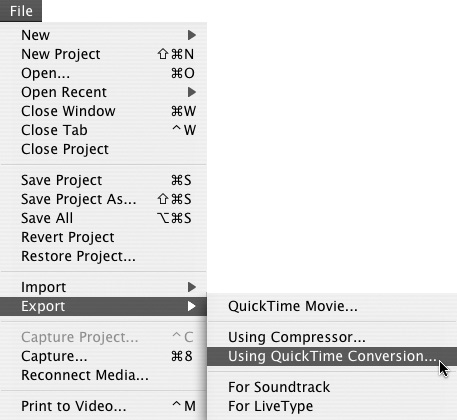
Figure 19.25. Choose File > Export > Using QuickTime Conversion. Choosing QuickTime gives you access to the full range of QuickTime’s output formats.
The Save dialog box opens.
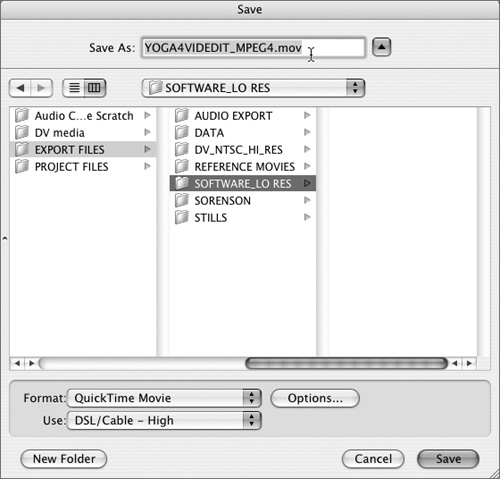
In the Save dialog box, choose an export file format from the Format pop-up menu (Figure 19.26). then do one of the following:
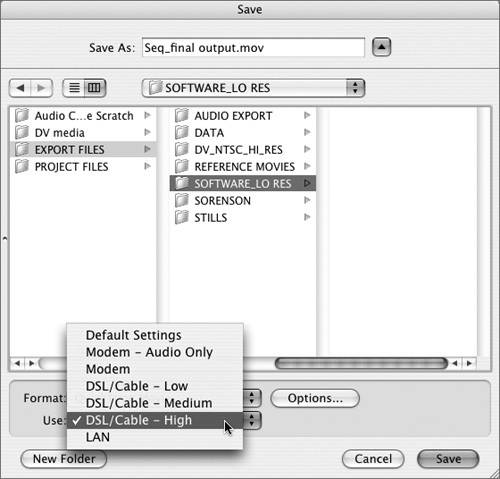
Choose one of the Export Settings presets from the Use pop-up menu (Figure 19.27).
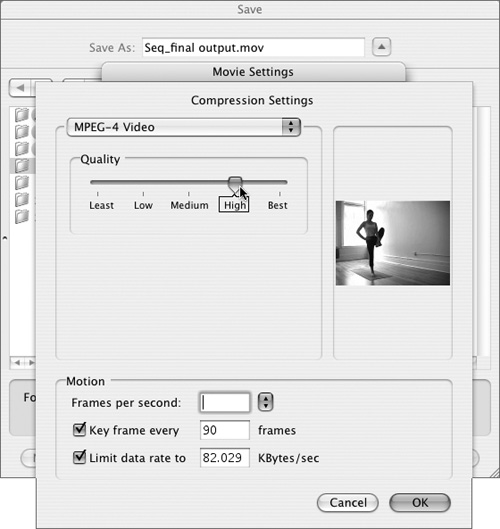
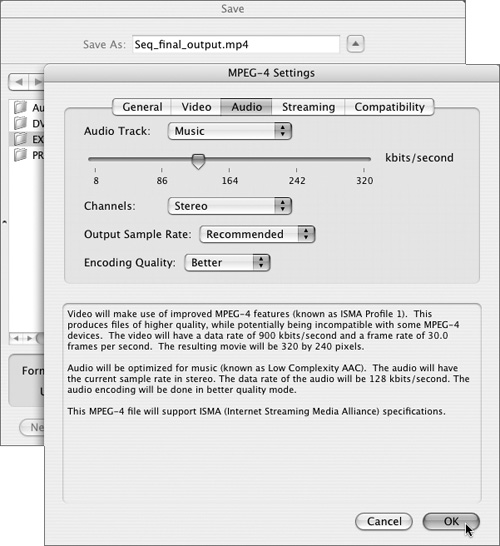
Click the Options button to access the full QuickTime settings for the format you have selected. In the settings dialog box (or boxes) that follow, confirm or modify the export format settings and then click OK. Export options will vary according to the format you have selected (Figure 19.28).
In the Save dialog box, name your file in the Save As field (Figure 19.29) and then select a destination folder.
Click Save.
Tip
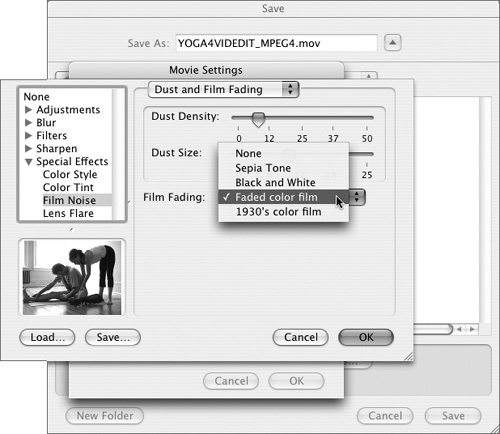
The QuickTime Movie format gives you the option of applying QuickTime’s suite of video filters, and you can choose from a range of effects and image control filters (check out the Film Noise filter!). Select the filters as you configure your export options, and they will be processed as part of the export operation. You can access the filters by clicking the Filter button in the Movie Settings window (Figure 19.30).
To export a still image from a Canvas or a Viewer frame:
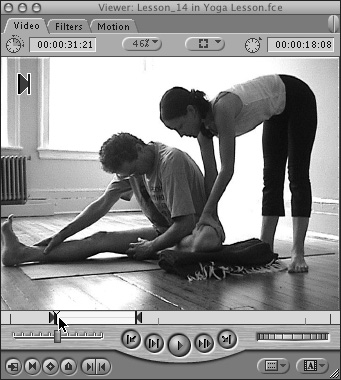
In the Canvas or the Viewer, position the playhead on the frame you want to export (Figure 19.31).
Choose File > Export > Using QuickTime Conversion.
In the Save dialog box, choose Still Image from the Format pop-up menu (Figure 19.32); then do one of the following:
Choose one of the Still Image presets from the Use pop-up menu.
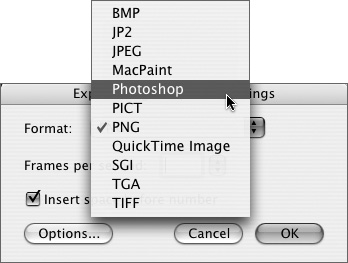
Click the Options button to access a complete list of QuickTime still image formats and their settings. In the Export Image Sequence Settings dialog box, select an export format from the pop-up menu at the top of the dialog box (Figure 19.33) and then click OK.
In the Save dialog box, type a name for your still frame in the Save As field and select a destination folder.
Click Save (Figure 19.34).
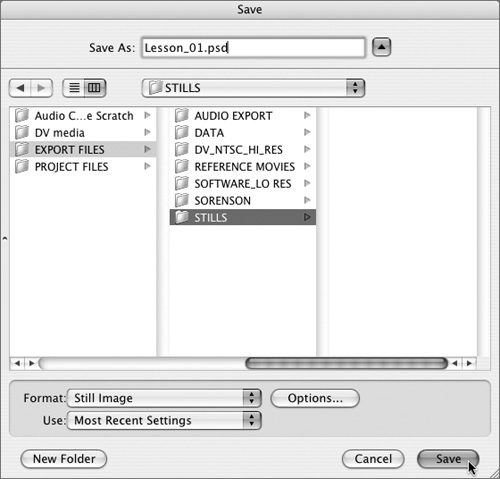
Figure 19.34. In the Save dialog box, type a name for your still frame in the Save As field; then select a destination folder and click Save.
Final Cut Express automatically adds the correct image file extension to the name you typed.


Tips
If you want to export multiple still frames in a batch process rather than exporting them directly (as outlined in this task), you’ll first need to use the Modify > Make Freeze Frame command to create FCE still clips. When you’re done selecting your freeze-frames, you can use the batch-export feature to convert them all to graphics files in one operation.
When you export a still frame, ignore the frames-per-second settings—they don’t apply to still-frame export.
To export an image sequence:
Do one of the following:
Select a clip or sequence in the Browser.
In the Timeline, open the sequence you want to export.
Set In and Out points in your clip or sequence to mark the section you want to export as a numbered image sequence (Figure 19.35). If you want to export the entire item, clear any In and Out points from the item before export.
Choose File > Export > Using QuickTime Conversion.
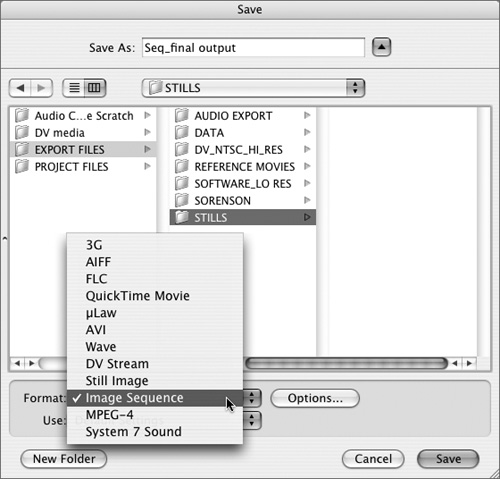
In the Save dialog box, choose Image Sequence from the Format pop-up menu (Figure 19.36); then do one of the following:
Choose one of the Image Sequence presets from the Use pop-up menu.
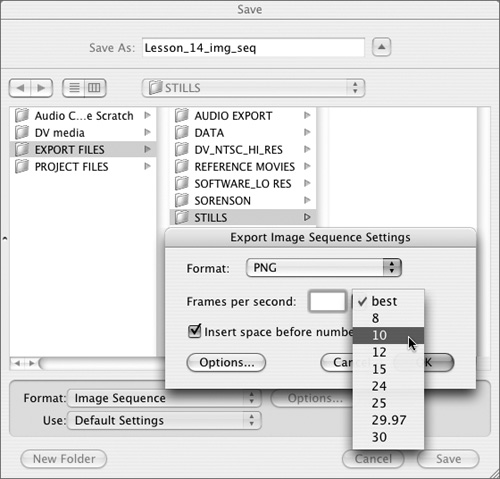
Click the Options button to access a complete list of QuickTime still image formats and their settings. In the Export Image Sequence Settings dialog box, select an export format from the Format pop-up menu and select a frame rate for your image sequence (Figure 19.37); then click OK.
In the Save dialog box, type a name for your still frame in the Save As field and then select a destination folder.
Click Save.
Your image sequence is saved as a series of still graphics in the file format you selected.
If you need more control over your audio tracks than you can get inside FCE, or if you just got off the phone with the BBC and you have a sudden need for an audio-only excerpt from your movie, read on. This section describes three options for exporting audio from your Final Cut Express project.
If you’d like to export just the audio from your sequence and you need access to export formats other than AIFF, you can use the Export > Using QuickTime Conversion command to convert and export your audio in a single operation.
If you plan to finish your audio in a dedicated audio editing workstation, you have a couple of options:
Export your edited sequence audio tracks as individual AIFF files, and you can export up to eight channels simultaneously, by mapping audio tracks to specific channels. Because each AIFF file exports as a single, continuous piece, you’ll retain volume, pan, and filters settings, but lose edit points.
Export the audio tracks from an FCE sequence in Open Media Framework (OMF) format, and you can transport your edited audio to any OMF-compatible digital audio workstation.
To export audio only from a clip or sequence:
Select a clip or sequence in the Browser, or open the sequence in the Timeline.
Set In and Out points in your clip or sequence to mark the section you want to export as an audio file.
Choose File > Export > Using QuickTime Conversion.
In the Save dialog box, choose an audio export file format from the Format pop-up menu (Figure 19.38). Then do one of the following:
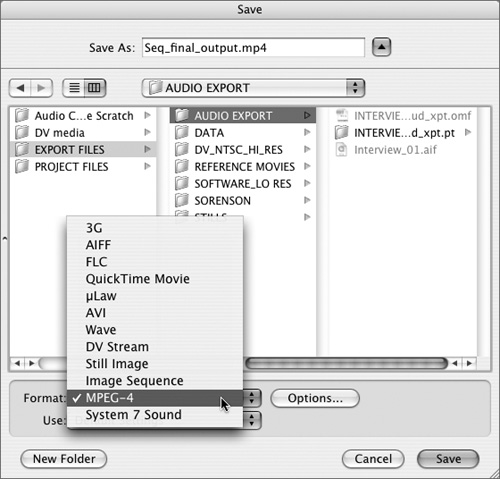
Figure 19.38. Choose File > Export > Using QuickTime Conversion and then select an audio format from the Format pop-up menu. AIFF, µLaw, and Wave are all audio formats.
Choose one of the audio export presets from the Use pop-up menu.
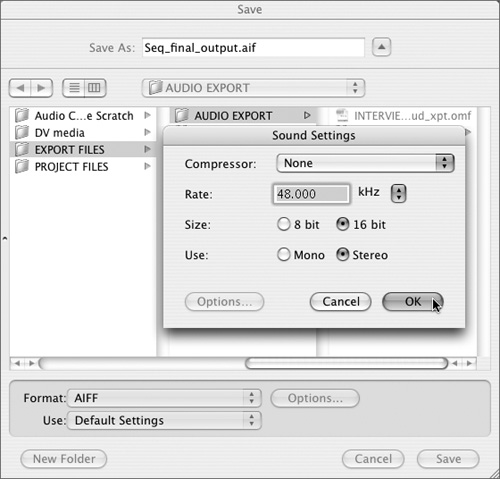
Click the Options button to access the full QuickTime settings for the format you have selected. In the Sound Settings dialog box, select sample-rate (Figure 19.39) and compression settings; then click OK.
In the Save dialog box, type a name for your audio file in the Save As field, select a destination folder, and then click Save.
Tips
You can use the export method just described to convert the 44.1-kHz sample rate of a CD audio track. In the Sound Settings dialog box (see step 4 in the preceding procedure), choose 48 (or 32) kHz—the sample rate that matches your sequence audio’s rate. Once you complete the export/sample-rate conversion, import the exported copy back into your project.
Final Cut Express allows you to mix audio tracks with different sample rates in the same sequence. The program can convert the sample rate of nonconforming audio on the fly as you play back a sequence. Real-time sample-rate conversion does take processor power, however and can occasionally produce nasty audible artifacts, so for best results, convert the sample rates of all your audio tracks to match the sequence settings.
To export audio in AIFF format:
Select a clip or sequence in the Browser, or open the sequence in the Timeline.
Set In and Out points in your clip or sequence to mark the section you want to export as an audio file.
Choose File > Export > Using QuickTime Conversion.
Choose AIFF from the Format pop-up menu; then click the Options button to access the full QuickTime settings for the AIFF format. In the Sound Settings dialog box, select sample-rate (Figure 19.40) and compression settings; then click OK.
Type a name for your audio file in the Save As field; then select a destination folder and click Save.
LiveType and Soundtrack both accept exported FCE reference movies in a variety of formats and resolutions. These application-specific Export menu commands are an amenity, but you don’t actually need to use them to export a movie you can use to position and time your titles, or your music score.
To export a file for use in LiveType:
In the Browser, select the sequence that you want to export to LiveType, and then choose File > Export > For LiveType (Figure 19.41).
Name your exported file, and be sure to include markers if you are using them within your sequence.
If you already have a LiveType clip in your FCE sequence when you choose File > Export > For LiveType, FCE will ask you if you want to include that LiveType clip in your exported file.
In the Finder, launch LiveType and create a new project.
Do one of the following:
Choose File > Place and select your exported FCE sequence movie file. Your file will be placed into a new, modifiable layer in LiveType.
Choose File > Place Background Movie and select your exported FCE movie. Your file will be placed into a protected layer in LiveType (Figure 19.42).
To export a file for use in Soundtrack:
In the Browser, select the sequence that you want to export to Soundtrack.
Choose File > Export > For Soundtrack.
Name your project, and be sure to include Audio Scoring Markers if you are using them within your sequence.
From the Finder, launch Soundtrack and create a new project.
Use Soundtrack’s Media Manager to select the saved FCE file and drag it into the Video tab (Figure 19.43). (Using “Open” does not work.)

Tips
When exporting your mixed track from Soundtrack, be sure to check “Mute audio track from video” when saving, or else you will mixdown your video’s audio tracks into your new soundtrack.
Get the full details on FCE/Soundtrack interaction protocols in Chapter 8 of Apple’s Soundtrack manual, Working with Video in Soundtrack.