
Chapter 8. Classes and Inheritance
How many .NET programmers does it take to change a light bulb? None—they call a method on the light bulb object, and it changes itself. Ha, ha, ha! That’s funny, but only if you understand the object-oriented programming (OOP) concepts that are the basic foundation of the .NET system. (Actually, it’s not even that funny if you do understand OOP.) Without OOP, it would be difficult to support core features of .NET, such as the central System.Object object, which is the basic foundation of the .NET system. Also, productivity would go way down among Windows developers, who are the basic foundation of the .NET system.
Although I briefly mentioned OOP development concepts in both Chapters 1, “Introducing .NET,” and 2, “Introducing Visual Basic,” it was only to provide some context for other topics of discussion. But in this chapter, I hold back no longer. After a vigorous discussion of general OOP concepts, I’ll discuss how you can use these concepts in your .NET code.
Object-Oriented Programming Concepts
If you’ve read this far into the book, it’s probably okay to let you in on the secret of object-oriented computing. The secret is: It’s all a sham, a hoax, a cover-up. That’s right, your computer does not really perform any processing with objects, no matter what their orientation. The CPU in your computer processes data and logic statements the old-fashioned way: one step at a time, moving through specific areas in memory as directed by the logic, manipulating individual values and bits according to those same logic statements. It doesn’t see data as collective objects; it sees only bits and bytes.
One moment, I’ve just been handed this important news bulletin. It reads, “Don’t be such a geek, Tim. It’s not the computer doing the object-oriented stuff, it’s the programmer.” Oh, sorry about that. But what I said before still stands: The final code as executed by your CPU isn’t any more object-oriented than old MS-DOS code. But object-oriented language compilers provide the illusion that OOP is built into the computer. You design your code and data in the form of objects, and the compiler takes it from there. It reorganizes your code and data, adds some extra code to do the simulated-OOP magic, and bundles it all up in an EXE file. You could write any OOP program using ordinary procedural languages, or even assembly language. But applications that focus on data can often be written much more efficiently using OOP development practices.
The Object
The core of object-oriented programming is, of course, the object. An object is a person, place, or thing. Wait a minute, that’s a noun. An object is like a noun. Objects are computer data-and-logic constructs that symbolize real-world entities, such as people, places, or things. You can have objects that represent people, employees, dogs, sea otters, houses, file cabinets, computers, strands of DNA, galaxies, pictures, word-processing documents, calculators, office supplies, books, soap opera characters, space invaders, pizza slices, majestic self-amortizing canals, plantations of ripening tea, a few of my favorite things, and sand.
Objects provide a convenient software means to describe and manage the data associated with one of these real-world objects. For instance, if you had a set of objects representing DVDs in your home video collection, the object could manage features of the DVD, such as its title, the actors performing in the content, the length of the video in minutes, whether the DVD was damaged or scratched, its cost, and so on. If you connected your application to the DVD-ROM player in your system, your object could even include a “play” feature that (assuming the DVD was in the drive) would begin to play the movie, possibly from a timed starting position or DVD “chapter.”
Objects work well because of their ability to simulate the features of real-world objects through software development means. They do this through the four key attributes of objects: abstraction, encapsulation, inheritance, and polymorphism.
Throughout this chapter, the term “object” usually refers to an instance of something, a specific in-memory use of the defined element—an instance with its own set of data, not just its definition or design. Class refers to the design and source code of the object, comprising the implementation.
Abstraction
An abstraction indicates an object’s limited view of a real-world object. Like an abstract painting, an abstracted object shows just the basic essentials of the real-world equivalent (see Figure 8-1).
Figure 8-1. Actually, the one on the left is kind of abstract, too.
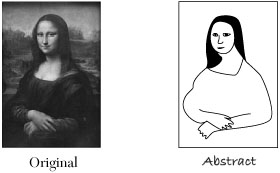
Objects can’t perfectly represent real-world counterparts. Instead, they implement data storage and processes on just those elements of the real-world counterpart that are important for the application. Software isn’t the only thing that requires abstraction. Your medical chart at your doctor’s office is an abstraction of your total physical health. When you buy a new house, the house inspector’s report is an abstraction of the actual condition of the building. Even the thermometer in your back yard is an abstraction; it cannot accurately communicate all of the minor temperature variations that exist just around the flask of mercury. Instead, it gathers the information it can, and communicates a single numeric result.
All of these abstract tools record, act on, or communicate just the essential information they were designed to manage. A software object, in a similar way, only stores, acts on, or communicates essential information about its real-world counterpart. For instance, if you were designing an object that monitored the condition of a building, you might record the following:
- Building location and address
- Primary construction material (wood, concrete, steel-beam, etc.)
- Age (in years)
- General condition (from a list of choices)
- Inspector notes
Although a building would also have color, a number of doors and windows, and a height, these elements may not be important for the application, and therefore would not be part of the abstraction. Those values that are contained within the object are called properties. Any processing rules or calculations contained within the object that act on the properties (or other supplied internal or external data) are known as methods. Taken together, methods and properties make up the members of the object.
Encapsulation
The great advantage of software is that a user can perform a lot of complex and time-consuming work quickly and easily. Actually, the software takes care of the speed and the complexity on behalf of the user, and in many cases, the user doesn’t even care how the work is being done. “Those computers are just so baffling; I don’t know and I don’t care how they work as long as they give me the results I need” is a common statement heard in management meetings. And it’s a realistic statement too, because the computer has encapsulated the necessary data and processing logic to accomplish the desired tasks.
Encapsulation carries with it the idea of interfaces. Although a computer may contain a lot of useful logic and data, if there was no way to interact with that logic or data, the computer would basically be a useless lump of plastic and silicon. Interfaces provide the means to interact with the internals of an object. An interface provides highly controlled entries and exits into the data and processing routines contained within the object. As a consumer of the object, it’s really irrelevant how the object does its work internally, as long as it produces the results you expect through its publicly exposed interfaces.
Using the computer as an example, the various interfaces include (among other things) the keyboard, display, mouse, power connector, USB and 1394 ports, speakers, microphone jack, and the power button. Often, the things I connect to these interfaces are also black boxes, encapsulations with well-defined public interfaces. A printer is a mystery to me. How the printer driver can send commands down the USB cable, and eventually squirt ink onto 24-pound paper is just inexplicable; but I don’t know and I don’t care how it really works, as long as it does work.
Inheritance
Inheritance in .NET isn’t like inheritance in real life; no one has to die before it works. But as in real life, inheritance defines a relationship between two different objects. Specifically, it defines how one object is descended from another.
The original class in the object relationship is called the base class. It includes various and sundry interface members, as well as internal implementation details. A derived class is defined using the base class as the starting point. Derived classes inherit the features of the base class. By default, any publicly exposed members of the base class automatically become publicly exposed members of the derived class, including the implementation. A derived class may choose to override one, some, or all of these members, providing its own distinct or supplementary implementation details.
Derived classes often provide additional details specific to a subset of the base class. For instance, a base class that defines animals would include interfaces for the common name, Latin species name, number of legs, and other common properties belonging to all animals. Derived classes would then enhance the features of the base class, but only for a subset of animals. A mammal class might define gestation time for birthing young, whereas a parallel avian-derived class could define the diameter of an egg. Both mammal and avian would still retain the name, species name, and leg count properties from the base animal class. An instance of avian would be an animal; an instance of mammal would be an animal. However, an instance of avian would not be a mammal. Also, a generic instance of animal could be considered as an avian only if it was originally defined as an avian.
Even though a base and derived class have a relationship, implementation details that are private to the base class are not made available to the derived class. The derived class doesn’t even know that those private members exist. A base class may include protected members that, although hidden from users of the class, are visible to the derived class. Any member defined as public in the base class is available to the derived class, and also to all users of the base class. (Visual Basic defines another level named “friend.” Members marked as friend are available to all code in the same assembly, but not to code outside of the assembly. Public members can be used by code outside of the defining assembly.)
Examples of inheritance do exist in the real world. A clock is a base object from which an alarm clock derives. The alarm clock exposes the public interfaces of a clock, and adds its own implementation-specific properties and methods. Other examples include a knife and its derived Swiss-army knife, a chair and its derived recliner, a table and its derived Periodic Table of the Elements.
Polymorphism
The concepts introduced so far could be implemented using standard procedural programming languages. Although you can’t do true inheritance in a non-OOP language like C, you can simulate it using flag fields. If a flag field named “type” in a non-OOP class-like structure was set to “mammal,” you could enable use of certain mammal-specific fields. There are other ways to simulate these features, and it wouldn’t be too difficult.
Polymorphism is a different avian altogether. “Polymorphism” means “many forms.” Because a derived class can have its own (overridden) version of a base class’s member, if you treat a mammal object like a generic animal, there could be some confusion as to which version of the members should be used, the animal version or the mammal version. Polymorphism takes care of figuring all of this out, on an ad hoc basis, while your program is running. Polymorphism makes it possible for any code in your program to treat a derived instance as if it were its base instance. This makes for great coding. If you have a routine that deals with animal objects, you can pass it objects of type animal, mammal, or avian, and it will still work. This type of polymorphism is known as subtyping polymorphism, but who cares what its name is.
Another variation of polymorphism is overloading. Overloading allows a single class method (forget about derived classes for now) to have multiple forms, but still be considered as a single method. For instance, if you had a house object with a paint method (that would change the color of the house), you could have one paint method that accepted a single color (paint the house all one color) and another paint method that accepted two colors (main color plus a trim color). When these methods are overloaded in a single class, the compiler determines which version to call based on the data you include in the call to the method.
Interfaces and Implementation
OOP development differentiates between the public definition of a class, the code written to implement that class, and the resulting in-memory use of that class as an object. It’s similar to how, at a restaurant, you differentiate between a menu, the cooking of your selection, and the actual food that appears at your table.
- The description of an item on the menu is (to some extent) its interface; it describes what the real object will expose publicly in terms of taste, smell, etc.
- The method used by the kitchen staff to prepare the food is the implementation; it’s how the meal is prepared. There may be different implementations by different restaurants for the same menu item. In objects, the implementation is hidden from public view; in a restaurant, food preparation is thankfully hidden from view or no one would ever eat there.
- The food you receive from the kitchen is—ta da!—the object, the actual instance of what the menu described. Many hungry customers may each order the same menu item, and each would receive a distinct instance of the food.
OOP in Visual Basic and .NET
Conceptually, OOP really isn’t that complex. Because both humans and programmers interact with real-world objects and instances every day, it’s pretty easy to wrap their minds around the idea of programming with objects. But how easy is it to communicate these object concepts to the computer through the Visual Basic compiler and the .NET Framework? Can it be done without weekly sessions on a shrink’s comfy sofa? Duh! It’s Visual Basic; of course it’s easy.
One reason objects are so easy in .NET is that they have to be. Everything in your .NET program is part of an object, and if everything about .NET was hard, you’d be reading a book on Macintosh development right about now. But it’s not too hard because the Visual Basic implementation of objects parallels the conceptual ideas of objects.
Classes
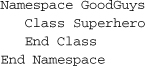
Visual Basic uses classes to define objects. The Class keyword starts the definition.
![]()
That’s most of it: the Class keyword, and a name for the class (“Superhero” in this case). All classes reside in a namespace (discussed way back in Chapter 1). By default, your classes appear in a namespace that is named after your project. You can alter this in the project properties (to set the top-level namespace for your assembly) and with the Namespace statement (to indicate relative namespaces from your assembly’s top-level namespace).
You can add any number of classes to a namespace. Classes that use the same name, but that appear in different namespaces, are unrelated.
The members of a class appear between the Class and End Class clauses. You can also split a class’s definition into multiple source code files. If you do split up a class like this, at least one of the parts must include the keyword Partial in the definition.
Partial Class Superhero
As with variable definitions, classes are defined using one of the access modifier keywords: Public, Private, Protected, Friend, or Protected Friend. Flip back to Chapter 6, “Data and Data Types,” in the “Variables” section, if you need a refresher course.
The .NET Framework Class Libraries are simply loaded with classes and objects, and they are all pretty much defined with this simple keyword: Class.
Class Members
Calling your class Superhero won’t endow it with any special powers if you don’t add any members to the class. All class members must appear between the Class and End Class boundaries, although if you use the Partial feature to break up your class, you can sprinkle the members among the different class parts in any way you wish.
There are 11 different kinds of members you can include in your Visual Basic classes. Other books or documents may give you a different number, but they’re wrong, at least if they organize things the way I do here.
- Variable fields. Value type and reference type variables can be added directly to your class as top-level members. As full class members, they are accessible by any code defined in the same class, and possibly by code that uses your class. Variables are defined using one of the access modifiers.

- Constant fields. You define constants just like variable fields, but include the Const keyword. As with local procedure-level constants, you must assign a value to the constant immediately in source code, using literals or simple non-variable calculations.
Public Const BaseStrengthFactor As Integer = 1
- Enumerations. Enumerations define related integral values. Once defined, you can use them in your code just like other integer values.
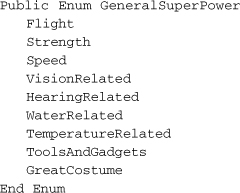
Enumerations can also be defined at the namespace level, outside of any specific class.
- Sub methods. Classes include two types of methods, Subs and Functions. All logic code in your application appears in one of these method types, so don’t bother looking for such code in an enumeration. Sub methods perform some defined logic, optionally working on data passed in as arguments.
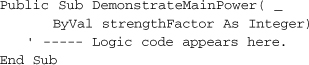
The DemonstrateMainPower method, as a public member of your class, can be called either by code within the class, or by any code referencing an instance of your class. This method includes a single parameter, strengthFactor, through which calls to the method send in data arguments.
You can jump out of a sub method at any time by using the Return statement, or the older pre-.NET Exit Sub statement.
- Function methods. Function methods are just like sub methods, but they support a return value. You define the data type of the return value with an As clause at the end of the function definition. Assignment of the return value can be done using the Return statement, or by assigning the function name directly within the code.
If you use the assignment-to-function-name style of return value assignment, use the Exit Function statement to return to the calling code at any time.
- Properties. Properties combine the ideas of fields and methods. You can create read-write, read-only, or write-only properties through the Get and Set accessors. The following code defines a write-only property:

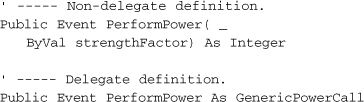
- Delegates. Delegates define arguments and return values for a method, and encase them in a single object all their own. They are generally used to support the event process, callback procedures, and indirect calls to class methods.
Public Delegate Sub GenericPowerCall( _
ByVal strengthFactor As Integer)Because delegates are pretty generic, they can also be defined at the namespace level, outside of any class definition.
- Events. Adding events to your class allows consumers of your class to react to changes and actions occurring within a class instance. The syntax used to define events looks a lot like a method definition, but an alternative syntax uses previously defined delegates to indicate the signature of the event.
- Declares. The Declare statement lets you call code defined in external DLL files, although it works only with pre-.NET DLL calls. The syntax for declares closely resembles the syntax used to define methods.

Once defined, an externally declared sub or function can be used in your code as if it were a built-in .NET sub or function definition. The .NET Framework does a lot of work behind the scenes to shuttle data between your program and the DLL. Still, care must be taken when interacting with such external “unmanaged” code, especially if the DLL is named “evil.dll.”
- Interfaces. Interfaces allow you to define abstract classes and, in a way, class templates. A section near the end of this chapter discusses interfaces. Interfaces can also be defined at the namespace level, and usually are.
- Nested types. Classes can include other subordinate classes for their own internal or public use. If you make such a “child” class public, you can return instances of these classes to code that uses the larger “parent” class. (You can also return private class instances, but the caller wouldn’t be able to do much with them.)
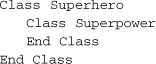
You can nest classes to any depth, but don’t go overboard. Creating multiple classes within the same namespace will likely meet your needs without making the code overly complex. But that’s just my idea; do what you want. It’s your code after all. If you want to throw away your life on a career in the movies, that’s fine with me.
Adding a nice variety of members to a class is a lot of fun. You can add class members in any variety, in any order, and in any quantity. If you add a lot of members, you might even get a quantity discount on Visual Studio from Microsoft, but I wouldn’t hold your breath.
Shared Class Members
Normally, objects (class instances) are greedy and selfish; they want to keep everything to themselves and not share with others. That’s why each instance of a class you create has its own version of the data elements defined as class members. Even class methods and properties give the appearance of being distinct for each class instance. It’s as if each object was saying, “I’ve got mine; get your own.” It’s this attitude that has led to what is now commonly called “class warfare.”
In an attempt to promote affability among software components and push for “kindlier and gentler” classes, Microsoft included the Shared keyword in its class design. The Shared keyword can be applied to Variable field, Sub method, Function method, and property members of your class. When defined, a shared member can be used without the need to create an instance of that class. You reference these shared members using just the class name and the member name.
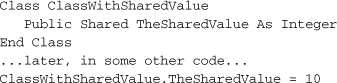
Shared members are literally “shared” by all instances of your class, and if public, by code outside of the class as well. Because they don’t require an object instance, they are also limited to just those resources that don’t require an object instance. This means that a shared method cannot access a non-shared variable field of the same class. Any class members that are not marked Shared are known as instance members.
Overloaded Members and Optional Arguments
Overloading of a method occurs by attaching the Overloads keyword to each of the overloaded members.
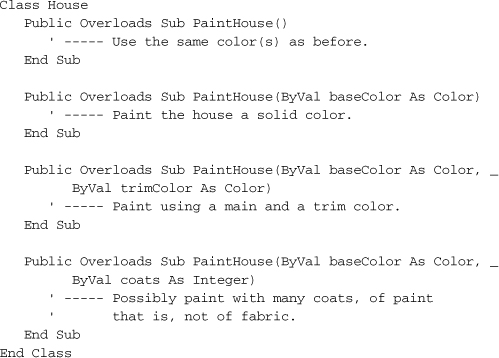
When you call the PaintHouse method, you must pass arguments that match one of the overloaded versions. Visual Basic determines which version to use based on the argument signature. If you pass the wrong type or number of arguments, the program will refuse to compile.
Two of the overloaded members in this class look alike, except for the second coats argument.

Instead of defining two distinct methods, I could have combined them into a single method, and defined an optional argument for the coats parameter.
Public Overloads Sub PaintHouse(ByVal baseColor As Color, _
Optional ByVal coats As Integer = 1)
The Optional keyword can be used on any number of parameters, but no non-optional parameters can appear after them; the optional arguments must always be last in the list. Although the calling code might not pass a value for coats, .NET still requires that every parameter receive an argument. Therefore, each optional argument includes a default value using a simple assignment within the parameter definition. The optional argument coats uses a default value of 1 through the “= 1” clause.
Inheritance
Visual Basic supports inheritance, the joining of two classes in an ancestor-descendant relationship. To implement inheritance, define the base class, and then add the derived class using the keyword Inherits. What a surprise!
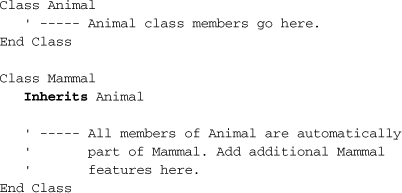
The Inherits statement must appear at the start of the class definition, before the definition for any class members. It must include the name of exactly one other class, the base class. If you split up your derived class using the Partial keyword, you only need to use the Inherits statement in one of the parts. And because a derived class can only use a single base class, you’re pretty much limited to using the Inherits statement only once per class. (The base class can be used in several different derived classes, and the derived class can further be used as a base class for other derived classes.)
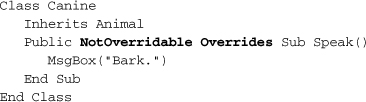
Derived classes automatically receive all defined members of the base class. If a derived class needs to provide special functionality for a member defined in the base class, it overrides the member in the base class. This is a two-step process: (1) the base class must allow its member to be overridden with the Overridable keyword; and (2) the base class must supply the overriding code using the Overrides keyword.

Any class that derives from Animal can now supply its own custom code for the Speak method. But the same is true for classes derived from Canine; the Overridable keyword is passed down to each generation. If you need to stop this attribute at a specific generation, use the NotOverridable keyword. This keyword is valid only when used in a derived class, because base class members are non-overridable by default.
There are times when it is not possible to write a truly generic method in the base class, and you want to require that every derived class define its own version of the method. Using the MustOverride keyword in the member definition enables this requirement.
![]()
Members marked as MustOverride include no implementation code of their own because it would go unused. (Also notice that DefenseTactic has no closing “End Sub” statement.) Because there is no code associated with this member, the entire Animal class has a deficiency. If you created an instance of Animal and called its DefenseTactic method, panic would ensue within the application. Therefore, it is not possible to create instances of classes that contain MustOverride members. To note this limitation, the class is also decorated with the MustInherit keyword.
![]()
It won’t be possible to create an instance of Animal directly, although you can derive classes from it, and create instances of those classes. Also, you can create an Animal variable (a reference type) and assign an instance of an Animal-derived class to it.
![]()
Such code doesn’t really seem fair to the base class. I mean, it defined all the core requirements for derived classes, but it doesn’t get any of the credit because it can’t be directly instantiated. But there is a way for a base class to control its own destiny, to take all of the glory for itself. It does this with the NotInheritable keyword.
NotInheritable Class Animal
End Class
The only way to use a NotInheritable class is to create an instance of it; you cannot use it as the base class of another derived class.
Inherits, MustInherit, NotInheritable, Overrides, Overridable, NotOverridable—this certainly isn’t your grandmother’s Visual Basic anymore. And there’s still one more of these inimitable keywords: Shadows. When you override a base class member, the new code must use a definition that is identical to the one provided in the base class. That is, if you override a function method with two String arguments and an Integer return code, the overriding code must use that same signature. Shadowed members have no such requirements. A shadowed member matches an item in the base class “in name only;” everything else is up for grabs. You can even change the member type. If you have a Sub method named PeanutButter in a base class, you can shadow it in the derived class with a variable field (or constant, or enumeration, or nested class) also named PeanutButter.
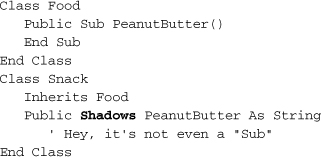
Without the Shadows keyword in the Snack class, a compile-time error would occur.
Creating Instances of Classes
Step one: designing classes. Step two: deriving classes. Step three: creating class instances. Step four: cha-cha-cha. Visual Basic uses the New keyword to create instances of your custom classes.
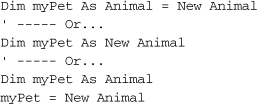
The instance can then be used like any other .NET instance variable. Member access occurs using “dot” notation.
myPet.Name = "Fido"
You can also (within reason) pass instance variables between their base and derived variations.
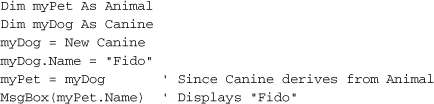
If you have Option Strict set to On, there will be limits on your ability to convert between types, especially narrowing conversions (where the source data type will not always “fit” in the target variable). In such cases, you must use the CType function (or one of a few similar .NET and Visual Basic supplied functions) to enable the conversion.
myDog = CType(myPet, Canine)
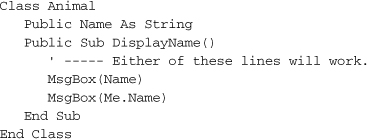
Referring to class instances is simply a matter of referring to the variable or object that contains the instance. That is true for code that uses an instance from outside of the class itself. For the code within your class (such as in one of its methods), you refer to members of your class as if they were local variables (with no qualification), or use the special Me keyword.
A similar keyword, MyClass, usually acts like the Me keyword, but it has some different functionality when a class instance is stored in a variable from a different (base or derived) class type. For instance, if you create an instance of Canine, but store it in an Animal variable, references using Me will focus on the Canine code, whereas references to MyClass will focus on the Animal code. I won’t be using MyClass in the Library Project, and for most simple uses of class instances, you will never use it either. But there are times when it is important to differentiate between base and derived code, and this is the way to do it.
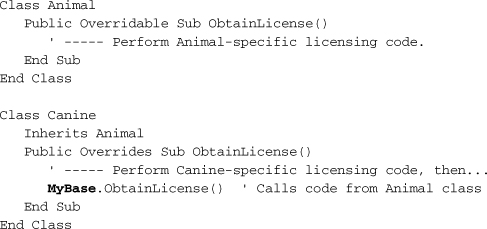
The MyBase keyword references elements of the base class from which the current class derives. It references only the closest base class; if you have a class named Class5 that derives from Class4, which in turn derives from Class3, which derives from Class2, which derives from Class1, which eventually derives from System.Object, references to MyBase in the code of Class5 refer to Class4. Well, that’s almost true. If you try to use MyBase.MemberName and MemberName doesn’t exist in Class4, MyBase will search back through the stack of classes until it finds the first definition of MemberName.
Constructors and Destructors
Class instances have a lifetime: a beginning, a time of activity, and finally, thankfully, an end. The beginning of an object’s lifetime occurs through a constructor; its final moments are dictated by a destructor before passing into the infinity of the .NET garbage collection process.
Each class includes at least one constructor, whether explicit or implicit. If you don’t supply one, .NET will at least perform minimal constructor-level activities, such as reserving memory space for each of the instance variable fields of your class. If you want a class to have any other startup-time logic, you must supply it through an explicit constructor.
Constructors in Visual Basic are Sub methods with the name New. A New constructor with no arguments acts as the default constructor, called by default whenever a new instance of a class is needed.

Without this constructor, new instances of Animal wouldn’t have any name assigned to the Name field. And because String variables are reference types, Name would have an initial value of Nothing. Not very user friendly. A default constructor gives you a chance to provide at least the minimum needed data and logic for a new instance.
You can provide additional custom constructors by adding more New methods, each with a different argument signature.
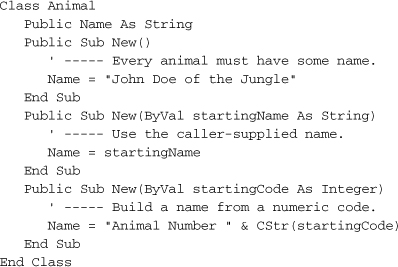
The following code demonstrates each constructor.
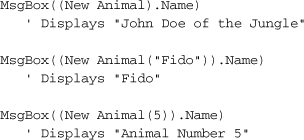
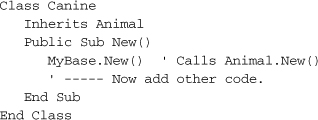
You can force the consumer of your class to use a custom constructor by excluding a default constructor from the class definition. Also, if you’re deriving your class from anything other than System.Object, it’s usually a good idea to call the base class’s constructor as the first line of your derived constructor, although the default constructor in the base class will be called by default.
Killing a class instance is not as easy as it might seem. When you create local class instances in your methods, they are automatically destroyed when that method exits if you haven’t assigned the instance to a variable outside of the method. If you create an instance in a method, and assign it to a class member, it will live on in the class member for the lifetime of the class, even though the method that created it has exited.
But let’s think only about local instances for now. An instance is destroyed when the routine exits. You can also destroy an instance immediately by setting its variable to Nothing.
myDog = Nothing
Setting the variable to a new instance will destroy any previous instance stored in that variable.
![]()
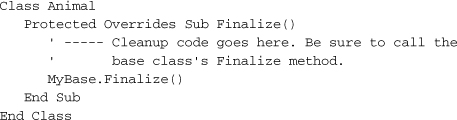
When an object is destroyed, .NET calls a special method named Finalize, if present, to perform any final cleanup before removing the instance from memory. Finalize is implemented as a Protected method of the base System.Object class; you must override this method in your class to use it.
So what’s with that crack about killing instances being so hard? The problem is that .NET controls the calling of the Finalize method; it’s part of the garbage collection process. The Framework doesn’t continually clean up its garbage. It’s like the service at your house; it gets picked up by the garbage truck once in a while. Until then, it just sits there, rotting, decaying, decomposing, and not having its Finalize method called. For most objects, this isn’t much of a problem; who cares if the memory for a string gets released now or 30 seconds from now? But there are times when it is important to release acquired resources as quickly as possible. For instance, if you acquire a lock on an external hardware resource and only release it in the destructor, you could be holding that lock long after the application has exited. Talk about a slow death.
There are two ways around this problem. One way is to add a separate cleanup method to your class that you expect any code using your class to call. This will work—until some code forgets to call the method. (You should therefore also call this routine from the destructor.) The second method is similar, but it uses a Framework-supplied interface called IDisposable. (I’ll talk about interfaces in a minute, so don’t get too worried about all the code shown here.)
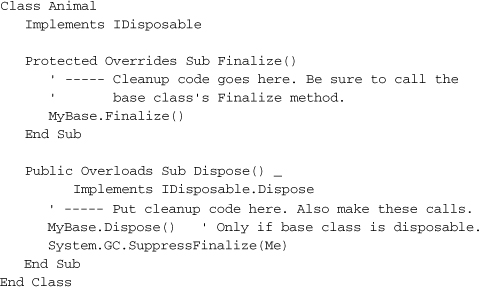
The SuppressFinalize method tells the garbage collector, “Don’t call Finalize; I’ve already cleaned up everything.” Any code that uses your class will need to call its Dispose method to perform the immediate cleanup of resources. So it’s not too different from the first method, but it does standardize things a bit. Also, it enables the use of the Visual Basic Using statement. This block statement provides a structured method of cleaning up resources.

Interfaces
The MustOverride and MustInherit keywords force derived classes to implement specific members of the base class. But what if you want the derived class to implement all members of the base class? You could use MustOverride next to each method and property, but a better way is to use an interface. Interfaces define abstract classes, classes consisting only of definitions, no implementation. (OOP purists will point out that a class with even just one MustOverride flag is also an abstract class. Fine.) The Interface statement begins the interface definition process. By convention, all interface names begin with the capital letter I.
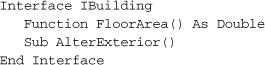
As you see here, the syntax is a somewhat simplified version of the class definition syntax. All interface members are automatically public, so access modifiers aren’t included. Only the definition line of each member is needed because there is no implementation. In addition to function and sub methods, interface members also include properties, events, other interfaces, classes, and structures. Interfaces can also derive from other interfaces (using the Inherits keyword), and automatically include all of the members of the base interface.
Classes make use of interfaces as they wish. It’s not like inheritance, where all base members become part of the derived class. A class can pick and choose which interface members to implement. Often you’ll implement all interface members, but as a class designer, you have the power. You attach interfaces to your class using the Implements keyword. This same keyword is used later to indicate which class member defines which interface member.
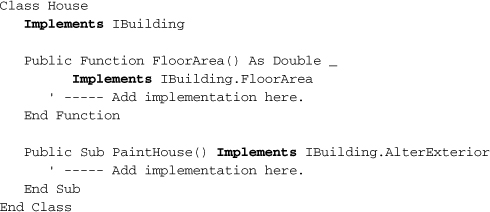
Class implementations of interface members are not required to maintain the original interface member name (although the argument signature must match the one in the interface). In the sample code, the FloorArea kept the name of the equivalent interface member, but the AlterExterior member was implemented using the PaintHouse method. This makes possible some interesting code.

Classes can only inherit from a single base class, but there is no limit on the number of interfaces that a class can implement.
Class House
Implements IBuilding, IDisposable
Also, a single class member can implement multiple interface members.
Public Sub PaintHouse() Implements _
IBuilding.AlterExterior, IContractor.DoWork
So, why use interfaces? Interfaces provide a generic way to access common functionality, even among objects that have nothing in common. Classes named Animal, House, and Superhero probably have nothing in common in terms of logic, but they may all need a consistent way to clean up their resources. If they each implement the IDisposable interface, they gain that ability without the need to derive from some common base class.
Modules and Structures
In addition to classes, Visual Basic provides two related object definition features: structures and modules. Although they have different names than “class,” they still act a lot like classes, but with different features enabled or disabled.
Modules provide a place to include general global code and data values in your application or assembly. All members of a module are Shared. In fact, a module acts just like a class with the Shared keyword added to each member, yet with one major difference: There is no inheritance relationship allowed with modules. You cannot create a derived module from a base class or module, nor can you use a module as a base for any other type. Modules are a carryover from pre-.NET versions of Visual Basic, which included “Modules” for all non-Form code.
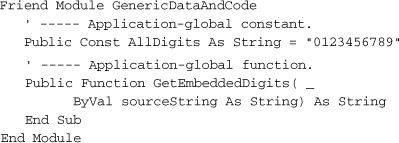
You cannot create an instance of a module. As with classes, modules appear in the context of a namespace. Unlike a class with shared members, you do not need to specify the module name to use the module member. All module members act as global variables and methods, and can be used immediately in any other code in your application without further qualification.
Structures are much more like classes than are modules. Classes implement reference types, but structures implement value types. All structures derive from System.ValueType (which in turn derives from System.Object). As such, they act like the core Visual Basic data types, such as Integer. You can create instances of a structure using the same syntax used to create class instances. However, you cannot use a structure as the base for another derived structure. And while you can include a constructor in your structure, destructors are not supported.
Because of the way that structures are stored and used in a .NET application, they are well suited to simple data types. You can include any number of members in your structure, but it is best to keep things simple.
Related Issues
Let me take a few moments here before getting into the project code to discuss some issues that don’t really fit into any particular chapter discussion, but that you might end up using a lot in your own applications.
The MsgBox Method
Although I’ve used it on practically every page of this book so far, I have never formally introduced you to the MsgBox method. Part of the Microsoft.VisualBasic namespace, MsgBox is a carryover from the MsgBox function in the original release of Visual Basic. It displays a simple message window, including a selection of response buttons and an optional icon. As a function, it returns a code indicating which button the user clicked to close the form, one of the MsgBoxResult enumeration values. The syntax is:
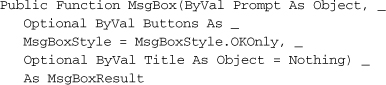
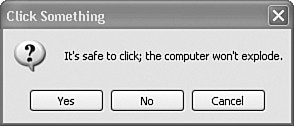
The Prompt parameter accepts a string for display in the main body of the dialog; Buttons indicates which buttons, icons, and other settings to use when displaying the dialog; and Title accepts a custom window title if you want something other than the application title to appear. The following statement displays the window in Figure 8-2.

Figure 8-2. Communicating an important message
The MsgBox function is considered to be an intrinsic part of the language. But as a member of the Microsoft.VisualBasic namespace, it’s valid within the Visual Basic language only. If you were to do some .NET coding in C#, you would need to find another way to display a message box. That way is through the MessageBox.Show method. It works pretty much like the MsgBox function, but its second and third arguments are reversed. Some .NET conformists insist that MsgBox—and anything that appears in the Microsoft.VisualBasic namespace—must be spurned in favor of class library alternatives. Personally, I find it to be a preference choice, but you may encounter just such a person insisting that your code is substandard. You can read my views about such tactics in Chapter 25, “Project Complete.”
Using DoEvents
Programs are designed to do a lot of thinking, and sometimes they think so much, they pretty much lock up the computer. This is especially true of Visual Basic methods that perform a lot of database-heavy transactions, one right after another. The system defers less-important screen updates so that more important data processing code can occur first. That’s great, but sometimes the user thinks, “This stupid computer’s dead again,” and pulls the plug. If the screen would simply provide better updates, the user might be more patient.
Each control on your form (and the form itself) includes a Refresh method, but it can be a bother to constantly refresh everything. And refreshing the display wouldn’t do much to enable the “Cancel” button that you want your user to click to abort all that lovely data processing. To make life easier, Visual Basic includes a DoEvents method. When called, the current method’s code pauses temporarily, and messages in the thread’s incoming message queue are processed, including “paint” (screen update) messages. DoEvents is part of the My namespace, and is used as a standalone statement.
My.Application.DoEvents()
Be warned that overuse of DoEvents can slow down your application, and can lead to problems related to an event being called too many times. In general, it should be used only in a processing-intensive block of code, and then it should be spread out so that it is called only a few times per second at the most.
ParamArray Arguments
Any method can enable optional arguments, and the calling code can choose to include or exclude those arguments. But what if you wanted to add an unlimited number of optional arguments to a method? How could you write, for instance, a function that would return the average of all supplied arguments, with no limits on the number of arguments? Although you could accept an array variable with the source data values, you could also use a parameter array argument, also called a “ParamArray” argument.
As with optional arguments, ParamArray arguments must appear at the end of a method’s argument list, and there can be only one, because one is more than enough for any method. Parameter array arguments use the ParamArray keyword just before the argument name.
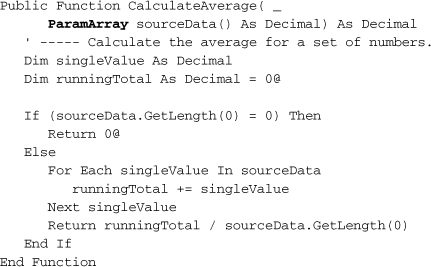
Calls to the CalculateAverage function now accept any number of decimal values.
MsgBox(CalculateAverage(1, 2, 3, 4, 5)) ' Displays: 3
Summary
The ability to extend classes through inheritance is truly the foundation on which complex yet manageable programs are built in .NET. And they are not overly complex either. Classes are simple containers for their members, and the variety and complexity of the available members is not that great. So it’s really amazing that you can write almost any type of program, and implement any number of features, using these simple foundational tools. Oh yeah, the Visual Basic language helps, too.
As we add code to the Library Project throughout this book, you will become more and more familiar with classes, structures, modules, and their members. And while you’ll never remember whether ByRef or ByVal is the default parameter-passing mechanism for methods, you will add properties, methods, events, fields, and other types to classes like you were born with the ability.
Project
This chapter’s code implements two features of the Library Project: (1) a simple helper class used with ListBox and ComboBox controls to manage text and data; and (2) a set of generic forms used to edit lookup tables in the Library, such as tables of status codes.
Supporting List and Combo Boxes
In Visual Basic 6.0 and earlier, ListBox and ComboBox controls included two primary array-like collections: List (used to store the display text for each item) and ItemData (used to store a 32-bit numeric value for each item). The List array was important to the user because it presented the text for each item. But many programmers depended more on the ItemData array, which allowed a unique identifier to be attached to each list item.

Later, after the user selected a value from the list, the numeric ID could be used for database lookup or any other designed purpose.
nMonth = cboMonth.ItemData(cboMonth.ListIndex)
The bad news is that neither List nor ItemData exists in the .NET variation of ListBox or ComboBox controls. The good news is that both are replaced with a much more flexible collection: Items. The Items collection stores any type of object you want—instances of Integer, String, Date, Animal, Superhero, and you can mix them within a single ListBox. Because Items is just a collection of System.Object instances, you can put any type of object you wish in the collection. The ListBox (or ComboBox) uses this collection to display items in the list.
So, how does a ListBox control know how to display text for any mixture of objects? By default, the control calls the ToString method of the object. ToString is defined in System.Object, and you can override it in your own class. The ListBox control also includes a DisplayMember property that you can set to the field or property of your class that generates the proper text.
Let’s see a ListBox in action. Add a new ListBox to a form, and then add the following code to the Form’s Load event handler.
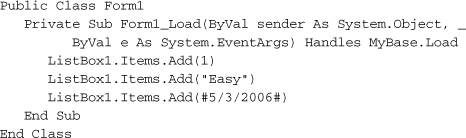
Running this code displays the form in Figure 8-3.
Figure 8-3. A simple ListBox with three different items

For the old ItemData value, the ListBox control includes a ValueMember property that identifies the identifier field or property for the objects in the Items collection. But you don’t have to use ValueMember. Instead, you can simply extract the object in question from the Items collection, and examine its members with your own custom code to determine its identity. In reality, it’s a little more work than the old Visual Basic 6.0 method. But then again, because you can store objects of any size in the Items collection, you could opt to store entire database records, something you could never do before .NET.
Still, storing entire records in a ListBox or ComboBox control is pretty wasteful. It’s usually much better to store just an ID number, and use it as a lookup into a database. That’s what we’ll do in the Library Project. To support this, we’ll need to create a simple class that will expose a text and data value. First, let’s go back into the Library code.
Project Access
Load the “Chapter 8 (Before) Code” project, either through the New Project templates, or by accessing the project directly from the installation directory. To see the code in its final form, load “Chapter 8 (After) Code” instead.
Let’s put the class in a source code file all its own. Add a new class file through the Project ![]() Add Class menu command. Name the class ListItemData.vb and click the Add button. The following code appears automatically.
Add Class menu command. Name the class ListItemData.vb and click the Add button. The following code appears automatically.
![]()
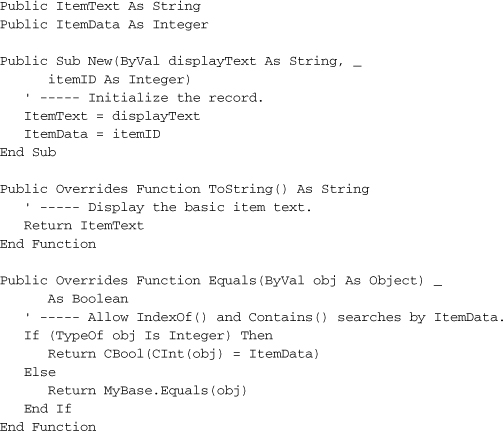
This class will be pretty simple. It will include only members for text and item display. In case we forget to connect the text field to the ListBox or ComboBox’s DisplayMember property, we’ll also include an override to the ToString function, plus a custom constructor that makes initialization of the members easier. Add the following code to the body of the class.
Insert Snippet
Insert Chapter 8, Snippet Item 1.
Later, when it’s time to populate a ListBox, we can use this object to add the display and identification values.
ListBox1.Items.Add(New ListItemData("Item Text", 25))
The override of the Equals method allows us to quickly look up items already added to a ListBox (or similar) control using features already included in the control. The ListBox control’s Items collection includes an IndexOf method that returns the position of a matching item. Normally, this method will only match the object itself; if you pass it a ListItemData instance, it will report whether that item is already in the ListBox. The updated Equals code will also return True if we pass an Integer value that matches a ListItemData.ItemData member for an item already in the list.
Dim itemPosition As Integer = SomeListBox.Items.IndexOf(5)
Editing Code Tables
Back in Chapter 4, “Designing the Database,” when we designed the database for the Library Project, several of the tables were designed to fill simple ComboBox lists in the application. All of these tables begin with the prefix “Code,” and contain records that rarely, if ever, change in the lifetime of the application. One such table is CodeCopyStatus, which identifies the current general condition of an item in the library’s collections (see Table 8-1).
Table 8-1. The CodeCopyStatus Table, Reprise

Because all of these tables have basically the same format—an ID field and one or more content fields—it should be possible to design a generic template to use for editing these tables. A base (class) form would provide the basic editing features, to be developed in full through derived versions of the base form.
For the project, we will add two forms: a “summary” form (that displays a list of all currently defined codes) and a “detail” form (that allows editing of a single new or existing code). To make things even simpler, we will only include the most basic record-management functionality in the summary form. Most of the code needed to edit, display, and remove codes will appear in the detail forms.
The Generic Detail Form
Add a new form to the project (Project ![]() New Windows Form), naming it BaseCodeForm.vb. Alter the following properties as indicated.
New Windows Form), naming it BaseCodeForm.vb. Alter the following properties as indicated.
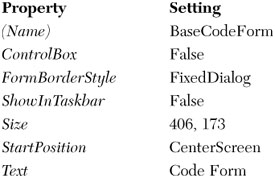
Now access the source code for this class (View ![]() Code). The code will never create instances of this generic form directly, so let’s disallow all direct instantiation by including the MustInherit keyword.
Code). The code will never create instances of this generic form directly, so let’s disallow all direct instantiation by including the MustInherit keyword.
![]()
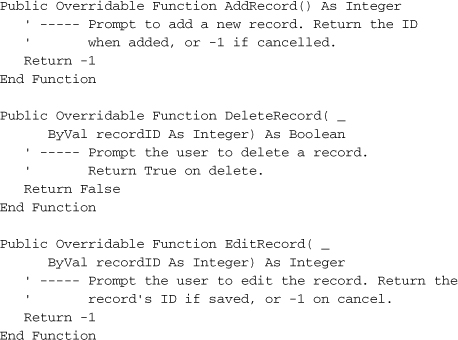
The main features of the form will be the adding of new code records, the editing of existing code records, and the removal of existing records. Add three function skeletons that support these features. We could have made them MustOverride, but as you’ll see later, we will want the option to keep the default functionality from the base generic form.
Insert Snippet
Insert Chapter 8, Snippet Item 2.
The detail form will take responsibility for filling the ListBox control on the summary form with its items. Two methods will handle this: one that adds all items, and one that updates a single item. The derived class will be required to supply these features.
Insert Snippet
Insert Chapter 8, Snippet Item 3.
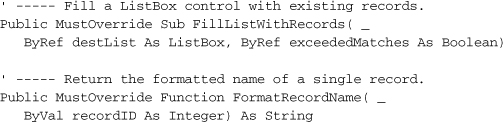
The detail form must also display the proper titles and usage information on the summary form.
Insert Snippet
Insert Chapter 8, Snippet Item 4.

While most of the tables will supply a short list of alphabetized codes, some tables will include a large number (possibly thousands) of codes. The summary form will support a search method, to locate an existing code quickly. Because only certain derived forms will use this feature, we won’t include MustOverride.
Insert Snippet
Insert Chapter 8, Snippet Item 5.
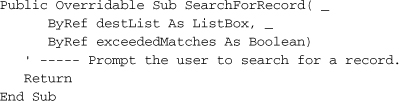
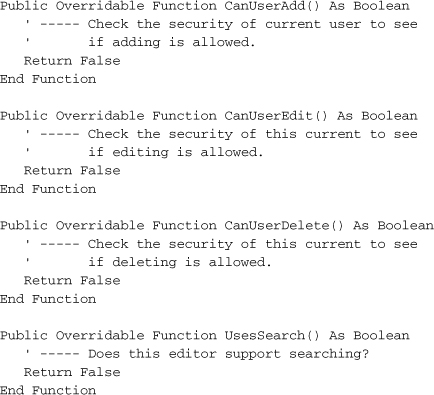
Finally, the detail form will indicate which of the available features can be used from the summary form. The summary form will call each of the following functions, and then enable or disable features as requested.
Insert Snippet
Insert Chapter 8, Snippet Item 6.
That’s it for the generic detail form. Later on in the book, we’ll create derived versions for each of the code tables.
Generic Summary Form
The summary form is a little more straightforward, because it is just a plain form. When it starts up, it uses an instance of one of the derived detail forms to control the experience presented to the user. I’ve already added the form to the project; it’s called ListEditRecords.vb, and looks like Figure 8-4.
Figure 8-4. The Generic Summary form

A large ListBox control fills most of the form, a control that will hold all existing items. There are also buttons to add, edit, delete, and search for items in the list. There’s a lot of code to manage these items; I’ve already written it in a code snippet. Switch to the form’s source code view, and add the source code just after the “Public Class ListEditRecords” line.
Insert Snippet
Insert Chapter 8, Snippet Item 7.
The first line of the added code defines a private instance of the generic detail form we just designed.
Private DetailEditor As Library.BaseCodeForm
This field holds an instance of a class derived from BaseCodeForm. That assignment appears in the public method ManageRecords.
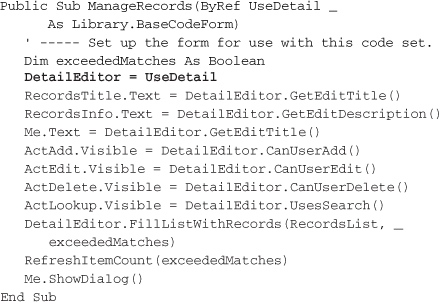
The code that calls ManageRecords passes in form instance, one of the forms derived from BaseCodeForm. Once assigned to the internal DetailEditor field, the code uses the public features of that instance to configure the display elements on the summary form. For instance, the detail form’s CanUserAdd function, a Boolean value, sets the Visible property of the ActAdd button. The FillListWithRecords method call populates the summary ListBox control with any existing code values. After some more display adjustments, the Me.ShowDialog method displays the summary form to the user.
Although the user will interact with the controls on the summary form, most of these controls defer their processing to the detail form, DetailEditor. For example, a click on the “Add” button defers most of the logic to the detail form’s AddRecord method. The code in the summary form doesn’t do much more than update its own display fields.
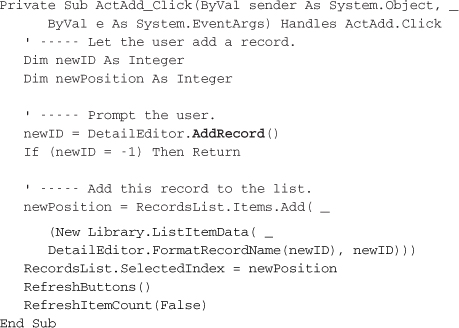
Most of the remaining code in the summary form is either just like this (for edit, delete, and search features), or is used to refresh the display based on user interaction with the form. Be sure to examine the code to get a good understanding of how the code works. In later chapters, when adding actual detail forms, you’ll see this code in action.