
Welcome to Day 12! Today you'll start learning how to create and work with Java servlets. As you may recall from Day 1, JSP was introduced to make working with servlets easier—JSP itself is based on servlets. However, servlets can also do things that JSP pages can't. Today you'll see these topics:
Using the
<jsp:plugin>elementCreating and running servlets
Sending data to and from a servlet
Understanding the servlet life cycle
Creating Web applications using servlets
Getting servlet initialization parameters
Servlets are Java classes, and today you'll learn how to make those classes accessible to Tomcat, and therefore, to Web pages.
In fact, today's work starts not with servlets, but with a new JSP element, <jsp:plugin>, which—like servlets—enables you to handle Java classes directly. This element will provide a good introduction to today's coverage of servlets.
One way to access and run Java .class files directly is the <jsp:plugin> element. You can use this element to display Web page objects, such as applets or beans, in a Web page. Here's how you use that element in general (note that, as discussed in the Introduction, + in syntax statements such as this one means “one or more of”):
<jsp:plugin
    type="bean|applet"
    code="classFileName"
    codebase="classFileDirectoryName"
    [name="Name"]
    [archive="ArchiveURL, ..."]
    [align="bottom|top|middle|left|right"]
    [height="{pixelMeasurement | <%= expression %>}"]
    [width="{pixelMeasurement | <%= expression %>}"]
    [hspace="leftRightPixels"]
    [vspace="topBottomPixels"]
    [jreversion="versionNumber | 1.2"]
    [nspluginurl="PluginURL"]
    [iepluginurl="PluginURL"]>
    [<jsp:params>
        [<jsp:param name="parameterName"
            value="{parameterValue | <%= expression %>}" /> ]+
      </jsp:params> ]
    [<jsp:fallback> text </jsp:fallback> ]
</jsp:plugin>
Here are what the various attributes of this element mean:
type="bean|applet"—. The type of object the plug-in will execute.code="classFileName"—. This is the name of the Java class file the plug-in will execute.codebase="classFileDirectoryName"—. Holds the path of the directory that contains the Java class file the plug-in should execute. The default is the path of the JSP page where<jsp:plugin>is used.name="Name"—. A name for the Web page bean or applet object.archive="ArchiveURL, ..."—. A comma-separated list of pathnames that locate archive files.align=”bottom|top|middle|left|right”—. The position of the image, object, or applet.height=”{pixelMeasurement | <%= expression %>}” width=”{pixelMeasurement | <%= expression %>}”—. The starting height and width, in pixels, of the image the applet or bean displays.hspace="leftRightPixels" vspace="topBottomPixels"—. The amount of space, in pixels, to the left and right (or top and bottom) of the image the applet or bean displays.jreversion="versionNumber|1.2"—. The version of Java the applet or bean requires. Note that the default value is1.2.nspluginurl="PluginURL"—. The URL where the user can download the Java plug-in for Netscape Navigator.iepluginurl="PluginURL"—. The URL where the user can download the Java plug-in for Internet Explorer.<jsp:params> [<jsp:param name="parameterName" value=”{parameterValue | <%= expression %>}” />]+ </jsp:params>—. These are the parameters and values that you want to pass to the applet or bean. You can use multiple<jsp:param>elements in one<jsp:params>element.<jsp:fallback> text </jsp:fallback>—. A text message to display for the user if the plug-in does not start.
Here's an example to make this clearer. In Day 1, you saw an applet that just displayed a message (this is Listing 1.4, ch01_04.java):
import java.applet.Applet;
import java.awt.*;

public class ch01_04 extends Applet
{
    public void paint(Graphics g)
    {
        g.drawString("Hello there!", 60, 100);
    }
}
You can support that applet in a Web page with the <APPLET> element, or with <jsp:plugin> in your JSP code. You can see how this works with <jsp:plugin> in Listing 12.1.
Example 12.1. Using <jsp:plugin> (ch12_01.jsp)
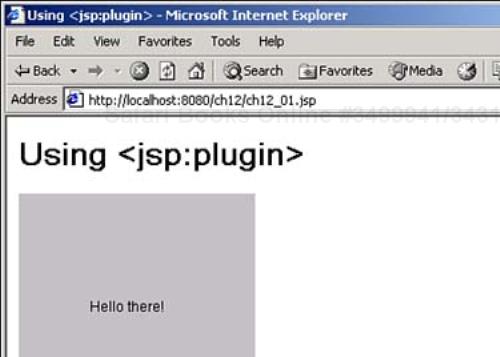
<HTML> element> <HEAD> <TITLE>Using <jsp:plugin></TITLE> </HEAD> <BODY> <H1>Using <jsp:plugin></H1> <jsp:plugin type="applet" code="ch01_04.class" width="200" height="200" > <jsp:fallback> Sorry, <OBJECT> or <EMBED> are not supported by your browser. </jsp:fallback> </jsp:plugin> </BODY> </HTML>
You can see the results in Figure 12.1, where the applet has been launched and is displaying its message.
Using <jsp:plugin> gives you one way of working with Java classes in Web browsers. The other way is to work with Java .class files that are written not to be applets or beans, but to execute on the server as servlets.
As you know, JSP pages are translated into servlets before they're run. When you start Tomcat, it copies the Web applications in the webapps directory to a new directory named work—and when you actually load pages from Tomcat, it uses work as a scratch space. The work directory is jakarta-tomcat-4.0.3work, and if you look in that directory, you'll find the subdirectory ch01, ch02, and so on, for all the example directories you've added to webapps.
For example, look at Listing 12.1, the <jsp:plugin> example you just saw. That example was translated into a servlet before it was run—if you run ch12_01.jsp and look in jakarta-tomcat-4.0.3workch12, you'll find a Java file that is easily recognizable as the translation of ch12_01.jsp into Java format, with a name, for example, of ch12_0005f01$jsp.java. You can see how Tomcat translated ch12_01.jsp into Java servlet format if you look at that file (you can even see the support for <jsp:plugin> in this code):
package org.apache.jsp;
import javax.servlet.*;
import javax.servlet.http.*;
import javax.servlet.jsp.*;
import org.apache.jasper.runtime.*;
public class ch12_0005f01$jsp extends HttpJspBase {
static {
}
public ch12_0005f01$jsp( ) {
}
private static boolean _jspx_inited = false;
public final void _jspx_init() throws org.apache.jasper.runtime.JspException
{}
public void _jspService(HttpServletRequest request, HttpServletResponse response)
throws java.io.IOException, ServletException {
JspFactory _jspxFactory = null;
PageContext pageContext = null;
HttpSession session = null;
ServletContext application = null;
ServletConfig config = null;
JspWriter out = null;
Object page = this;
String _value = null;
try {
if (_jspx_inited == false) {
synchronized (this) {
if (_jspx_inited == false) {
_jspx_init();
_jspx_inited = true;
}
}
}
_jspxFactory = JspFactory.getDefaultFactory();
response.setContentType("text/html;charset=ISO-8859-1");
pageContext = _jspxFactory.getPageContext(this, request, response,
"", true, 8192, true);
application = pageContext.getServletContext();
config = pageContext.getServletConfig();
session = pageContext.getSession();
out = pageContext.getOut();
// HTML // begin [file="/ch12_01.jsp";from=(0,0);to=(7,8)]
out.write("<HTML>
<HEAD>
<TITLE>
Using <jsp:plugin></TITLE>
</HEAD>
<BODY>
<H1>Using <jsp:plugin></H1>
");
// end
// begin [file="/ch12_01.jsp";from=(7,8);to=(12,21)]
/*Code generated for plugin*/
{
out.println ("<OBJECT classid="clsid: 8AD9C840-044E-11D1-B3E9-00805F499D93"
width="200" height="200"
codebase="http://java.sun.com/products/plugin/1.2.2/ jinstall-1_2_2-win
 .cab#Version=1,2,2,0">");
out.println ("<PARAM name="java_code" value="ch01_04.class">");
out.println ("<PARAM name="type" value=" application/x-java-applet;">");
String _jspxString = null;
String [][] _jspxNSString = null;
int i = 0;
out.println ("<COMMENT>");
out.print ("<EMBED type="application/x-java-applet;" width="200"
height="200" pluginspage="http://java.sun. com/products/plugin/"
java_code="ch01_04.class" ");
if (_jspxNSString != null) {
for (i = 0; i < _jspxNSString.length; i++) {
out.println ( _jspxNSString [i][0] + "=" + _ jspxNSString[i][1]);
}
}
out.println (">");
out.println ("<NOEMBED>");
out.println ("</COMMENT>");
out.println ("Sorry, <OBJECT> or <
EMBED> are not supported by your browser.
");
out.println ("</NOEMBED></EMBED>");
out.println ("</OBJECT>");
}
// end
// HTML // begin [file="/ch12_01.jsp";from=(12,21);to=(14,7)]
out.write("
</BODY>
</HTML>");
// end
} catch (Throwable t) {
if (out != null && out.getBufferSize() != 0)
out.clearBuffer();
if (pageContext != null) pageContext.handlePageException(t);
} finally {
if (_jspxFactory != null) _jspxFactory.releasePageContext (pageContext);
}
}
}
.cab#Version=1,2,2,0">");
out.println ("<PARAM name="java_code" value="ch01_04.class">");
out.println ("<PARAM name="type" value=" application/x-java-applet;">");
String _jspxString = null;
String [][] _jspxNSString = null;
int i = 0;
out.println ("<COMMENT>");
out.print ("<EMBED type="application/x-java-applet;" width="200"
height="200" pluginspage="http://java.sun. com/products/plugin/"
java_code="ch01_04.class" ");
if (_jspxNSString != null) {
for (i = 0; i < _jspxNSString.length; i++) {
out.println ( _jspxNSString [i][0] + "=" + _ jspxNSString[i][1]);
}
}
out.println (">");
out.println ("<NOEMBED>");
out.println ("</COMMENT>");
out.println ("Sorry, <OBJECT> or <
EMBED> are not supported by your browser.
");
out.println ("</NOEMBED></EMBED>");
out.println ("</OBJECT>");
}
// end
// HTML // begin [file="/ch12_01.jsp";from=(12,21);to=(14,7)]
out.write("
</BODY>
</HTML>");
// end
} catch (Throwable t) {
if (out != null && out.getBufferSize() != 0)
out.clearBuffer();
if (pageContext != null) pageContext.handlePageException(t);
} finally {
if (_jspxFactory != null) _jspxFactory.releasePageContext (pageContext);
}
}
}
So what about writing your own servlets? As you may recall, you first saw a servlet example in Day 1. That example was ch01_06.java, written in pure Java, which simply displayed the message “Hello there!” in a Web page. You can see this same example in Listing 12.2, renamed ch12_02.java for consistency with today's other examples.
Example 12.2. A Java Servlet (ch12_02.java)
import java.io.*;
import javax.servlet.*;
import javax.servlet.http.*;

public class ch12_02 extends HttpServlet
{
    public void doGet(HttpServletRequest request,
        HttpServletResponse response)
        throws IOException, ServletException
    {
        response.setContentType("text/html");
        PrintWriter out = response.getWriter();

        out.println("<HTML>");
        out.println("<HEAD>");
        out.println("<TITLE>");
        out.println("A Web Page");
        out.println("</TITLE>");
        out.println("</HEAD>");
        out.println("<BODY>");
        out.println("Hello there!");
        out.println("</BODY>");
        out.println("</HTML>");
    }
}
As mentioned in Day 1, compiling the code in Listing 12.2 takes a little preparation. Much of the support for servlets is not built into the core of Java, but is stored in a JAR file named servlet.jar.
That file comes with Tomcat, in the jakarta-tomcat-4.0.3commonlib directory. To access servlet.jar, you have to set the CLASSPATH environment variable, which is specific to Java. For example, here's how you can set the CLASSPATH variable to include servlet.jar in Windows (change the path to servlet.jar as needed):
C:>SET CLASSPATH=C: omcatjakarta-tomcat-4.0.3commonlibservlet.jar
You may have already set CLASSPATH to other locations, so you might just want to add servlet.jar to the class path without affecting the rest of what's already in CLASSPATH (as discussed in Day 1). For example, you can do this in Windows:
C:>set classpath=%CLASSPATH%;C: omcatjakarta-tomcat-4.0.3commonlibservlet. jar
Now you have access to servlet.jar, so navigate to the directory where the servlet's Java source file, ch12_02.java, is and use javac to create ch12_02.class (assuming javac is in your computers' path):
C: omcatjakarta-tomcat-4.0.3webappsch12WEB-INFclasses>javac ch12_02.java
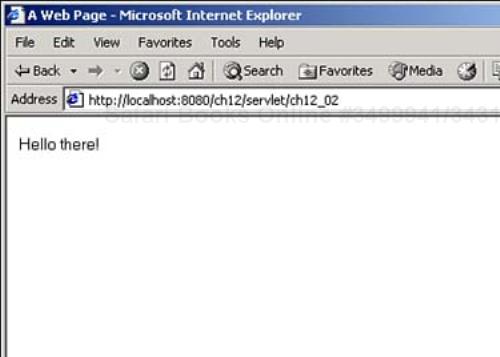
Then make sure that ch12_02.class is in jakarta-tomcat-4.0.3webappsch12classes and restart Tomcat. Now you can navigate to http://localhost:8080/ch12/servlet/ch12_02; you can see the results in Figure 12.2. Congratulations, you've created and run a servlet!
Note
Note that the “servlet” in the URL http://localhost:8080/ch12/servlet/ch12_02 tells Tomcat that you're navigating to a servlet that it should run. You'll see how to make some configuration changes that will enable you to omit that term later today, making this URL simply http://localhost:8080/ch12/ch12_02.
Now it's time to take apart this servlet example. The code starts with, and is based on, the HttpServlet class:
import java.io.*;
import javax.servlet.*;
import javax.servlet.http.*;

public class ch12_02 extends HttpServlet
{
    .
    .
    .
}
The HttpServlet class, in turn, is based on the GenericServlet class. The functionality you have access to in servlets is based on these classes, so it's a good idea to be familiar with them. You can see the methods of the GenericServlet class in Table 12.1, and the methods of the HttpServlet class in Table 12.2. (Note that both these classes are abstract, so you can't create objects of them directly.)
Table 12.1. Methods of the GenericServlet Class
Table 12.2. Methods of the HttpServlet Class
Using Tables 12.1 and 12.2, you can understand more of the code in the servlet example you see in Listing 12.2—the doGet method handles GET requests from Web page, passing you both a request and response object:
import java.io.*;
import javax.servlet.*;
import javax.servlet.http.*;

public class ch12_02 extends HttpServlet
{
    public void doGet(HttpServletRequest request,
        HttpServletResponse response)
        throws IOException, ServletException
    {
        //Handle requests...
        .
        .
        .
        //Configure responses...
    }
}
Besides doGet, you can also use doPost to handle POST requests (as you recall from Day 4, “Reading Data From Web Pages: Check Boxes, Radio Buttons, and Select Controls,” GET and POST are two ways of sending data from forms back to the server). The request and response parameters passed to doPost are the same as those passed to doGet, and you work with them in the same way in your code.
If you want to, you can set up your servlet to handle both GET and POST requests by overriding the service method instead of doGet or doPost. This method is called for both GET and POST requests (in fact, this is the method that calls doGet and doPost in the first place):
import java.io.*;
import javax.servlet.*;
import javax.servlet.http.*;

public class ch12_02 extends HttpServlet
{
    public void service(HttpServletRequest request,
        HttpServletResponse response)
        throws IOException, ServletException
    {
        //Handle requests...
        .
        .
        .
        //Configure responses...
    }
        .
        .
        .
Now that you're handling requests sent from the Web page, it's time to look at working with response objects in servlets, so you can send something back to the Web page.
In goGet, doPost, and service, you're passed a request object that implements the HttpServletRequest interface, such as the request object already created for you in JSP code (you can see the methods of the HttpServletRequest interface in Tables 4.1 and 4.2). Using this object, you can get access to the data the user sent to you, just as you can in JSP pages.
You are also passed a response object that implements the HttpServletResponse interface in the goGet, doPost, and service methods (you can see the fields and methods of the HttpServletResponse interface in Tables 7.2 and 7.3). You can use this object to send data back to the browser.
However, to actually send text back to the Web page in servlets, you can't use the built-in out object you find in JSP (an object of the JSPWriter class, as you saw in Day 2, “Handling Data and Operators”). Instead of the built-in out object you see in JSP, you create an object of the PrintWriter class in servlet code, and you can do that with the response object's getWriter method.
After it's created, you can use the new PrintWriter object just like the out object in JSP, as you see in the first servlet example's code (note also that you can use the response object's setContentType method to set the type of data you're sending back to the browser to HTML):
import java.io.*;
import javax.servlet.*;
import javax.servlet.http.*;

public class ch12_02 extends HttpServlet
{
    public void doGet(HttpServletRequest request,
        HttpServletResponse response)
        throws IOException, ServletException
    {
        response.setContentType("text/html");
        PrintWriter out = response.getWriter();

        out.println("<HTML>");
        out.println("<HEAD>");
        out.println("<TITLE>");
        out.println("A Web Page");
        out.println("</TITLE>");
        out.println("</HEAD>");
        out.println("<BODY>");
        out.println("Hello there!");
        out.println("</BODY>");
        out.println("</HTML>");
    }
}
As you see, you can use println with objects of the PrintWriter class, just as you can with objects of the JspWriter class. You can see the methods of the PrintWriter class you use in servlets in Table 12.3.
Table 12.3. Methods of the PrintWriter Class
And that completes the dissection of today's first servlet! All that remains is to compile and use this code.
The first servlet you saw today just displayed some text when you ran it—but what about sending data from a Web page to a servlet? For example, take a look at Listing 12.3, which displays a text field and asks the user to enter his or her name. (Note that this Web page uses the GET method, which means you should use doGet in the servlet.)
You can see the Web page in Listing 12.3 in Figure 12.3.

When you click the submit button in Figure 12.3, the user's name is sent to a servlet named ch12_04.class, as you can see in the Web page's ACTION attribute in Listing 12.3. That servlet will use the request object passed to it to read that data just as you would in a JSP page—by using the request object's getParameter method to get the user's name:
import java.io.*;
import javax.servlet.*;
import javax.servlet.http.*;

public class ch12_04 extends HttpServlet
{
    public void doGet(HttpServletRequest request,
        HttpServletResponse response)
        throws IOException, ServletException
    {

        String name = request.getParameter("name");
        .
        .
        .
Then the servlet returns that name in a new Web page, as you see in Listing 12.4.
Example 12.4. A Data-Handling Java Servlet (ch12_04.java)
import java.io.*;
import javax.servlet.*;
import javax.servlet.http.*;

public class ch12_04 extends HttpServlet
{
    public void doGet(HttpServletRequest request,
        HttpServletResponse response)
        throws IOException, ServletException
    {

        String name = request.getParameter("name");

        response.setContentType("text/html");
        PrintWriter out = response.getWriter();

        out.println("<HTML>");
        out.println("<HEAD>");
        out.println("<TITLE>");
        out.println("Using the request Object");
        out.println("</TITLE>");
        out.println("</HEAD>");
        out.println("<BODY>");
        out.println("<H1>");
        out.println("Using the request Object");
        out.println("</H1>");
        out.println("Your name is " + name + ".");
        out.println("</BODY>");
        out.println("</HTML>");
    }
}
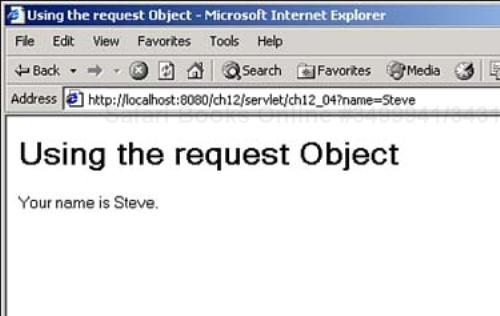
You can see the result in Figure 12.4—now you're reading data from the browser in a servlet, just as you already can with JSP pages.
It's worth knowing that servlets have two methods that have special purposes—init and destroy. In the life cycle of a servlet, the init method is called first to enable you to perform initialization—for example, you might open a connection to a database. When the servlet is about to be destroyed at the other end of its life cycle, the destroy method is called, and you can perform clean-up operations, such as de-allocating the connection to a database.
Here's an example that uses the init method to initialize the data in a String named msg to "Hello from Java servlets!":
import java.io.*;
import javax.servlet.*;
import javax.servlet.http.*;

public class ch12_05 extends HttpServlet
{
    String msg = "";

    public void init(ServletConfig config)
    {
        msg = "Hello from Java servlets!";
    }
    .
    .
    .
}
After msg has been initialized, you can use it in the code throughout the rest of the servlet. For example, take a look at the code in Listing 12.5, which displays the data in msg in a Web page.
Example 12.5. Using Servlet Initialization (ch12_05.java)
import java.io.*;
import javax.servlet.*;
import javax.servlet.http.*;

public class ch12_05 extends HttpServlet
{
    String msg = "";

    public void init(ServletConfig config)
    {
        msg = "Hello from Java servlets!";
    }

    public void doGet(HttpServletRequest request,
        HttpServletResponse response)
        throws IOException, ServletException
    {
        response.setContentType("text/html");
        PrintWriter out = response.getWriter();

        out.println("<HTML>");
        out.println("<HEAD>");
        out.println("<TITLE>");
        out.println("Using the init Method");
        out.println("</TITLE>");
        out.println("</HEAD>");
        out.println("<BODY>");
        out.println("<H1>Using the init Method</H1>");
        out.println(msg);
        out.println("</BODY>");
        out.println("</HTML>");
    }
}
You can see the results in Figure 12.5, where you see that the text in the msg data member was indeed initialized properly.

So far today, you've had to include the term “servlet” in the URL you use to access a servlet, such as this: http://localhost:8080/ch12/servlet/ch12_02. A URL such as that tells Tomcat that you're looking for a servlet, and it will search the classes directory for the appropriate .class file.
<web-app>
    <icon>
    <display-name>
    <description>
    <distributable>
    <context-param>
    <servlet>
    <servlet-mapping>
    <session-config>
    <mime-mapping>
    <welcome-file-list>
    <error-page>
    <taglib>
    <resource-ref>
    <security-constraint>
    <login-config>
    <security-role>
    <env-entry>
    <ejb-ref>
</web-app>
For today's examples, the web.xml file will go into the ch12WEB-INF directory. You can give this Web application a name using the <display-name> element in web.xml such as this:
<?xml version="1.0" encoding="ISO-8859-1"?>
<!DOCTYPE web-app PUBLIC "-//Sun Microsystems, Inc.//DTD Web Application 2.3//EN"
"http://java.sun.com/dtd/web-app_2_3.dtd">

<web-app>
  <display-name>Example Applications</display-name>
        .
        .
        .
Tip
You can get the name specified in a Web application's <display-name> element using the servlet context method getServletContextName; see Table 12.4 for more details.
Next you can tell Tomcat that a servlet such as ch12_02.class is actually a servlet with the <servlet> element, which takes two subelements—<servlet-name> and <servlet-class>:
<?xml version="1.0" encoding="ISO-8859-1"?>
<!DOCTYPE web-app PUBLIC "-//Sun Microsystems, Inc.//DTD Web Application 2.3//EN"
"http://java.sun.com/dtd/web-app_2_3.dtd">

<web-app>
  <display-name>Example Applications</display-name>

  <servlet>
    <servlet-name>ch12_02</servlet-name>
    <servlet-class>ch12_02</servlet-class>
  </servlet>
        .
        .
        .
Then you can use the <servlet-mapping> element, with the subelements <servlet-name> and <url-pattern> to let Tomcat handle URLs that refer to this servlet:
<?xml version="1.0" encoding="ISO-8859-1"?>
<!DOCTYPE web-app PUBLIC "-//Sun Microsystems, Inc.//DTD Web Application 2.3//EN"
"http://java.sun.com/dtd/web-app_2_3.dtd">

<web-app>
  <display-name>Example Applications</display-name>

  <servlet>
    <servlet-name>ch12_02</servlet-name>
    <servlet-class>ch12_02</servlet-class>
  </servlet>

  <servlet-mapping>
    <servlet-name>ch12_02</servlet-name>
    <url-pattern>/ch12_02</url-pattern>
  </servlet-mapping>

  <session-config>
    <session-timeout>30</session-timeout>
  </session-config>
</web-app>
The <url-pattern> element gives the “pattern” for URLs to match—if an URL matches this pattern, the corresponding servlet is invoked. In this case, the URL pattern is simply "/ch12_02", which will only match the URL of the ch12_02 servlet itself. You can also use wildcards with an asterisk (*) as an URL pattern to match any URL in the Web application. A Web pattern of "/data/*" will match any URL in the data subdiretory, and so on.
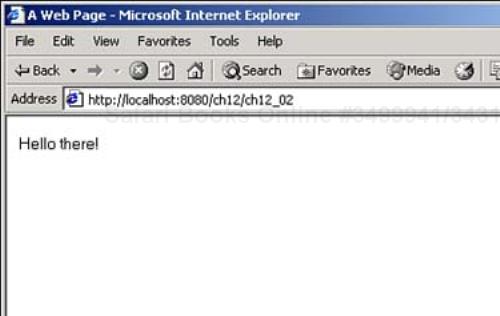
Now you can use the URL http://localhost:8080/ch12/ch12_02 instead of http://localhost:8080/ch12/servlet/ch12_02 to access this servlet, as you see in Figure 12.6. (Note that this figure looks just the same as Figure 12.2, except that the URL doesn't include “servlet” in it.)
There are two more interfaces you should know about—javax.servlet.ServletConfig and javax.servlet.ServletContext. ServletConfig enables you to access initialization data for an individual servlet, and ServletContext enables you to access initialization data for all the servlets in the same Web application.
For example, to set a servlet's configuration data in web.xml, you can use the <init-param> element inside your <servlet> elements. You can use <param-name> and <param-value> elements inside the <init-param> element to specify the name and value of an initialization parameter. For example, here's how you might set two initialization parameters, firstName and lastName, with the values Cary and Grant in web.xml:
<?xml version="1.0" encoding="ISO-8859-1"?>
<!DOCTYPE web-app PUBLIC "-//Sun Microsystems, Inc.//DTD Web Application 2.3//EN"
"http://java.sun.com/dtd/web-app_2_3.dtd">
<web-app>
  <display-name>Example Applications</display-name>

  <servlet>
    <servlet-name>ch12_02</servlet-name>
    <servlet-class>ch12_02</servlet-class>
  </servlet>

  <servlet>
    <servlet-name>ch12_06</servlet-name>
    <servlet-class>ch12_06</servlet-class>
    <init-param>
      <param-name>firstName</param-name>
      <param-value>Cary</param-value>
    </init-param>
    <init-param>
      <param-name>lastName</param-name>
      <param-value>Grant</param-value>
    </init-param>
  </servlet>
        .
        .
        .
In your servlet code, you can use ServletConfig interface methods to access those parameters. That interface is already implemented in the GenericServlet class, which you can see in Table 12.1—including the getInitParameter method that you can use to get initialization parameters from the servlet's configuration. For example, here's how you can get the value of the firstName parameter:
public class ch12_06 extends HttpServlet
{
    public void doGet(HttpServletRequest request,
        HttpServletResponse response)
        throws IOException, ServletException
    {
        response.setContentType("text/html");
        PrintWriter out = response.getWriter();

        String firstName = getInitParameter("firstName");
        .
        .
        .
If you prefer, you can create a ServletConfig object explicitly, using the ServletConfig method getServletConfig such as this, where the code is retrieving the value of the second initialization parameter, lastName:
public class ch12_06 extends HttpServlet
{
    public void doGet(HttpServletRequest request,
        HttpServletResponse response)
        throws IOException, ServletException
    {
        response.setContentType("text/html");
        PrintWriter out = response.getWriter();

        String firstName = getInitParameter("firstName");

        ServletConfig configuration = getServletConfig();
        String lastName = configuration.getInitParameter("lastName");
        .
        .
        .
Besides the individual servlet configuration, you can also access initialization parameters for an entire Web application using the servlet context, which is supported with the ServletContext interface. You can see the methods of this interface in Table 12.4.
Table 12.4. Methods of the ServletContext Interface
To set a context-wide parameter, you use the <context-param> element in a <web-app> element in web.xml. You can use the <param-name> and <param-value> elements in the <context-param> element, just as you can with the <init-param>—but now that you're setting a Web application's context parameter, the parameter is available to all servlets in the application.
For example, here's how you might set a servlet context parameter named category to Stars in web.xml:
<?xml version="1.0" encoding="ISO-8859-1"?>
<!DOCTYPE web-app PUBLIC "-//Sun Microsystems, Inc.//DTD Web Application 2.3//EN"
"http://java.sun.com/dtd/web-app_2_3.dtd">
<web-app>
  <display-name>Example Applications</display-name>

  <context-param>
    <param-name>category</param-name>
    <param-value>Stars</param-value>
  </context-param>

  <servlet>
    <servlet-name>ch12_02</servlet-name>
    <servlet-class>ch12_02</servlet-class>
  </servlet>

  <servlet>
    <servlet-name>ch12_06</servlet-name>
    <servlet-class>ch12_06</servlet-class>
    <init-param>
      <param-name>firstName</param-name>
      <param-value>Cary</param-value>
    </init-param>
    <init-param>
      <param-name>lastName</param-name>
      <param-value>Grant</param-value>
    </init-param>
  </servlet>

  <servlet-mapping>
    <servlet-name>ch12_02</servlet-name>
    <url-pattern>/ch12_02</url-pattern>
  </servlet-mapping>

  <servlet-mapping>
    <servlet-name>ch12_06</servlet-name>
    <url-pattern>/ch12_06</url-pattern>
  </servlet-mapping>

  <session-config>
    <session-timeout>30</session-timeout>
  </session-config>
</web-app>
How do you get the value of a servlet context parameter in code? You can use the GenericServlet method getServletContext to get a ServletContext object, and then you can use that object's getInitParameter method (just like the ServletContext method of the same name) to get the value of a servlet context parameter.
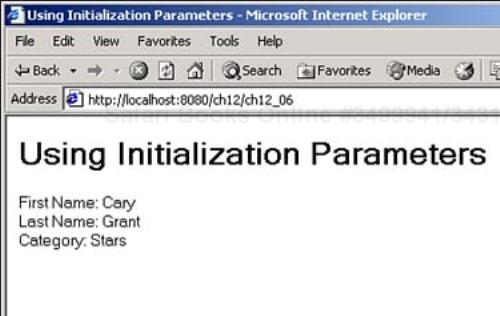
You can see how this works in Listing 12.6, where the code is getting the values of the servlet configuration parameters firstName, lastName, and the servlet context parameter category, and displaying them in a Web page.
Example 12.6. Getting Initialization Parameters (ch12_06.java)
import java.io.*;
import javax.servlet.*;
import javax.servlet.http.*;

public class ch12_06 extends HttpServlet
{
    public void doGet(HttpServletRequest request,
        HttpServletResponse response)
        throws IOException, ServletException
    {
        response.setContentType("text/html");
        PrintWriter out = response.getWriter();

        String firstName = getInitParameter("firstName");

        ServletConfig configuration = getServletConfig();
        String lastName = configuration.getInitParameter("lastName");

        ServletContext context = getServletContext();
        String category = context.getInitParameter("category");

        out.println("<HTML>");
        out.println("<HEAD>");
        out.println("<TITLE>");
        out.println("Using Initialization Parameters");
        out.println("</TITLE>");
        out.println("</HEAD>");
        out.println("<BODY>");
        out.println("<H1>Using Initialization Parameters</H1>");

        out.println("First Name: " + firstName);
        out.println("<BR>");
        out.println("Last Name: " + lastName);
        out.println("<BR>");
        out.println("Category: " + category);
        out.println("<BR>");

        out.println("</BODY>");
        out.println("</HTML>");
    }
}
You can see the results in Figure 12.7. As you see in that figure, this servlet has indeed been able to retrieve the value of both servlet configuration parameters and servlet context parameters.
Today's work got you started with the <jsp:plugin> element, a useful element that enables you to support plugins and applets in your JSP code.
Next you saw how JSP pages are translated into servlets and run by Tomcat, and you learned how to build a sample servlet. In that servlet, you learned how to handle both GET and POST methods from the browser.
You learned how the server will pass you request and response objects, and how to create the other objects you need, such as PrintWriter objects to send data back to the browser.
You use the request object's getParameter method to get data sent to your code from a Web page, just as you can in a JSP page. You can also use the response object's methods to send data back to the browser.
You also saw that servlets have an init method that is called first, to enable you to perform initialization, and a destroy method that is called when the servlet is about to be destroyed.
In addition, you learned how to create Web applications using web.xml. A Web application can contain a number of servlets, and you learned how to map servlets, so that the server will know where to look for those servlets (letting you avoid using the term “servlet” in the servlet's URL).
Finally, you learned how to work with both servlet configurations and contexts to set and retrieve initialization data for servlets.
Tomorrow, you'll see even more techniques to add power to your servlet-programming arsenal as you learn how to work with sessions using servlets, call JSP pages, and more.
Do I need to use | |
A1: | No—you can simply use the |
Can the servlets in a Web application communicate with each other? | |
A2: | Certainly. You can use the servlet context's |
This workshop tests whether you understand all the concepts you learned today. It's a good idea to master today's concepts by honing your knowledge here before starting tomorrow's material. You can find the answers to the quiz questions in Appendix A.
1: | Modify the “Design Your Sandwich!” example from Day 5, “Reading Data From Web Pages: Check Boxes, Radio Buttons, and Select Controls,” (Listing 5.5) to use a servlet on the server instead of JSP. |
2: | Create a new Web application with two servlets in it (that is, use two |