Chapter 20. Creating Images on the Fly and Handling Internet Programming

Welcome to Day 20! Many books on programming include discussions on graphics, and you might think that's impractical with JSP because the code is on the server, and the results in the browser. But in fact, you can create images on the server and send them to the browser, as you'll see today. You'll also get an introduction to Internet programming, including how to retrieve Web pages from the Web, and even how to create a mini-Web server using Java. Here are today's topics:

  • Creating images on the fly

  • Sending images back to the browser

  • Java drawing techniques

  • Embedding returned images in HTML documents

  • Reading Web documents directly from servers

  • Creating a mini-Web server

Today's work starts with learning how to create images on the Web server.

Creating an Image on the Fly

To get started, you'll see how to create a simple JPEG image now and send it back to the browser. This example will just create a JPEG image and draw a single diagonal line to get things started. You begin by setting the page directive's contentType attribute to image/jpeg so the browser knows a JPEG image is coming. You also must import the Java packages needed (the com.sun.image.codec.jpeg.* packages are bundled with Java, so no additional downloads or classpath concerns are needed here):

<%@ page contentType="image/jpeg" import="java.io.*, java.awt.*, 
java.awt.image.*,com.sun.image.codec.jpeg.*" %>
Creating an Image on the Fly
<%@ page contentType="image/jpeg" import="java.io.*, java.awt.*, java.awt. image.*,com.sun
Creating an Image on the Fly.image.codec.jpeg.*" %> 
<%
    try {
        BufferedImage image = new BufferedImage(200, 200, BufferedImage. TYPE_INT_RGB);
        .
        .
        .

You can see the fields of the java.awt.image.BufferedImage class in Table 20.1, and the methods of this class in Table 20.2.

Table 20.1. The Fields of the java.awt.image.BufferedImage Class

Field

Means This

static int TYPE_3BYTE_BGR

Stands for an image with 8-bit RGB color components using the BGR model.

static int TYPE_4BYTE_ABGR

Stands for an image with 8-bit RGBA color components.

static int TYPE_BYTE_BINARY

Stands for an opaque byte-packed image.

static int TYPE_BYTE_GRAY

Stands for an unsigned byte grayscale image.

static int TYPE_BYTE_INDEXED

Stands for an indexed byte image.

static int TYPE_CUSTOM

Stands for a customized image.

static int TYPE_INT_ARGB

Stands for an image with 8-bit RGBA color components.

static int TYPE_INT_BGR

Stands for an image with 8-bit RGB color components, with the BGR color model.

static int TYPE_INT_RGB

Stands for an image with 8-bit RGB color components packed into integer pixels.

static int TYPE_USHORT_555_RGB

Stands for an image with 5-5-5 RGB color components.

static int TYPE_USHORT_565_RGB

Stands for an image with 5-6-5 RGB color components.

static int TYPE_USHORT_GRAY

Stands for an unsigned short grayscale image.

Table 20.2. The Methods of the java.awt.image.BufferedImage Class

Method

Does This

BufferedImage(ColorModel cm, WritableRaster raster, boolean isRasterPremultiplied, Hashtable properties

Creates a new BufferedImage object with a given ColorModel and Raster.

BufferedImage(int width, int height, int imageType)

Creates a BufferedImage using a predefined image type.

BufferedImage(int width, int height, int imageType, IndexColorModel cm)

Creates a BufferedImage of one of these types: TYPE_BYTE_BINARY or TYPE_BYTE_INDEXED.

WritableRaster copyData (WritableRaster outRaster)

Copies data to the given WritableRaster.

Graphics2D createGraphics()

Creates a Graphics2D object, which can be used to draw with.

void flush()

Flushes all resources used.

WritableRaster getAlphaRaster()

Returns a WritableRaster representing the alpha channel.

ColorModel getColorModel()

Returns the ColorModel.

Raster getData()

Returns the image's data.

Raster getData(Rectangle rect)

Computes and returns a region of the object.

Graphics getGraphics()

Returns a Graphics2D object.

int getHeight()

Returns the height of the image.

int getHeight(ImageObserver observer)

Returns the actual height of the image.

int getMinX()

Returns the minimum x coordinate of the image.

int getMinY()

Returns the minimum y coordinate of the image.

Object getProperty(String name)

Returns a property of the image by name.

Object getProperty(String name, ImageObserver observer)

Returns a property of the image by name using an observer.

String[] getPropertyNames()

Returns an array of property names.

WritableRaster getRaster()

Returns the WritableRaster object.

int getRGB(int x, int y)

Returns an integer pixel in the default RGB color model.

int[] getRGB(int startX, int startY, int w, int h, int[] rgbArray, int offset, int scansize)

Returns an array of integer pixels in the default RGB color model from part of the image data.

SampleModel getSampleModel()

Returns the SampleModel object for this image.

ImageProducer getSource()

Returns the object that creates the pixels for the image.

Vector getSources()

Returns a Vector of DrawedImage objects that are the sources of image data for this image.

BufferedImage getSubimage (int x, int y, int w, int h)

Returns a subimage defined by a given rectangular region.

int getType()

Returns the image type.

int getWidth()

Returns the width of the BufferedImage.

int getWidth(ImageObserver observer)

Returns the actual width of the image.

boolean hasTileWriters()

True if any tile is checked out for writing.

boolean isAlphaPremultiplied()

True if the alpha value has been pre-multiplied.

void setData(Raster r)

Sets a rectangular region of the image to the contents of the given Raster r.

void setRGB(int x, int y, int rgb)

Sets a pixel in this BufferedImage to the given RGB value.

void setRGB(int startX, int startY, int w, int h, int[] rgbArray, int offset, int scansize)

Sets an array of integer pixels in the default RGB color model.

String toString()

Returns a String representation of this image.

Now that you have a buffered image in memory, you can get a Java Graphics2D object to work with that image. To get a Graphics2D object, you can use the BufferedImage object's createGraphics method:

<%@ page contentType="image/jpeg" import="java.io.*, java.awt.*, java.awt. image.*,com.sun
The Methods of the java.awt.image.BufferedImage Class.image.codec.jpeg.*" %> 
<%
    try {
        BufferedImage image = new BufferedImage(200, 200, BufferedImage. TYPE_INT_RGB);
        Graphics2D g = image.createGraphics();
        .
        .
        .
%>

The Graphics2D class is the class you use to create two-dimensional graphics using the Java AWT. This class is based on the Java Graphics class, and both classes are huge, but worth knowing. You can see the methods of the java.awt.Graphics class in Table 20.3, and the methods of the java.awt.Graphics2D class in Table 20.4.

Table 20.3. The Methods of the java.awt.Graphics Class

Method

Does This

protected Graphics()

Creates a new Graphics object.

abstract void clearRect(int x, int y, int width, int height)

Clears the given rectangle.

abstract void clipRect(int x, int y, int width, int height)

Intersects the current clip with the given rectangle.

abstract void copyArea(int x, int y, int width, int height, int dx, int dy)

Copies an area of the component by a distance given by dx and dy.

abstract Graphics create()

Creates a new Graphics object (a copy of this Graphics object).

Graphics create(int x, int y, int width, int height)

Creates a new Graphics object with a new translation and clip area.

abstract void dispose()

Disposes of this graphics context.

void draw3DRect(int x, int y, int width, int height, boolean raised)

Draws a 3D highlighted outline of the given rectangle.

abstract void drawArc(int x, int y, int width, int height, int startAngle, int arcAngle)

Draws the outline of an arc covering the given rectangle.

void drawBytes(byte[] data, int offset, int length, int x, int y)

Draws the text using a byte array.

void drawChars(char[] data, int offset, int length, int x, int y)

Draws the text given using a character array.

abstract boolean drawImage(Image img, int x, int y, Color bgcolor, ImageObserver observer)

Draws an image.

abstract boolean drawImage(Image img, int x, int y, ImageObserver observer)

Draws an image using an observer.

abstract boolean drawImage(Image img, int x, int y, int width, int height, Color bgcolor, ImageObserver observer)

Draws an image in a rectangle.

abstract boolean drawImage(Image img, int x, int y, int width, int height, ImageObserver observer)

Draws an image.

abstract boolean drawImage(Image img, int dx1, int dy1, int dx2, int dy2, int sx1, int sy1, int sx2, int sy2, Color bgcolor, ImageObserver observer)

Draws a scaled image.

abstract boolean drawImage(Image img, int dx1, int dy1, int dx2, int dy2, int sx1, int sy1, int sx2, int sy2, ImageObserver observer)

Draws a scaled image using an observer.

abstract void drawLine(int x1, int y1, int x2, int y2)

Draws a line.

abstract void drawOval(int x, int y, int width, int height)

Draws the outline of an oval.

abstract void drawPolygon(int[] xPoints, int[] yPoints, int nPoints)

Draws a closed polygon.

void drawPolygon(Polygon p)

Draws a polygon defined by the given Polygon object.

abstract void drawPolyline(int[] xPoints, int[] yPoints, int nPoints)

Draws a sequence of connected lines.

void drawRect(int x, int y, int width, int height)

Draws the outline of the given rectangle.

abstract void drawRoundRect(int x, int y, int width, int height, int arcWidth, int arcHeight)

Draws an outlined round-cornered rectangle.

abstract void drawString (AttributedCharacterIterator iterator, int x, int y)

Draws the text given by the given iterator.

abstract void drawString(String str, int x, int y)

Draws the text given by the given string.

void fill3DRect(int x, int y, int width, int height, boolean raised)

Paints a filled 3D highlighted rectangle.

abstract void fillArc(int x, int y, int width, int height, int startAngle, int arcAngle)

Fills a circular or elliptical arc.

abstract void fillOval(int x, int y, int width, int height)

Fills an oval.

abstract void fillPolygon(int[] xPoints, int[] yPoints, int nPoints)

Fills a closed polygon.

void fillPolygon(Polygon p)

Fills the polygon defined by the given Polygon object.

abstract void fillRect(int x, int y, int width, int height)

Fills the given rectangle.

abstract void fillRoundRect(int x, int y, int width, int height, int arcWidth, int arcHeight)

Fills the given rounded-corner rectangle.

abstract Shape getClip()

Gets the current clipping area.

abstract Rectangle getClipBounds()

Returns the bounding rectangle of the current clipping area.

Rectangle getClipBounds(Rectangle r)

Returns the bounding rectangle of the current clipping area.

abstract Color getColor()

Gets this graphics context's current color.

abstract Font getFont()

Gets the current font.

FontMetrics getFontMetrics()

Gets the font metrics of the current font.

abstract FontMetrics getFontMetrics(Font f)

Gets the font metrics for the given font.

boolean hitClip(int x, int y, int width, int height)

True if the given rectangular area intersects the current clipping area.

abstract void setClip(int x, int y, int width, int height)

Sets the current clip.

abstract void setClip(Shape clip)

Sets the current clipping area to an arbitrary clip shape.

abstract void setColor(Color c)

Sets this graphics context's current color to the given color.

abstract void setFont(Font font)

Sets this graphics context's font to the given font.

abstract void setPaintMode()

Sets the paint mode of this graphics context.

abstract void setXORMode(Color c1)

Sets the paint mode to XOR mode.

String toString()

Returns a String object representing this Graphics object's value.

abstract void translate(int x, int y)

Translates the origin of the graphics context to the point (x, y).

Table 20.4. Methods of the java.awt.Graphics2D Class

Method

Does This

protected Graphics2D()

Creates a new Graphics2D object.

abstract void addDrawingHints(Map hints)

Sets the values preferences for the drawing algorithms.

abstract void clip(Shape s)

Intersects the current Clip with the interior of the given Shape.

abstract void draw(Shape s)

Draws the outline of a Shape using the settings of the current Graphics2D context.

void draw3DRect(int x, int y, int width, int height, boolean raised)

Draws a 3D-highlighted outline of the given rectangle.

abstract void drawGlyphVector(GlyphVector g, float x, float y)

Draws the text of the given GlyphVector object.

abstract void drawImage(BufferedImage img, BufferedImageOp op, int x, int y)

Draws a BufferedImage object.

abstract boolean drawImage(Image img, AffineTransform xform, ImageObserver obs)

Draws an image, applying a transform.

abstract void drawDrawableImage (DrawableImage img, AffineTransform xform)

Draws a DrawableImage, applying a transform.

abstract void drawDrawedImage(DrawedImage img, AffineTransform xform)

Draws a DrawedImage, applying a transform.

abstract void drawString (AttributedCharacterIterator iterator, float x, float y)

Draws the text of the given iterator.

abstract void drawString (AttributedCharacterIterator iterator, int x, int y)

Draws the text of the given iterator.

abstract void drawString(String s, float x, float y)

Draws the text given by the given String.

abstract void drawString(String str, int x, int y)

Draws the text of the given String.

abstract void fill(Shape s)

Fills the interior of a Shape using the settings of the Graphics2D context.

void fill3DRect(int x, int y, int width, int height, boolean raised)

Paints a filled 3D-highlighted rectangle.

abstract Color getBackground()

Returns the background color used.

abstract Composite getComposite()

Returns the current Composite object in the Graphics2D context.

abstract GraphicsConfiguration getDeviceConfiguration()

Returns the device configuration associated with this Graphics2D object.

abstract FontDrawContext getFontDrawContext()

Gets the drawing context of the Font in this Graphics2D context.

abstract Paint getPaint()

Returns the current Paint object in the Graphics2D context.

abstract Object getDrawingHint (DrawingHints.Key hintKey)

Returns the value of a single drawing preference.

abstract DrawingHints getDrawingHints()

Gets the preferences for the drawing algorithms.

abstract Stroke getStroke()

Returns the current Stroke object in the Graphics2D context.

abstract AffineTransform getTransform()

Returns a copy of the current Transform in the Graphics2D context.

abstract boolean hit(Rectangle rect, Shape s, boolean onStroke)

Checks whether or not the given Shape intersects the given Rectangle.

abstract void rotate(double theta)

Concatenates the current Graphics2D Transform object with a rotation transform.

abstract void rotate(double theta, double x, double y)

Concatenates the current Graphics2D Transform object with a translated rotation transform.

abstract void scale(double sx, double sy)

Concatenates the current Graphics2D Transform with a scaling transformation.

abstract void setBackground(Color color)

Sets the background color for the Graphics2D context.

abstract void setComposite(Composite comp)

Sets the Composite object for the Graphics2D context.

abstract void setPaint(Paint paint)

Sets the Paint attribute for the Graphics2D context.

abstract void setDrawingHint(DrawingHints. Key hintKey, Object hintValue)

Sets the value of a single preference for the drawing algorithms.

abstract void setDrawingHints(Map hints)

Replaces the values of all preferences for the drawing algorithms.

abstract void setStroke(Stroke s)

Sets the Stroke for the Graphics2D context.

abstract void setTransform(AffineTransform Tx)

Overwrites the Transform object in the Graphics2D context.

abstract void shear(double shx, double shy)

Concatenates the current Graphics2D Transform object with a shearing transform.

abstract void transform(AffineTransform Tx)

Composes an AffineTransform object with the Transform in this Graphics2D context.

abstract void translate(double tx, double ty)

Concatenates the current Graphics2D Transform object with a translation transform.

abstract void translate(int x, int y)

Translates the origin of the Graphics2D context to the point (x, y).

Now that you have a Graphics2D object corresponding to your new buffered image in memory, you can use the drawing methods you see in Tables 20.3 and 20.4. For example, to draw a diagonal line, you can use the drawLine method:

<%@ page contentType="image/jpeg" import="java.io.*, java.awt.*, java.awt.image.*,com.sun
Methods of the java.awt.Graphics2D Class.image.codec.jpeg.*" %> 
<%
    try {
        BufferedImage image = new BufferedImage(200, 200, BufferedImage.TYPE_INT_RGB);
        Graphics2D g = image.createGraphics();
        g.drawLine(0, 0, 199, 199);
        .
        .
        .

In graphics terms, the upper left corner of your 200×200 pixel image corresponds to (0, 0), and the lower right corner corresponds to (199, 199). That means that g.drawLine(0, 0, 199, 199) will draw a line from the upper left corner to the lower right corner.

To send this new image back to the browser, you can use an object that implements the JPEGImageEncoder interface. To create that object, you can use the createJPEGEncoder method of the JPEGCodec class (codec stands for coder/decoder), and you pass that method an OutputStream object (discussed in Day 15, “Handling Files on the Server”). Note that you can't use the customary JSP out object (a JSPWriter object) here. Instead, you can use the response object's getOutputStream method to get an OutputStream object:

<%@ page contentType="image/jpeg" import="java.io.*, java.awt.*, java.awt. image.*,com.sun
Methods of the java.awt.Graphics2D Class.image.codec.jpeg.*" %> 
<%
    try {
        BufferedImage image = new BufferedImage(200, 200, BufferedImage.TYPE_INT_RGB);
        Graphics2D g = image.createGraphics();
        g.drawLine(0, 0, 200, 200);

        JPEGImageEncoder encoder =
            JPEGCodec.createJPEGEncoder(response.getOutputStream());
        .
        .
        .

To send the image back to the browser, you can use the JPEGImageEncoder object's encode method:

<%@ page contentType="image/jpeg" import="java.io.*, java.awt.*, java.awt.image.*,com.sun
Methods of the java.awt.Graphics2D Class.image.codec.jpeg.*" %> 
<%
    try {
        BufferedImage image = new BufferedImage(200, 200, BufferedImage.TYPE_INT_RGB);
        Graphics2D g = image.createGraphics();
        g.drawLine(0, 0, 200, 200);

        JPEGImageEncoder encoder =
            JPEGCodec.createJPEGEncoder(response.getOutputStream());
        encoder.encode(image);
        .
        .
        .

You can see the methods of the com.sun.image.codec.jpeg.JPEGCodec class in Table 20.5, and the methods of the com.sun.image.codec.jpeg.JPEGImageEncoder interface in Table 20.6.

Table 20.5. The Methods of the com.sun.image.codec.jpeg.JPEGCodec Class

Method

Does This

static JPEGImageDecoder createJPEGDecoder (InputStream src)

Creates a JPEGImageDecoder object that can be used to decode JPEG data streams.

static JPEGImageDecoder createJPEGDecoder (InputStream src, JPEGDecodeParam jdp)

Creates a JPEGImageDecoder object that can be used to decode JPEG data streams.

static JPEGImageEncoder createJPEGEncoder (OutputStream dest)

Creates a JPEGImageEncoder object that can be used to encode image data as JPEG data streams.

static JPEGImageEncoder createJPEGEncoder (OutputStream dest, JPEGEncodeParam jep)

Creates a JPEGImageEncoder object that can be used to encode image data as JPEG data streams.

static JPEGEncodeParam getDefaultJPEGEncodeParam (BufferedImage bi)

Creates JPEGEncodeParam objects.

static JPEGEncodeParam getDefaultJPEGEncodeParam (int numBands, int colorID)

Creates JPEGEncodeParam objects.

static JPEGEncodeParam getDefaultJPEGEncodeParam (JPEGDecodeParam jdp)

Creates a JPEGEncodeParam object from a JPEGDecodeParam object.

static JPEGEncodeParam getDefaultJPEGEncodeParam (Raster ras, int colorID)

This is a factory method for creating JPEGEncodeParam objects.

Table 20.6. The Methods of the com.sun.image.codec.jpeg.JPEGImageEncoder Interface

Method

Does This

void encode(BufferedImage bi)

Encodes a BufferedImage as a JPEG data stream.

void encode(BufferedImage bi, JPEGEncodeParam jep)

Encodes a BufferedImage as a JPEG data stream.

void encode(Raster ras)

Encodes a Raster as a JPEG data stream.

void encode(Raster ras, JPEGEncodeParam jep)

Encodes a Raster as a JPEG data stream.

int getDefaultColorId(ColorModel cm)

Returns the default COLOR_ID for the given ColorModel.

JPEGEncodeParam getDefaultJPEGEncodeParam

Creates JPEGEncodeParam objects. (BufferedImage bi)

JPEGEncodeParam getDefaultJPEGEncodeParam

Creates JPEGEncodeParam objects.(int numBands, int colorID)

JPEGEncodeParam getDefaultJPEGEncodeParam (JPEGDecodeParam jdp)

Creates a JPEGEncodeParam object from a JPEGDecodeParam object.

JPEGEncodeParam getDefaultJPEGEncodeParam (Raster ras, int colorID)

Creates JPEGEncodeParam objects.

JPEGEncodeParam getJPEGEncodeParam()

Returns a copy of the current JPEGEncodeParam object.

OutputStream getOutputStream()

Returns the stream the Encoder is connected to.

void setJPEGEncodeParam(JPEGEncodeParam jep)

Sets the JPEGEncodeParam object for future encoding operations.

You can see the full code for this example in Listing 20.1.

Example 20.1. Creating an Image (ch20_01.jsp)

<%@ page contentType="image/jpeg" import="java.io.*, java.awt.*, java.awt.image.*,com.sun
Creating an Image (ch20_01.jsp).image.codec.jpeg.*" %>
<%
    try {
        BufferedImage image = new BufferedImage(200, 200, BufferedImage.TYPE_INT_RGB);
        Graphics2D g = image.createGraphics();
        g.drawLine(0, 0, 200, 200);

        JPEGImageEncoder encoder =
            JPEGCodec.createJPEGEncoder(response.getOutputStream());
        encoder.encode(image);

    } catch (Exception e) {}
%>

You can see the results in Figure 20.1, where you see the JPEG image produced by this code, showing the diagonal line as required. Now you're creating images on the server and sending them back to the browser.

Creating an image on the fly.

Figure 20.1. Creating an image on the fly.

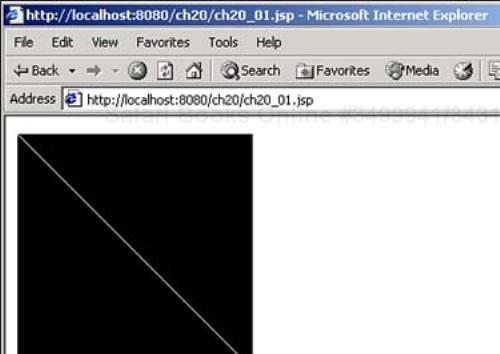
There are two things to note here—first, the background of the image is black, which is the default color for buffered images. Second, the color of the line (the foreground color) is white, which is the default foreground color. You'll see how to set your own colors later today.

Drawing in Response to User Actions

You can even go so far as to implement a measure of graphics interaction with the user. For example, take a look at Listing 20.2, which is an HTML document that displays a black rectangle the user can draw in with the mouse. The document includes some JavaScript (designed for Internet Explorer) that records the position at which the mouse went down and then went up, and sends those locations on to ch20_03.jsp:

<SCRIPT> 
    <!--
    document.onmousedown = mouseDown
    document.onmouseup = mouseUp

        var x1, y1, x2, y2
        function mouseDown()
        {
            x1 = event.offsetX
            y1 = event.offsetY
        }
        function mouseUp()
        {
            x2 = event.offsetX
            y2 = event.offsetY
            var outString = "ch20_03.jsp?x1=" + x1
            outString += "&y1=" + y1
            outString += "&x2=" + x2
            outString += "&y2=" + y2
            location.href = outString
        }
        function dragStart(event)
        {
            return false
        }
    // -->

You can see the full code in Listing 20.2.

Example 20.2. Letting the User Draw a Line (ch20_02.html)

<HTML>
    <HEAD>
    </HEAD>

    <BODY>
        <DIV STYLE="POSITION:ABSOLUTE; LEFT:10; TOP:10; WIDTH:480; HEIGHT:400;
        BACKGROUND-COLOR:BLACK;"></DIV>
    </BODY>
        <SCRIPT>
            <!--
            document.onmousedown = mouseDown
            document.onmouseup = mouseUp

                var x1, y1, x2, y2
                function mouseDown()
                {
                    x1 = event.offsetX
                    y1 = event.offsetY
                }
                function mouseUp()
                {
                    x2 = event.offsetX
                    y2 = event.offsetY
                    var outString = "ch20_03.jsp?x1=" + x1
                    outString += "&y1=" + y1
                    outString += "&x2=" + x2
                    outString += "&y2=" + y2
                    location.href = outString
                }
                function dragStart(event)
                {
                    return false
                }
            // -->
        </SCRIPT>
</HTML>

You can see ch20_03.jsp in Listing 20.3—this JSP page accepts the mouse data from ch20_02.html and draws the line to match.

Example 20.3. Creating the User-Drawn Line (ch20_03.jsp)

<%@ page contentType="image/jpeg" import="java.io.*, java.awt.*, java.awt.image.*,com.sun
Creating the User-Drawn Line (ch20_03.jsp).image.codec.jpeg.*" %>
<%
    try {

        int x1 = Integer.parseInt(request.getParameter("x1"));
        int y1 = Integer.parseInt(request.getParameter("y1"));
        int x2 = Integer.parseInt(request.getParameter("x2"));
        int y2 = Integer.parseInt(request.getParameter("y2"));

        BufferedImage image = new BufferedImage(480, 400, BufferedImage.TYPE_INT_RGB);
        Graphics2D g = image.createGraphics();
        g.drawLine(x1, y1, x2, y2);

        JPEGImageEncoder encoder =
            JPEGCodec.createJPEGEncoder(response.getOutputStream());
        encoder.encode(image);

    } catch (Exception e) {}
%>

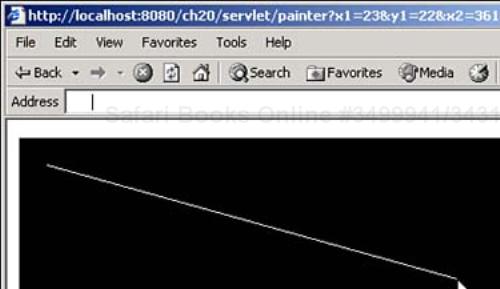
You can see the results in Figure 20.2, where the user draws a line by dragging the mouse. When the user releases the mouse button, the new JPEG image with the new line in it appears (assuming the connection to the server is fairly fast), as you see in the figure. Pretty cool, but don't rely on this method for true interactive graphics—the server round trips take too long.

Letting the user draw lines.

Figure 20.2. Letting the user draw lines.

It's also worth noting that you can return JPEG images from servlet code. Here's what this example (Listing 20.3) would look like using a servlet instead of JSP—note that here, you can set the content type of the response to "image/jpeg" using the response object's setContentType method:

import java.io.*; 
import javax.servlet.*;
import javax.servlet.http.*;
import java.awt.*;
import java.awt.image.*;
import com.sun.image.codec.jpeg.*;

public class ch20_03 extends HttpServlet
{

    protected void doGet(HttpServletRequest request,
        HttpServletResponse response)
        throws ServletException, IOException
    {

        int x1 = Integer.parseInt(request.getParameter("x1"));
        int y1 = Integer.parseInt(request.getParameter("y1"));
        int x2 = Integer.parseInt(request.getParameter("x2"));
        int y2 = Integer.parseInt(request.getParameter("y2"));

        ServletOutputStream out = response.getOutputStream();

        try {
            response.setContentType("image/jpeg");

            BufferedImage image = new BufferedImage(480, 400, BufferedImage.TYPE_INT_RGB);
            Graphics2D g = image.createGraphics();
            g.drawLine(x1, y1, x2, y2);

            JPEGImageEncoder encoder = JPEGCodec.createJPEGEncoder(out);
            encoder.encode(image);
            out.flush();

            } catch (Exception e) {}
        }
    }

Drawing Images

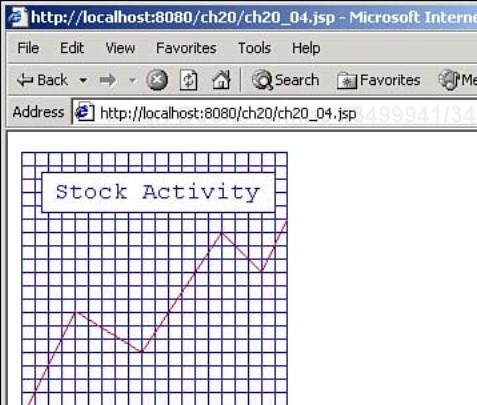
So far, the images you've created today just drew a single line. The next step is to elaborate on that and put other graphics methods to work. For example, take a look at the code in Listing 20.4; this code uses additional Java drawing methods to create the image you see in Figure 20.3—a graph of stock prices created on the fly (you can't see it in the figure, but the grid lines and text are blue here, and the actual graphed line is red).

Using additional graphics methods.

Figure 20.3. Using additional graphics methods.

Example 20.4. Using Additional Graphics Techniques (ch20_04.jsp)

<%@ page contentType="image/jpeg" import="java.io.*, java.awt.*, java.awt.image.*,com.sun
Using Additional Graphics Techniques (ch20_04.jsp).image.codec.jpeg.*" %>
<%
    try {
        BufferedImage image = new BufferedImage(200, 200, BufferedImage.TYPE_INT_RGB);
        Graphics2D g = image.createGraphics();

        g.setColor(Color.white);
        g.fillRect(0, 0, 200, 200);

        g.setColor(Color.blue);

        g.drawLine(0, 0, 0, 199);
        g.drawLine(0, 0, 199, 0);
        g.drawLine(0, 199, 199, 199);
        g.drawLine(199, 199, 199, 0);

        for(int loopIndex = 0; loopIndex < 20; loopIndex++){
            g.drawLine(0, loopIndex * 10, 199, loopIndex * 10);
            g.drawLine(loopIndex * 10, 0, loopIndex * 10, 199);
        }

        g.drawRect(15, 15, 175, 30);
        g.setColor(Color.white);
        g.fillRect(16, 16, 174, 29);

        g.setColor(Color.blue);
        Font font = new Font("Courier", Font.PLAIN, 18);
        g.setFont(font);

        g.drawString("Stock Activity", 25, 35);

        g.setColor(Color.red);

        g.drawLine(0, 199, 40, 119);
        g.drawLine(40, 119, 90, 150);
        g.drawLine(90, 150, 150, 60);
        g.drawLine(150, 60, 180, 90);
        g.drawLine(180, 90, 199, 50);

        JPEGImageEncoder encoder =
            JPEGCodec.createJPEGEncoder(response.getOutputStream());
        encoder.encode(image);

    } catch (Exception e) { }
%>

This code uses graphics methods to create this new image; for example, to give the whole image a white background, you can set the current drawing color to write with the Graphics2D setColor method, and then use the fillRect method to draw a solid white rectangle:

g.setColor(Color.white); 
g.fillRect(0, 0, 199, 199);

You can set AWT colors using the Java Color class, which has many predefined color fields like Color.white, Color.blue, Color.black, Color.red, and so on. The Color class also has many constructors, including one that lets you set a color using red, green, and blue color values (ranging from 0–255), just as you do with HTML colors:

g.setColor(new Color(int r, int g, int b)); 

Now you can draw the grid lines you see in Figure 20.3 with this code:

g.setColor(Color.blue); 

g.drawLine(0, 0, 0, 199);
g.drawLine(0, 0, 199, 0);
g.drawLine(0, 199, 199, 199);
g.drawLine(199, 199, 199, 0);

for(int loopIndex = 0; loopIndex < 20; loopIndex++){
    g.drawLine(0, loopIndex * 10, 199, loopIndex * 10);
    g.drawLine(loopIndex * 10, 0, loopIndex * 10, 199);
}

Note also the boxed label with text in Figure 20.3. You can draw the box for the label this way:

g.drawRect(15, 15, 175, 30); 
g.setColor(Color.white);
g.fillRect(16, 16, 174, 29);

The text in the label is drawn with the drawString method, which takes the text string to draw, and the (x, y) location of that text. To draw text, you can set the font used by the Graphics2D object with the setFont method. To do that, you can create a new Java Font object, passing the Font class's constructor the name of the font ("Courier" in this case), the type of font (using the Font.PLAIN field here—other choices include Font.BOLD and FONT.ITALIC), and the font size in points (a point is 1/72nd of an inch—this example uses 18 point font). Then you install the new font in the Graphics2D object and use drawString to draw the text:

g.setColor(Color.blue); 
Font font = new Font("Courier", Font.PLAIN, 18);
g.setFont(font);

g.drawString("Stock Activity", 25, 35);

Finally, you can draw the graphed line itself in red:

g.setColor(Color.red); 

g.drawLine(0, 199, 40, 119);
g.drawLine(40, 119, 90, 150);
g.drawLine(90, 150, 150, 60);
g.drawLine(150, 60, 180, 90);
g.drawLine(180, 90, 199, 50);

And that's all it takes—you can see the results in Figure 20.3.

Embedding Images in HTML Documents

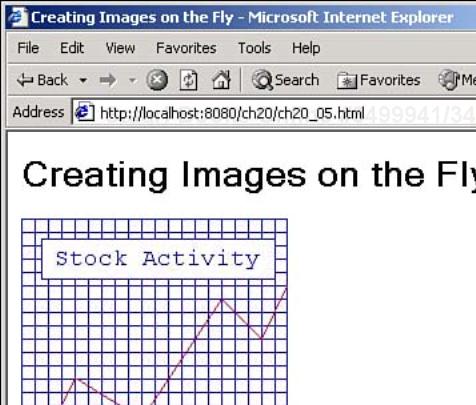
The image generated by ch20_04.jsp is a standalone JPEG image—how can you embed such generated images in HTML documents? That turns out to be easy enough—you just use the URL of the JSP that creates the image in the SRC attribute of an HTML <IMG> element.

You can see an example in Listing 20.5, which embeds the image you see in Figure 20.3 in an HTML document using this technique.

Example 20.5. Embedding a New Image in an HTML Document (ch20_05.html)

<HTML>
    <HEAD>
        <TITLE>Creating Images on the Fly</TITLE>
    </HEAD>

    <BODY>
        <H1>Creating Images on the Fly</H1>
        <IMG SRC="ch20_04.jsp">
    </BODY>
</HTML>

You can see the results in Figure 20.4.

Embedding a new image in an HTML document.

Figure 20.4. Embedding a new image in an HTML document.

That completes the graphics work you'll see today—next you'll see some Internet programming, including working with Internet servers directly.

Internet Programming—Interacting Directly with Servers

You've learned how to create Web documents that the user can download throughout this book—but what if you want to get a Web document from some other server yourself? Java can help out here, using the Socket class.

For example, what if you wanted to download the main page from the Sun Microsystems Web site (www.sun.com) using code in a JSP page? It turns out that you can issue a GET command to that Web site's server directly (as long as you have a connection to the Internet, of course). You do that using the java.net.* package, and you start by creating a new Internet socket that connects to the Sun server on port 80 (the HTTP port used by browsers and Web servers):

Socket s = new Socket("www.sun.com", 80); 
        .
        .
        .

You can see the methods of the Socket class in Table 20.7.

Table 20.7. The Methods of the Socket Class

Method

Does This

Socket()

Creates an unconnected socket.

Socket(InetAddress address, int port)

Creates a stream socket and connects it to the given port number at the given IP address.

Socket(InetAddress address, int port, InetAddress localAddr, int localPort)

Creates a socket and connects it to the given remote address on the given remote port.

Socket(String host, int port)

Creates a stream socket and connects it to the given port number on the named host.

Socket(String host, int port, InetAddress localAddr, int localPort)

Creates a socket and connects it to the given host on the given port.

void bind(SocketAddress bindpoint)

Binds the socket to a local address.

void close()

Closes this socket.

void connect(SocketAddress endpoint)

Connects this socket to the server.

void connect(SocketAddress endpoint, int timeout)

Connects this socket to the server using a timeout value.

SocketChannel getChannel()

Returns the SocketChannel object associated with this socket if there is one.

InetAddress getInetAddress()

Returns the address to which the socket is connected.

InputStream getInputStream()

Returns an input stream for this socket.

boolean getKeepAlive()

True if "keep alive" is enabled.

InetAddress getLocalAddress()

Gets the local address for the socket.

int getLocalPort()

Returns the local port for this socket.

SocketAddress getLocalSocketAddress()

Returns the address of the endpoint to which this socket is bound.

OutputStream getOutputStream()

Returns an output stream for the socket.

int getPort()

Returns the remote port to which this socket is connected.

int getReceiveBufferSize()

Gets buffer size.

SocketAddress getRemoteSocketAddress()

Returns the address of the endpoint to which this socket is connected.

boolean getReuseAddress()

True if the address can be reused.

int getSendBufferSize()

Returns the send buffer size.

boolean getTcpNoDelay()

True if TCP-no-delay is enabled.

int getTrafficClass()

Gets the traffic class in the IP header for packets sent from this Socket.

boolean isBound()

True if the socket is bound.

boolean isClosed()

True if the socket is closed.

boolean isConnected()

True if the socket is connected.

boolean isInputShutdown()

True if the reading part of the socket is closed.

boolean isOutputShutdown()

True if the writing part of the socket connection is closed.

void sendUrgentData(int data)

Sends a byte of urgent data on the socket.

void setKeepAlive(boolean on)

Enables/disables "keep alive".

void setReceiveBufferSize(int size)

Sets the receive buffer size to the given value.

void setReuseAddress(boolean on)

Turn the reuse-address option on or off.

void setSendBufferSize(int size)

Sets the send buffer size.

static void setSocketImplFactory (SocketImplFactory fac)

Sets the client socket implementation factory.

void setTcpNoDelay(boolean on)

Enables or disables TCP-no-delay.

void setTrafficClass(int tc)

Sets the traffic class in the IP header for packets sent from this Socket.

void shutdownInput()

Places the input stream for this socket at the end of the stream.

void shutdownOutput()

Disables the output stream.

String toString()

Converts this socket's data into a String.

Next, you can create a BufferedReader object to read the data the server sends you, and a PrintWriter object to send commands to the server. Here's how you can send a GET command for the main page, www.sun.comindex.html (note that commands like these must end with two newline characters ( ) to terminate them properly):

Socket s = new Socket("www.sun.com", 80); 

BufferedReader in = new BufferedReader(new InputStreamReader(s.getInputStream()));
PrintWriter socketOut = new PrintWriter(s.getOutputStream());

socketOut.print("GET /index.html

");
socketOut.flush();
        .
        .
        .

Now you can read the results from the server using the BufferedReader object, line by line, and display each line you read from the server this way:

BufferedReader in = new BufferedReader(new InputStreamReader(s.getInputStream())); 
PrintWriter socketOut = new PrintWriter(s.getOutputStream());

socketOut.print("GET /index.html

");
socketOut.flush();

while ((line = in.readLine()) != null){
    out.println(line);
}
        .
        .
        .

You can see the whole code in Listing 20.6.

Example 20.6. Issuing Commands to a Server (ch20_06.jsp)

<%@ page contentType="text/html" import="java.io.*, java.net.*" %>

<%
    try {
        Socket s = new Socket("www.sun.com", 80);

        BufferedReader in = new BufferedReader(new InputStreamReader(s.getInputStream()));
        PrintWriter socketOut = new PrintWriter(s.getOutputStream());

        socketOut.print("GET /index.html

");
        socketOut.flush();

        String line;

        while ((line = in.readLine()) != null){
            out.println(line);
        }
    }
    catch (Exception e){}
%>

You can see the resulting HTML fetched from www.sun.com in Figure 20.5 (bear in mind that this code only gets the HTML document index.html from the Sun site—it doesn't download any images, which you can do separately if you want to).

Issuing commands to a server.

Figure 20.5. Issuing commands to a server.

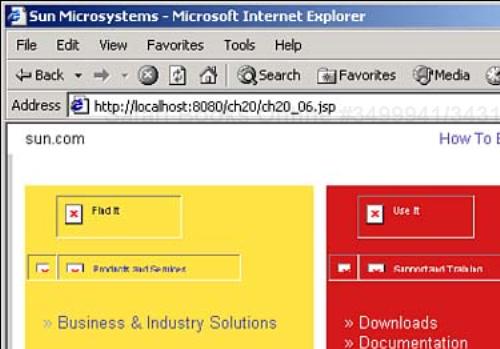
Now you can issue a GET command directly to a Web server—no browser needed.

Creating Client/Server Applications

You can even create a mini-Web server yourself using the ServerSocket class. This next example will do just that—here you'll learn how to create a mini-server and run it. A JSP page (the client) will connect to that mini-server and send it some text ("Hello!"). The mini-server will add a little additional text and return the result back to the client (returning "The server got this: Hello!").

Creating the Client JSP Application

To connect to such a mini-server in a client JSP page, you can create a new Internet socket using an IP address for the server and a port number you specify:

Socket socket = new Socket("127.0.0.1", 8765); 

Then you can use the Socket class's input stream and output stream to send data to the mini-server and read it back like this (the newline character ( ) at the end of the text sent to the mini-server is to inform the mini-server—which will read one line of data from the client connection—that no more data is coming):

Socket socket = new Socket("127.0.0.1", 8765); 

InputStream inSocket = socket.getInputStream();
OutputStream outSocket = socket.getOutputStream();

String str = "Hello!
";
byte buffer[] = str.getBytes();
outSocket.write(buffer);

while ((character = inSocket.read()) != -1) {
    out.print((char) character);
}

socket.close();

You can see the entire client JSP page in Listing 20.7.

Example 20.7. Sending and Reading Data Using a Mini-Server (ch20_07.jsp)

<%@ page import="java.io.*, java.net.*" %>
<HTML>
    <HEAD>
        <TITLE>Creating Client/Server Applications</TITLE>
    </HEAD>

    <BODY>
        <H1>Creating Client/Server Applications</H1>
        <%
        try{
            int character;
            Socket socket = new Socket("127.0.0.1", 8765);

            InputStream inSocket = socket.getInputStream();
            OutputStream outSocket = socket.getOutputStream();

            String str = "Hello!
";
            byte buffer[] = str.getBytes();
            outSocket.write(buffer);

            while ((character = inSocket.read()) != -1) {
                out.print((char) character);
            }

            socket.close();
        }
        catch(java.net.ConnectException e){
        %>
            You must first start the server application
            (ch20_08.class) at the command prompt.
            <BR>
            See the book for more details.
        <%
        }
        %>
    </BODY>
</HTML>

Creating the Server

Creating the mini-server isn't difficult—you create a new ServerSocket object using the same port number that the client uses. Then you can use the ServerSocket object's accept method to create a Socket object for I/O:

ServerSocket socket = new ServerSocket(8765); 
Socket insocket = socket.accept( );
        .
        .
        .

Next, you can use the Socket object to create a BufferedReader object and a PrintWriter object to handle I/O:

ServerSocket socket = new ServerSocket(8765); 
Socket insocket = socket.accept( );

BufferedReader in = new BufferedReader (new InputStreamReader(insocket. getInputStream()));
PrintWriter out = new PrintWriter (insocket.getOutputStream(), true);
        .
        .
        .

When the client sends text to the mini-server, you can read that text, preface it with "The server got this:", and send it back to the client:

ServerSocket socket = new ServerSocket(8765); 
Socket insocket = socket.accept( );

BufferedReader in = new BufferedReader (new InputStreamReader(insocket. getInputStream()));
PrintWriter out = new PrintWriter (insocket.getOutputStream(), true);

String instring = in.readLine();
out.println("The server got this: " + instring);
insocket.close();
        .
        .
        .

You can see the whole mini-server in Listing 20.8.

Example 20.8. A Java Mini-Server (ch20_08.java)

import java.io.*;
import java.net.*;

public class ch20_08
{
    public static void main(String[] args )
    {
        try {
            ServerSocket socket = new ServerSocket(8765);

            Socket insocket = socket.accept( );

            BufferedReader in = new BufferedReader (new InputStreamReader(insocket
A Java Mini-Server (ch20_08.java).getInputStream()));
            PrintWriter out = new PrintWriter ( insocket.getOutputStream(), true);

            String instring = in.readLine();
            out.println("The server got this: " + instring);
            insocket.close();
        }
        catch (Exception e) {}
     }
}

To run this example, you need to run the mini-server, ch20_08.class, at the command prompt using Java (which would look something like this in Windows: c:>java ch20_08). The server starts on port 8765 and will wait for input from the client (note it doesn't display anything at the command prompt, it just waits for input from the client). When you open the JSP page (ch20_07.jsp) in a browser using Tomcat, text is sent to the mini-server. The mini-server reads that text and echoes it back.

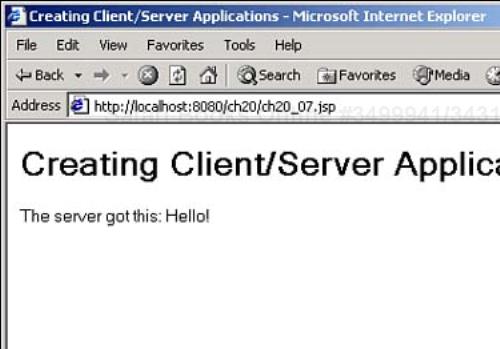
You can see the results in Figure 20.6, where the JSP page has sent text to the mini-server, which added more text and echoed the resulting text back. Congratulations—now you've created and run your own mini-Web server. Although this example ran on the same machine, you could run this code on two different ISPs—as long as the client knows the IP address (or name) of the Web server and both client and server use the same port number, you can connect and send data back and forth this way.

Using a mini-server.

Figure 20.6. Using a mini-server.

As you can imagine from this discussion, working with sockets is a large topic in Java. Today's work just provided an introduction to that topic—but even so, you can see that it's possible to write powerful applications with just a few lines of code.

Summary

Today you learned how to send images back to the browser. This is done by setting the contentType attribute of the page directive to "image/jpeg" in the JSP code.

Next you create a buffered image in memory using the Java BufferedImage class. After you've created that object, you can get a Graphics2D object corresponding to your image with the buffered image's createGraphics method.

When you have a Graphics2D object corresponding to your image, you can use the drawing methods of this object to draw in the image. Then, to send the image back to the browser, you can use the JPEGImageEncoder object's encode method.

You also got an introduction to Internet programming, with the Java Socket class. You learned how to get BufferReader and PrintWriter objects corresponding to the socket, which enables you to read data and send it, and which also enables you to download an HTML document from the Internet.

You also learned how to create a mini-server using Java with the ServerSocket class. This mini-server is able to connect to a JSP page that has sent it text and return it.

Tomorrow, we're going to take a look at the client-side of things as we see how to work with JavaScript and JSP. We'll also take a look at how to deploy your Web applications.

Q&A

Q1:

Can I embed images in an image I create?

A1:

Yes, you can. Just create a Java Image object using an image file, and use the Graphics2D method drawImage to draw it in your buffered image.

Q2:

Are there other types of binary objects that I can send back to the browser?

A2:

There are—using the techniques you've learned today, you can send back other binary objects, such as Microsoft Word .doc files, or even .exe applications or zipped files. Just make sure you set the contentType attribute correctly.

Workshop

This workshop tests whether you understand all the concepts you learned today. It's a good idea to master today's concepts by honing your knowledge here before starting tomorrow's material. You can find the answers to the quiz questions in Appendix A.

Quiz

1:

What class do you use to make an image to work with in memory?

2:

What method do you use to create a JPEG encoder?

3:

What method do you use to create a solid rectangle in AWT programming?

4:

What two items do you pass to the Socket class constructor's two-argument form to create a new socket?

5:

What Java class do you use to create your own mini-server in Java?

Exercises

1:

Modify the user-interactive drawing code to let the user select which figure to draw—a line, a rectangle, or an oval—by clicking a button. Then implement the corresponding functionality in the JSP page to create the correct type of figure.

2:

Augment the Web document-reading example (Listing 20.6) to read and store images as well as HTML documents from other servers.

..................Content has been hidden....................

You can't read the all page of ebook, please click here login for view all page.
Reset
3.142.255.140