
2. Introduction to Programming in Mac OS X
—Anonymous
For those of you coming from the Mac, you might remember MPW (Macintosh Programmers Workshop). This worksheet-style development environment allowed you extremely extensive control over your build configuration. I still remember working on a project that had Assembly, Pascal, and C modules and an incredibly long script that would take hours to build it all on the fastest 68020 of the day. If you ever needed a break, you could “accidentally” touch a well-used header file.
Apple's tools today are much more advanced than MPW, and best of all they're free with Mac OS X. Apple ships a plethora of tools for development, debugging, and exploration. You will mainly use Project Builder and Interface Builder to create and manage your project, but we will touch on many of the available tools in this chapter so that you have a good idea of what is available.
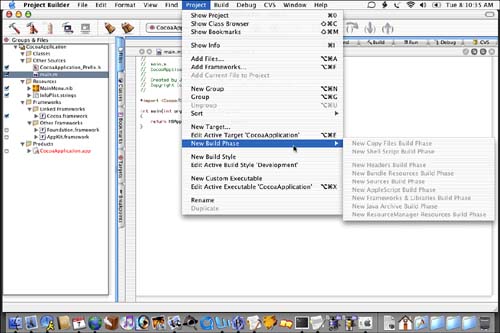
Project Builder (shown in Figure 2.1) is what you might refer to as an Integrated Development Environment (IDE). It allows you to manage all the source files and resources that go into building your application and create multiple deployment versions of your software. Project Builder allows you to create and manage one-button builds of just about any size project written in a variety of languages including Objective-C, Java, and others. For those of you destined for the command line, you can still use one from within Project Builder features such as debugging. Project Builder uses gcc3 (the GNU Compiler Collection) and gdb (The GNU Debugger).
Interface Builder (shown in Figure 2.2) is the main tool you use to create your application's user interface. Using Interface Builder, you create windows, lay out the controls within them, link your class instance variables (outlets) and methods (actions) to your user interface elements, and more. Interface Builder is also used to edit menu items and set the attributes of even the simplest buttons. It is extensible and supports plug-ins, which allow you to implement your own custom objects. Interface Builder is kind of like a much more sophisticated version of ResEdit.
Figure 2.2. Interface Builder.
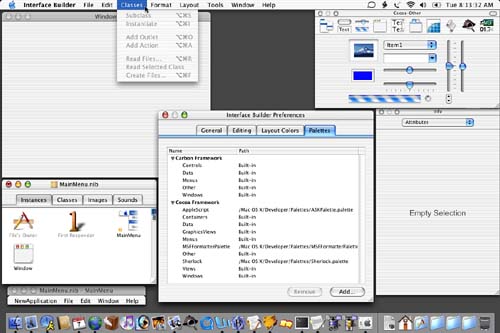
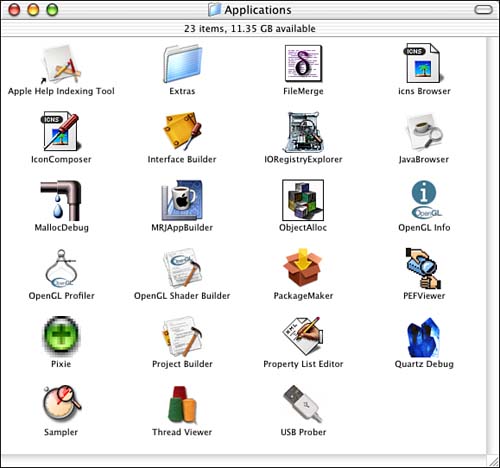
Figure 2.3 shows some of the other development tools packaged with the standard development kit. These tools are mostly small utilities used for specialized purposes. Not everyone will use every tool in this collection, but when needed, you'll be thankful that they're there. These utilities will be looked at in more depth later in this chapter.
Figure 2.3. More Development Tools.
Programming Languages
When developing software for Mac OS X, you have a few different development languages to choose.
Objective-C
Objective-C and the Cocoa framework should probably be your first choice for new development projects. Objective-C is not hard to learn if you know C and even easier if you know C++ or some other object-oriented programming language. You can also use straight C and C++ especially if you are maintaining a Carbon-based development project. Listings 2.1 and 2.2 show a simple Objective-C class.
Listing 2.1. MyClass.h—an Objective-C Header File
#import <Foundation/Foundation.h>
@interface MyClass : NSObject {
BOOL locked;
}
- (void)setLocked:(BOOL)new_locked;
- (BOOL)locked;
@end
Listing 2.1 defines the header file of an Objective-C class. After #importing the standard Foundation.h header file, we define the interface for our class. The class is named MyClass and is a subclass of the NSObject base class. MyClass has one instance variable, a BOOL named locked. It also has two methods—one to set the value of locked and one to retrieve the value of locked. Note that Cocoa convention defines how we name these two methods. We end with the @end.
Listing 2.2. MyClass.m—an Objective-C Source File
#import "MyClass.h"
@implementation MyClass
- (void)setLocked:(BOOL)new_locked
{
locked = new_locked;
}
- (BOOL)locked
{
return [self locked];
}
@end
Listing 2.2 defines the source file of the aforementioned Objective-C class. We first #import the header file MyClass.h (see Listing 2.1) and then define the implementation of MyClass. This simply involves defining the two methods -setLocked: and –locked. –setLocked: takes the new_locked value and sets the instance variable locked to that value. –locked returns the current value of the locked instance variable. Note the name of the “get” method is the same as the instance variable it is getting; this is by Cocoa convention.
If you are new to Objective-C, once you browse some source code, it will all come together quite quickly for you. There are also some great online and offline tutorials on learning the language, including an entire manual in PDF format available from the Apple developer Web site, which can be found at http://developer.apple.com/.
Java
Project Builder contains many templates for using Java as your language of choice. Java can be used to develop Cocoa applications or Java applets and applications. Although details are sketchy, not many developers seem to be using Java with Cocoa. However, plenty are using Java to write cross-platform Java applets and applications. The Macintosh can now be considered a reliable platform to develop on using Java, and it improves daily.
Tools
We've looked briefly at the two main tools available for development under Mac OS X—Project Builder and Interface Builder. Now let's take a look at some of the many other faces in your development arsenal, ranging from tabs within Project Builder to standalone utility applications.
Debugging
Figure 2.4 shows Project Builder in Debug mode. The gdb (GNU Debugger) is the debugger of choice for use in Project Builder. Through the Debug tab, you can view the current stack frame and threads in addition to a hierarchical list of global and local variables and method arguments as well as their values.
Figure 2.4. Debugging in Project Builder.
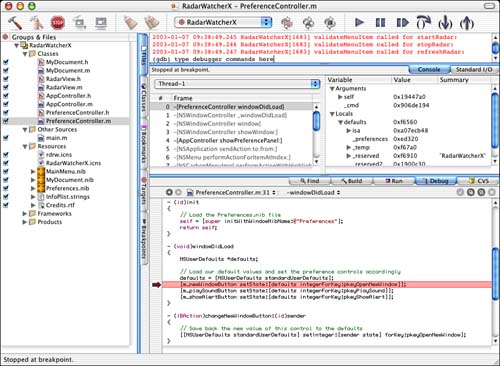
By using the Console tab, you can type commands directly into gdb as well as view debugging statements from your program. Although Project Builder allows you to do many of the standard debugging practices from the graphical user interface, such as setting breakpoints, typing commands directly into gdb allows you to completely master the environment your program is running in. The gdb is an incredibly powerful tool that is worth your time to learn.
Type man gdb in Terminal for more information.
Source Control
Project Builder contains built-in support for CVS, the Concurrent Versions System. CVS is a version control system that allows developers to keep a log of who changed what file as well as when and how. CVS supports hierarchical collections of directories and files and is especially useful when managing a project among multiple authors. CVS works over a local or wide area network including the Internet.
In Mac OS X, you can use CVS from the command line as well as directly from within Project Builder. CVS is very much a command line tool, especially when setting up a new repository. There are detailed instructions packaged with the development tools that walk you through setting up a new project using CVS.
Type man cvs in Terminal for more information.
Developer Utilities
In Figure 2.3, you saw a collection of developer utilities that are made available by Apple. Let's look a bit more closely at each of these tools.
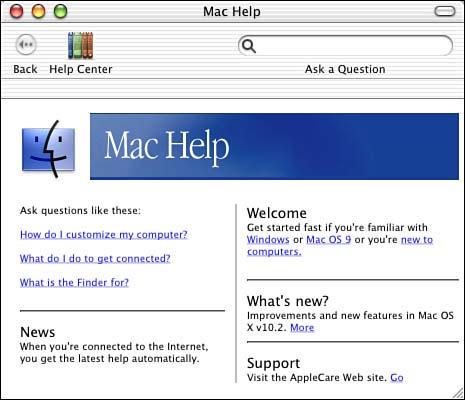
The Apple Help Indexing Tool is used to create a search index for Help Viewer files. Help Viewer can be seen by selecting Mac Help from the Finder's Help menu. Under Mac OS X, this is the standard way to provide online, searchable, linked help (see Figure 2.5).
Figure 2.5. The Help Viewer main window.
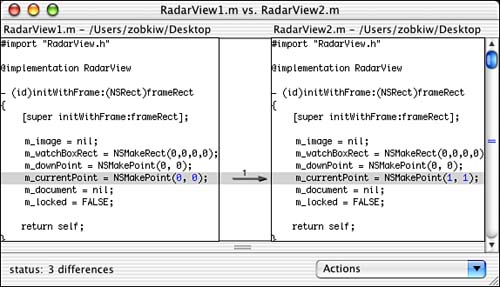
FileMerge allows you to easily compare two files for differences. After selecting the two files to compare, FileMerge will quickly locate the differences between the files and allow you to merge the changes into one. For each difference, you can choose either the old or the new version. This can be very handy when you receive a file back from a developer and you're not sure what he changed (or what you changed since the file was out of your control). Figure 2.6 shows a comparison in progress.
Figure 2.6. The FileMerge differences window.
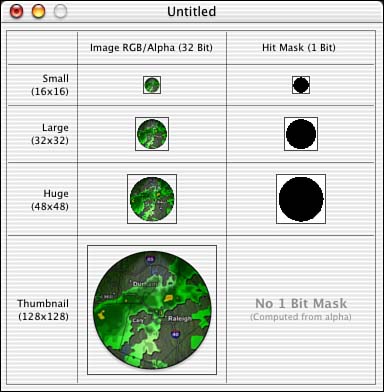
Icns Browser allows you to view the contents of any icns file. These files normally contain application or document icons in various sizes and bit depths. Figure 2.7 shows the icns Browser in action.
Figure 2.7. The icns Browser window.

IconComposer creates the icns files that we browse with icns Browser. By importing standard formats such as TIFF or JPG, you piece together the various sizes and bit depths to create the finished icns file (see Figure 2.8).
Figure 2.8. The IconComposer window.
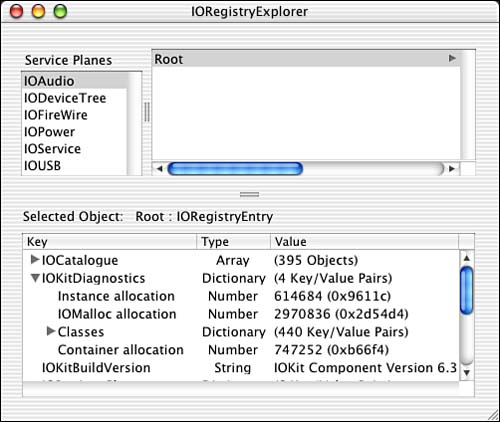
IORegistryExplorer is a tool for use by developers writing I/O drivers. This tool allows you to browse, search, and update the I/O registry (see Figure 2.9).
Figure 2.9. The IORegistryExplorer window.
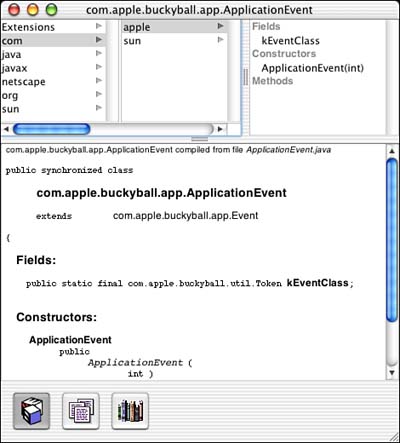
JavaBrowser allows Java developers to browse Java classes, documentation, and source files. Figure 2.10 shows an application source file being browsed.
Figure 2.10. The JavaBrowser window.
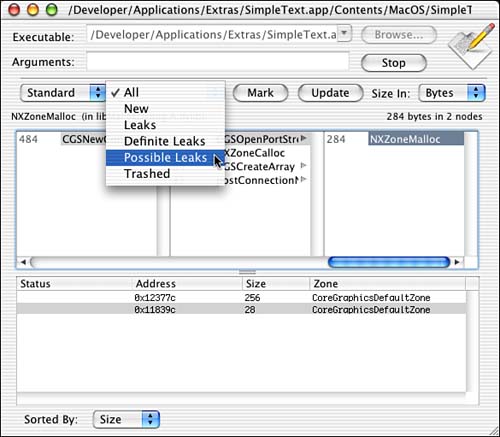
MallocDebug is a utility to help in the understanding of how an application uses memory. It can measure and analyze all allocated memory in an application or measure the memory allocated since a given point in time. It can also be used to detect memory leaks. Figure 2.11 shows MallocDebug in the process of analyzing an application.
Figure 2.11. The MallocDebug window.
JarBundler is new with Java 1.4 for Mac OS X and is used by Java developers to package their program's files and resources into single double-clickable applications. By using Mac OS X's bundle technology, developers can make their Java applications simpler to install and use with this utility (see Figure 2.12).
Figure 2.12. The Jar Bundler window.

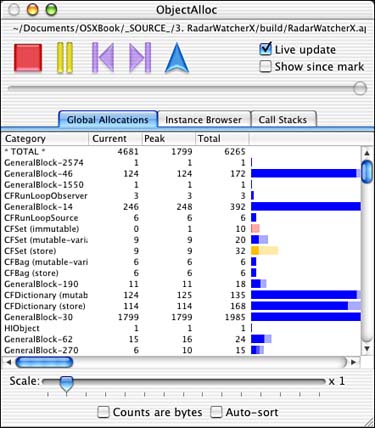
ObjectAlloc allows developers to observe memory allocations and deallocations in an application in almost real-time. You can also view the history of memory use over time to help identify allocation patterns throughout the life of an application. Figure 2.13 shows ObjectAlloc in the process of analyzing an application being launched.
Figure 2.13. The ObjectAlloc window.
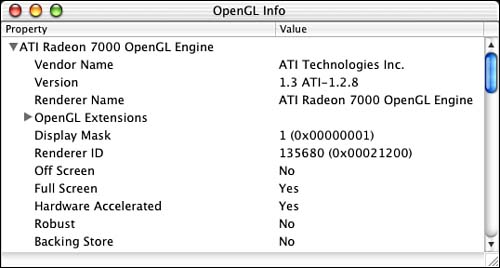
OpenGL Info displays information about the installed OpenGL extensions and is useful to developers working with OpenGL (see Figure 2.14).
Figure 2.14. The OpenGL Info window.
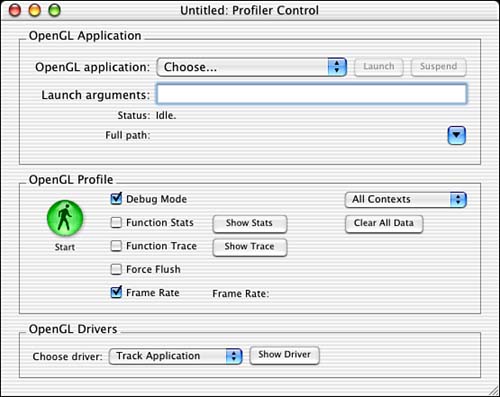
OpenGL Profiler allows you to profile an application that is using OpenGL. Because OpenGL can be so processor intensive, the more you can optimize an OpenGL application, the better. This utility is just the right one for the job. Figure 2.15 shows the Profiler Control window, but the application also provides charts and graphs of application activity once the profile begins.
Figure 2.15. The OpenGL Profiler window.
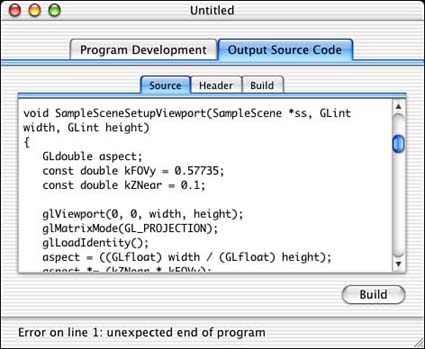
OpenGL Shader Builder allows real-time entry, syntax checking, debugging, and analysis of vertex/fragment programs for use with OpenGL. You can also export your creation to a sample GLUT application in Project Builder format. It also includes an instruction reference (see Figure 2.16).
Figure 2.16. The OpenGL Shader Builder window.
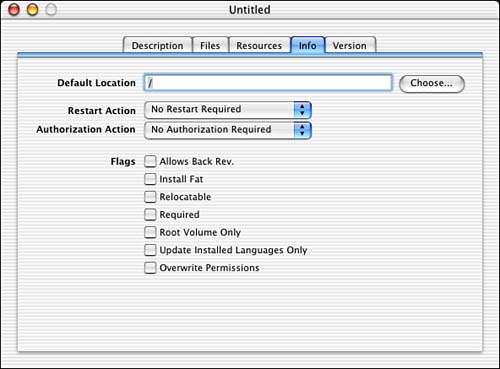
PackageMaker, brought to you by the Apple Mac OS X Installer Elves, allows you to easily create installers for your applications. Figure 2.17 shows the Info tab of the PackageMaker application. Note that you can require a restart if needed or authorization before allowing a package to be installed. Plenty of other options are also available, so make sure that you read the documentation on using this powerful tool.
Figure 2.17. The PackageMaker window.
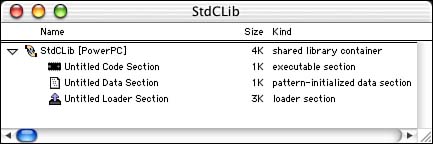
PEFViewer allows you to easily browse and search detailed information and HEX views of any Preferred Executable Format file. Figure 2.18 shows PEFViewer looking inside the small StdCLib file.
Figure 2.18. The PEFViewer window.
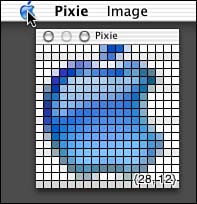
Pixie is a great little application that allows you to zoom in at various levels to view the pixels underneath the cursor. You can see the information in a variety of ways and export the selected area to a TIFF file. This tool is great for examining your user interface in minute detail. Figure 2.19 shows Pixie in action under the Apple icon.
Figure 2.19. The Pixie window.
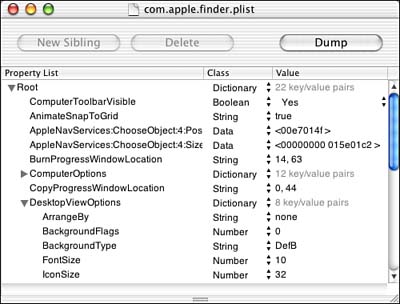
Property List Editor allows you to view property list files in the true hierarchical fashion that they were meant to be viewed. Property list files are nothing more than XML-format text files. However, if the thought of viewing them in a text editor sends shivers up your spine, the Property List Editor is here to take some of the shiver away. You still need to know what you're doing, but it will take you a few seconds more to completely screw up your machine using this handy little utility as opposed to a text editor (see Figure 2.20).
Figure 2.20. The Property List Editor window.
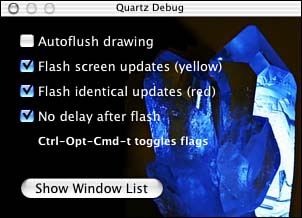
Quartz Debug is a great utility that helps you debug the Quartz drawing in your application. This includes window refreshes and just about any other 2D drawing you do in your program. By enabling the Flash screen updates or Flash identical updates options, you can see exactly where the screen is being refreshed throughout the operating system. Figure 2.21 shows the Quartz Debug palette, but there is also a view that displays detailed information about each program's open windows.
Figure 2.21. The Quartz Debug window.
Sampler is a utility to help in the understanding of an application's behavior while it is running. Using Sampler, you can see where an application spends most of its time executing. It can also summarize why certain allocation routines, system calls, or other functions were called. Figure 2.22 shows Sampler in action sampling Safari, Apple's turbo Web browser.
Figure 2.22. The Sampler window.

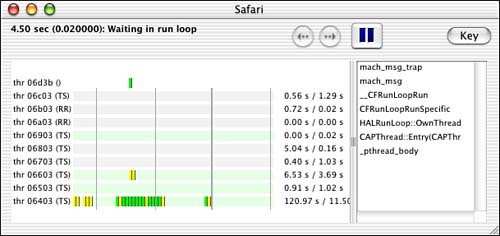
Thread Viewer allows you to examine thread behavior in your application. You can identify commonly executing code and learn where your application needs optimization. Figure 2.23 shows the Thread Viewer observing Safari.
Figure 2.23. The Thread Viewer window.
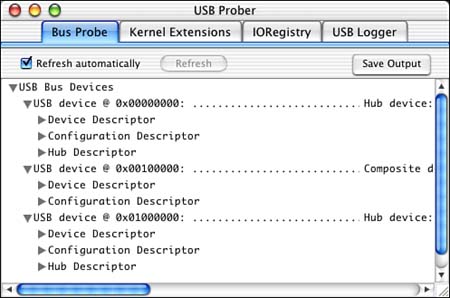
USB Prober gives you a bird's eye view of USB devices and drivers on your system as well as the tools to debug and optimize them. Figure 2.24 shows the USB Prober in action.
Figure 2.24. The USB Prober window.
The utilities listed here are only the ones supplied by Apple; dozens, if not hundreds, more are available from third-party developers as commercial software, shareware, or freeware. Many developers also write their own utilities and editors to use in their development efforts. The Online Resources listing in Appendix B is a good place to start your search for that perfect utility—and if it doesn't exist, create it! But wait…there's more!
Command-Line Developer Utilities
Apple also includes a collection of utilities that are only available from the command line. Some are standard to UNIX, and others are specific to Mac OS X. Many of these can be used to remotely debug an application via Telnet. Let's introduce them one by one—you'll know if you need them.
agvtool is the Apple generic versioning tool that is used to get or set the current version of a binary.
CpMac is used to copy Macintosh files. This utility copies both the resource and data forks.
DeRez decompiles resource files into Rez language files.
fs_usage logs all file operations including virtual memory paging for one or all processes.
GetFileInfo returns detailed file information about the selected file.
heap lists all heap memory in a process.
leaks searches a process's heap memory for unreferenced buffers, also known as leaks.
malloc_history displays a history of all heap allocations by a process.
MergePef allows you to merge Preferred Executable Format files.
MvMac is used to move Macintosh files. This utility moves both the resource and data forks.
ps lists all currently running processes.
ResMerger is a resource management tool that allows you, among other things, to copy resources from the resource fork into the data fork of another file and vice versa.
Rez compiles Rez language files into resource files.
RezWack allows you to convert a resource file into a format that can be transferred to a non-resource-fork-friendly platform.
sample can be used to profile a process at specific intervals, similar to the Sampler application listed earlier.
sc_usage logs all Mach system calls.
sdp converts XML files ending in .sdef into either .r files (for Carbon use) or .scriptSuite or .scriptTerminology files (for Cocoa use).
SetFile sets Finder information for Macintosh files.
SplitForks separates the resource and data forks of a file into a UNIX-friendly format.
top displays a list of currently running processes and their resource usage. This list is continually updated.
UnRezWack allows you to convert a RezWacked file back to a standard resource file.
vmmap displays detailed information of how virtual memory is being used including where malloc memory and libraries are stored.
WSMakeStubs generates static Objective-C stubs from WSDL files for use with WebServices
Frameworks
Similar to libraries, frameworks are collections of code or resources that together allow your programs to access certain features of the system and other software. By adding frameworks to your Project Builder projects and including the appropriate header files, you can begin using them immediately. A little documentation helps too.
The /System/Library/Frameworks directory contains dozens of frameworks—some documented, some not. Here is a partial list as of this writing with some explanations as to what each one does.
The AddressBook.framework is used to access items in the Address Book database that is new with Mac OS X Jaguar.
The AppKit.framework allows access to all AppKit Objective-C classes such as NSApplication, NSButton, NSColor, NSDocument, NSImage, NSMenuItem, NSResponder, NSView, and NSWindow. We will be using these classes throughout the book.
The AppleScriptKit.framework contains resources, AppleScript definition files, and event handlers for use when implementing AppleScript in your applications.
The ApplicationServices.framework contains multiple frameworks including those that support ColorSync, CoreGraphics, FindByContent, Language Analysis, and Speech Synthesis.
The Carbon.framework contains multiple frameworks including those that support Sound, Help, Human Interface Toolbox, HTML Rendering, Navigation Services, Printing, and the Security Human Interface.
The Cocoa.framework simply contains a header file that includes the AppKit and Foundation framework's header files for convenience.
The CoreFoundation.framework allows access to all CoreFoundation items such as CFArray, CFBundle, CFDictionary, CFString, and so on (see Foundation.framework).
The CoreMIDI.framework allows access to the MIDI (Musical Instrument Digital Interface) capabilities built into Mac OS X.
The CoreServices.framework contains multiple frameworks including those that support networking and Web services.
The DiscRecording.framework allows access to the CD (Compact Disc) and DVD (Digital Video Disc) disc burning capabilities that are built into Mac OS X.
The Foundation.framework allows access to all Foundation Objective-C classes such as NSArray, NSBundle, NSDictionary, NSString, and so on. We will be using these classes throughout the book (see CoreFoundation.framework).
The InterfaceBuilder.framework allows developers to build palettes and objects for use within the Interface Builder application.
The IOBluetooth.framework and IOBluetoothUI.framework allow developers to communicate with Bluetooth devices via capabilities built into Mac OS X.
The IOKit.framework is used to develop drivers for Mac OS X.
The Message.framework includes NSMailDelivery, which is a class that allows you to easily send an email message from within your Cocoa application.
The PreferencePanes.framework is used to implement Preference Panes, popularized by the System Preferences application. We will implement a Preference Pane in Chapter 8.
The ScreenSaver.framework is used to implement screen savers, now called Screen Effects, under Mac OS X. We will implement a Screen Effect in Chapter 10.
The WebCore framework is a Mac OS X specific version of the cross-platform KHTML library. Apple's Safari Web browser uses WebCore to implement its HTML parsing engine.
Be sure to peruse the Frameworks directory yourself for more goodies awaiting your discovery.
Conclusion
That ends our brief introduction to the tools you will be using while swimming in the sea of Mac OS X development. Although we will only use a few of these tools throughout the book, it is very important to know what is available to you as a developer. If you didn't know about the hammer, you might try to use your hand to pound in a nail—some of us already have! So, be sure to peruse the Developer directory to see what else is in there including scripts, templates, and examples.