Appendix A
Deploying JavaFX
Much of this book was spent covering the basics of JavaFX development. You have learned how to navigate JavaFX scripting and create some very compelling applications.
Admittedly, you have only scratched the surface of what is available to you in JavaFX, which is a very deep language with a lot to offer. No doubt, you have some questions about some of the things you have learned. Therefore, this book’s appendixes attempt to fill in some of the holes that may have been left in the lessons of this book.
Deploying JavaFX
Throughout this book you have created multiple JavaFX scripts that you can execute from within NetBeans. You have written some very useful scripts in your short time with the language, but one issue remains: You need to be able to deploy the scripts you write so that others can execute your applications.
The following steps teach you a quick-and-easy way to deploy your JavaFX applications using NetBeans.
NOTE
In this example you will be using Chapter12.fx. If you do not have Chapter12.fx from the example in Chapter 12, any of the book’s examples will work. In the event you have not retained any of the examples in the book, you may want to complete one before following these steps.
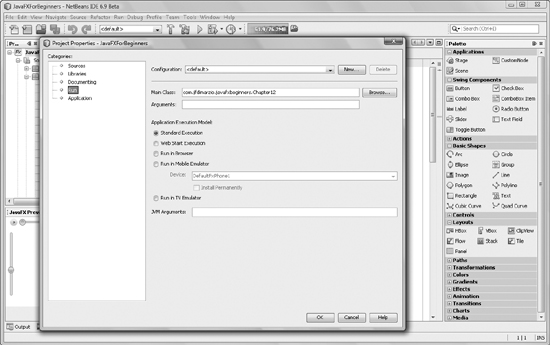
The first step in deploying JavaFX from NetBeans is to right-click your project in NetBeans and go to the project’s Properties dialog box. From there, select the Run properties, as shown in Figure A-1.
In the Run properties, you just want to confirm that the Main class is the .fx script file you want to execute. The .fx file listed in the Main Class section is the file that will be compiled and deployed during this process. Once you have confirmed or set the correct .fx script file as the Main class, you can close the project’s Properties dialog box.
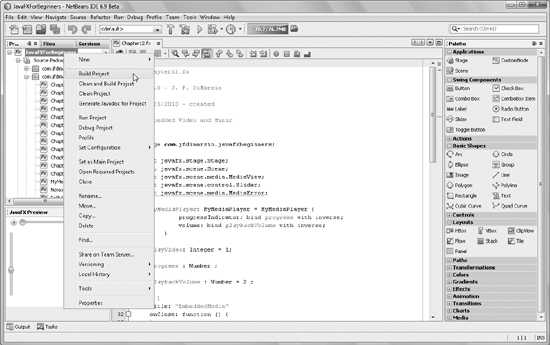
The next step in deploying your JavaFX application is to build your project. The build process compiles the scripts so that they are executable outside the NetBeans IDE. To build your project, right-click your project once again and select Build Project, as shown in Figure A-2.
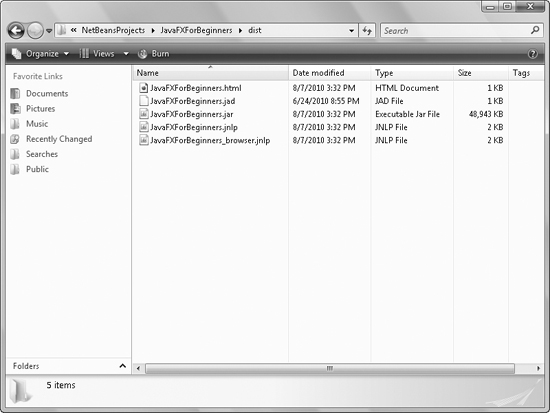
When the build process completes, you will have a fully executable set of files. These files are placed in the dist folder of your NetBeans project. The contents of the dist folder are shown in Figure A-3.
Notice that one of the files created for you during the build process is an HTML file with the name of your project. This file is a sample distribution file that contains all the information needed to distribute your app successfully. If you open the file, you will see that it contains the following code:
<html>
<head>
<meta http-equiv="Content-Type" content="text/html; charset=utf-8">
<title>JavaFXForBeginners</title>
</head>
<body>
<h1>JavaFXBeginners</h1>
<script src="http://dl.javafx.com/1.3/dtfx.js"></script>
<script>
    javafx(
        {
              archive: "JavaFXBeginners.jar",
              draggable: true,
              width: 200,
              height: 200,
              code: "com.jfdimarzio.javafxbeginners.Chapter12",
              extPackages: "javafx.ext.swing",
              name: "JavaFXBeginners"
        }
    );
</script>
</body>
</html>
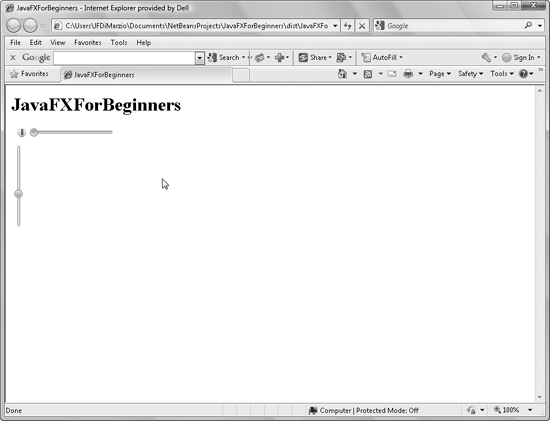
Within the script section of the HTML is a javafx script that allows the compiled project to run when this page is opened. Open the HTML file with your browser and you should see the fully functional application, as shown in Figure A-4.
In this short appendix you learned how to compile and build your script files so that they can be executed outside of the NetBeans IDE. As you can see, the distribution process is very easy—which only adds to the usefulness and accessibility of JavaFX.