Chapter 8 Graphics Interoperability
Since this book has focused on general-purpose computation, for the most part we’ve ignored that GPUs contain some special-purpose components as well. The GPU owes its success to its ability to perform complex rendering tasks in real time, freeing the rest of the system to concentrate on other work. This leads us to the obvious question: Can we use the GPU for both rendering and general-purpose computation in the same application? What if the images we want to render rely on the results of our computations? Or what if we want to take the frame we’ve rendered and perform some image-processing or statistics computations on it?
Fortunately, not only is this interaction between general-purpose computation and rendering modes possible, but it’s fairly easy to accomplish given what you already know. CUDA C applications can seamlessly interoperate with either of the two most popular real-time rendering APIs, OpenGL and DirectX. This chapter will look at the mechanics by which you can enable this functionality.
The examples in this chapter deviate some from the precedents we’ve set in previous chapters. In particular, this chapter assumes a significant amount about your background with other technologies. Specifically, we have included a considerable amount of OpenGL and GLUT code in these examples, almost none of which will we explain in great depth. There are many superb resources to learn graphics APIs, both online and in bookstores, but these topics are well beyond the intended scope of this book. Rather, this chapter intends to focus on CUDA C and the facilities it offers to incorporate it into your graphics applications. If you are unfamiliar with OpenGL or DirectX, you are unlikely to derive much benefit from this chapter and may want to skip to the next.
8.1 Chapter Objectives
Through the course of this chapter, you will accomplish the following:
• You will learn what graphics interoperability is and why you might use it.
• You will learn how to set up a CUDA device for graphics interoperability.
• You will learn how to share data between your CUDA C kernels and OpenGL rendering.
8.2 Graphics Interoperation
To demonstrate the mechanics of interoperation between graphics and CUDA C, we’ll write an application that works in two steps. The first step uses a CUDA C kernel to generate image data. In the second step, the application passes this data to the OpenGL driver to render. To accomplish this, we will use much of the CUDA C we have seen in previous chapters along with some OpenGL and GLUT calls.
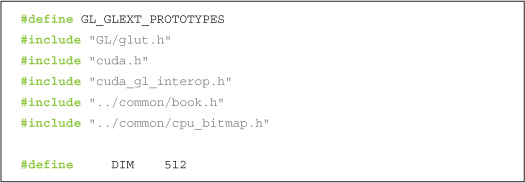
To start our application, we include the relevant GLUT and CUDA headers in order to ensure the correct functions and enumerations are defined. We also define the size of the window into which our application plans to render. At 512 x 512 pixels, we will do relatively small drawings.
Additionally, we declare two global variables that will store handles to the data we intend to share between OpenGL and data. We will see momentarily how we use these two variables, but they will store different handles to the same buffer. We need two separate variables because OpenGL and CUDA will both have different “names” for the buffer. The variable bufferObj will be OpenGL’s name for the data, and the variable resource will be the CUDA C name for it.

Now let’s take a look at the actual application. The first thing we do is select a CUDA device on which to run our application. On many systems, this is not a complicated process, since they will often contain only a single CUDA-enabled GPU. However, an increasing number of systems contain more than one CUDA-enabled GPU, so we need a method to choose one. Fortunately, the CUDA runtime provides such a facility to us.
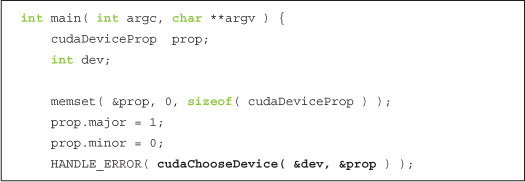
You may recall that we saw cudaChooseDevice() in Chapter 3, but since it was something of an ancillary point, we’ll review it again now. Essentially, this code tells the runtime to select any GPU that has a compute capability of version 1.0 or better. It accomplishes this by first creating and clearing a cudaDeviceProp structure and then by setting its major version to 1 and minor version to 0. It passes this information to cudaChooseDevice(), which instructs the runtime to select a GPU in the system that satisfies the constraints specified by the cudaDeviceProp structure. In the next chapter, we will look more at what is meant by a GPU’s compute capability, but for now it suffices to say that it roughly indicates the features a GPU supports. All CUDA-capable GPUs have at least compute capability 1.0, so the net effect of this call is that the runtime will select any CUDA-capable device and return an identifier for this device in the variable dev. There is no guarantee that this device is the best or fastest GPU, nor is there a guarantee that the device will be the same GPU from version to version of the CUDA runtime.
If the result of device selection is so seemingly underwhelming, why do we bother with all this effort to fill a cudaDeviceProp structure and call cudaChooseDevice() to get a valid device ID? Furthermore, we never hassled with this tomfoolery before, so why now? These are good questions. It turns out that we need to know the CUDA device ID so that we can tell the CUDA runtime that we intend to use the device for CUDA and OpenGL. We achieve this with a call to cudaGLSetGLDevice(), passing the device ID dev we obtained from cudaChooseDevice():
![]()
After the CUDA runtime initialization, we can proceed to initialize the OpenGL driver by calling our GL Utility Toolkit (GLUT) setup functions. This sequence of calls should look relatively familiar if you’ve used GLUT before:

At this point in main(), we’ve prepared our CUDA runtime to play nicely with the OpenGL driver by calling cudaGLSetGLDevice(). Then we initialized GLUT and created a window named “bitmap” in which to draw our results. Now we can get on to the actual OpenGL interoperation!
Shared data buffers are the key component to interoperation between CUDA C kernels and OpenGL rendering. To pass data between OpenGL and CUDA, we will first need to create a buffer that can be used with both APIs. We start this process by creating a pixel buffer object in OpenGL and storing the handle in our global variable GLuint bufferObj:

If you have never used a pixel buffer object (PBO) in OpenGL, you will typically create one with these three steps: First, we generate a buffer handle with glGenBuffers(). Then, we bind the handle to a pixel buffer with glBindBuffer(). Finally, we request the OpenGL driver to allocate a buffer for us with glBufferData(). In this example, we request a buffer to hold DIM x DIM 32-bit values and use the enumerant GL_DYNAMIC_DRAW_ARB to indicate that the buffer will be modified repeatedly by the application. Since we have no data to preload the buffer with, we pass NULL as the penultimate argument to glBufferData().
All that remains in our quest to set up graphics interoperability is notifying the CUDA runtime that we intend to share the OpenGL buffer named bufferObj with CUDA. We do this by registering bufferObj with the CUDA runtime as a graphics resource.

We specify to the CUDA runtime that we intend to use the OpenGL PBO bufferObj with both OpenGL and CUDA by calling cudaGraphicsGLRegisterBuffer(). The CUDA runtime returns a CUDA-friendly handle to the buffer in the variable resource. This handle will be used to refer to bufferObj in subsequent calls to the CUDA runtime.
The flag cudaGraphicsMapFlagsNone specifies that there is no particular behavior of this buffer that we want to specify, although we have the option to specify with cudaGraphicsMapFlagsReadOnly that the buffer will be readonly. We could also use cudaGraphicsMapFlagsWriteDiscard to specify that the previous contents will be discarded, making the buffer essentially write-only. These flags allow the CUDA and OpenGL drivers to optimize the hardware settings for buffers with restricted access patterns, although they are not required to be set.
Effectively, the call to glBufferData() requests the OpenGL driver to allocate a buffer large enough to hold DIM x DIM 32-bit values. In subsequent OpenGL calls, we’ll refer to this buffer with the handle bufferObj, while in CUDA runtime calls, we’ll refer to this buffer with the pointer resource. Since we would like to read from and write to this buffer from our CUDA C kernels, we will need more than just a handle to the object. We will need an actual address in device memory that can be passed to our kernel. We achieve this by instructing the CUDA runtime to map the shared resource and then by requesting a pointer to the mapped resource.
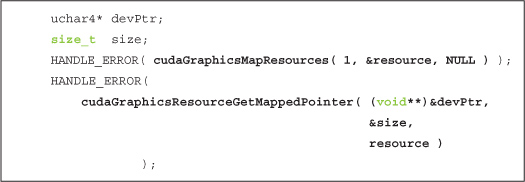
We can then use devPtr as we would use any device pointer, except that the data can also be used by OpenGL as a pixel source. After all these setup shenanigans, the rest of main() proceeds as follows: First, we launch our kernel, passing it the pointer to our shared buffer. This kernel, the code of which we have not seen yet, generates image data to be rendered. Next, we unmap our shared resource. This call is important to make prior to performing rendering tasks because it provides synchronization between the CUDA and graphics portions of the application. Specifically, it implies that all CUDA operations performed prior to the call to cudaGraphicsUnmapResources() will complete before ensuing graphics calls begin.
Lastly, we register our keyboard and display callback functions with GLUT (key_func and draw_func), and we relinquish control to the GLUT rendering loop with glutMainLoop().
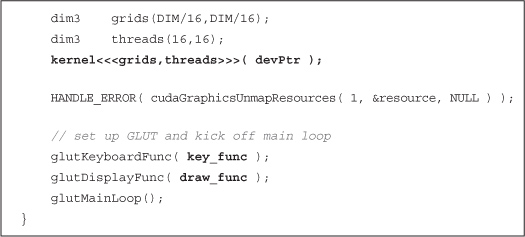
The remainder of the application consists of the three functions we just highlighted, kernel(), key_func(), and draw_func(). So, let’s take a look at those.
The kernel function takes a device pointer and generates image data. In the following example, we’re using a kernel inspired by the ripple example in Chapter 5:
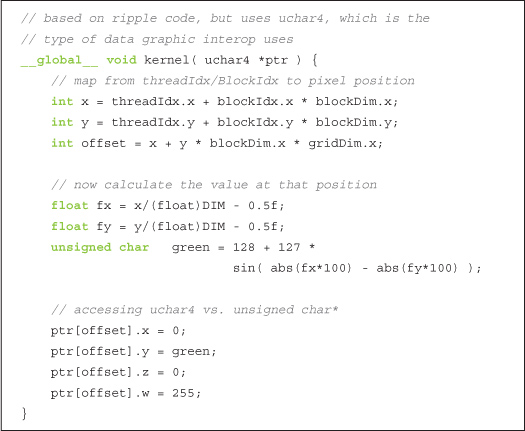
Many familiar concepts are at work here. The method for turning thread and block indices into x- and y-coordinates and a linear offset has been examined several times. We then perform some reasonably arbitrary computations to determine the color for the pixel at that (x,y) location, and we store those values to memory. We’re again using CUDA C to procedurally generate an image on the GPU. The important thing to realize is that this image will then be handed directly to OpenGL for rendering without the CPU ever getting involved. On the other hand, in the ripple example of Chapter 5, we generated image data on the GPU very much like this, but our application then copied the buffer back to the CPU for display.
So, how do we draw the CUDA-generated buffer using OpenGL? Well, if you recall the setup we performed in main(), you’ll remember the following:
glBindBuffer( GL_PIXEL_UNPACK_BUFFER_ARB, bufferObj );
This call bound the shared buffer as a pixel source for the OpenGL driver to use in all subsequent calls to glDrawPixels(). Essentially, this means that a call to glDrawPixels() is all that we need in order to render the image data our CUDA C kernel generated. Consequently, the following is all that our draw_func() needs to do:

It’s possible you’ve seen glDrawPixels() with a buffer pointer as the last argument. The OpenGL driver will copy from this buffer if no buffer is bound as a GL_PIXEL_UNPACK_BUFFER_ARB source. However, since our data is already on the GPU and we have bound our shared buffer as the GL_PIXEL_UNPACK_BUFFER_ARB source, this last parameter instead becomes an offset into the bound buffer. Because we want to render the entire buffer, this offset is zero for our application.
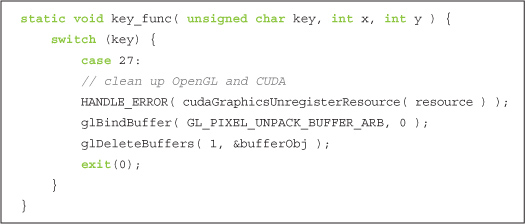
The last component to this example seems somewhat anticlimactic, but we’ve decided to give our users a method to exit the application. In this vein, our key_func() callback responds only to the Esc key and uses this as a signal to clean up and exit:
Figure 8.1 A screenshot of the hypnotic graphics interoperation example
When run, this example draws a mesmerizing picture in “NVIDIA Green” and black, shown in Figure 8.1. Try using it to hypnotize your friends (or enemies).
8.3 GPU Ripple with Graphics Interoperability
In “Section 8.2: Graphics Interoperation,” we referred to Chapter 5’s GPU ripple example a few times. If you recall, that application created a CPUAnimBitmap and passed it a function to be called whenever a frame needed to be generated.
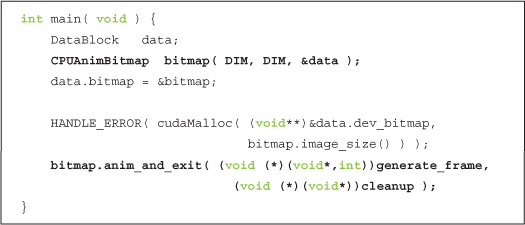
With the techniques we’ve learned in the previous section, we intend to create a GPUAnimBitmap structure. This structure will serve the same purpose as the CPUAnimBitmap, but in this improved version, the CUDA and OpenGL components will cooperate without CPU intervention. When we’re done, the application will use a GPUAnimBitmap so that main() will become simply as follows:

The GPUAnimBitmap structure uses the same calls we just examined in Section 8.2: Graphics Interoperation. However, now these calls will be abstracted away in a GPUAnimBitmap structure so that future examples (and potentially your own applications) will be cleaner.
8.3.1 The GPUanimbitmap Structure
Several of the data members for our GPUAnimBitmap will look familiar to you from Section 8.2: Graphics Interoperation.
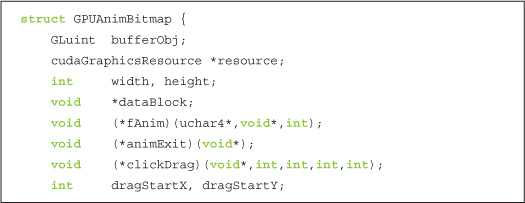
We know that OpenGL and the CUDA runtime will have different names for our GPU buffer, and we know that we will need to refer to both of these names, depending on whether we are making OpenGL or CUDA C calls. Therefore, our structure will store both OpenGL’s bufferObj name and the CUDA runtime’s resource name. Since we are dealing with a bitmap image that we intend to display, we know that the image will have a width and height to it.
To allow users of our GPUAnimBitmap to register for certain callback events, we will also store a void* pointer to arbitrary user data in dataBlock. Our structure will never look at this data but will simply pass it back to any registered callback functions. The callbacks that a user may register are stored in fAnim, animExit, and clickDrag. The function fAnim() gets called in every call to glutIdleFunc(), and this function is responsible for producing the image data that will be rendered in the animation. The function animExit() will be called once, when the animation exits. This is where the user should implement cleanup code that needs to be executed when the animation ends. Finally, clickDrag(), an optional function, implements the user’s response to mouse click/drag events. If the user registers this function, it gets called after every sequence of mouse button press, drag, and release events. The location of the initial mouse click in this sequence is stored in (dragStartX, dragStartY) so that the start and endpoints of the click/drag event can be passed to the user when the mouse button is released. This can be used to implement interactive animations that will impress your friends.
Initializing a GPUAnimBitmap follows the same sequence of code that we saw in our previous example. After stashing away arguments in the appropriate structure members, we start by querying the CUDA runtime for a suitable CUDA device:
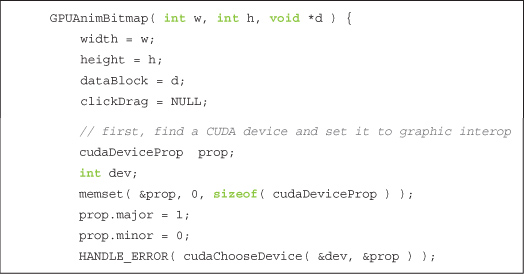
After finding a compatible CUDA device, we make the important cudaGLSetGLDevice() call to the CUDA runtime in order to notify it that we intend to use dev as a device for interoperation with OpenGL:
![]()
Since our framework uses GLUT to create a windowed rendering environment, we need to initialize GLUT. This is unfortunately a bit awkward, since glutInit() wants command-line arguments to pass to the windowing system. Since we have none we want to pass, we would like to simply specify zero command-line arguments. Unfortunately, some versions of GLUT have a bug that causes applications to crash when zero arguments are given. So, we trick GLUT into thinking that we’re passing an argument, and as a result, life is good.

We continue initializing GLUT exactly as we did in the previous example. We create a window in which to render, specifying a title with the string “bitmap.” If you’d like to name your window something more interesting, be our guest.

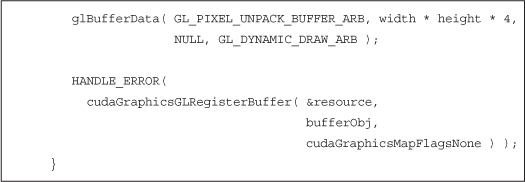
Next, we request for the OpenGL driver to allocate a buffer handle that we immediately bind to the GL_PIXEL_UNPACK_BUFFER_ARB target to ensure that future calls to glDrawPixels() will draw to our interop buffer:

Last, but most certainly not least, we request that the OpenGL driver allocate a region of GPU memory for us. Once this is done, we inform the CUDA runtime of this buffer and request a CUDA C name for this buffer by registering bufferObj with cudaGraphicsGLRegisterBuffer().
With the GPUAnimBitmap set up, the only remaining concern is exactly how we perform the rendering. The meat of the rendering will be done in our glutIdleFunc(). This function will essentially do three things. First, it maps our shared buffer and retrieves a GPU pointer for this buffer.
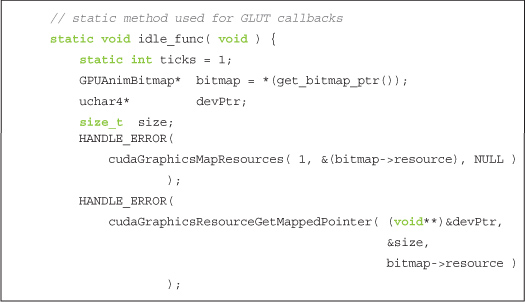
Second, it calls the user-specified function fAnim() that presumably will launch a CUDA C kernel to fill the buffer at devPtr with image data.
![]()
And lastly, it unmaps the GPU pointer that will release the buffer for use by the OpenGL driver in rendering. This rendering will be triggered by a call to glutPostRedisplay().

The remainder of the GPUAnimBitmap structure consists of important but somewhat tangential infrastructure code. If you have an interest in it, you should by all means examine it. But we feel that you’ll be able to proceed successfully, even if you lack the time or interest to digest the rest of the code in GPUAnimBitmap.
8.3.2 GPU Ripple Redux
Now that we have a GPU version of CPUAnimBitmap, we can proceed to retrofit our GPU ripple application to perform its animation entirely on the GPU. To begin, we will include gpu_anim.h, the home of our implementation of GPUAnimBitmap. We also include nearly the same kernel as we examined in Chapter 5.
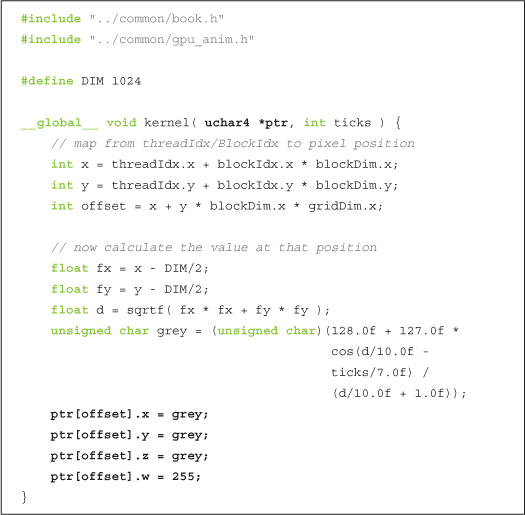
The one and only change we’ve made is highlighted. The reason for this change is because OpenGL interoperation requires that our shared surfaces be “graphics friendly.” Because real-time rendering typically uses arrays of four-component (red/green/blue/alpha) data elements, our target buffer is no longer simply an array of unsigned char as it previously was. It’s now required to be an array of type uchar4. In reality, we treated our buffer in Chapter 5 as a four-component buffer, so we always indexed it with ptr[offset*4+k], where k indicates the component from 0 to 3. But now, the four-component nature of the data is made explicit with the switch to a uchar4 type.
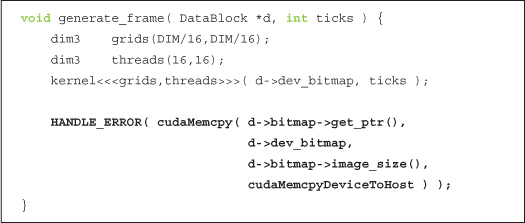
Since kernel() is a CUDA C function that generates image data, all that remains is writing a host function that will be used as a callback in the idle_func() member of GPUAnimBitmap. For our current application, all this function does is launch the CUDA C kernel:

That’s basically everything we need, since all of the heavy lifting was done in the GPUAnimBitmap structure. To get this party started, we just create a GPUAnimBitmap and register our animation callback function, generate_frame().

8.4 Heat Transfer with Graphics Interop
So, what has been the point of doing all of this? If you look at the internals of the CPUAnimBitmap, the structure we used for previous animation examples, we would see that it works almost exactly like the rendering code in Section 8.2: Graphics Interoperation.
Almost.
The key difference between the CPUAnimBitmap and the previous example is buried in the call to glDrawPixels().
We remarked in the first example of this chapter that you may have previously seen calls to glDrawPixels() with a buffer pointer as the last argument. Well, if you hadn’t before, you have now. This call in the Draw() routine of CPUAnimBitmap triggers a copy of the CPU buffer in bitmap->pixels to the GPU for rendering. To do this, the CPU needs to stop what it’s doing and initiate a copy onto the GPU for every frame. This requires synchronization between the CPU and GPU and additional latency to initiate and complete a transfer over the PCI Express bus. Since the call to glDrawPixels() expects a host pointer in the last argument, this also means that after generating a frame of image data with a CUDA C kernel, our Chapter 5 ripple application needed to copy the frame from the GPU to the CPU with a cudaMemcpy().
Taken together, these facts mean that our original GPU ripple application was more than a little silly. We used CUDA C to compute image values for our rendering in each frame, but after the computations were done, we copied the buffer to the CPU, which then copied the buffer back to the GPU for display. This means that we introduced unnecessary data transfers between the host and the device that stood between us and maximum performance. Let’s revisit a compute-intensive animation application that might see its performance improve by migrating it to use graphics interoperation for its rendering.
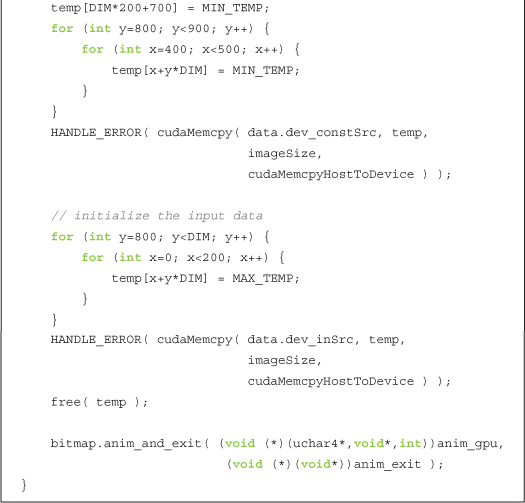
If you recall the previous chapter’s heat simulation application, you will remember that it also used CPUAnimBitmap in order to display the output of its simulation computations. We will modify this application to use our newly implemented GPUAnimBitmap structure and look at how the resulting performance changes. As with the ripple example, our GPUAnimBitmap is almost a perfect drop-in replacement for CPUAnimBitmap, with the exception of the unsigned char to uchar4 change. So, the signature of our animation routine changes in order to accommodate this shift in data types.
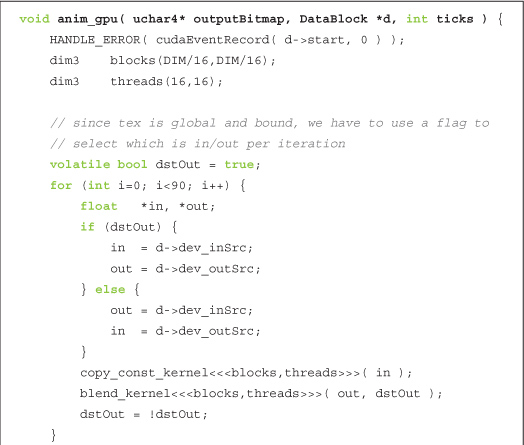
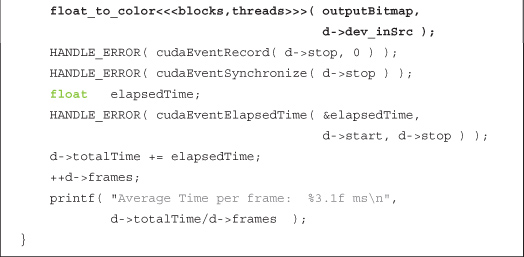
Since the float_to_color() kernel is the only function that actually uses the outputBitmap, it’s the only other function that needs modification as a result of our shift to uchar4. This function was simply considered utility code in the previous chapter, and we will continue to consider it utility code. However, we have overloaded this function and included both unsigned char and uchar4 versions in book.h. You will notice that the differences between these functions are identical to the differences between kernel() in the CPU-animated and GPU-animated versions of GPU ripple. Most of the code for the float_to_color() kernels has been omitted for clarity, but we encourage you to consult book.h if you’re dying to see the details.
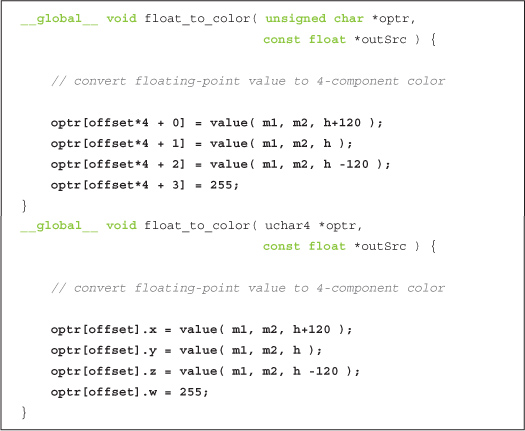
Outside of these changes, the only major difference is in the change from CPUAnimBitmap to GPUAnimBitmap to perform animation.
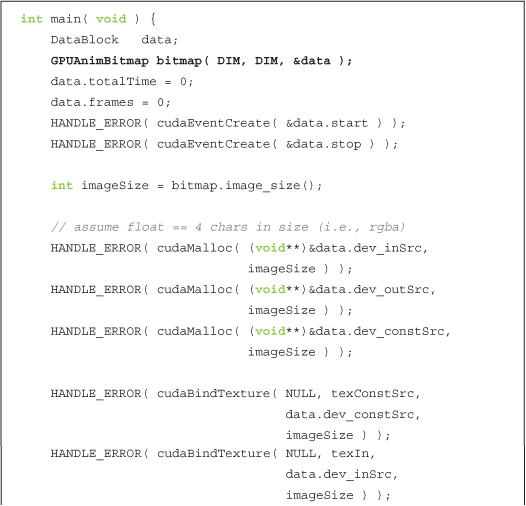
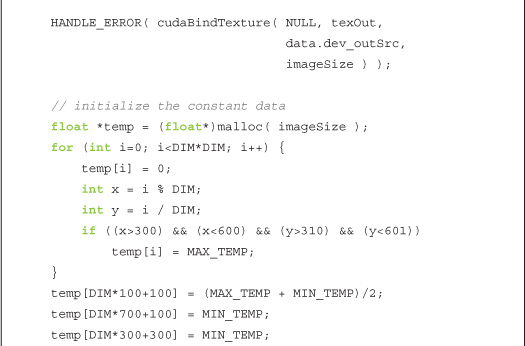
Although it might be instructive to take a glance at the rest of this enhanced heat simulation application, it is not sufficiently different from the previous chapter’s version to warrant more description. The important component is answering the question, how does performance change now that we’ve completely migrated the application to the GPU? Without having to copy every frame back to the host for display, the situation should be much happier than it was previously.
So, exactly how much better is it to use the graphics interoperability to perform the rendering? Previously, the heat transfer example consumed about 25.3ms per frame on our GeForce GTX 285–based test machine. After converting the application to use graphics interoperability, this drops by 15 percent to 21.6ms per frame. The net result is that our rendering loop is 15 percent faster and no longer requires intervention from the host every time we want to display a frame. That’s not bad for a day’s work!
8.5 DirectX Interoperability
Although we’ve looked only at examples that use interoperation with the OpenGL rendering system, DirectX interoperation is nearly identical. You will still use a cudaGraphicsResource to refer to buffers that you share between DirectX and CUDA, and you will still use calls to cudaGraphicsMapResources() and cudaGraphicsResourceGetMappedPointer() to retrieve CUDA-friendly pointers to these shared resources.
For the most part, the calls that differ between OpenGL and DirectX interoperability have embarrassingly simple translations to DirectX. For example, rather than calling cudaGLSetGLDevice(), we call cudaD3D9SetDirect3DDevice() to specify that a CUDA device should be enabled for Direct3D 9.0 interoperability. Likewise, cudaD3D10SetDirect3DDevice() enables a device for Direct3D 10 interoperation and cudaD3D11SetDirect3DDevice() for Direct3D 11.
The details of DirectX interoperability probably will not surprise you if you’ve worked through this chapter’s OpenGL examples. But if you want to use DirectX interoperation and want a small project to get started, we suggest that you migrate this chapter’s examples to use DirectX. To get started, we recommend consulting the NVIDIA CUDA Programming Guide for a reference on the API and taking a look at the GPU Computing SDK code samples on DirectX interoperability.
8.6 Chapter Review
Although much of this book has been devoted to using the GPU for parallel, general-purpose computing, we can’t forget the GPU’s successful day job as a rendering engine. Many applications require or would benefit from the use of standard computer graphics rendering. Since the GPU is master of the rendering domain, all that stood between us and the exploitation of these resources was a lack of understanding of the mechanics in convincing the CUDA runtime and graphics drivers to cooperate. Now that we have seen how this is done, we no longer need the host to intervene in displaying the graphical results of our computations. This simultaneously accelerates the application’s rendering loop and frees the host to perform other computations in the meantime. Otherwise, if there are no other computations to be performed, it leaves our system more responsive to other events or applications.
There are many other ways to use graphics interoperability that we left unexplored. We looked primarily at using a CUDA C kernel to write into a pixel buffer object for display in a window. This image data can also be used as a texture that can be applied to any surface in the scene. In addition to modifying pixel buffer objects, you can also share vertex buffer objects between CUDA and the graphics engine. Among other things, this allows you to write CUDA C kernels that perform collision detection between objects or compute vertex displacement maps to be used to render objects or surfaces that interact with the user or their surroundings. If you’re interested in computer graphics, CUDA C’s graphics interoperability API enables a slew of new possibilities for your applications!

