Chapter 11 CUDA C on Multiple GPUs
There is an old saying that goes something like this: “The only thing better than computing on a GPU is computing on two GPUs.” Systems containing multiple graphics processors have become more and more common in recent years. Of course, in some ways multi-GPU systems are similar to multi-CPU systems in that they are still far from the common system configuration, but it has gotten quite easy to end up with more than one GPU in your system. Products such as the GeForce GTX 295 contain two GPUs on a single card. NVIDIA’s Tesla S1070 contains a whopping four CUDA-capable graphics processors in it. Systems built around a recent NVIDIA chipset will have an integrated, CUDA-capable GPU on the motherboard. Adding a discrete NVIDIA GPU in one of the PCI Express slots will make this system multi-GPU. Neither of these scenarios is very farfetched, so we would be best served by learning to exploit the resources of a system with multiple GPUs in it.
11.1 Chapter Objectives
Through the course of this chapter, you will accomplish the following:
• You will learn how to allocate and use zero-copy memory.
• You will learn how to use multiple GPUs within the same application.
• You will learn how to allocate and use portable pinned memory.
11.2 Zero-Copy Host Memory
In Chapter 10, we examined pinned or page-locked memory, a new type of host memory that came with the guarantee that the buffer would never be swapped out of physical memory. If you recall, we allocated this memory by making a call to cudaHostAlloc() and passing cudaHostAllocDefault to get default, pinned memory. We promised that in the next chapter, you would see other more exciting means by which you can allocate pinned memory. Assuming that this is the only reason you’ve continued reading, you will be glad to know that the wait is over. The flag cudaHostAllocMapped can be passed instead of cudaHostAllocDefault. The host memory allocated using cudaHostAllocMapped is pinned in the same sense that memory allocated with cudaHostAllocDefault is pinned, specifically that it cannot be paged out of or relocated within physical memory. But in addition to using this memory from the host for memory copies to and from the GPU, this new kind of host memory allows us to violate one of the first rules we presented in Chapter 3 concerning host memory: We can access this host memory directly from within CUDA C kernels. Because this memory does not require copies to and from the GPU, we refer to it as zero-copy memory.
11.2.1 Zero-Copy Dot Product
Typically, our GPU accesses only GPU memory, and our CPU accesses only host memory. But in some circumstances, it’s better to break these rules. To see an instance where it’s better to have the GPU manipulate host memory, we’ll revisit our favorite reduction: the vector dot product. If you’ve managed to read this entire book, you may recall our first attempt at the dot product. We copied the two input vectors to the GPU, performed the computation, copied the intermediate results back to the host, and completed the computation on the CPU.
In this version, we’ll skip the explicit copies of our input up to the GPU and instead use zero-copy memory to access the data directly from the GPU. This version of dot product will be set up exactly like our pinned memory test. Specifically, we’ll write two functions; one will perform the test with standard host memory, and the other will finish the reduction on the GPU using zero-copy memory to hold the input and output buffers. First let’s take a look at the standard host memory version of the dot product. We start in the usual fashion by creating timing events, allocating input and output buffers, and filling our input buffers with data.
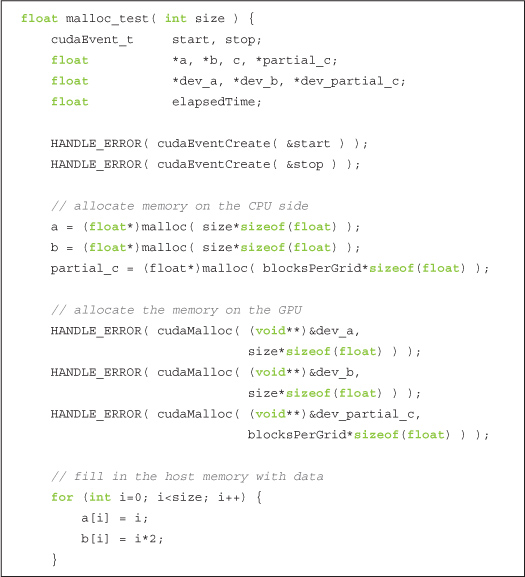
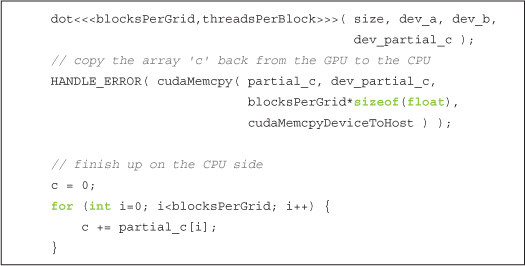
After the allocations and data creation, we can begin the computations. We start our timer, copy our inputs to the GPU, execute the dot product kernel, and copy the partial results back to the host.
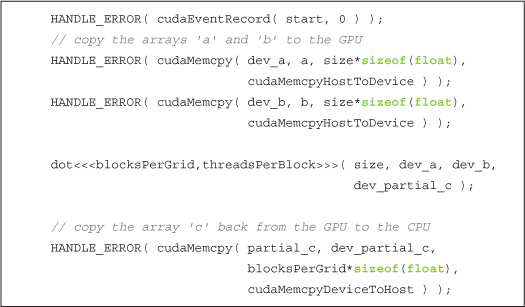
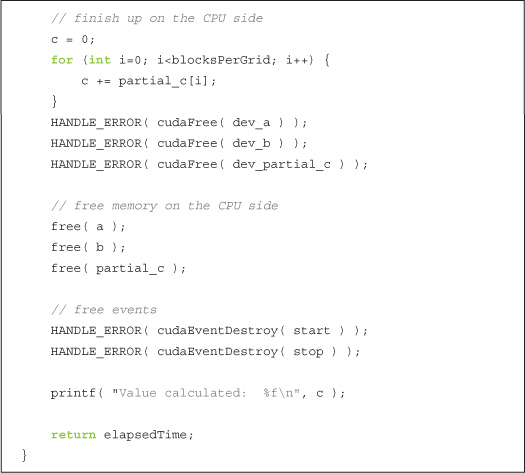
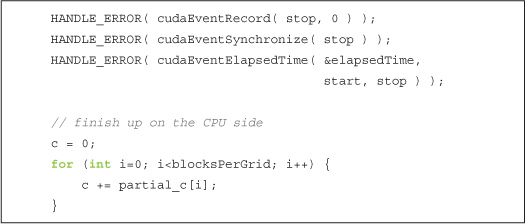
Now we need to finish up our computations on the CPU as we did in Chapter 5. Before doing this, we’ll stop our event timer because it only measures work that’s being performed on the GPU:

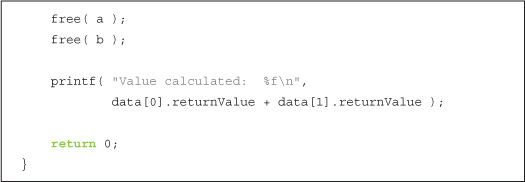
Finally, we sum our partial results and free our input and output buffers.
The version that uses zero-copy memory will be remarkably similar, with the exception of memory allocation. So, we start by allocating our input and output, filling the input memory with data as before:
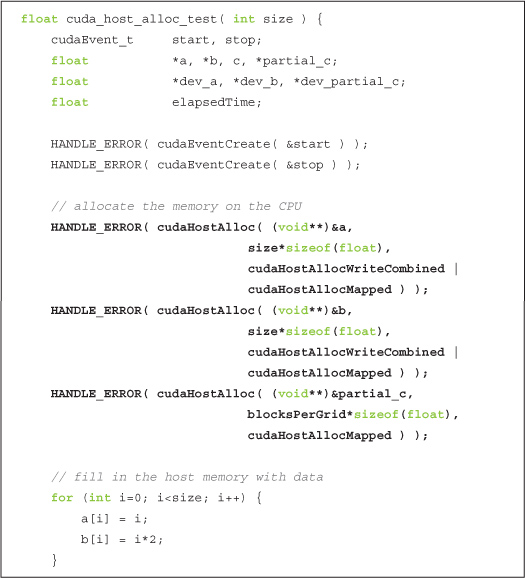
As with Chapter 10, we see cudaHostAlloc() in action again, although we’re now using the flags argument to specify more than just default behavior. The flag cudaHostAllocMapped tells the runtime that we intend to access this buffer from the GPU. In other words, this flag is what makes our buffer zero-copy. For the two input buffers, we specify the flag cudaHostAllocWriteCombined. This flag indicates that the runtime should allocate the buffer as write-combined with respect to the CPU cache. This flag will not change functionality in our application but represents an important performance enhancement for buffers that will be read only by the GPU. However, write-combined memory can be extremely inefficient in scenarios where the CPU also needs to perform reads from the buffer, so you will have to consider your application’s likely access patterns when making this decision.
Since we’ve allocated our host memory with the flag cudaHostAllocMapped, the buffers can be accessed from the GPU. However, the GPU has a different virtual memory space than the CPU, so the buffers will have different addresses when they’re accessed on the GPU as compared to the CPU. The call to cudaHostAlloc() returns the CPU pointer for the memory, so we need to call cudaHostGetDevicePointer() in order to get a valid GPU pointer for the memory. These pointers will be passed to the kernel and then used by the GPU to read from and write to our host allocations:
With valid device pointers in hand, we’re ready to start our timer and launch our kernel.

Even though the pointers dev_a, dev_b, and dev_partial_c all reside on the host, they will look to our kernel as if they are GPU memory, thanks to our calls to cudaHostGetDevicePointer(). Since our partial results are already on the host, we don’t need to bother with a cudaMemcpy() from the device. However, you will notice that we’re synchronizing the CPU with the GPU by calling cudaThreadSynchronize(). The contents of zero-copy memory are undefined during the execution of a kernel that potentially makes changes to its contents. After synchronizing, we’re sure that the kernel has completed and that our zero-copy buffer contains the results so we can stop our timer and finish the computation on the CPU as we did before.
The only thing remaining in the cudaHostAlloc() version of the dot product is cleanup.
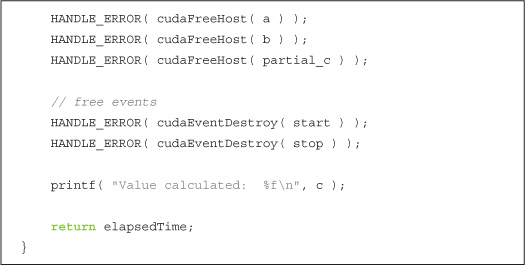
You will notice that no matter what flags we use with cudaHostAlloc(), the memory always gets freed in the same way. Specifically, a call to cudaFreeHost() does the trick.
And that’s that! All that remains is to look at how main() ties all of this together. The first thing we need to check is whether our device supports mapping host memory. We do this the same way we checked for device overlap in the previous chapter, with a call to cudaGetDeviceProperties().
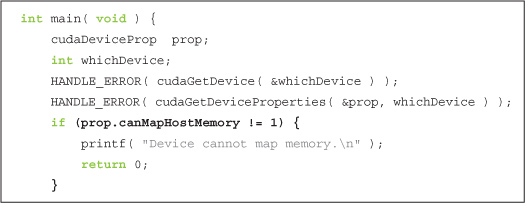
Assuming that our device supports zero-copy memory, we place the runtime into a state where it will be able to allocate zero-copy buffers for us. We accomplish this by a call to cudaSetDeviceFlags() and by passing the flag cudaDeviceMapHost to indicate that we want the device to be allowed to map host memory:
![]()
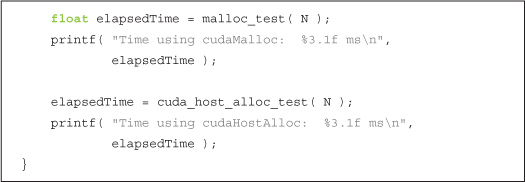
That’s really all there is to main(). We run our two tests, display the elapsed time, and exit the application:
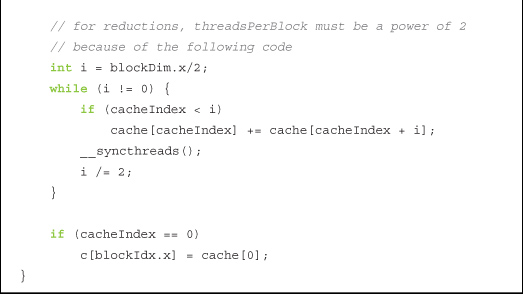
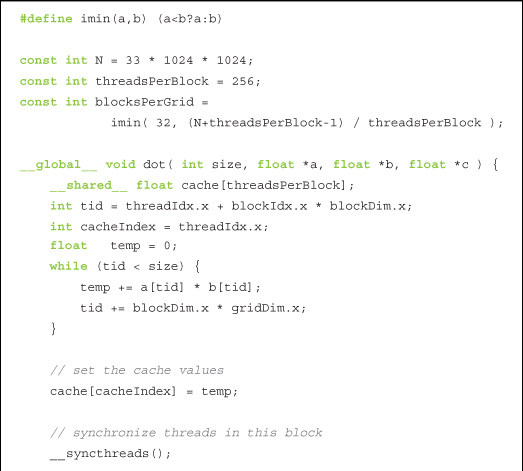
The kernel itself is unchanged from Chapter 5, but for the sake of completeness, here it is in its entirety:
11.2.2 Zero-Copy Performance
What should we expect to gain from using zero-copy memory? The answer to this question is different for discrete GPUs and integrated GPUs. Discrete GPUs are graphics processors that have their own dedicated DRAMs and typically sit on separate circuit boards from the CPU. For example, if you have ever installed a graphics card into your desktop, this GPU is a discrete GPU. Integrated GPUs are graphics processors built into a system’s chipset and usually share regular system memory with the CPU. Many recent systems built with NVIDIA’s nForce media and communications processors (MCPs) contain CUDA-capable integrated GPUs. In addition to nForce MCPs, all the netbook, notebook, and desktop computers based on NVIDIA’s new ION platform contain integrated, CUDA-capable GPUs. For integrated GPUs, the use of zero-copy memory is always a performance win because the memory is physically shared with the host anyway. Declaring a buffer as zero-copy has the sole effect of preventing unnecessary copies of data. But remember that nothing is free and that zero-copy buffers are still constrained in the same way that all pinned memory allocations are constrained: Each pinned allocation carves into the system’s available physical memory, which will eventually degrade system performance.
In cases where inputs and outputs are used exactly once, we will even see a performance enhancement when using zero-copy memory with a discrete GPU. Since GPUs are designed to excel at hiding the latencies associated with memory access, performing reads and writes over the PCI Express bus can be mitigated to some degree by this mechanism, yielding a noticeable performance advantage. But since the zero-copy memory is not cached on the GPU, in situations where the memory gets read multiple times, we will end up paying a large penalty that could be avoided by simply copying the data to the GPU first.
How do you determine whether a GPU is integrated or discrete? Well, you can open up your computer and look, but this solution is fairly unworkable for your CUDA C application. Your code can check this property of a GPU by, not surprisingly, looking at the structure returned by cudaGetDeviceProperties(). This structure has a field named integrated, which will be true if the device is an integrated GPU and false if it’s not.
Since our dot product application satisfies the “read and/or write exactly once” constraint, it’s possible that it will enjoy a performance boost when run with zero-copy memory. And in fact, it does enjoy a slight boost in performance. On a GeForce GTX 285, the execution time improves by more than 45 percent, dropping from 98.1ms to 52.1ms when migrated to zero-copy memory. A GeForce GTX 280 enjoys a similar improvement, speeding up by 34 percent from 143.9 ms to 94.7ms. Of course, different GPUs will exhibit different performance characteristics because of varying ratios of computation to bandwidth, as well as because of variations in effective PCI Express bandwidth across chipsets.
11.3 Using Multiple GPUs
In the previous section, we mentioned how devices are either integrated or discrete GPUs, where the former is built into the system’s chipset and the latter is typically an expansion card in a PCI Express slot. More and more systems contain both integrated and discrete GPUs, meaning that they also have multiple CUDA-capable processors. NVIDIA also sells products, such as the GeForce GTX 295, that contain more than one GPU. A GeForce GTX 295, while physically occupying a single expansion slot, will appear to your CUDA applications as two separate GPUs. Furthermore, users can also add multiple GPUs to separate PCI Express slots, connecting them with bridges using NVIDIA’s scalable link interface (SLI) technology. As a result of these trends, it has become relatively common to have a CUDA application running on a system with multiple graphics processors. Since our CUDA applications tend to be very parallelizable to begin with, it would be excellent if we could use every CUDA device in the system to achieve maximum throughput. So, let’s figure out how we can accomplish this.
To avoid learning a new example, let’s convert our dot product to use multiple GPUs. To make our lives easier, we will summarize all the data necessary to compute a dot product in a single structure. You’ll see momentarily exactly why this will make our lives easier.

This structure contains the identification for the device on which the dot product will be computed; it contains the size of the input buffers as well as pointers to the two inputs a and b. Finally, it has an entry to store the value computed as the dot product of a and b.
To use N GPUs, we first would like to know exactly what value of N we’re dealing with. So, we start our application with a call to cudaGetDeviceCount() in order to determine how many CUDA-capable processors have been installed in our system.
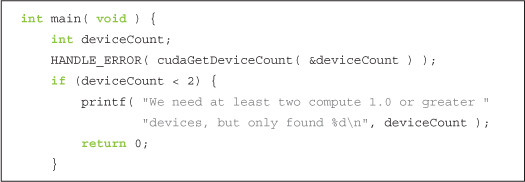
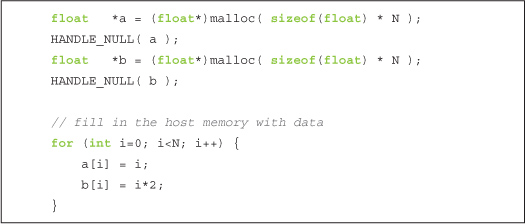
This example is designed to show multi-GPU usage, so you’ll notice that we simply exit if the system has only one CUDA device (not that there’s anything wrong with that). This is not encouraged as a best practice for obvious reasons. To keep things as simple as possible, we’ll allocate standard host memory for our inputs and fill them with data exactly how we’ve done in the past.
We’re now ready to dive into the multi-GPU code. The trick to using multiple GPUs with the CUDA runtime API is realizing that each GPU needs to be controlled by a different CPU thread. Since we have used only a single GPU before, we haven’t needed to worry about this. We have moved a lot of the annoyance of multithreaded code to our file of auxiliary code, book.h. With this code tucked away, all we need to do is fill a structure with data necessary to perform the computations. Although the system could have any number of GPUs greater than one, we will use only two of them for clarity:
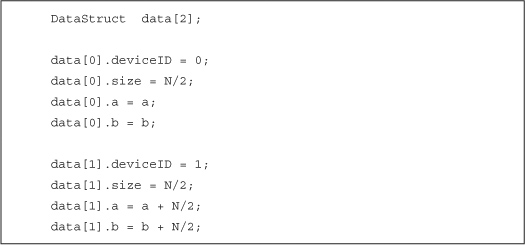
To proceed, we pass one of the DataStruct variables to a utility function we’ve named start_thread(). We also pass start_thread() a pointer to a function to be called by the newly created thread; this example’s thread function is called routine(). The function start_thread() will create a new thread that then calls the specified function, passing the DataStruct to this function. The other call to routine() gets made from the default application thread (so we’ve created only one additional thread).

Before we proceed, we have the main application thread wait for the other thread to finish by calling end_thread().
![]()
Since both threads have completed at this point in main(), it’s safe to clean up and display the result.
Notice that we sum the results computed by each thread. This is the last step in our dot product reduction. In another algorithm, this combination of multiple results may involve other steps. In fact, in some applications, the two GPUs may be executing completely different code on completely different data sets. For simplicity’s sake, this is not the case in our dot product example.
Since the dot product routine is identical to the other versions you’ve seen, we’ll omit it from this section. However, the contents of routine() may be of interest. We declare routine() as taking and returning a void* so that you can reuse the start_thread() code with arbitrary implementations of a thread function. Although we’d love to take credit for this idea, it’s fairly standard procedure for callback functions in C:

Each thread calls cudaSetDevice(), and each passes a different ID to this function. As a result, we know each thread will be manipulating a different GPU. These GPUs may have identical performance, as with the dual-GPU GeForce GTX 295, or they may be different GPUs as would be the case in a system that has both an integrated GPU and a discrete GPU. These details are not important to our application, though they might be of interest to you. Particularly, these details prove useful if you depend on a certain minimum compute capability to launch your kernels or if you have a serious desire to load balance your application across the system’s GPUs. If the GPUs are different, you will need to do some work to partition the computations so that each GPU is occupied for roughly the same amount of time. For our purposes in this example, however, these are piddling details with which we won’t worry.
Outside the call to cudaSetDevice() to specify which CUDA device we intend to use, this implementation of routine() is remarkably similar to the vanilla malloc_test() from Section 11.2.1: Zero-Copy Dot Product. We allocate buffers for our GPU copies of the input and a buffer for our partial results followed by a cudaMemcpy() of each input array to the GPU.
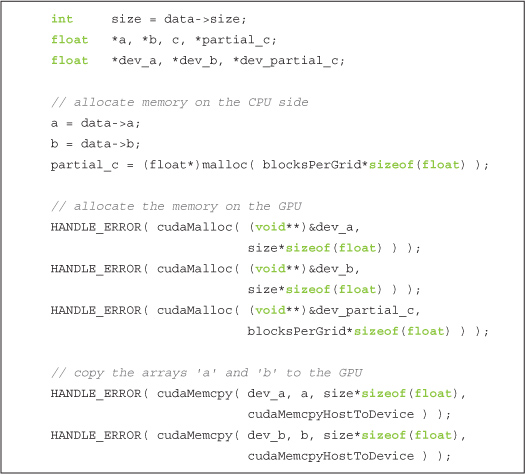
We then launch our dot product kernel, copy the results back, and finish the computation on the CPU.
As usual, we clean up our GPU buffers and return the dot product we’ve computed in the returnValue field of our DataStruct.
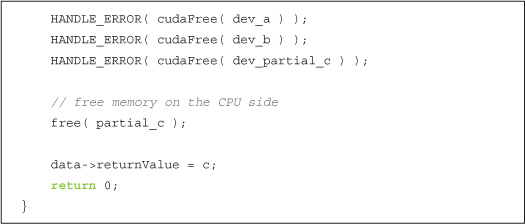
So when we get down to it, outside of the host thread management issue, using multiple GPUs is not too much tougher than using a single GPU. Using our helper code to create a thread and execute a function on that thread, this becomes significantly more manageable. If you have your own thread libraries, you should feel free to use them in your own applications. You just need to remember that each GPU gets its own thread, and everything else is cream cheese.
11.4 Portable Pinned Memory
The last important piece to using multiple GPUs involves the use of pinned memory. We learned in Chapter 10 that pinned memory is actually host memory that has its pages locked in physical memory to prevent it from being paged out or relocated. However, it turns out that pages can appear pinned to a single CPU thread only. That is, they will remain page-locked if any thread has allocated them as pinned memory, but they will only appear page-locked to the thread that allocated them. If the pointer to this memory is shared between threads, the other threads will see the buffer as standard, pageable data.
As a side effect of this behavior, when a thread that did not allocate a pinned buffer attempts to perform a cudaMemcpy() using it, the copy will be performed at standard pageable memory speeds. As we saw in Chapter 10, this speed can be roughly 50 percent of the maximum attainable transfer speed. What’s worse, if the thread attempts to enqueue a cudaMemcpyAsync() call into a CUDA stream, this operation will fail because it requires a pinned buffer to proceed. Since the buffer appears pageable from the thread that didn’t allocate it, the call dies a grisly death. Even in the future nothing works!
But there is a remedy to this problem. We can allocate pinned memory as portable, meaning that we will be allowed to migrate it between host threads and allow any thread to view it as a pinned buffer. To do so, we use our trusty cudaHostAlloc() to allocate the memory, but we call it with a new flag: cudaHostAllocPortable. This flag can be used in concert with the other flags you’ve seen, such as cudaHostAllocWriteCombined and cudaHostAllocMapped. This means that you can allocate your host buffers as any combination of portable, zero-copy and write-combined.
To demonstrate portable pinned memory, we’ll enhance our multi-GPU dot product application. We’ll adapt our original zero-copy version of the dot product, so this version begins as something of a mash-up of the zero-copy and multi-GPU versions. As we have throughout this chapter, we need to verify that there are at least two CUDA-capable GPUs and that both can handle zero-copy buffers.
In previous examples, we’d be ready to start allocating memory on the host to hold our input vectors. To allocate portable pinned memory, however, it’s necessary to first set the CUDA device on which we intend to run. Since we intend to use the device for zero-copy memory as well, we follow the cudaSetDevice() call with a call to cudaSetDeviceFlags(), as we did in Section 11.2.1: Zero-Copy Dot Product.
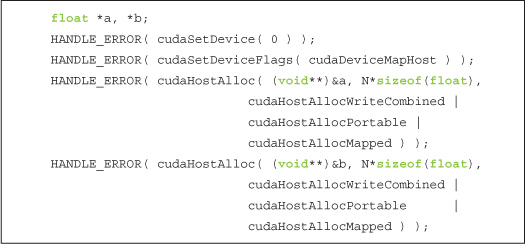
Earlier in this chapter, we called cudaSetDevice() but not until we had already allocated our memory and created our threads. One of the requirements of allocating portable page-locked memory with cudaHostAlloc(), though, is that we have initialized the device first by calling cudaSetDevice(). You will also notice that we pass our newly learned flag, cudaHostAllocPortable, to both allocations. Since these were allocated after calling cudaSetDevice(0), only CUDA device zero would see these buffers as pinned memory if we had not specified that they were to be portable allocations.
We continue the application as we have in the past, generating data for our input vectors and preparing our DataStruct structures as we did in the multi-GPU example in Section 11.3: Using Multiple GPUs.
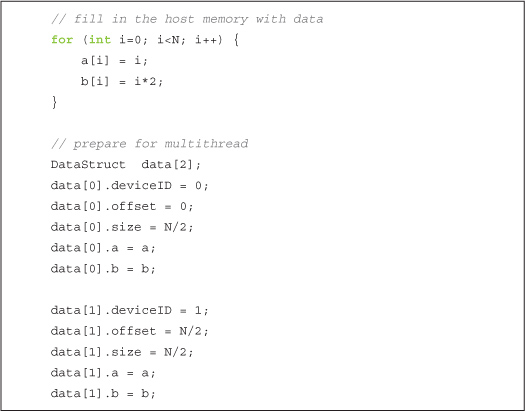
We can then create our secondary thread and call routine() to begin computing on each device.
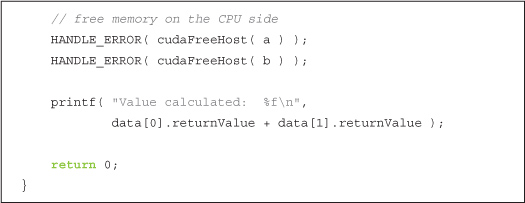
Because our host memory was allocated by the CUDA runtime, we use cudaFreeHost() to free it. Other than no longer calling free(), we have seen all there is to see in main().
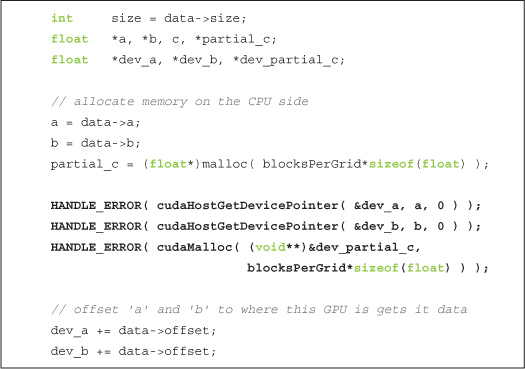
To support portable pinned memory and zero-copy memory in our multi-GPU application, we need to make two notable changes in the code for routine(). The first is a bit subtle, and in no way should this have been obvious.

You may recall in our multi-GPU version of this code, we need a call to cudaSetDevice() in routine() in order to ensure that each participating thread controls a different GPU. On the other hand, in this example we have already made a call to cudaSetDevice() from the main thread. We did so in order to allocate pinned memory in main(). As a result, we only want to call cudaSetDevice() and cudaSetDeviceFlags() on devices where we have not made this call. That is, we call these two functions if the deviceID is not zero. Although it would yield cleaner code to simply repeat these calls on device zero, it turns out that this is in fact an error. Once you have set the device on a particular thread, you cannot call cudaSetDevice() again, even if you pass the same device identifier. The highlighted if() statement helps us avoid this little nasty-gram from the CUDA runtime, so we move on to the next important change to routine().
In addition to using portable pinned memory for the host-side memory, we are using zero-copy in order to access these buffers directly from the GPU. Consequently, we no longer use cudaMemcpy() as we did in the original multi-GPU application, but we use cudaHostGetDevicePointer() to get valid device pointers for the host memory as we did in the zero-copy example. However, you will notice that we use standard GPU memory for the partial results. As always, this memory gets allocated using cudaMalloc().
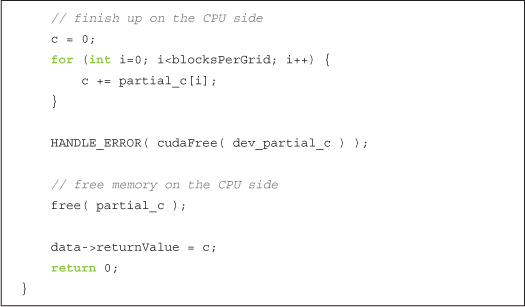
At this point, we’re pretty much ready to go, so we launch our kernel and copy our results back from the GPU.

We conclude as we always have in our dot product example by summing our partial results on the CPU, freeing our temporary storage, and returning to main().
11.5 Chapter Review
We have seen some new types of host memory allocations, all of which get allocated with a single call, cudaHostAlloc(). Using a combination of this one entry point and a set of argument flags, we can allocate memory as any combination of zero-copy, portable, and/or write-combined. We used zero-copy buffers to avoid making explicit copies of data to and from the GPU, a maneuver that potentially speeds up a wide class of applications. Using a support library for threading, we manipulated multiple GPUs from the same application, allowing our dot product computation to be performed across multiple devices. Finally, we saw how multiple GPUs could share pinned memory allocations by allocating them as portable pinned memory. Our last example used portable pinned memory, multiple GPUs, and zero-copy buffers in order to demonstrate a turbocharged version of the dot product we started toying with back in Chapter 5. As multiple-device systems gain popularity, these techniques should serve you well in harnessing the computational power of your target platform in its entirety.
