
Chapter 12. Launchers and Choosers
In This Chapter
• The internal workings of chooser event tombstoning
• Providing directions using the built-in Maps app
• Sending emails, SMS messages, and making calls
• Sharing links on social networks
• Launching the built-in Marketplace app
• Launching the built-in web browser app
• Launching the phone’s network settings pages
• Playing local and remote media files
• Capturing images
• Saving ringtones
• Retrieving the user’s contacts and appointments
• Data binding to ListBox.SelectedItems
Windows Phone apps execute within a sandbox and lack direct access to phone services like email and messaging. Launchers and choosers allow your app to reach outside the sandbox in a safe and system friendly way to give indirect access to a set of built-in system applications.
Launchers and choosers are fundamental to Windows Phone development. They enable users to perform common tasks in the same way across all apps, providing a consistent user experience.
This chapter begins by looking at the two types of tasks: launchers and choosers. It then explores the execution model of choosers, the internal workings of event subscriptions that span across application lifetimes. It then examines each launcher and chooser in detail.
Finally, the chapter examines how to programmatically retrieve contact and appointment information in a read-only manner.
Many launchers and choosers are presented in this chapter, so do not feel like you need to absorb them all at once. You may want to skim over them, just to get a feel for what is on offer, and then refer back to this chapter when you are implementing a particular launcher or chooser in your app.
API Overview
The launcher and chooser API is located in the Microsoft.Phone.Tasks namespace of the Microsoft.Phone.dll assembly.
Launchers and choosers share two characteristics. First, all contain a Show method, which initiates an associated system app. Second, all cause your app to be deactivated when the Show method is called. For more information on deactivation, see Chapter 3, “Application Execution Model.”
Both launchers and choosers use an internal API, and there is little or no capability for custom launchers or choosers. In addition, nearly all are sealed classes, meaning that extending the existing implementations is not possible. The one exception is the MediaPlayerLauncher task, though subclassing it would serve little to no purpose since it has no virtual or protected members.
Launchers are a set of classes that do not return data to your application; they are fire and forget. Launchers, in general, do not share a common base class or interface.
Conversely, choosers derive from the ChooserBase<TTaskEventArgs> class, which contains a Completed event that is raised when the user either completes a task, such as selecting an image with the PhotoChooserTask, or when the user cancels the task, either explicitly within the system app or by using the hardware Back button.
The generic parameter TTaskEventArgs of the ChooserBase class specifies the type passed to the event handler for the Completed event.
When your app is activated, after being deactivated by calling the Show method of a chooser, the chooser’s Completed event is raised. This occurs even if the user takes a detour to another app or to the Start Experience (home screen), and then returns to your application via the hardware Back button.
The Windows Phone launchers and choosers available for your application are listed in Table 12.1.
Table 12.1. Launchers and Choosers

Choosers and the Application Execution Model
Recall from Chapter 3 that when tombstoned, your app is terminated, and therefore all regular CLR event subscriptions are discarded. Well, choosers use a subscription model that relies on CLR events, and using a chooser can lead to your app being tombstoned. To contend with this, the chooser infrastructure has some interesting plumbing that allows it to survive tombstoning and to reinstate subscriptions to the ChooserBase.Completed event when an app is reactivated.
Internal Workings of the ChooserBase.Completed Event
When subscription to the ChooserBase.Completed event occurs, the location of the subscription, in particular the class name and method name, is used as an identifier for the event subscription. This information is serialized to your app’s transient state, allowing it to survive application termination. When the system application associated with the chooser completes, your app is restarted, and the OS signals that a chooser has completed by invoking a static method. When the event subscription occurs again in your class, the subscription identifier is re-created and compared with the list of subscription identifiers for that chooser. If there is a match, the event handler in your class is called.
To understand this further, consider the following code:
readonly SaveEmailAddressTask saveEmailAddressTask
= new SaveEmailAddressTask();
public SomeViewModel()
{
/* Step 2. */
saveEmailAddressTask.Completed += saveEmailAddressTask_Completed;
/* Step 4. */
Debug.WriteLine("Constructor.");
}
public void ShowLauncher()
{
/* Step 1. */
saveEmailAddressTask.Show();
}
void saveEmailAddressTask_Completed(object sender, TaskEventArgs e)
{
/* Step 3. */
Debug.WriteLine("Task Completed.");
}
Subscription to the SaveEmailAddressTask.Completed event is performed in the viewmodel’s constructor. When the Show method of the saveEmailAddressTask is called (step 1) the user app is deactivated. Presuming that the app is tombstoned, when the system app completes and the user app is restarted and activated, the viewmodel’s constructor is called again (step 2). When the event subscription occurs this time, however, the Completed event is raised and the event handler is called (step 3). When the event handler returns, the code in the constructor resumes (step 4).
When subscribing to the Completed event of a chooser, declare the chooser at the class level and subscribe to the event within the class constructor.
Launchers and Choosers in Detail
The following sections cover each launcher and chooser class in detail. There is some repetition in the structure of several of the sections, but each is intended to be self-contained to allow you to look up a particular launcher or chooser when needed.
The examples presented in this chapter show tasks used directly from within viewmodel classes. Chapter 22, “Unit Testing,” looks at techniques for removing the dependency on the Silverlight for Windows Phone SDK, which allows your code to be more portable across other platforms.
Retrieve Driving Directions Using the BingMapsDirectionsTask
The Bing Maps directions task launches the built-in Maps application and displays driving directions between two points. A start and an end point can be specified using the task’s Start and End properties, which are of type LabeledMapLocation. If only one location is specified, the user’s current location is used as the second location.
At least one of the Start or End properties must be specified, or an InvalidOperationException is thrown when you call the BingMapsDirectionsTask.Show method.
Both Start and End properties allow you to specify a string label and geographic coordinates indicating the latitude and longitude of the location. If you omit the geographic coordinates, the Maps application searches for the label string.
The following example demonstrates how to launch the Maps application to search for two locations.
BingMapsDirectionsTask bingMapsDirectionsTask
= new BingMapsDirectionsTask();
...
bingMapsDirectionsTask.Start = new LabeledMapLocation("geneva", null);
bingMapsDirectionsTask.End = new LabeledMapLocation("london", null);
bingMapsDirectionsTask.Show();
To specify geographic coordinates, insert a using statement for System.Device.Location at the top of your class. A GeoCoordinate can then be passed to the task as shown:
GeoCoordinate geoCoordinate = new GeoCoordinate(46.25829, 6.20966);
bingMapsDirectionsTask.Start
= new LabeledMapLocation("Geneva", geoCoordinate);
bingMapsDirectionsTask.Show();
By specifying the geographic coordinates, the Maps application places a label at the location using the supplied text.
The sample for this section allows the user to enter the start and end search terms, and to launch the BingMapsDirectionsTask via an application bar button.
The sample can be found in the LaunchersAndChoosers/BingMaps directory of the WindowsPhone7Unleashed.Examples project.
The BingMapsDirectionsTaskViewModel class contains two string properties, which are used as search terms for a BingMapsDirectionsTask (see Listing 12.1).
An ICommand, named SearchCommand, initializes the BingMapsDirectionsTask and calls its Show method.
Listing 12.1. BingMapsDirectionsTaskViewModel Class
public class BingMapsDirectionsTaskViewModel : ViewModelBase
{
readonly BingMapsDirectionsTask bingMapsDirectionsTask
= new BingMapsDirectionsTask();
public BingMapsDirectionsTaskViewModel() : base("get directions")
{
searchCommand = new DelegateCommand(arg => ShowTask());
}
void ShowTask()
{
bingMapsDirectionsTask.Start
= new LabeledMapLocation(startLocation, null);
bingMapsDirectionsTask.End
= new LabeledMapLocation(endLocation, null);
bingMapsDirectionsTask.Show();
}
readonly DelegateCommand searchCommand;
public ICommand SearchCommand
{
get
{
return searchCommand;
}
}
string startLocation;
public string StartLocation
{
get
{
return startLocation;
}
set
{
Assign(() => StartLocation, ref startLocation, value);
}
}
string endLocation;
public string EndLocation
{
get
{
return endLocation;
}
set
{
Assign(() => EndLocation, ref endLocation, value);
}
}
}
The BingMapsDirectionsTaskView page contains two TextBox controls that are bound to the viewmodel string properties, as shown:
<StackPanel x:Name="ContentPanel" Grid.Row="1">
<TextBlock Text="start location"
Style="{StaticResource LabelTextStyle}" />
<TextBox Text="{Binding StartLocation, Mode=TwoWay}" />
<TextBlock Text="end location"
Style="{StaticResource LabelTextStyle}" />
<TextBox Text="{Binding EndLocation, Mode=TwoWay}" />
</StackPanel>
In addition, the view contains an AppBarIconButton that is used to execute the viewmodel’s SearchCommand. See the following excerpt:
<u:AppBar>
<u:AppBarIconButton
Command="{Binding SearchCommand}"
Text="Search"
IconUri="/LaunchersAndChoosers/BingMaps/Images/AppBarSearch.png" />
</u:AppBar>
Figure 12.1 shows the view before launching the Bing Maps directions task.
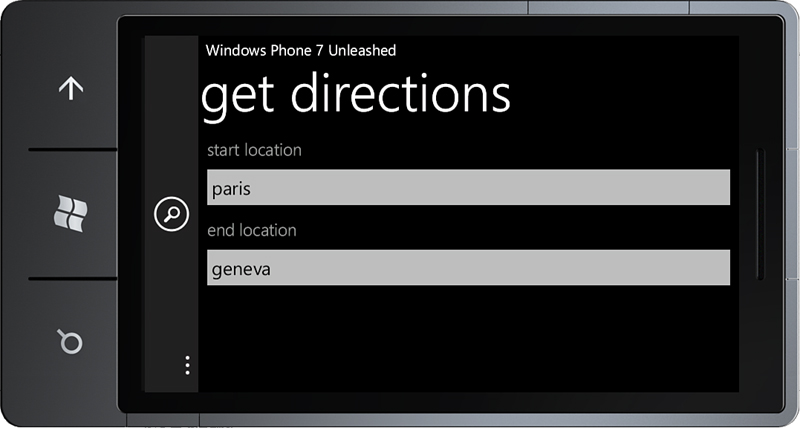
Figure 12.1. BingMapsDirectionsTaskView page
Tapping the Search button launches the built-in Maps application (see Figure 12.2).
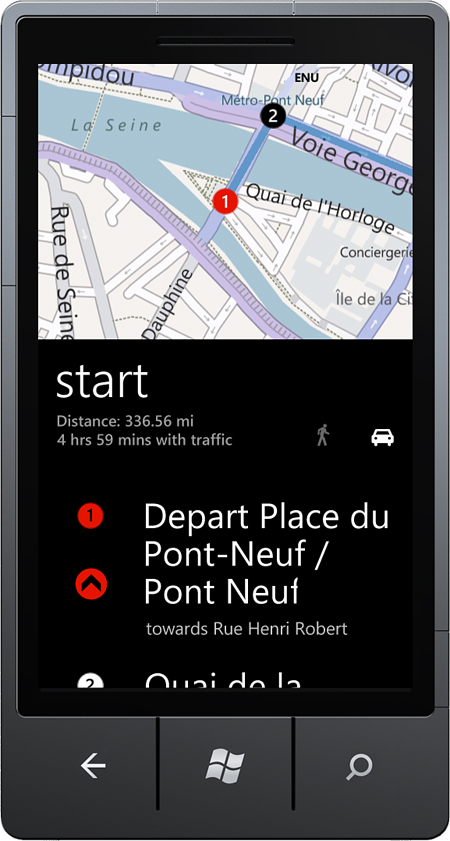
Figure 12.2. Built-in Maps application
The Bing Maps directions task is a simple way to launch the built-in Maps application. Chapter 16, “Bing Maps,” shows how to build similar capabilities directly into your app, allowing you to completely customize how direction information is presented.
Displaying a Location on a Map Using the BingMapsTask
The Bing Maps task allows you to launch the built-in Maps application centered at the location specified by the BingMapsTask.Center property, which is of type GeoCoordinate. If not specified the map is centered at the user’s current location. If provided, the Center property is ignored and the BingMapsTask.SearchTerm property is used to search for matching locations. The best match is then tagged on the map.
To use the BingMapsTask to search for a location, define it as a field in your class and set its SearchTerm property, as demonstrated:
BingMapsTask bingMapsTask = new BingMapsTask();
...
bingMapsTask.SearchTerm = "prague";
bingMapsTask.Show();
The following example demonstrates how to specify a geographic location:
bingMapsTask.Center = new GeoCoordinate(50.08021, 14.416983);
bingMapsTask.Show();
A sample for the BingMapsTask can be found in the LaunchersAndChoosers/BingMaps directory of the WindowsPhone7Unleashed.Examples project. The sample is almost identical to the previous BingMapsDirectionsTask sample.
Navigating to a Connection Setting Page Using the ConnectionSettingsTask
The connection settings task allows you to launch a settings page for a specified set of network connection related settings.
The ConnectionSettingsType property of the ConnectionSettingsTask class allows you to display the settings dialog using one of the following four ConnectionSettingsType values:
• AirplaneMode
• Bluetooth
• Cellular
• WiFi
To display the Wi-Fi settings dialog, for example, use the following:
ConnectionSettingsTask task = new ConnectionSettingsTask();
task.ConnectionSettingsType = ConnectionSettingsType.WiFi;
task.Show();
The four built-in settings pages available to the ConnectionSettingsTask are shown in Figure 12.3.
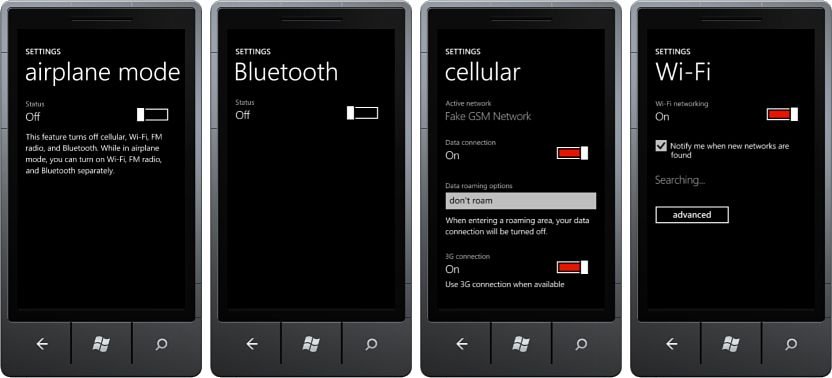
Figure 12.3. Connection settings pages
The sample for the ConnectionSettingsTask allows you to select one of the ConnectionSettingsType values from a Silverlight Toolkit ListPicker control (see Figure 12.4). Tapping the Settings button in the application bar executes an ICommand in the viewmodel, which initializes and calls the Show method of the ConnectionSettingsTask.
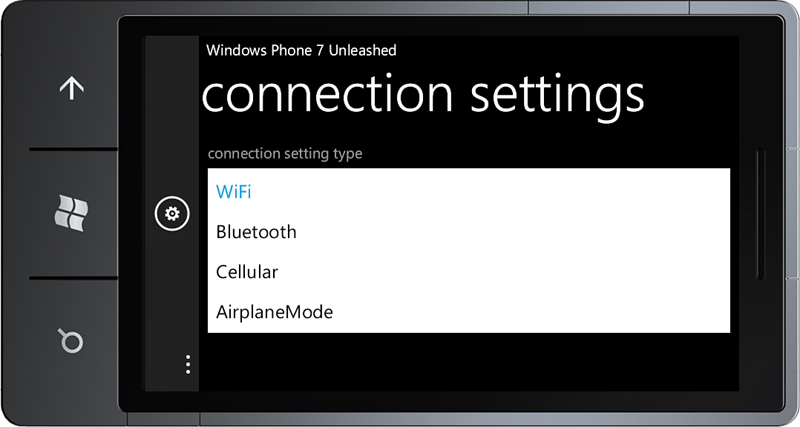
Figure 12.4. ConnectionSettingsTaskView page
Selecting an Email Address with the EmailAddressChooserTask
The email address chooser task launches the Windows Phone Contacts application and allows the user to select a contact. When the user completes the task, the Completed event is raised, and the event handler receives an EmailResult object that exposes a string containing the selected contact’s email address.
To query the user’s contact list, without requiring the user to select a contact, use the Contacts class, which is described later in this chapter.
The EmailAddressChooserTask should be defined as a field in your class, like so:
readonly EmailAddressChooserTask emailAddressChooserTask
= new EmailAddressChooserTask();
Subscribe to the EmailAddressChooserTask.Completed event within your class constructor, as shown:
emailAddressChooserTask.Completed
+= new EventHandler<EmailResult>(HandleEmailAddressChooserTaskCompleted);
Use the Show method of the EmailAddressChooserTask to launch the built-in Contacts app. When the task completes the handler receives an EmailResult object, as shown:
void HandleEmailAddressChooserTaskCompleted(object sender, EmailResult e)
{
if (e.TaskResult == TaskResult.OK)
{
ToAddress = e.Email;
}
else if (e.Error != null)
{
Message = "Unable to choose email address. " + e.ToString();
}
else if (e.TaskResult == TaskResult.Cancel)
{
Message = "Cancelled";
}
}
Sample Overview
Example code for the EmailComposeTask can be found in the EmailViewModel in the downloadable sample code. The EmailView allows the user to select the recipient and to launch a new EmailComposeTask via a button (see Figure 12.5).
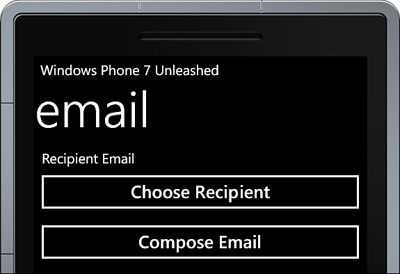
Figure 12.5. The EmailView page
The viewmodel contains a public property of type ICommand called ChooseRecipientCommand. The view’s Choose Email button is bound to the command.
When the ChooseRecipientCommand is executed, the Show method of the emailAddressChooserTask is called. This behavior is defined in the viewmodel constructor, as shown:
public EmailViewModel() : base("Email")
{
emailAddressChooserTask.Completed
+= HandleEmailAddressChooserTaskCompleted;
chooseRecipientCommand = new DelegateCommand(
obj => emailAddressChooserTask.Show());
...
}
When the EmailAddressChooserTask.Show method is called, the built-in Contacts application is launched (see Figure 12.6).
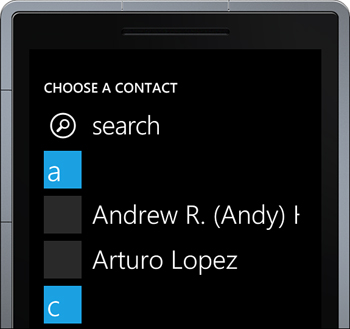
Figure 12.6. The Windows Phone Contacts application
The result returned by the Contacts app is used by an EmailComposeTask, which is presented in the next section.
Preparing an Email with the EmailComposeTask
The EmailComposeTask launches the Windows Phone Email application, which displays a page allowing the user to create a new email.
You can optionally specify recipients, a message subject, and a message body, which are prepopulated in the new email, as shown in the following excerpt:
EmailComposeTask task = new EmailComposeTask
{
To = "[email protected]",
Cc = "[email protected]",
Subject = "Windows Phone",
Body = "Hi from Windows Phone!"
};
task.Show();
Multiple recipients in the To and Cc properties can be specified by delimiting the address with a semicolon character.
Sample Overview
Example code for the EmailComposeTask can be found in the EmailViewModel in the downloadable sample code. The EmailView allows the user to select the recipient and to launch a new EmailComposeTask via a button (shown previously in Figure 12.5).
The view’s Compose Email button is bound to a viewmodel command called ComposeCommand.
When executed, the ComposeCommand creates a new EmailComposeTask and sets its To property to the text supplied by the EmailAddressChooserTask. This behavior is defined in the EmailViewModel constructor, as shown:
public EmailViewModel() : base("Email")
{
...
composeCommand = new DelegateCommand(
delegate
{
EmailComposeTask emailComposeTask
= new EmailComposeTask
{
To = toAddress,
Subject = "Windows Phone 7 Unleashed",
Body = "Hi from Windows Phone 7!"
};
emailComposeTask.Show();
});
}
When the EmailComposeTask.Show method is called, the built-in Email application is launched. If the user has multiple email accounts defined on the device, the Email application prompts the user to select which account to use. The user is then presented with a new email message, prepopulated with the To, Cc, Subject, and Body properties of the EmailComposeTask.
Saving a Contact’s Email Using the SaveEmailAddressTask
The SaveEmailAddressTask is a chooser that allows the user to save a specified email address using the built-in Contacts application. An email address can be saved to an existing contact, or to a new contact. SaveEmailAddressTask does not return data, but its Completed event can be handled to determine whether the task was completed correctly.
The SaveEmailAddressTask should be defined as a field in your class, like so:
readonly SaveEmailAddressTask saveEmailAddressTask
= new SaveEmailAddressTask();
Subscribe to the SaveEmailAddressTask.Completed event within your class constructor, as shown:
saveEmailAddressTask.Completed += HandleSaveEmailAddressTaskCompleted;
Use the Show method of the SaveEmailAddressTask to launch the built-in Contacts app. When the task completes the handler receives a TaskEventArgs object, as shown:
void HandleSaveEmailAddressTaskCompleted(object sender, TaskEventArgs e)
{
if (e.Error != null)
{
Message = "Unable to save the email address. " + e.Error;
return;
}
if (e.TaskResult == TaskResult.OK)
{
Message = "Email address saved";
}
else if (e.TaskResult == TaskResult.Cancel)
{
Message = "Cancelled";
}
}
Sample Overview
Example code for the SaveEmailAddressTask can be found in the SaveEmailAddressViewModel in the downloadable sample code.
The SaveEmailAddressView page allows the user to enter an email address and then to initiate the SaveEmailAddressTask using a button (see Figure 12.7).
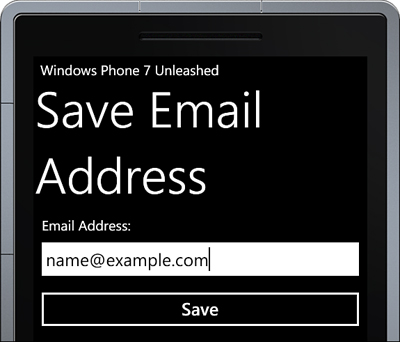
Figure 12.7. SaveEmailAddressView page
The view’s Email Address TextBlock has a two-way binding to the viewmodel’s EmailAddress property, as shown:
<TextBox Text="{Binding EmailAddress, Mode=TwoWay}"
InputScope="EmailSmtpAddress" />
The InputScope property of the TextBox causes the onscreen keyboard to be displayed with a set of keys suitable for typing an email address. For more information on InputScopes, see Chapter 6, “Text Elements.”
To initiate the SaveEmailAddressTask, the viewmodel contains a public property called SaveCommand:
readonly DelegateCommand saveCommand;
public ICommand SaveCommand
{
get
{
return saveCommand;
}
}
When the saveCommand is executed, the Show method of the saveEmailAddressTask is called. This behavior is defined in the viewmodel’s construct, as shown in the following excerpt:
public SaveEmailAddressViewModel() : base("Save Email Address")
{
saveEmailAddressTask.Completed += saveEmailAddressTask_Completed;
saveCommand = new DelegateCommand(
delegate
{
Message = string.Empty;
saveEmailAddressTask.Email = emailAddress;
saveEmailAddressTask.Show();
});
}
The view’s Save button is bound to the SaveCommand, as shown:
<Button Command="{Binding SaveCommand}"
Content="Save" />
When the saveEmailAddressTask.Show method is called, the built-in Contacts application is launched (see Figure 12.8).
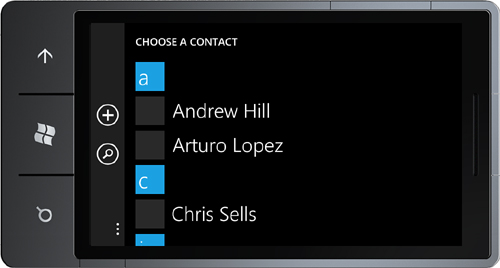
Figure 12.8. The Contacts application allows the user to select an existing contact or create a new one.
When the user selects either an existing contact or the new contact option, the Edit Email page is displayed (see Figure 12.9).
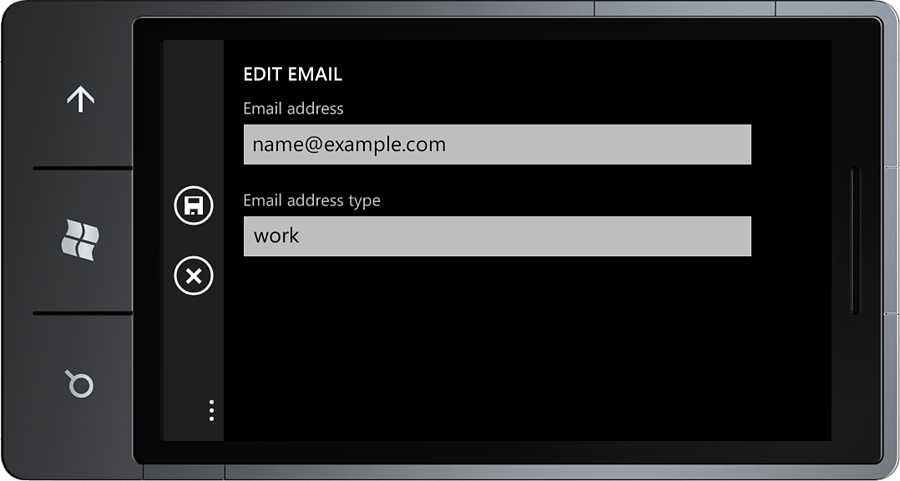
Figure 12.9. Edit Email page
If the user selects an existing contact, when the Save icon button is tapped, the Edit Phone Contact page is displayed (see Figure 12.10).

Figure 12.10. Edit Phone Contact page
Alternatively, if the user opts to create a new contact, the New Contact page is displayed.
Once the contact information is saved using the disk icon, the sample application is activated, and the HandleSaveEmailAddressTaskCompleted handler is called.
Navigating to an App on the Marketplace with the MarketplaceDetailTask
The Marketplace detail task is used to launch the built-in Marketplace app, which shows the details page for a product specified by a unique identifier that you provide. If an identifier is not specified, the details page for the current application is shown.
The following code demonstrates how to launch the MarketplaceDetailTask:
MarketplaceDetailTask task
= new MarketplaceDetailTask
{
ContentIdentifier = "<ID>",
//ContentType = MarketplaceContentType.Applications
};
task.Show();
The MarketplaceDetailTask has two properties: ContentIdentifier and ContentType. The ContentIdentifier is the unique product identifier for an app. When an application is published on the Windows Phone Marketplace it is assigned a unique identifier, which is located in a ProductID attribute of the WMAppManifest.xml file. This identifier can be used to launch the MarketplaceDetailsTask from other apps.
If the ContentIdentifier is specified, the value must be a valid product identifier. If the identifier has an invalid format, a FormatException is raised. The identifier format is 32 digits separated by hyphens and enclosed in braces, as shown in the following example:
{45dc3711-8af7-42bf-a749-6c491f2b427f}
As an aside, this format can be achieved using a Guid, by calling its ToString method with “B” as the format argument, as shown:
string productId = guid.ToString("B");
Retrieving Your Application’s Product ID at Runtime
While the ContentIdentifier is not required to launch the MarketplaceDetailTask for the current app, it is required to launch the details page for a different app. This value can be read at runtime by retrieving the WMAppManifest.xml file using the Application.GetResourceStream method, and then by extracting the value using the System.Xml.Linq API, as shown in the following excerpt:
public string GetProductId()
{
Uri uri = new Uri("WMAppManifest.xml", UriKind.Relative);
StreamResourceInfo info
= Application.GetResourceStream(uri);
XElement manifestElement = XElement.Load(info.Stream);
XElement appElement = manifestElement.Element("App");
XAttribute idAttribute
= appElement.Attribute("ProductID");
return idAttribute.Value;
}
Sample Overview
Example code for the MarketplaceDetailTask can be found in the MarketplaceViewModel in the downloadable sample code. The MarketplaceView page includes a ListBox to select content type for the MarketplaceHubTask and the MarketplaceSearchTask, both of which are discussed later in this chapter, and buttons for exercising the various tasks (see Figure 12.11).
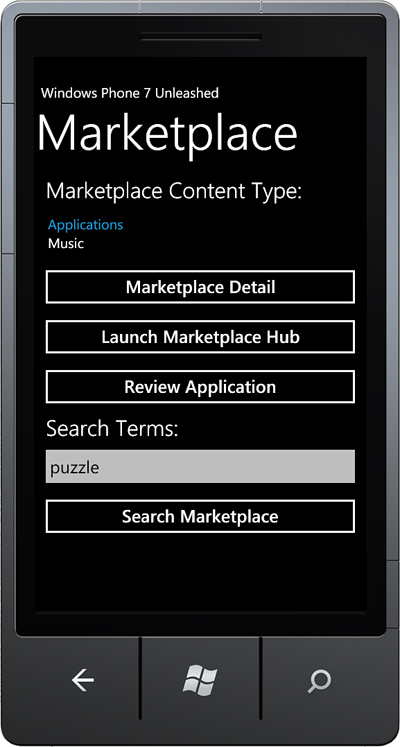
Figure 12.11. MarketplaceView page
The viewmodel contains a DetailCommand defined as follows:
readonly DelegateCommand detailCommand;
public ICommand DetailCommand
{
get
{
return detailCommand;
}
}
The detailCommand is instantiated in the MarketplaceViewModel constructor. When executed, the detailCommand creates a new MarketplaceDetailTask and calls its Show method. This behavior is defined in the viewmodel constructor, as shown:
public MarketplaceViewModel()
{
detailCommand = new DelegateCommand(
delegate
{
var task = new MarketplaceDetailTask();
task.Show();
});
// ...
}
The MarketPlaceView uses a button to execute the DetailCommand in the viewmodel:
<Button Command="{Binding DetailCommand}"
Content="Marketplace Detail" />
Launching the Marketplace App with the MarketplaceHubTask
The Marketplace hub task is used to launch the built-in Marketplace app.
The marketplace category can be specified using the ContentType property of the MarketplaceHubTask. Set the ContentType property to a value from the MarketplaceContentType enumeration to launch the hub to a particular type of content, as shown in the following excerpt:
MarketplaceHubTask task
= new MarketplaceHubTask
{
ContentType = MarketplaceContentType.Music
};
task.Show();
ContentType allows you to specify one of two categories: Music or Applications.
The only allowed value for the ContentType property is MarketplaceContentType.Applications, which is the default value if not supplied. If MarketplaceContentType.Music is used, an ArgumentException is raised.
Sample Overview
Example code for the MarketplaceHubTask can be found in the MarketplaceViewModel in the downloadable sample code.
The viewmodel contains an ICommand called HubCommand, which is instantiated in the MarketplaceViewModel constructor. A Silverlight Toolkit ListPicker allows the user to select the marketplace content type.
When executed, the hubCommand creates a new MarketplaceHubTask, sets its ContentType property, and calls its Show method, like so:
public MarketplaceViewModel()
{
hubCommand = new DelegateCommand(
delegate
{
MarketplaceHubTask task = new MarketplaceHubTask();
if (contentType.HasValue)
{
task.ContentType = contentType.Value;
}
task.Show();
});
// ...
}
Allowing the User to Review Your App Using the MarketplaceReviewTask
The Marketplace review task is used to launch the built-in Marketplace application. A review page allows the user to enter a text review for the current app and give it a rating out of five. The user can also see the average rating of the application by other users.
The MarketplaceReviewTask has no settable properties and is launched like so:
MarketplaceReviewTask task = new MarketplaceReviewTask();
task.Show();
Sample Overview
Example code for the MarketplaceReviewTask can be found in the MarketplaceViewModel in the downloadable sample code. The MarketPlaceView uses a button to execute an ICommand called ReviewCommand in the viewmodel.
The reviewCommand is instantiated in the MarketplaceViewModel constructor. When executed, the reviewCommand creates a new MarketplaceReviewTask and calls its Show method, like so:
public MarketplaceViewModel()
{
reviewCommand = new DelegateCommand(
delegate
{
MarketplaceReviewTask task = new MarketplaceReviewTask();
task.Show();
});
// ...
}
Searching the Marketplace with the MarketplaceSearchTask
The Marketplace search task is used to launch the built-in Marketplace app, which displays the search results for a specified search string.
The MarketplaceSearchTask class has two properties: SearchTerms and ContentType. SearchTerms is a string that contains one or more search terms. ContentType can be set to either MarketplaceContentType.Applications or MarketplaceContentType.Music. If not specified, ContentType defaults to MarketplaceContentType.Applications. The following excerpt demonstrates how to create and launch a MarketplaceSearchTask:
MarketplaceSearchTask task
= new MarketplaceSearchTask
{
ContentType = MarketplaceContentType.Applications,
SearchTerms = "puzzle"
};
task.Show();
The Marketplace app is not shown on the emulator’s App List page. It does, however, exist on the emulator, and it is not necessary to have an unlocked emulator to use it. By calling the Show method on the MarketplaceSearchTask in an app running on the emulator, it allows you to launch the Marketplace app search page and to browse search results using real data.
Sample Overview
Example code for the MarketplaceSearchTask can be found in the MarketplaceViewModel in the downloadable sample code.
The MarketPlaceView has a button that executes an ICommand named SearchCommand in the viewmodel. The searchCommand is instantiated in the MarketplaceViewModel constructor. When executed it creates a new MarketplaceSearchTask, sets its SearchTerms property with the text supplied by a TextBox in the view, sets its ContentType property, and finally calls its Show method, like so:
public MarketplaceViewModel()
{
searchCommand = new DelegateCommand(
delegate
{
MarketplaceSearchTask task = new MarketplaceSearchTask
{
/* SearchTerms can't be null or empty,
* or else an ArgumentException is thrown. */
SearchTerms = string.IsNullOrEmpty(searchTerms)
? " " : searchTerms
};
if (contentType.HasValue)
{
task.ContentType = contentType.Value;
}
task.Show();
});
// ...
}
If the MarketplaceSearchTask.SearchTerms property is null or empty, an ArgumentException is raised. To launch the MarketplaceSearchTask without providing search terms, set its SearchTerms property to a string consisting of a single space.
Playing a Media File Using the MediaPlayerLauncher
The media player launcher is used to launch the built-in Media Player app to play a specified media file (see Figure 12.12).

Figure 12.12. Windows Phone Media Player application
Media files can be stored either locally on the device or externally using an absolute Uri. If stored locally, the MediaPlayerLauncher.Media property must be assigned a relative Uri to the file location. Relative Uri’s are used for files located in either isolated storage or in the app’s XAP file.
Files downloaded from the Internet are placed in isolated storage, whereas files accompanying the app are placed into the app’s XAP file during the build process.
The MediaPlayerLauncher.Location property allows you to specify where the content is located, either in the XAP, isolated storage, or on a remote server.
The MediaPlayerLauncher.Location property must be set to MediaLocationType.Install for media files located within the app’s XAP file. For content located in isolated storage, MediaLocationType.Data should be used. If not specified, MediaPlayerLauncher.Location defaults to MediaLocationType.Data. For content located on a remote server, MediaLocationType.None is used along with an absolute Uri. If MediaLocationType.None is used in conjunction with a relative Uri, a FileNotFoundException is raised when the MediaPlayerLauncher.Show method is called.
You can optionally specify that one or more playback controls should be shown by the Media Player, by setting the MediaPlayerLauncher.Controls property using bitwise OR combinations of the MediaPlaybackControls enum values.
The following is the list of possible MediaPlaybackControls enum values:
• All—All controls. The equivalent of using OR to combine all the other members of the enumeration.
• FastForward—The fast-forward control.
• None—No controls are shown.
• Pause—The pause control.
• Rewind—The rewind control.
• Skip—The skip control.
• Stop—The stop control.
If not specified, the MediaPlayerLauncher.Controls property defaults to MediaPlaybackControls.All, and the rewind, pause, and fast-forward buttons are displayed by the Media Player app.
While it is possible to specify the Skip and Stop controls, the controls are not displayed, and it does not affect the Media Player app.
The following example shows how to use the MediaPlayerLauncher to play a local media file in the Media Player app, displaying a Pause and a Stop button:
MediaPlayerLauncher mediaPlayerLauncher
= new MediaPlayerLauncher
{
Media = new Uri("LaunchersAndChoosers/Video.wmv",
UriKind.Relative),
Location = MediaLocationType.Install,
Controls = MediaPlaybackControls.Pause
| MediaPlaybackControls.Stop
};
mediaPlayerLauncher.Show();
To specify a nonlocal media file, use an absolute Uri, as demonstrated in the following example:
MediaPlayerLauncher mediaPlayerLauncher
= new MediaPlayerLauncher
{
Media = new Uri("http://www.example.com/Video.wmv",
UriKind.Absolute),
Controls = MediaPlaybackControls.All
};
mediaPlayerLauncher.Show();
Sample Overview
Example code for the MediaPlayerLauncher can be found in the MediaPlayerLauncherViewModel, in the downloadable sample code.
The MediaPlayerLauncherView page has a button that executes an ICommand named SearchCommand in the viewmodel.
When executed, the command instantiates a MediaPlayerLauncher and populates its Controls property with the playbackControls field, using a lambda expression (see Listing 12.2).
The lambda Aggregate extension method combines the values in the IEnumerable collection of MediaPlaybackControls enum flags by OR’ing each one with the previous result.
Listing 12.2. MediaPlayerLauncherViewModel Class (excerpt)
public class MediaPlayerLauncherViewModel : ViewModelBase
{
public MediaPlayerLauncherViewModel()
: base("Media Player Launcher")
{
launchCommand = new DelegateCommand(
delegate
{
MediaPlayerLauncher mediaPlayerLauncher
= new MediaPlayerLauncher
{
//Media = new Uri("http://example.com/Video.wmv",
// UriKind.Absolute),
Media = new Uri("LaunchersAndChoosers/Video.wmv",
UriKind.Relative),
Location = MediaLocationType.Install,
};
if (playbackControls.Count > 0)
{
mediaPlayerLauncher.Controls
= playbackControls.Aggregate((a, b) => a | b);
}
mediaPlayerLauncher.Show();
});
}
readonly List<MediaPlaybackControls> mediaPlaybackControls
= new List<MediaPlaybackControls>
{
MediaPlaybackControls.FastForward,
MediaPlaybackControls.Pause,
MediaPlaybackControls.Rewind,
/* Not used by Media Player. */
//MediaPlaybackControls.Skip,
//MediaPlaybackControls.Stop
};
public IEnumerable<MediaPlaybackControls> AvailablePlaybackControls
{
get
{
return mediaPlaybackControls;
}
}
readonly ObservableCollection<MediaPlaybackControls> playbackControls
= new ObservableCollection<MediaPlaybackControls>();
public ObservableCollection<MediaPlaybackControls> PlaybackControls
{
get
{
return playbackControls;
}
}
...
}
The view presents the list of available playback controls in a ListBox. A custom attached property is used to provide quasi binding support for the SelectedItems property of the ListBox. This attached property is discussed further in the next section. See the following excerpt:
<StackPanel x:Name="ContentPanel" Grid.Row="1">
<TextBlock Text="Media Player Controls:"
Style="{StaticResource PhoneTextTitle2Style}" />
<ListBox ItemsSource="{Binding AvailablePlaybackControls}"
SelectionMode="Multiple"
unleashed:SelectedItems.Items="{Binding PlaybackControls}"
Margin="15">
</ListBox>
<Button Command="{Binding LaunchCommand}"
Content="Launch Media Player" />
<TextBlock Text="{Binding Message}"
Style="{StaticResource PhoneTextMessageStyle}" />
</StackPanel>
Multiple items in the ListBox can be selected, and the Launch Media Player button initiates the LaunchCommand in the viewmodel (see Figure 12.13).
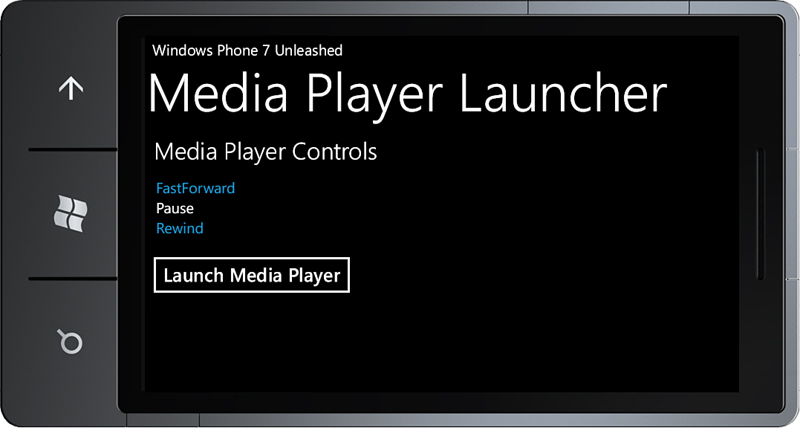
Figure 12.13. The media player launcher page
Binding to the ListBox.SelectedItems Property
Unfortunately, the ListBox.SelectedItems property is not a DependencyProperty, which means it cannot be the target of a databinding. A custom attached property is included in the downloadable sample code that allows you to bind the SelectedItems property to a collection (see Listing 12.3).
The SelectedItems class contains two DependencyProperty’s: an ItemsProperty and a SelectedItemsBehaviorProperty. ItemsProperty specifies the source property of the DataContext and is used to assign the selected items to the ListBox’s DataContext. When the SelectionChanged event of the ListBox is raised, the DataContext’s property is updated.
The SelectedItemsBehavior class contains the logic for updating the list of selected items, which also relies on the DataContextChangedListener class, which raises an event when the DataContext of the ListBox changes. For more information on the DataContextChangedListener, see Chapter 23, “Input Validation.”
An instance of the SelectedItemsBehavior is associated with the ListBox using the SelectedItemsBehaviorProperty.
Listing 12.3. SelectedItems Class
public static class SelectedItems
{
public static readonly DependencyProperty ItemsProperty
= DependencyProperty.RegisterAttached(
"Items",
typeof(IList),
typeof(SelectedItems),
new PropertyMetadata(null, ItemsPropertyChanged));
public static void SetItems(ListBox listBox, IList list)
{
listBox.SetValue(ItemsProperty, list);
}
public static IList GetItems(ListBox listBox)
{
return (IList)listBox.GetValue(ItemsProperty);
}
static readonly DependencyProperty SelectedItemsBehaviorProperty
= DependencyProperty.RegisterAttached(
"SelectedItemsBehavior",
typeof(SelectedItemsBehavior),
typeof(ListBox), null);
static void ItemsPropertyChanged(
DependencyObject d, DependencyPropertyChangedEventArgs e)
{
var target = d as ListBox;
if (target != null)
{
GetOrCreateBehavior(target, (IList)e.NewValue);
}
}
static SelectedItemsBehavior GetOrCreateBehavior(
ListBox listBox, IList list)
{
var behavior = (SelectedItemsBehavior)listBox.GetValue(
SelectedItemsBehaviorProperty);
if (behavior == null)
{
behavior = new SelectedItemsBehavior(listBox, list);
listBox.SetValue(SelectedItemsBehaviorProperty, behavior);
}
return behavior;
}
class SelectedItemsBehavior
{
readonly ListBox listBox;
readonly IList sourceList;
public SelectedItemsBehavior(ListBox listBox, IList sourceList)
{
this.listBox = ArgumentValidator.AssertNotNull(listBox, "listBox");
this.sourceList = ArgumentValidator.AssertNotNull(
sourceList, "sourceList");
this.listBox.SelectionChanged += OnSelectionChanged;
DataContextChangedListener.Subscribe(listBox, OnDataContextChanged);
}
void OnDataContextChanged(
DependencyObject d, DependencyPropertyChangedEventArgs e)
{
UpdateList();
}
void OnSelectionChanged(object sender, SelectionChangedEventArgs e)
{
UpdateList();
}
void UpdateList()
{
sourceList.Clear();
foreach (object item in listBox.SelectedItems)
{
sourceList.Add(item);
}
}
}
}
Placing a Call with the PhoneCallTask
The phone call task is used to launch the built-in Phone app and displays the specified phone number and display name.
The following example demonstrates how to launch the phone call task:
PhoneCallTask phoneCallTask = new PhoneCallTask
{
DisplayName = "Alan Turing",
PhoneNumber = "882960"
};
phoneCallTask.Show();
If the PhoneCallTask.PhoneNumber is a null or empty string, calling the PhoneCallTask.Show method has no effect. If the PhoneCallTask.PhoneNumber has an invalid format, the Phone app prompts the user when the call is being made.
Sample Overview
Example code for the PhoneCallTask can be found in the PhoneCallViewModel in the downloadable sample code.
The PhoneCallView allows the user to enter a telephone number and place a call to that number when a button is tapped.
A Place Call button in the view is bound to the viewmodel’s CallCommand.
The callCommand field is instantiated in the PhoneCallViewModel constructor. When executed, the callCommand creates a new PhoneCallTask, and sets its PhoneNumber property with the text supplied by a TextBox in the view, as shown:
public PhoneCallViewModel() : base("Phone Call Tasks")
{
callCommand = new DelegateCommand(
delegate
{
PhoneCallTask phoneCallTask = new PhoneCallTask
{
DisplayName = "someone",
PhoneNumber = phoneNumber
};
phoneCallTask.Show();
});
}
Figure 12.14 shows the PhoneCallView page.
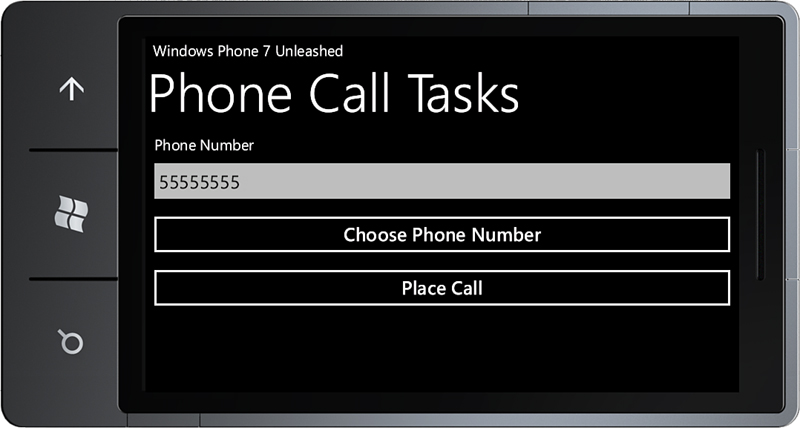
Figure 12.14. PhoneCallView page
When the PhoneCallTask.Show method is called, the Phone application is launched, which deactivates the sample application but leaves the sample app’s UI visible in the background (see Figure 12.15).
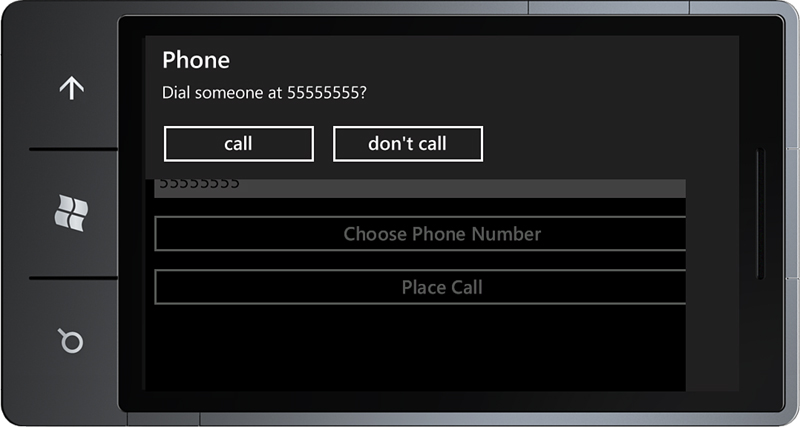
Figure 12.15. The built-in Phone app is superimposed on the sample application.
Selecting a Phone Number with the PhoneNumberChooserTask
The phone number chooser task is used to launch the built-in Contacts application and allows the user to select a contact. A phone number for the contact is then returned to your app.
To query the user’s contact list without requiring the user to select a contact, use the Contacts class, described later in this chapter.
The PhoneNumberChooserTask should be defined as a field in your class, like so:
readonly PhoneNumberChooserTask phoneNumberChooserTask
= new PhoneNumberChooserTask();
Subscribe to the PhoneNumberChooserTask.Completed event within your class constructor, as shown:
PhoneNumberChooserTask.Completed
+= new EventHandler<PhoneNumberResult>(
HandlePhoneNumberChooserTaskCompleted);
Use the Show method of the PhoneNumberChooserTask to launch the built-in Contacts app. When the task completes the handler receives a PhoneNumberResult object, as shown:
void HandlePhoneNumberChooserTaskCompleted(object sender,
PhoneNumberResult e)
{
if (e.TaskResult == TaskResult.OK)
{
PhoneNumber = e.PhoneNumber;
}
else if (e.Error != null)
{
Message = "Unable to choose number. " + e.ToString();
}
else if (e.TaskResult == TaskResult.Cancel)
{
Message = "Cancelled";
}
}
Sample Overview
Example code for the PhoneNumberChooserTask can be found in the PhoneCallViewModel in the downloadable sample code. The PhoneCallView allows the user to populate the Phone Number TextBox by using a button that launches the PhoneNumberChooserTask (shown previously in Figure 12.14).
A button in the view is bound to a viewmodel ICommand property named ChooseCommand. The chooseCommand field is instantiated in the PhoneCallViewModel constructor. When executed, the command calls the Show method of the PhoneNumberChooserTask, as shown:
public PhoneCallViewModel() : base("Phone Call Tasks")
{
phoneNumberChooserTask.Completed
+= HandlePhoneNumberChooserTaskCompleted;
chooseCommand = new DelegateCommand(obj => phoneNumberChooserTask.Show());
...
}
When the Show method is called, the Contacts application is launched (see Figure 12.16).
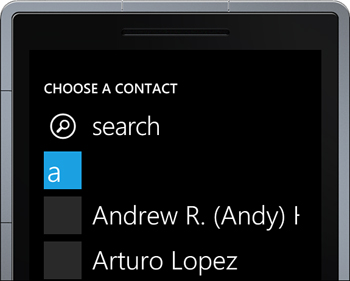
Figure 12.16. Windows Phone Contacts application
When the user selects a contact from the Contacts app, the sample app is activated, and the Completed event handler is called, which updates the PhoneNumber property in the viewmodel.
Saving a Contact’s Phone Number with the SavePhoneNumberTask
The save phone number task is used to launch the built-in Contacts app, allowing the user to save a specified phone number. This chooser does not return data, but you can handle the Completed event to determine whether the task was completed correctly.
SavePhoneNumberTask contains a single PhoneNumber property, which is passed to the Contacts application when the task’s Show method is called.
The SavePhoneNumberTask should be defined as a field in your class, like so:
readonly SavePhoneNumberTask savePhoneNumberTask
= new SavePhoneNumberTask();
Subscribe to the SavePhoneNumberTask.Completed event within your class constructor, as shown:
savePhoneNumberTask.Completed
+= new EventHandler<TaskEventArgs>(HandleSavePhoneNumberTaskCompleted);
Use the Show method of the SavePhoneNumberTask to launch the built-in Contacts app. When the task completes the handler receives a TaskEventArgs object, as shown:
void HandleSavePhoneNumberTaskCompleted(object sender, TaskEventArgs e)
{
if (e.Error != null)
{
Message = "Unable to save the phone number. " + e.Error;
return;
}
if (e.TaskResult == TaskResult.OK)
{
Message = "Phone number saved";
}
else if (e.TaskResult == TaskResult.Cancel)
{
Message = "Cancelled";
}
}
Sample Overview
Example code for the SavePhoneNumberTask can be found in the SavePhoneNumberViewModel in the downloadable sample code.
The SavePhoneNumberView page allows the user to enter a phone number into a TextBox and then to initiate the savePhoneNumberTask, using a button.
The button is bound to a viewmodel command named SaveCommand.
The TextBox is bound to the viewmodel’s PhoneNumber property using a TwoWay data binding, as shown:
<TextBox Text="{Binding PhoneNumber, Mode=TwoWay}"
InputScope="TelephoneNumber" />
The InputScope property of the TextBox causes the onscreen keyboard to be displayed with a set of keys suitable for typing a phone number. For more information on InputScopes, see Chapter 6.
When the SaveCommand is executed, the phoneNumber text is assigned to the task, and the task’s Show method is called. See the following excerpt:
public SavePhoneNumberViewModel() : base("Save Phone Number")
{
savePhoneNumberTask.Completed += savePhoneNumberTask_Completed;
saveCommand = new DelegateCommand(
delegate
{
Message = string.Empty;
savePhoneNumberTask.PhoneNumber = phoneNumber;
savePhoneNumberTask.Show();
});
}
Figure 12.17 shows the custom SavePhoneNumberView page.
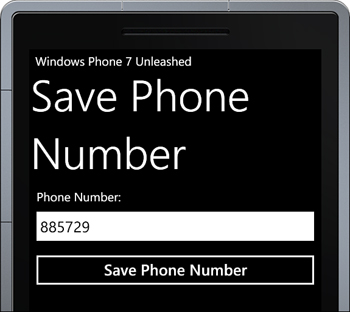
Figure 12.17. SavePhoneNumberView page
When the savePhoneNumberTask.Show method is called, the Contacts application is launched (shown previously in Figure 12.8).
When the user selects either an existing contact, or the new contact option, the Edit Phone Number page is displayed (see Figure 12.18).
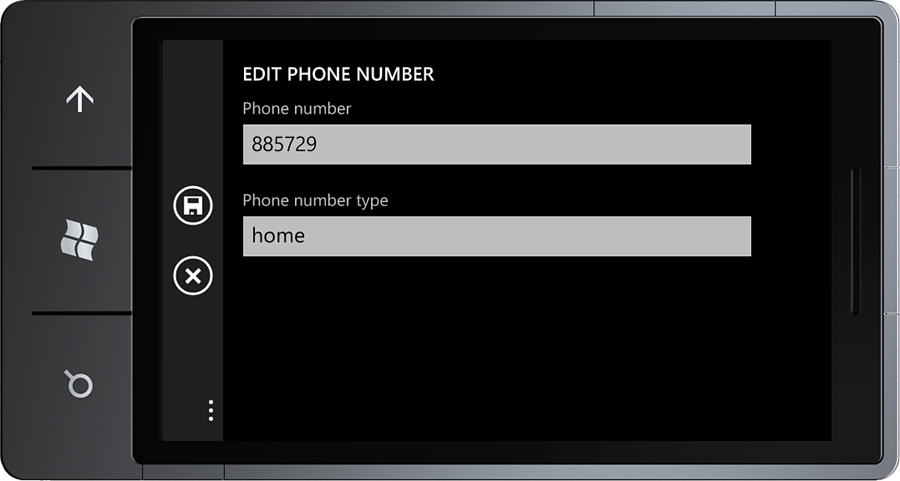
Figure 12.18. Edit Phone Number page
When the save icon button is pressed, if the user selected an existing contact, the Edit Phone Contact page, shown previously in Figure 12.10, is displayed.
Alternatively, if the user opts to create a new contact, the New Contact page is displayed.
Once the contact information has been stored, the sample application is activated, and the Completed handler is called.
Searching the Web with the SearchTask
The Search task is used to launch the built-in Search application and performs a search for the specified search string. The Search application presents search results for the following three categories:
• Web—The search query is used to perform a web search.
• Local—Geographic location is used to provide search results that are relevant to the user’s location. For example, searching for the term restaurant presents a map with the location of nearby restaurants.
• News—The search query is used to perform a search of various news-related websites and blogs.
The SearchTask class has a single string property called SearchQuery.
If the SearchQuery property is null or empty, calling the SearchTask.Show method has no effect.
The following excerpt demonstrates how to initiate a SearchTask:
SearchTask searchTask = new SearchTask { SearchQuery = "restaurant" };
searchTask.Show();
Sample Overview
Example code for the SearchTask can be found in the SearchViewModel in the downloadable sample code.
The SearchView allows the user to populate a TextBox with a search query. The TextBox has a two-way data binding to the viewmodel’s SearchQuery property.
A button is used to execute an ICommand named SearchCommand, which initiates the SearchTask.
The searchCommand field is instantiated in the SearchViewModel constructor. When executed, the searchCommand creates a new SearchTask and sets its SearchQuery property to the text supplied by a TextBox in the view, as shown in the following excerpt:
public SearchViewModel()
{
searchCommand = new DelegateCommand(
delegate
{
SearchTask searchTask = new SearchTask
{
SearchQuery = searchQuery
};
searchTask.Show();
});
}
Figure 12.19 shows the custom SearchView page.
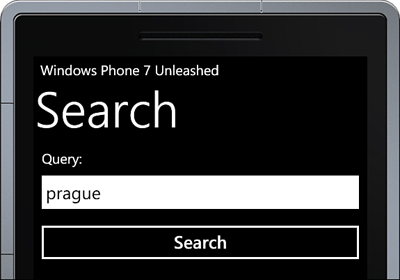
Figure 12.19. The sample search page allows the user to enter a search query.
When the SearchTask.Show method is called, the built-in Search app is launched (see Figure 12.20).

Figure 12.20. The built-in Search app
Sending Contacts a Link Using the ShareLinkTask
The share link task is used to enable the user to share a link on one or more social networks.
The ShareLinkTask allows you to specify a link URI, title, and message, as shown in the following excerpt:
ShareLinkTask task = new ShareLinkTask
{
LinkUri = new Uri("http://linkd.in/jnFoqE", UriKind.Absolute),
Title = "Check out the Windows Phone Experts group.",
Message = "Interested in Windows Phone development? "
+ " Join the Windows Phone Experts group on Linked-In!"
};
task.Show();
When the task’s Show method is called, the built-in link sharing app is launched, allowing the user to select various social networks, such as Facebook, Twitter, and LinkedIn.
The sample for the ShareLinkTask is a page called ShareLinkTaskView, which allows the user to enter a URL, title, and message, and to launch the ShareLinkTask via an application bar button (see Figure 12.21).
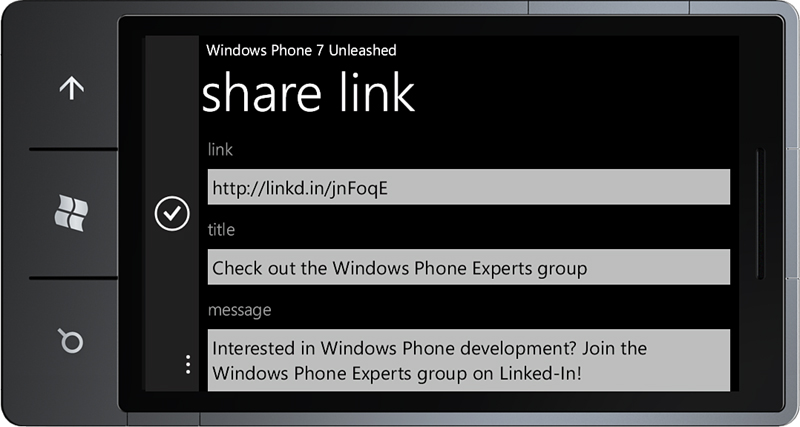
Figure 12.21. ShareLinkTaskView page
Allowing the user to share a link with his contacts is a great way to connect your app with a wider audience.
Posting a Status Update to Social Networks Using the ShareStatusTask
The share status task is used to enable the user to post a status update to one or more social networks. The ShareStatusTask contains a single Status property of type string. When the Show method is called, the ShareStatusTask presents the built-in message sharing app. See the following excerpt:
ShareStatusTask task = new ShareStatusTask();
task.Status = "I'm loving the new features of the Windows Phone 7.5 API!";
task.Show();
The sample for the ShareStatusTask is a page called ShareStatusTaskView, which allows the user to enter some text and to launch the ShareLinkTask via an application bar button.
Preparing an SMS With the SmsComposeTask
The SMS compose task is used to launch the built-in Messaging app, allowing the user to create a new SMS message.
You can optionally specify recipients and a message body, which are prepopulated in the new message, as shown in the following excerpt:
SmsComposeTask smsComposeTask = new SmsComposeTask
{
To = "885729",
Body = "Hi from Windows Phone!"
};
smsComposeTask.Show();
Sample Overview
Example code for the SmsComposeTask can be found in the SmsView page and SmsViewModel classes in the downloadable sample code.
The SmsView allows the user to launch the built-in Messaging app when a button is tapped (see Figure 12.22).
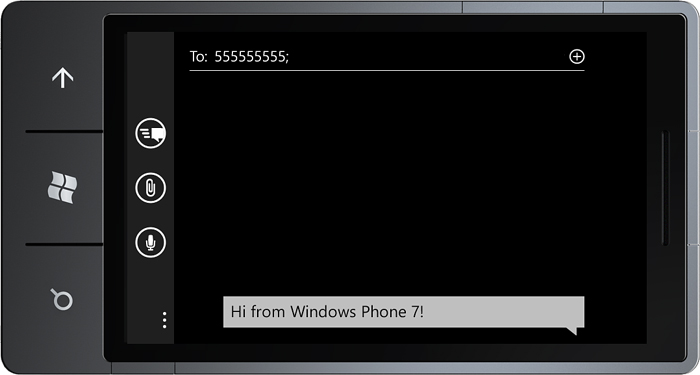
Figure 12.22. The built-in Messaging app
Navigating to a Web Page Using the WebBrowserTask
The web browser task is used to launch the built-in Web Browser app and optionally navigates the browser to a specified URL:
Uri uri = new Uri("http://msdn.microsoft.com", UriKind.RelativeOrAbsolute);
WebBrowserTask task = new WebBrowserTask { Uri = uri };
task.Show();
If the Uri results in a 404 HTTP standard response code (Not Found), no exception is raised; instead the Windows Phone Search application is launched.
Sample Overview
Example code for the WebBrowserTask can be found in the LaunchWebBrowserViewModel in the downloadable sample code.
The LaunchWebBrowserView page contains a TextBox in which the user can enter a URL and a Launch Web Browser Button (see Figure 12.23).
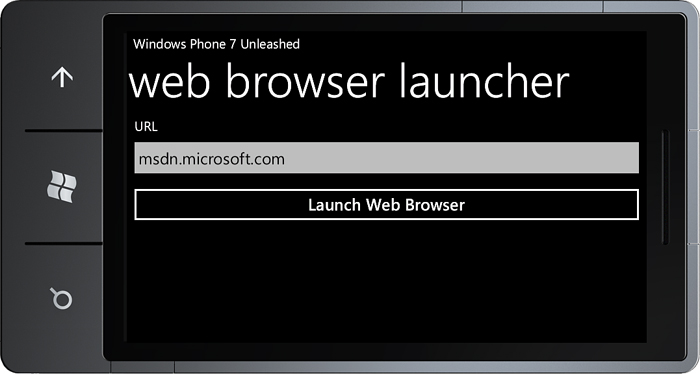
Figure 12.23. Web Browser Launcher page
The view’s TextBox has a TwoWay data binding to the viewmodel’s Url property, as shown:
<TextBox Text="{Binding Url, Mode=TwoWay}" InputScope="Url" />
The InputScope property of the TextBox causes the onscreen keyboard to be displayed with a set of keys suitable for typing a URL. For more information on InputScopes, see Chapter 6.
A button is bound to an ICommand in the viewmodel named LaunchCommand. The command is instantiated in the viewmodel’s constructor. When executed, LaunchCommand creates a new WebBrowserTask and sets its Uri property using the text supplied by a TextBox in the view. See the following excerpt:
public LaunchWebBrowserViewModel()
{
launchCommand = new DelegateCommand(
delegate
{
WebBrowserTask task = new WebBrowserTask { URL = url };
task.Show();
});
}
When the WebBrowserTask.Show method is called, the built-in Web Browser app is launched.
Selecting a Contact’s Address Using the AddressChooserTask
The address chooser task is used to allow the user to provide your app with the street address of a contact. This task launches the built-in Contacts application so that the user can select a contact.
To query the user’s contact list without requiring the user to select a contact, use the Contacts class, described later in this chapter.
If the user completes the task, an event is raised and the task’s Completed event handler receives an address in the result.
The sample for the AddressChooserTask consists of the AddressChooserTaskView page and AddressChooserTaskViewModel class.
The AddressChooserTask should be defined as a field in your class, like so:
readonly AddressChooserTask addressChooserTask = new AddressChooserTask();
Subscribe to the AddressChooserTask.Completed event within your class constructor, as shown:
addressChooserTask.Completed
+= new EventHandler<AddressResult>(HandleCompleted);
Use the Show method of the AddressChooserTask to launch the built-in Contacts application (see Figure 12.24).
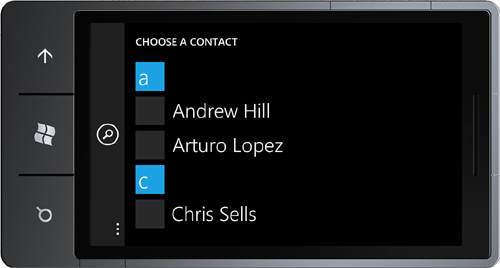
Figure 12.24. Contacts application
When the task completes, the handler receives an AddressResult object that contains the display name and address of the contact. See the following excerpt from the AddressChooserTaskViewModel class:
void HandleTaskCompleted(object sender, AddressResult e)
{
if (e.Error != null)
{
MessageService.ShowError("Unable to retrieve address");
}
if (e.TaskResult != TaskResult.OK)
{
return;
}
DisplayName = e.DisplayName;
Address = e.Address;
}
Saving a Contact to the Phone’s Contact List Using the SaveContactTask
The save contact task is used to enable a user to save a contact to the phone’s contact list. The SaveContactTask class contains 26 string properties such as FirstName, Company, and Website, which allow you to pass detailed information to the built-in Contacts app.
When the user finishes saving the contact, cancels out of the task, or an error occurs, the task’s Completed event is raised.
The sample for the SaveContactTask consists of the SaveContactTaskView page and the SaveContactTaskViewModel class.
The SaveContactTask should be defined as a field in your class, like so:
readonly SaveContactTask saveContactTask = new SaveContactTask();
Subscribe to the SaveContactTask.Completed event within your class constructor, as shown:
saveContactTask.Completed
+= new EventHandler<SaveContactResult>(HandleCompleted);
The sample page allows the population of just some of the SaveContactTask properties (see Figure 12.25).
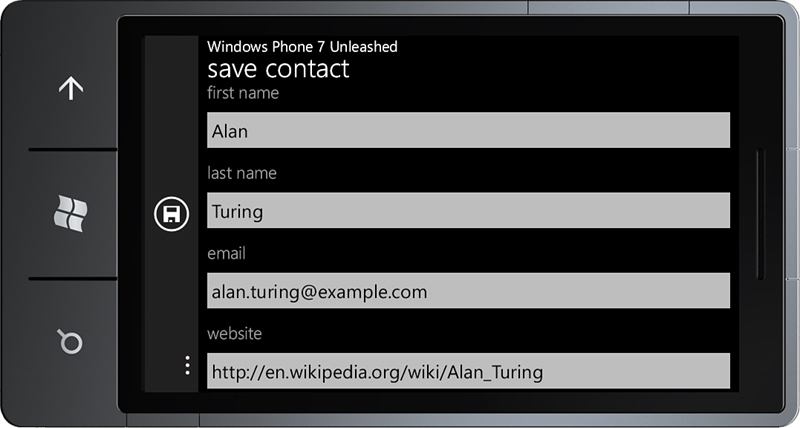
Figure 12.25. SaveContactTaskView page
When the application bar button is tapped, the Show method of the SaveContactTask launches the built-in Contacts application.
When the task returns, the Completed event handler receives a SaveContactResult object that allows you to determine whether the task completed successfully. See the following excerpt:
void HandleTaskCompleted(object sender, SaveContactResult e)
{
if (e.Error != null)
{
MessageService.ShowError("Unable to save contact.");
return;
}
if (e.TaskResult == TaskResult.OK)
{
MessageService.ShowMessage("Contact saved.");
}
}
Taking a Photo with the CameraCaptureTask
The camera capture task is a chooser that is used to launch the built-in Camera app. If the user completes the task by taking and confirming a photo, the Completed event is raised and the event handler receives a PhotoResult object, which exposes a stream containing the image data.
For information on working with photo image streams, see Chapter 18, “Extending the Windows Phone Picture Viewer.”
The CameraCaptureTask should be defined as a field in your class, like so:
readonly CameraCaptureTask cameraCaptureTask
= new CameraCaptureTask();
Subscribe to the CameraCaptureTask.Completed event within your class constructor, as shown:
cameraCaptureTask.Completed
+= new EventHandler<PhotoResult>(HandleCameraCaptureTaskCompleted);
Use the Show method of the CameraCaptureTask to launch the built-in Camera app. When the task completes the handler receives a PhotoResult object, as shown:
void HandleCameraCaptureTaskCompleted(object sender, PhotoResult e)
{
if (e.TaskResult == TaskResult.OK)
{
BitmapImage bitmapImage = new BitmapImage();
bitmapImage.SetSource(e.ChosenPhoto);
CapturedImage = bitmapImage;
}
else if (e.Error != null)
{
MessageService.ShowError("An error occurred. " + e.ToString());
}
else if (e.TaskResult == TaskResult.Cancel)
{
/* Cancelled. */
}
}
Sample Overview
Example code for the CameraCaptureTask is located in the CameraCaptureViewModel in the downloadable sample code.
The view contains a button that is bound to a viewmodel ICommand property named CaptureCommand.
The CameraCaptureView allows the user to launch the CameraCaptureTask when she taps the button. When the captureCommand is executed, the Show method of the cameraCaptureTask is called, as shown in the following excerpt:
public CameraCaptureViewModel() : base("Camera Capture")
{
cameraCaptureTask.Completed += cameraCaptureTask_Completed;
captureCommand = new DelegateCommand(obj => cameraCaptureTask.Show());
}
Calling the task’s Show method launches the built-in Camera application (see Figure 12.26).

Figure 12.26. The built-in Camera application
Once the photo has been taken and accepted by the user, the task’s Completed event handler is called, and a new BitmapImage is created using the e.ChosenPhoto image Stream. It is then assigned to the CapturedImage property of the viewmodel, as shown:
BitmapImage bitmapImage = new BitmapImage();
bitmapImage.SetSource(e.ChosenPhoto);
CapturedImage = bitmapImage;
An Image control in the view is used to display the image, as shown:
<Image Source="{Binding CapturedImage}" />
When the CapturedImage property is updated, the image is displayed in the view (see Figure 12.27).
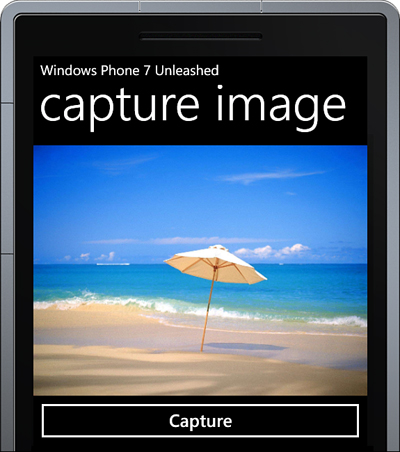
Figure 12.27. The captured image is displayed on the CameraCaptureView page.
Inviting Game Players with the GameInviteTask
The game invite task is used to show a game invite screen that enables the user to invite players to a multiplayer game session that is in progress on a Windows Phone device. The invitation is sent asynchronously.
The game invite task works only when called from within a game that is approved for release on Xbox LIVE on Windows Phone.
When the user finishes sending the invite, cancels out of the task, or an error occurs, the task’s Completed event is raised.
The GameInviteTask should be defined as a field in your class, like so:
readonly GameInviteTask gameInviteTask = new GameInviteTask();
Subscribe to the GameInviteTask.Completed event within your class constructor, as shown:
gameInviteTask.Completed
+= new EventHandler<TaskEventArgs>(HandleCompleted);
The GameInviteTask allows you to specify a unique session id. The only information that another player needs to join an active game session is the session id.
gameInviteTask.SessionId = "<session id>";
gameInviteTask.Show();
When the task’s Show method is called, the built-in Game Invite app is launched, allowing the user to email recipients using either a gamer tag or an email address.
The built-in Game Invite app is shown in Figure 12.28.

Figure 12.28. Built-in game invite page
Selecting a Photo from the Photo Hub Using the PhotoChooserTask
The photo chooser task is used to launch the built-in Photo Picker app, which allows a user to select an image from isolated storage or, optionally, to take a photo using the device’s camera.
The following is a list of the PhotoChooserTask properties:
• PixelHeight—The maximum height, in pixels, of the resulting image.
• PixelWidth—The maximum width, in pixels, of the resulting image.
• ShowCamera—If set to true, the user is presented with the option to use the device’s camera to take a photo. A button is displayed on the first page of the Photo Picker app. If not specified, this value defaults to false.
When debugging with the Zune software running, the media database on the phone device is locked. To debug while using the PhotoChooserTask use the Windows Phone Connect tool discussed in Chapter 18.
The PhotoChooserTask should be defined as a field in your class, like so:
readonly PhotoChooserTask photoChooserTask = new PhotoChooserTask();
Subscribe to the PhotoChooserTask.Completed event within your class constructor, as shown:
PhotoChooserTask.Completed
+= new EventHandler<PhotoResult>(HandlePhotoChooserTaskCompleted);
Use the Show method of the PhotoChooserTask to launch the built-in Photo Picker app. When the task completes the handler receives a PhotoResult object, as shown:
void HandleTaskCompleted(object sender, PhotoResult e)
{
if (e.TaskResult == TaskResult.OK)
{
BitmapImage bitmapImage = new BitmapImage();
bitmapImage.SetSource(e.ChosenPhoto);
CapturedImage = bitmapImage;
}
if (e.Error != null)
{
MessageService.ShowError("An error occurred. " + e.Error.ToString());
}
}
When the task’s Show method is called, the built-in Photo Picker app is launched, allowing the user to select or take a photo (see Figure 12.29).
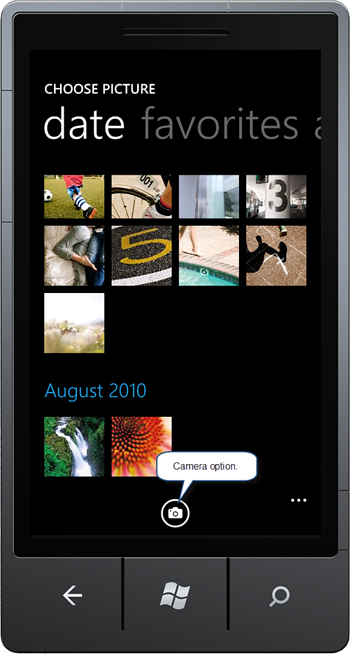
Figure 12.29. The PhotoChooserTask.ShowCamera property determines whether the user is given the option to use the device’s camera.
Once an image has been selected by the user, it can be cropped to the aspect ratio specified by the PhotoChooserTask’s PixelHeight and PixelWidth properties.
If neither the PixelHeight nor PixelWidth is specified, the Photo Picker application skips the step that allows the user to crop the image.
The PhotoChooserTask’s Completed event is raised when an image has been selected or the user cancels out of the Photo Picker application. If the user completes the task of choosing an image, the Completed event is raised and the event handler receives a PhotoResult object that exposes a stream containing the image data. For information on working with image streams, see Chapter 18.
The properties of the PhotoResult class (a subclass of TaskEventArgs) are presented in the following list:
• ChosenPhoto—A System.IO.Stream for the selected image
• OriginalFileName—The path to the file in isolated storage
Sample Overview
The PhotoChooserViewModel class in the downloadable sample code demonstrates how to use the PhotoChooserTask (see Listing 12.4).
Subscription to the PhotoChooserTask.Completed event occurs in the class constructor. The chooseCommand’s execute handler assigns the task’s various properties and calls its Show method. When the Completed event of the task is raised, a BitmapImage is created using the chosen image Stream.
Listing 12.4. PhotoChooserViewModel Class (excerpt)
public class PhotoChooserViewModel : ViewModelBase
{
readonly PhotoChooserTask task = new PhotoChooserTask();
public PhotoChooserViewModel()
{
task.Completed += HandleTaskCompleted;
chooseCommand = new DelegateCommand(
delegate
{
task.PixelWidth = pixelWidth;
task.PixelHeight = pixelHeight;
task.ShowCamera = showCamera;
task.Show();
});
}
void HandleTaskCompleted(object sender, PhotoResult e)
{
if (e.TaskResult == TaskResult.OK)
{
BitmapImage bitmapImage = new BitmapImage();
bitmapImage.SetSource(e.ChosenPhoto);
CapturedImage = bitmapImage;
PixelWidth = ImageWidth = bitmapImage.PixelWidth;
PixelHeight = ImageHeight = bitmapImage.PixelHeight;
OriginalFileName = e.OriginalFileName;
}
if (e.Error != null)
{
MessageService.ShowError("An error occurred. " + e.Error.ToString());
}
}
...
}
The PhotoChooserView is data-bound to the PhotoChooserViewModel, which allows the user to affect the properties of the PhotoChooserTask when the viewmodel’s ChooseCommand is executed. The ChooseCommand is executed when the Capture button is pressed. The user can change the aspect ratio of the image by modifying the Width and Height Ratio Sliders.
A PhotoChooserViewModel instance is assigned to the view’s DataContext, as shown in the following excerpt from the PhotoChooserView code-beside:
public PhotoChooserView()
{
InitializeComponent();
DataContext = new PhotoChooserViewModel();
}
The view uses data binding to populate its controls and to interact with the viewmodel. Once the user chooses an image via the PhotoChooserTask, the Image control is populated via its data binding to the CapturedImage property of the PhotoChooserViewModel. The Capture button causes the execution of the ChooseCommand (see Listing 12.5).
Listing 12.5. PhotoChooserView.xaml (excerpt)
<StackPanel x:Name="ContentPanel" Grid.Row="1">
<TextBlock Text="{Binding PixelWidth, StringFormat='Width Ratio: {0}'}"
Style="{StaticResource PhoneTextNormalStyle}" />
<Slider Value="{Binding PixelWidth, Mode=TwoWay}"
Minimum="10" Maximum="200" LargeChange="50" SmallChange="10"/>
<TextBlock Text="{Binding PixelHeight, StringFormat='Height Ratio: {0}'}"
Style="{StaticResource PhoneTextNormalStyle}" />
<Slider Value="{Binding PixelHeight, Mode=TwoWay}"
Minimum="10" Maximum="200" LargeChange="50" SmallChange="10"/>
<CheckBox IsChecked="{Binding ShowCamera, Mode=TwoWay}" Content="Show Camera" />
<Button Command="{Binding ChooseCommand}"
Content="Choose" />
<Image Source="{Binding CapturedImage}"
Width="{Binding ImageWidth}" Height="{Binding ImageHeight}"
HorizontalAlignment="Left" Margin="15,0,15,0" />
<TextBlock Text="Path: "
Style="{StaticResource PhoneTextSmallStyle}" />
<TextBlock Text="{Binding OriginalFileName}"
Style="{StaticResource PhoneTextSmallStyle}" TextWrapping="Wrap" />
</StackPanel>
The PhotoChooserView page is presented in Figure 12.30.
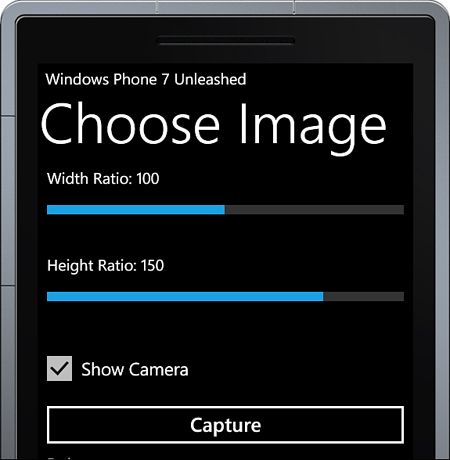
Figure 12.30. PhotoChooserView page
The PixelWidth and PixelHeight properties of the PhotoChooserTask determine the maximum dimensions of the resulting image. The Photo Picker crop page presents the image with a selection overlay conforming to the aspect ratio PixelWidth/PixelHeight, which spans either the entire width or height of the image. When the user confirms the selection, the image is reduced to the size specified by PixelWidth and PixelHeight (see Figure 12.31).

Figure 12.31. The Photo Picker crop page
When the user completes the PhotoChooserTask, the PhotoChooserTask.Completed event is handled by the PhotoChooserViewModel.HandleTaskCompleted method. A new BitmapImage is created using the resulting image stream, and it is assigned to the CapturedImage property of the viewmodel. The view is then automatically updated via the Image control’s data binding (see Figure 12.32).
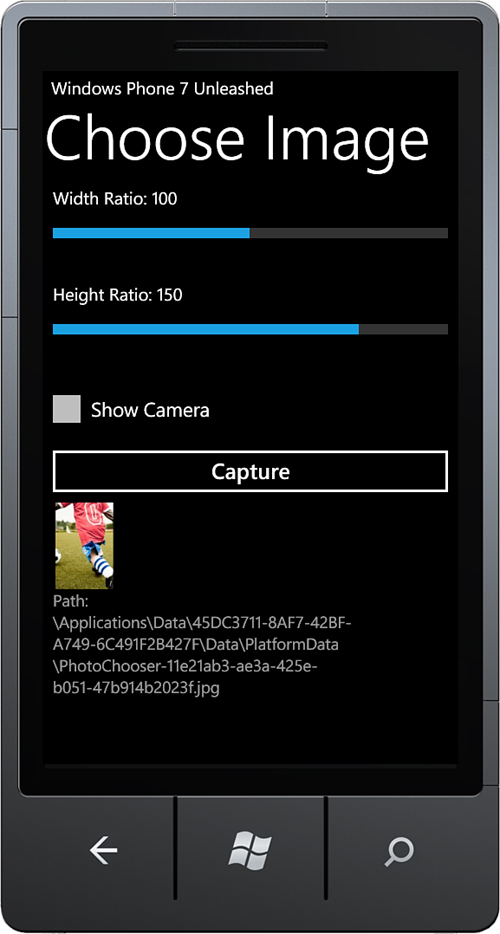
Figure 12.32. The chosen image is displayed in the view.
Creating a Ringtone with an Audio File Using the SaveRingtoneTask
The save ringtone task is used to launch the built-in Ringtones app, which enables the user to save an audio file to the system ringtones list and to optionally set it as the active ringtone on the device.
The ringtones list can be viewed by selecting the Ringtones + Sounds item on the phone’s system settings page.
Once the audio file is added to the list, the user can set it as the ringtone for individual contacts in the Contacts application.
When the user finishes saving the contact, cancels out of the task, or an error occurs, the task’s Completed event is raised.
The SaveRingtoneTask should be defined as a field in your class, like so:
readonly SaveRingtoneTask saveRingtoneTask = new SaveRingtoneTask();
Subscribe to the SaveRingtoneTask.Completed event within your class constructor, as shown:
saveRingtoneTask.Completed
+= new EventHandler<TaskEventArgs>(HandleCompleted);
The SaveRingtoneTask allows you to specify a display name for the ringtone and the URI of the audio file. The audio file can be either located in isolated storage or within an assembly. Initialization and launching of the task is shown in the following excerpt:
saveRingtoneTask.DisplayName = displayName;
saveRingtoneTask.IsShareable = shareable;
saveRingtoneTask.Source = new Uri("appdata:/AudioFiles/Audio01.wma");
//saveRingtoneTask.Source = new Uri("isostore:/AudioFiles/Audio01.wma");
saveRingtoneTask.Show();
The appdata segment of the Source Uri value indicates that the file is located within the app’s XAP file. In this case, the file is located in a project directory called AudioFiles.
When using the appdata prefix, the file must have its Build Action set to Content; otherwise, it will be unresolvable.
Conversely, the isostore prefix indicates that the file is located in isolated storage. Files located in isolated storage must be placed there by your app.
Ringtone audio files must meet the following requirements.
• File must be of type MP3 or WMA.
• Files must be less than 1MB in size.
• Files must be less than 40 seconds in length.
• Files must not have digital rights management (DRM) protection.
When the task’s Show method is called, the built-in Ringtone app is launched, allowing the user to edit the ringtone’s display name and to optionally set the ringtone as the active ringtone.
The sample for the SaveRingtoneTask consists of the SaveRingtoneTaskView page and SaveRingtoneTaskViewModel class. The view allows the user to enter a display name for the ringtone and to launch the SaveRingtoneTask via an application bar button. The built-in Ringtone app is shown in Figure 12.33.

Figure 12.33. The built-in Ringtone app
When the task returns control to your app, the Completed event handler is called. The TaskEventArgs object allows you to determine whether the user successfully saved the ringtone, as shown in the following excerpt:
void HandleTaskCompleted(object sender, TaskEventArgs e)
{
if (e.Error != null)
{
MessageService.ShowError("Unable to save ringtone.");
return;
}
if (e.TaskResult == TaskResult.OK)
{
MessageService.ShowMessage("Ringtone saved.");
}
}
The save ringtone task is a great way to extend an audio app. You could have your app procure audio from third-party websites or from your own website.
Contacts and Appointments
While the three choosers: AddressChooserTask, EmailAddressChooserTask, and PhoneNumberChooserTask enable the user to select a contact, your app may also query the user’s contact list without user intervention. Read-only access to the user’s contacts and appointments can be achieved using the Contacts and Appointment classes, located in the Microsoft.Phone.UserData namespace.
Retrieving Contacts
The Contacts class allows you to search the user’s contacts for a string. The search can be restricted to a single field of the Contact class, or to contacts that have been pinned to the phone’s Start Experience (home screen). Searches are performed using one of the following FilterKind enumeration values:
• None (default value)
• DisplayName
• EmailAddress
• PhoneNumber
• PinnedToStart
To query the user’s contact list, define a Contacts instance as a field in a class, as shown:
Contacts contacts;
Instantiate the Contacts object, subscribe to its SearchCompleted event, and then call SearchAsync, as shown in the following excerpt:
void SearchContacts()
{
contacts = new Contacts();
contacts.SearchCompleted += HandleSearchCompleted;
contacts.SearchAsync("andrew", FilterKind.DisplayName, null);
}
To access the user’s contact list the ID_CAP_CONTACTS capability must be present in the WMAppManifest.xml file.
For more information on the phone’s security capability model, see Chapter 2, “Fundamental Concepts in Silverlight Development for Windows Phone.”
The Contacts.SearchAsync method allows the use of an empty search string when FilterKind is set to DisplayName, PinnedToStart, or None. An exception is raised if you attempt to search for an empty string in conjunction with a FilterKind value equal to EmailAddress or PhoneNumber.
When the search completes, the specified event handler receives a list of matching Contact objects. See the following excerpt:
void HandleSearchCompleted(object sender, ContactsSearchEventArgs e)
{
if (e.Results == null)
{
return;
}
Contacts = e.Results;
}
The list of retrieved Contact objects can be further refined using LINQ.
Be mindful when using LINQ, however, that some users may have a lot of contacts, and it may be expensive to use LINQ to select a subset of the resulting Contact objects.
Internally, the contact list has various indexes placed on fields corresponding to the FilterKind enumeration, which may offer superior performance during retrieval. Therefore, favor the use of filters rather than LINQ wherever possible.
Windows Phone aggregates contacts from various social networking accounts, including Windows Live, Facebook, Twitter, and LinkedIn (and potentially more to come). To determine the accounts from which contacts are available, use the Contacts class’s Accounts property.
Sample Contacts Page
The example for this section allows the user to enter a search string, select a FilterKind enumeration value, and perform a search against the user’s contact list.
Within the ContactsViewModel class a SearchText property and a FilterKind property restrict the results of the call to contacts.SearchAsync (see Listing 12.6).
The list of available filter values is exposed by the viewmodel’s FilterKinds property.
A DelegateCommand named SearchCommand calls the SearchContacts method when it is executed. When the SearchCompleted handler is called, a Contacts property is populated with the result.
Listing 12.6. ContactsViewModel Class
public class ContactsViewModel : ViewModelBase
{
public ContactsViewModel() : base("search contacts")
{
searchCommand = new DelegateCommand(arg => SearchContacts());
}
Contacts contacts;
void SearchContacts()
{
if (string.IsNullOrWhiteSpace(searchText)
&& (FilterKind == FilterKind.EmailAddress
|| FilterKind == FilterKind.PhoneNumber))
{
MessageService.ShowMessage("Please enter the search text.");
return;
}
contacts = new Contacts();
contacts.SearchCompleted += HandleSearchCompleted;
contacts.SearchAsync(searchText, FilterKind, null);
}
void HandleSearchCompleted(object sender, ContactsSearchEventArgs e)
{
if (e.Results == null)
{
return;
}
Contacts = e.Results;
}
IEnumerable<Contact> contactsList = new List<Contact>();
public IEnumerable<Contact> Contacts
{
get
{
return contactsList;
}
private set
{
Assign(() => Contacts, ref contactsList, value);
}
}
readonly DelegateCommand searchCommand;
public ICommand SearchCommand
{
get
{
return searchCommand;
}
}
string searchText;
public string SearchText
{
get
{
return searchText;
}
set
{
Assign(() => SearchText, ref searchText, value);
}
}
FilterKind filterKind = filterKinds.First();
public FilterKind FilterKind
{
get
{
return filterKind;
}
set
{
Assign(() => FilterKind, ref filterKind, value);
}
}
static readonly IEnumerable<FilterKind> filterKinds
= EnumUtility.CreateEnumValueList<FilterKind>().OrderBy(x => x.ToString());
public IEnumerable<FilterKind> FilterKinds
{
get
{
return filterKinds;
}
}
}
The view contains a TextBox that is bound to the viewmodel’s SearchText property, and a ListPicker whose ItemsSource property is bound to the FilterKinds viewmodel property (see Listing 12.7).
When the user selects an item in the ListPicker, the viewmodel’s FilterKind property is updated.
Results are displayed using a ListBox, whose ItemsSource property is bound to the viewmodel’s Contacts property. Each Content object is presented using a TextBlock to show its DisplayName, and a ListBox is used to display each of the contact’s email addresses.
Listing 12.7. ContactsView.xaml (excerpt)
<StackPanel x:Name="ContentPanel" Grid.Row="1">
<TextBlock Text="search" Style="{StaticResource LabelTextStyle}" />
<TextBox Text="{Binding SearchText, Mode=TwoWay}" />
<toolkit:ListPicker
ItemsSource="{Binding FilterKinds}"
SelectedItem="{Binding FilterKind, Mode=TwoWay}"
Header="filter" />
<ListBox ItemsSource="{Binding Contacts}">
<ListBox.ItemTemplate>
<DataTemplate>
<StackPanel Margin="0,0,0,20">
<TextBlock Text="{Binding DisplayName}"
Style="{StaticResource PhoneTextLargeStyle}" />
<ListBox ItemsSource="{Binding EmailAddresses}"
ScrollViewer.VerticalScrollBarVisibility="Disabled">
<ListBox.ItemTemplate>
<DataTemplate>
<StackPanel>
<TextBlock Text="{Binding EmailAddress}"
Style="{StaticResource PhoneTextNormalStyle}" />
</StackPanel>
</DataTemplate>
</ListBox.ItemTemplate>
</ListBox>
</StackPanel>
</DataTemplate>
</ListBox.ItemTemplate>
</ListBox>
</StackPanel>
In addition, the view contains an AppBarIconButton that is bound to the viewmodel’s SearchCommand, as shown:
<u:AppBar>
<u:AppBarIconButton
Command="{Binding SearchCommand}"
Text="search"
IconUri="/Images/ApplicationBarIcons/AppBarSearch.png" />
</u:AppBar>
When the user taps the application bar button, matching contacts are displayed at the bottom of the page (see Figure 12.34).
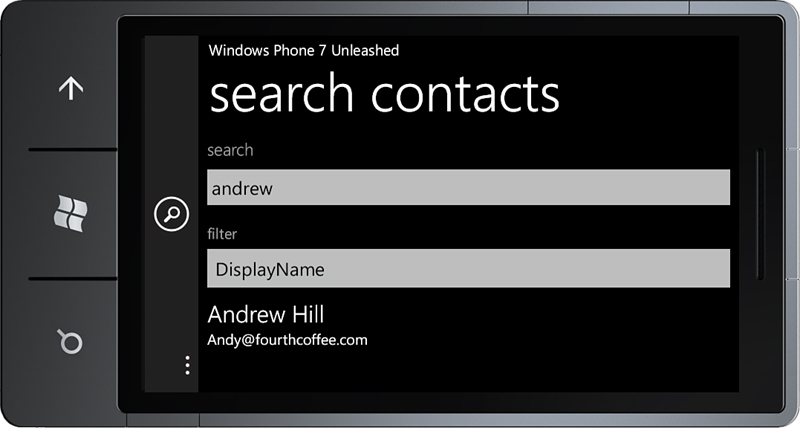
Figure 12.34. ContactsView page
Retrieving Appointments
The Appointments class allows you to retrieve appointments that fall between two specified dates.
To access the user’s appointments the ID_CAP_APPOINTMENTS capability must be present in the WMAppManifest.xml file.
For more information on the phone’s security capability model, see Chapter 2.
To query the user’s appointments, define an Appointments instance as a field in a class, as shown:
Appointments appointments;
Instantiate the Appointments object, subscribe to its SearchCompleted event, and then call SearchAsync. The following excerpt demonstrates the retrieval of appointments that fall within the next six months:
void SearchAppointments()
{
appointments = new Appointments();
appointments.SearchCompleted += HandleSearchCompleted;
appointments.SearchAsync(DateTime.Now, DateTime.Now.AddMonths(6), null);
}
When the search completes, the specified event handler receives a list of matching Appointment objects. See the following excerpt:
void HandleSearchCompleted(object sender, AppointmentsSearchEventArgs e)
{
if (e.Results == null)
{
return;
}
Appointments = e.Results;
}
To determine the accounts from which appointments are available, use the Appointment class’s Accounts property.
Each appointment is represented by an Appointment object. The Appointment class provides various read-only properties, described in Table 12.2.
Table 12.2. Appointment Class Properties
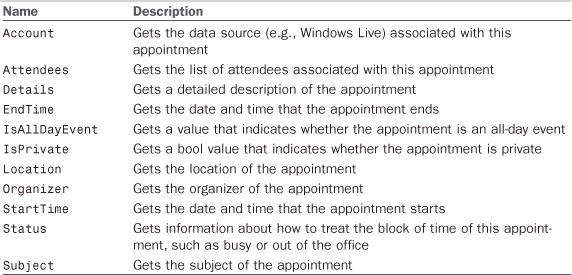
The Appointments.SearchAsync method is overloaded to allow you to restrict the retrieval of appointments from specific accounts. For example, to retrieve only those appointments associated with the user’s Windows Live account, use the following:
Account account = appointments.Accounts.Where(
x => x.Name == "Windows Live").First();
appointments.SearchAsync(
DateTime.Now, DateTime.Now.AddMonths(6), account, null);
Sample Appointments Page
The example for this section allows the user to retrieve the list of appointments for a specified period. The AppointmentsViewModel class, located in the downloadable sample code, contains a StartTimeInclusive property and an EndTimeInclusive property, which are used to specify the period (see Listing 12.8).
A DelegateCommand named SearchCommand calls the SearchAppointments method when it is executed. When the SearchCompleted handler is called, the Appointments property is populated with the result.
Listing 12.8. AppointmentsViewModel Class
public class AppointmentsViewModel : ViewModelBase
{
public AppointmentsViewModel() : base("appointments")
{
searchCommand = new DelegateCommand(arg => SearchAppointments());
}
Appointments appointments;
void SearchAppointments()
{
appointments = new Appointments();
appointments.SearchCompleted += HandleSearchCompleted;
appointments.SearchAsync(startTimeInclusive, endTimeInclusive, null);
}
void HandleSearchCompleted(object sender, AppointmentsSearchEventArgs e)
{
if (e.Results == null)
{
return;
}
Appointments = e.Results;
}
IEnumerable<Appointment> appointmentList = new List<Appointment>();
public IEnumerable<Appointment> Appointments
{
get
{
return appointmentList;
}
private set
{
Assign(() => Appointments, ref appointmentList, value);
}
}
readonly DelegateCommand searchCommand;
public ICommand SearchCommand
{
get
{
return searchCommand;
}
}
DateTime startTimeInclusive = DateTime.Now.AddYears(-1);
public DateTime StartTimeInclusive
{
get
{
return startTimeInclusive;
}
set
{
Assign(() => StartTimeInclusive, ref startTimeInclusive, value);
}
}
DateTime endTimeInclusive = DateTime.Now.AddYears(1);
public DateTime EndTimeInclusive
{
get
{
return endTimeInclusive;
}
set
{
Assign(() => EndTimeInclusive, ref endTimeInclusive, value);
}
}
}
The view contains two Silverlight Toolkit ListPicker controls that are bound to the viewmodel’s StartTimeInclusive and EndTimeInclusive properties (see Listing 12.9).
Results are displayed using a ListBox, whose ItemsSource property is bound to the viewmodel’s Appointments property. Each Appointment object is presented using a TextBlock to display its StartTime, Subject, and Details properties.
Listing 12.9. AppointmentsView.xaml (excerpt)
<StackPanel x:Name="ContentPanel" Grid.Row="1">
<toolkit:DatePicker Value="{Binding StartTimeInclusive, Mode=TwoWay}"
Header="start"/>
<toolkit:DatePicker Value="{Binding EndTimeInclusive, Mode=TwoWay}"
Header="end"/>
<ListBox ItemsSource="{Binding Appointments}">
<ListBox.ItemTemplate>
<DataTemplate>
<StackPanel Margin="0,0,0,20">
<TextBlock Text="{Binding StartTime}"
Style="{StaticResource PhoneTextNormalStyle}" />
<TextBlock Text="{Binding Subject}"
Style="{StaticResource PhoneTextLargeStyle}" />
<TextBlock Text="{Binding Details}"
Style="{StaticResource PhoneTextNormalStyle}" />
</StackPanel>
</DataTemplate>
</ListBox.ItemTemplate>
</ListBox>
</StackPanel>
In addition, the view includes an AppBarIconButton that is bound to the viewmodel’s SearchCommand, as shown:
<u:AppBar>
<u:AppBarIconButton
Command="{Binding SearchCommand}"
Text="search"
IconUri="/Images/ApplicationBarIcons/AppBarSearch.png" />
</u:AppBar>
When the user taps the application bar button, appointments that fall within the specified date range are displayed at the bottom of the page (see Figure 12.35).
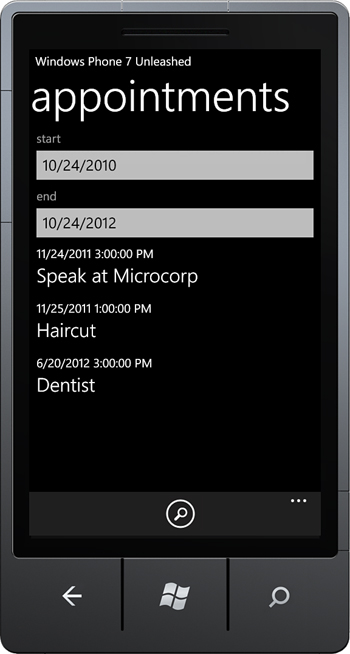
Figure 12.35. AppointmentsView page
By using the Appointments and Contacts classes you are able to further integrate your app with the social networking features of the phone.
Summary
This chapter began by looking at the two types of tasks: launchers and choosers. Launchers have no common base class, yet choosers all derive from ChooserBase<TTaskEventArgs>, which has a Completed event.
The chapter then explored the execution model of choosers and the internal workings of ChooserBase.Completed event subscriptions that span across application lifetimes. Each launcher and chooser was discussed in detail.
Finally, the chapter examined how to programmatically retrieve contact and appointment information in a read-only manner.