
Lesson 14. Understanding Pages
In this lesson, you learn how to promote a business, brand, or public figure using Facebook Pages. You’ll learn the differences between regular profile pages, groups, and specialty Pages. You’ll also learn how to subscribe to Pages, create your own Page, and manage it as its administrator.
Page Basics
If you represent a company, organization, or professional group of some kind, you can create a presence on Facebook. Unlike individual profile pages, however, you need to create a special page—one that starts with a capital P. Facebook Pages are designed specifically for professional use and are completely separate from profile pages. A Page is a great way for fans to find you or your brand and spread the word about upcoming events, news, and information. Pages are a tool for connecting directly with customers or an audience, and even attracting future fans or buyers. Facebook members can choose to be fans or supporters of Pages.
Pages are an ideal public relations/marketing tool for the following:
• Public figures, such as politicians and government officials
• Celebrities
• Bands and musicians
• Artists
• Nonprofit organizations and charities
• Government agencies
• Large and small businesses
• Entertainment industries, such as television and radio
• Educational entities, such as schools, colleges, and universities
• Brand names and products, and the companies behind them
By using Pages, businesses, artists, and brands can interact with fans directly, going beyond one-directional conversation to dynamic communication. The content you post on a Page shows up in the news feeds of any fans or supporters, which in turn can be viewed by their friends, potentially driving up traffic to your Page and more customers to your door. As a marketing tool, Facebook Pages can help you increase product or brand awareness and interest, plus allow you more ways to communicate your message and receive feedback.
Pages, Profiles, or Groups?
Facebook users are often confused about the difference between profiles, groups, and Pages. Certainly a lot of similarities exist among the three; for example, Facebook features, such as the Wall, are readily available in each. Take a look at the Page for a television show shown in Figure 14.1.
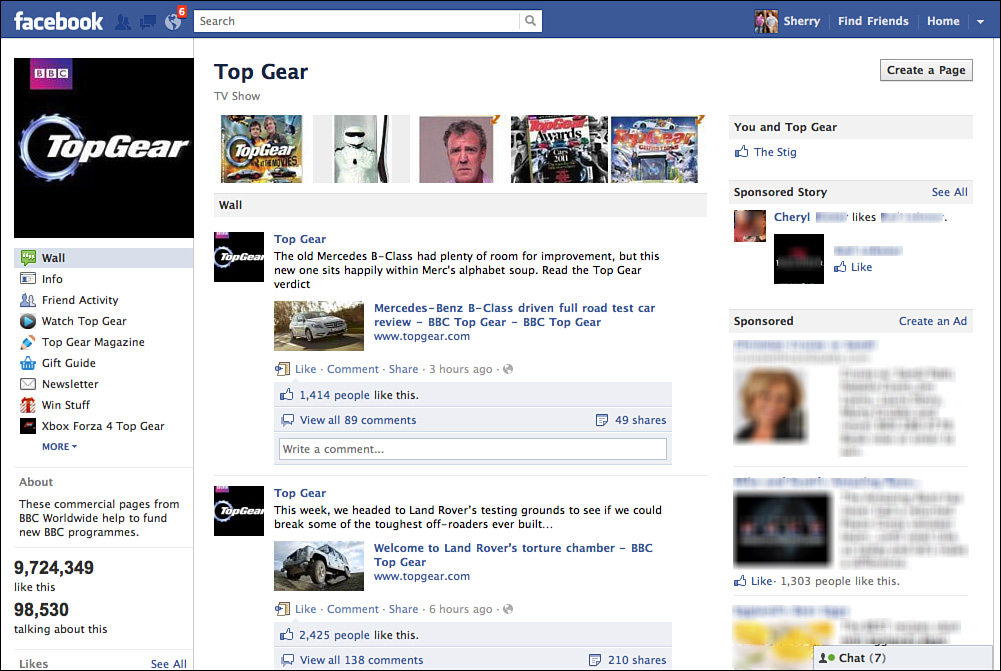
Figure 14.1 A Page for a popular cable television show.
At first glance, the Page looks similar to a regular profile or group page. It has a Wall for posting comments, a profile picture, a photo strip, and all the other regular Facebook features. Although it looks like a profile page, it’s actually much more. To help you distinguish between Pages, profiles, and groups, however, take a look at some of the differences:
• Any individual can create a profile page, but only an authorized representative can create a professional Page. If you’re not an authorized representative, you can create a group for the person or entity instead and invite other fans to participate. See Lesson 11, “Joining Groups,” to learn more.
• Pages are also different in that you don’t see who is actually administering the content. No one’s name, other than the company or public figure, appears on the Pages.
• With a Page, you don’t have to okay friend requests. Anyone who wants to be a fan is automatically approved when they click the Like button. This saves an administrator valuable time.
• Pages cannot invite people to be friends; rather, you can “like” a Page.
• Pages can integrate applications, contrasting with groups, which cannot add apps. With Pages, you can add apps such as Flash Player for uploading Flash files, YouTube Box to import your YouTube videos, or Simply RSS to import feeds.
• Unlike a regular profile page, a Page offers special administrator tools for collecting traffic and demographic information.
• A Page administrator can send out updates, such as a status posting or a link, to every fan or supporter.
• If you like a Page, the Page’s administrator does not have access to your profile information.
• When you create a Page, it’s indexed and searchable both inside and outside of Facebook.
• Tools for creating profiles and groups are readily available; however, tools for creating professional Pages are more difficult to locate on the site.
Basically, a Page is for promoting an entity or public figure, whereas a profile is just for individuals. Groups are informal fan-created pages, whereas Pages are authorized by the artist or company.
Strategies for Marketing with Pages
From a marketing standpoint, creating a Facebook Page for a business or public figure can really generate ongoing buzz about a product or promotion. One of the unique things about Pages is that you, as the administrator, can determine what tab on the Page users land on when they display your Page. You can use this strategy to direct a user to a specific ad campaign or action found on a custom tab on your Page. Take a look at Figure 14.2, for an example. It’s a Page for a famous fast food chain. Notice you land on customized promotional artwork as soon as you display the Page.
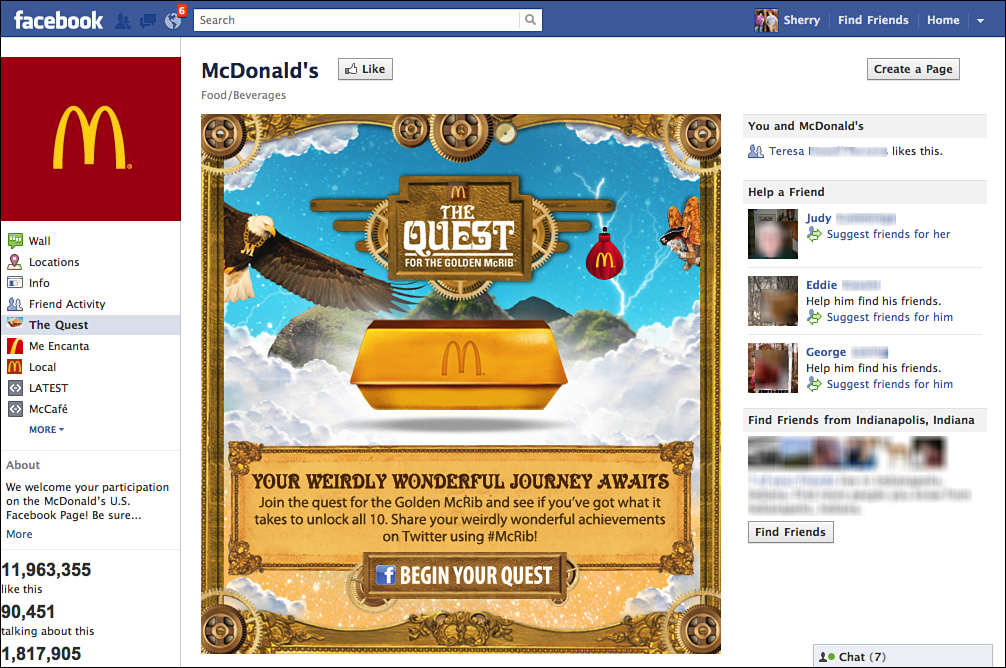
Figure 14.2 A Page for a popular fast food chain with customized promotional artwork displayed.
As in the customized promotional art shown here, you can integrate all kinds of applications to engage the people who visit your Page. Hundreds of business-related apps are available to help you create all kinds of interesting and interactive content. For example, you can create quizzes, surveys, and games that keep users coming back for more. You can hold drawings and contests to bring back people frequently to the Page. Be sure to keep your Page content up-to-date and relevant. Utilize Facebook events to reach out to your fan base and let them know about upcoming calendar dates, engagements, concerts, rallies, or appearances.
As far as communication goes, responding promptly to fans who write on the Wall is also a good strategy, if applicable. If someone comments on a photo or video, keep the dialogue going. Fans and supporters want to hear back from you, and this medium is designed just for this type of activity. Failing to engage your fans and supporters results in lost opportunities to generate revenue and interest. Remember, Facebook is a social network first and foremost, designed to foster human interaction. Your marketing strategy should focus on this, too, to help extend your brand or message.
Note
You can find numerous resources on the Internet to help you tap into the marketing and programming sides of Facebook, creating specialized apps and integrating others to suit your marketing needs. Sites like All Facebook (www.allfacebook.com) and Mashable (http://mashable.com) can offer some insights to get you started. Also be sure to check out Facebook’s Developers page by clicking the Developers link at the bottom of any Facebook page.
Finding and Following Pages
From a fan or supporter standpoint, you can subscribe to a Page and get regular updates whenever new information is published. News appears as a story on the news feed on your Home page. Actually finding Pages to become a fan of takes a little effort on your part. One way to find a Page you like is to stumble across a story about one on your friends’ profile pages or the stories that appear in the news feed or ticker on the Home page. Check your friends’ Likes category on their profile page and see what Pages they’re subscribing to or what public figures they’re supporting. You can click the Likes category just below the cover photo to view all the Pages you’re following.
You can also conduct a search for a particular name or product and see what’s available on Facebook. Click in the Search box at the top of any Facebook page and type in the keyword or words you’re searching for, such as a company or product name. Facebook immediately lists any potential matches; click the See More Results link at the bottom of the menu list to open the search results page, as shown in Figure 14.3. Click the Pages category to filter the view to any matching Pages.

Figure 14.3 The results page displays any matches.
When you find a Page you like, you can become a fan or supporter in just one click. Look for a Like button at the top of the Page. When you click the button, the page is added to your list of Likes.
After you’re a fan, you’re a subscribed member, so to speak. You’ll now see stories from the Page out in the news feed. To find all the Pages you like in one spot, click the Likes link on your profile page (find it below the cover photo) to open the Favorites page, as shown in Figure 14.4. You can also find recently viewed pages listed under the Pages heading on your Home page (left column).
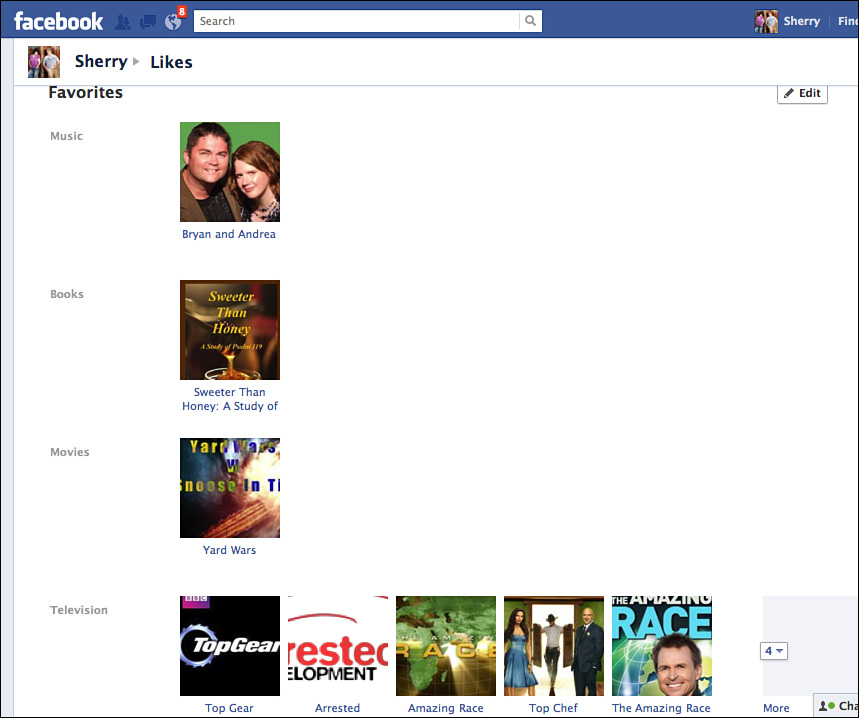
Figure 14.4 You can view your collection of Pages you like on the Favorites page accessed through your profile.
Tip
To unsubscribe from a Page, open the Page and look for an Unlike link or something similar. You’ll find it on the far-left side as you scroll down the Page. Just click the link, and you’re no longer a fan.
Creating and Managing a Page
If you’re the official representative of a business, organization, or public figure, you can set up a Page in Facebook. Before you get started, take time to gather all the elements you need and save yourself some effort. Here are a few things you’ll need:
• A name for the Page. The name you choose cannot be changed later—it’s permanent (unless the Page is deleted entirely).
• A photo to act as the Page’s profile picture.
• Information about the company, organization, or public figure. Information may include contact information, address, background story, company history, and so on.
• Content, such as pictures for a photo gallery or video clips, or content generated by apps.
• Choose a category, such as a local business, brand or product, or public figure. Facebook offers six main categories. Within each of these main categories are subcategories for defining exactly what kind of organization you represent, such as a grocery store or travel agency, actor or comedian, and so on. The category you choose has everything to do with how the Page is indexed on Facebook. It might help to research other Pages to see how they are categorized before attempting to create your own Page.
Caution
If you’re not authorized to create a Page and Facebook finds out, your account may be closed and the Page pulled from the site. Fan pages are not allowed unless created by an authorized person. If you would rather create a fan page, you can do so with a group. See Lesson 11 to learn more about groups.
Setting Up a New Page
After you’ve planned out what you need to display on the Page, you’re ready to start building it. Follow these steps to create a new Page in Facebook:
1. If you’re already logged on to your Facebook account, click the Create a Page link at the very bottom of the Home page.
2. Select the main category of Page you want to create. Each box displays a set of information you’ll need to fill out. In Figure 14.5, for example, Brand or Product is selected and displayed.

Figure 14.5 Start by choosing a type for your Page and entering the basic information.
3. Click the Category drop-down menu and choose a specific subcategory. Try to choose a category that best matches the type of Page you’re creating.
4. Type in the name for the business, organization, product, or public figure.
You cannot change the category later, so choose wisely. Facebook’s form for Page creation has different fields for you to fill in based on which type of organization you select.
5. Click the terms of service check box.
6. Click the Get Started button.
Note
If you have not yet set up a Facebook account, you’ll need to do so in order to create a Page. You can click the Create a Page link on the Facebook startup page and follow the prompts to create an account and a Page.
7. Next, Facebook steps you through three form pages for establishing your Page, not unlike the pages you saw when first creating your account. First, upload a picture to represent your Page, as prompted in Figure 14.6. The process for uploading a Page profile picture is the same as adding a regular profile picture.
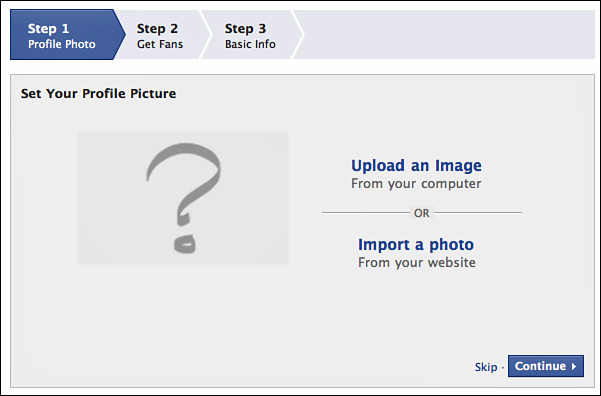
Figure 14.6 The next phase for creating a Page is to upload a profile picture.
8. After your picture uploads, click Continue.
9. The next phase is to find fans, as shown in Figure 14.7. You can invite people you already know on Facebook to like your Page, import contacts from another list, share a story about your new Page on your Wall, and automatically Like your Page.

Figure 14.7 The next part of creating a Page is finding fans.
10. Make your selections, as needed, and click Continue.
11. Add information about your official website and write up a description about your Page in 255 words or less, as prompted in the screen shown in Figure 14.8.
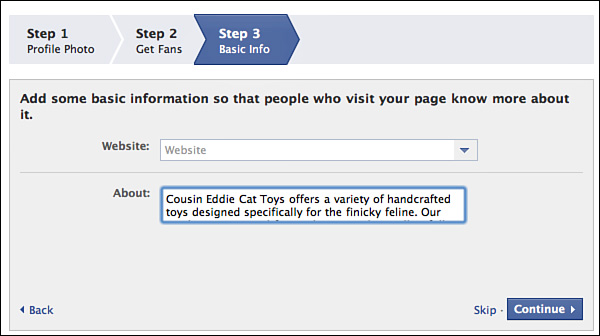
Figure 14.8 Type a brief description about your Page in this final form.
12. Click Continue. Facebook displays your new official Page, similar to that shown in Figure 14.9.
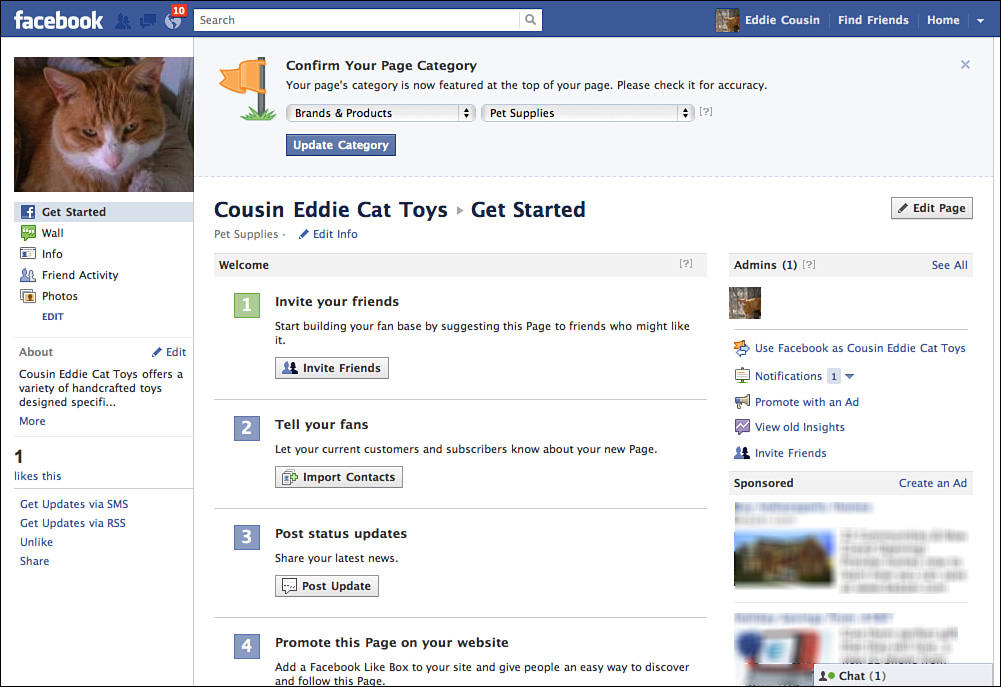
Figure 14.9 When you’re done creating your Page, Facebook opens it and offers some help for fine-tuning the information.
After you’ve created your Page, follow the steps listed on the Welcome page to help you get started with fine-tuning your Page. Start by confirming your category and subcategory, as prompted at the top of the Page shown in Figure 14.9. You can also click the Edit Page button to specify options and settings for how your Page works (learn more about this in the next section). Use the links on the left to access various Page elements and features.
Administering Your Page
Managing a Page using your administrator powers is easy. Click the Edit Page link to open the settings shown in Figure 14.10.
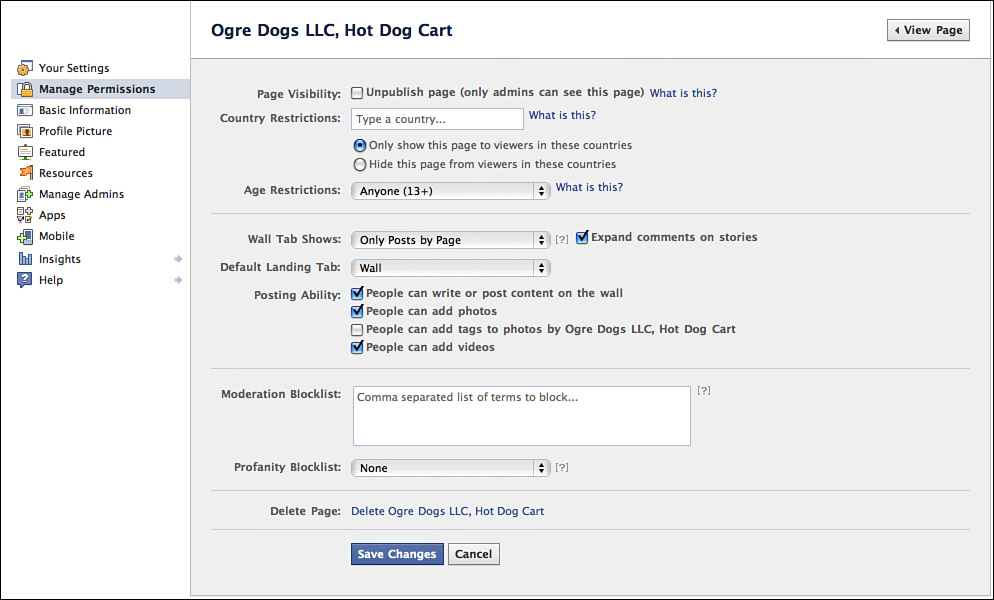
Figure 14.10 Open the Edit Page settings to make changes to various aspects of the Page.
To make changes to the settings, just click a link in the left pane to view associated options and settings. Here’s a rundown of the editing categories displayed:
• Your Settings—Use this category to control your own posting preferences and email notifications for Page activities posted by others.
• Manage Permissions—Use this category to restrict the Page to a certain country or age group, as well as manage what sort of postings are allowed. You can also manage blocked users in this category, in case you need to control unfriendly posters.
• Basic Information—Click here to find settings for Page category, official Page name, contact information, description, and other basic info pertaining to the original category you assigned when creating the Page.
• Profile Picture—You can change your profile picture using these settings.
• Featured—When you like other professional Pages, Facebook lists them on your Page as featured likes, allowing users to click and visit the other Pages as well. The settings in this category let you control how this info is displayed on your Page.
• Resources—You’ll find a plethora of resource links in this category to help you develop and market your Page.
• Manage Admins—If you need help managing your Page, you can add administrators using this category’s settings.
• Apps—A listing of all the apps added to this Page appear here, including the default Facebook apps such as Photos.
• Mobile—You can set up your mobile device to update your Page using the settings in this category.
• Insights—Use Facebook’s Insights tools to help you interpret and view data about the visitors and subscribers to your Page.
• Help—Click this link to go directly to the Help Center and view info about how to use Pages.
After your Page has been up and running for 48 hours, you can use the Insights feature to view data about demographics and activity of people accessing your Page.
To return to the Page after making changes, just click the View Page button at the top.
Advertising Your Page
You can use your advertising dollars to promote your Page on Facebook. Facebook offers two kinds of advertising: pay by clicks or pay by views (also called per-impression ads). With pay by clicks, you pay a set amount every time a user clicks your ad. With pay by views, you establish a price for 1,000 views of your ad. When creating an ad for Facebook, you can specify a target audience to help your ad reach the people you want. You can also specify a maximum amount to spend on the ad. You can learn all about advertising on Facebook by clicking the Advertising link at the bottom of any Facebook page. The Facebook Advertising page, shown in Figure 14.11, offers a step-by-step guide for planning and implementing an ad. You’ll also find help with advertising regulations and rules on the site.
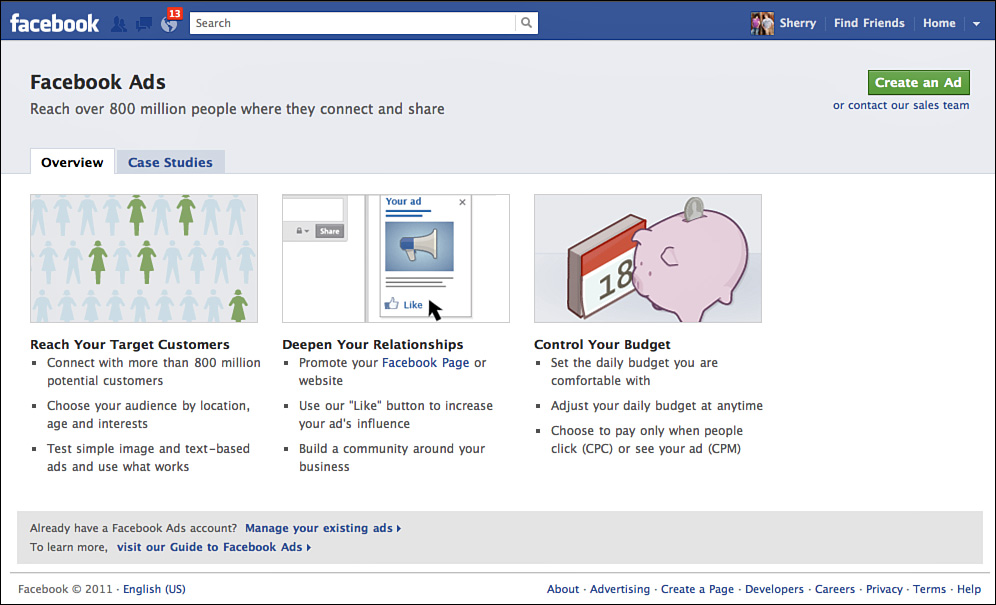
Figure 14.11 Facebook’s Advertising feature offers step-by-step help with placing a promotional ad on the site.
If you already know exactly what kind of ad you want to create, click the Promote with an Ad link found on your Page. When clicked, the first form page opens to help you start designing and implementing your ad right away.
Summary
In this lesson, you learned how to use Pages on Facebook. You learned how to find and subscribe to Pages. You also saw how to make a new Page for your company or organization and then manage the Page after it’s published. In the next lesson, you’ll learn how to buy and sell stuff at the Facebook Marketplace.