
Lesson 12. Tracking Events
In this lesson, you learn how to work with Facebook events. You learn how to search for events in your area and handle event invitations. You also learn how to create your own events and manage their pages.
Events Overview
Events are another amazing social aspect of using Facebook. You can quickly get the word out among your friends and interested others about upcoming events, whether it’s a party, a concert, a trip, or any other kind of social gathering. For example, if you’re organizing a rally of some sort, you can turn it into a Facebook event to let everyone know about it and invite people to attend and spread the word, thus increasing your chances of a good crowd. In another example, a friend of a friend might be having a backyard barbecue, and you don’t know whether you want to go or not. You can check the attendees list to see whether anyone else you know is going. Facebook events are perfect for sending out informal invitations and planning out your social itinerary.
You can use Facebook’s Events application to advertise an event, track attendees, view birthdays, and find other events. The application is one of several default applications already loaded into your Facebook account. You can use the application to search for events in your area, or create new events yourself. The Events application acts as your personal secretary with regard to your social calendar.
You can use the Events application to create all kinds of events, including numerous types of parties, fundraisers, meetings, educational classes or study groups, exhibits, recitals, sporting events and tournaments, trips, and festivals. Events you create using the Events application have their own pages on Facebook. The person who creates the event page in Facebook is the page’s administrator and controls the content and management of the event page. An event page, shown in Figure 12.1, looks similar to a group page and features information about the event itself. It has an area listing details and a description, an event “profile” picture area, a Wall for posting comments, and features for tracking who’s attending and how to RSVP.
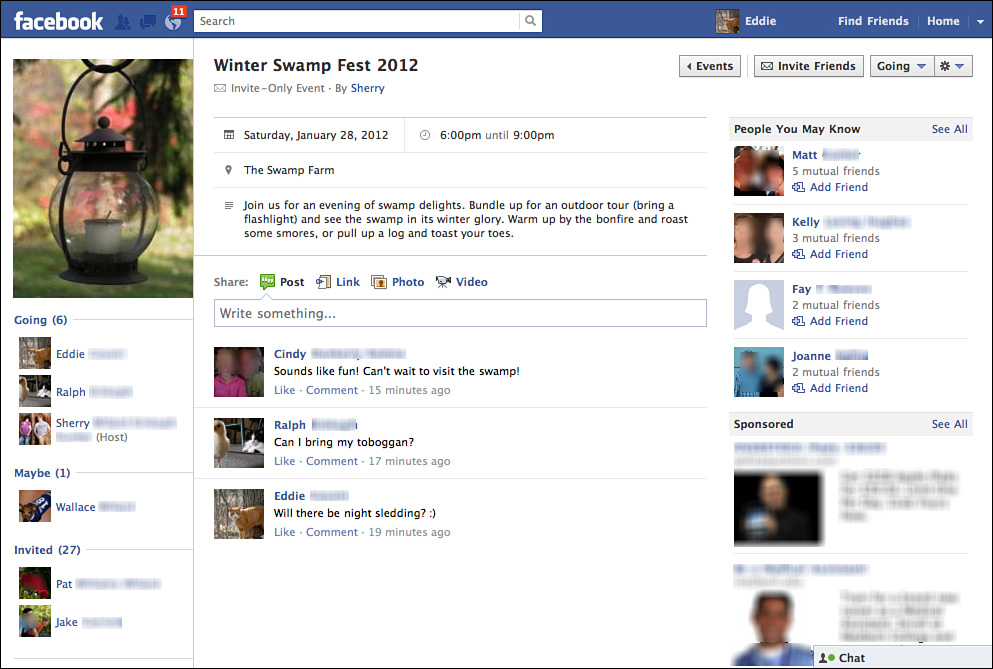
Figure 12.1 An example of a typical event page on Facebook.
Facebook events come in two different types, as follows:
• Public Events—Anyone can read about a public event and accept an invitation to attend it. Public events are perfect for festivals, gallery showings, concerts, and other large public gatherings.
• Private Events—Only the people you invite can choose to attend a private event.
Whether you can attend an event or not depends on how it is listed. Look in the Event Type area of the page to see what type of event it is.
There are also a few things to keep in mind when attending Facebook events in person. Meeting people online and meeting them face to face are both situations in which you should always use common sense coupled with caution. Just because someone appears to be one way online doesn’t mean he or she will be the same in person. Online dangers can often be avoided by following secure habits (antivirus software, privacy settings, passwords, and so on); however, when you meet people in real life, criminal behaviors can take physical shape. Just be careful!
Finding Events
Ready to find something fun to do? Or how about seeing what your friends are attending? You can find out about an event in several ways. One way is to check the news feed on the Home page to see what events your friends are attending. You can also search for specific events.
On the Home page, you can view upcoming events on the right side of the page just above all the advertising. You can use the Events page to view a list of all the events you’ve responded to or are invited to. To access the app, just click the Events link on the left side of the Home page. Facebook opens the Events page, shown in Figure 12.2.
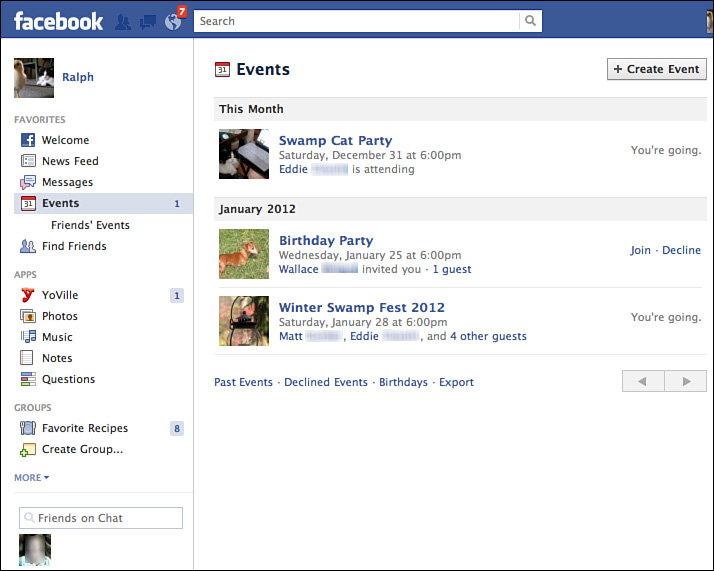
Figure 12.2 Use the Events page to view your events.
You can use this page to view events by month and make use of the following links at the bottom of the listing:
• Past Events—Displays an archive of previous events.
• Declined Events—Displays events you’ve declined.
• Birthdays—Displays all your Facebook friends with upcoming birthdays.
• Export—Exports your events to another scheduling program, such as Microsoft Outlook or Google Calendar.
Also at the top of the Events page is a Create Event button for making your own event listings.
Searching for an Event
If you know the event you’re looking for, either by name or subject, you can use the built-in search tool to look it up. To conduct a search, click in the Search box at the top of the Facebook page.
Type in the word or words you want to search for. As you type, Facebook displays a drop-down menu with any matching results, similar to those shown in Figure 12.3. Click the See More Results option at the bottom of the menu to open a search results page, as shown in Figure 12.4. Click the Events filter on the left side of the page to display just events in the results and not just any Facebook page.

Figure 12.3 You can use the search feature to look for specific events.
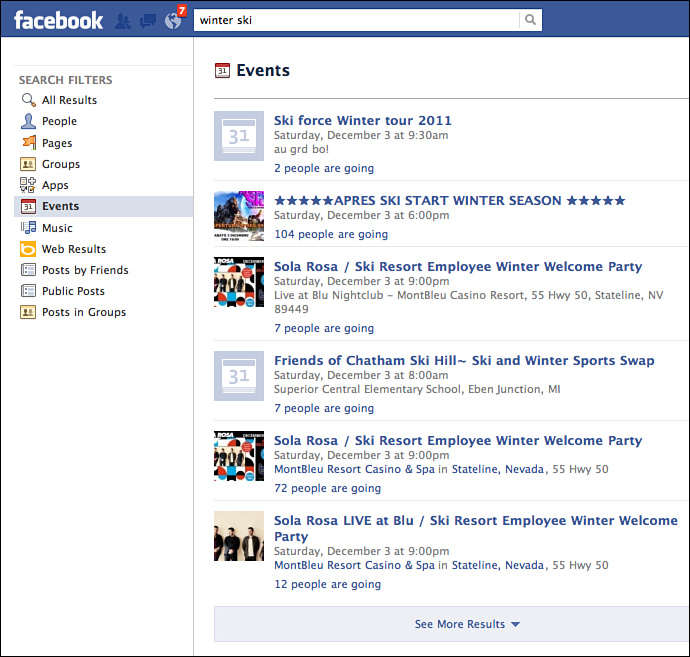
Figure 12.4 Filter your search results to show only events.
When you see an event that matches what you want, you can click the event name to view the event’s page. You can find out more about the event, see who is attending, and locate a link to RSVP yourself.
Responding to an Event
To sign up to attend an event, click the Join button on the event’s page, as shown in Figure 12.5. This immediately adds your name and a thumbnail of your profile picture under the Going category located on the left side of the event page.
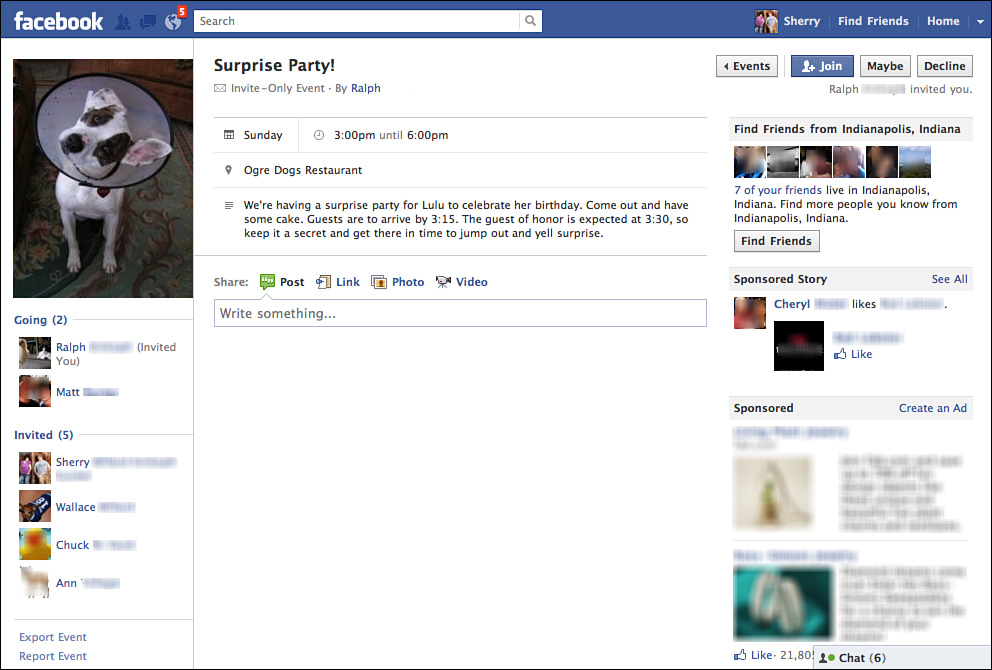
Figure 12.5 Use the response buttons to let the page administrator know whether you’re attending.
If you’re not attending, click the Decline button. If you’re still undecided, click the Maybe option, which adds your name under the Maybe category. In the past, Facebook events utilized the common RSVP lingo to interact with events to which you’re invited, including buttons for attending and not attending. With the latest Facebook interface, the event response buttons are labeled Join, Maybe, and Decline.
Meanwhile, back on the Events page, you can quickly see whether you’re attending an event, and you can even join an event without having to open the event’s profile page.
You can also change an RSVP response from the event’s profile page. For example, if you originally said you were attending, but now you need to cancel, you can open the profile page, click the Going button, and change your response. If you originally declined an invitation, you can open it again through your Events page by clicking the Past Events link and revisiting the event page from there.
Creating Your Own Events
You can create your own events and invite others to join you. Events run the full gamut from public gatherings to intimate parties. For example, if you’re part of a group organizing a “fun run” race or other fundraising event, you can create a Facebook event and invite people to attend. After people start responding, their friends see the event, and they think about attending, too. It’s great word of mouth about your group and your cause. Facebook events are perfect for advertising festivals, flea markets, gallery openings, holiday parties, business meetings, conventions, piano recitals, tournaments, workshops, and so on.
Before you begin creating a new event, take a moment and figure out the details you’ll need for posting the event. Required data includes a name for the event and a date and time. You cannot create an event without this information. You’ll also need some basic information, such as the location of the event. Although it’s not a requirement, having a picture handy to go along with your event page—something that illustrates what the event is about or the organization hosting the event—is a good idea.
When you’re ready to create an event, follow these steps:
1. Open the Events page (by clicking the Events link on the Home page).
2. Click the Create Event button. Facebook opens a form you can fill out to create the event, as shown in Figure 12.6.
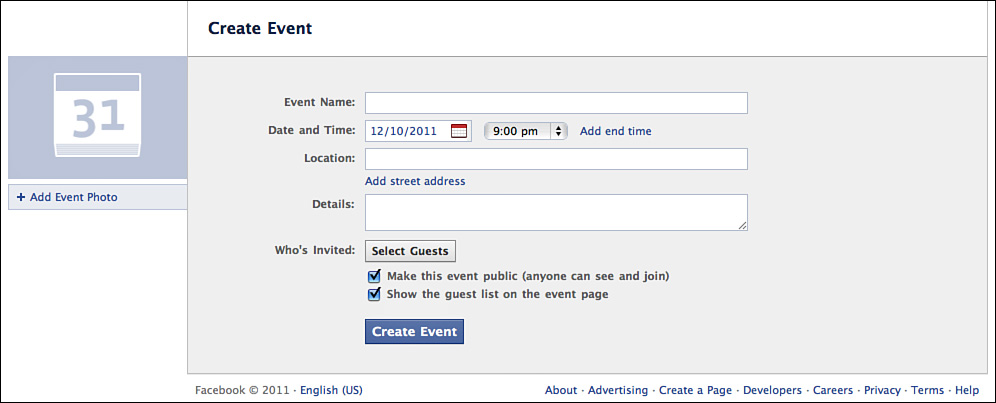
Figure 12.6 To create a new event, fill out this form page.
3. Click in the Event Name box and type a name for the event.
4. Click the Date and Time boxes to set the date, start time, and (optionally) end time.
5. Click in the Location box and type a location.
6. Click in the Details box and type all the details surrounding the event. Details can include instructions for guests, directions, or any other info you need to convey or explain about the event.
7. To invite friends, click the Select Guests button to display the Invite Friends dialog box, shown in Figure 12.7.
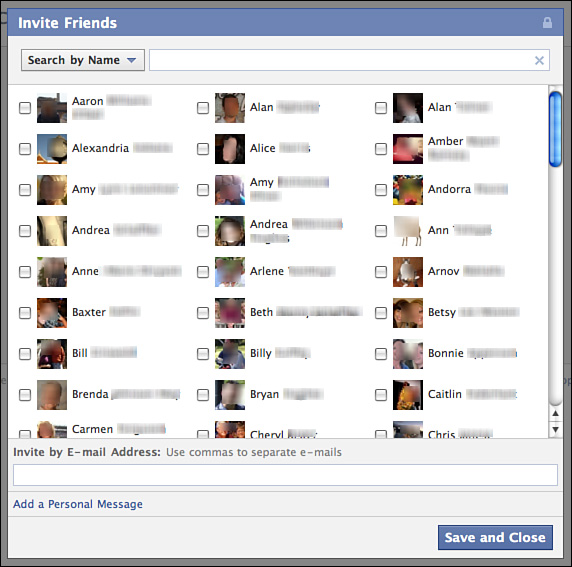
Figure 12.7 Use this dialog box to invite your friends to the event.
8. Select which friends you want to invite, and then click the Save and Close button.
Optionally, you can add a personal message to the invitation by clicking the Add a Personal Message link and typing the message.
You can also invite people outside your Facebook circle; just type the email addresses in the Invite by E-mail Address box.
Caution
You can only invite 100 people at a time. If you need to invite more, use the Invite Friends link found on the event’s profile page.
9. Choose whether you want the event to be public or private. Deselect the Make This Event Public check box to make the event private.
To include the guest list on the event’s profile page, leave the Show the Guest List on the Event Page check box selected.
10. To add a photo to the page, click the Add Event Photo link and upload a picture.
11. Click the Create Event button at the bottom of the form.
Facebook displays the event page and sends out your invitations.
Managing Your Events
After you’ve created an event, you’re automatically the administrator of the event page. This means you can edit the page’s info, make changes to the guest list, and send out more invitations as needed.
To view the page at any time, open the event’s profile page. Here’s what you can do:
• To edit the page, just click the Edit button. This opens the same form you used to create the event, and you can make changes to the information.
• To invite more people to come, click the Invite Friends link and select more Facebook friends to invite.
• To send a message to attendees, such as a reminder about the date, click the cog-like icon and select Message Guests.
• To cancel the event, click the cog-like icon and select Cancel This Event to open a prompt box; click Yes. Facebook notifies everyone on your guest list. Canceling is a one-time deal—you cannot undo it and “uncancel” the event again.
You can continue monitoring your event page leading up to the event, checking to see who is attending, not attending, or thinking about attending, and viewing any page content left by the invitees. You can send out messages to the attendees. You can also update the page with the latest news about the event as it draws near.
Summary
In this lesson, you learned how to find and create events on Facebook. You learned how to look for events to attend, and how to create a new event and invite your friends. You also learned how to respond to event invitations and administer an event page. In the next lesson, you’ll learn how to use Facebook applications.