
7. Using Your iPad for School
In this chapter, you learn about some of the many ways the iPad can help you do your schoolwork, including:
• Writing and printing on the iPad
• Using Notes
• Using Pages
• Using your iPad in class
• How to use the Internet for homework
Your iPad isn’t just an awesome gadget for games, music, movies, and the Internet. It’s also a powerful tool for doing your schoolwork. That might seem like less fun than some of the other stuff in this book, but if your parents bought your iPad, they’ll be glad they did if you use it for school, too. From writing papers to keeping track of your schedule to doing research online, you can use your iPad in almost every part of your academic life.
Writing and Printing on the iPad
Writing on the iPad involves a lot more than just tapping on the screen when the keyboard appears. It can include wireless keyboards, hidden special symbols, and, of course, lots of useful apps.
To start writing, though, you need to decide what kind of keyboard you want to use. Two kinds of keyboards can be used with the iPad: the onscreen keyboard that pops up in lots of apps or an external keyboard. Some external keyboards connect using the Dock Connector; wireless keyboards use Bluetooth to link to the iPad.
Which Keyboards You Can Use
Even though it would be nice—and a lot easier—you can’t just use any keyboard with your iPad. Most computer keyboards connect to the computer with a type of cable/connector called USB. Your iPad doesn’t have a USB port. Therefore, instead of plugging your computer keyboard into the iPad, you have to get a separate one.
Remember the Dock Connector, the port on the bottom of the iPad that you plug the cable into to sync? A few keyboards plug into that and then prop the iPad up for easy typing.

Apple makes the most popular one of these keyboards. It’s pretty nice, but because it’s a regular keyboard—and one with a very awkward shape—it doesn’t fold or bend and isn’t as portable as some other options.
The other option is a Bluetooth keyboard.
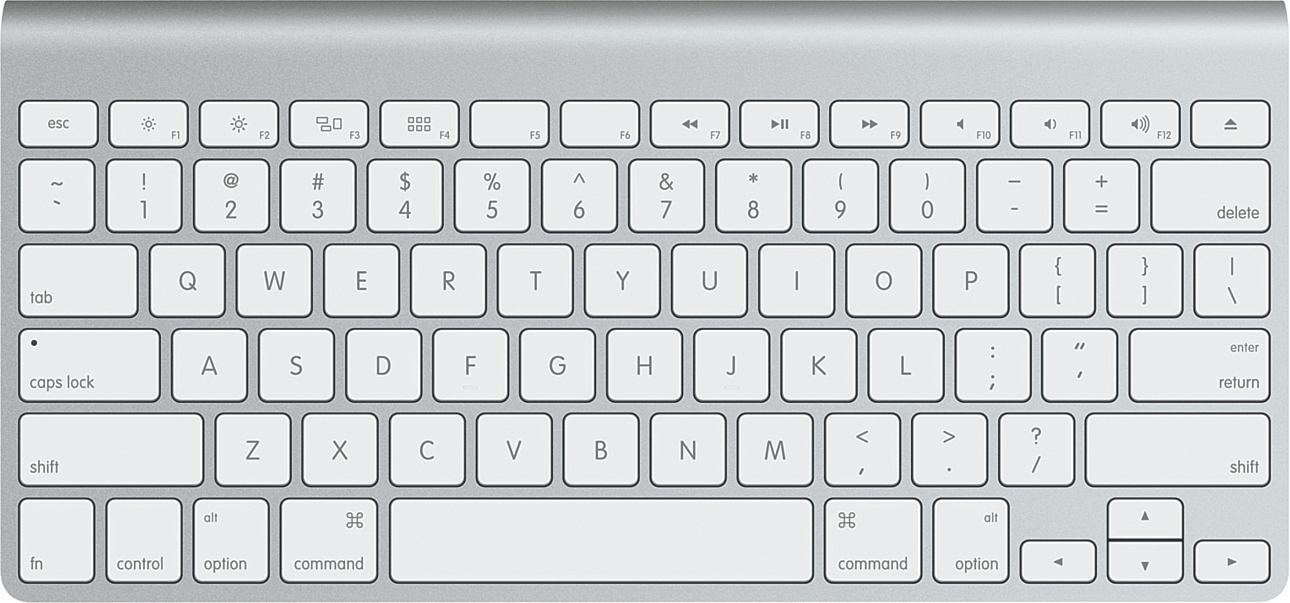
Bluetooth is a kind of wireless technology that lets your iPad connect to accessories such as speakers, headphones, and keyboards. Bluetooth keyboards are cool because they’re wireless, so the iPad doesn’t have to be right next to the keyboard. Some of them fold up, making them easier to carry, and others come with carrying cases and mount the iPad like a laptop.
Which kind of keyboard is best for you depends on what you like, what you can afford, and where you’re using the keyboard (the Dock Connector version might be better on a table, while the Bluetooth version could be better in bed or in your lap).
Connecting a Bluetooth Keyboard to Your iPad
If you choose a Bluetooth keyboard, you need to follow a few steps to connect it. Before you begin, make sure your keyboard is near the iPad; Bluetooth can only connect devices that are within a few feet of each other. Also, make sure the keyboard has charged batteries in it. Now you can follow these steps:
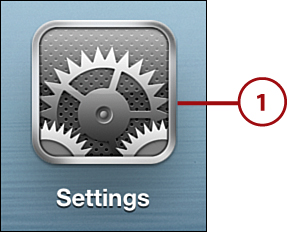
1. Open the Settings app on your iPad.
2. Tap Bluetooth from the options available and then, on the Bluetooth screen, move the slider to On.
3. Your keyboard (make sure it’s powered on) will appear in the devices menu. Tap it.
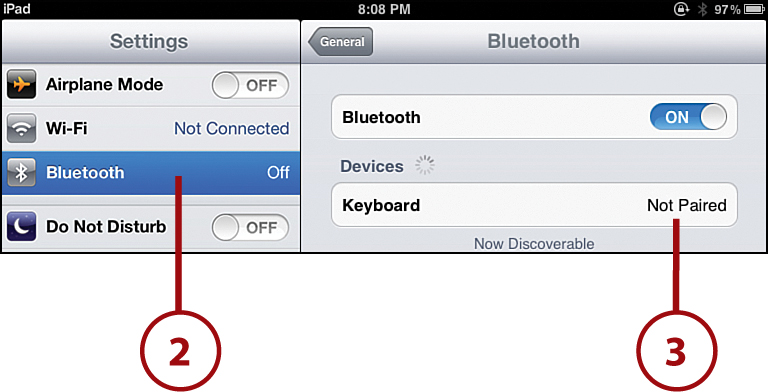
Some Bluetooth keyboards have to be put in what’s called “pairing mode.” This means they’re ready to connect to the iPad. Check your keyboard’s instructions to find out if you need to, and to learn how to, put it in pairing mode.
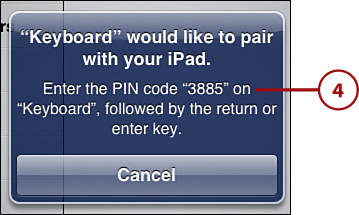
4. A window appears on the iPad with four numbers in it. Type them on your keyboard and then press Enter on the keyboard.
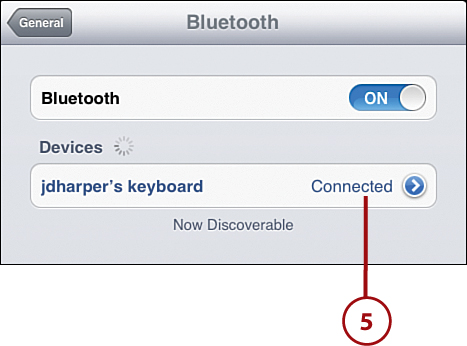
5. If everything worked, the Devices menu should now show your keyboard and read “Connected.” If not, check the instructions that came with your keyboard and try again (or ask a parent for a little help).
Using the Onscreen Keyboard
External keyboards aren’t your only option, though. The iPad has an onscreen keyboard that can be a great option for writing. The iPad’s onscreen keyboard appears in any app where you can enter text, such as Mail, Notes, or Safari. There are a few tricks about using the onscreen keyboard you should know.
Entering Numbers or Symbols
To enter a number or symbol using the onscreen keyboard, follow these steps:
1. Tap the number button. The keyboard changes to show numbers and some basic punctuation marks.
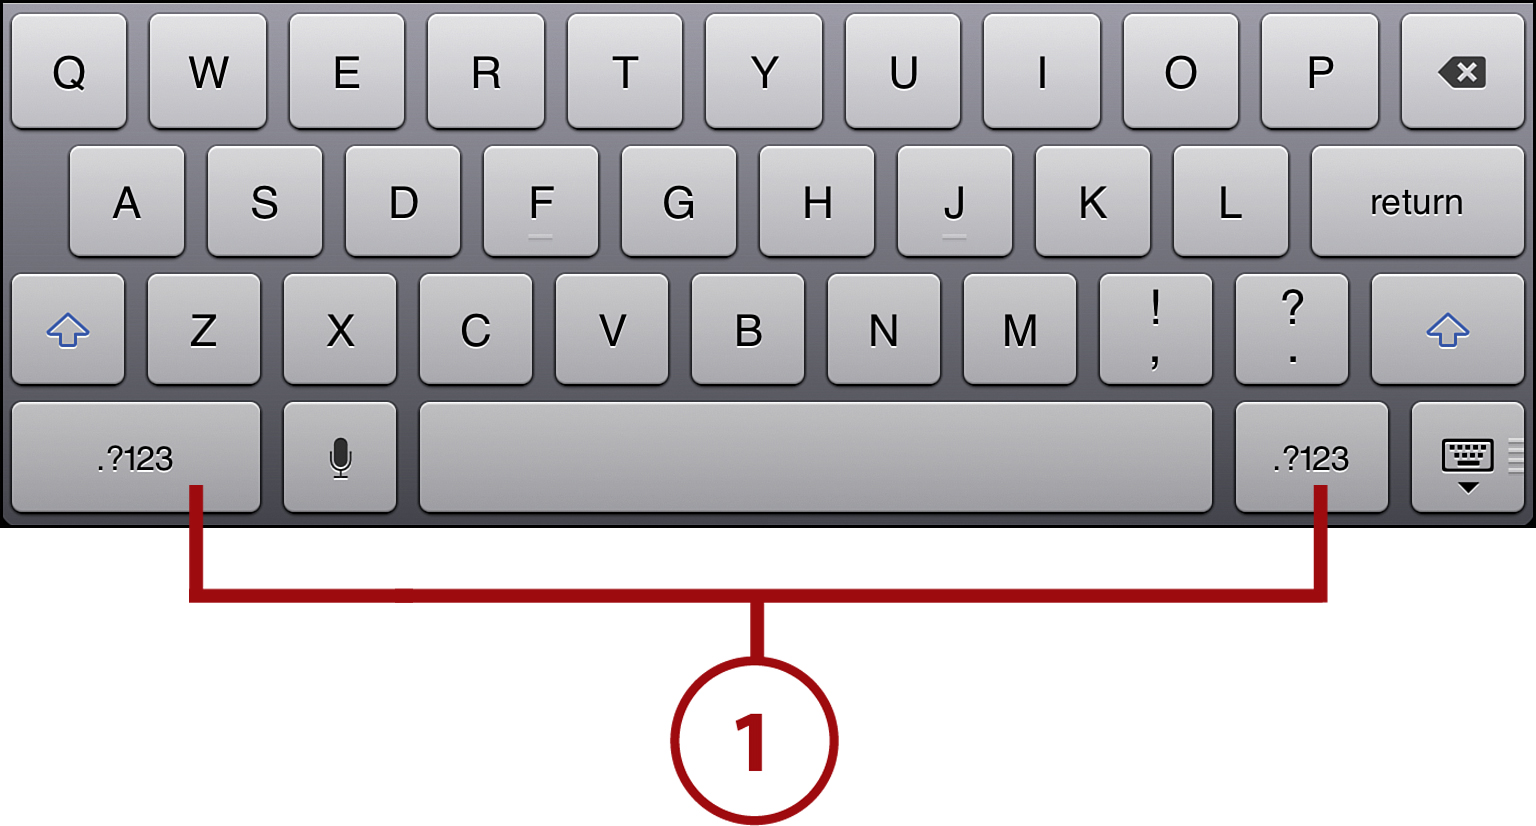
2. Here you can enter numbers along with a variety of symbols, such as parentheses, question mark, and so on. To access more uncommon symbols, tap the symbols button on the number keyboard.
3. To go back to the regular keyboard, tap the letters button. To go back to the numbers and punctuation marks, tap the numbers button (which button you see depends on which keyboard screen you’re on).

Entering Accent Marks and Alternate Symbols
To write words in other languages, or use some really unusual and fun symbols, you have to tap and hold certain letters and punctuation marks. When you do this, you see lots of alternate versions. The letters that have these alternate versions are a, e, i, o, u, c, and n. The punctuation marks that have alternative versions are -, $, &, “, ., ?, !, ‘, and %.
To use an alternate version of a letter or punctuation mark, follow these steps:
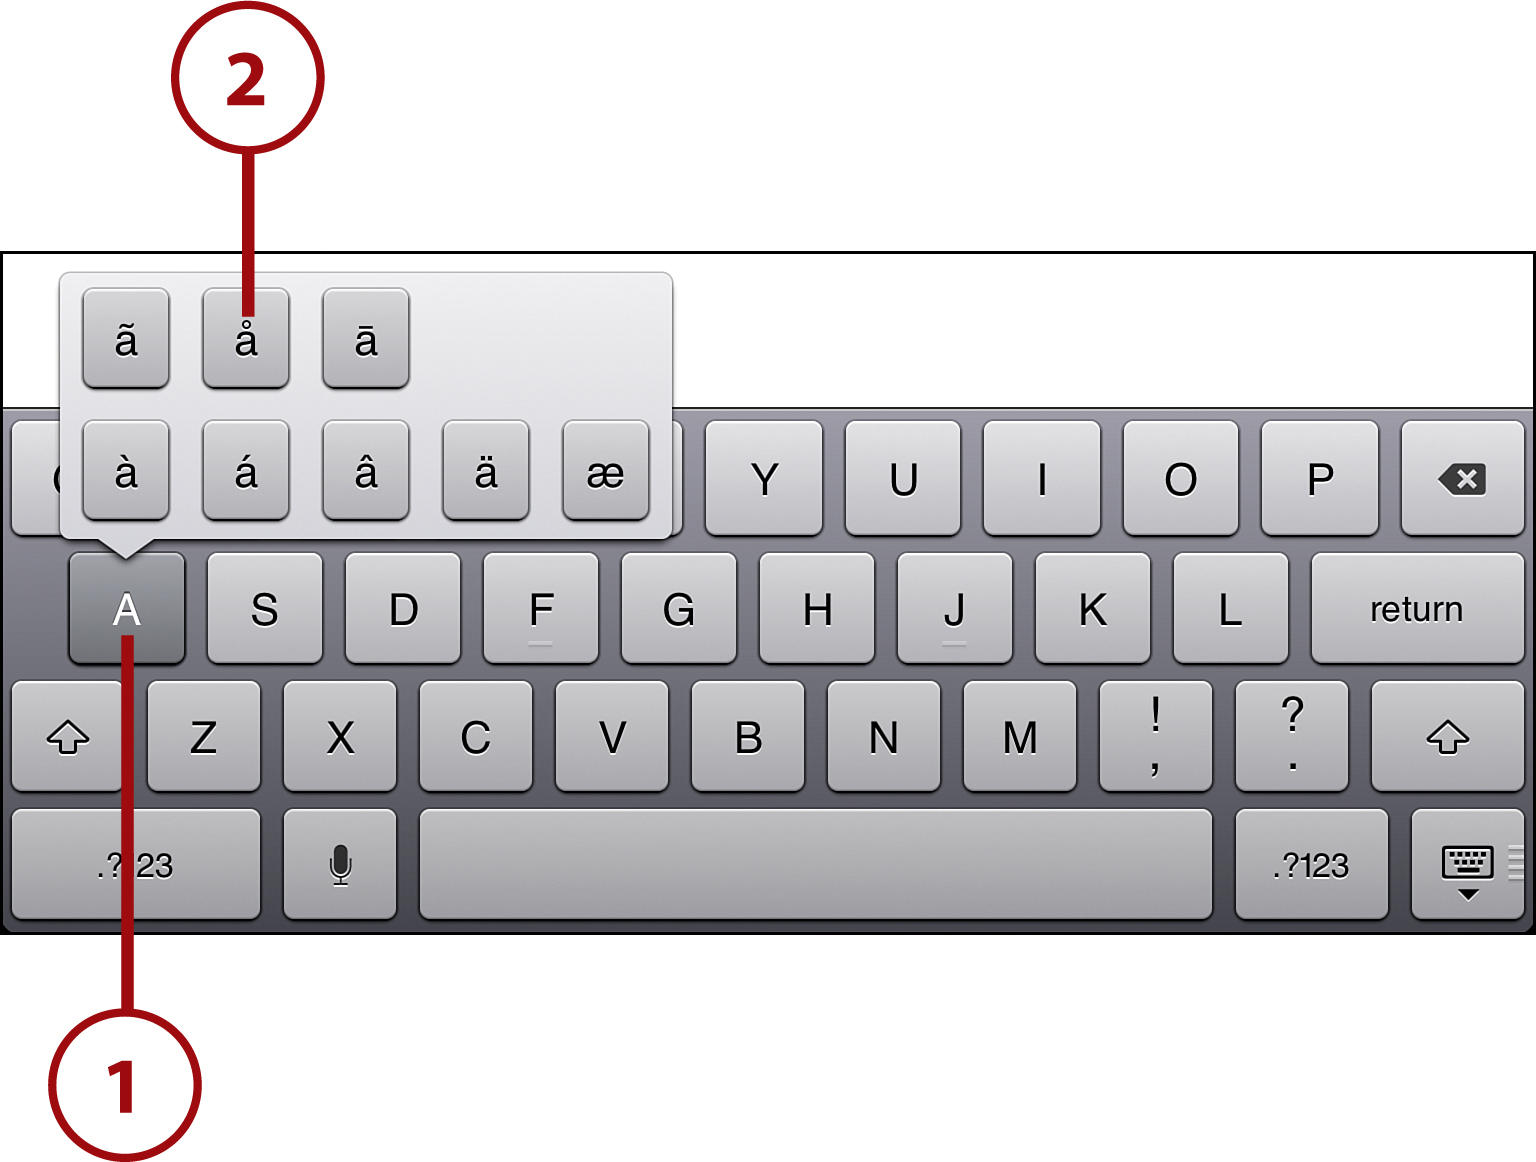
1. Tap and hold one of the keys that has alternate versions. Options pop up above it.
2. To select an alternate version, don’t take your finger off the screen (if you do, the options disappear). Instead, slide your finger to the option you want, and when the option turns blue, take your finger off the screen. The alternate version appears where you were typing.
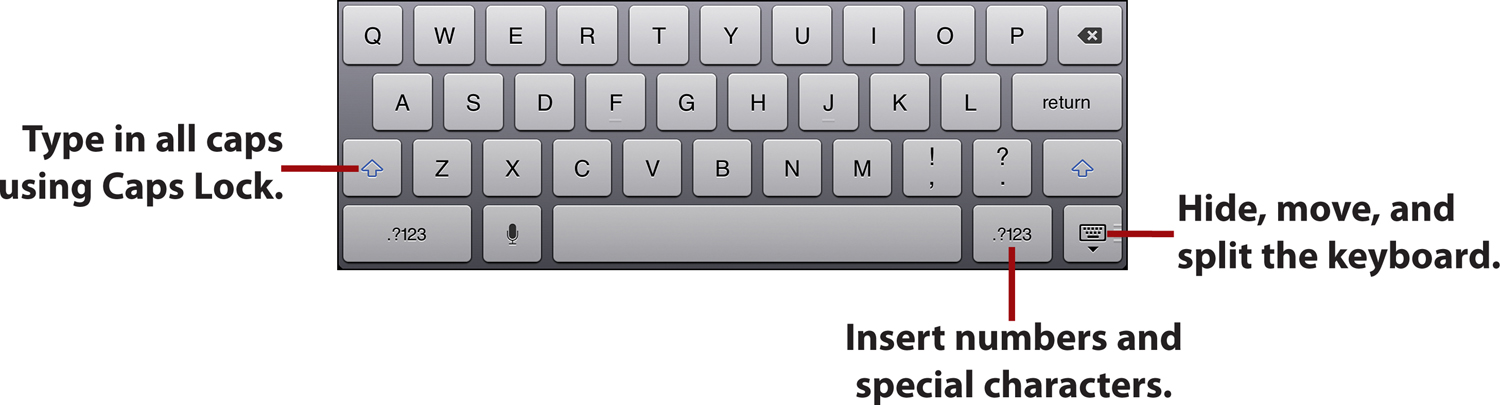
Enabling the Caps Lock
If you want to type something all in uppercase letters, the fastest and easiest way is to use Caps Lock.
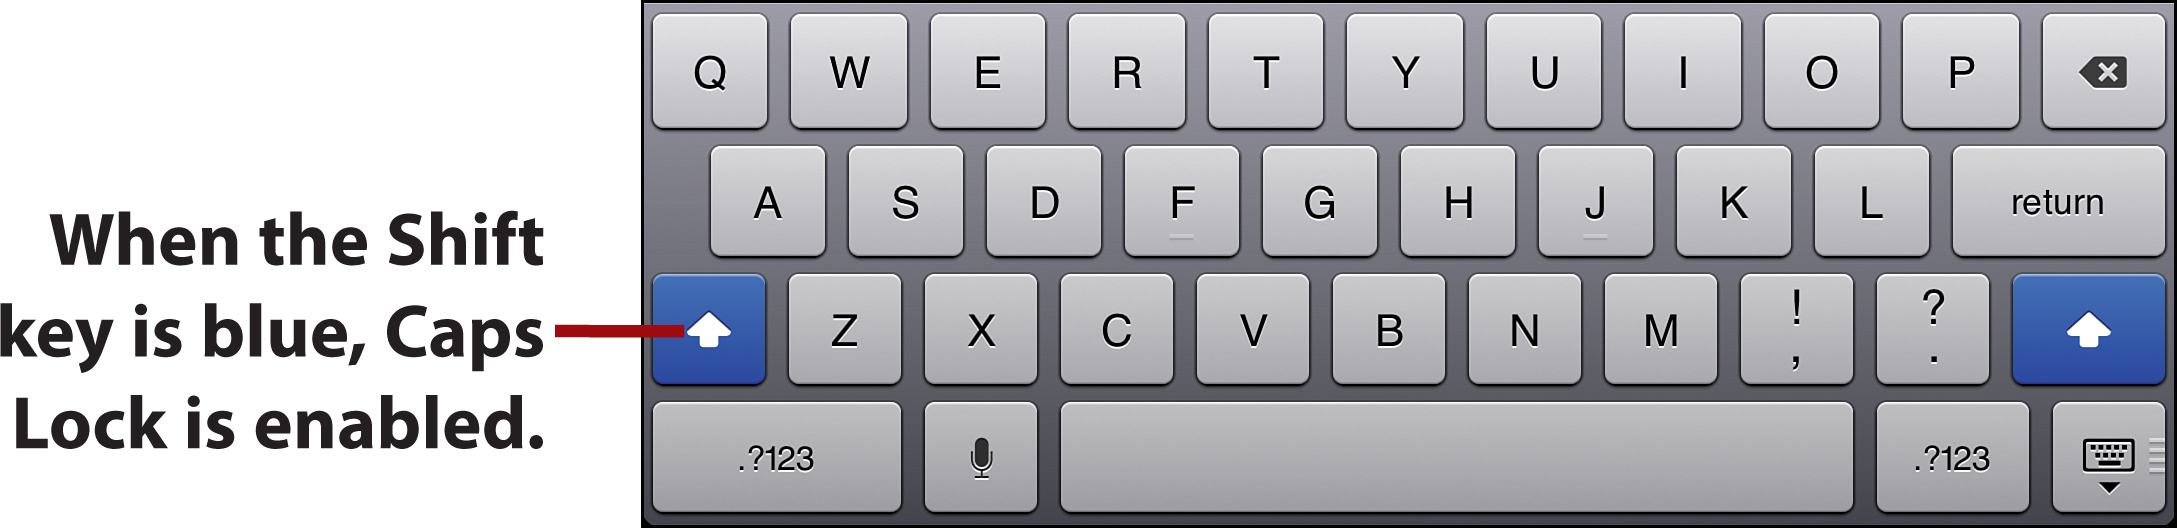
• To do this, double tap the Shift (up-arrow) button on the keyboard. It turns blue. This means Caps Lock is on.
• When you want to turn Caps Lock off and start using lowercase letters again, single-tap the up-arrow button.
Copying and Pasting Text
Copying and pasting text on a desktop computer is pretty easy: Select the text you want, click the necessary menus or keyboard shortcuts, and paste the text where you want it to go. But the iPad doesn’t have menus or the same keyboard keys as your desktop, so how do you do it?
Not every iPad app handles copying and pasting exactly the same way, so there’s no single way to show you how to do it. These steps show you one way. If the app you’re trying to copy and paste in handles it differently, use what you learn here and try to apply it to that different process.
Begin by finding the text you want to copy (nearly every app on your iPad that lets you write, read articles, or browse the Web offers copy-and-paste functionality). After you’ve done that, follow these steps:
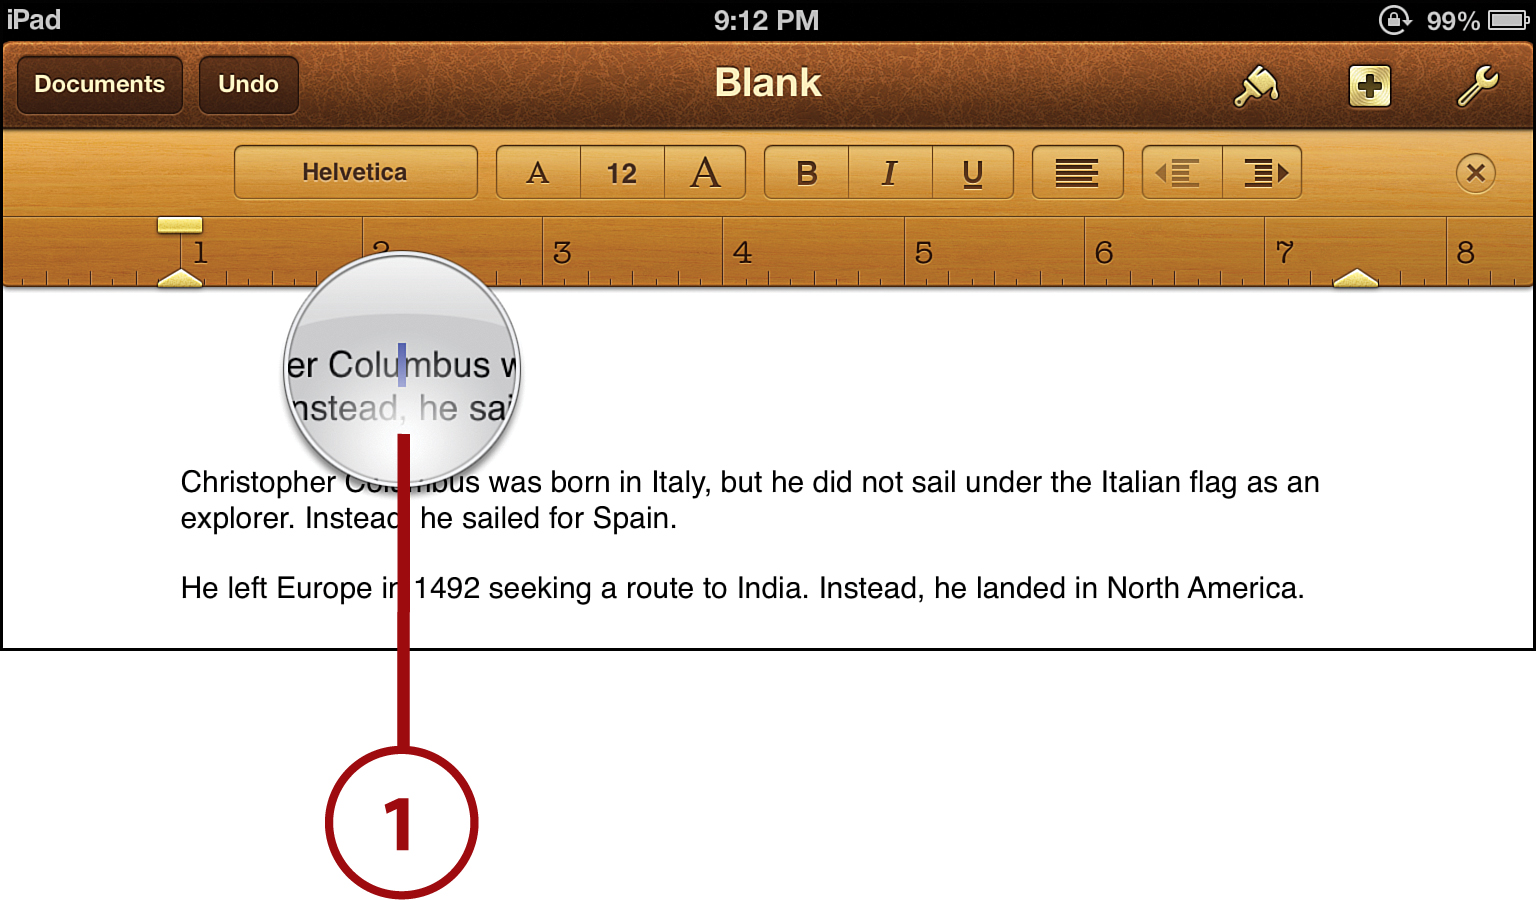
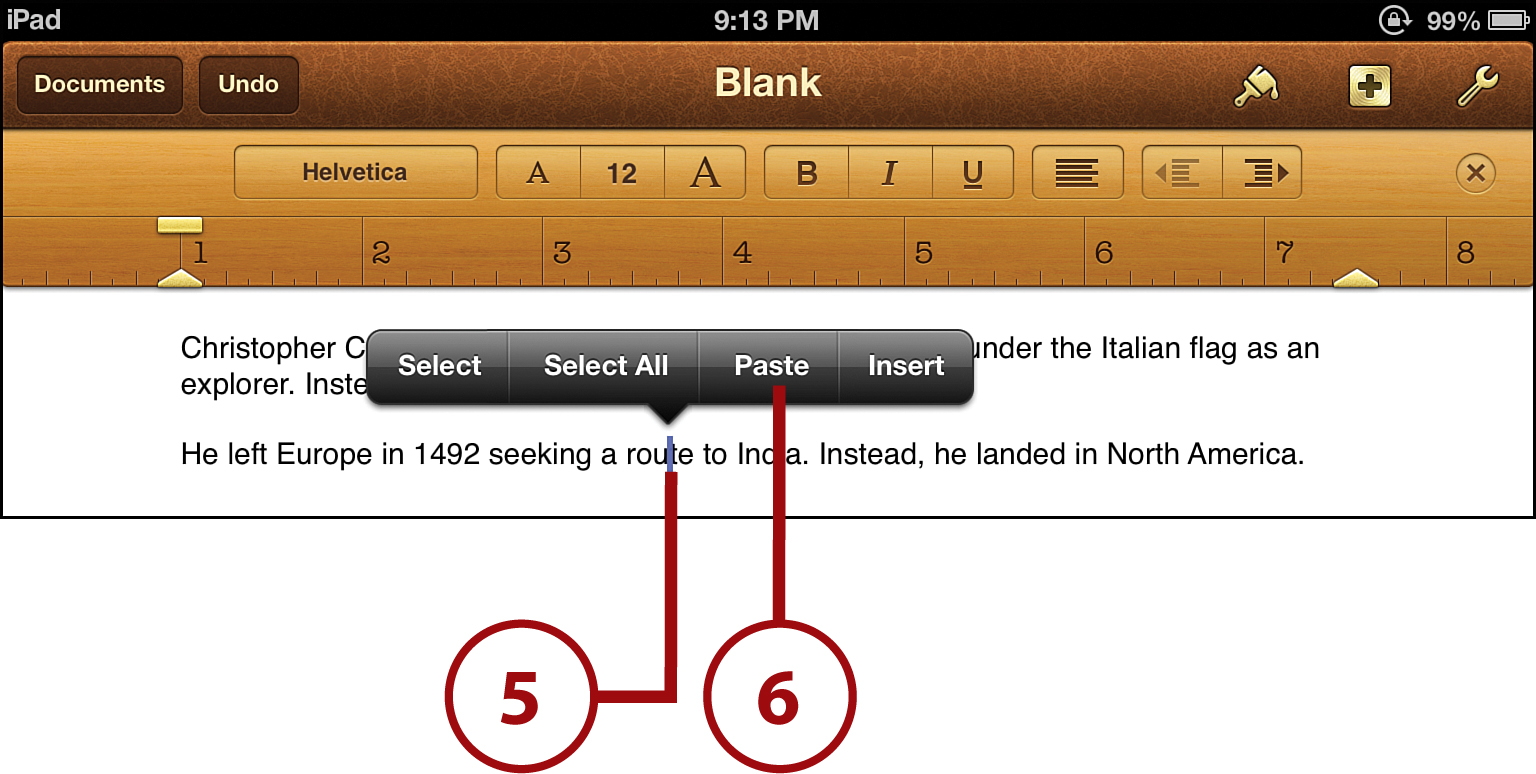
1. Tap and hold on the text you want to copy until the magnifying glass pops up. Then let go.
2. To select just one section of the text, tap Select.
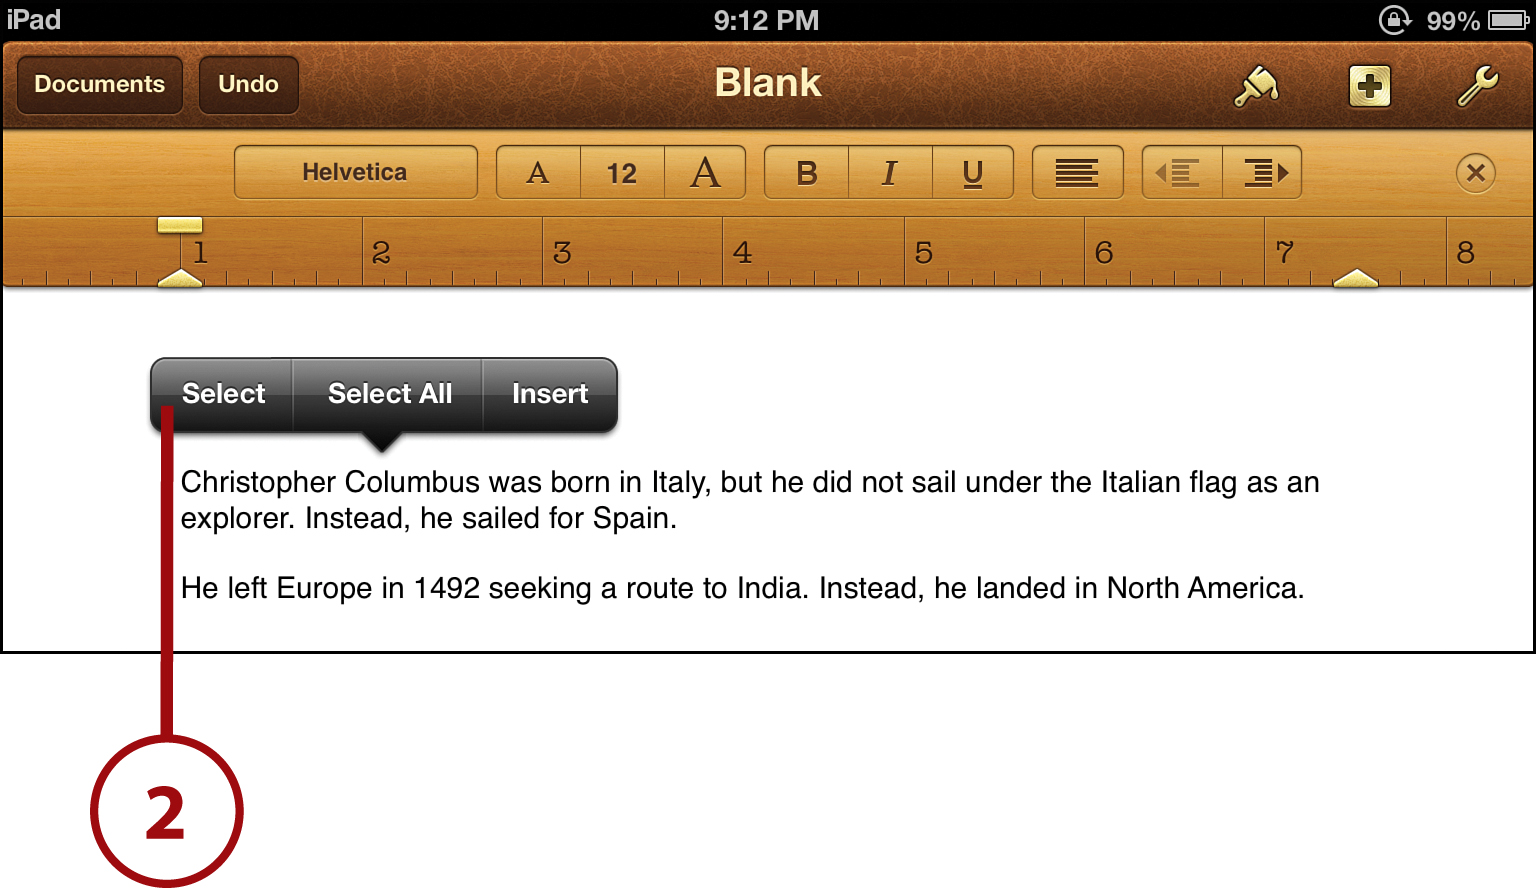
3. When you tap Select, the text you tapped gets highlighted in blue. The blue highlight tells you what text is selected to be cut or copied. You can change the selection by dragging the blue dot on either side of the selected text.
4. Most apps let you choose to cut or copy the text. Cut means you’ll delete the text and then paste it somewhere else. Copy means you’ll make a copy to paste elsewhere, but not delete the original text. As mentioned earlier, different apps have slightly different options, but they should all at least offer copy.

5. Find the place where you want to paste the text—this could be in the same app or another app; it doesn’t matter. Tap and hold until the magnifying glass appears. Then let go.
6. Tap Paste in the menu that appears.
Syncing Documents to Your iPad with iTunes
It’s easy to move documents such as school papers and e-books from your computer onto your iPad. To do that, you first have to sync your iPad and computer. After you’ve done that, follow these steps:
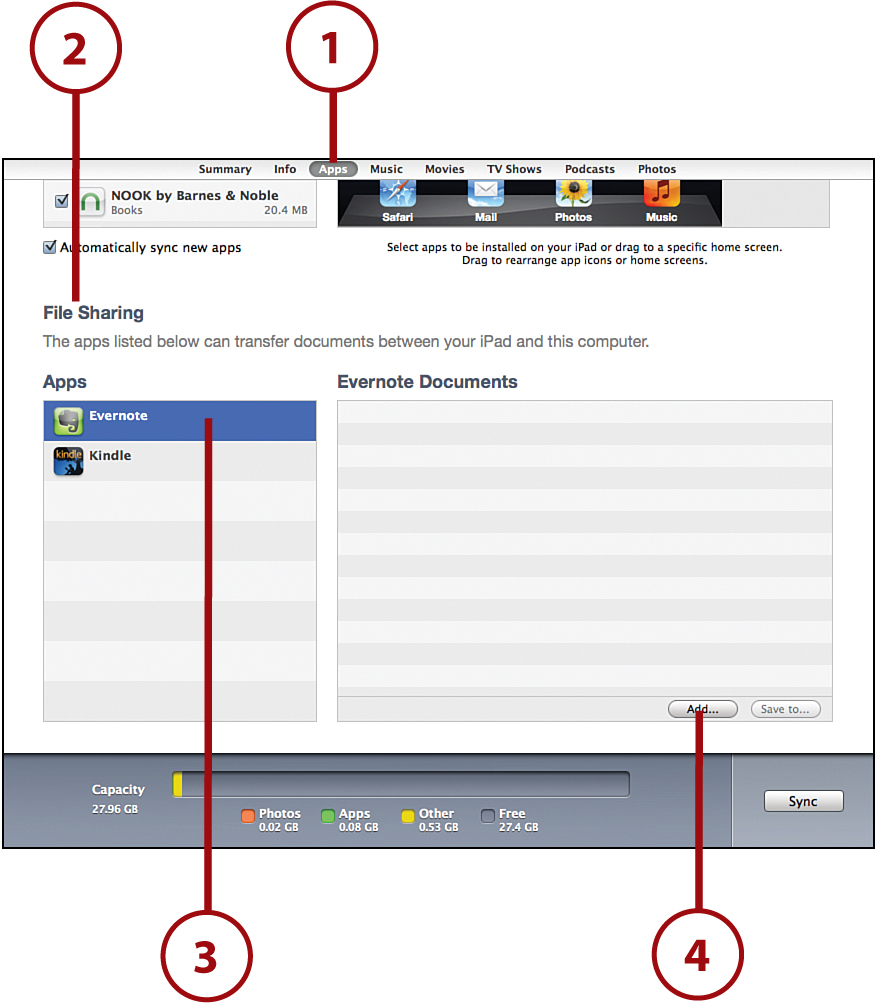
1. In iTunes, click the Apps tab to access the document-sharing options.
2. Scroll to the bottom of that screen and find File Sharing.
3. You see a list of all the apps on your iPad that can sync documents with your computer. Click the app you want to sync the document to.
4. Click Add.
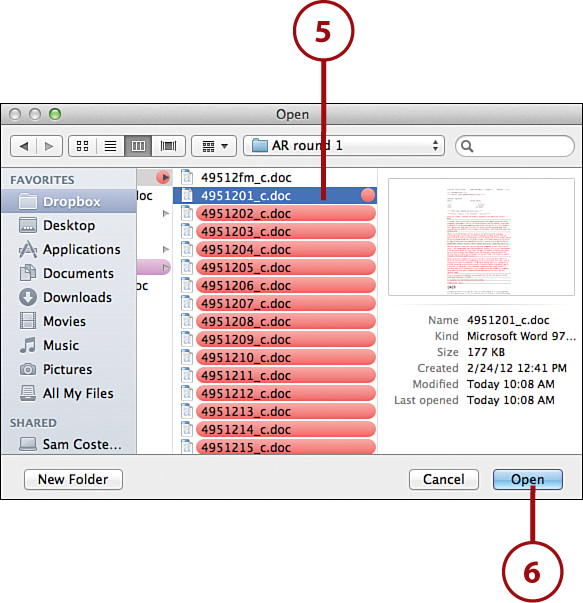
5. Browse through the window until you find the document you want to sync. Click once on the document.
6. Click Open. Repeat this for as many documents as you want to sync to that app. You can also choose other apps and repeat these steps to sync documents to them.
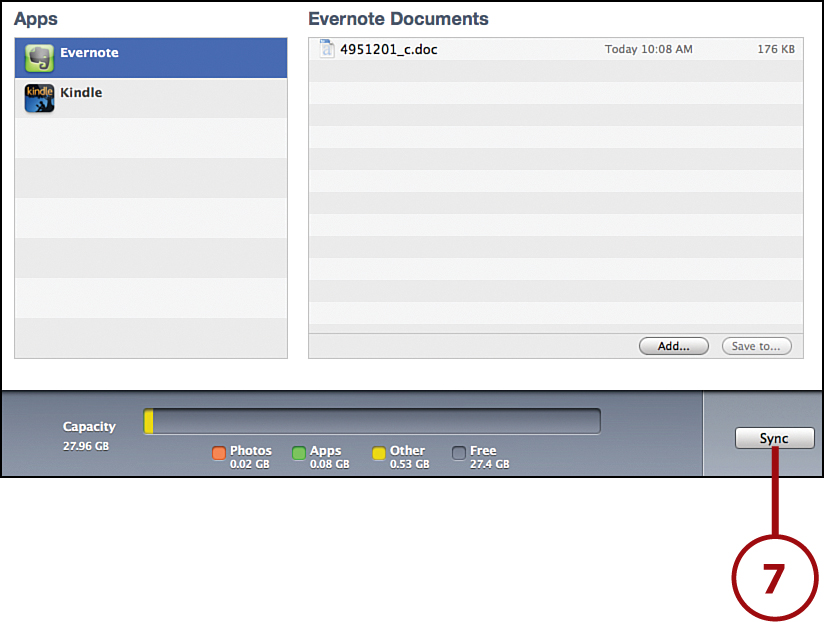
7. When you’ve added all the documents you want to sync, click the Sync (or Apply) button in iTunes. When the sync is complete, the documents will be on your iPad. Just tap the apps you synced them to and you can start reading them.
AirPrint and Compatible Printers
Just like with keyboards, printing from the iPad is a little tricky because there’s no connector for printers to plug into. You can always sync or send files from your iPad to your computer to print there, but if you don’t have a computer or want to print right from your iPad, you need something else: AirPrint.
AirPrint is an Apple technology that lets you print wirelessly from your iPad to certain printers. For this to work, you can’t use just any old printer; you need one that’s AirPrint compatible.
Because not all printers support AirPrint—not even all printers that have Wi-Fi—you and your parents need to do some research if you’re thinking of getting one. The list of printers that support AirPrint is always changing, but big companies such as Hewlett-Packard, Epson, Canon, and Lexmark all make AirPrint-compatible printers.
How to Print
Just like different apps handle copy and paste differently, there’s no single way to print using iPad apps. That’s because apps are so different in what they do and how they look. There are a few common ways to print—such as by tapping the Action box (the square with the arrow curving out of it)—but you won’t find that in every app. (Not even every app that can print works this way.) This chapter includes tips on how to print in two writing apps, Notes and Pages. Many other apps that can print work in similar ways.
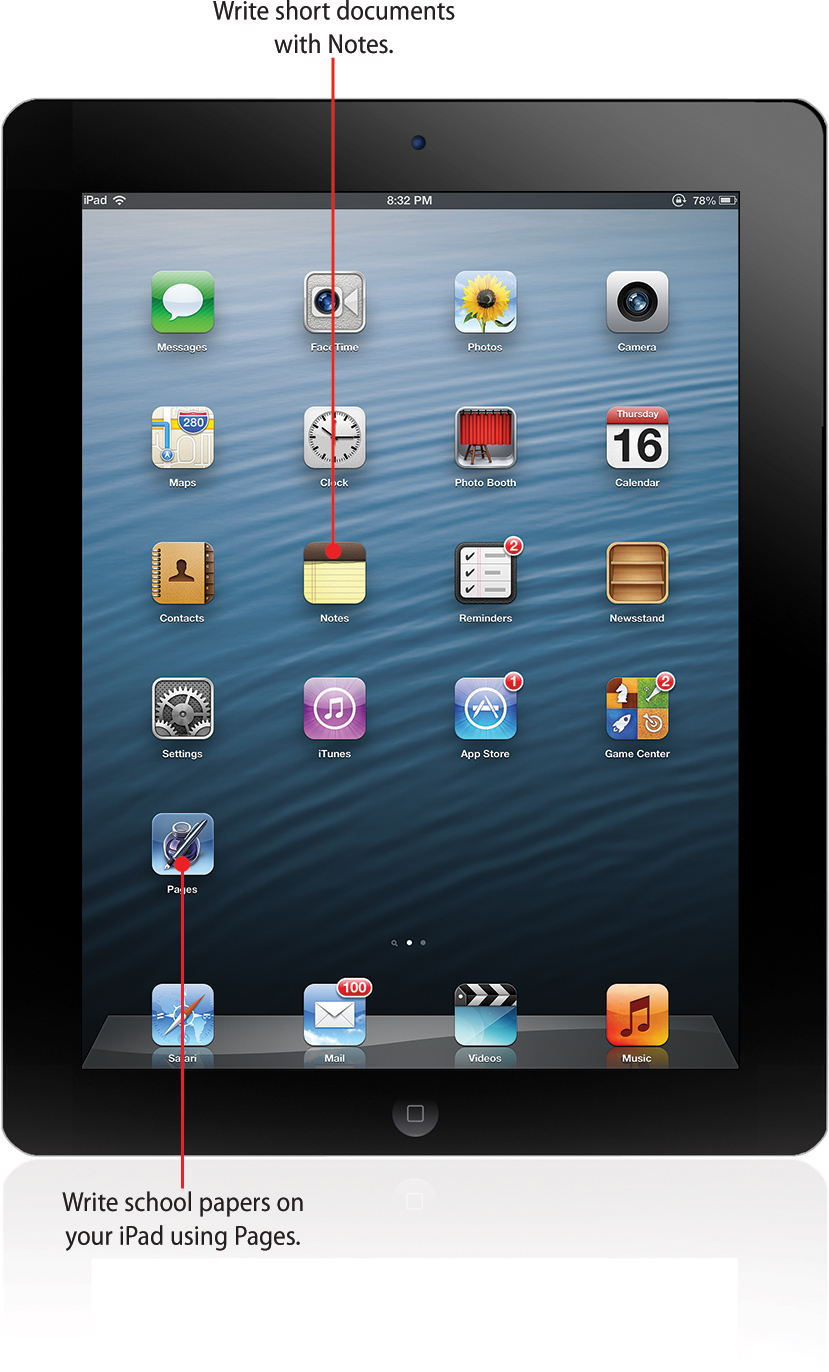
Writing Apps: Notes
If you want to write something besides an email—a school paper, for instance—the only writing app that comes with your iPad is Notes. Notes is far from the only writing app available for the iPad (check out the “Writing Apps: Pages” or “Awesome Apps” sections later in this chapter for others), but it’s a good tool for quickly writing down your ideas or keeping track of things. If you want to write papers for school, it might not be the best tool, but for writing short things, it’s a good choice.
Creating a New Note
To write something new using Notes, begin by tapping the app to open it and then follow these steps:
1. Tap the + button to create a new note.
2. A blank note and the keyboard appears. Begin typing.

Printing and Deleting Notes
After you’ve created a few notes, you can do several other things with the app. First, hide the keyboard by tapping the down-keyboard button. Then you have options such as the following:

• To email, text, or print a note, tap the Action box at the bottom of the page and tap Mail or Print. When you tap Mail, a new, blank email will be created with the text of the note in it. When you tap Message, a new message with the text of the note in it is created. When you tap Print, you’ll have to select your printer and the number of copies you want to print.
• To delete a note, tap the trash can icon and then tap Delete Note.
• To move between notes, tap the left and right arrows.
Viewing the Notes List
If you’ve created more than one note, you have two ways to see a list of all your notes so you can choose the one you want:
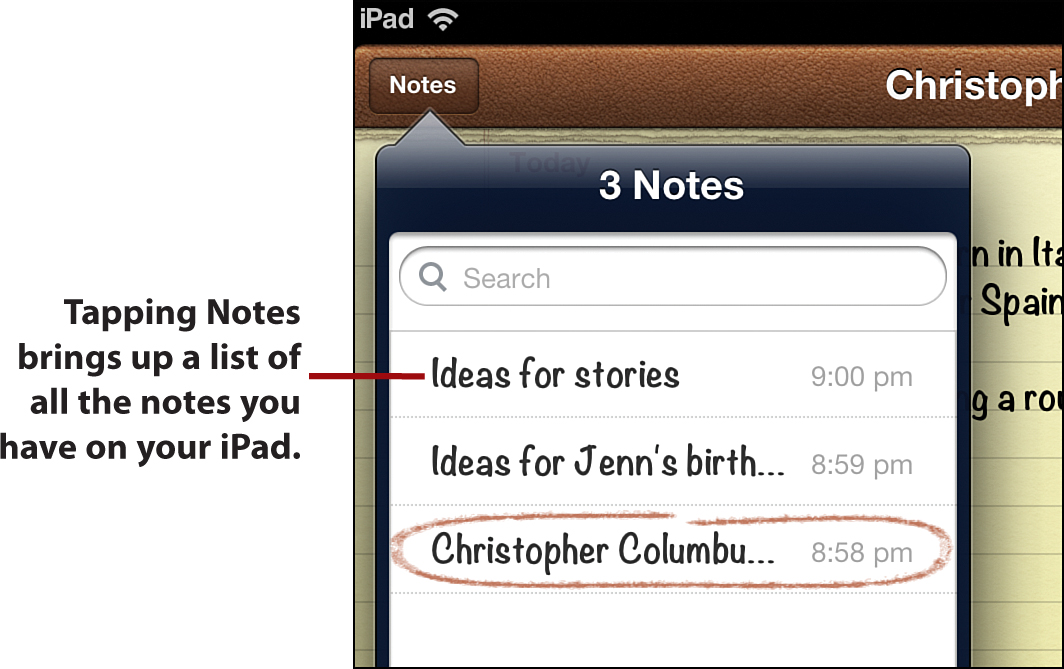
• If your iPad is in Portrait mode, tap Notes and then tap the note you want from the list.
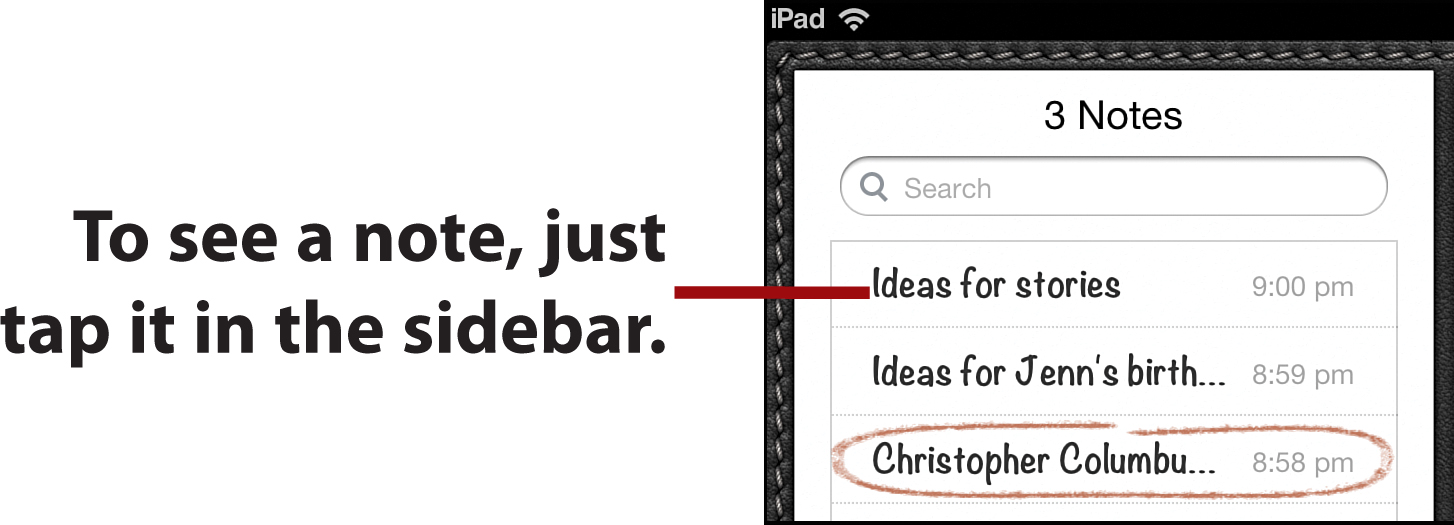
• In Landscape mode, the list of notes appears automatically in the sidebar. Simply tap the note you want to read or edit.
Writing Apps: Pages
If you want to create a document with images or charts in it, or that uses different fonts and colors, you need a more powerful app. There are a lot of good choices, but Apple makes one of the best. It’s called Pages, and you can buy it at the App Store.
If you’re planning to use your iPad to write papers for school, you’ll probably want Pages. Not only does it offer the features you’re probably used to from using programs like Microsoft Word, it has some special ones, too. For instance, it comes with document templates that allow you to write your own text while using the template’s layout to create a cooler-looking paper. It can also help you drag and drop pictures, charts, and graphs. With Pages, you have the tools to create homework that really wows your teachers.
Creating a Basic Document
To create a basic document in Pages, such as a short paper, note, or story, start by tapping the Pages icon on your iPad’s home screen to open the app and then follow these steps:
1. Tap +.
2. Tap Create Document to open a new document.

Just like in Notes, you won’t find a Save button in Pages. That’s because your changes get saved automatically every 30 seconds when you make them.
3. You see a selection of templates, pre-built documents designed for different uses (there are templates for letters, papers, reports, and much more). Tap the template you want to use to create your document. If you choose any template other than “Blank,” there will be some text and images in it already that show you how to use it; replace those with your own writing or pictures. For a plain document, tap Blank. From here you can immediately begin typing into the new document.
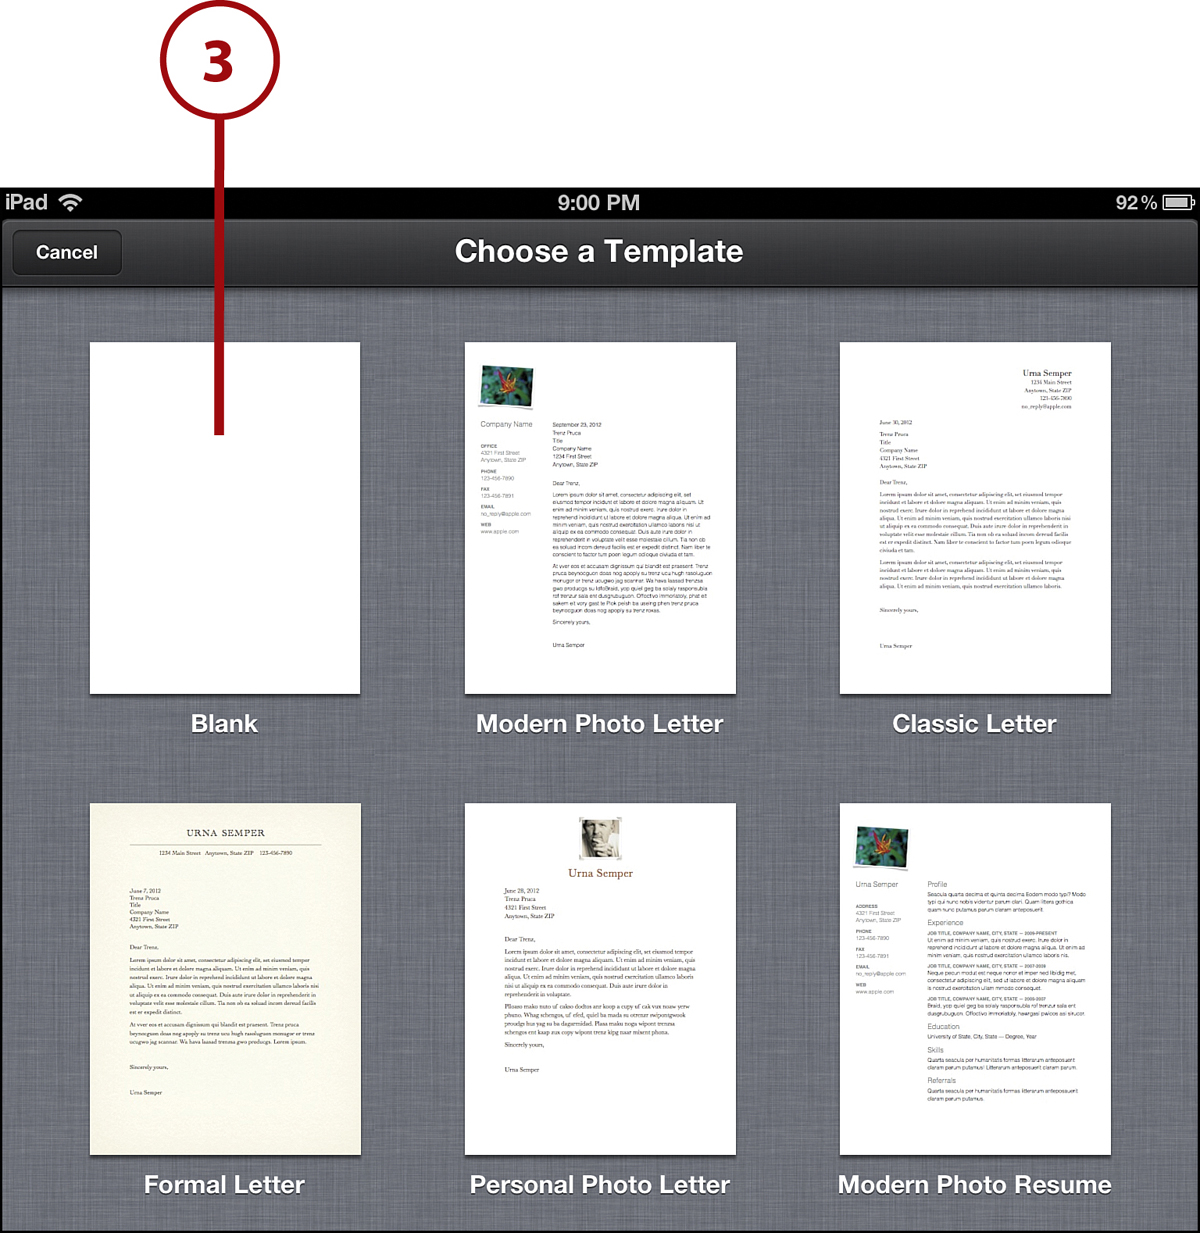
Pages comes with lots of different templates designed for various uses. They include different styles of letters, flyers, and school papers. Experiment with the templates when you have different kinds of documents to create. They’ll make it easier to create great-looking papers.
Formatting a Document
When you’ve begun writing a document, you’ll probably want to format your text—for instance, make it bigger or smaller or change the font. Formatting can be a lot of fun and a good way to make your papers more interesting and creative looking. Be careful, though: If you’re creating a paper for school, check with your teachers about what kind of formatting they like. Some teachers have very specific rules about that.
To format your documents, you need to select the text—which was already covered in the section “Copying and Pasting Text”—and then choose from the following options:
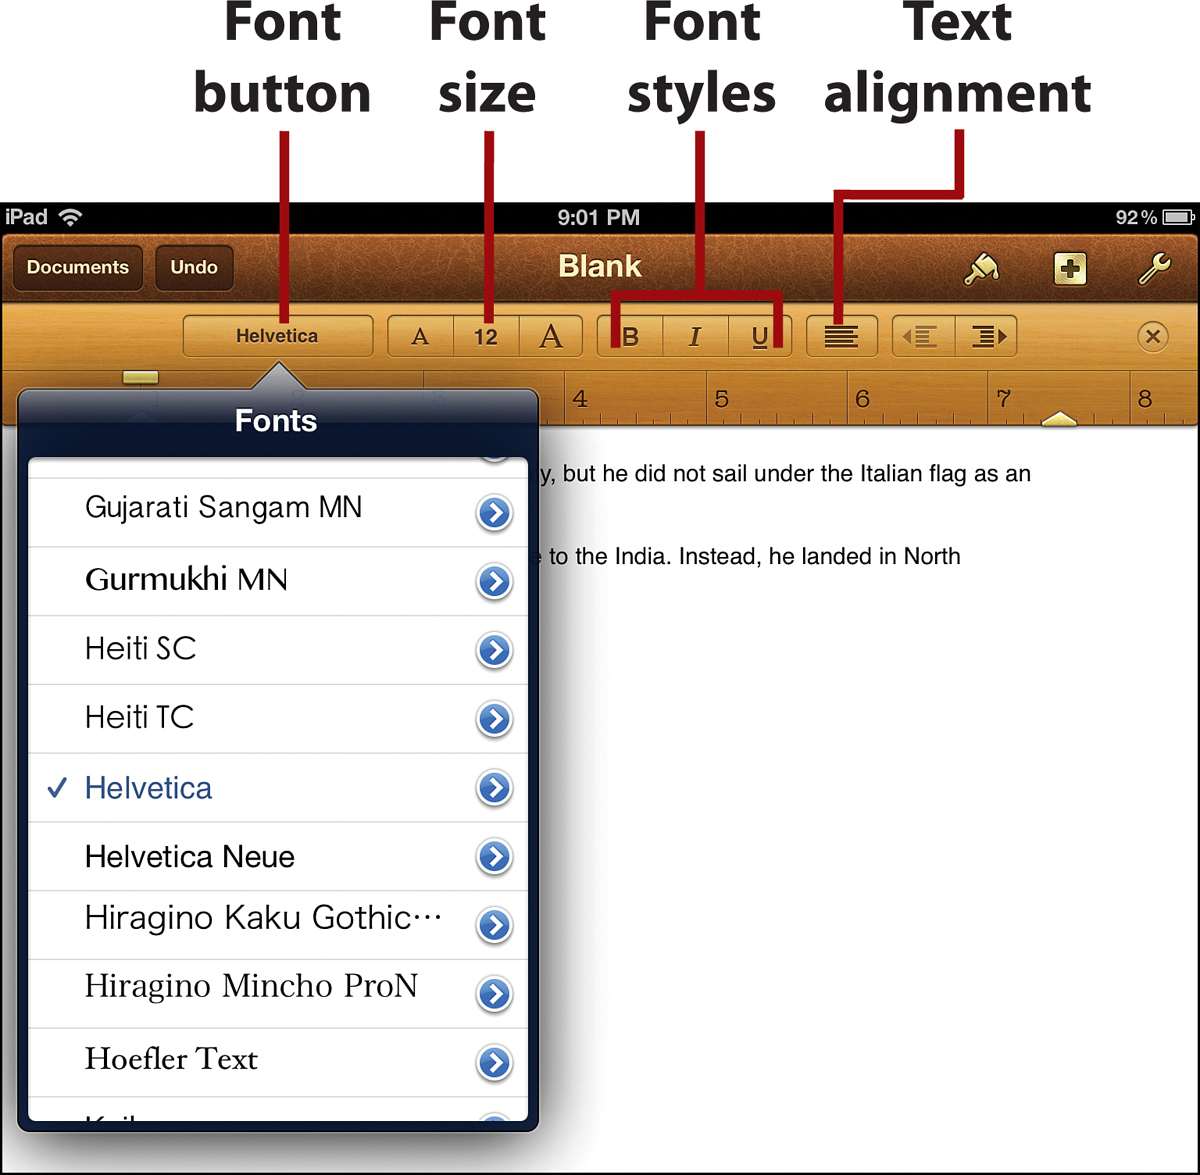
• Font—Tap the font button to see a list of all your font choices (the preview shows what each font looks like). Tap the arrow next to the font name to see different versions of the font. Tap the one you want to use in your document.
• Font Size—There are two options here: Tap the number button and then select a new font size, or tap the small A to make the font smaller and the large A to make it bigger. Tap the correct A until the font is the size you want.
• Style—Choices are bold (the B button), italic (the I button), and underlined (the U button).
• Alignment—This controls whether the text lines up on the left, right, or center of the page. Tap the button to make your choice. You can also choose Justify if you want the edges of the text to be even on both sides.
Advanced Formatting Options
When you get to be a pro with basic formatting, you might want to try some more advanced options. To access them, tap the Paintbrush button. The menu that appears offers several options spread across three tabs:
• Style—The default tab is Style and contains basic formatting options as well as additional styles such as strikethrough (to make text look crossed out) and pre-made styles such as title, heading, and bullet.
• List—The List tab contains the controls for making bulleted and numbered lists. The arrow buttons control what level of the list the selected text is on, and the buttons below control whether numbers or letters are used for each item in the list.
• Layout—The Layout tab changes how many columns your document has and how much space appears between lines (important when your teachers want a double-spaced paper).
If you’re writing a paper for class or for your school newspaper, you’ll need to know how many words your document has. To turn on Pages’ word count feature, tap the wrench icon, then Settings, and then move the Word Count slider to On. The word count displays at the bottom of the page. It updates as you add or delete words.
Adding Headers and Footers
You might want to add headers and footers to the documents you create. A header is a section at the top of the page. A footer is the same thing, but at the bottom of the page. Headers are commonly used for your name or the paper’s title, and footers often show page numbers. After you’ve set them up, they’re automatically added to each page.
1. Open the document you want to add the header or footer to. It could either be a new document or one you’ve already been working on.
2. Tap the wrench icon.
3. Tap Document Setup.

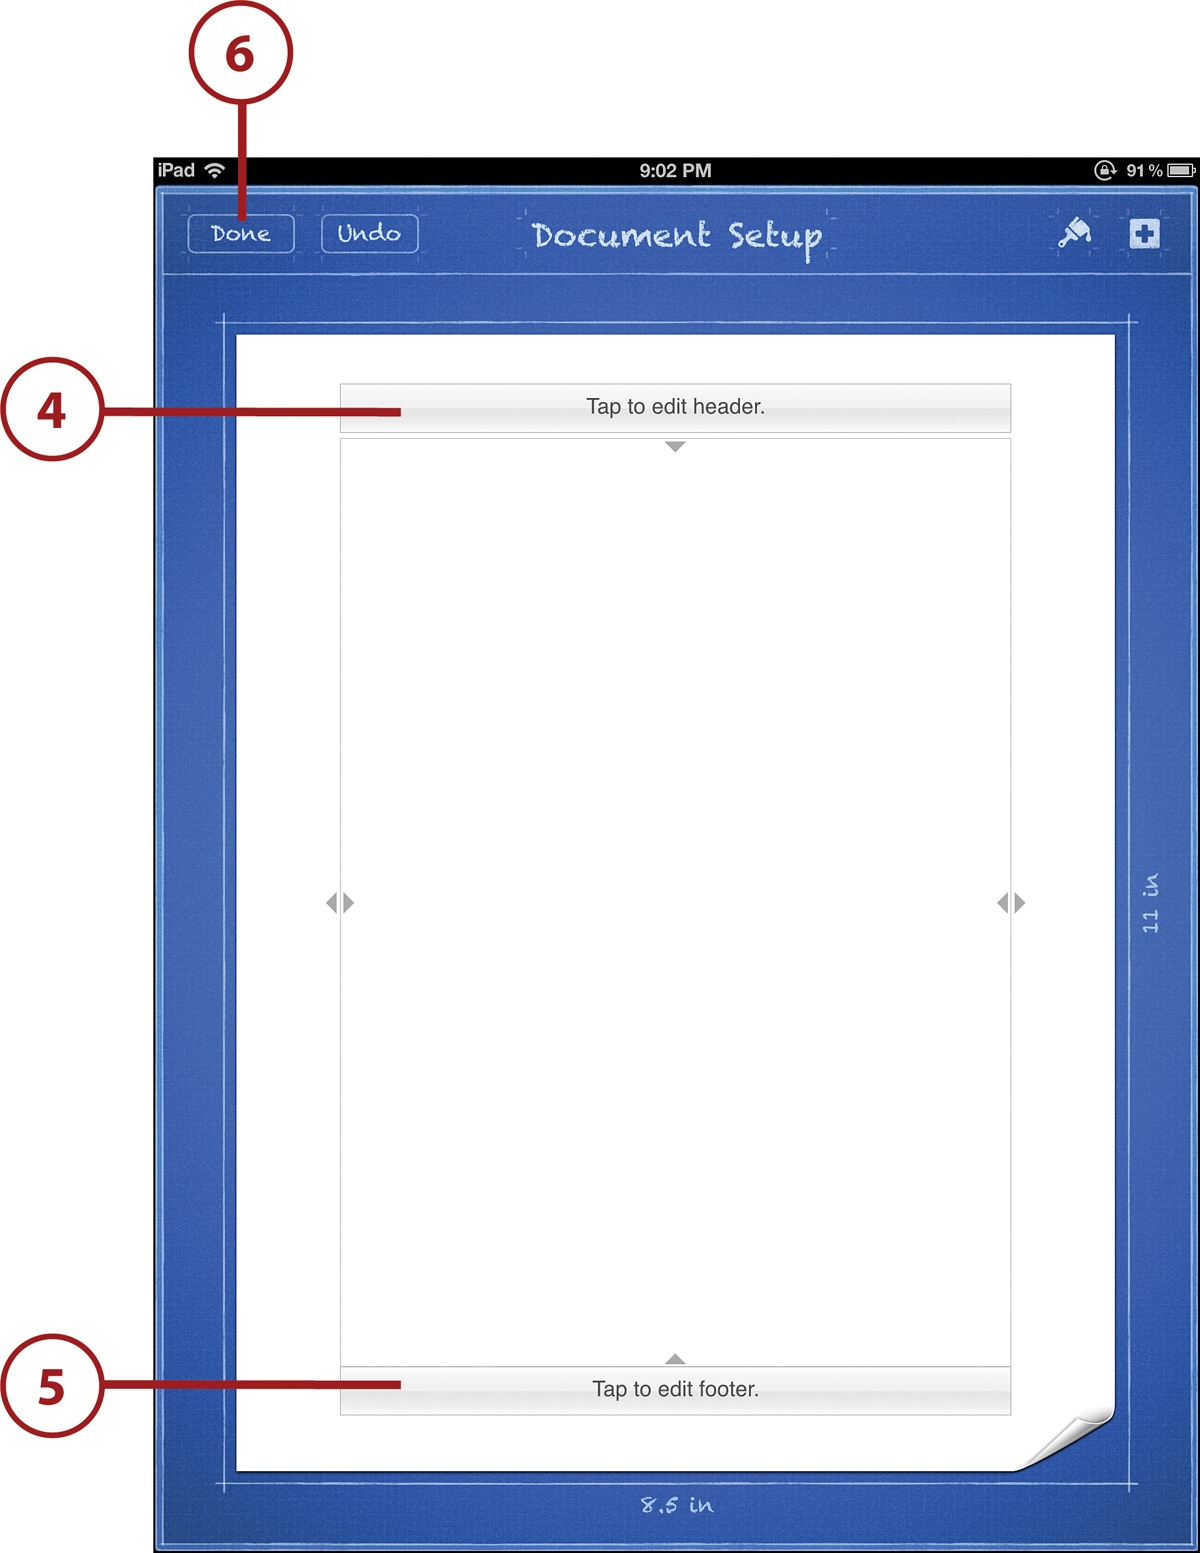
4. The paper goes into Setup mode. To add a header, tap the Tap to Edit Header button and then type in the text you want to have in the header. Automatically insert a page number on every page by tapping Page Numbers and choosing the format you prefer. When you’ve created the header you want, tap the page.
5. To add a footer, tap the Tap to Edit Footer button and add the text or page number you want in the footer. When you’ve added what you want, tap the page.
6. When you’ve added a header or footer, tap the Done button to go back to writing your document with the new header or footer in it.
Document Setup mode also lets you change the amount of empty space at the sides and top and bottom of your document. These spaces are called margins. It’s always safe to use the built-in margins (1 inch at the edges, 0.88 inches at the top and bottom) because they’re pretty standard. But if your teachers want you to use a different margin, this is where you do it. Tap the arrows at the edge of the page and drag in or out to change the side margins. Tap the arrow at the top or bottom of the page and drag up or down to change those margins. When you have them where you want them, tap Done.
Adding Images to a Document
One of the really cool things about Pages is that it’s easy to add images to make your document look extra good. To do that, start by tapping the document you want to add an image to and then follow these steps:
1. Tap the Plus icon.
2. The first time you do this, you have to tap OK to give Pages access to your photos (not pictured).
3. To add a photo, tap Media from the menu.
4. Tap Camera Roll (or if the photo is located elsewhere in your Photos app, choose that location). You can select any image already saved on your iPad.
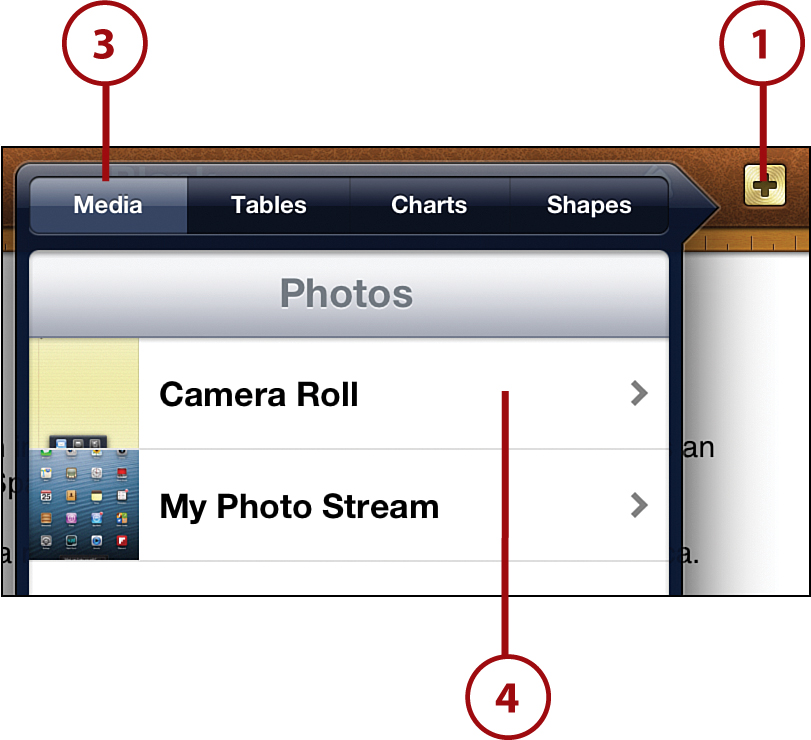
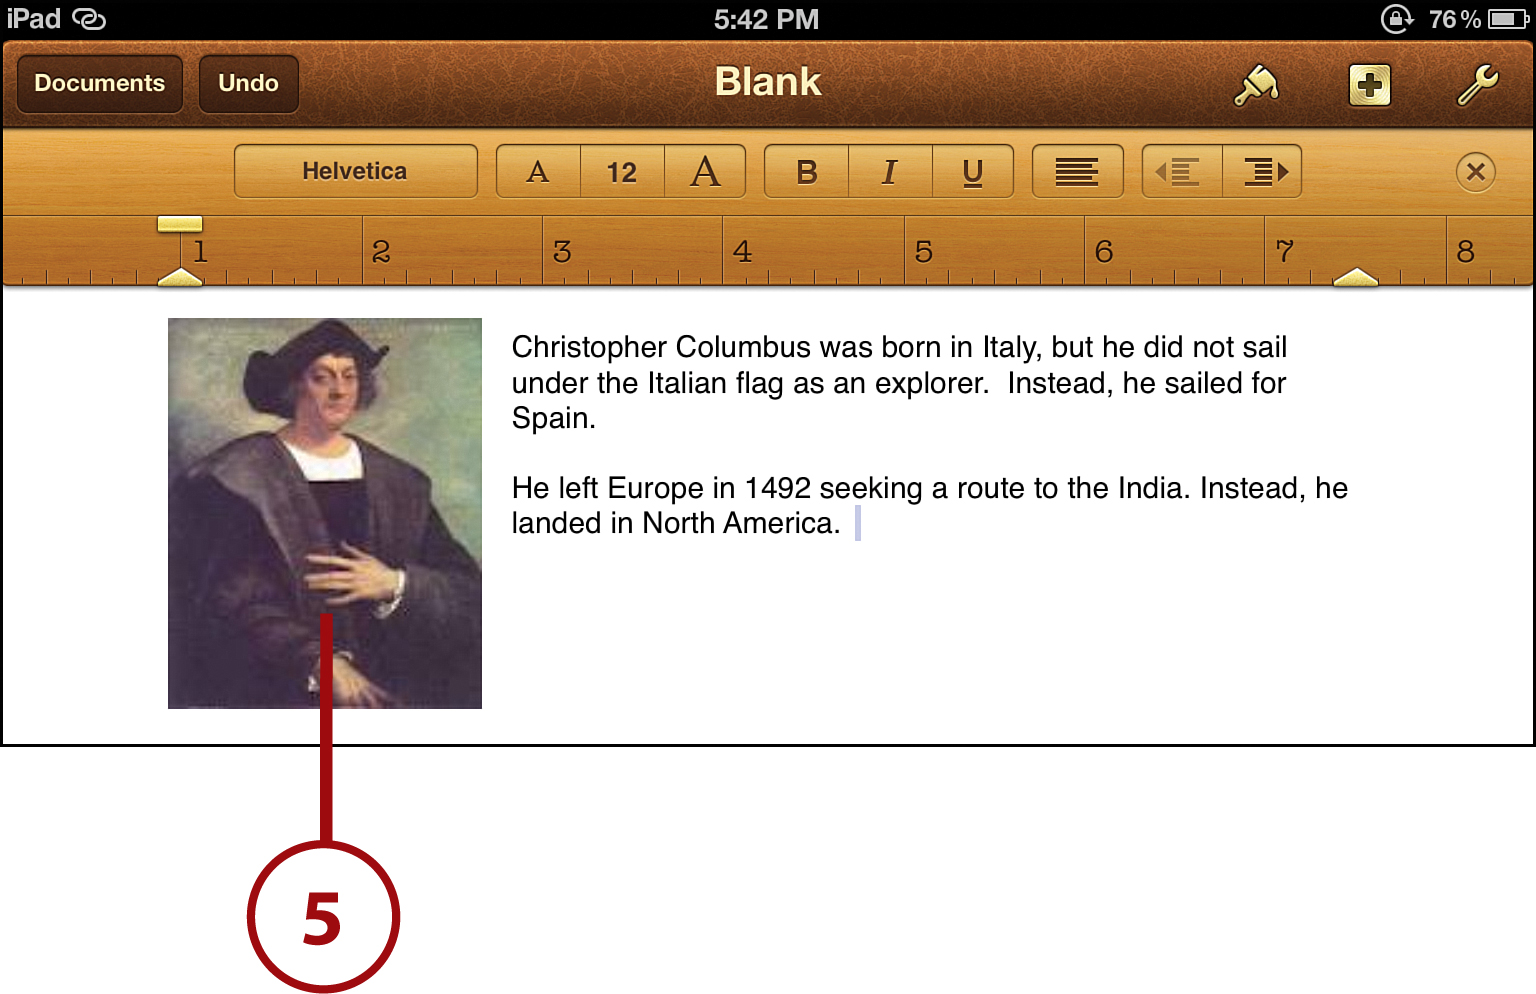
5. Tap the image you want and it is added to your document.
You can also add tables, charts, and shapes to your documents by choosing those options in step 3.
Formatting Images and Shapes
When you add an image or shape to your document, you can change how it looks by tweaking its size and location. To do that, first tap the image or shape and then follow these steps:
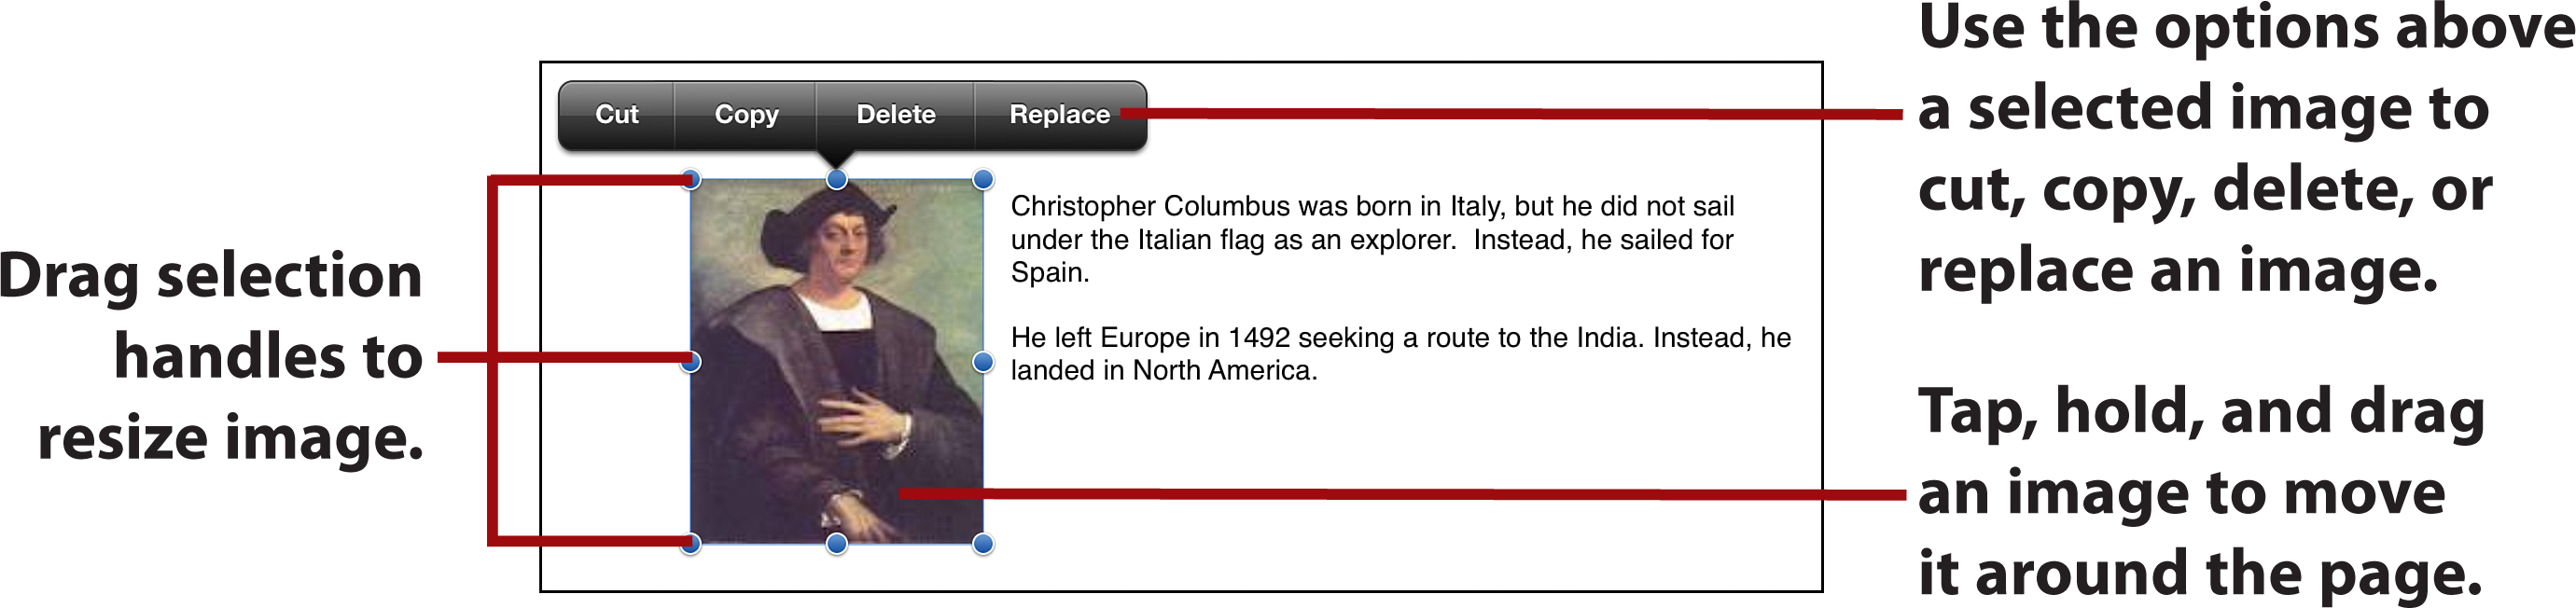
• To change the size of the image or shape, tap and hold one of the blue dots at its edge. Drag in to make the image or shape smaller; drag out to make it larger. When it’s the right size, take your finger off the screen.
• To change the place where the image or shape is located in your document, tap its center and drag the image or shape to a new location. The text flows around it.
• To delete the image or shape, tap it and then tap Delete from the pop-up menu.
Formatting Tables
After you’ve inserted and selected a table, choose from these options:
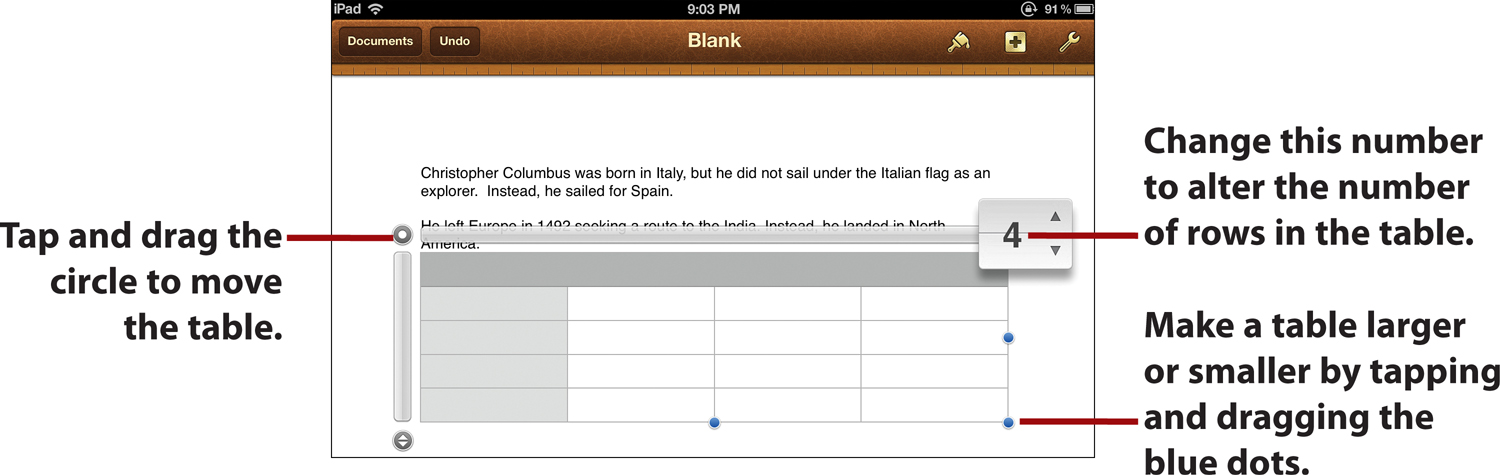
• Add or remove rows (the horizontal strips that make up part of the table) by tapping the rows button and then tapping the up or down arrow to choose the number of rows the table should have. Adding or removing columns (the vertical strips in the table) works the same way.
• To move the table, tap and hold it, then drag the table to a new location. Let it go when the table is where you want it.
• To delete the table, tap it and then tap Delete.
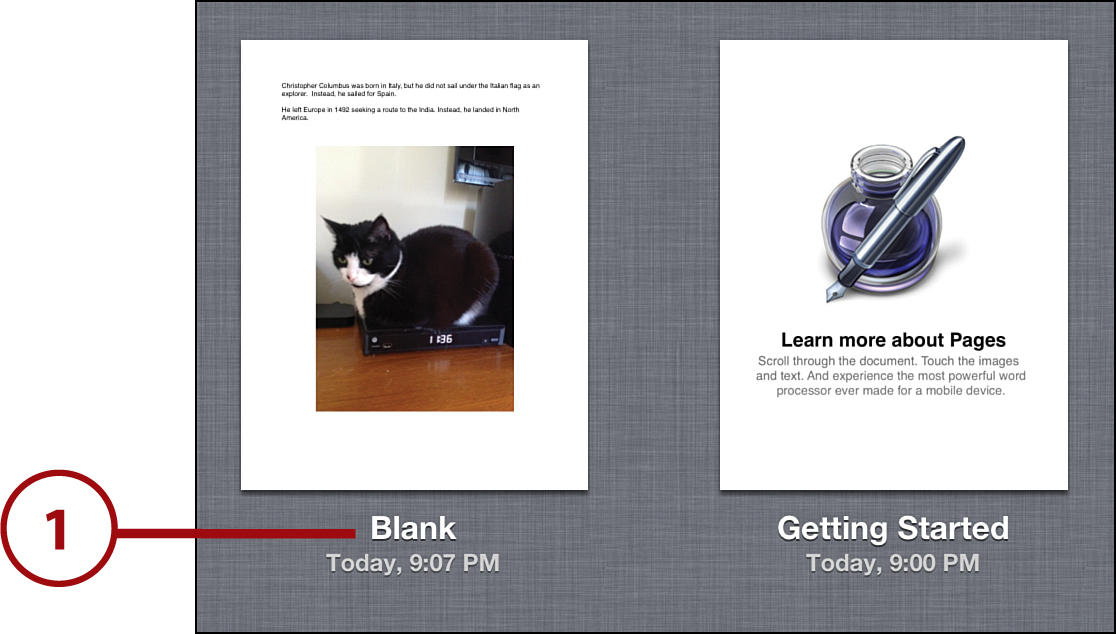
Naming a Document
The documents you create in Pages are automatically given a name based on the text in them. But you can also give them names you want so it’s easier to identify them from the main Pages screen.
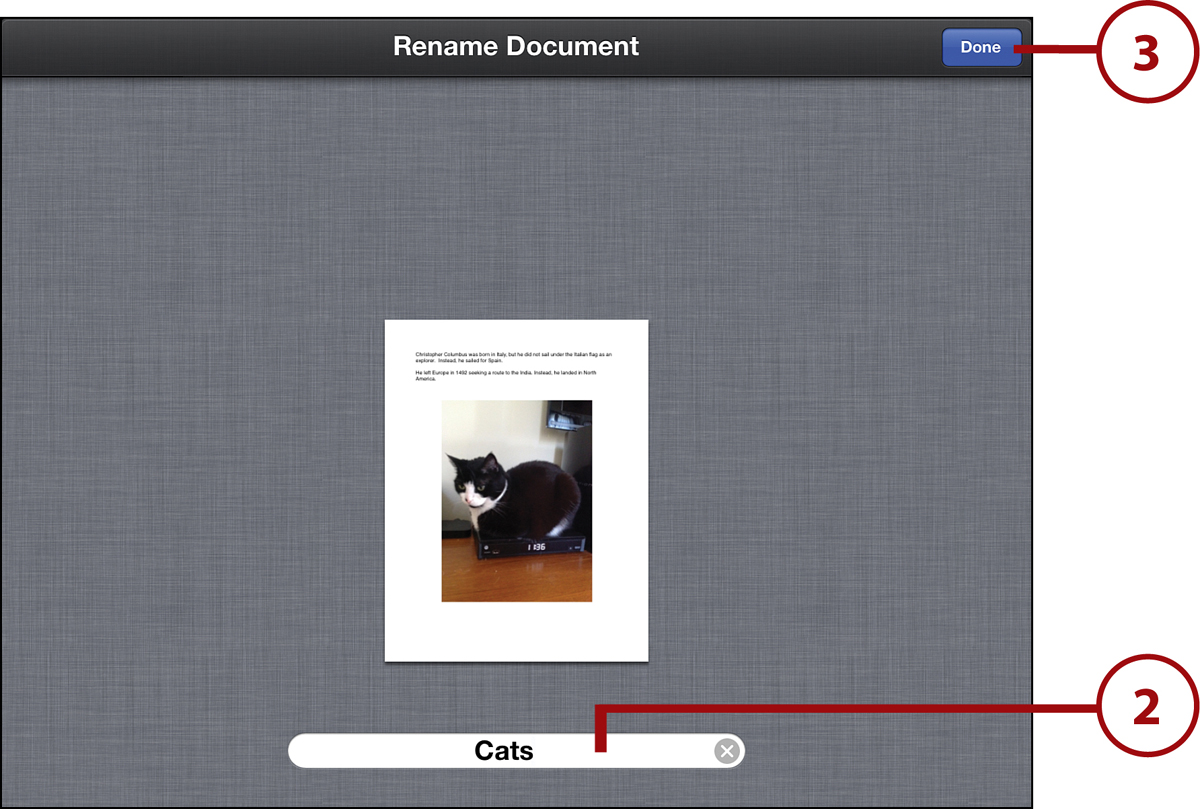
1. Find the document you want to rename and tap its current name underneath its icon.
2. Type in a new name.
3. Tap Done and the new name is saved.
Printing a Document
To print a document in Pages, you first have to tap the document you want to print to open it. Then follow these steps:
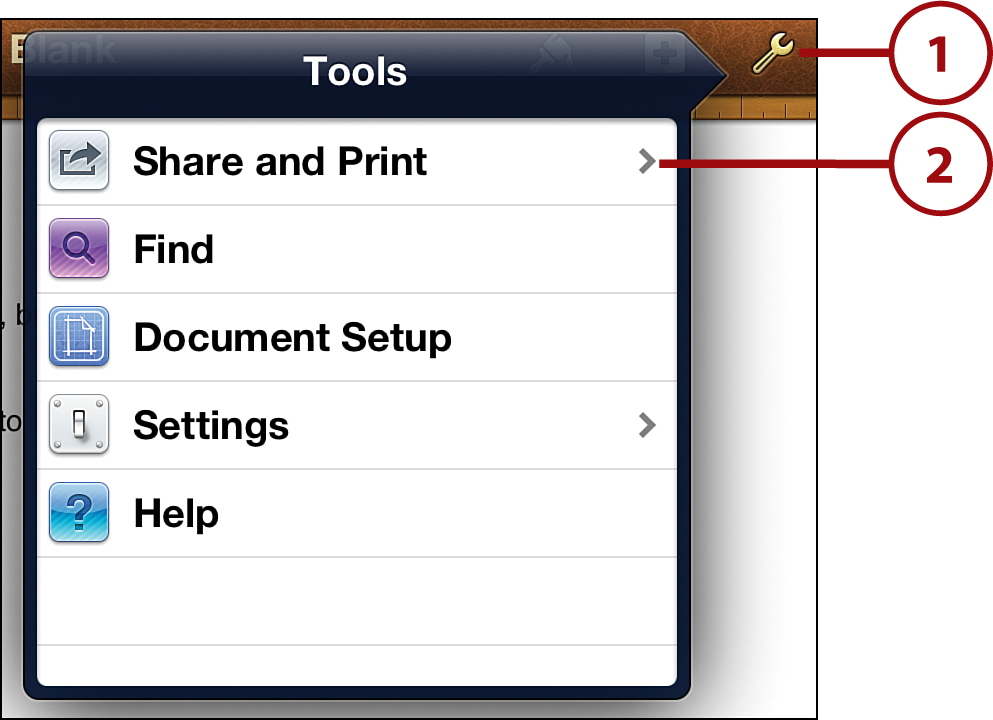
1. Tap the wrench icon.
2. Tap Share and Print.
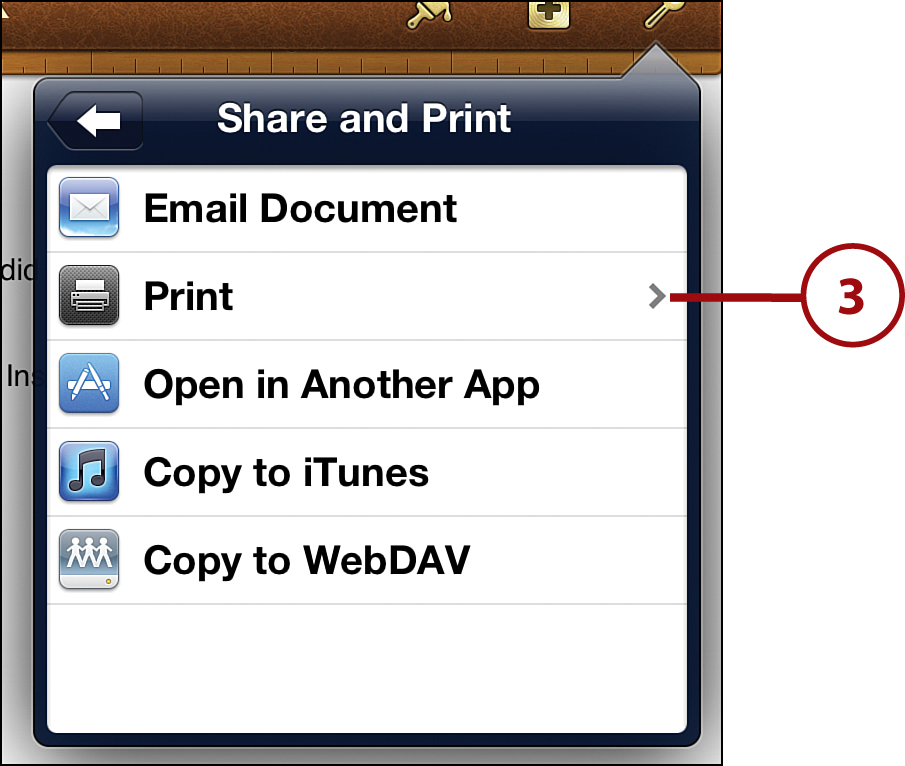
3. Tap Print.
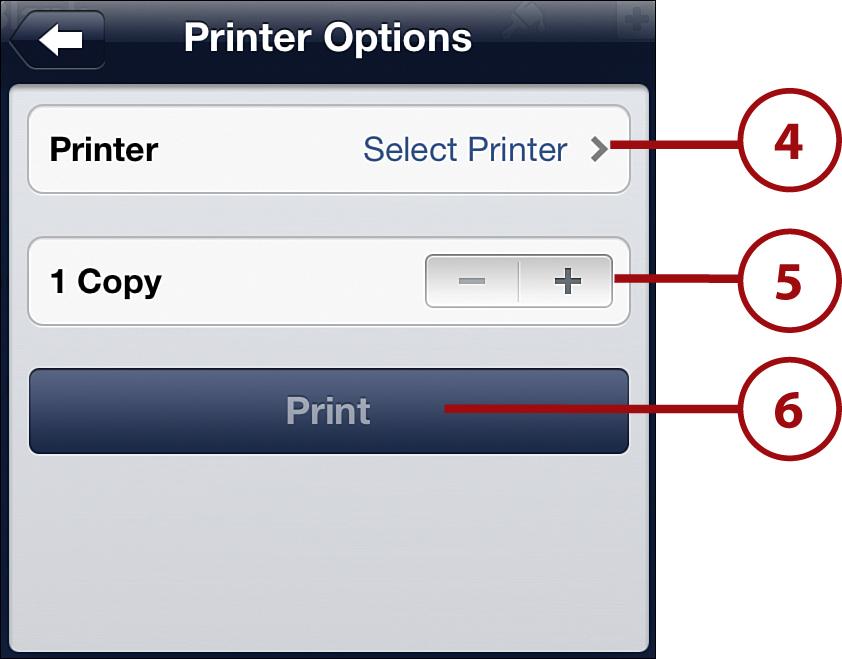
4. Tap Printer to select your printer. Remember, your iPad and printer both have to be on the same Wi-Fi network for AirPrint to work—and your printer has to be AirPrint compatible.
5. Tap the + or − button to choose the number of copies you want to print.
6. Tap the Print button to start printing.
If You Don’t Have an AirPrint-Compatible Printer
There’s a good chance you don’t have an AirPrint-compatible printer. That’s okay; not that many people do yet. If that’s the case, and you can’t print from your iPad, you have some options, including emailing your document to someone who has a printer (more on emailing using Pages in a minute) or syncing it to iTunes if your computer has a printer connected.
Emailing a Document
If you want to email a document you’ve created in Pages (for instance, to send your homework to your teacher), start by tapping the document you want to email to open it. Then follow these steps:
1. Tap the wrench icon.
2. Tap Share and Print.
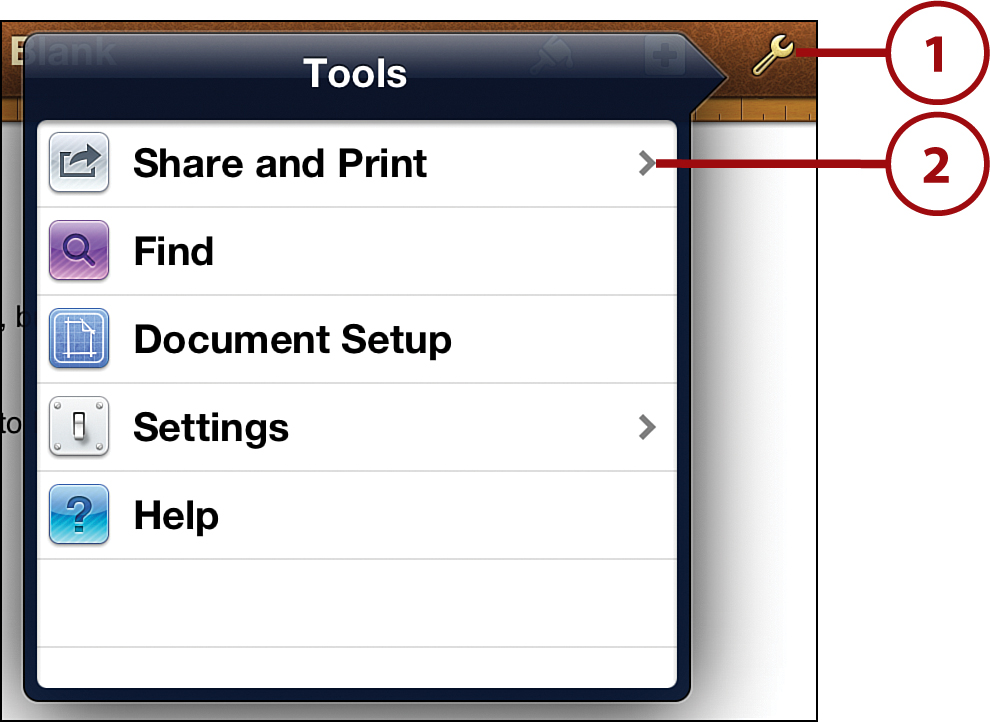
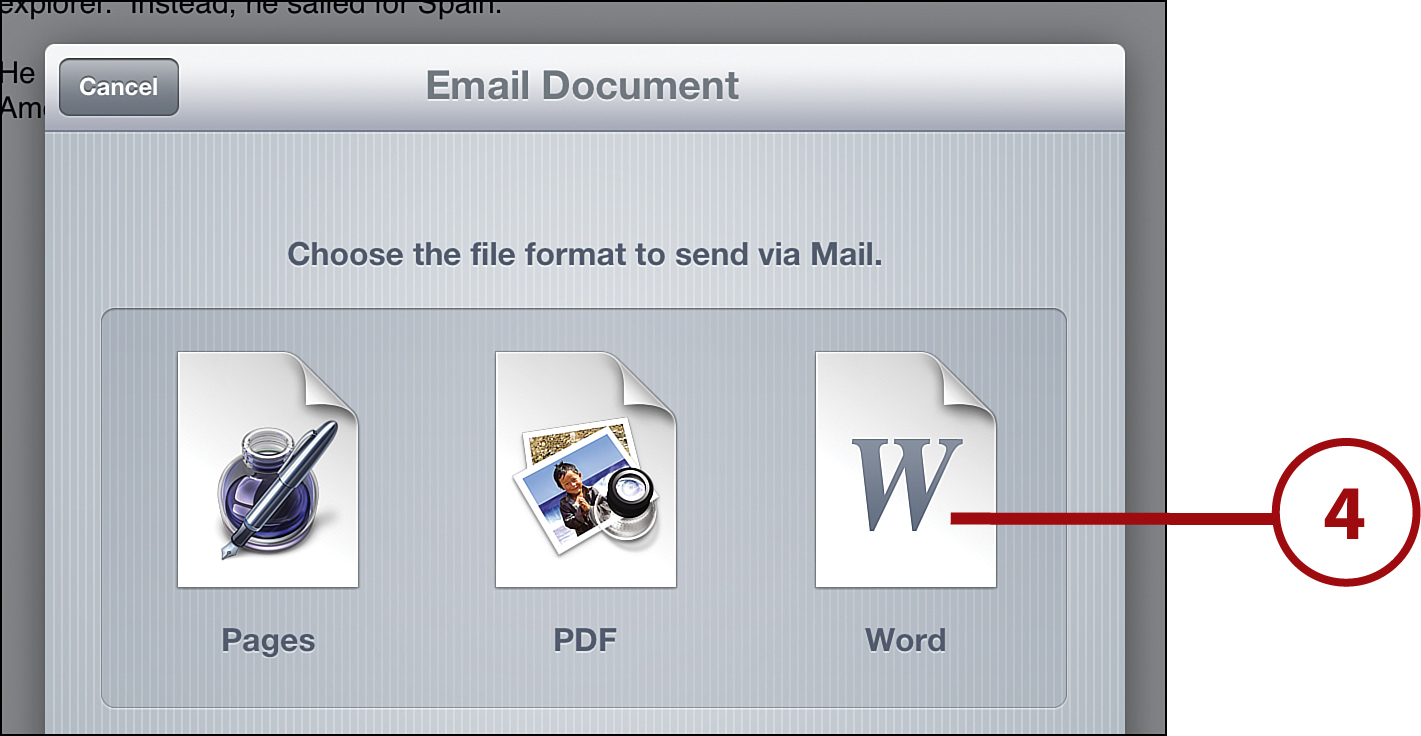
3. Tap Email Document.

4. Choose what format you want to send the document in: Pages, PDF, or Word. For school papers, ask your teachers what format they want before you send. Different teachers will want you to send different formats.
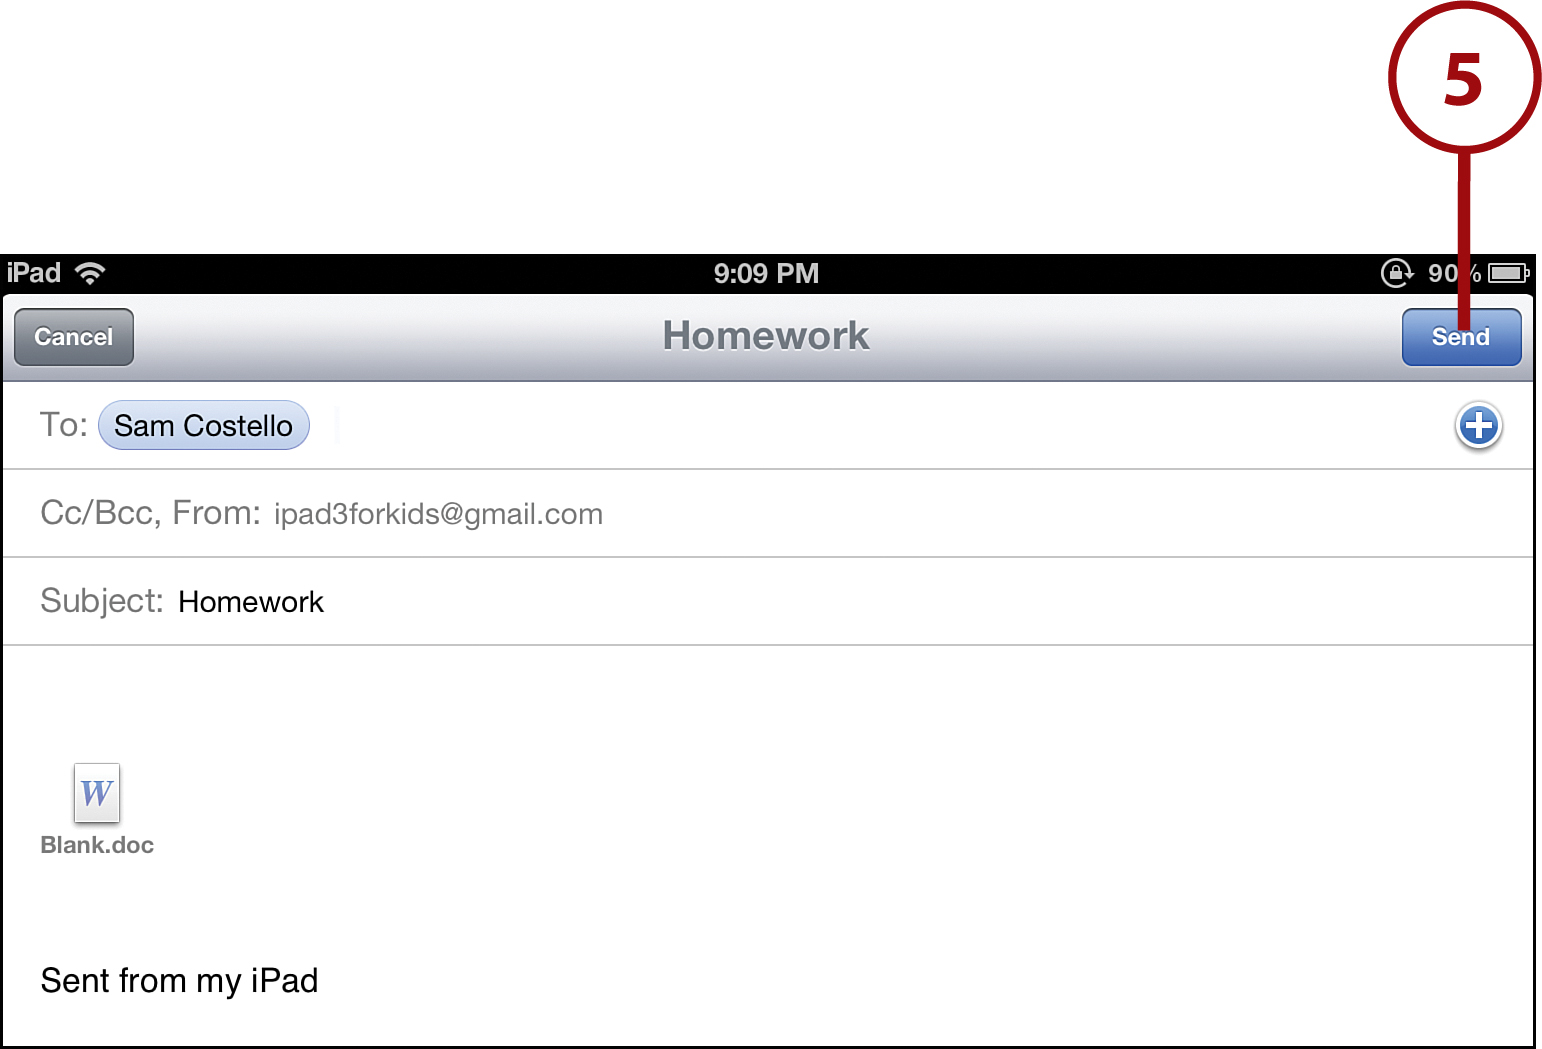
5. A blank email will open with the paper attached to it. Fill out the email like you normally would and tap Send to send it.
Deleting Documents
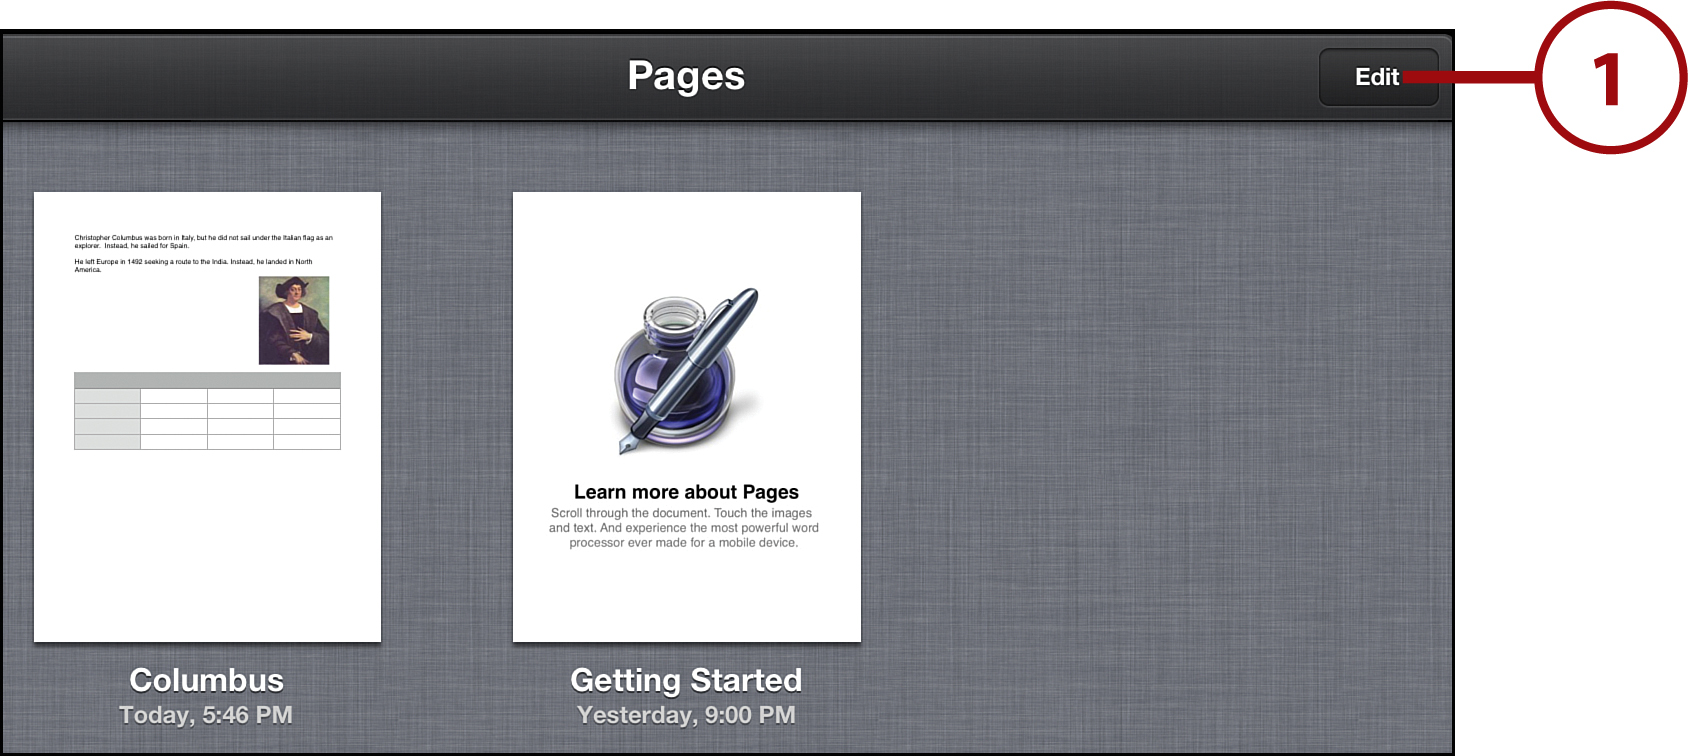
If you want to delete a Pages document, you first have to open Pages by tapping it on your home screen. When you see the list of all your documents, follow these steps:
1. Tap Edit.
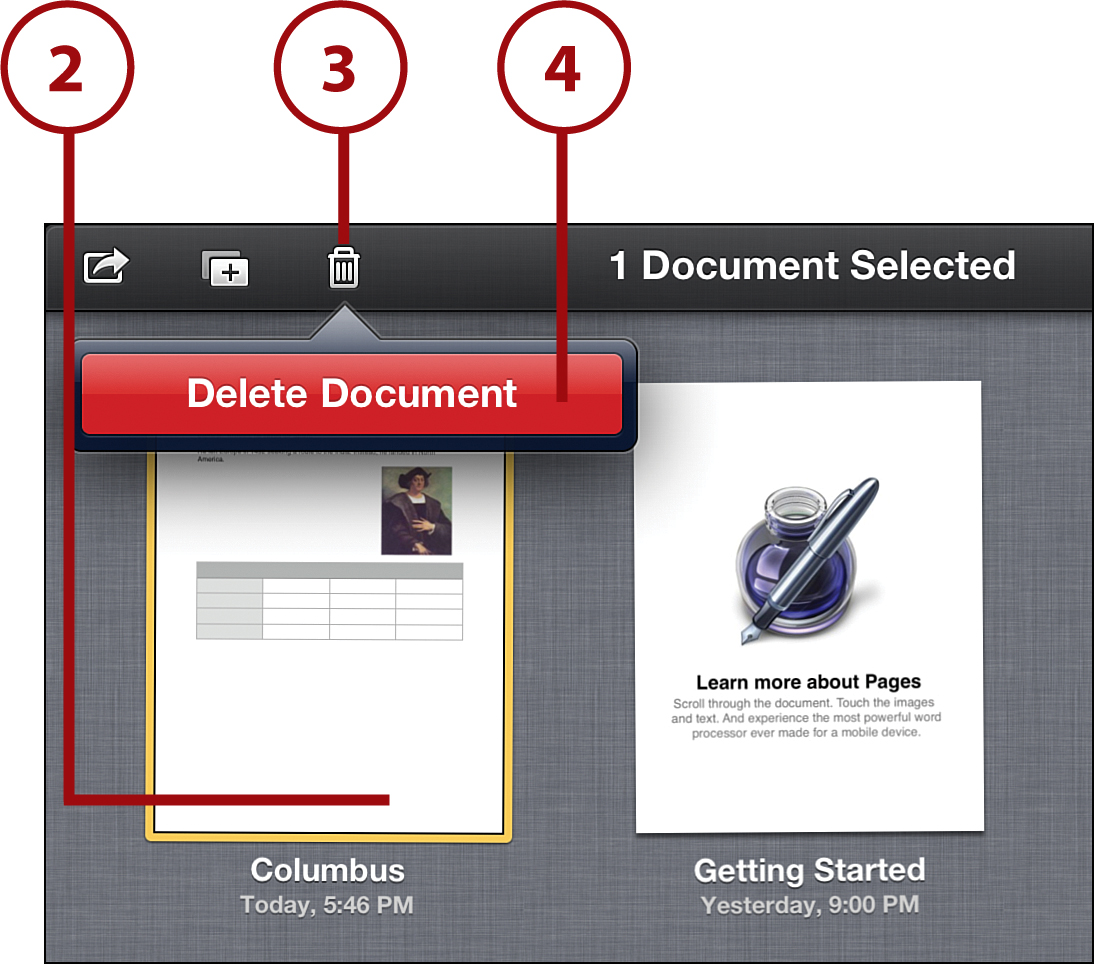
2. Tap the document you want to delete. Pages highlights it with a yellow border.
3. Tap the trash can icon.
4. Tap Delete Document. This erases the document—permanently—from your iPad and, if the document is synced using iCloud, from all other devices where it’s synced (so be sure you really want it gone).
Awesome Apps
The only app for writing that comes with the iPad—Notes—is okay for writing, well, notes. But if you need to write anything longer or more complicated—and if you use your iPad for school, you definitely will—you’ll want a more powerful writing app. Pages is one good choice, but it’s far from the only one. Here are some other suggestions:
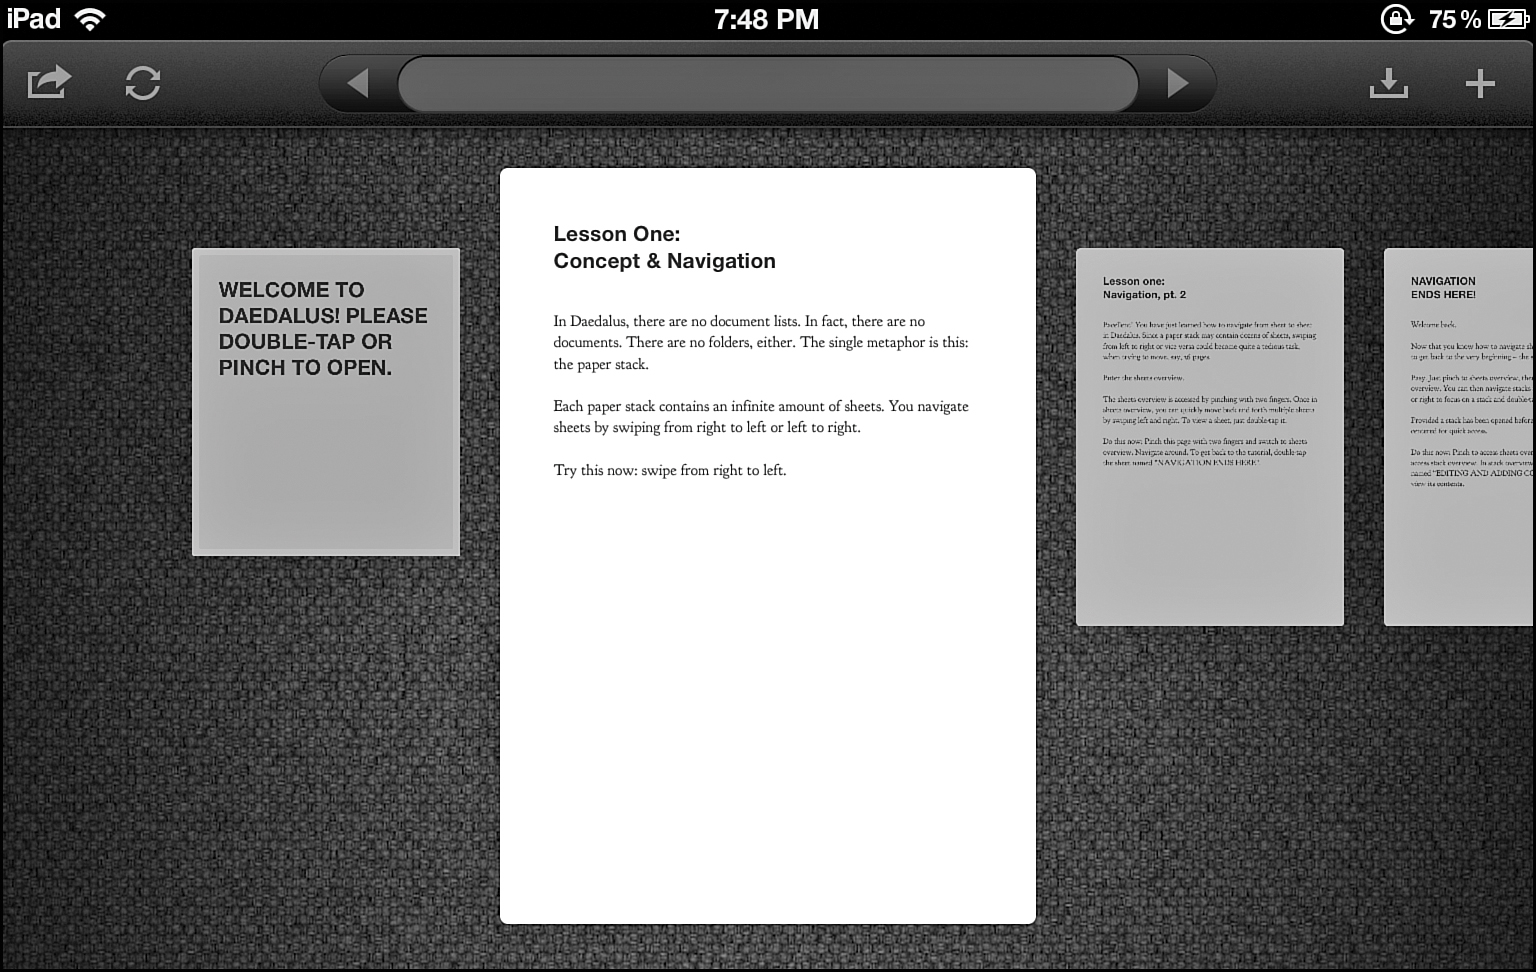
• Daedalus Touch—A cool word processor designed just for the iPad. It lets you create papers, but also helps you make and email PDFs and e-books. $4.99

• iA writer—Not only does this word processor let you focus on what you’re writing—and not all the buttons and options that other word processors have—it also lets you touch the screen to perform actions (such as undoing your typing with a swipe). It’s really only for writing, though; if you need even basic formatting, you should use a different app. $0.99
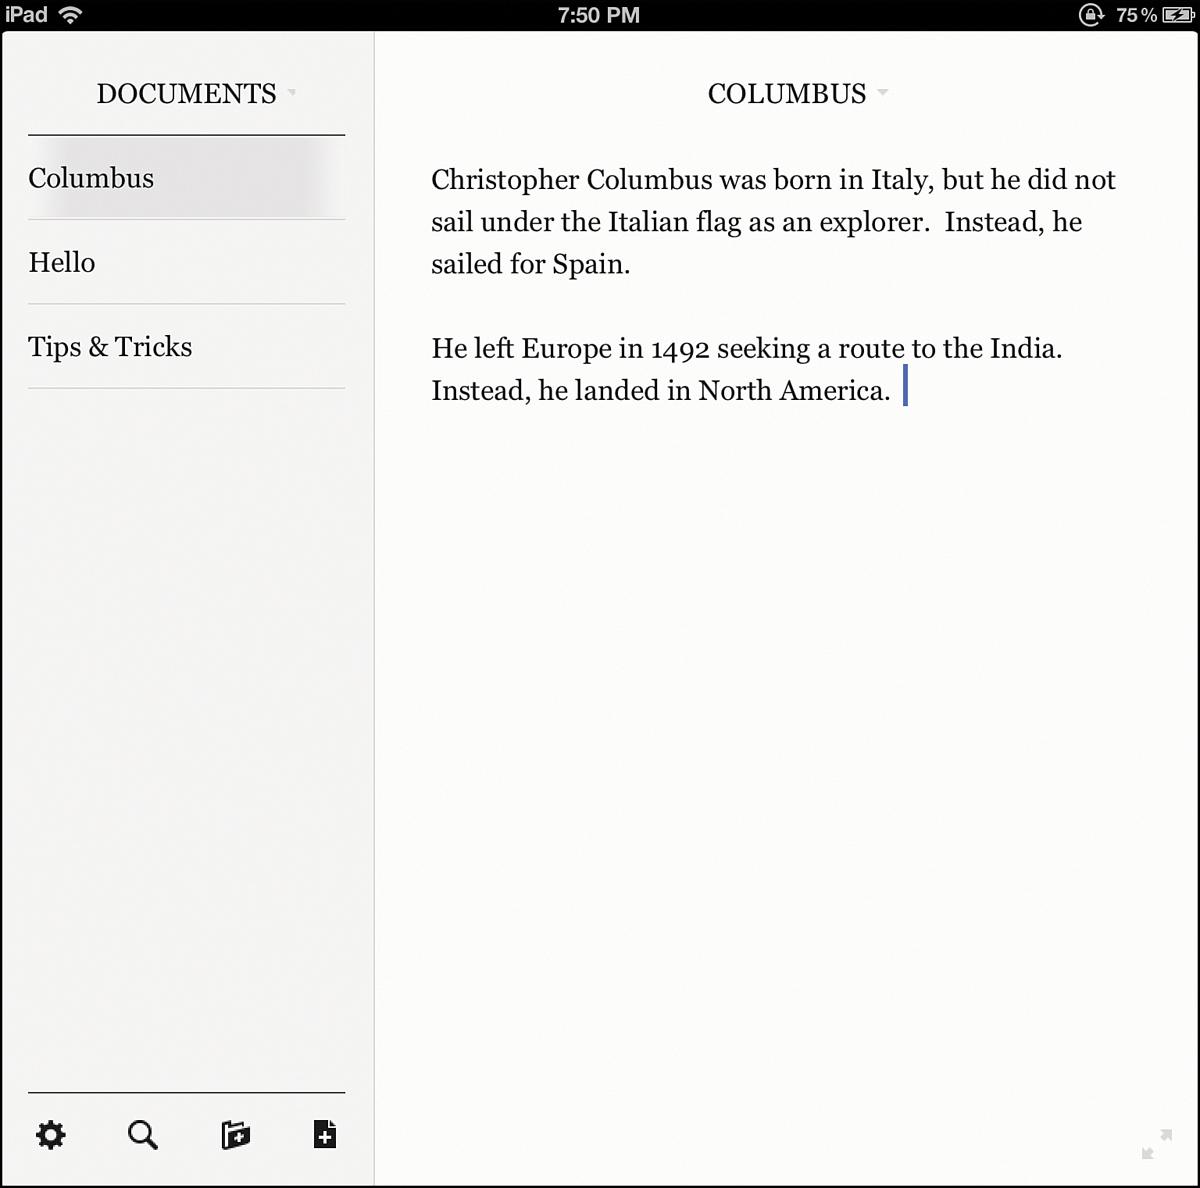
• PlainText—A very simple program that is like writing on paper. Not only does each document look like a piece of paper, you store them in folders. You can even use it to back up your documents online. Free ($1.99 to remove ads)
Using the Internet for Homework
If you’re using your iPad for schoolwork, you’ll probably use the Internet to do research for your papers. If you’re going to do that, though, there are a few things you need to know.
How to Do Research Online
It might seem obvious, but doing research for your schoolwork online works pretty much the same way that finding any other information does. If you don’t know where to find what you’re looking for, begin by searching for it at a search engine such as Google and tapping the sites that come up in the search results. If you know of websites that have the information you want, you can also go directly to them.
Of course, online isn’t the only place to do research. Your school or neighborhood library is packed full of helpful books and magazines. Ask your parents to take you there and then get help from the librarian to find what you’re looking for. Libraries are full of things you can’t get online at all. You never know what you’ll find at them—and that’s pretty cool!
Choosing Good Sources
The places you find information for your school papers are called sources. Books, encyclopedias, and even websites can all be sources.
Creating a website or blog is pretty easy. But because it’s so easy, that means just about anybody can do it—and not everyone is an expert on the things they’re writing about. When you’re writing papers for school, you should use only the best and most expert sources, not just the first ones you find.
But with so many websites online, how can you figure out who’s an expert? Here are some tips:
• Be skeptical—This means you shouldn’t automatically believe everything you read. A smart way to try to figure out if something is true is to check to see whether other websites are saying the same thing about the same topic. If they are, that means it’s more likely to be true.
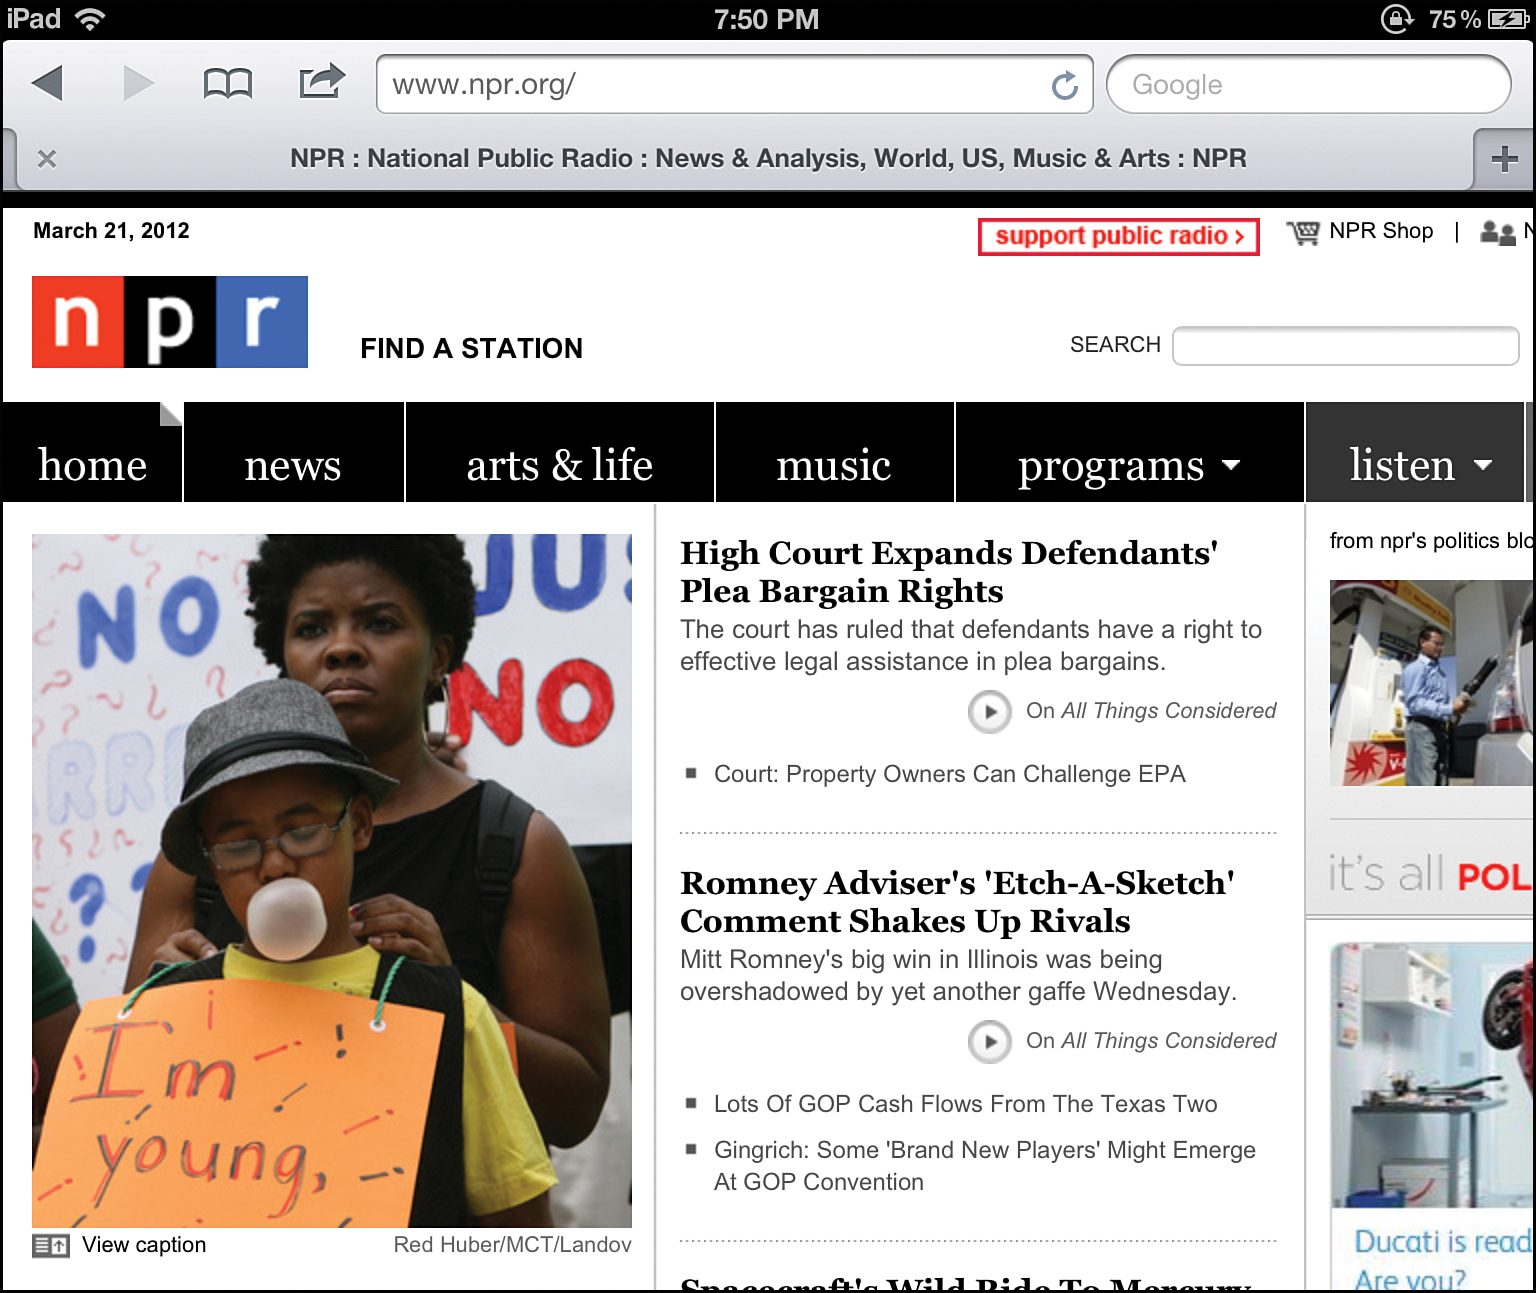
• Use established sources—If you’re writing about a news story, going to a big-name news website such as CNN, CBS, or NPR is good idea. They’ll usually have more accurate information than the blog of a person who isn’t directly involved with what they’re writing about.
• Use primary sources—A primary source is someone with first-hand experience of a situation. For instance, if you’re writing about the Declaration of Independence, quoting writing by someone who helped write it or the Declaration itself are both great primary sources. If you’re writing about a person, quoting their own words is a terrific primary source.
• Consider the source—When deciding whose information to use in your paper, figure out who’s saying it. If you’re writing about biology, quoting a college biology professor is a better idea than quoting some random person with a blog but no expertise in biology.
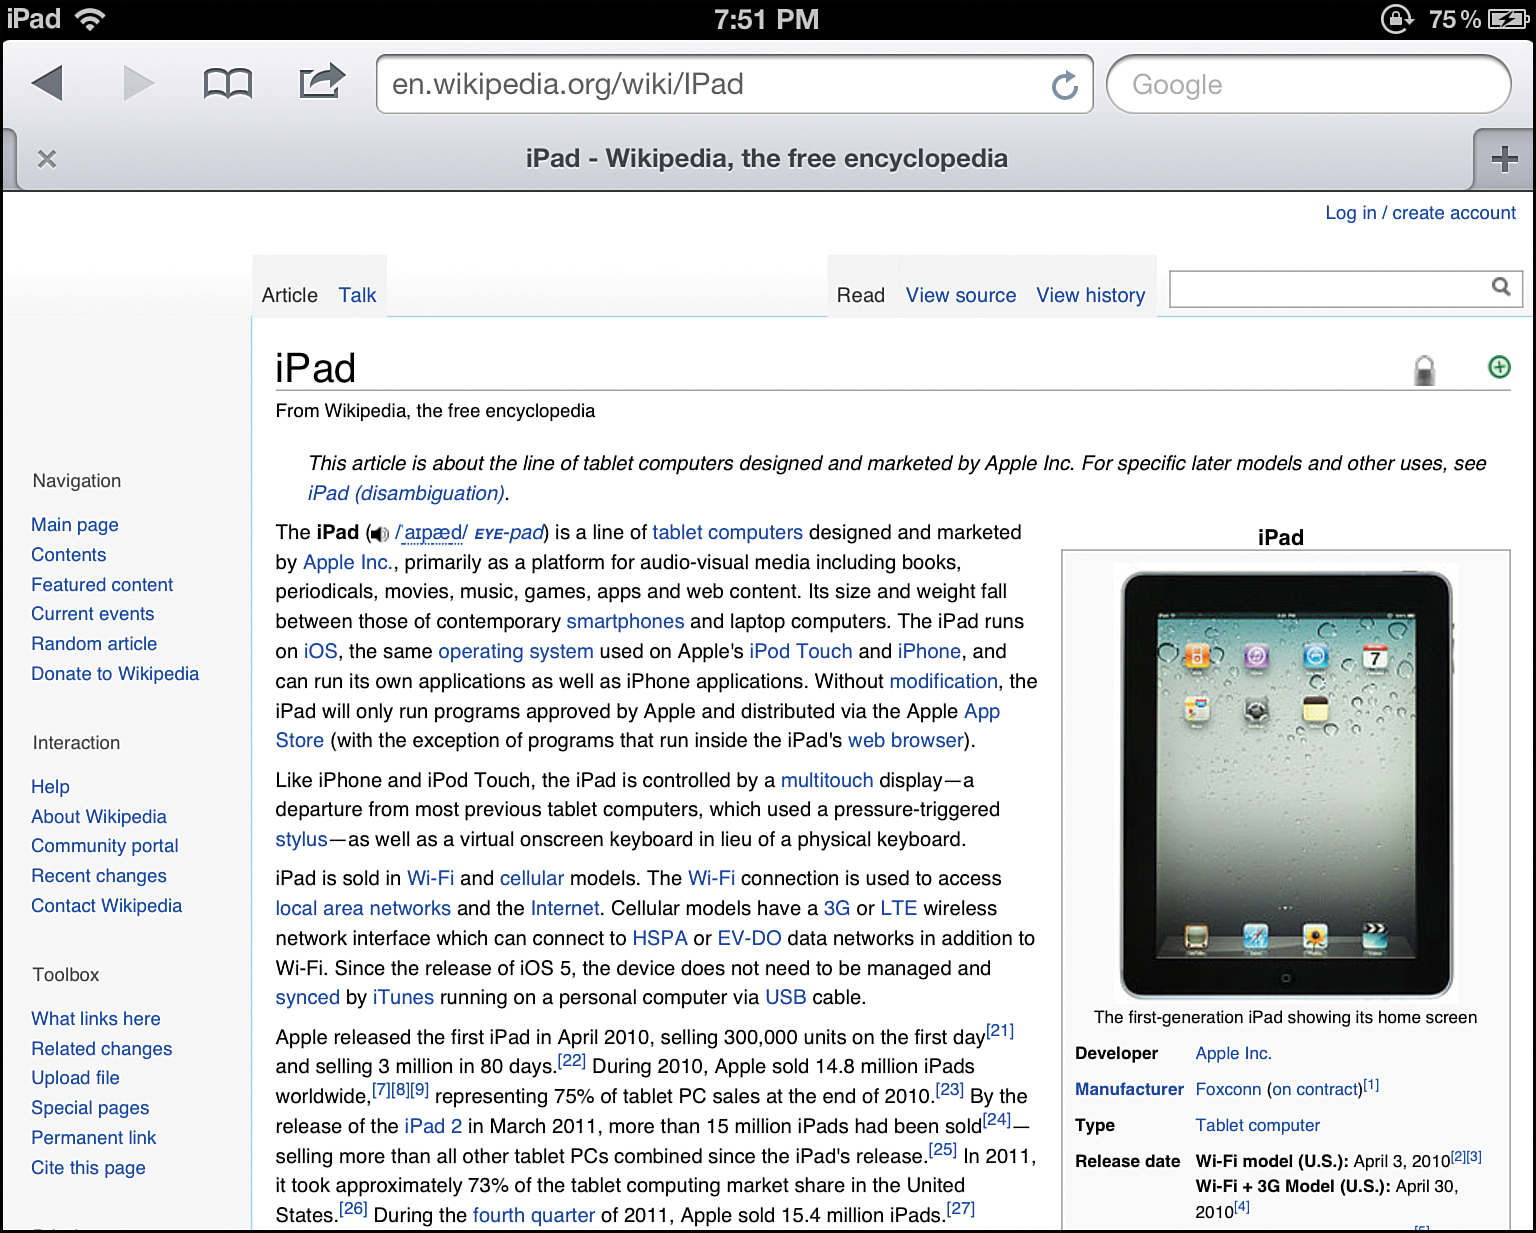
• Watch out for Wikipedia—Wikipedia seems like an easy place to get all the information you need, but it’s not always accurate. That’s because almost anyone can change articles on Wikipedia, even if the changes they make are wrong. When using Wikipedia, find the information you’re looking for and then click the little number after the sentence or paragraph you want to use. This shows you where that information came from. Go to that site to confirm the information for yourself. If there’s no link, try finding the same information somewhere else to make sure it’s correct.
Using Research in Your Papers
When you find something that you want to use in your paper, don’t just copy and paste it. It’s important to give credit to the person who wrote what you want to use. If you don’t, and act like their words are your own, you’re committing plagiarism, which is a form of lying. If you wrote something and someone else used it, you’d want them to give you credit, right? You should do the same for others. When you find something you want to add to your paper, do the following:
• Always make sure to put the text you’re copying and pasting into your paper in quotes.
• Make sure to accurately write down who wrote the text you’re quoting and where they wrote it or where you found it.
• After the quotes, put the writer and the name of their work in parentheses. Italicize the name of the work.
For example, if you’re quoting something written by Ben Franklin in a book called Ben Franklin Writes About American History (which I made up), and the quote is “American history is interesting,” you should write the following:
“American history is interesting” (Ben Franklin, Ben Franklin Writes About American History).
If you’re getting the quote from a website, try this:
“American history is interesting” (Ben Franklin, www.benfranklin.com).
• Even if you’re not directly copying and pasting something from another document, it’s a good idea to give the writer credit for their ideas, as in the following example:
Ben Franklin wrote that American history is interesting (www.benfranklin.com).
• Your teachers might have another way they want you to credit the sources you’re quoting. If they do, use their guidelines instead.
If you always follow these rules when you’re writing your papers, you won’t run the risk of getting in trouble for plagiarism and will establish writing habits that can help you succeed in school for years to come.