8. Get Organized with Calendar, Reminders, and Clock
In this chapter, you find out about some of the many ways that the iPad can help you keep track of all kinds of things, from birthdays to important events to things happening at school. To learn how to do that, you need to learn about:
• Using Clock
Using Calendar
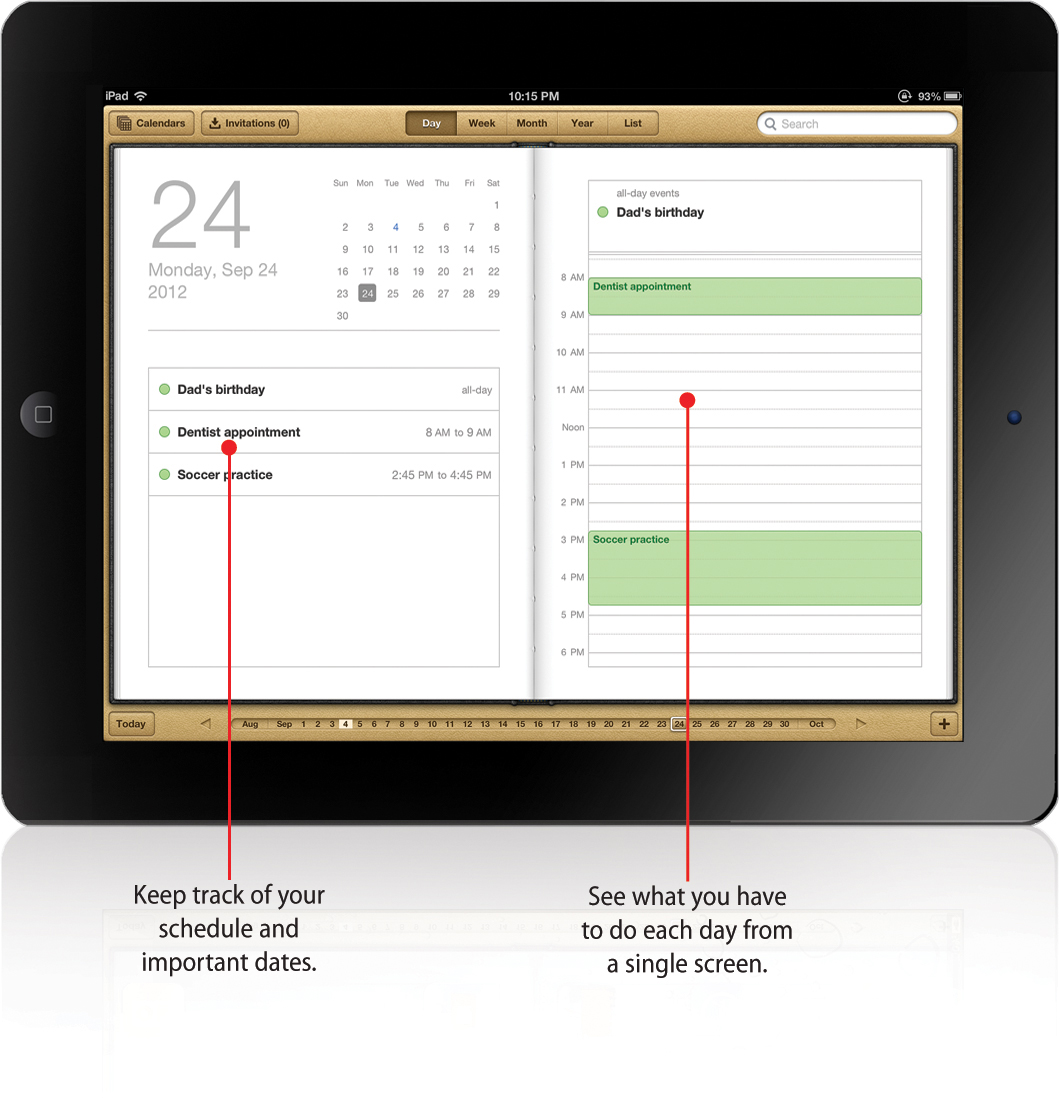
Calendar is a great app to use for school because it lets you keep track of all the important events in your life. Whether that’s your friends’ or family members’ birthdays, when big projects or papers are due in class, or an important game or the school play, putting those dates in your calendar—and setting alerts to remind you—can be a big help. And because Calendar can sync with your computer and iCloud, even if you’re not near your iPad, you never have to be far away from your important dates.
Adding Events
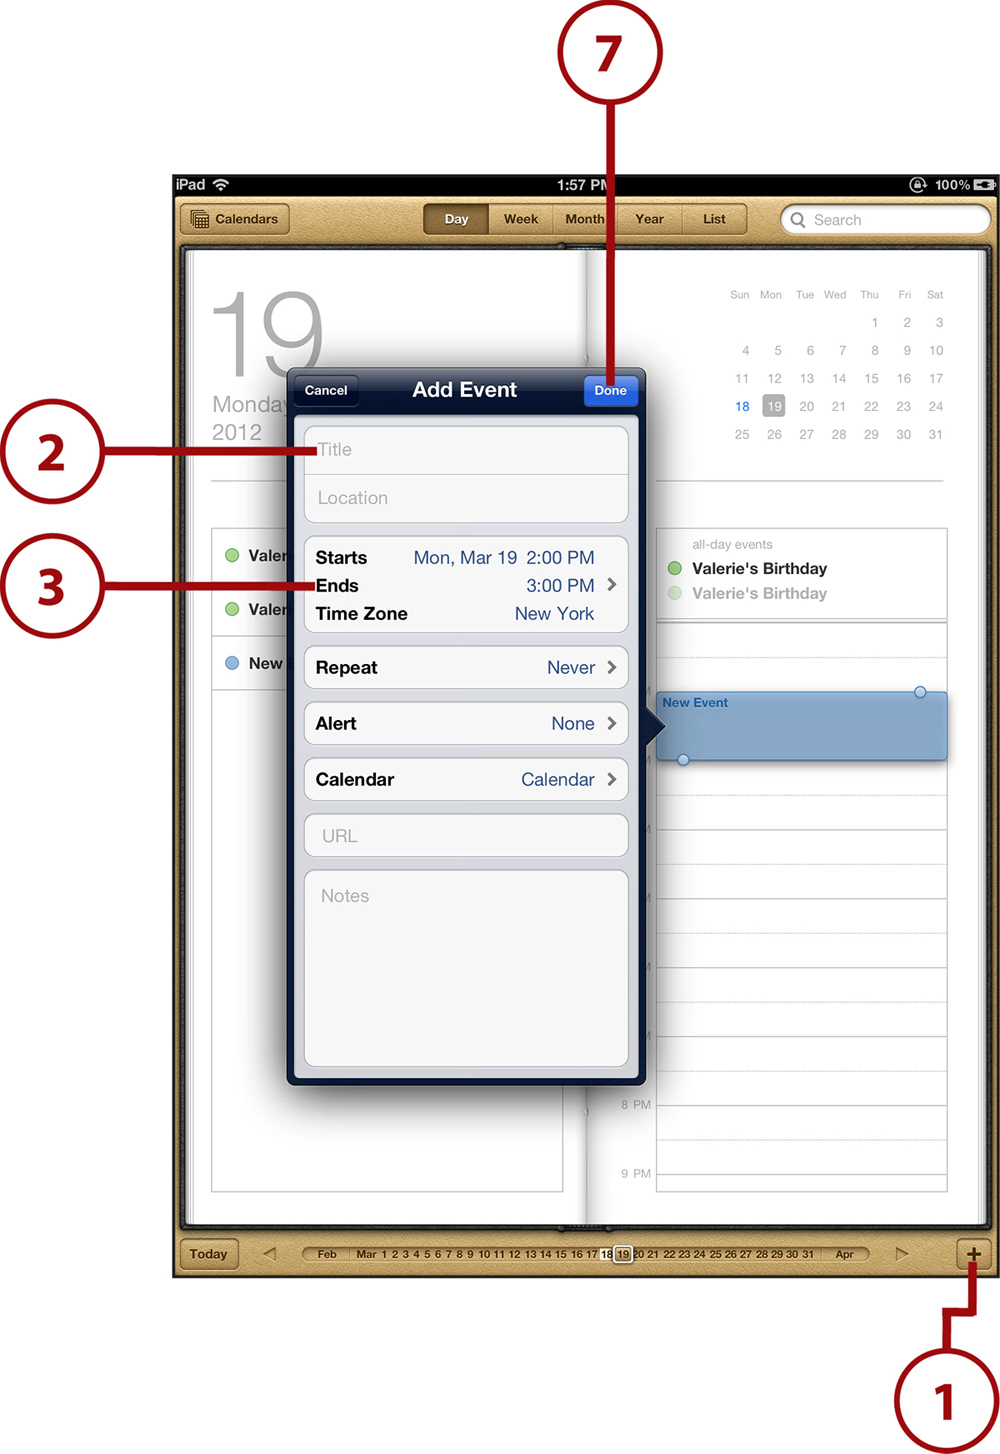
To add an event to your calendar, first tap the Calendar app to open it and then follow these steps:
1. Tap + to add an event.
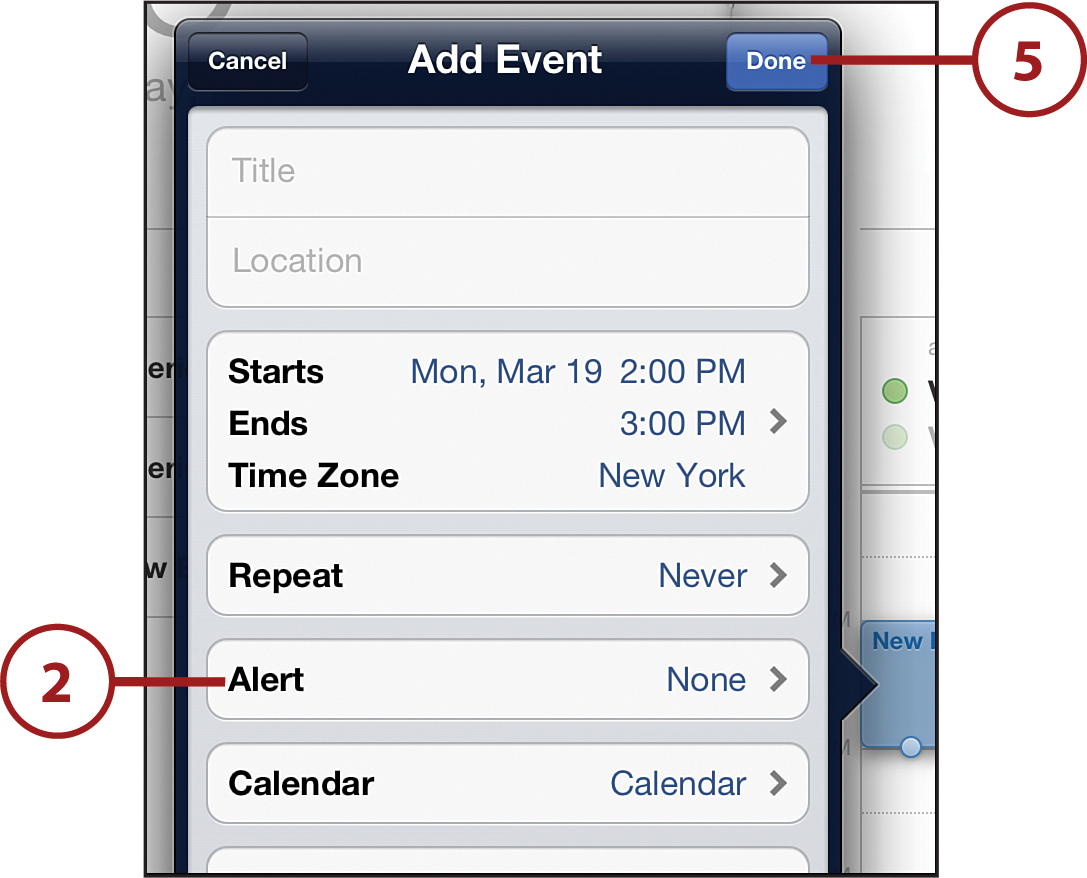
2. Enter the name of the event (say, Dad’s birthday or the last day of school) and, if you want, a location for the event.
3. Tap the date and time box to choose when the event is happening.
4. For the Start time, move the wheels until you have the right date and time. If the event is all day, like a birthday, move the All-day slider to On instead.
5. Tap the Ends box and do the same.
6. Tap Done.
7. If everything looks right, tap Done, and the event is added to your calendar.

Add Calendar Events Using Siri
Typing isn’t the only way you can add events to your calendar; you can also use Siri. Hold down the Home button until the Siri menu appears at the bottom of the screen. Then speak the event you want to create. For example, you could say, “New appointment at the dentist Monday at 11,” or, “New Event: Piano practice,” and then answer the questions Siri asks. Save the event by tapping Confirm and your calendar is updated.
Creating Alerts
Do you ever forget to do something that you need to do? Maybe you want your iPad to remind you when an event is happening so you don’t forget it? You can use alerts to do that.
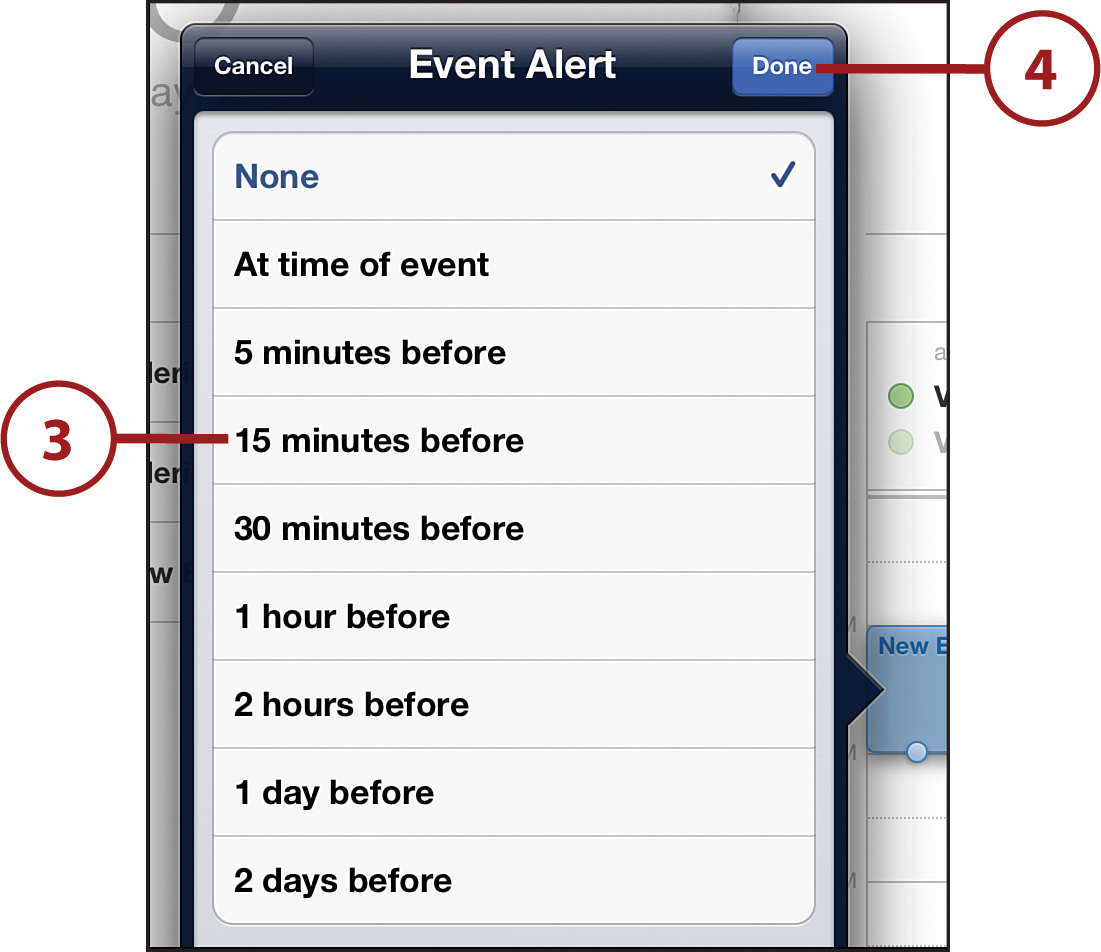
1. Follow the first six steps in “Adding Events,” as previously described.
2. Tap Alert.
3. You can choose to get an alert when the event happens, a few minutes before, or a day or two before. Tap the option for when you want to be reminded.
4. Tap Done.
5. Make any other changes you want to the event and then tap Done to save it. Remember, the sound that alerts you to the event is controlled by the Calendar Alerts sound in the Settings app (explained in “Choosing Your Sounds” in Chapter 3, “It’s All Yours! Customizing Your iPad”).
If you want to change something about an event you’ve already created, just find the event in the Calendar app and tap it. This pulls up all the event’s options, and all you have to do is make your changes and tap Done to save them when you’re finished.
You can also use Siri to edit or delete events. Just hold down the Home button until Siri appears and then speak the change you want to make. For example, you could say, “Cancel piano lesson on Tuesday,” “Reschedule tutoring to next Thursday,” or, “Cancel soccer on Saturday.” Siri might ask some follow-up questions. Answer them and your calendar is updated in no time.
Deleting Events
If you want to get rid of an event from your calendar, it’s very simple. Start by finding the event you want to delete. Then tap it and follow these steps:
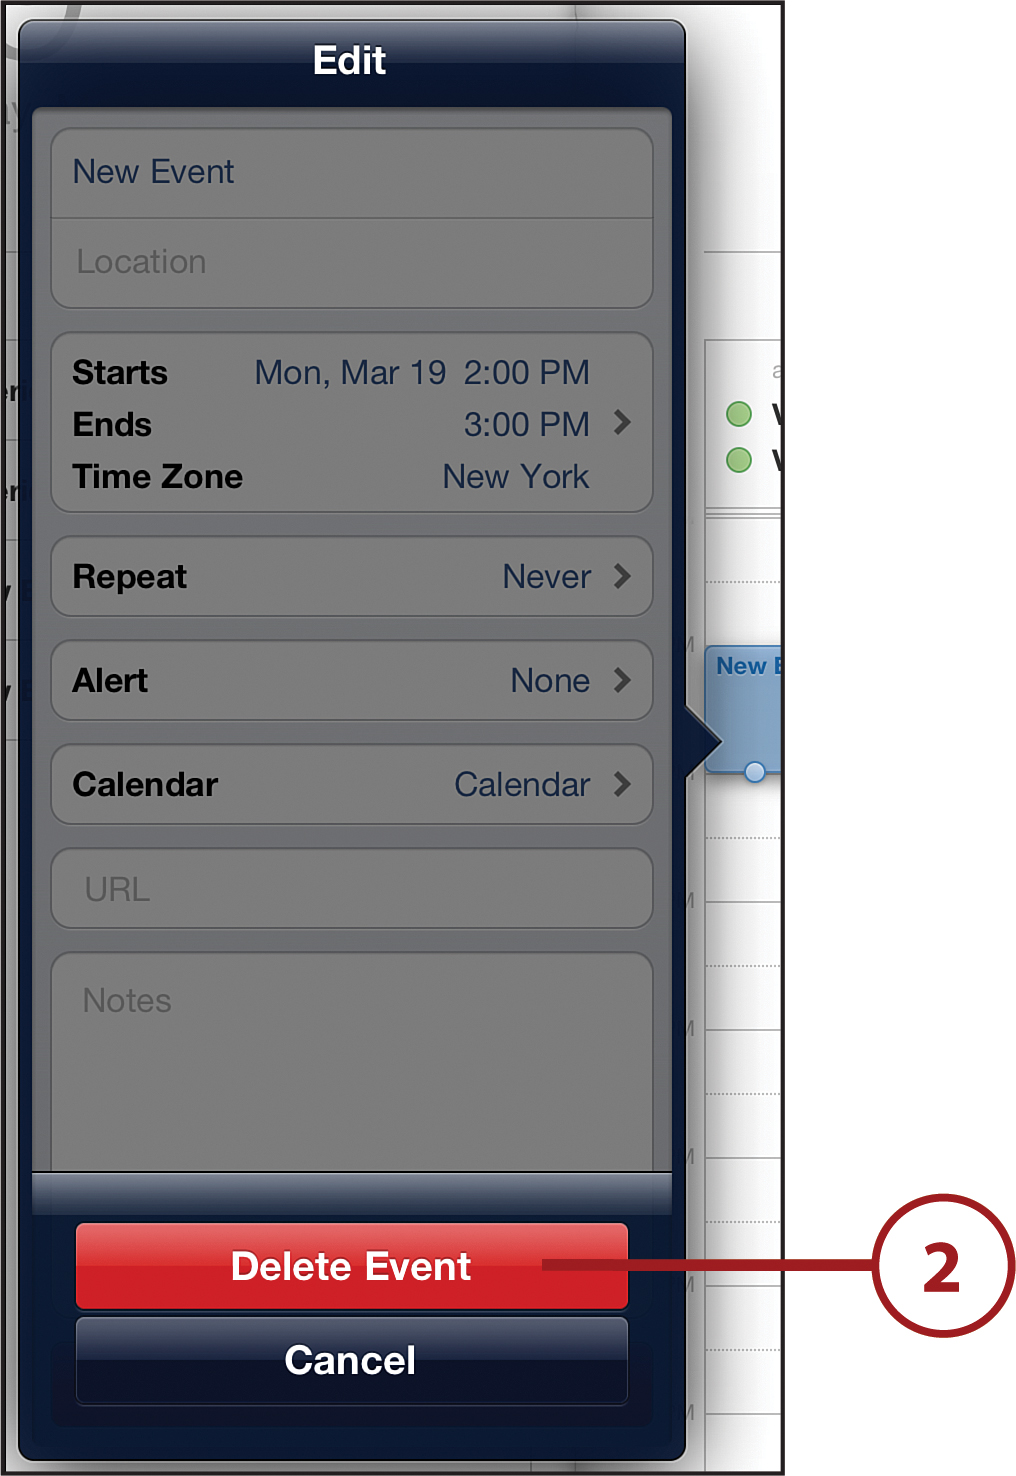
1. If you’re in Landscape mode, scroll to the bottom of the pop-up window (if you’re in Portrait, you don’t need to scroll) and tap Delete Event.

2. Tap Delete Event to remove the event.
Using Multiple Calendars
Do you want to keep a separate calendar of all your school events and your home events? How about one calendar for sports and another for birthdays? You can do that by using multiple calendars. To create more than one calendar, follow these steps:
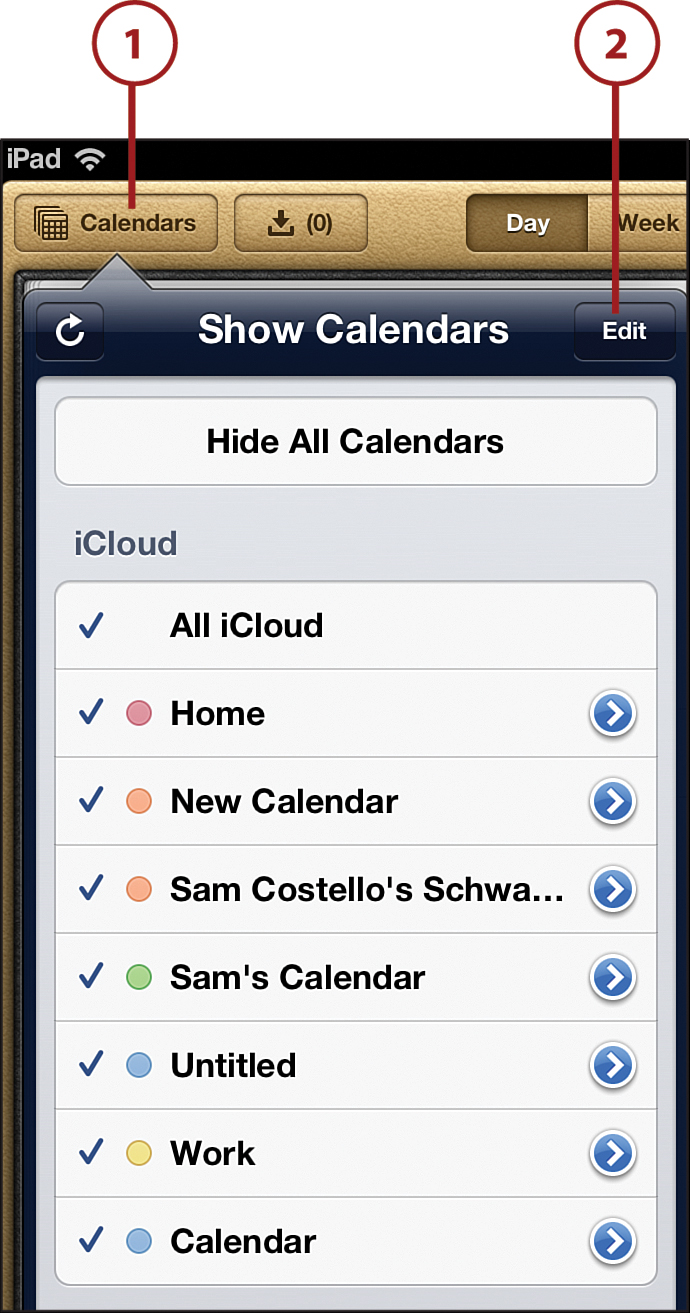
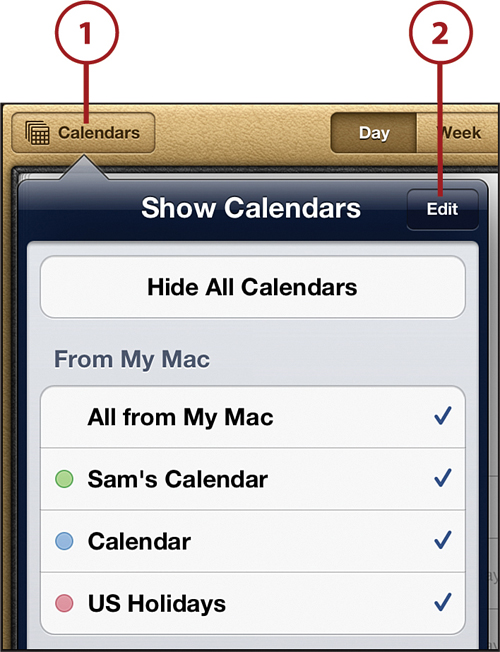
1. Tap Calendars to view your list of calendars.
2. Tap Edit.
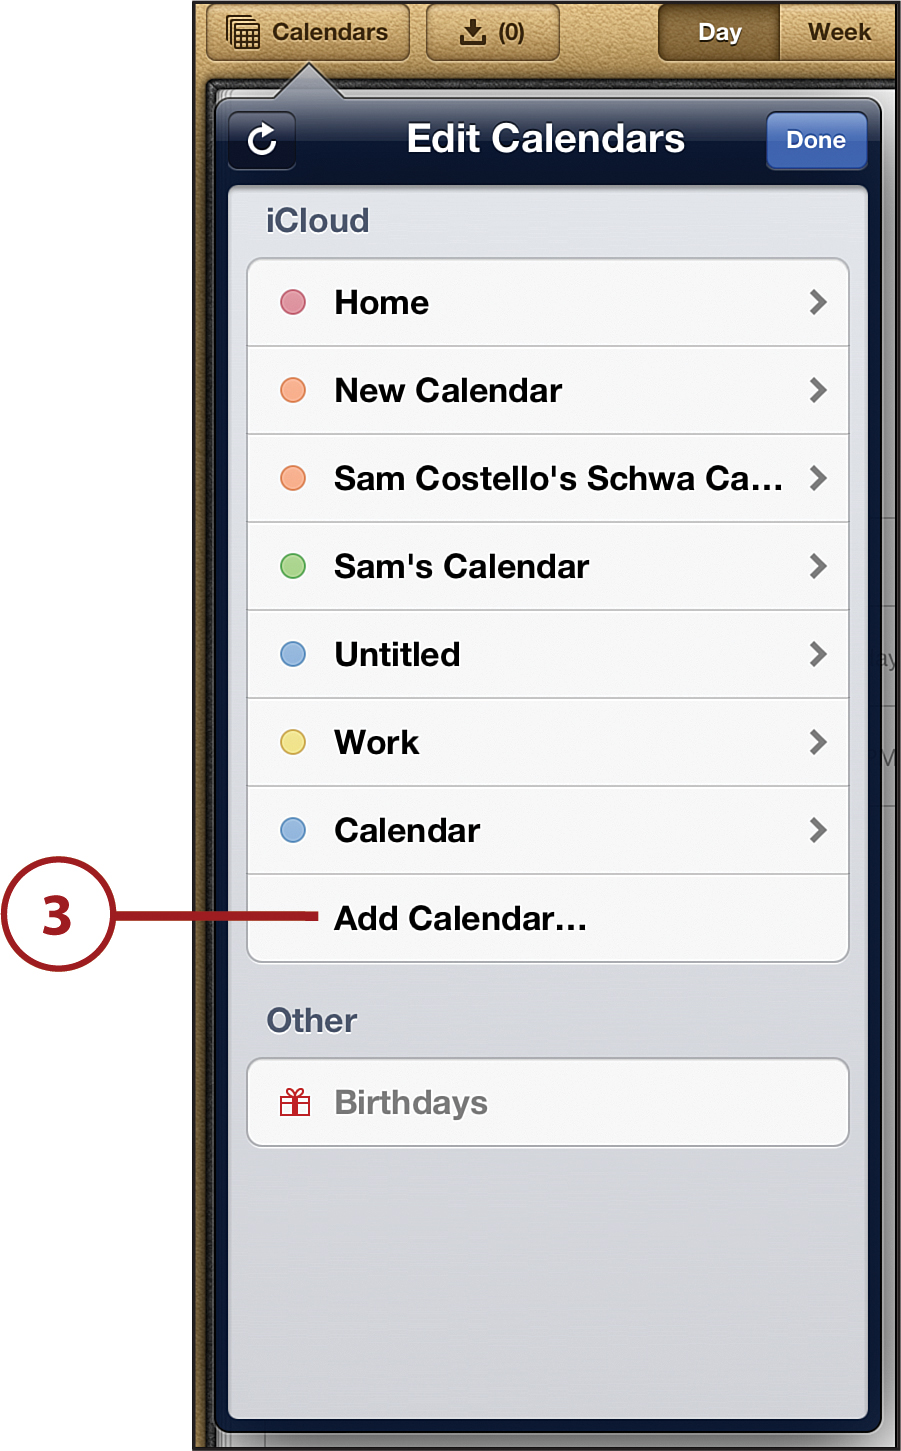
3. Tap Add Calendar. This adds the new calendar to your iCloud account and automatically syncs it to all your devices that have iCloud turned on, so they’re all up to date.
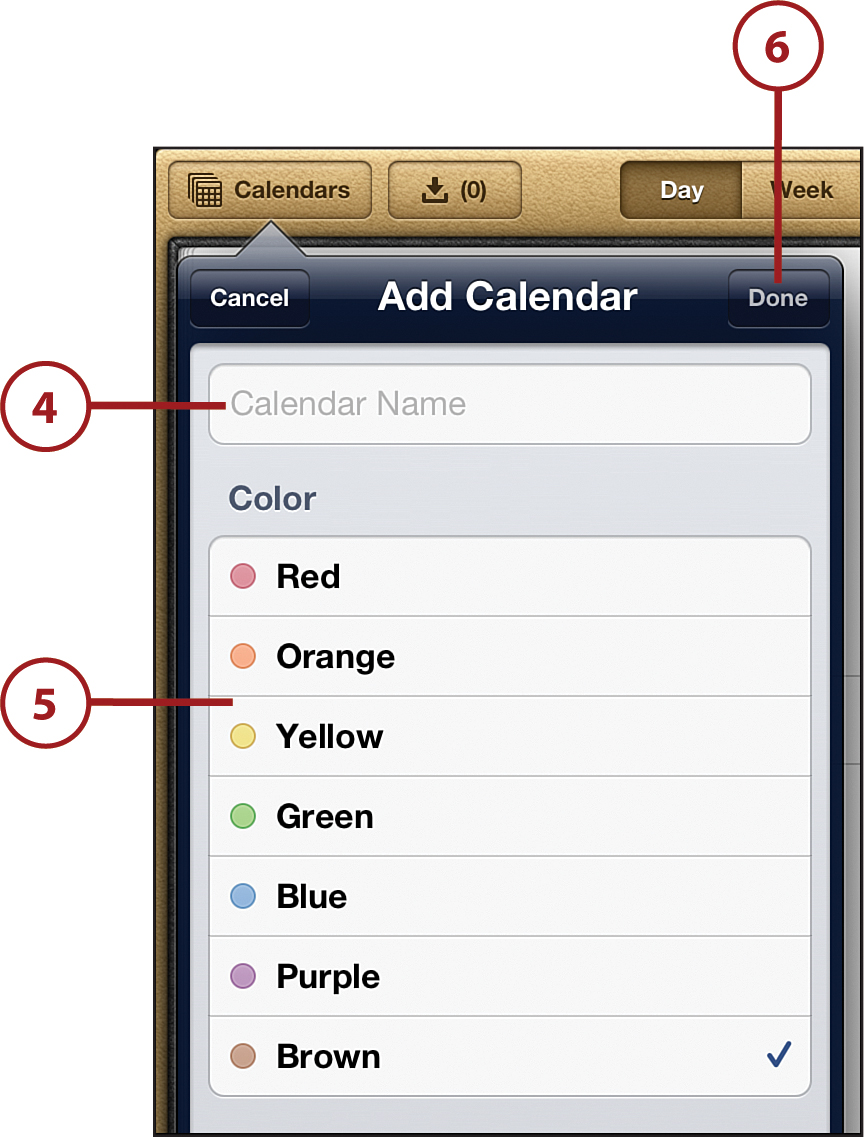
4. Type in a name for the calendar.
5. Tap a color. All the events in this calendar will be in this color so you can tell them apart from events in other calendars.
6. Tap Done.
7. Tap Done again and you’ll have a new calendar.
Deleting a Calendar
If you have more than one calendar and want to delete one entire calendar (not just a single event), follow these steps:
1. Tap Calendars to view the list of your calendars.
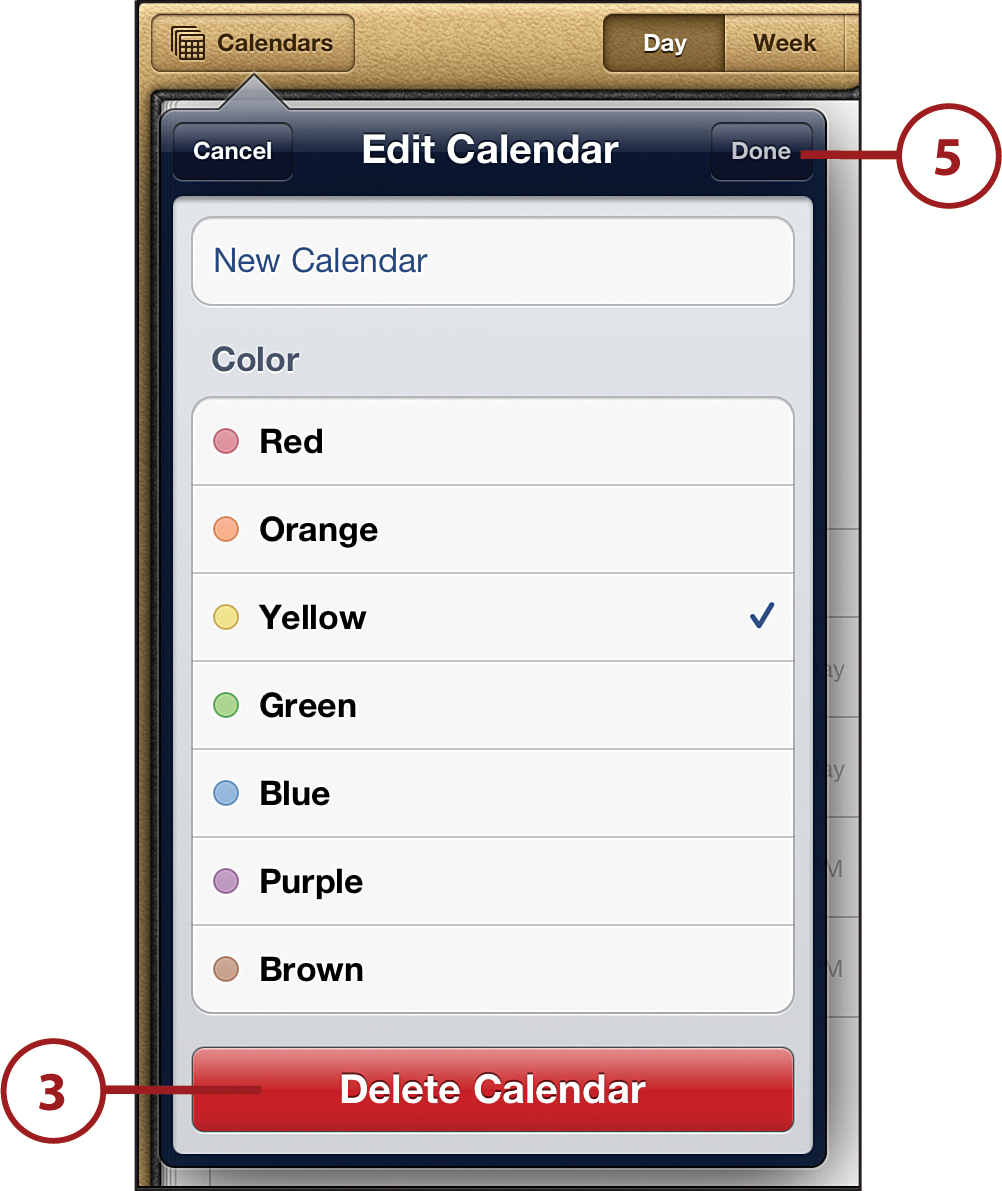
2. Tap Edit and tap again on the Calendar you want to delete.
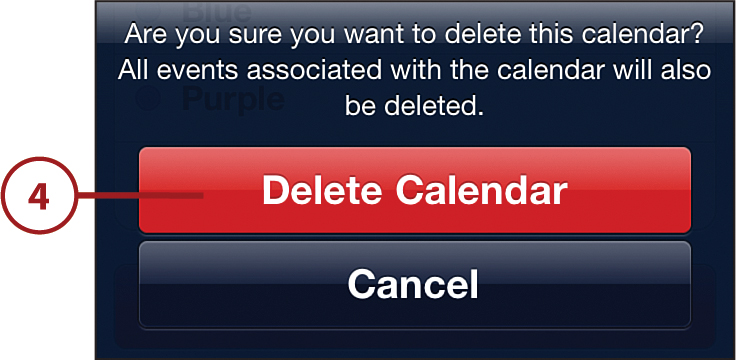
4. Tap the Delete Calendar button again (and remember, when you do this, you’re also deleting every event in the calendar, so you better be sure you want to get rid of it). This also deletes the calendar from anywhere it’s synced, like your computer or iCloud account.
5. Tap Done.
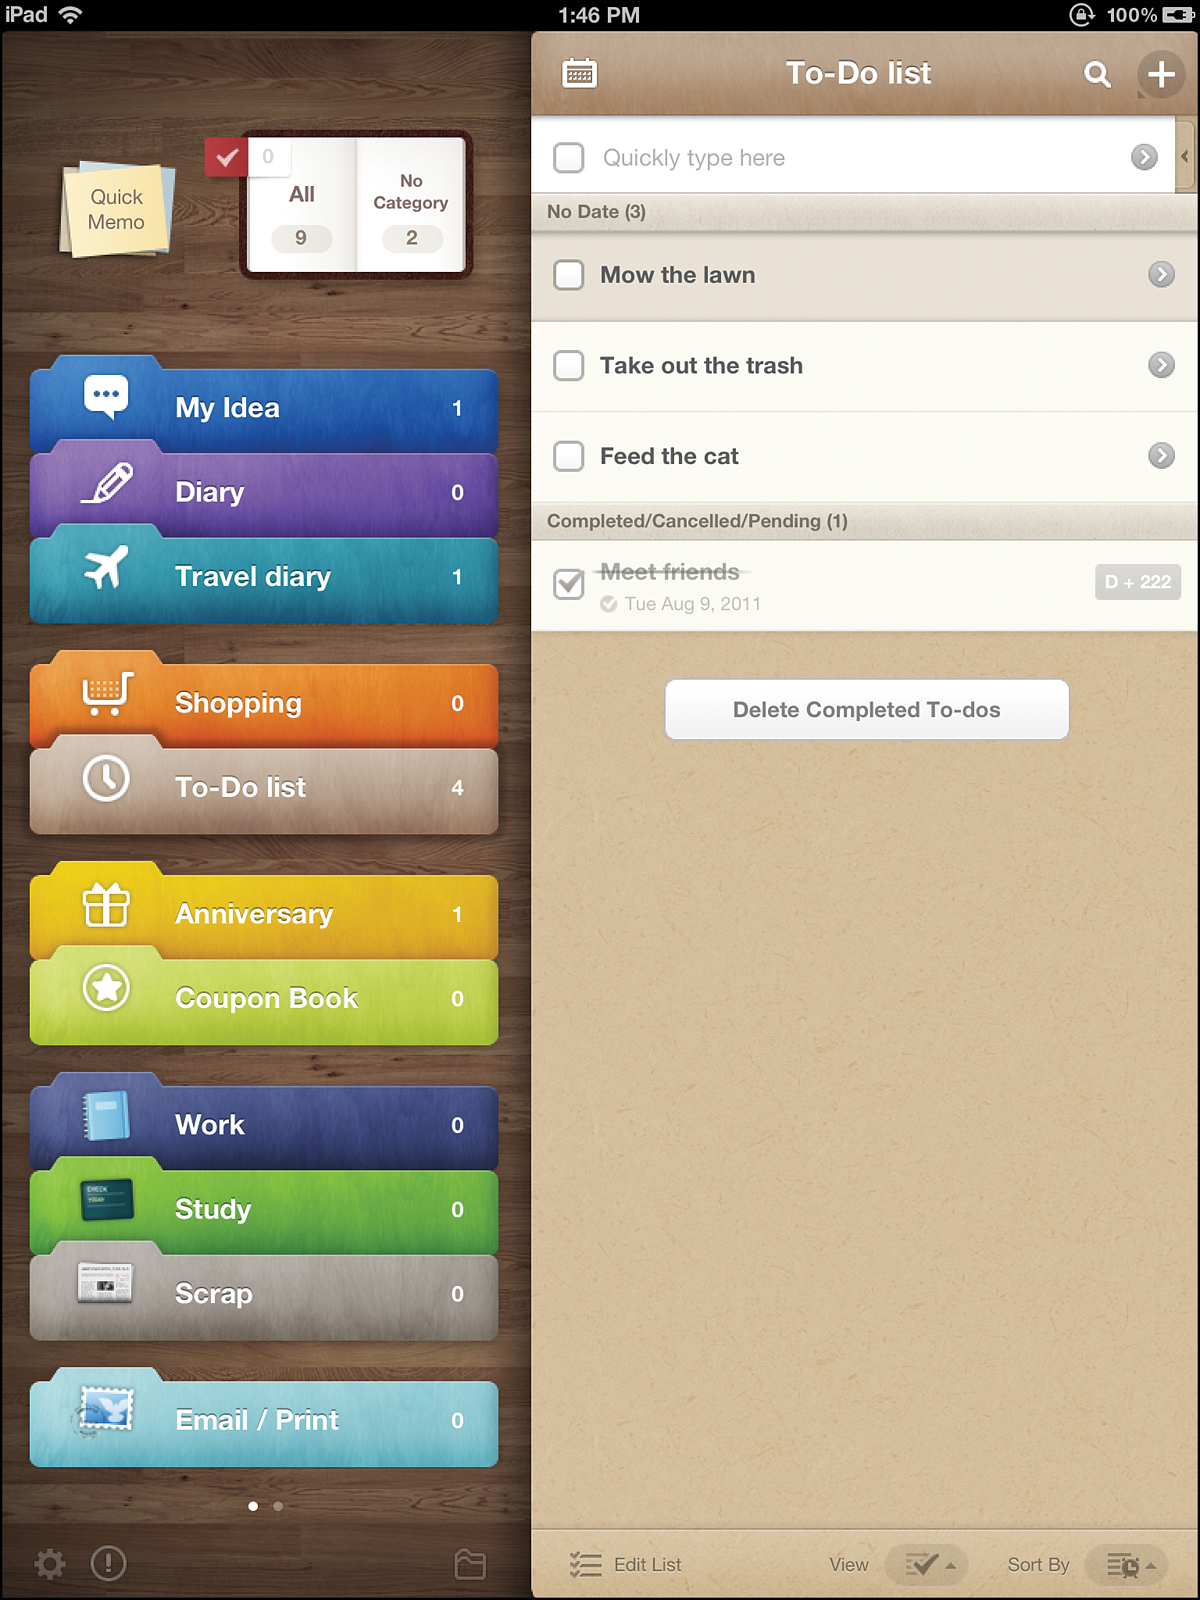
Using Reminders
Calendar is a good app for keeping track of events, but there’s another app that comes with your iPad that can be a big help, too: Reminders. Reminders helps you manage all the things you need to do, such as big school projects and buying birthday presents for your relatives. Unlike Calendar, which ties events to dates, Reminders lets you create to-do lists that hang around until you complete them.
Creating Reminders
To create a reminder, start by tapping the Reminders app on the home screen and then follow these steps:
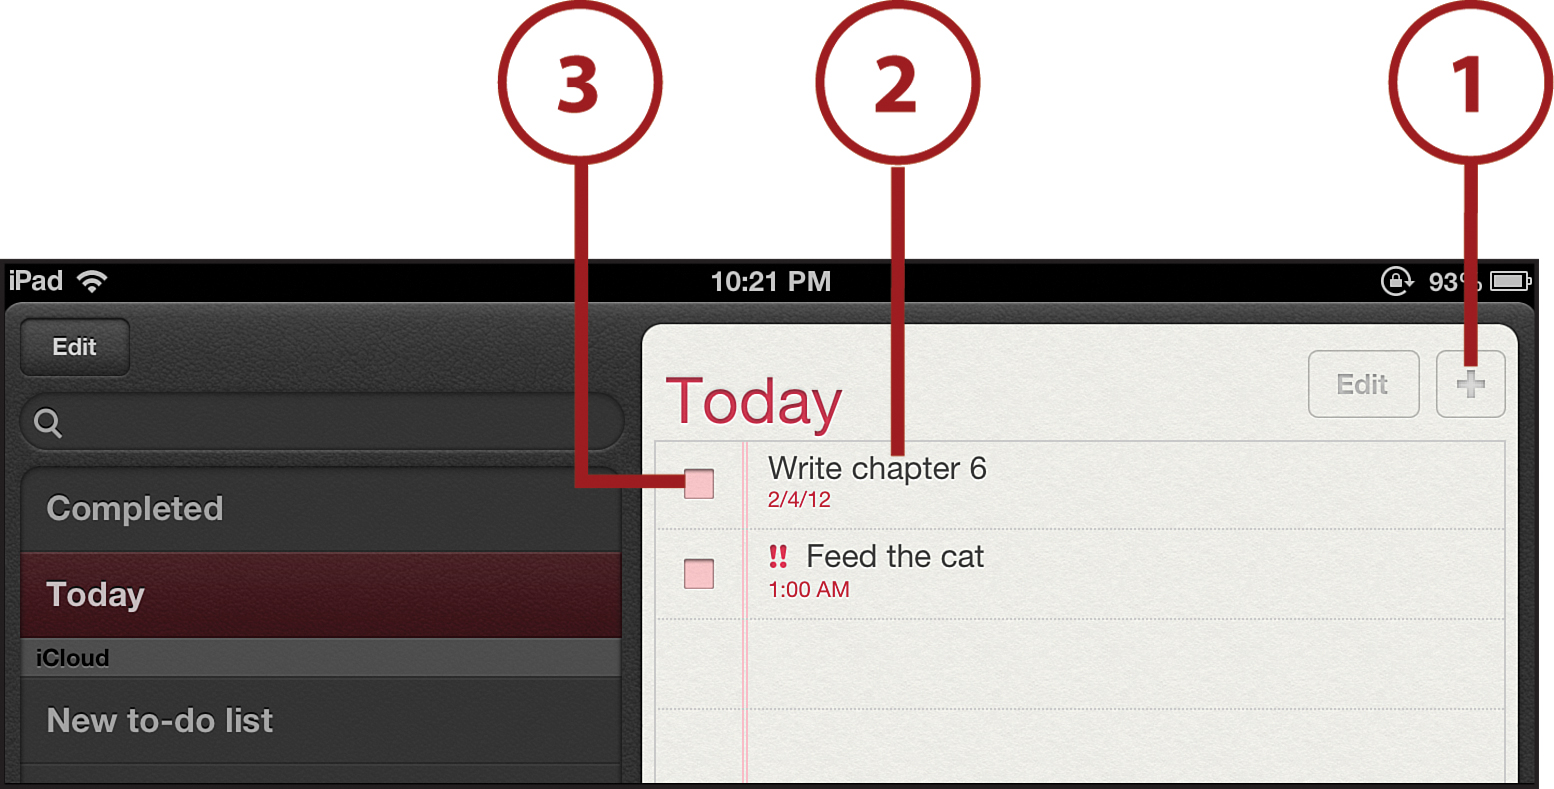
1. Tap the + button to add a reminder.
2. Type in the reminder you want to create and tap Return on the keyboard. This creates a reminder. To create another, repeat these steps again.
3. When you’ve done the thing the reminder is there to help you remember, tap the box next to it to mark it as done.
Just like with Calendar, you can add reminders using Siri. Hold down the Home button until Siri appears and then say the reminder you want created. For instance, you can say, “Remind me to buy Dad a birthday present,” or, “New reminder: take out the trash.” If Siri asks any follow-up questions, answer them. Tap Confirm to create your new reminder.
More Reminder Options
The basic reminder is just a box you can check off when you’re done. But reminders have options that enable them to do a lot more to help you. You can access those options by tapping the reminder you want to change; then follow these steps:
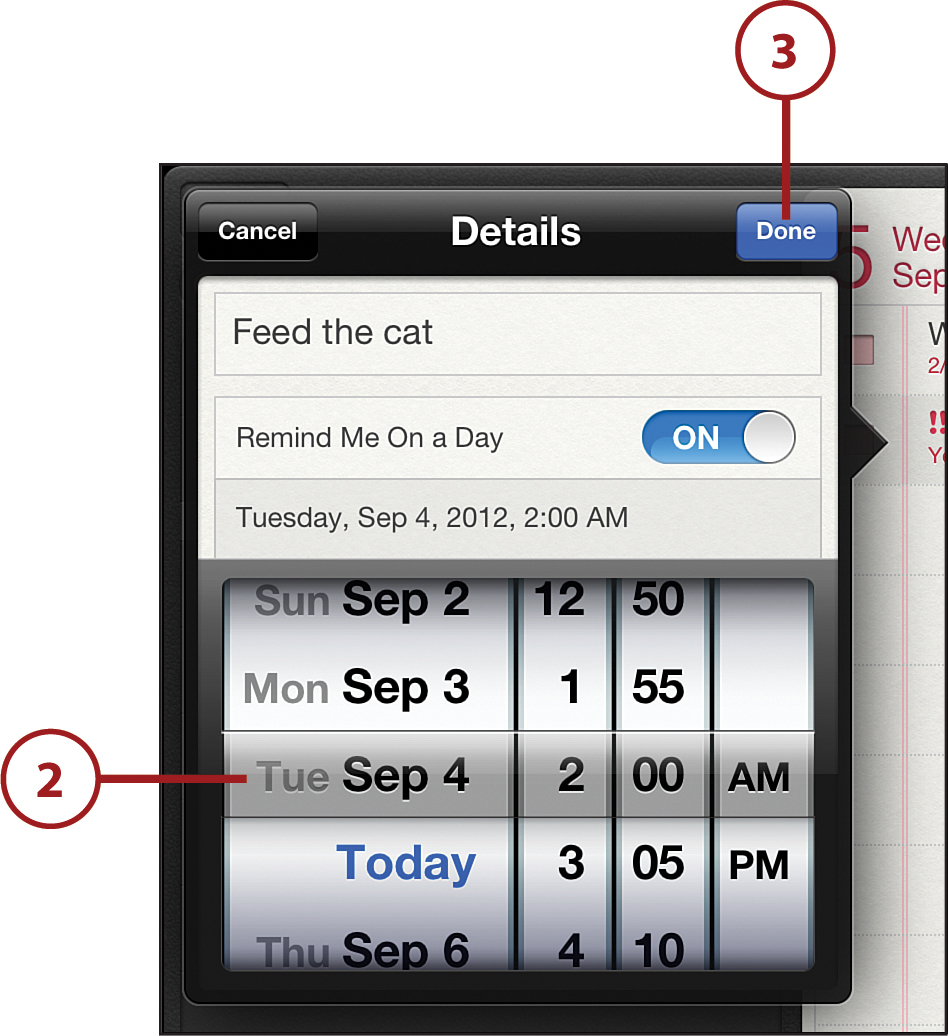
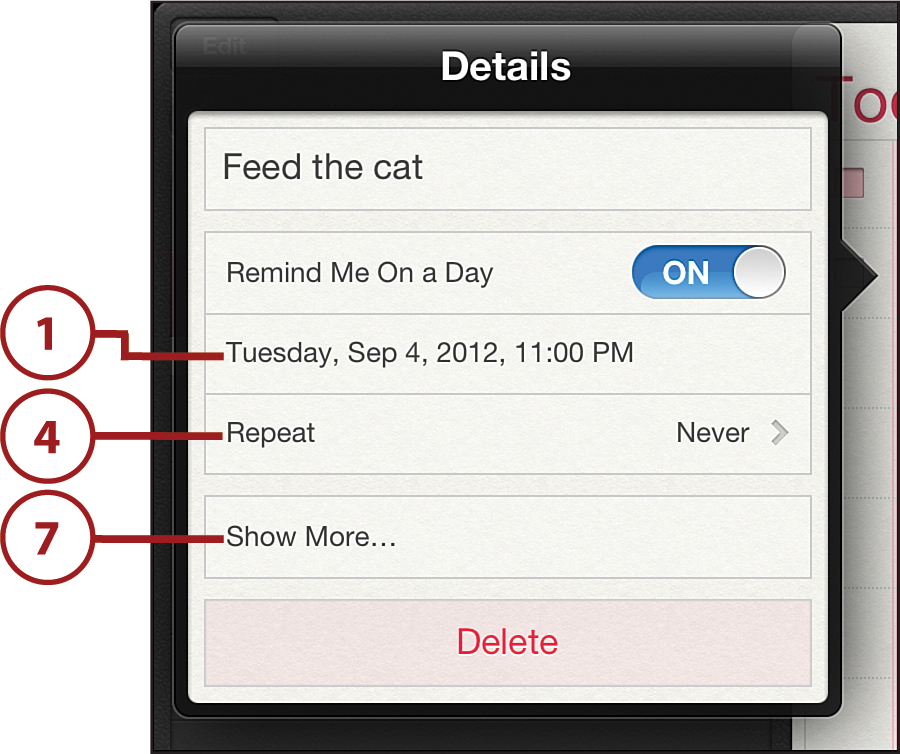
1. To have your iPad automatically alert you about the reminder, make sure the Remind Me On a Day slider is moved to On (it’s there by default) and then tap the date.
2. Use the wheels to select the date and time when you want to be reminded.
3. Tap Done.
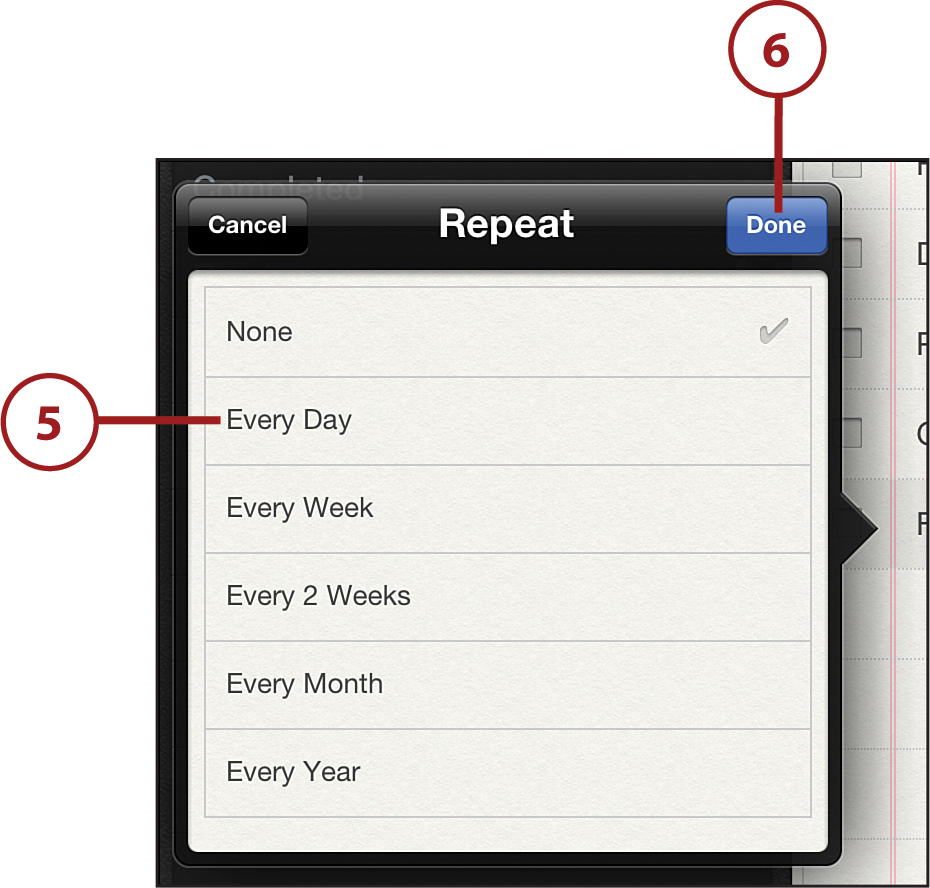
4. If you want the reminder to automatically repeat, tap Repeat.
5. Tap on how often you want it to repeat.
6. Tap Done.
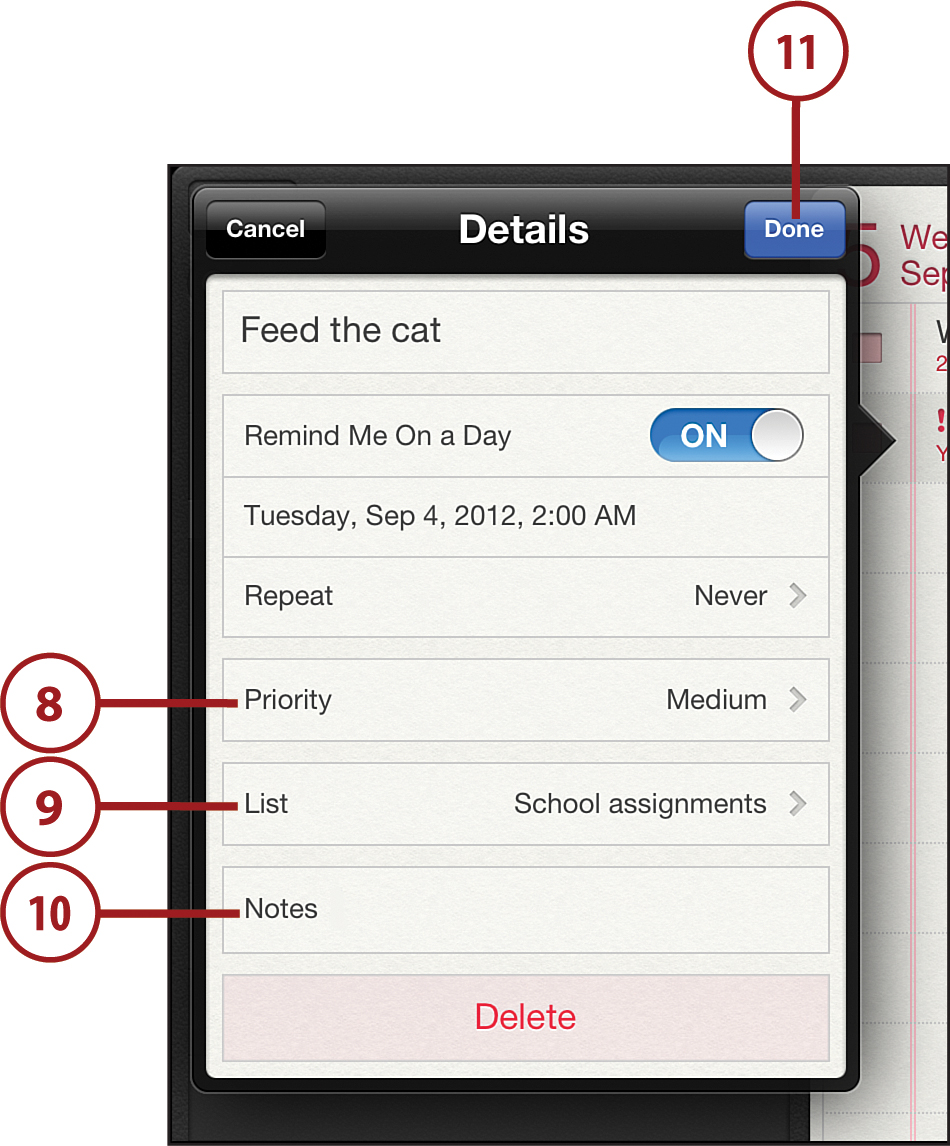
7. Tap Show More to access other options.
8. To assign an importance to the reminder, tap Priority and then tap Low, Medium, or High.
9. To add the reminder to a to-do list, tap List and then tap the list you want to add the reminder to. (See the “Creating To-Do Lists” section later in this chapter for more information.) When you’ve made your choice, tap Done.
10. To add additional information to the reminder, tap Notes and enter more details.
11. Tap Done one more time to save the Reminder.
If you want to change something about a reminder you’ve already created, tap it and then tap any of the items in the menu you want to change. When you’ve made the change you want, tap Done.
Deleting Reminders
To completely delete a reminder (rather than just marking it as done), first tap the one you want to delete and then follow these steps:
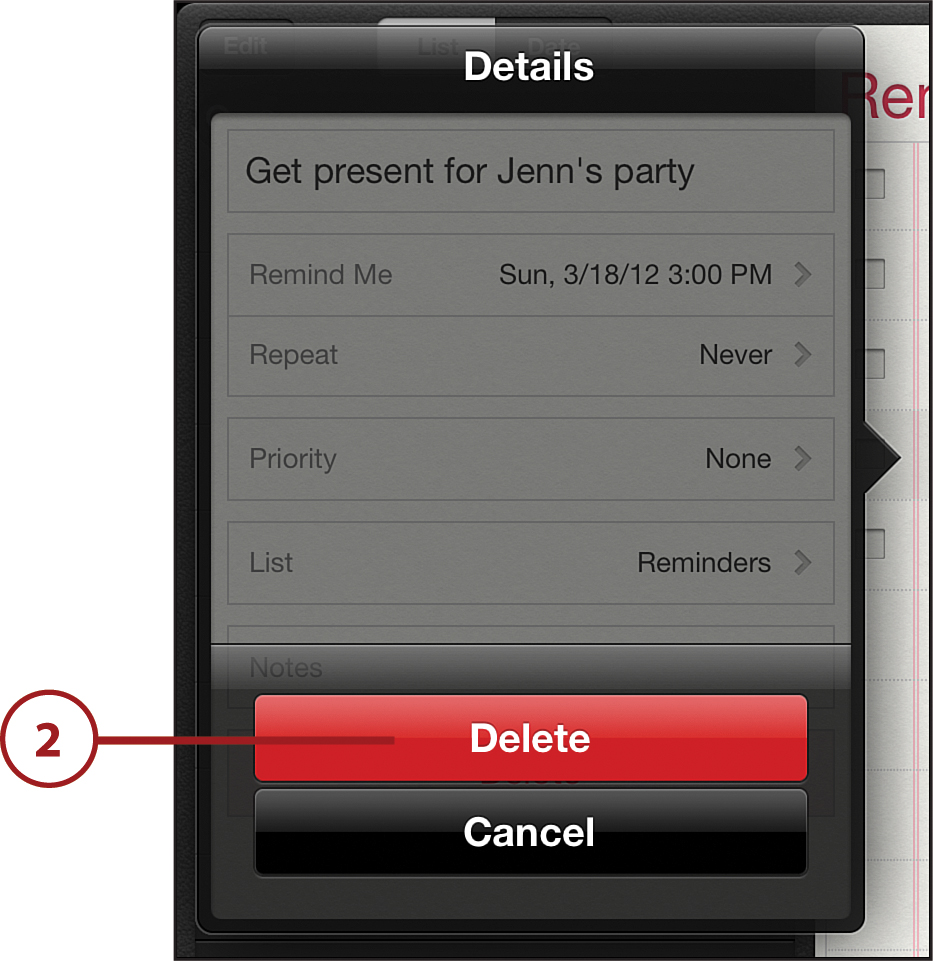
1. Tap the Delete button (shown in the image for steps 9–11 of “More Reminder Options”).
2. When asked to confirm, tap Delete again to finish the deletion.
Creating To-Do Lists
If you want to stay organized by creating groups of reminders—say, one for things you’re doing for school, another for Boy or Girl Scouts, a third for chores—you need to make to-do lists. Start doing that by tapping Reminders to launch the app and then follow these steps:
1. Tap Edit.
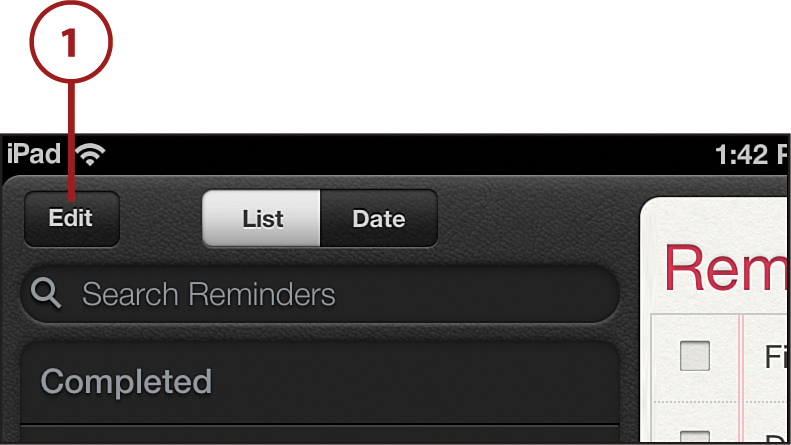
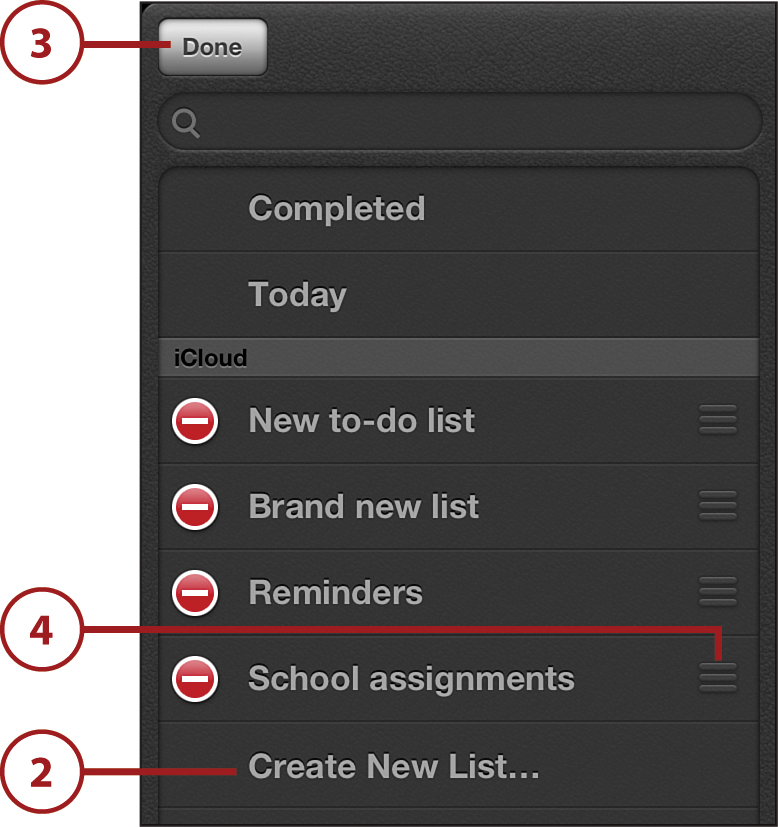
2. Tap Create New List. Give the new list a name and tap Done on the keyboard.
3. When you’re ready to save the new list, tap Done again.
4. To rearrange the order of your to-do lists, tap and hold the bars next to a list and drag it to the new location. Let it go to save the new order.
Awesome Apps
Reminders is a good app for doing just what it says—providing you reminders to do things. But it’s pretty basic; if you want more advanced or powerful features, you might want to check out these great to-do list apps:
• 2Do—This powerful, complex app can be hard to figure out, but it can also help you get super-organized. Not only can you use it to create to-do lists, but each item on that list can have an action attached to it—like a phone call or an email—as well as GPS locations or voice notes. It’s an expensive app, but it’s very powerful. $9.99
• Awesome Note HD (+ToDo)—This is another powerful to-do list tool. The interface is tricky, but after you get the hang of it, it can help you. Use it to create to-do lists and take notes. You can add photos, GPS locations, and other things to each to-do and sync your to-dos with other apps. $4.99 or free 3-day trial version
• ToodleDo—The basic display of the to-dos in ToodleDo is easy to understand and use. You can add reminders to each to-do, organize them into folders, and sort them in all kinds of ways. The priority system can be a little tricky, though. $2.99
Always Wake Up on Time: Using Clock
Have you ever slept too late and then had to rush to get ready for school on time? That feeling of being behind and needing to catch up is no fun—and you can avoid it with a good alarm clock to make sure you wake up on time. Luckily, your iPad comes with a Clock app that can help you out.
Setting an Alarm
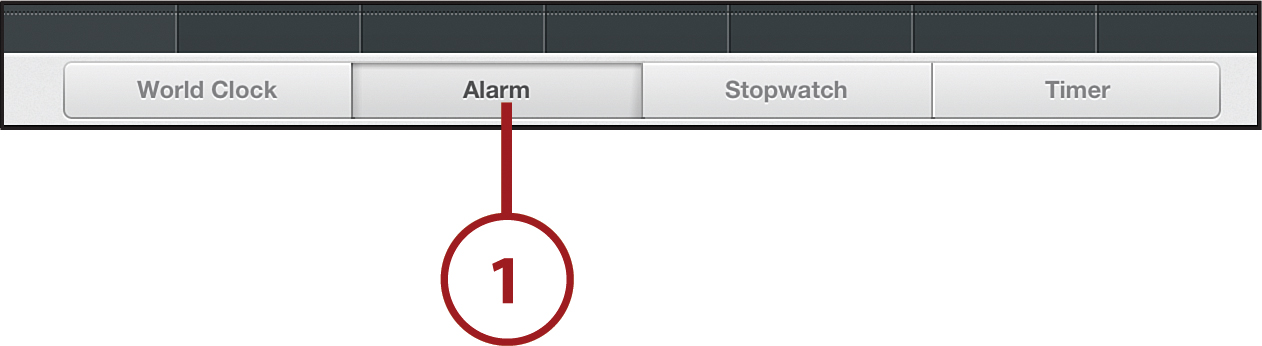
To create an alarm, tap the Clock app on your home screen and then follow these steps:
1. Tap Alarm at the bottom of the screen.
2. Tap + to create a new alarm.
3. If you want the alarm to repeat (say to wake you up every school day), tap Repeat and then tap the days when you want the alarm to go off.
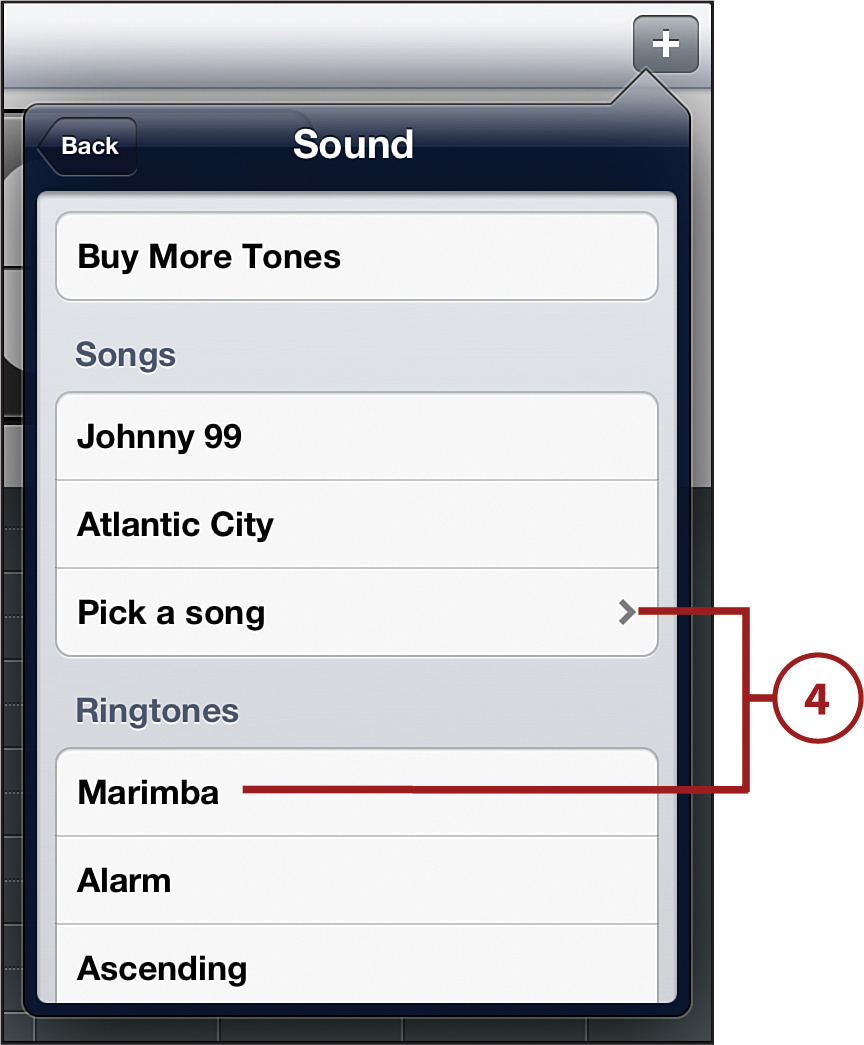
4. Tap Sound to choose the sound you’re woken up by. You can choose the sounds that come with the iPad or any song in your iPad’s music library. To do that, tap Pick a Song and then tap the song you want.
5. If you want to enable snooze (a button you hit to sleep just a few more minutes), make sure the Snooze slider is moved to On.
6. Move the wheels to the time you want the alarm to go off.
7. When you’ve created the alarm and want to save it, tap Save.

You can also use Siri to create an alarm. Hold down the Home button until Siri appears and then say something like, “Wake me up at 8:00 a.m. tomorrow,” or, “Set an alarm for 7:00 a.m. tomorrow.” Siri confirms the alarm has been created and you’re done.
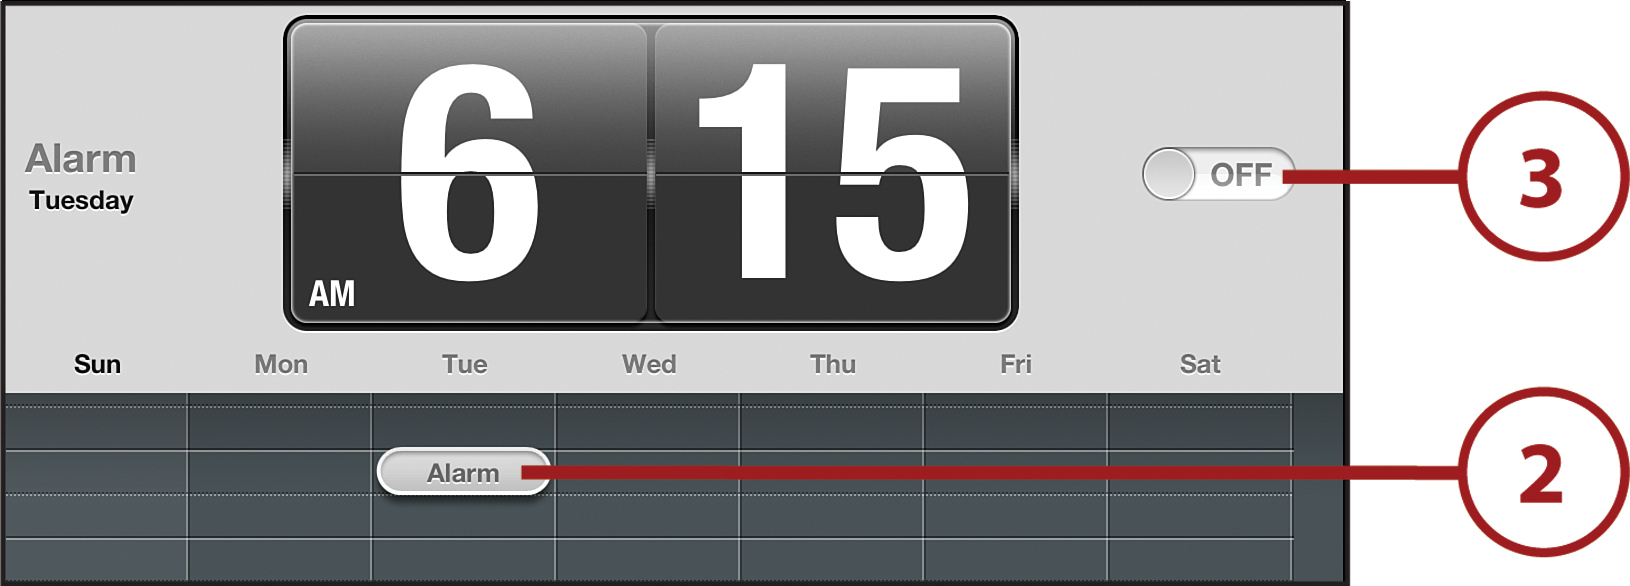
Turning Alarms Off
If your alarm normally wakes you up at 7:00 a.m. on Monday but this Monday is a holiday and you have the day off from school, then you might want to sleep in. To do that, you don’t have to delete your alarm—you can just turn it off. Start by opening Clock and then follow these steps:
1. Tap Alarm at the bottom of the screen (not shown).
2. Tap the alarm you want to turn off.
3. Move the slider to Off.
If you’ve turned your alarm off, make sure to slide it back to On for the next day you need it—you don’t want to oversleep!
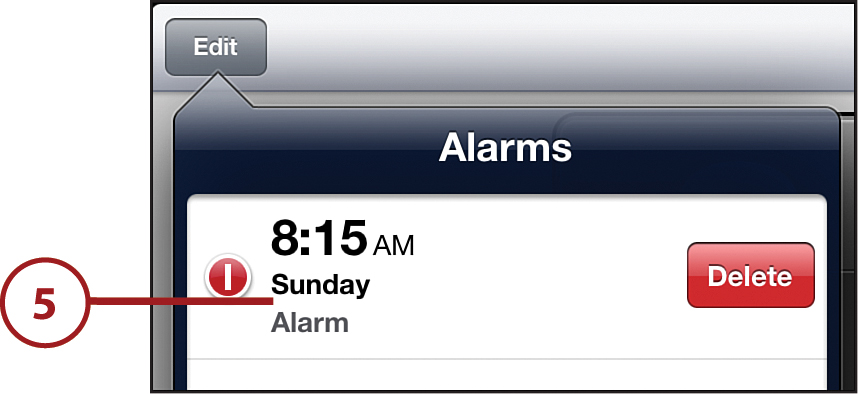
Editing or Deleting an Alarm
If you want to change an alarm or delete it, tap the Clock app and follow these steps:
1. Tap Alarm at the bottom of the screen (not shown).
2. Tap the alarm you want to edit or delete.
3. Tap Edit.
4. To edit the alarm, tap it in the drop-down menu and change the parts of it you want. Tap Save.
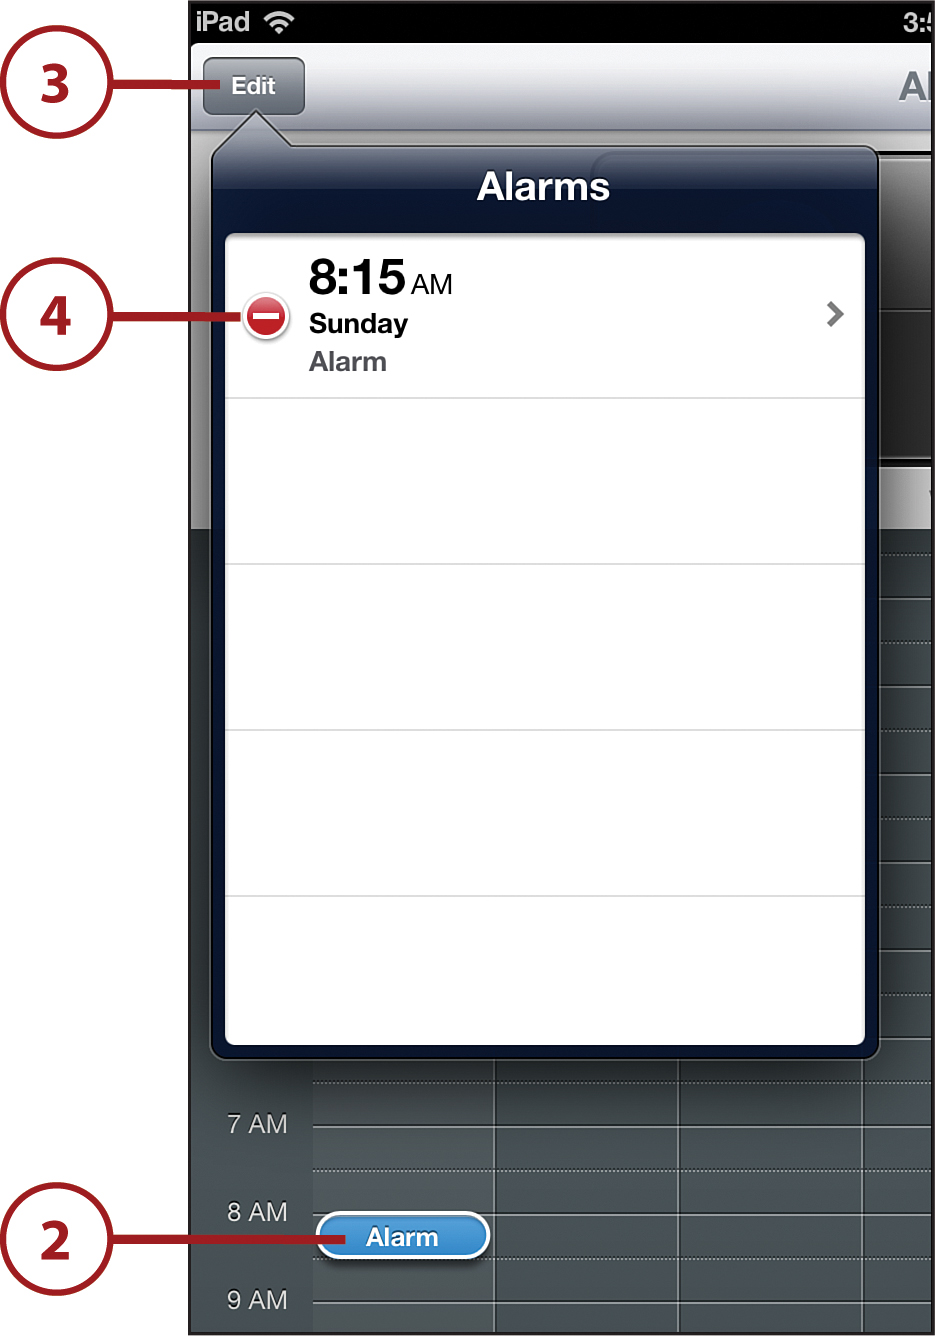
5. To delete the alarm, tap the red icon and then tap Delete. When you do that, it completely deletes the alarm, so make sure you really want to delete the alarm.