
5. Talk to Me: Texting, Chatting, and Email
From email to chat to text messaging, the iPad makes it easy for you to stay in touch with almost anyone. In this chapter, you find out about:
• Texting
• Chatting and instant messaging
• Talking to friends with social media
• Emailing
• Staying safe while texting, chatting, and emailing
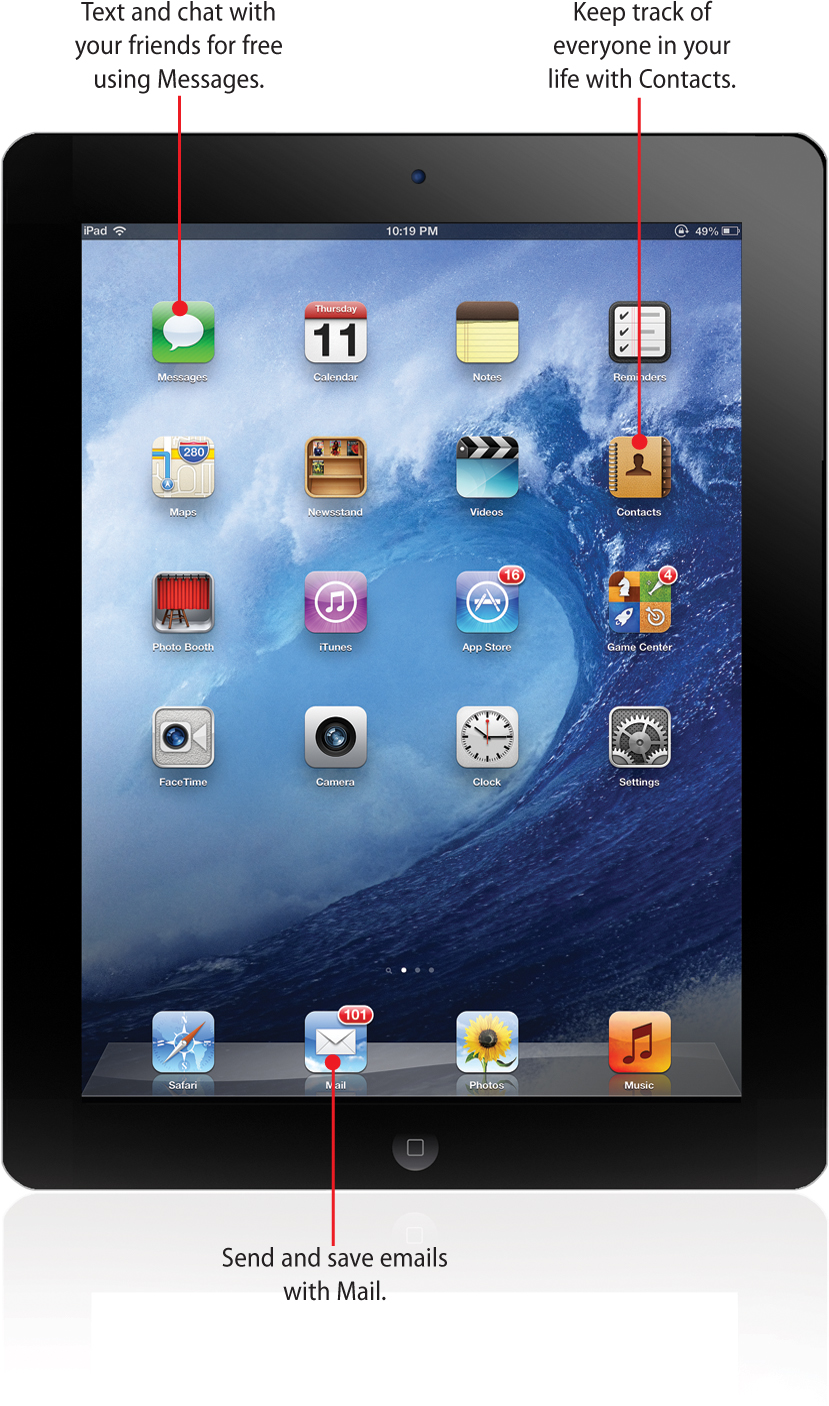
No matter how you want to stay in touch with your friends, family, or teachers, the iPad can help. You can use Apple’s Messages app to send text messages to other iPhone and iPad users. Other apps let you send texts to friends’ phones, chat on AOL or other instant messaging services, and send email. (If you’re interested in video chat using FaceTime or Skype, check out the next chapter.) There are even apps for popular social media services such as Twitter and Facebook. With the right apps on your iPad, you can communicate with practically anyone, anytime.
Using Contacts
The Contacts app lets you store all the ways to contact your friends, family, teachers, and other people: email, phone, chat, and FaceTime. It also lets you keep handy their address, birthday, and other information and share that information with similar programs on your desktop or laptop computer, or with online address books from Yahoo! and Google. Many of the apps on your iPad that let you communicate with other people use Contacts, so it makes sense to put the people in your life into it.
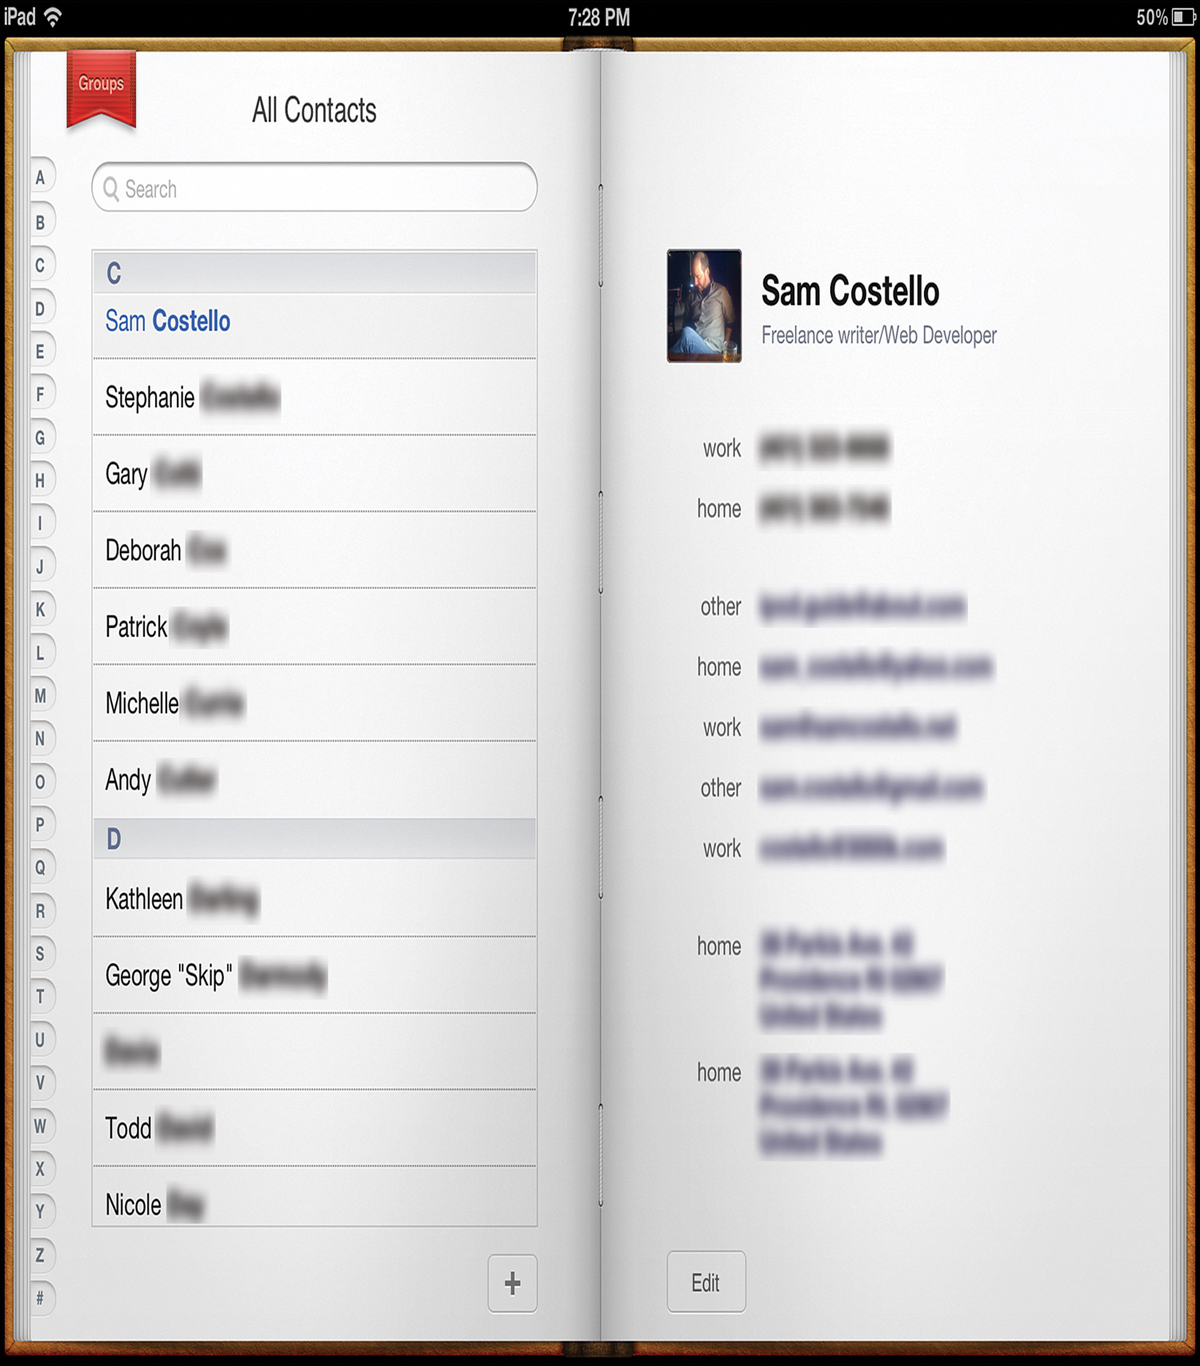
Adding People to Your Contacts
To add people to Contacts, open the Contacts app on your iPad’s home screen and follow these steps:
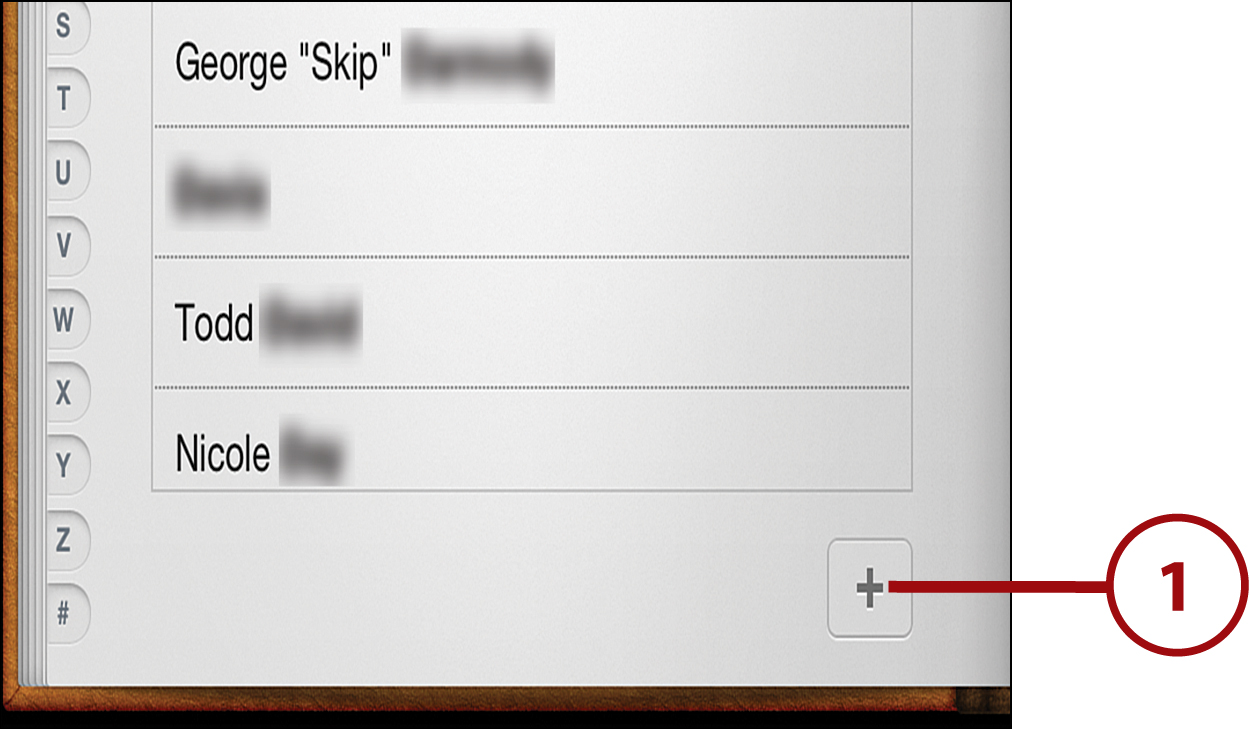
1. Tap the + button to add a new contact.
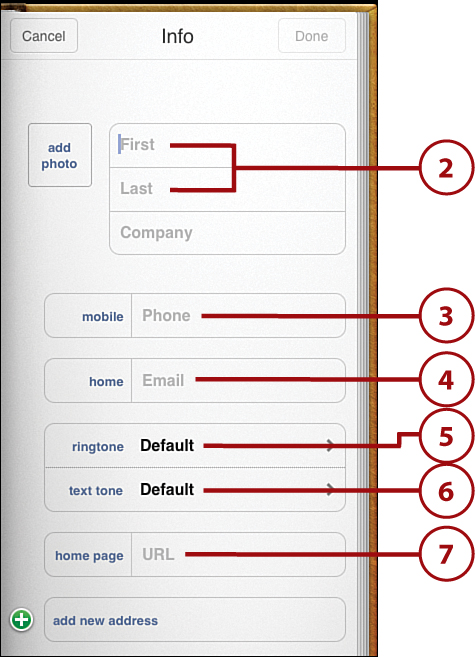
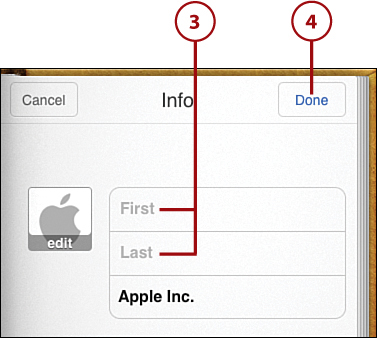
2. Type the person’s first and last name.
3. Type the person’s phone number. It is automatically added to the Mobile field. When you enter one phone number, the Contacts app automatically adds a line for a second in case you want to add another.
4. Choose the email address you want to add and enter it. Just like with phone numbers, you can choose the kind of email address you’re adding by tapping the Home box and choosing from the pop-up list. After you add one email, a second email line is added.
5. Tap Ringtone to choose what sound plays when this person calls you. You can hear each tone by tapping on it. When you’ve made your choices, tap Save.
6. Tap Text Tone to choose what sound plays when this person texts you. You can hear each tone by tapping it. When you’ve made your choices, tap Save.
7. If the person has a website or blog, enter it on the Home Page line. If she has more than one, enter those on the lines that appear below the first one.
If you want to enter a phone number other than a mobile phone, tap the word “mobile” to get a list of the other kinds of phone numbers. You can change the type of label on many lines by tapping it and selecting from the pop-up menu.
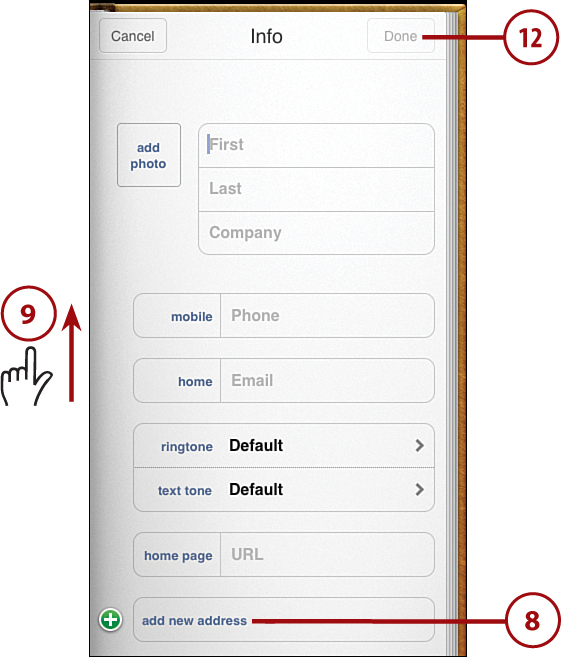
8. Tap Add New Address to enter the person’s address. If you want to put in more than one address (work and home addresses, for instance), tap Add New Address again below the first one. Tap “home” next to the address to choose what kind of address it is.
9. Swipe up the screen to see more options.
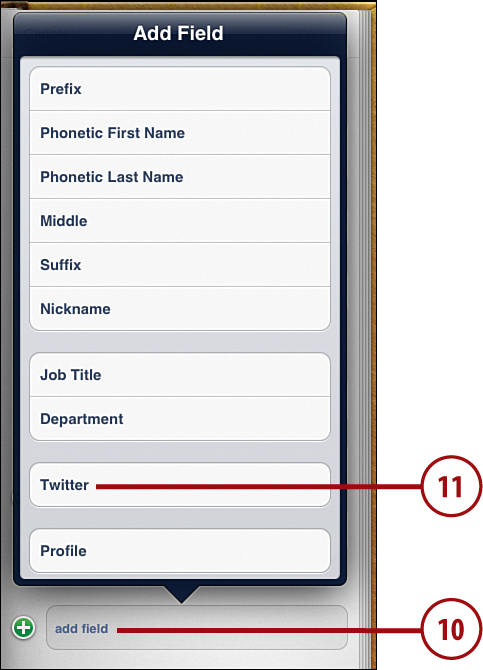
10. Tap Add Field to add all kinds of other information about the person. You can choose fields like Nickname, Twitter account, Instant Messenger name, Birthday, and so on. You need to swipe through the menu because not everything fits on the screen.
11. From the list of options that appears, tap the field you want to add to the contact. To add another item, tap Add Field again.
12. Tap Done to save when you’re done entering information.
Add Photos to Contacts
One of the fun things to add to your Contacts is pictures of people. When you do, their pictures show up in their emails, their chats, and when they contact you on FaceTime. To add photos to Contacts, open the Contacts app and follow these steps:
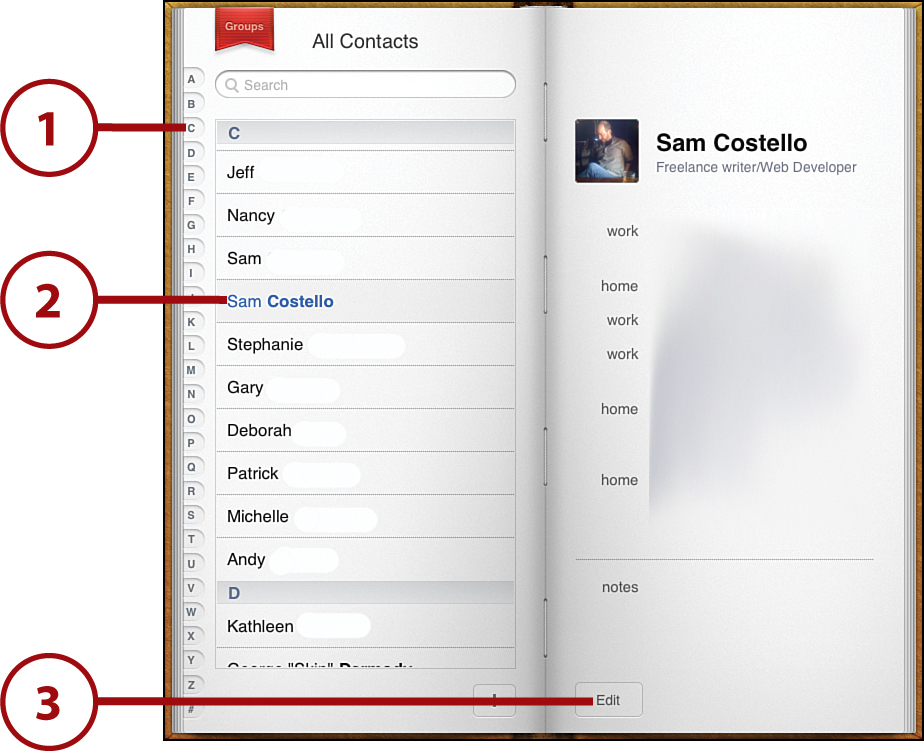
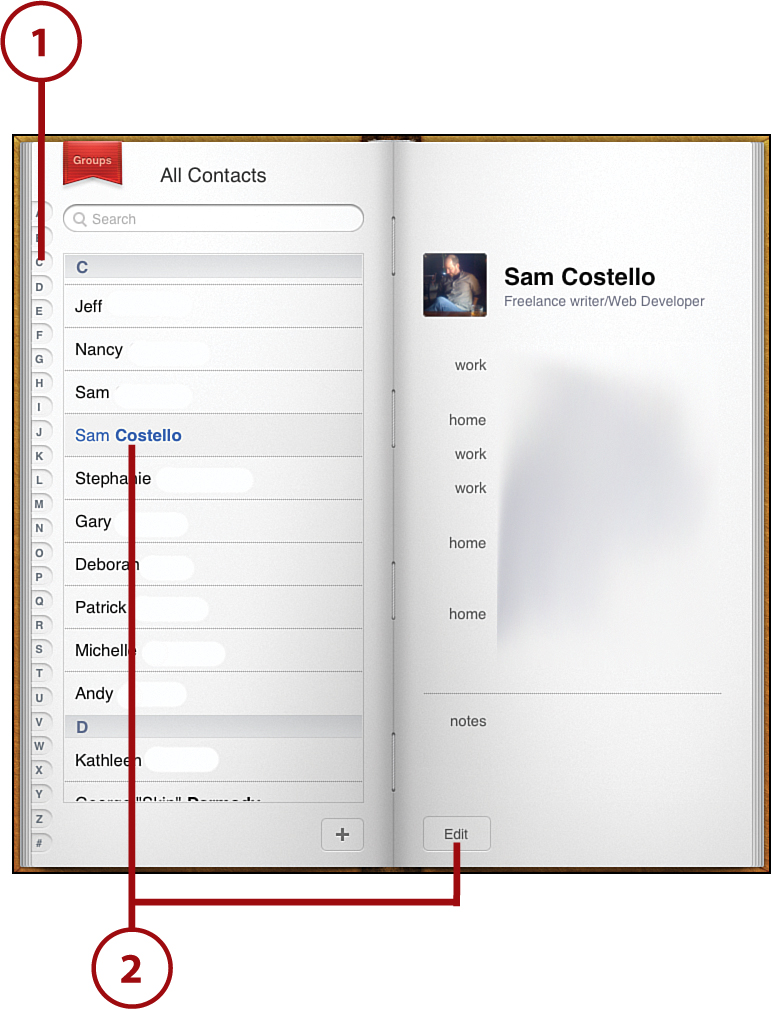
1. Tap the letter that begins the person’s last name on the left or search for the person in the search bar.
2. Tap the person’s name when you find it.
3. Tap the Edit button so that you can change the contact information to include a photo.
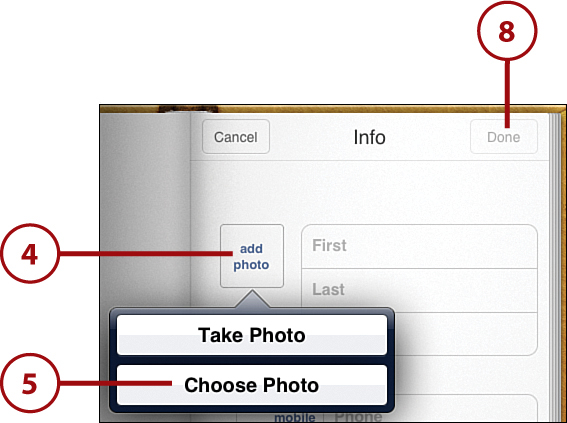
4. Tap Add Photo.
5. Tap Choose Photo to use a photo that’s already on your iPad. From here you can select any of the locations on your iPad where you keep photos: Camera Roll, any folders you’ve added, and so on. To learn more about using photos on your iPad, check out Chapter 15, “Lights, Camera, Action: Videos and Photos.”
If your contact is in the room with you, you can use your iPad to take a quick picture of them and immediately plug it into their contact page. Just tap the Take Photo button instead and use the Camera app to snap the photo.
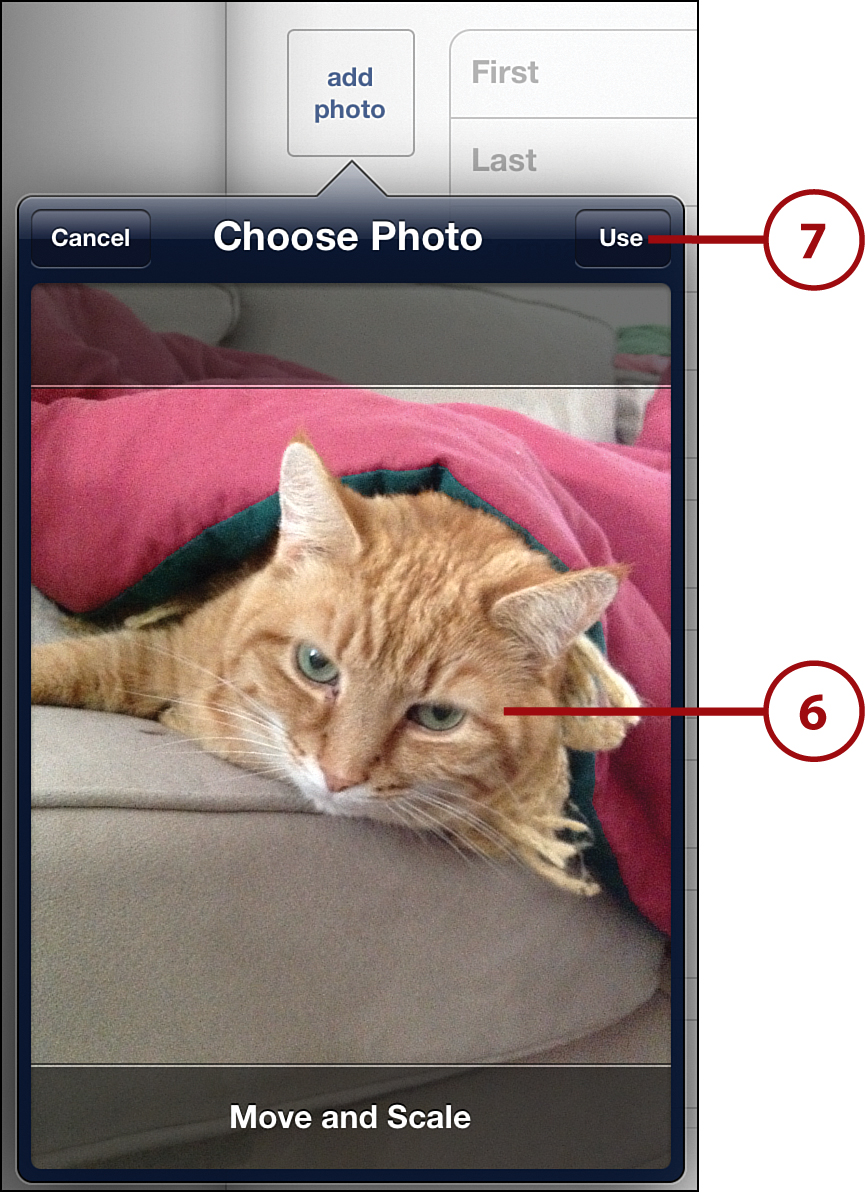
6. After you’ve selected a photo, you can zoom in on the picture by pinching it or you can move it around by tapping and dragging.
7. Tap Use to select the photo.
8. When you have the picture you want added to Contacts, tap Done to save it.
Editing Contacts
When someone moves or gets a new email address, you’ll want to update the information you have about that person in Contacts. To do that, open the Contacts app and follow these steps:
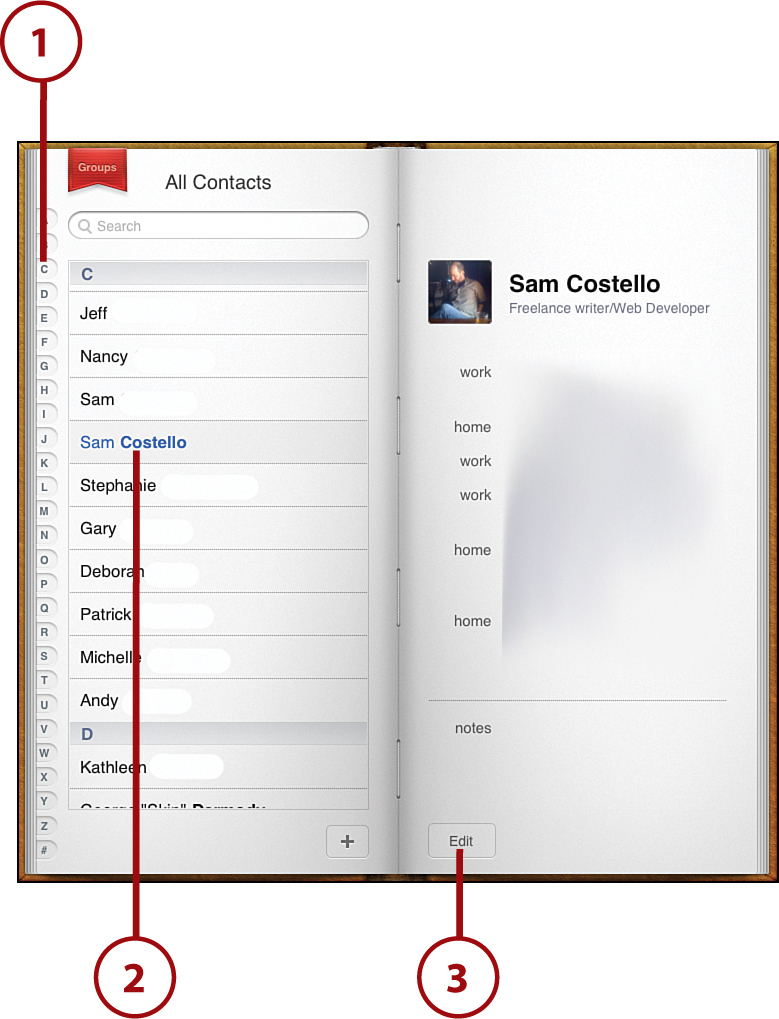
1. Tap the letter that begins the person’s last name on the left or search for her in the search bar.
2. When you find the person’s name, tap it and then tap Edit.
3. Make the changes you want to make by tapping in any field and updating its contents.
4. Tap Done to save the changes.
Deleting a Contact
If you want to delete someone from Contacts, open the Contacts app and follow these steps:
1. Tap the letter that begins the person’s last name on the left or search for them in the search bar.
2. Tap the person’s name when you find it.
3. Tap Edit.
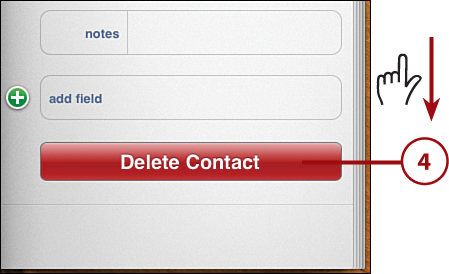
4. Scroll down to the bottom and tap Delete Contact.
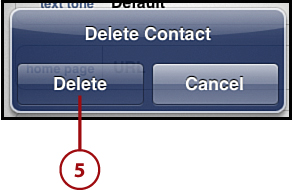
5. Tap Delete in the warning that pops up.
Awesome Apps
Contacts offers most of the features you need for your address book, with a few exceptions. One of the major exceptions is being able to send emails or texts to groups of people rather than just one person. Check out these suggestions for apps that can do just that as well as other neat things:
• Remove Duplicate Contact—Do you find yourself with a lot of duplicates cluttering up your Contacts? This app helps you easily find and delete all your duplicates. $0.99
• Smart Group—Want to contact a group of your friends all at once? SmartGroup allows you to send emails and text messages to groups of friends. You can use it to make groups on your own, or you can have it create “smart groups” of people that fit certain criteria. $5.99
Using Messages
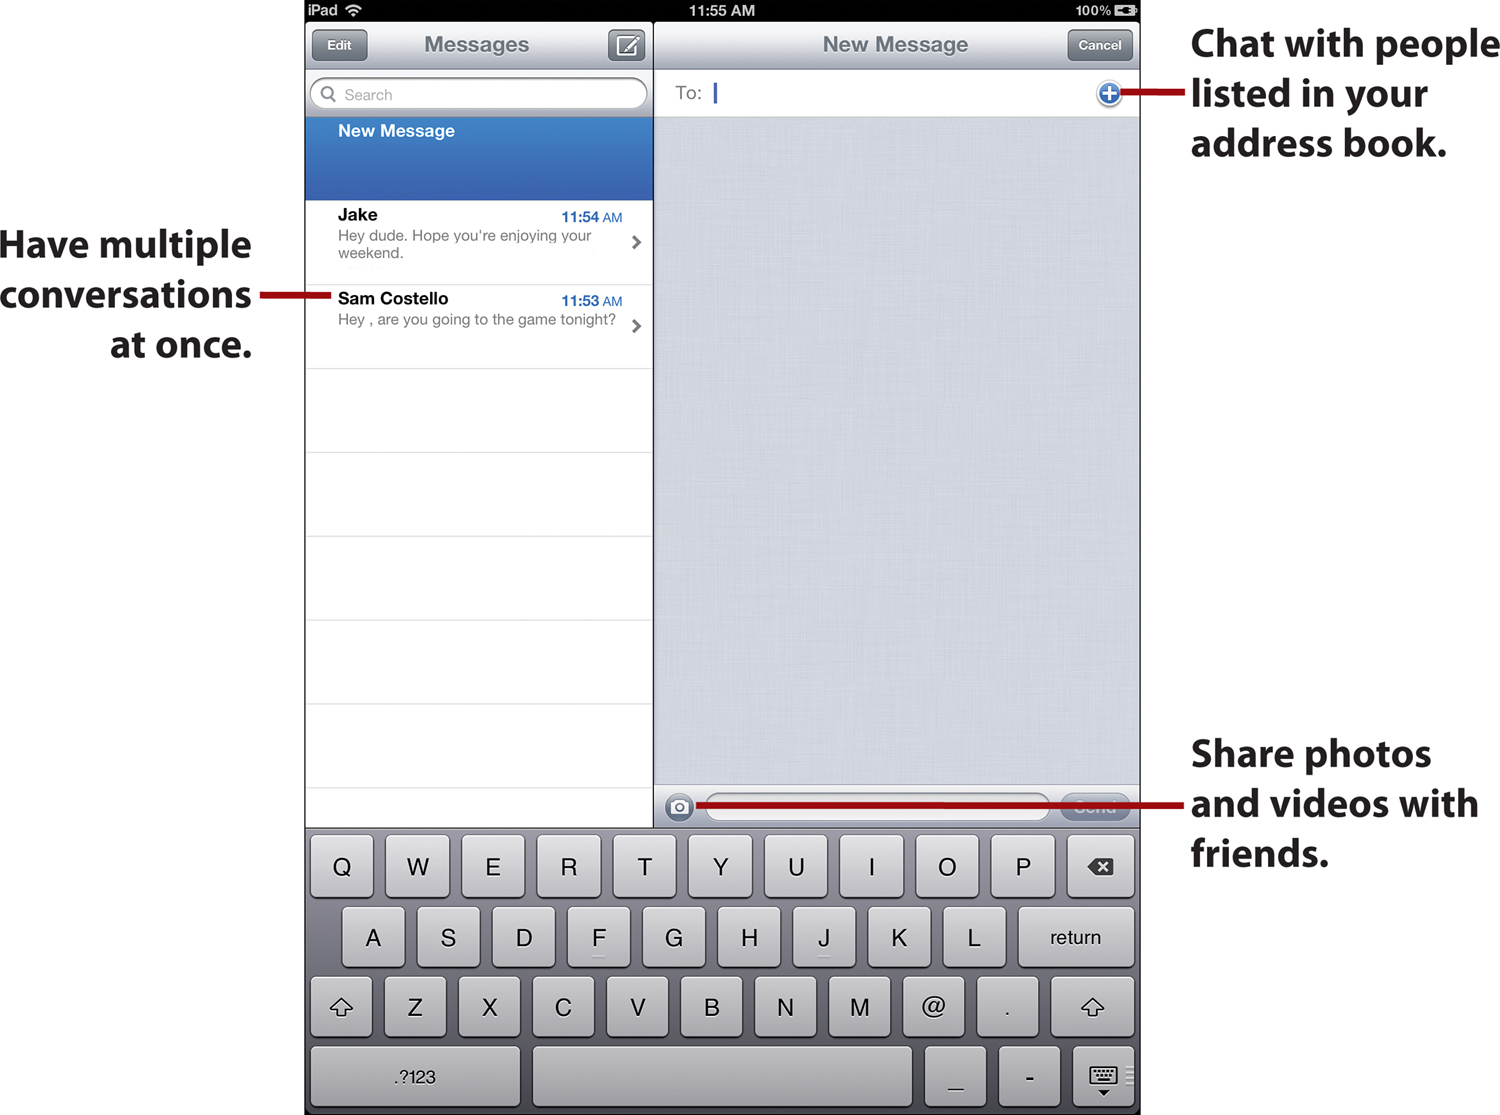
Your friends like to text message, right? (And if they don’t text, they probably want to.) With your iPad, texting and chatting comes free thanks to an app called Messages. Messages is a lot like other chat or texting apps you might have used on phones or computers. It lets you trade messages with your friends or send them photos or videos. In order to use it, though, your friends need to also have iPads, iPhones, iPod touches, or Macs that use Messages.
If your friends have cell phones, you can’t text them using Messages unless they have iPhones—but don’t worry, there’s a way around that limitation that you find out about in the next section.
Remember how your Apple ID is used for a lot of things? Here’s more proof: Your Messages account, by default, is your Apple ID. The first time you open Messages, you’re asked to sign in with your Apple ID to activate Messages.
Sending Messages Using Messages
Messages only works when you’re connected to the Internet using Wi-Fi or 3G/4G. When you’re online and want to message your friends, you just need to open the Messages app and follow these steps:
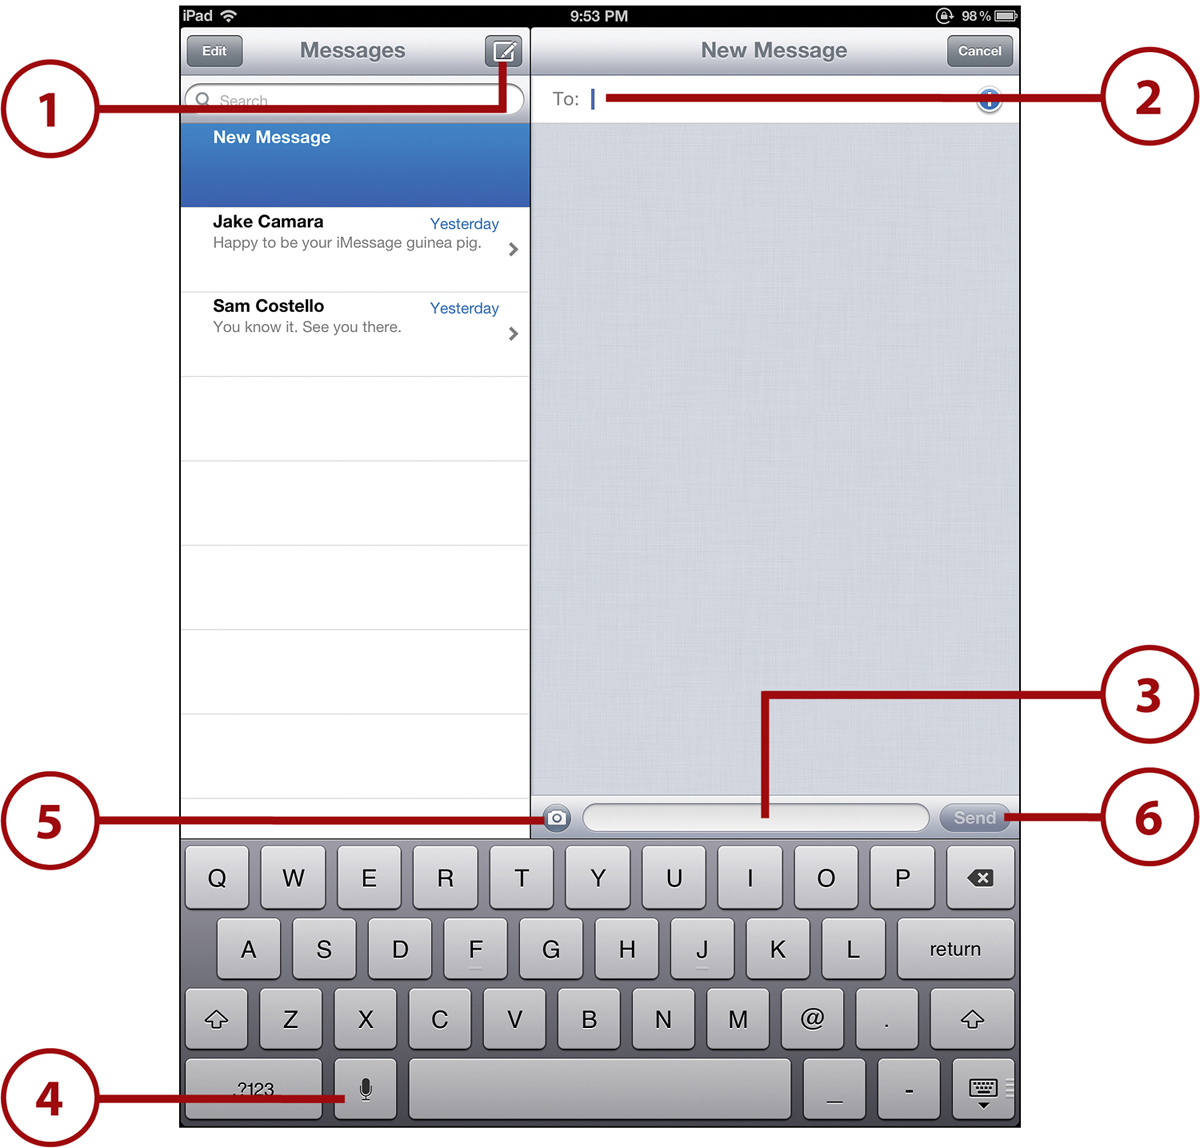
1. Tap the new message icon.
2. Messages lets you contact your friends using their phone numbers (if they have iPhones) or their email addresses (if they have iPod touches or iPads). Type in the name, email address, or phone number of the person you want to send a message to (it automatically goes into the To: line) or tap the + button to select the person from your Contacts.
3. Tap the text area at the bottom and type your message.
4. If you turned on Siri back in Chapter 2, “Getting Started: Set Up and Sync Your iPad,” when you set up your iPad, you can speak your messages instead of typing them. To do that, tap the microphone and begin speaking. When you’re done, tap it again. Siri converts your words into text (though you might have to edit them if it gets any words wrong).
5. You can also send photos or videos by tapping the camera icon. To send one that you already have, tap Choose Existing. To take a new one, tap Take Photo or Video.
6. When you’re ready to send the message, tap Send. You know that your message has reached the person you sent it to when the word “Delivered” shows up under it.
Names: Red Versus Blue and What That Means
If the person you’re trying to contact isn’t a Messages user, her name turns red. The app tells you that she isn’t a Messages user and that it can’t send your message. If the person is a Messages user, her name appears in blue.
Sending Messages with Siri
As mentioned earlier, you can use Siri to speak the messages you want to send to your friends from within the Messages app. But did you know you can use Siri to send a message from anywhere on your iPad? Here’s how:
1. Press and hold the Home button until the Siri menu pops up.
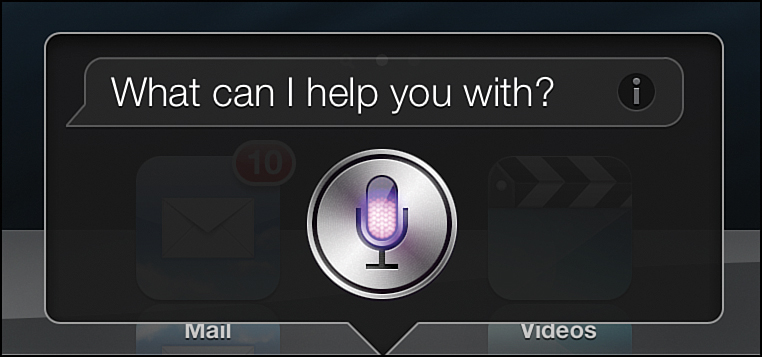
2. Speak the message you want to send. Some examples of ways to speak your messages include
• “Send a message mom to say practice is cancelled.”
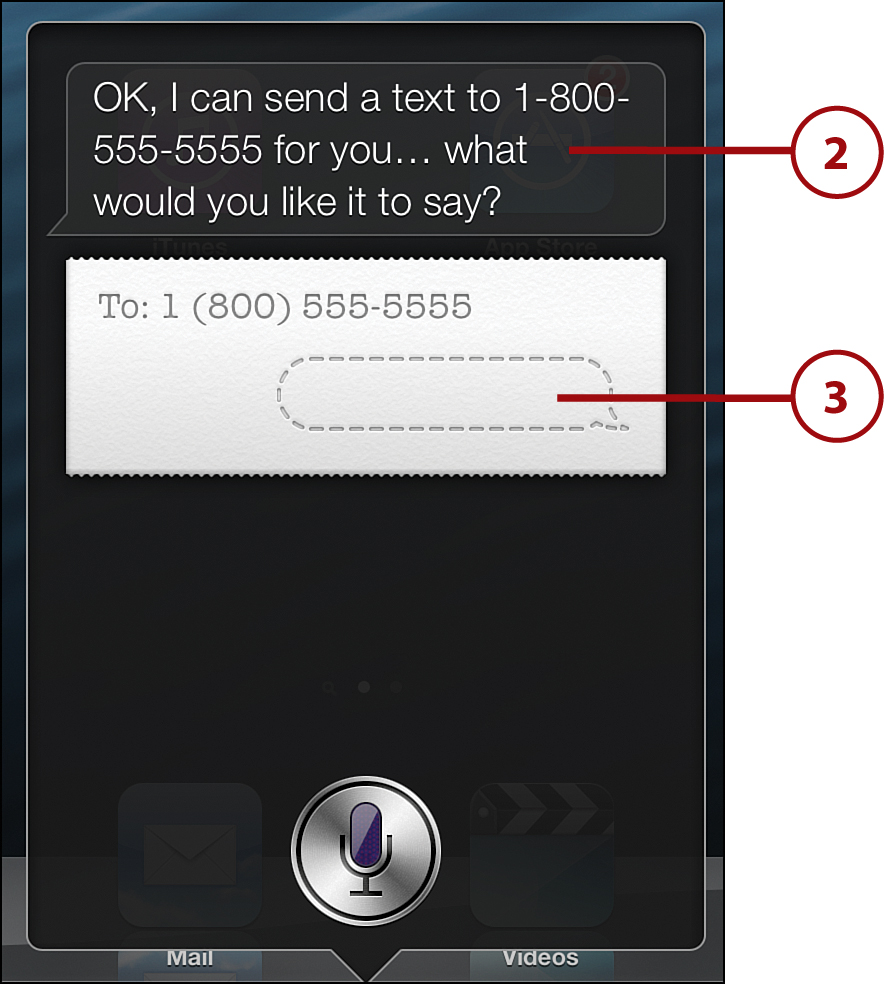
• “Message 1-800-555-5555.”
• “Tell Bobby that the movie was great.”
3. Depending on the message you want to send, Siri might ask some extra questions (such as “Which Bobby?” if you have more than one in your Contacts, or what message you want to send to 1-800-555-555). If it asks, answer the questions.
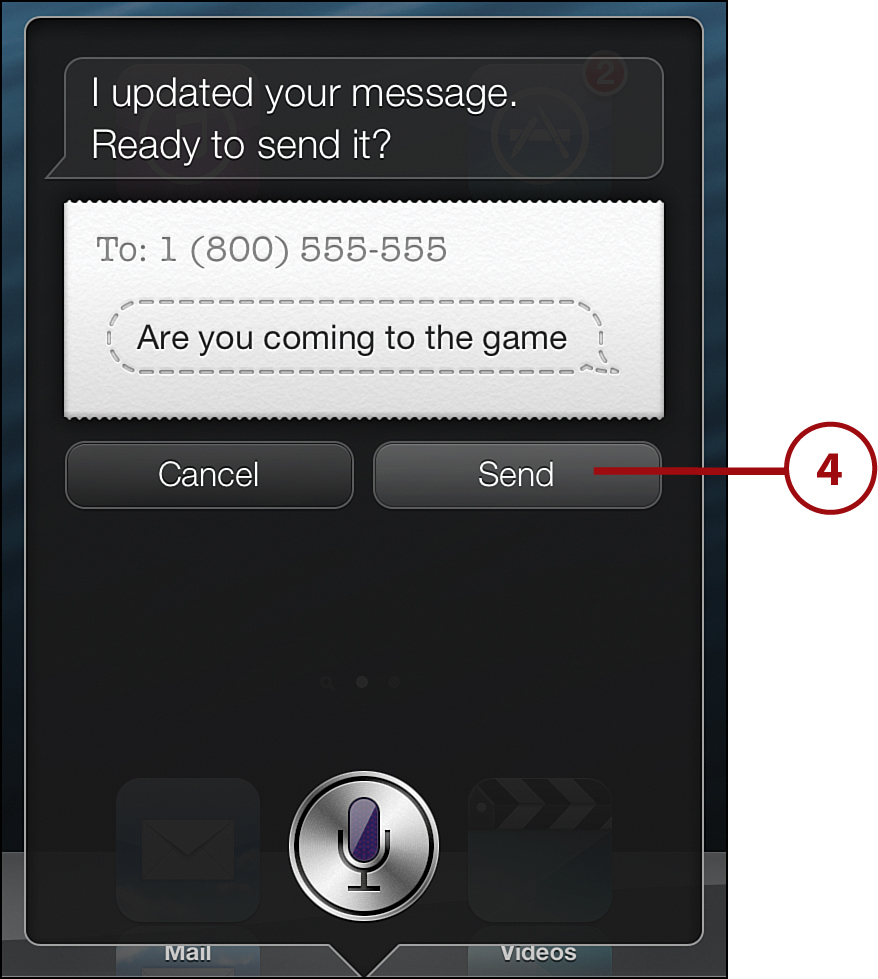
4. Siri might then ask if you want to send the message. Tap or say Send (or Cancel, if you change your mind) and the recipient will be reading your note in no time.
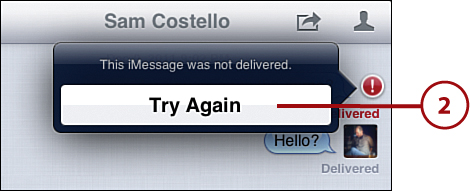
Undelivered Messages
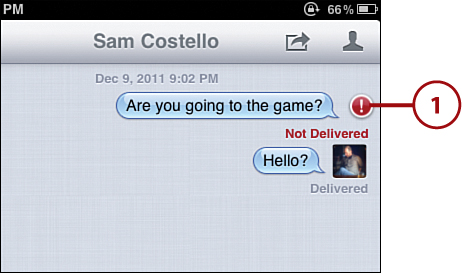
Sometimes, a problem with either your (or your friend’s) Internet connection or software stops your message from being delivered. You know the message didn’t go through because a red exclamation point and a “Not Delivered” message appears next to it. To try again, follow these steps:
1. To resend the message, tap the red exclamation point.
2. Tap Try Again. In a lot of situations, this solves the problem and the message goes through. If it doesn’t, you can always try again later.
Managing Multiple Messages Conversations
All Messages conversations have two parts: the message and the conversation. The message is the individual thing you send. The conversation is the collection of all the messages you’ve sent to and gotten from the person you’re talking to. You can delete either a single message or an entire conversation.
Deleting Messages
To delete just one or a few messages, but keep the rest of the conversation, follow these steps:
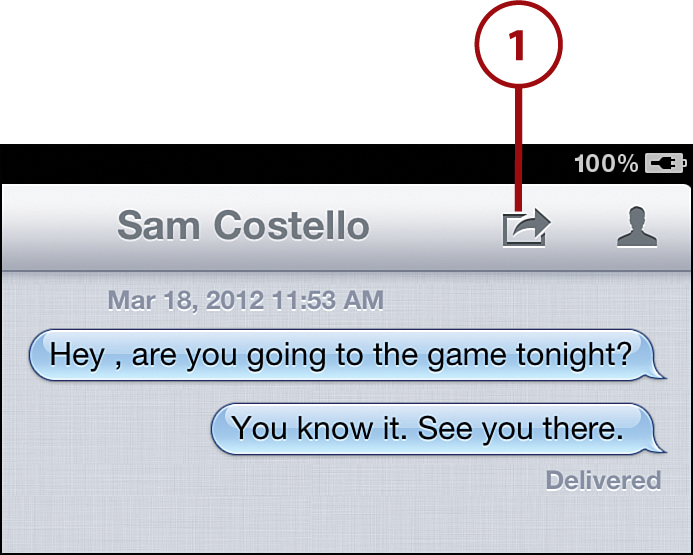
1. In Messages, tap the Action box.
2. Tap the circle next to the message you want to delete. A red check mark appears when you’ve selected it. To delete more than one message at a time, tap the circle next to all the messages you want to get rid of.
3. Tap Delete to complete the deletion process.
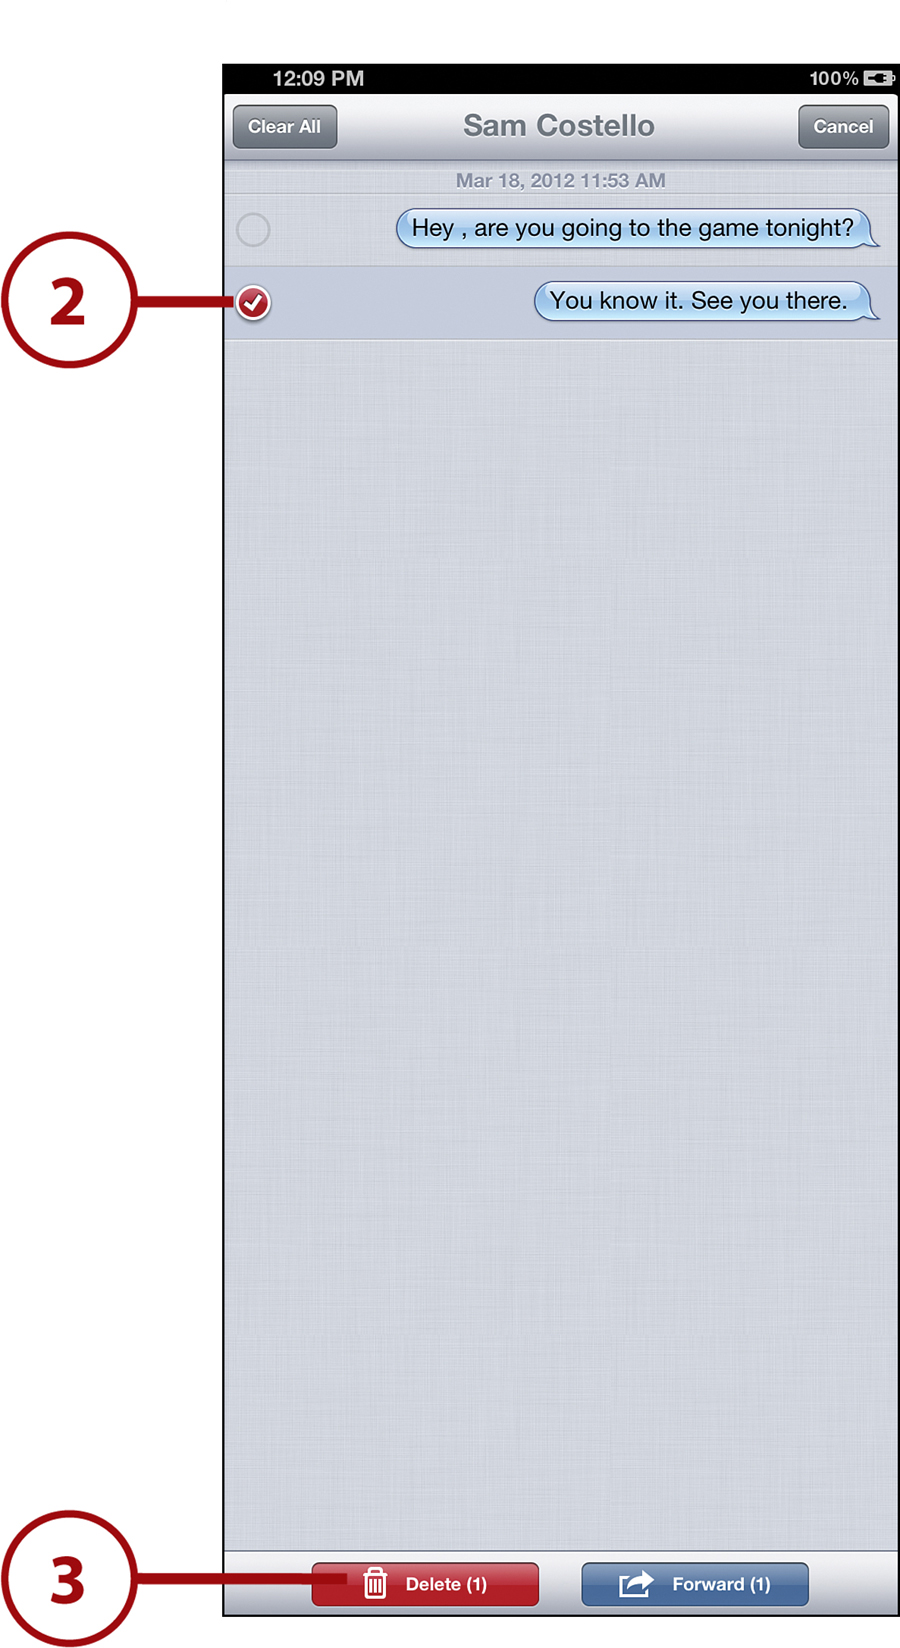
You can also forward a message to someone else so you can share what that person has sent you. To forward the message, follow the first two steps to delete a message; instead of tapping Delete, tap Forward and then select a new recipient in the To: line.
Deleting a Conversation
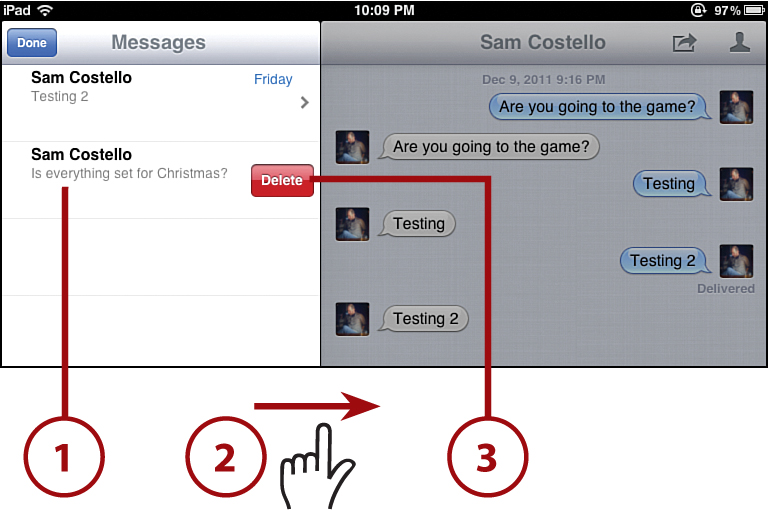
To delete the entire conversation, not just a message or two, follow these steps:
1. Find the conversation you want to delete in the Messages column.
2. To delete the conversation, swipe across the name of the conversation in the Messages column.
3. Tap Delete to complete the deletion. If you decide not to delete the conversation, just tap the Messages column again and the deletion is canceled.
Finding Great Texting Apps
Messages is great, right? But not all of your friends have iPads, iPhones, or iPod touches, so what if you want to text them? In that case, you need regular texting. But if Messages only works with other iOS devices, what do you do?
Easy: You get some apps.
A bunch of texting apps at the App Store work on Wi-Fi (or 3G/4G) and allow you to send free or cheap texts to any user with a phone that can receive them, not just other Messages users. They also let your friends text you on your iPad. These apps are your best bet if you want to text friends who don’t have iPads or iPhones:
• HeyWire—This free texting app is great if you text with people in other countries. It offers free text and picture messaging to phones in 45 countries, including the U.S., Canada, Mexico, China, and many more. Free (turn off ads or add new features with paid upgrades)
• Textfree—You get a free phone number from this app so that people with any kind of phone can send you texts as well as get them from you. You can also send picture messages. Textfree only works with some phone companies, but it’s compatible with all the major ones. Free (turn off ads for $5.99/year)
• TextNow—Like the other apps on this list, TextNow gives you a free phone number that lets you send and receive text and picture messages. The basic app is free, and there are lots of add-on features you can buy. Free (turn off ads and add new features with paid upgrades)
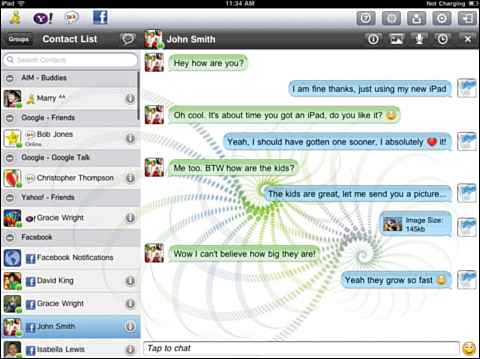
Awesome Chat and Instant Messaging Apps
Another great way to talk to your friends is chat or instant messaging (IM) software. Chat/IM is similar to texting, but it’s not quite the same thing. Chat/IM happens when you and your friend are using the app at the same time and talking live, whereas texting can happen at the same time, but doesn’t have to. Think of chat as being more like talking on the phone, whereas texting is like sending email.
There are a ton of IM apps for the iPad—everything from AOL to Google Talk to Yahoo! Messenger and beyond. A lot of these apps let you talk with friends on all kinds of different chat systems from a single screen, which is much better than having to use a different app for each different chat system.
• Agile Messenger HD Pro—Agile lets you chat with friends on Facebook, Yahoo!, MSN, Google, AIM, and Skype. Beyond that, though, it also lets you use Facebook to check out friends’ pages and post statuses as well as send voice and picture messages. $7.99
• AIM for iPad—This is the iPad version of the classic AOL Instant Messenger, or AIM, program. Along with AIM users, you can use it to chat with Facebook and Google users, too. Free
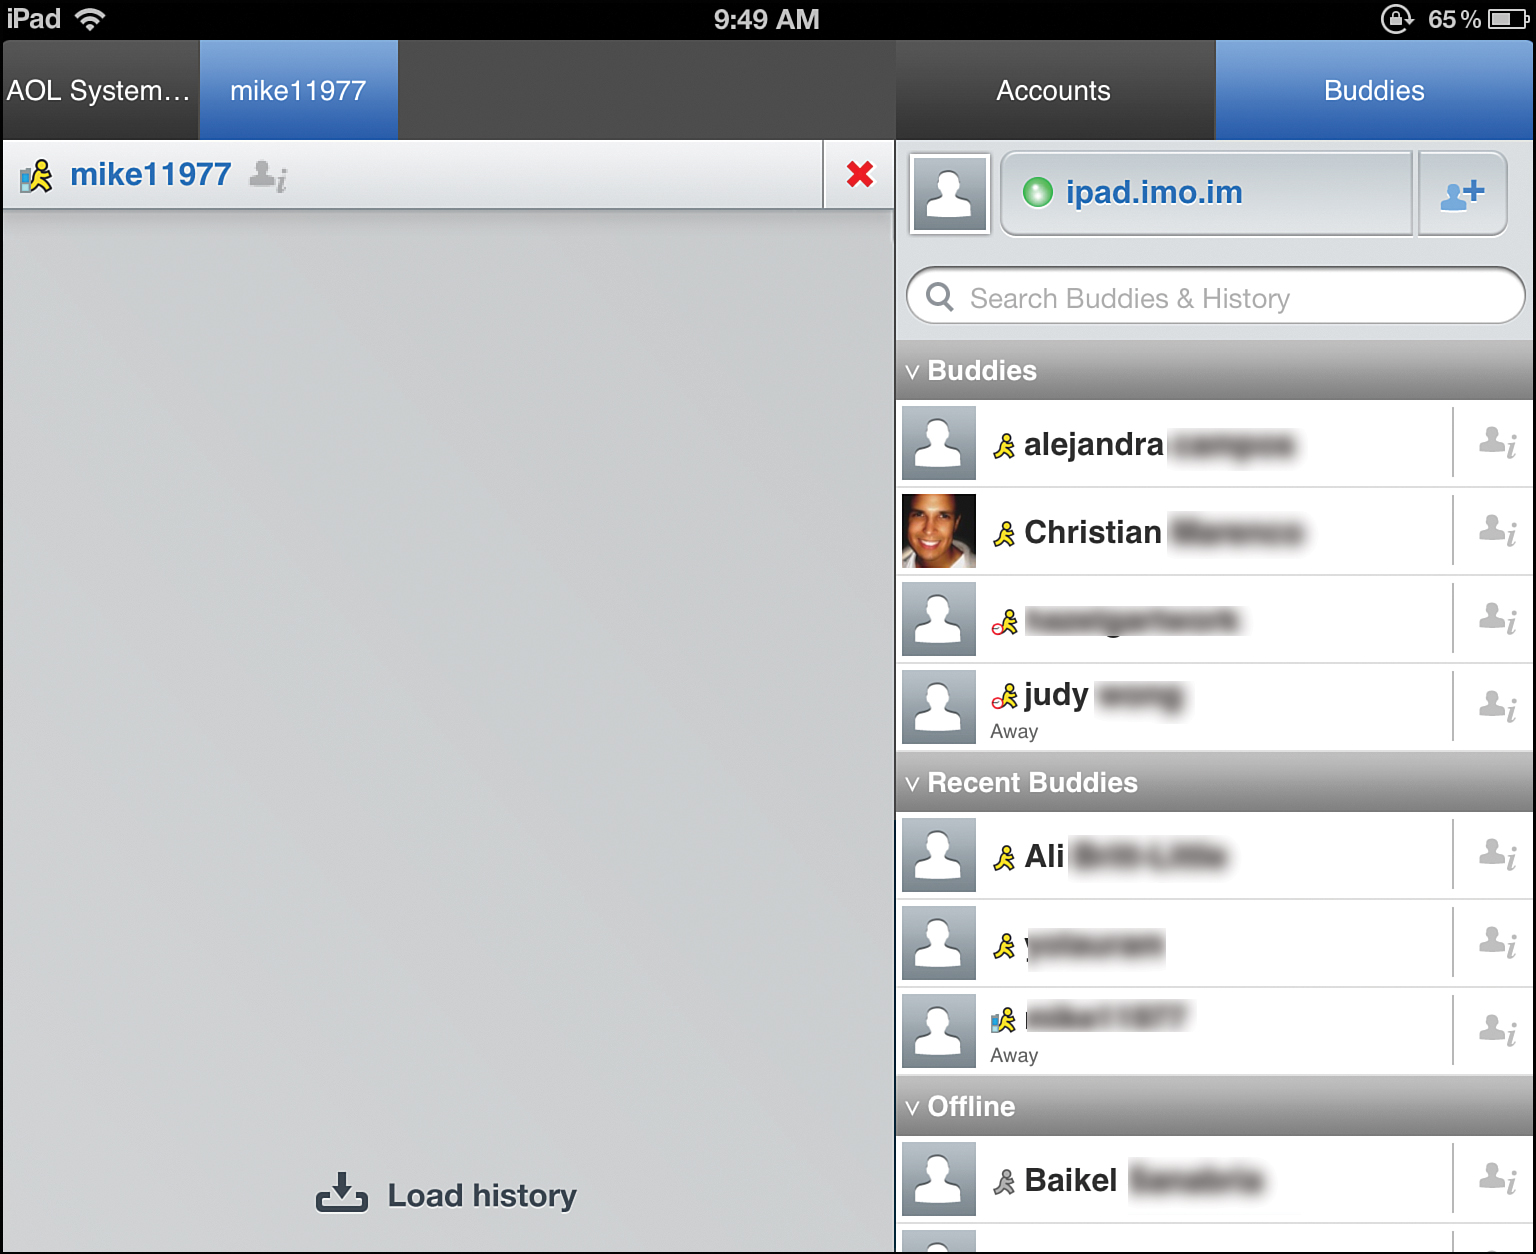
• imo—This free app lets you chat in Facebook, Google, Skype, MSN, AOL, Yahoo!, Jabber, and more, all from one screen. imo supports group chats, too. It also has a web-based version that lets you chat with your friends even when you’re not in front of your iPad. Free
• Yahoo! Messenger—This is the iPad version of Yahoo!’s classic instant messaging app. It lets you chat with Yahoo! and MSN Messenger users and place phone and video calls to other users on your buddy list. You can even text users in the U.S. and Asia from this app. Free
Talk to Friends with Social Media
Texting, instant messaging, and chatting aren’t the only ways to stay in touch with friends and family on the Internet. Some of the newest tools go beyond that to let you get information and updates directly from actors, athletes, writers, and other celebrities. The tools that let you do this fall into a broad category: social media.
You’ve probably heard of two of the most popular social media sites—Facebook and Twitter. They’re both for social media, but that doesn’t mean they’re the same.
• Facebook—Facebook is designed to help you stay in touch with people you already know. When you have a Facebook account, you can “friend” people and add them to your network. When you do that, you can see the information and photos they post about themselves, and they can see the same about you. It’s a great place to play games, share photos, listen to music, and plan events such as parties. Like most social media sites, Facebook is free.
• Twitter—Twitter is similar to Facebook in some ways, but different in some other important ones. On Twitter, you post short messages about what you’re doing or thinking. These messages are posted to your public Twitter page and are automatically delivered to anyone who “follows” your tweets (being a follower on Twitter is like being a friend on Facebook). You can follow people and send private messages to other users.
Both Facebook and Twitter are interesting, and sharing to both of them is part of the iOS (just Twitter in iOS 5; both in iOS 6), but if you’re a reader of this book, there’s something very important about them that you need to know.
Whether you use it to communicate with friends, to stay in touch with your relatives who live far away, or to send homework to your teachers, email is a big part of using an iPad.
Your iPad’s email program, called Mail, has all the features you’re probably used to from other email programs. The basic inbox screen in Mail lets you read email, reply to it, and store it in folders or delete it. You can also write a new message or search your emails from the main screen.
Before you can read or send emails, though, you need to learn how to set up email accounts on your iPad.
Setting Up Your First Email Account on Your iPad
You can add one (or more) email accounts directly on your iPad. To do this, start by tapping the Mail app and then follow these steps:
1. Tap the kind of email account you have.

2. If you have an iCloud, Exchange, Gmail, Yahoo!, AOL, or Hotmail email address, enter the information about your email account that the iPad asks for.
3. Tap Next.
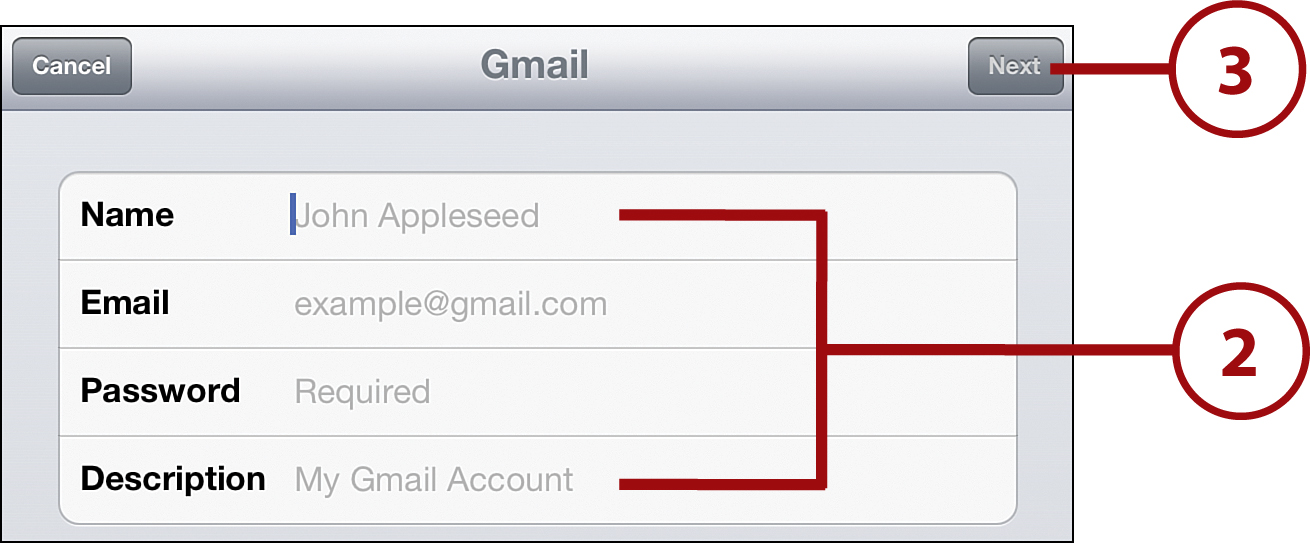
If you don’t have any of the kinds of email accounts listed here, you can tap Other to configure the account manually. That gets kind of complicated, so you should ask a parent or teacher to help you set one of these up.
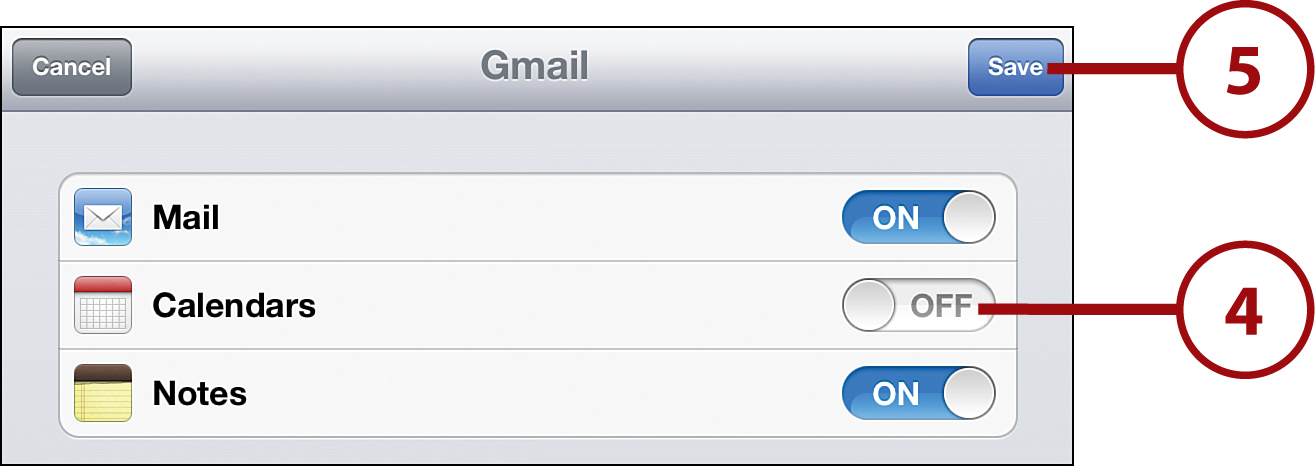
4. Some kinds of email accounts can also sync notes and calendars between your online accounts and iPad so that you can access them from multiple places. If these options appear, make your choices by leaving the default settings or moving the sliders to Off.
5. Tap Save. You go right to your new inbox and your email begins downloading. Tap the Inbox button to see the list of all your messages.
To add more accounts, go to the Settings page and, under Mail, Contacts and Calendars, tap Add Account.
When you delete an email account on your iPad, you’re also deleting all the email in that account from your iPad. It doesn’t delete the email account itself or the emails in it. You can still get them on your computer or via the Web, depending on the type of email account. The messages just aren’t accessible from your iPad’s Mail app anymore.
Writing and Sending Email
Now that you’ve set up an email account on your iPad, it’s time to start using it! To send an email, you need to be in the Mail app.
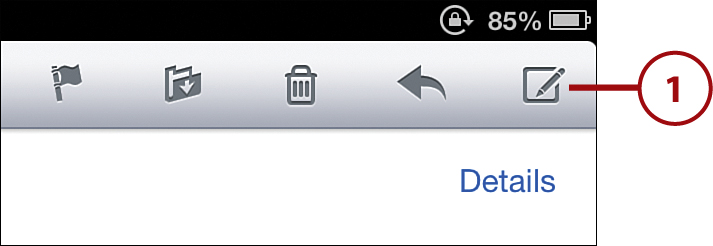
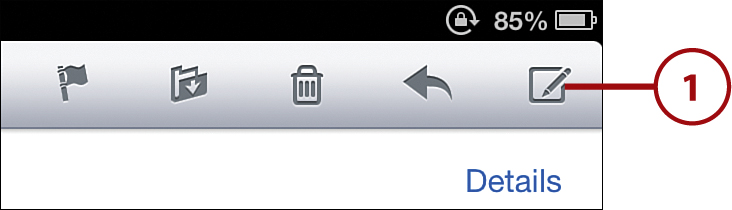
1. Tap the new email button to create an email.
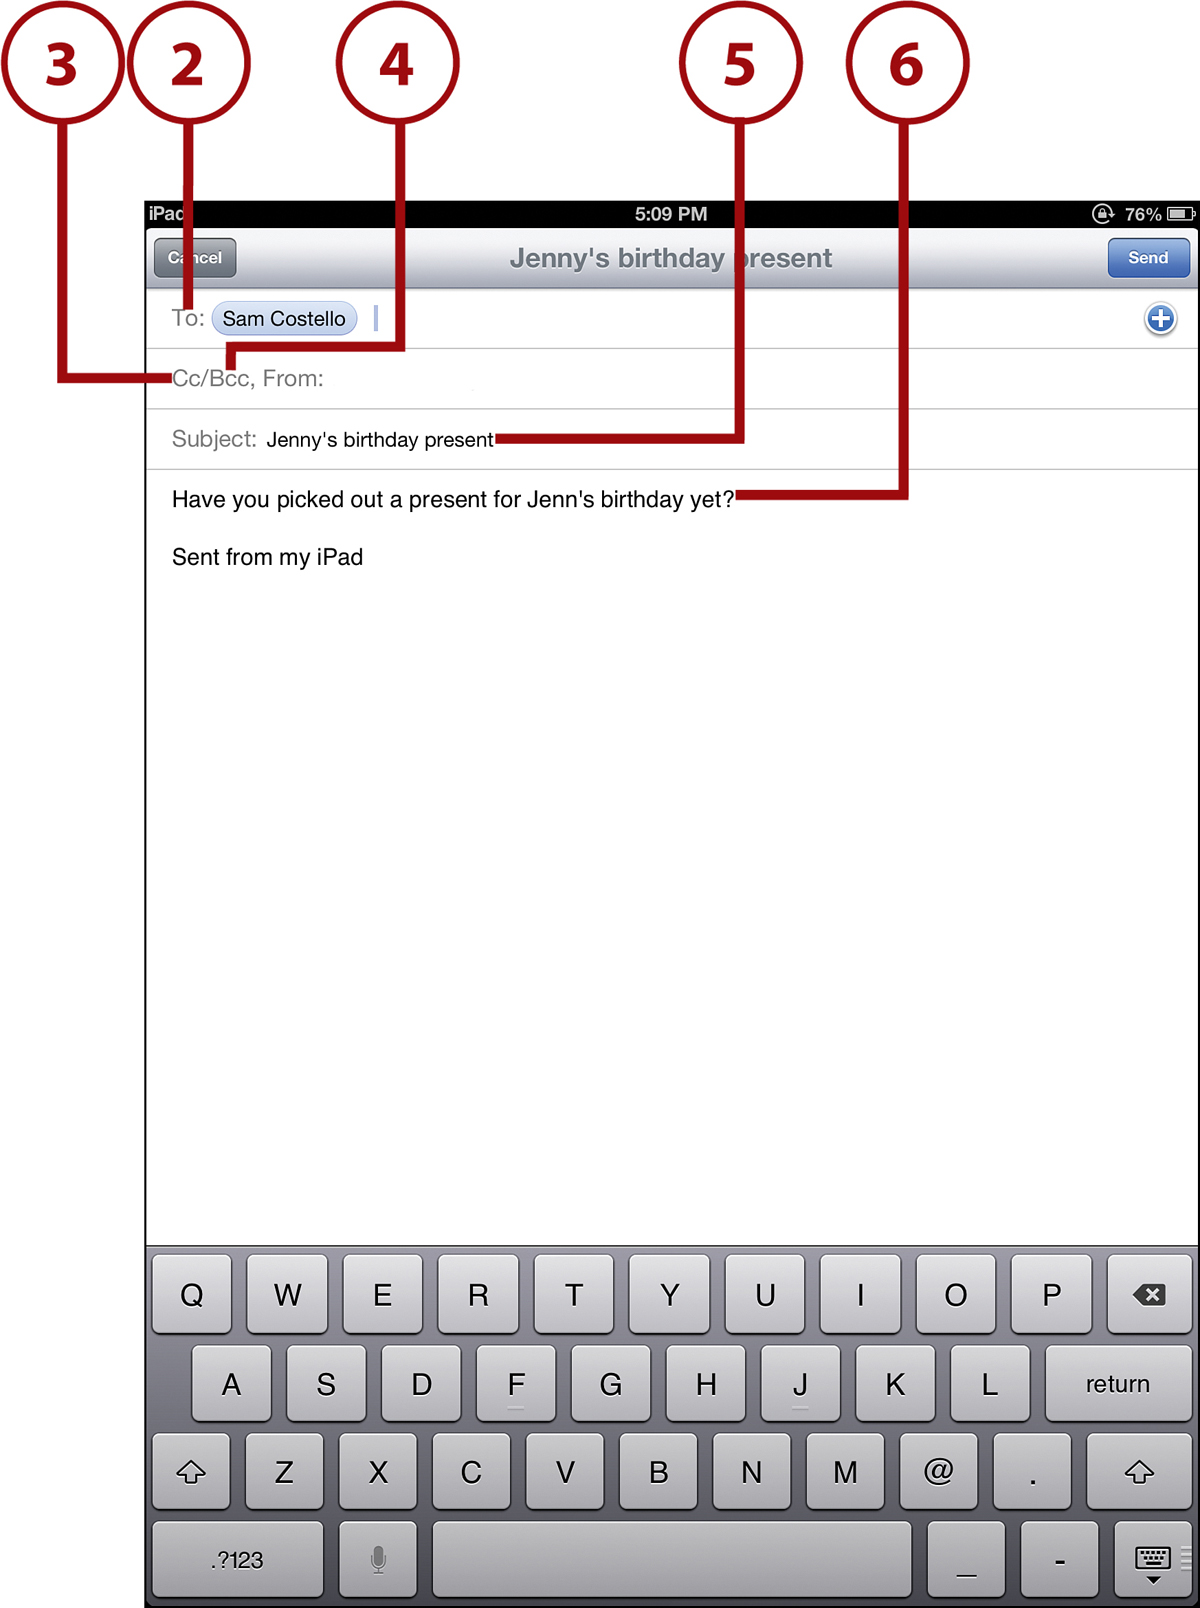
2. Address an email. You have two ways to do this: Either type in the address of the person you want to send the email to in the To: field or, if you put the person in Contacts, tap the + and select them.
3. The CC: line lets you send the same email to another person at the same time. Enter the person’s address or tap the + button.
4. BCC: lets you send a copy of the email to someone else without the people in the To: and CC: lines line knowing about it. Tap the CC/BCC: line to expand this option.
5. Tap the Subject line and type the subject of the email.
6. Tap Enter or tap the blank body of the message and start typing your email.
7. If you want to speak your messages instead of typing them, just make sure Siri is turned on. (You had the option when you set your iPad up in Chapter 2. If you didn’t take it, tap Settings, then tap General, and then tap Siri and turn it on.) To learn how to use Siri to write email, check out the next section, “Using Siri to Send Email.”
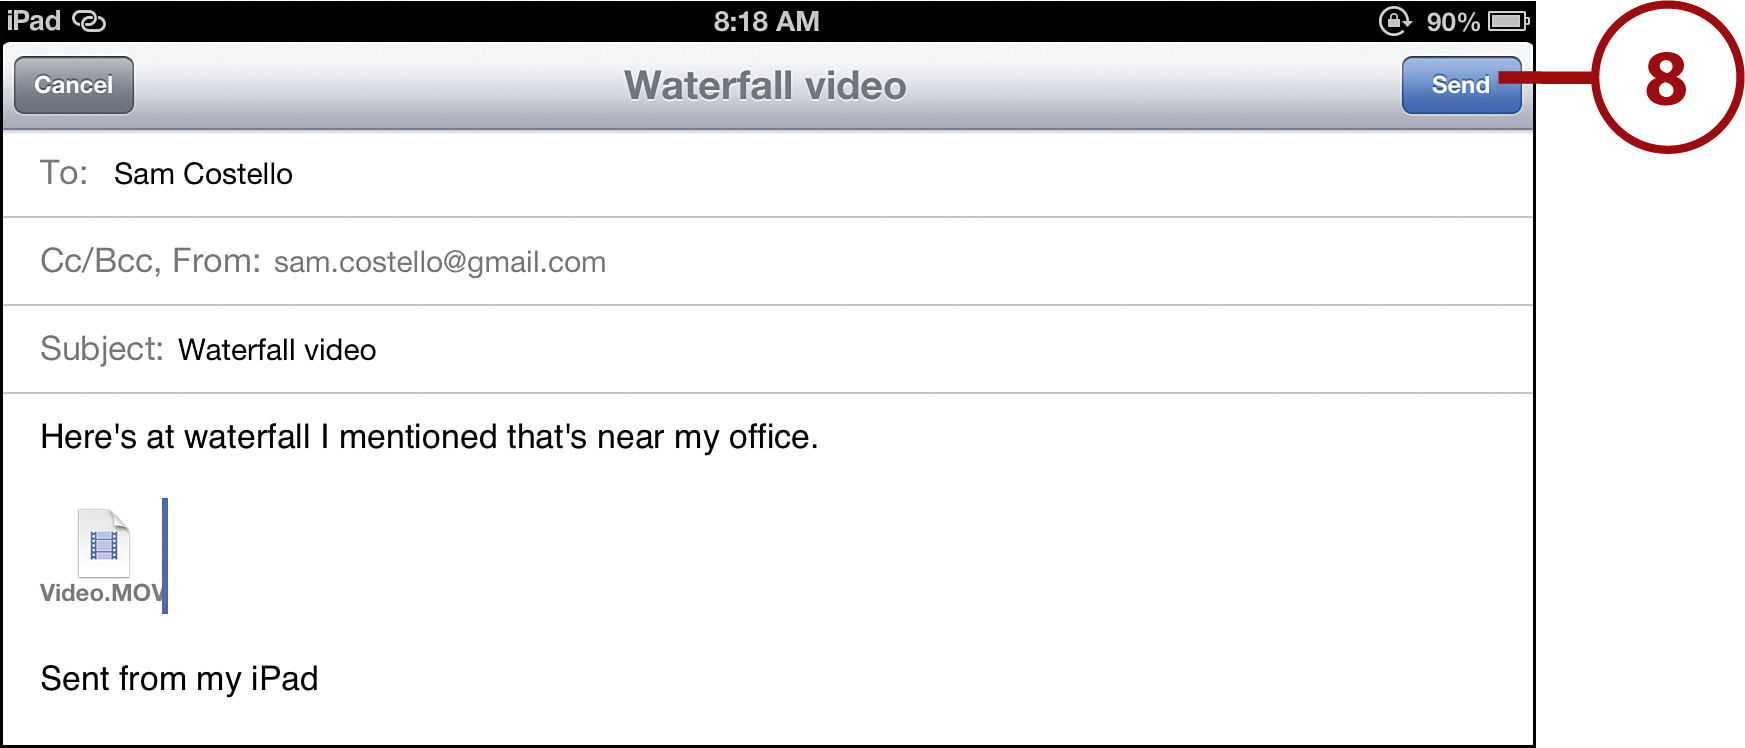
8. When you’re done with the email and you’re ready to send it, tap Send.
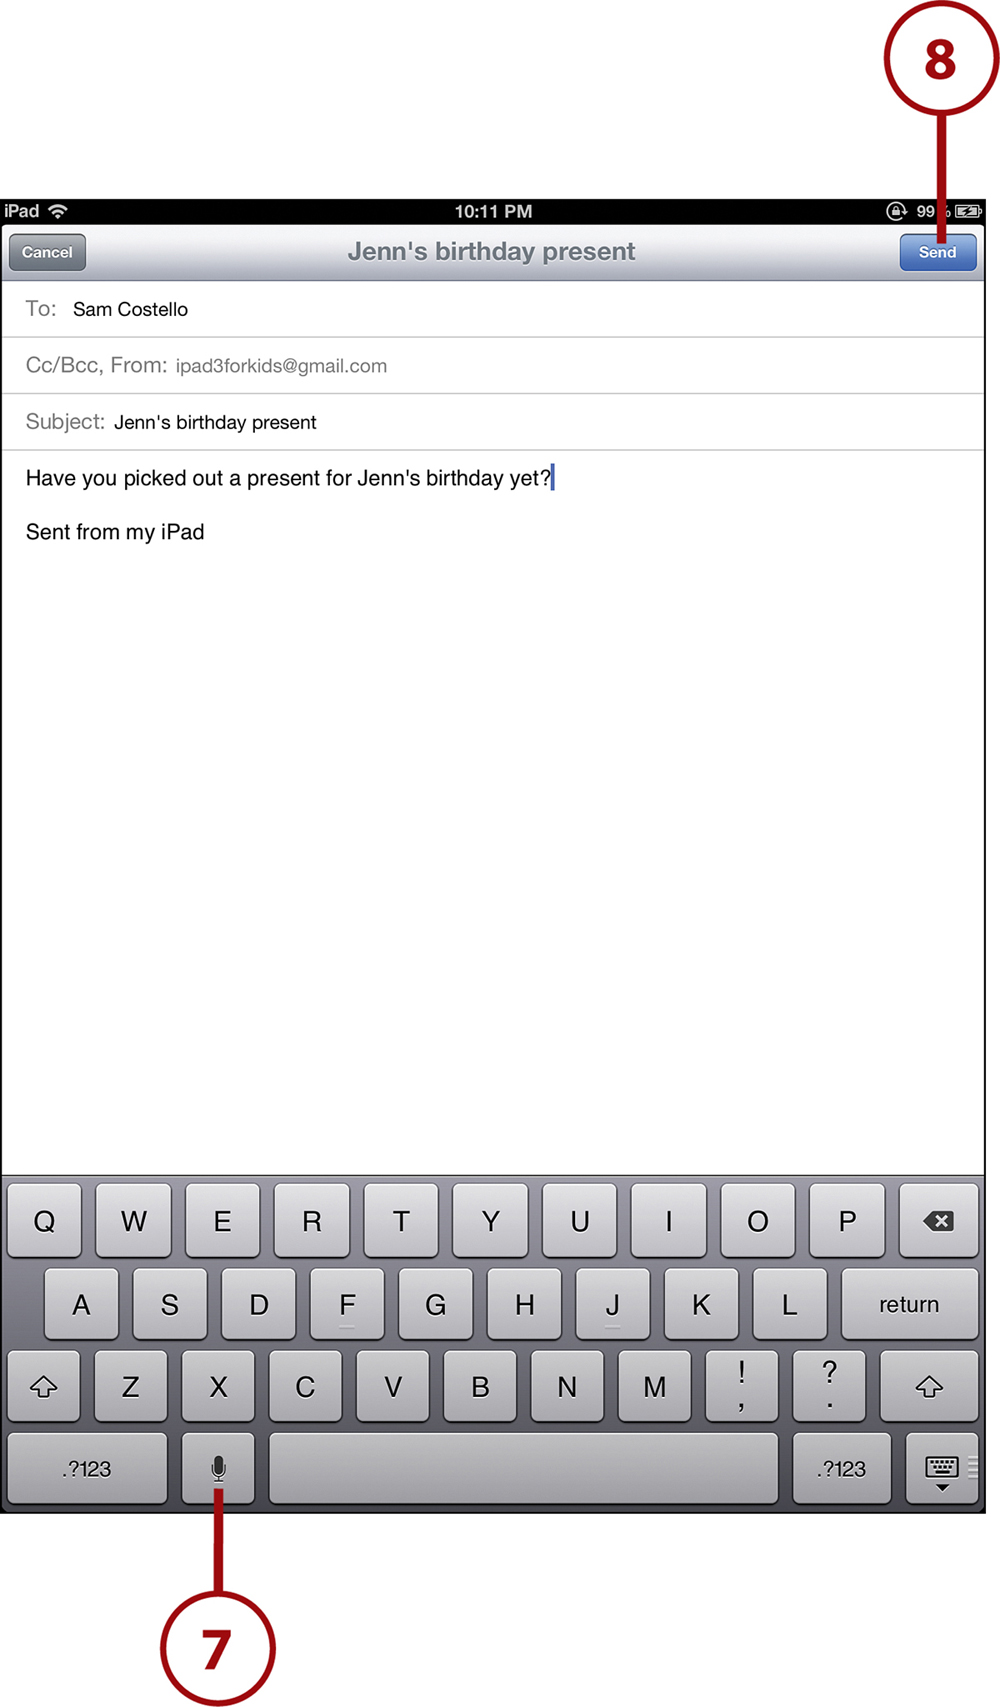
If you have more than one email account on your iPad, make sure to check the From: line to see which you’re sending from. If you want to choose a different one, tap From: and then tap the account you want to use.
Using Siri to Send Email
If you’re already in the Mail app with a blank email open in front of you, you can use Siri to dictate the email and send it. But did you know you can use Siri to send an email from basically anywhere on your iPad? Just like with Messages, you can tell Siri who to email and what to tell them, and then you can send the message without ever opening the Mail app.
1. Press and hold the Home button until the Siri menu pops up.
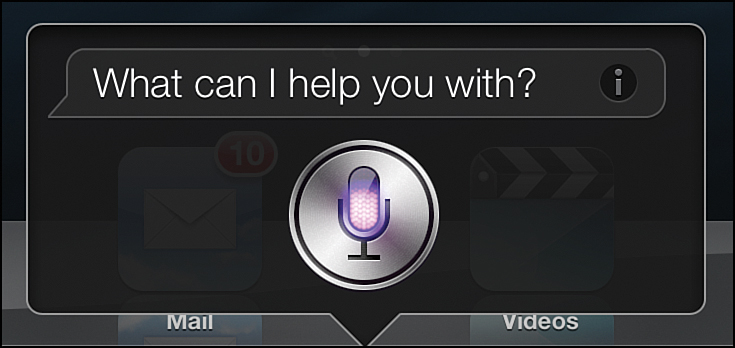
2. Tell Siri what email you want to send and who you want to send it to. Here are some examples of what you can say to send email with Siri:
• “Send an email to John Smith saying, ‘Do you want to come to my party on Saturday?’”
• “New email to Ms. Jones.”
• “Email mom and tell her that she needs to sign my field trip permission slip.”
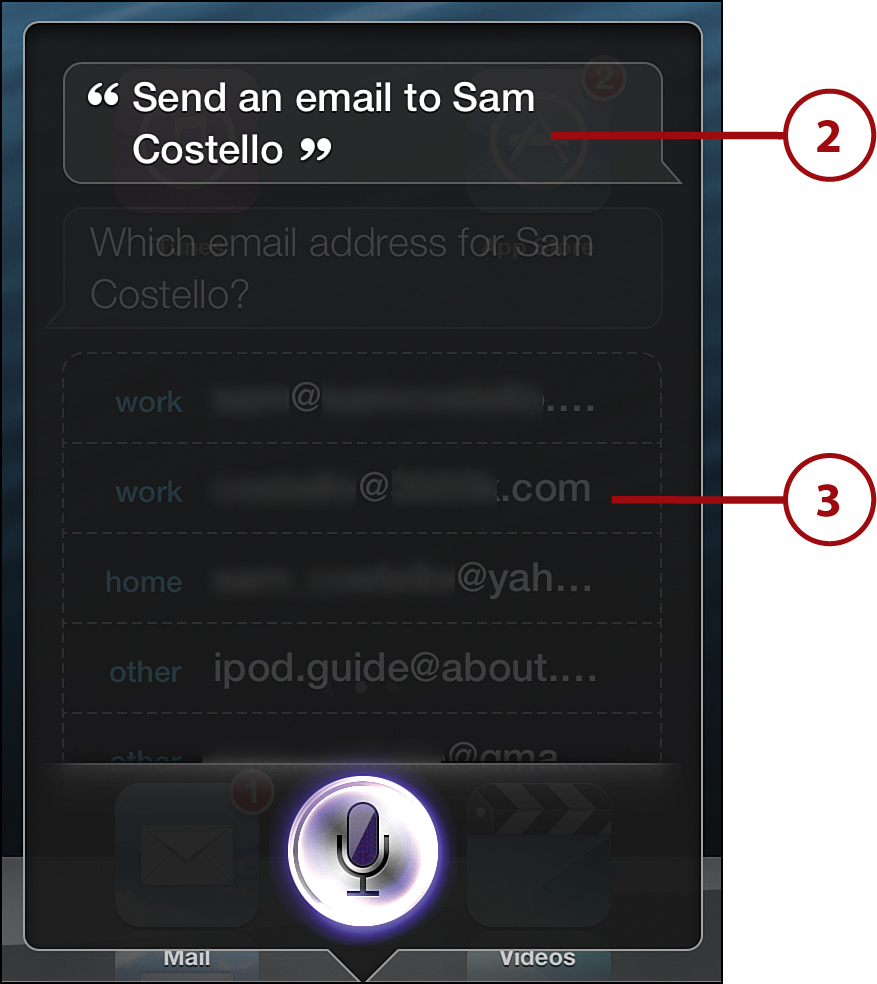
3. Depending on what you say, Siri might ask you some follow-up questions. These questions can include things like clarifying which person you want to email (if you have more than one person in your Contacts with the same name) or exactly what you want to say (if you just said something like “New email to Ms. Jones”). Answer them.
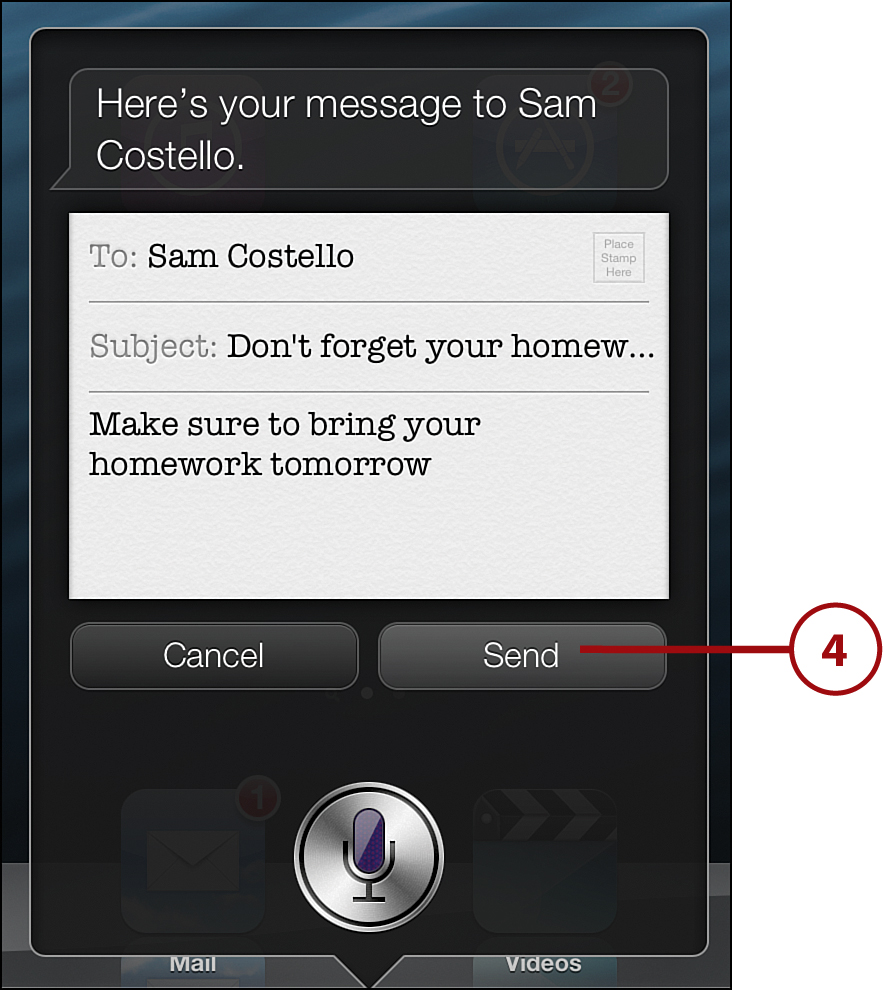
4. When Siri has all the information it needs, it asks if you want to send the email. Tap Send and the email is sent. If you change your mind about sending the email, tap Cancel.
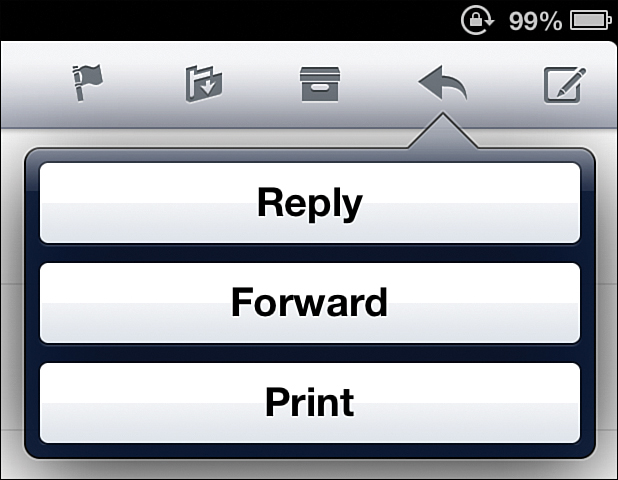
When you get an email that you want to reply to, just tap the Reply button and you get a new email with the old one copied in it, already addressed to the person you’re replying to.
Sending Photos or Videos in Mail
In its first few versions, the only way to email photos or videos on the iPad was from the built-in Photos app or from photo and video apps from the App Store. But if you’re running iOS 6, that’s changed. Now, you can attach a photo or video to any email without ever leaving Mail. To do that, tap the Mail app to open it and follow these steps:
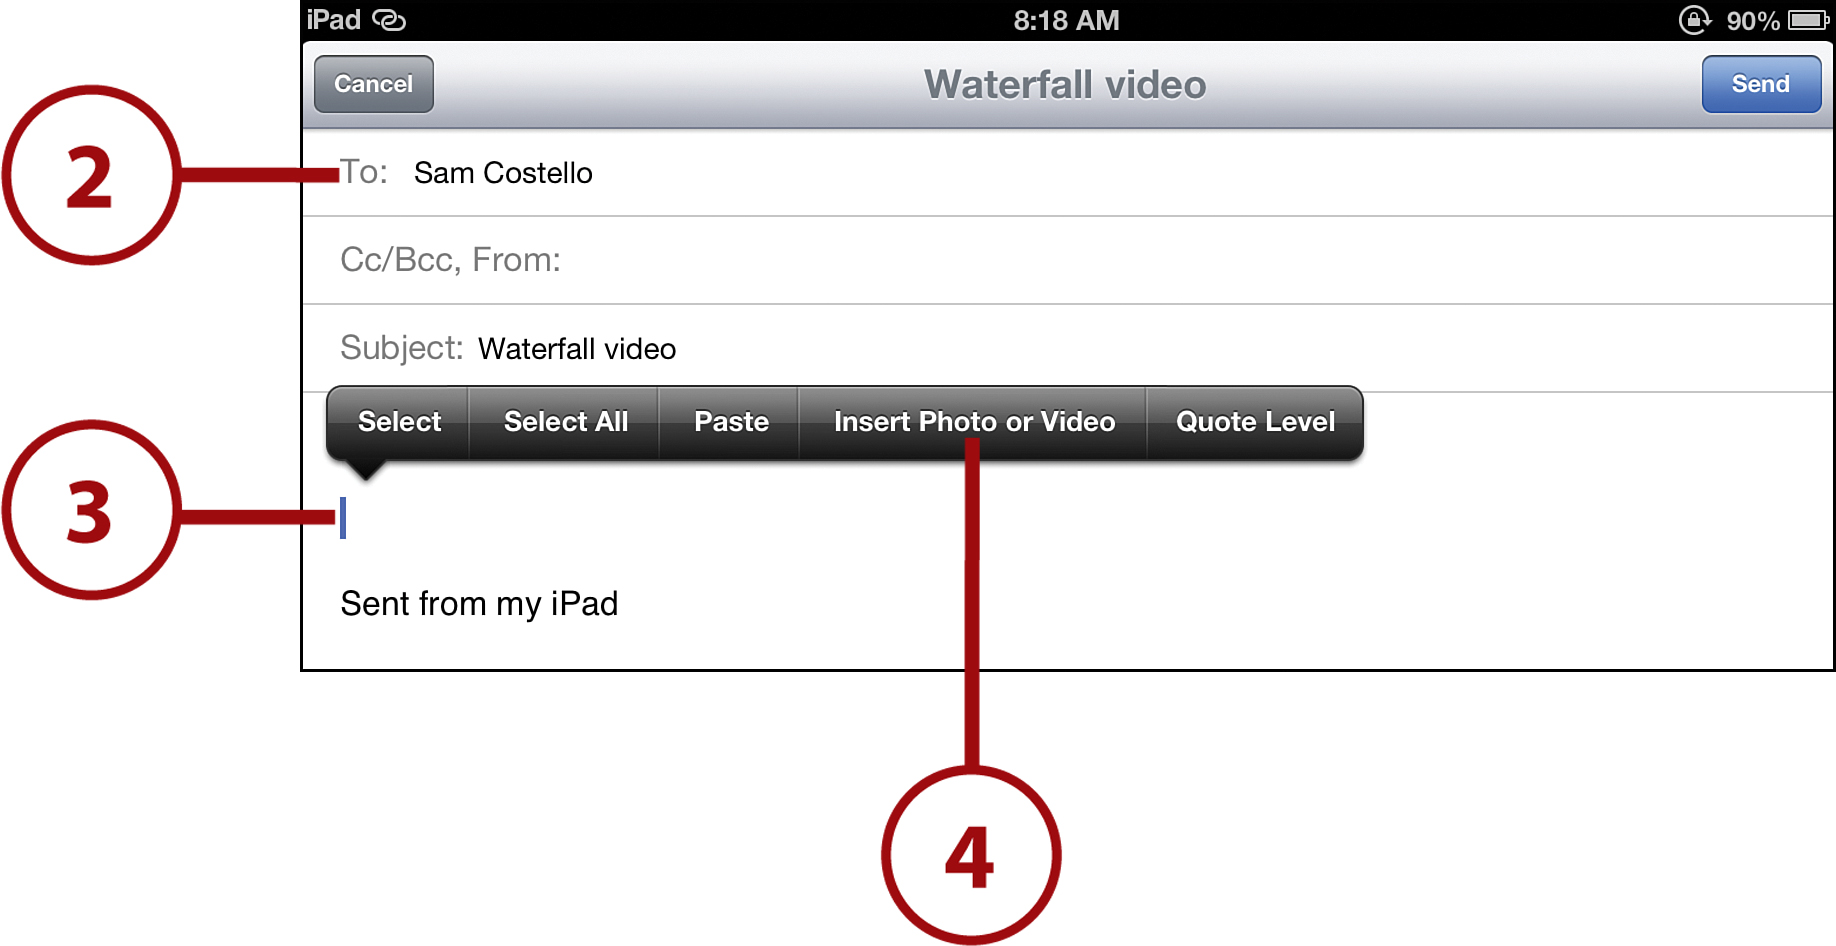
1. Tap the new email button to create a new blank email.
2. Address the email in the To: line and give the email a Subject: line like you normally would with any email.
3. Type the message you want to send.
4. When you’re ready to include a photo or video, tap and hold on a blank area of the email until the magnifying glass appears. When it does, let go and a pop-up menu appears. Tap Insert Photo or Video.
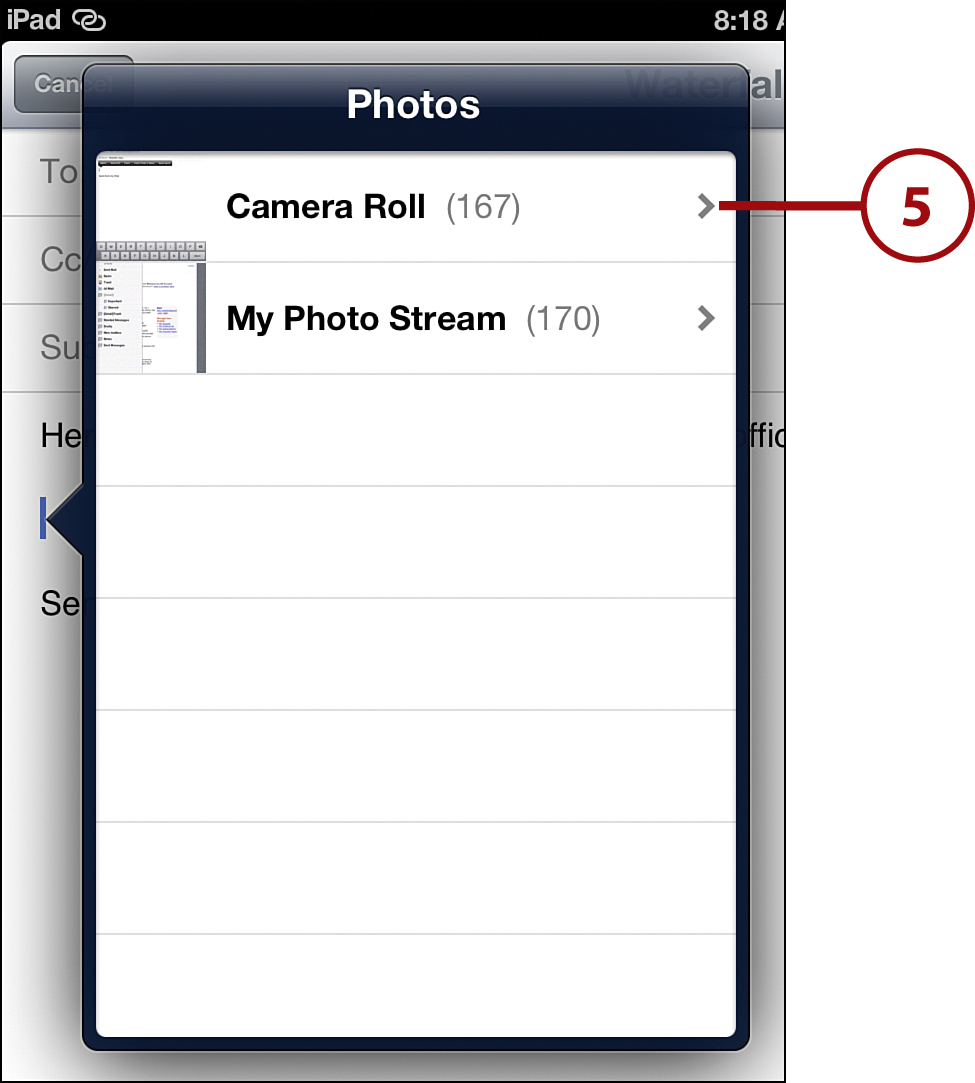
5. Tap the collection of photos that contains the photo or video you want to send. Unless you’ve added new Photo Albums (check out “Working with Photo Albums” in Chapter 15 to learn how to do that), tap Camera Roll.
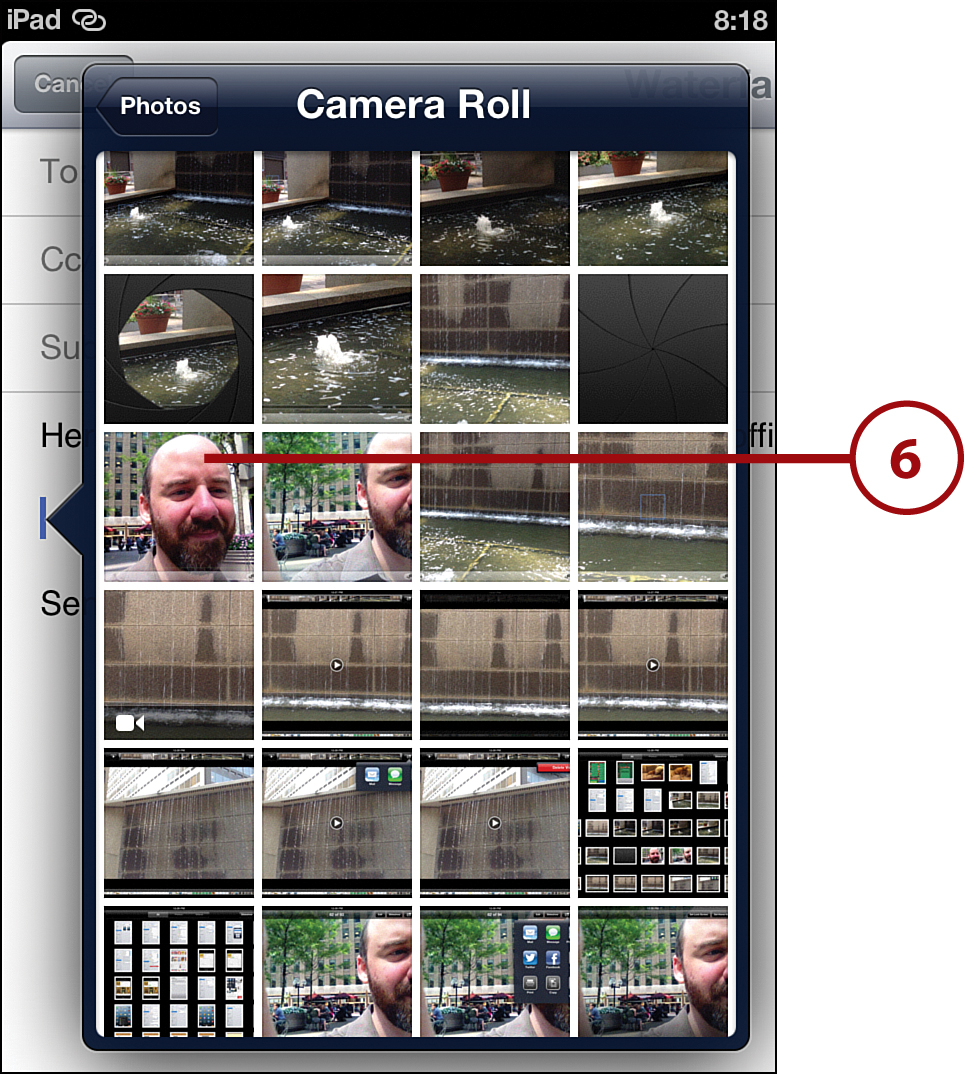
6. Scroll through your Camera Roll until you find the item you want to send. Tap it.
7. If the item is a photo, you see a small version of it. If it’s a video, you can tap the play button to watch it. If you decide you do want to use it, tap Use.
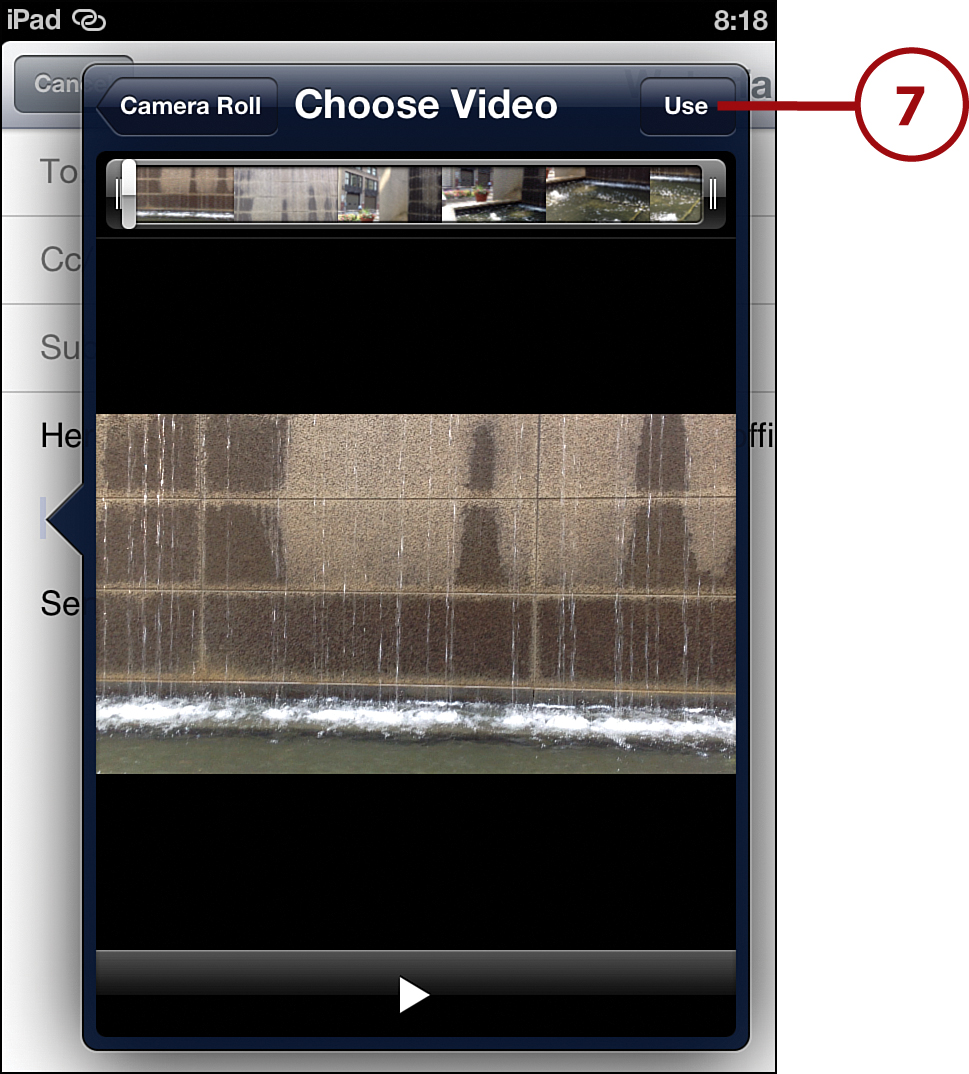
8. If the item is a photo, it is attached to your email. If it’s a video, it is first compressed to be small enough to email and then attached. When you’re done writing your email, tap Send to send it and the photo or video.
Photos and videos take up a lot of space, so most email accounts don’t let you send more than a couple at a time to prevent email computers and accounts from filling up. A good rule of thumb is to just send three or four photos in one email, and only send one or two videos in an email.
Reading, Saving, and Deleting Email
Reading email on the iPad is simple: When an email shows up in your inbox, tap it. That’s it! Well, OK, there’s a little more to it. Here’s what you need to know:
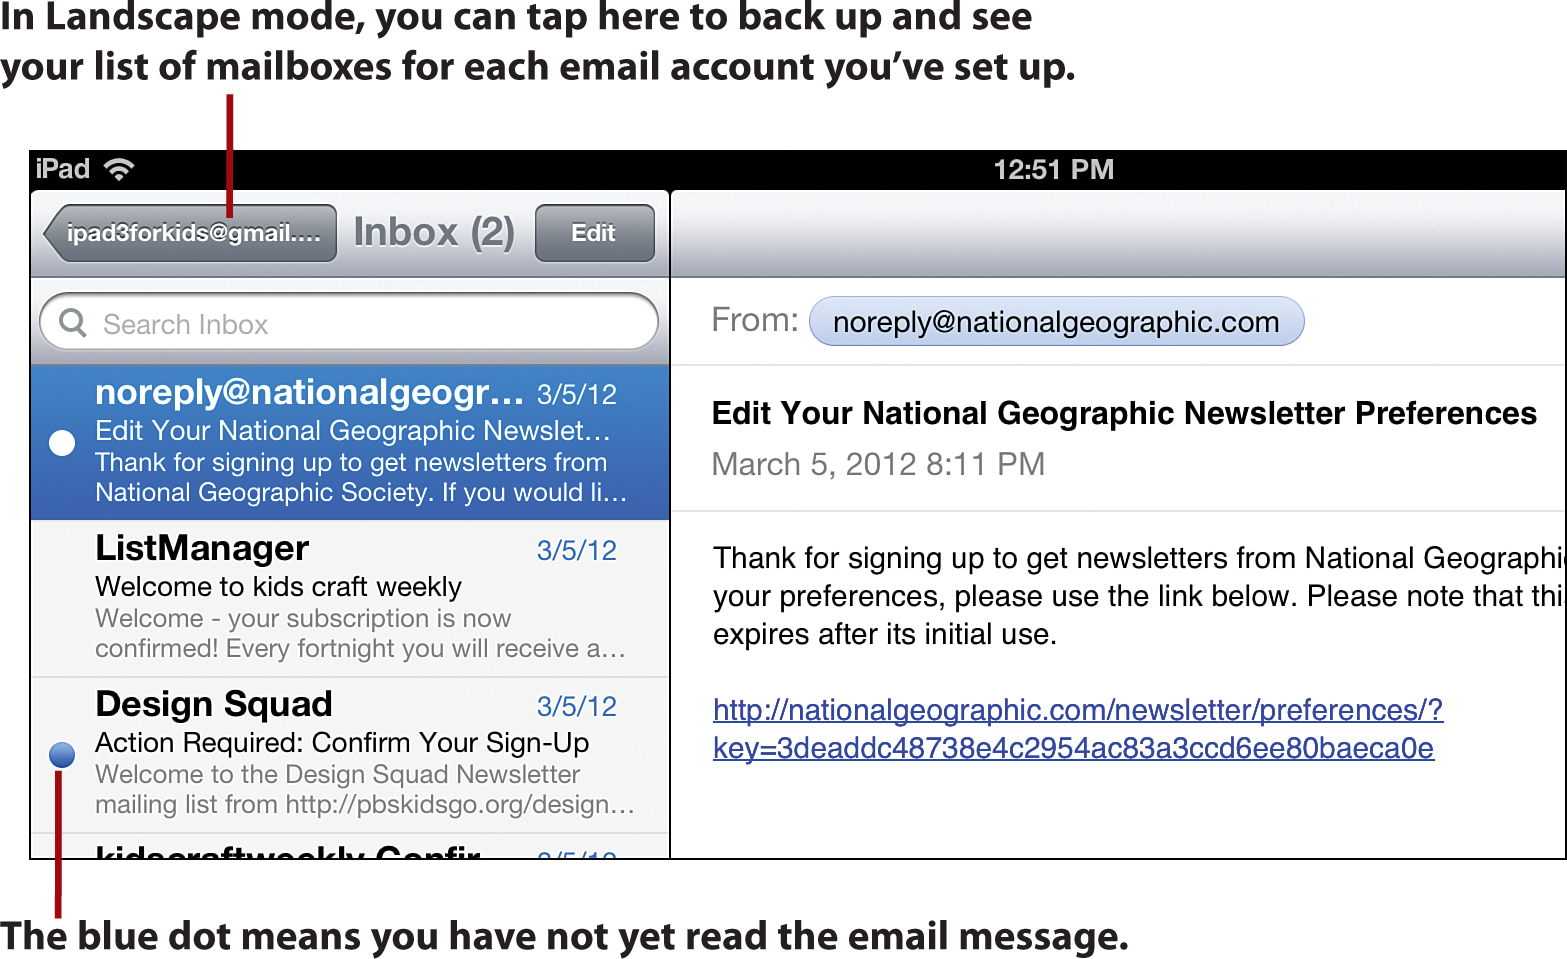
• If your iPad is in Portrait mode (taller than it is wide), tap the Inbox button to see a list of your messages for that email account. If your iPad is in Landscape mode (wider than tall), the inbox automatically appears on the side.
• The blue dot next to an email means you haven’t read it yet.
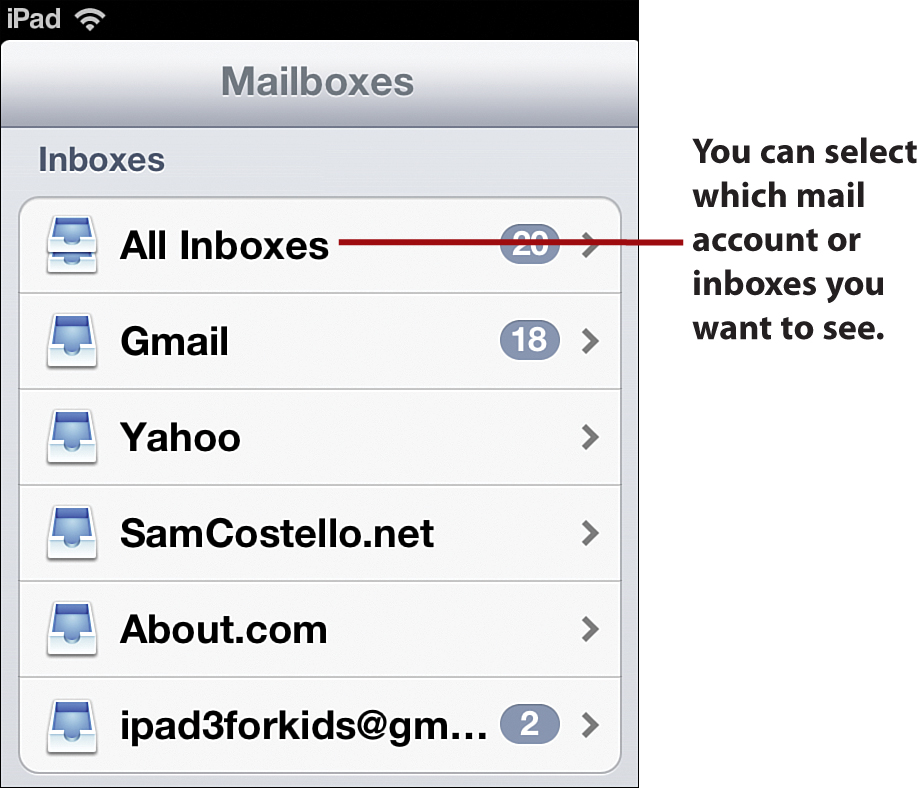
• You can read your email one inbox at a time, or you can combine them all into one so that you don’t have to go to each separate inbox to read your messages. To do that, keep tapping the Mailboxes button until you get to the Mailboxes screen and then tap All Inboxes.
Deleting Email
Follow these steps to delete an email:
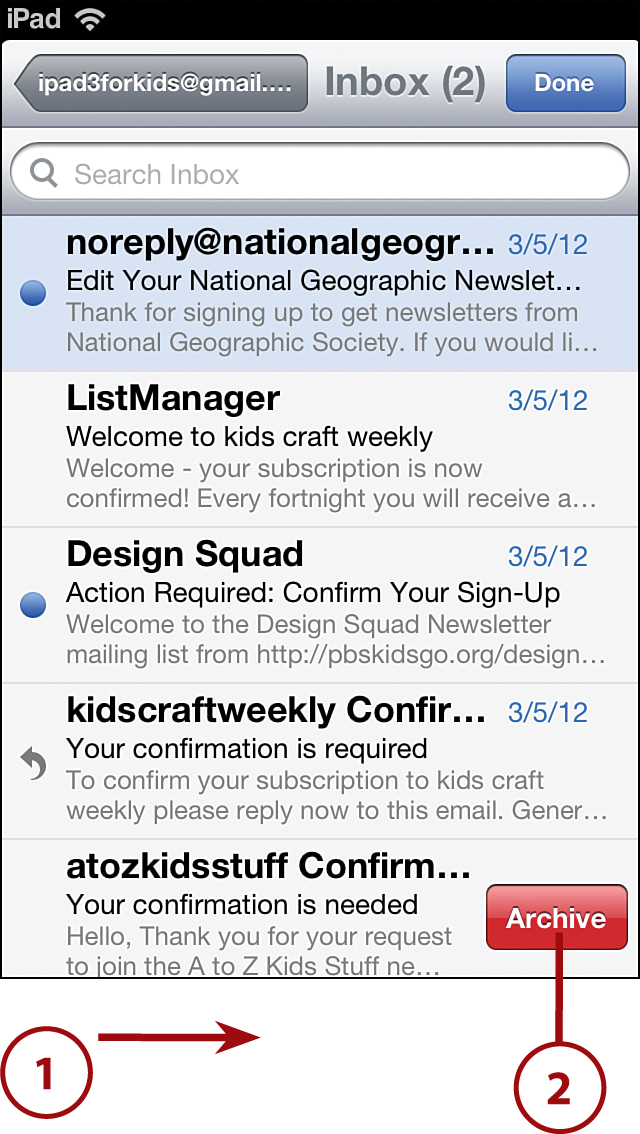
1. Swipe from left to right on the message you want to delete.
2. Tap Delete (or Archive, depending on which button appears. Different email accounts use different buttons).
You can also delete an email by tapping it and then tapping the trash can icon above the message.
Moving Email
A lot of people like to just keep the emails they need to respond to or act on in their inboxes because it’s easier to keep organized. If you’re like that, you might want to move messages to another folder for storage. Start by selecting the message you want to move and then follow these steps:
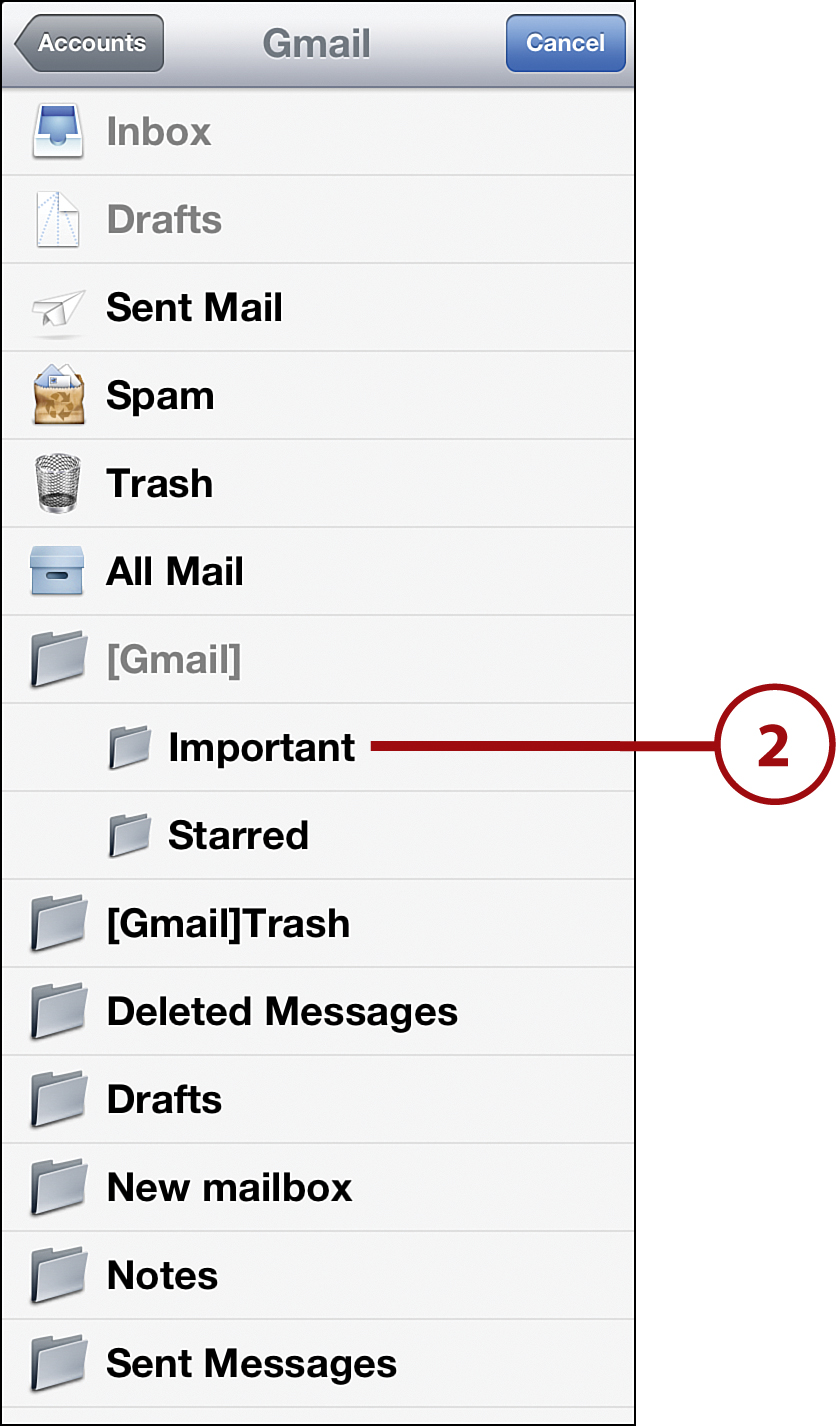
1. Tap the Move to Folder button.
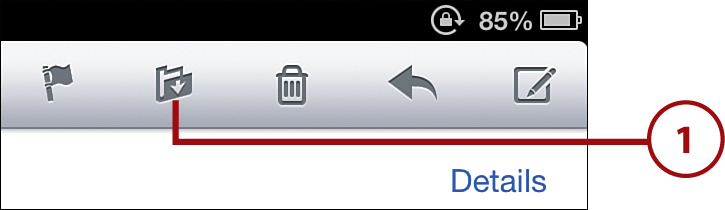
2. Tap the folder you want to move the email to.
Be Safe: Texting, Chatting, and Emailing
It pays to be safe when you’re texting, chatting, or emailing. Because you can’t see who’s messaging you, you can’t be 100% sure they are who they say they are. Lots of people online are nice and are just there to have fun or learn, but some aren’t so nice. Follow these rules to stay safe:
• If someone sends you something that makes you uncomfortable, tell a parent, teacher, or other adult you trust right away.
• If someone is being mean to you or one of your friends online, tell an adult.
• If someone asks you to be mean to someone else, or to gang up to tease or be mean to someone else, don’t do it. Remember, you should always treat other people the way you want to be treated.
• If someone you don’t know tries to chat with you, don’t talk to them. If they keep trying to chat with you, block them.
• Never give your full name, address, phone number, or where you go to school to a stranger or anyone you don’t know in real life.
• Never send a picture of yourself, your family, or your friends to a stranger or anyone you don’t know in real life.
• If you get a file, picture, program, or other document emailed to you that you’re not expecting, don’t click it. Lots of emailed files have viruses in them.
• If you get an email with something in it that seems too good to be true (a free PlayStation or TV, for instance), it’s probably a scam. Delete it and don’t click any links or respond.