17. Fixing Problems Yourself
In this chapter, you find out what to do when something goes wrong with your iPad. Most of the time, the iPad works pretty smoothly, and you rarely have problems. But when problems do happen, you don’t want to be stuck asking someone for help and then waiting for them to help you. After you read this chapter, you won’t have to because this chapter covers:
• Making your battery last longer
• Saving your iPad if it gets wet
• Redownloading purchases from iCloud
Some problems that can happen to your iPad are too serious or too complicated to try to fix yourself. If your screen cracks or the speaker stops working, don’t try taking the iPad apart; instead, ask your parents for help. (Chances are they’ll need to contact Apple at an Apple Store, on the Web, or by phone.) But you don’t want other problems to prevent you from doing things you want to do, such as playing a game or browsing the Web, or things you need to do, such as your homework. This chapter helps you figure out how to solve some of the most common iPad problems.
Restarting a Frozen iPad
Sometimes your iPad might not work the way you expect it to, or it has a problem you can’t figure out. There are also some rare circumstances when your iPad just won’t work at all; its screen has frozen, the buttons are locked, and nothing you touch or swipe works. When any of these things happen, restarting your iPad is a smart first step to try to fix it. A restart doesn’t fix every problem, but you’ll be surprised how many problems it does fix.
Restarting Your iPad
You can always try to turn the iPad on and off, as described in the section “Turning an iPad On and Off” of Chapter 1, “Please Touch: How the iPad Works.” If your iPad is frozen and doesn’t respond when you touch the screen or press the Home button, then hold down the power button until a power off slider appears. When it does, slide it to the right.

A wheel appears in the center of the screen until the iPad shuts down. When the iPad is off, hold down the power button until the white Apple logo appears on the screen. When it appears, release the button and your iPad should start up normally.
Hard Resetting Your iPad
If a basic restart doesn’t work, it’s possible your iPad has a more serious problem. In that case, you need to do what’s called a hard reset:
1. Hold down both the button at the top-right and the Home button for 10 to 15 seconds. The red slider might appear, but don’t touch it and don’t let go of the buttons.
2. Keep holding until the iPad’s screen goes black and turns off.
3. You can then turn it on like normal.
Make Your Battery Last Longer
Your iPad isn’t much good if it doesn’t work because its battery has run out. The iPad can run a pretty long time on a charged battery—it depends on what you’re using it for, but you can expect to get 8 to 10 hours of use out of a full battery—but if you want to get every last minute out of it, here are some tips you should try.
You get to all of these options by first tapping the Settings app. When you’re there, follow the instructions in each tip.

• Use Auto-Brightness—The iPad can automatically detect how much light is around it. When it does that, the screen can brighten or dim based on the light. By automatically having the screen dim when extra brightness isn’t needed, you can save battery power. Tap Brightness & Wallpaper and then move the Auto-Brightness slider to On. (You can also move the Brightness slider manually; the lower the brightness, the more battery you save.)
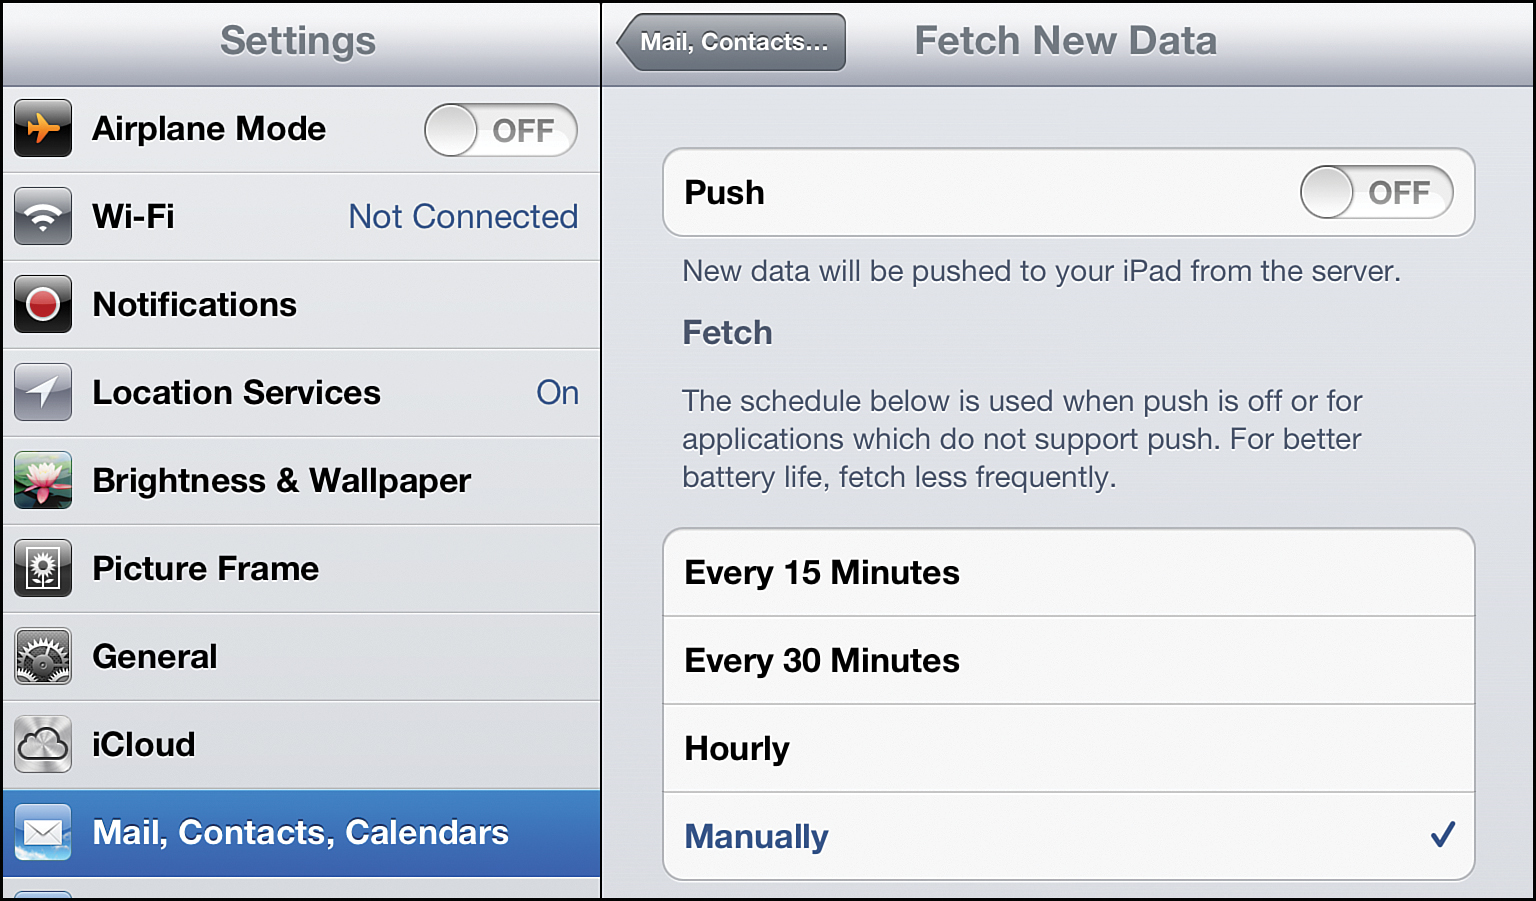
• Turn off data push—Push is a setting that automatically moves your email from the Internet to your iPad without you having to check your email. It’s basically a way to stay up to date as quickly as possible. That’s handy, but the downside is that it takes up battery life. To turn it off and just let your email show up when you open the Mail app, tap Mail, Contacts, Calendar, tap Fetch New Data, and then move the Push slider to Off.
• Fetch email less often—I just mentioned that you can set your iPad to automatically check for new email. It’s fun to get new email, but the more often you check for it, the more battery life you use. So, unless you need to get your email all the time, set your iPad not to check too often. Tap Mail, Contacts, Calendar, tap Fetch New Data, and then tap Every 30 Minutes, Hourly, or Manually (which gives you the biggest battery savings).

• Turn off Bluetooth—You’ll probably only use Bluetooth for connecting wireless keyboards. If you’re not connected to a keyboard, you can save battery life by turning Bluetooth off. Tap Bluetooth and move the slider to Off.
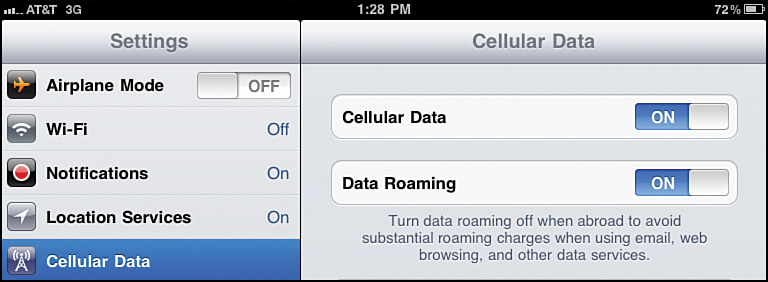
• Turn off 4G—Connecting to the Internet always uses more battery life because you have to send data back and forth. If you have a 4G iPad but don’t need to connect to a 4G network right now (or are in a place where there’s no 4G signal for your iPad to look for), turning off 4G saves battery life. To do this, tap General, Cellular Data, and move the slider to Off.

• Turn off Wi-Fi—If you’re not connected to the Internet and don’t need to be (like when you’re on a bus or car trip), or if you’re using 4G instead (assuming your iPad has 4G), turn off Wi-Fi. Tap Wi-Fi and then move the Wi-Fi slider to Off.

• Turn off Location Services—Location Services is an iPad feature that can figure out where you are geographically and give you data based on it. It’s especially good when you want to find nearby stores and restaurants or you need to get directions. If you don’t need to find local information, turn off Location Services until you do. Tap Privacy, tap Location Services, and move the Location Services slider to Off.
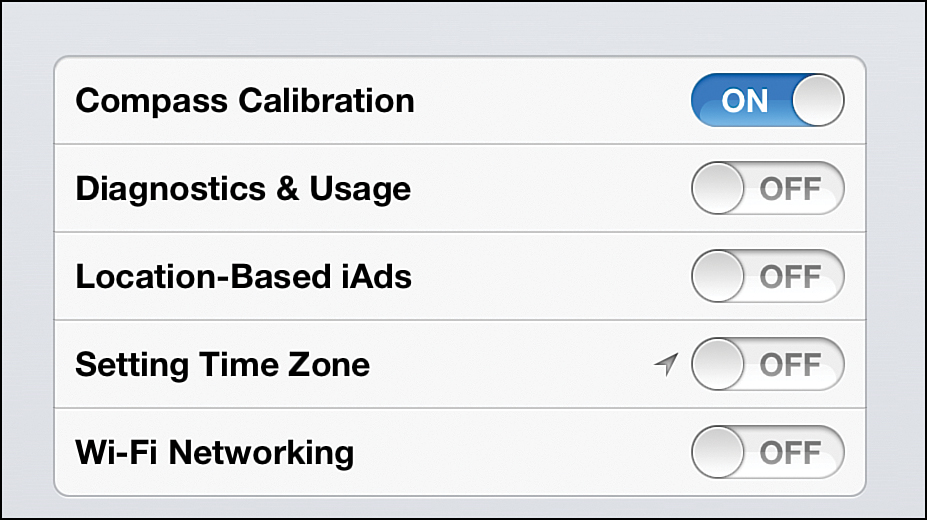
• Turn off other Location Services—Even if you leave your main Location Services on, there are some other, advanced settings that you can turn off to save some extra battery power. To do that, tap Privacy, tap Location Services, tap System Services, and move all the sliders on that screen to Off except Compass Calibration. Because it’s the option that helps your iPad know where you are when using location-specific apps and tools, leave that one set to On.
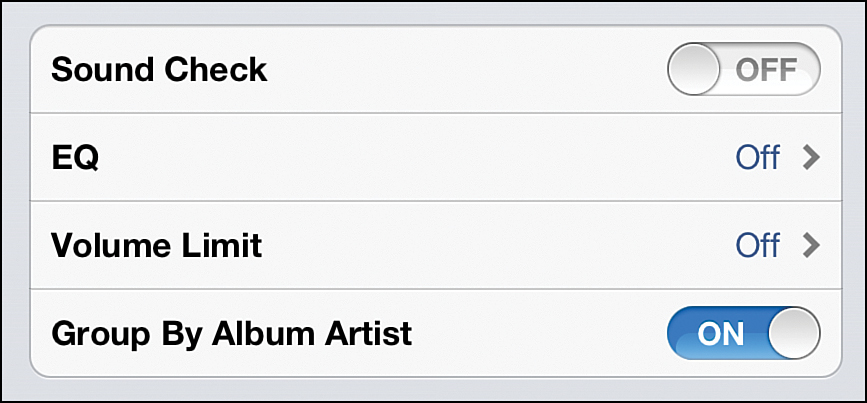
• Turn off Equalizer—There’s a setting in the Music app that automatically changes how your music sounds: It can add bass to rap music or the echo of a concert hall to a classical music performance. Doing that, though, takes up battery life. If you’re not using that setting, turn it off. Tap Music, tap EQ, and then tap Off.
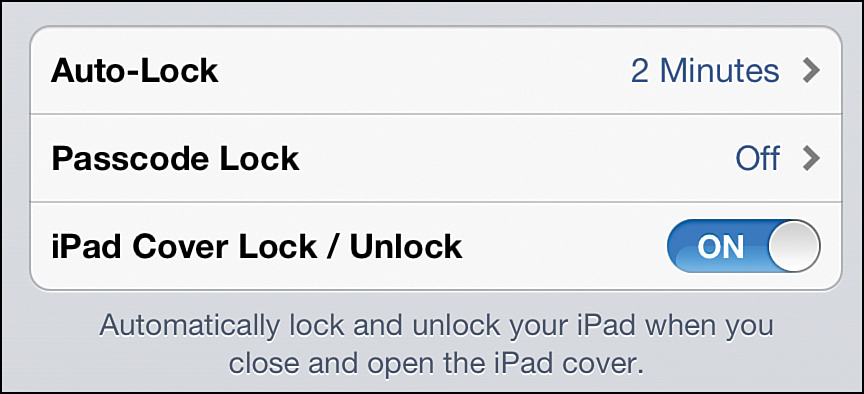
• Lock the screen sooner—Keeping the iPad’s screen lit up can take up a lot of battery life. If you’re not using your iPad, putting it to sleep sooner saves more battery. You can control how quickly the iPad goes to sleep when you’re not using it. To do this, tap General, tap Auto-Lock, and choose 2 Minutes or 5 Minutes.

• Use Airplane Mode—One handy tip for saving battery life is called Airplane Mode. You can use this when you’re not connected to 4G or Wi-Fi and don’t expect to be anytime soon. Airplane Mode (named that because it’s required for using your iPad on an airplane) turns off 4G, Wi-Fi, and a number of other features that can drain your battery. To use it, tap the Settings app and then move the Airplane Mode slider to On.
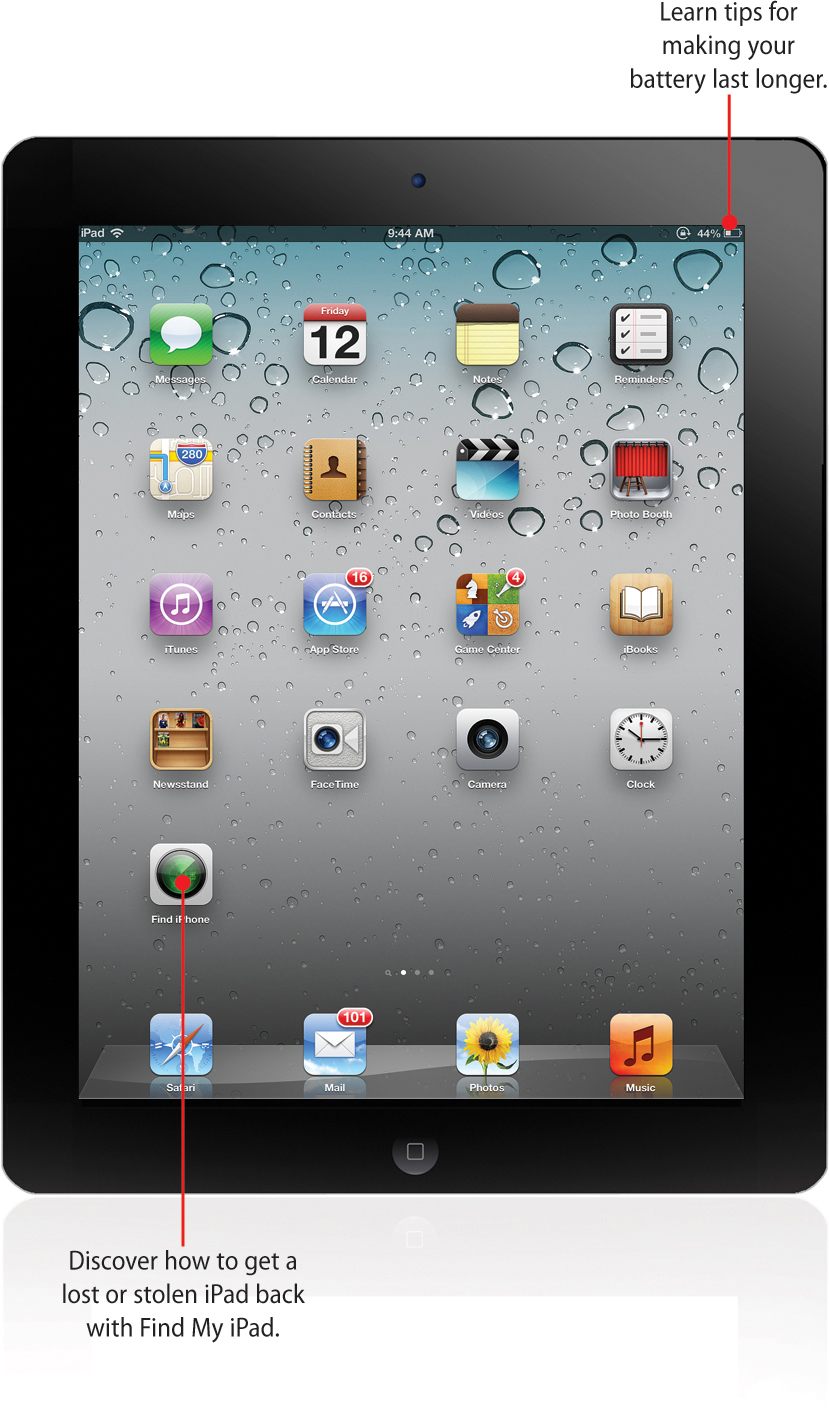
Finding a Lost iPad
We all try to take good care of our expensive possessions, including our iPads, but sometimes we lose them or, worse, they get stolen. It’s very upsetting when this happens, but luckily a lost or stolen iPad isn’t necessarily gone for good. If you turned on Find My iPad (check out “Lost and Found: Setting Up Find My iPad,” in Chapter 2, “Getting Started: Set Up and Sync Your iPad,” for more information) before your device was lost or stolen, you might be able to get it back.
Using Find My iPad
Find My iPad uses the Internet and the iPad’s Location Awareness features to try to figure out where your iPad is. To locate your lost or stolen iPad, follow these steps:
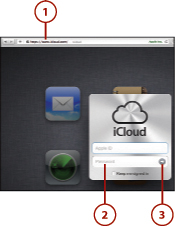
1. Use any desktop, laptop, iPhone, or iPad that’s connected to the Internet to go to www.icloud.com (there’s also a free app from Apple for iPhone and iPad that you can get).
2. Enter your Apple ID and password.
3. Click the arrow to log in.
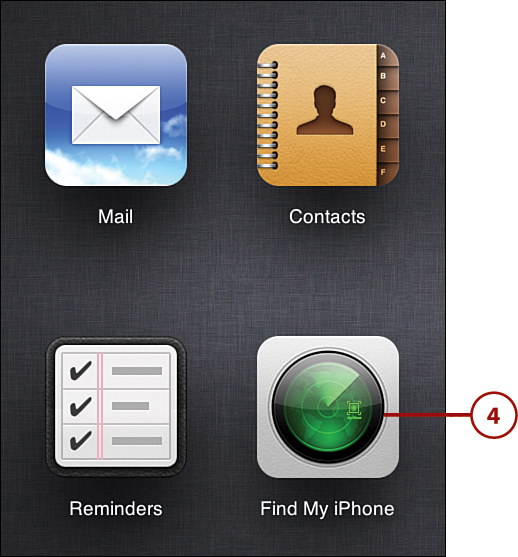
4. Click the Find My iPhone icon (don’t worry, it works for iPads too).
5. Tap the Devices menu to see all your iOS devices. The website spends some time trying to locate your iPad on a map. When you’ve found your iPad, tell a parent or teacher and ask them to help you get it back. Never try to get your lost iPad back yourself; that can be dangerous.
6. When the website finds your iPad, you see it appear on the map as a green dot.
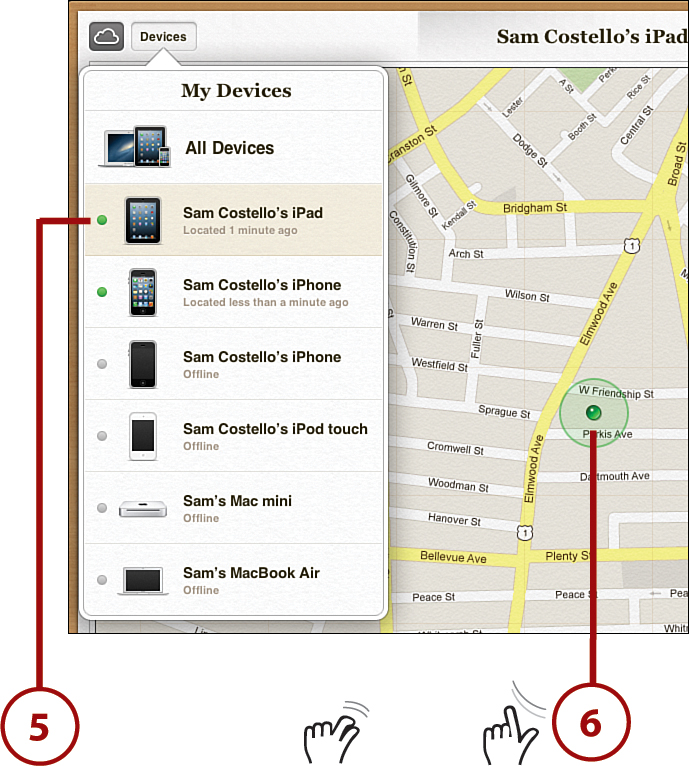
You can drag around and zoom in or out on the map to get more information about where your iPad is located. You can even go so far as to see the building it’s in.
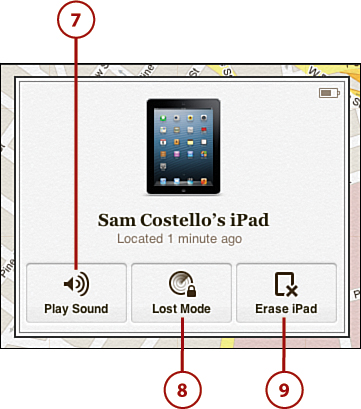
7. Play Sound—Choosing this causes the iPad to make a noise (good if it’s lost under dirty clothes in your room and you want to find it).
8. Lost Mode—If you didn’t already add a passcode to your iPad, you can do it now. This stops the person who has your iPad from using it or accessing your info. Click it and then set a four-digit code.
9. Erase iPad—To take a really drastic step, you can delete all the information on your iPad. This way, the person who has it can’t read your email or look at your photos. Don’t do this on your own because it can mean losing important information. If you think this is a good option, check with your parents (or your teachers) and see if they want to do this for you. If they decide to do it, they should click the Erase iPad button.
What to Do If Your iPad Gets Wet
If there’s any rule you have to follow about taking care of your iPad, it’s this: Don’t get it wet. A drop of water on the iPad’s screen or back is okay if you wipe it off, but dropping the iPad in the bath because you were reading in the tub spells trouble. Knocking over a glass of juice or soda onto it can be worse because those drinks can do even more damage than water. Either way, getting your iPad wet is a bad idea because electronics aren’t designed to get wet, and when they do, they can be damaged or stop working altogether—which could be the end of your iPad!
Or maybe not. If your iPad gets really wet, try these tips to dry it out. They won’t save every iPad—sometimes too much water gets in and the iPad is ruined—but they will save some:
• Don’t turn it on—This is super important. If your iPad gets soaked, don’t turn it on. That could cause the electronics to short-circuit. If your iPad was on, though, hold down the power button until it shuts down. (This isn’t the same as pressing the button to put it to sleep. Hold the button until the iPad’s screen shuts off completely.)
• Shake out the water or let it drain—Get as much of the water out as possible. A good way to do that is to turn the iPad so that the dock connector is facing down and let the water drain out. Also try shaking the iPad to get water out.
• Try rice—Even after the water has drained, some water will still be stuck in the nooks and crannies inside your iPad. Believe it or not, the way to get it out involves rice. Get some dry, uncooked rice and a big plastic bag. Put a scoop or two of rice into the bag and then put your iPad in the bag, too. Keep it there for one to two days. Believe it or not, the rice sucks the moisture out of the iPad and absorbs it! This trick has saved many iPads.
After you’ve tried these tips and your iPad appears dry, you can turn it on. It might work perfectly or it might not work at all. Maybe the most frustrating outcome, though, is if it sort of works and sort of doesn’t. For example, maybe your iPad seems to work, but the speaker doesn’t make noise. Or everything works but the screen is streaky. In these cases, try the rice again. If that still doesn’t work, your iPad might be broken for good. You should tell your parents and find out what they want to do.
Backing Up Your iPad
The iPad is very reliable, but sometimes accidents happen and the things you have stored on it can get erased or lost. When you have music, photos, email, and school papers stored on your iPad, you don’t want to take any chances of losing important items.
To prevent that, you have to make copies of everything on your iPad. This is called backing up your data. There are two main ways to do this: backing up using iCloud and backing up by syncing with a desktop or laptop computer.
Maybe the easiest way to back up your iPad is by using the iCloud account you created when you set up the iPad (check out Chapter 2 for more info). iCloud is Apple’s web-based service for storing your data. It automatically copies data there and lets you download it later if you need it.
Backup Using iCloud
If you chose to back up to iCloud during the setup process, there’s nothing to change: You’re already backing up to iCloud. If you didn’t do that, though, you have to turn this feature on. To do that, make sure you have an iCloud account (it’s the same as your Apple ID), you’re signed in to it, you’re connected to the Internet, and you have opened the Settings app. Then follow these steps:
1. Tap iCloud from the Settings options.
2. Tap Storage & Backup.
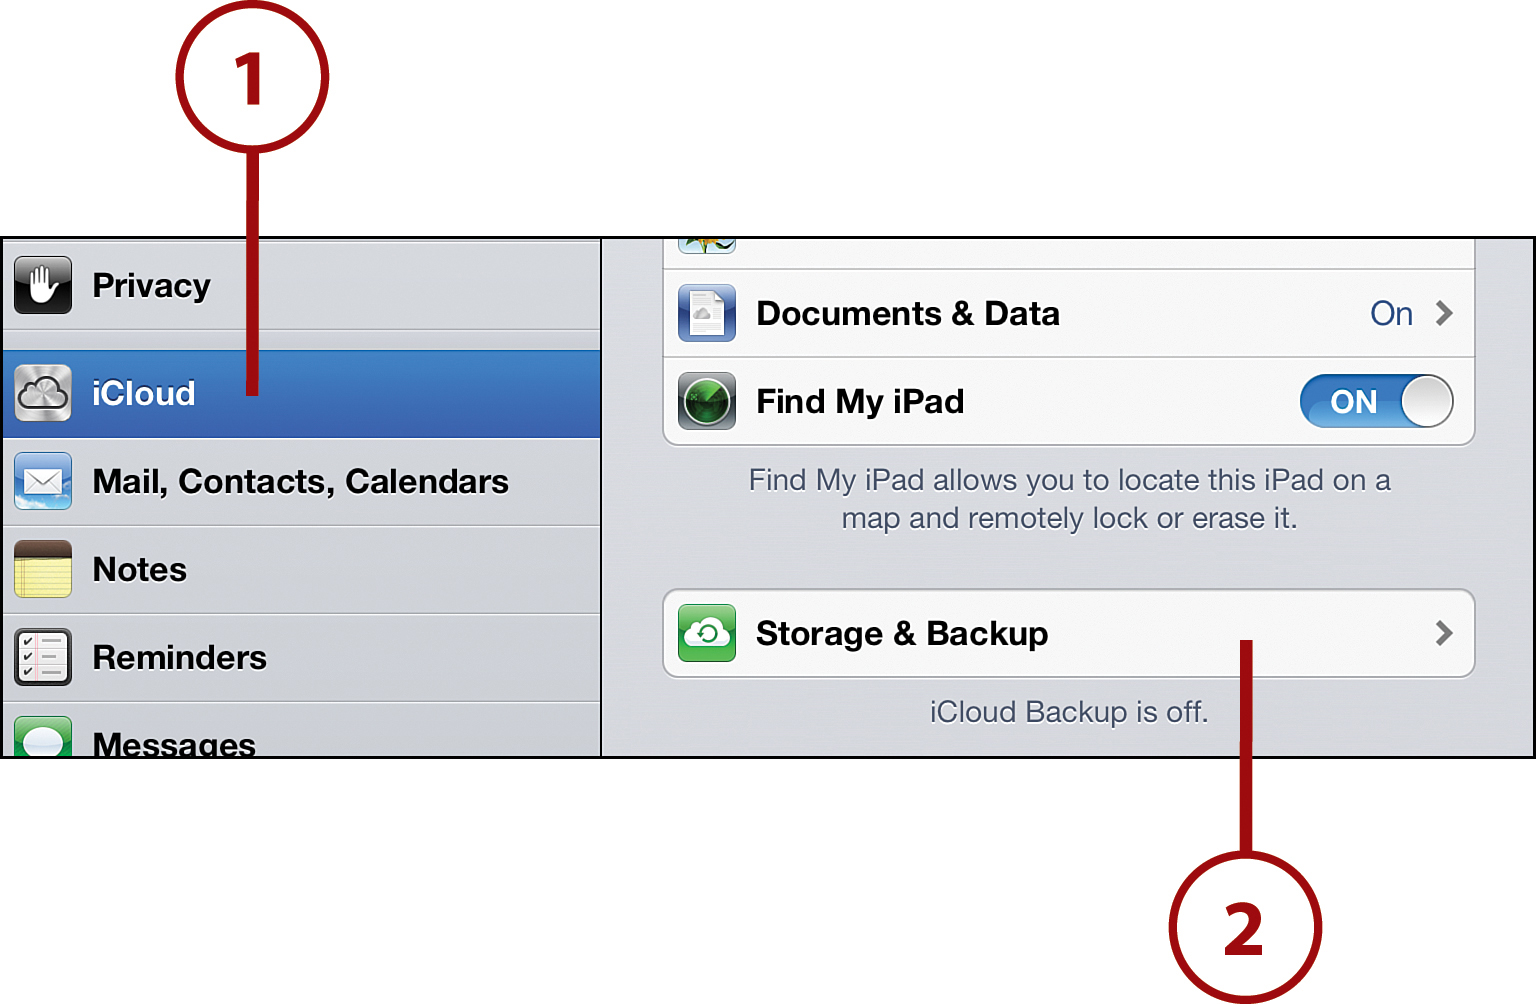
3. Move the iCloud Backup slider to On.
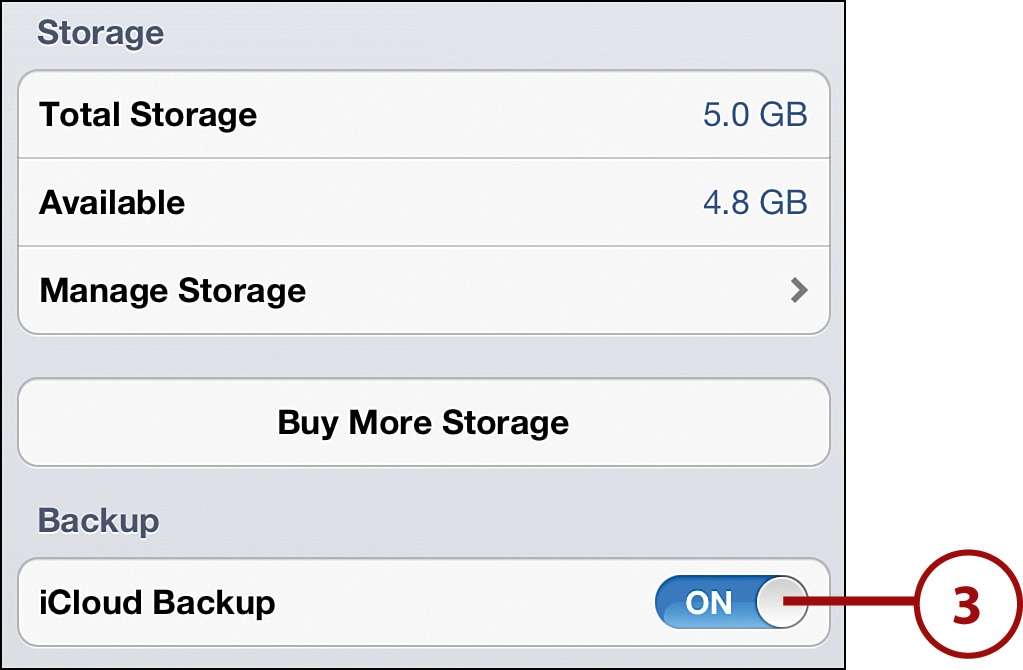
iCloud gives you 5GB of storage for free. If you need more, you can buy it for $20 to $100 per year.
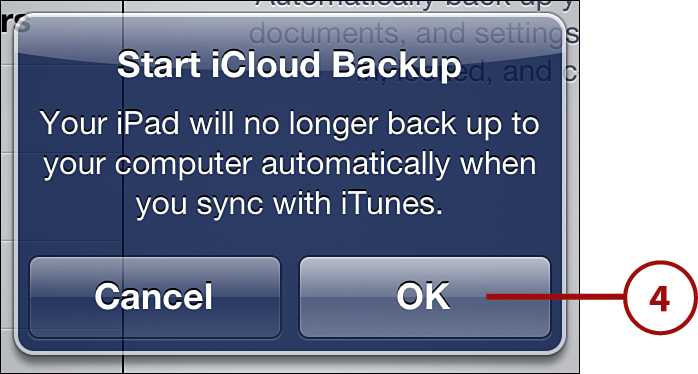
4. Tap OK in the pop-up window to agree to iCloud backup. Your iPad spends a moment turning on the backup feature and then you’re all set. From now on, backups to iCloud happen automatically whenever you’re connected to the Web.
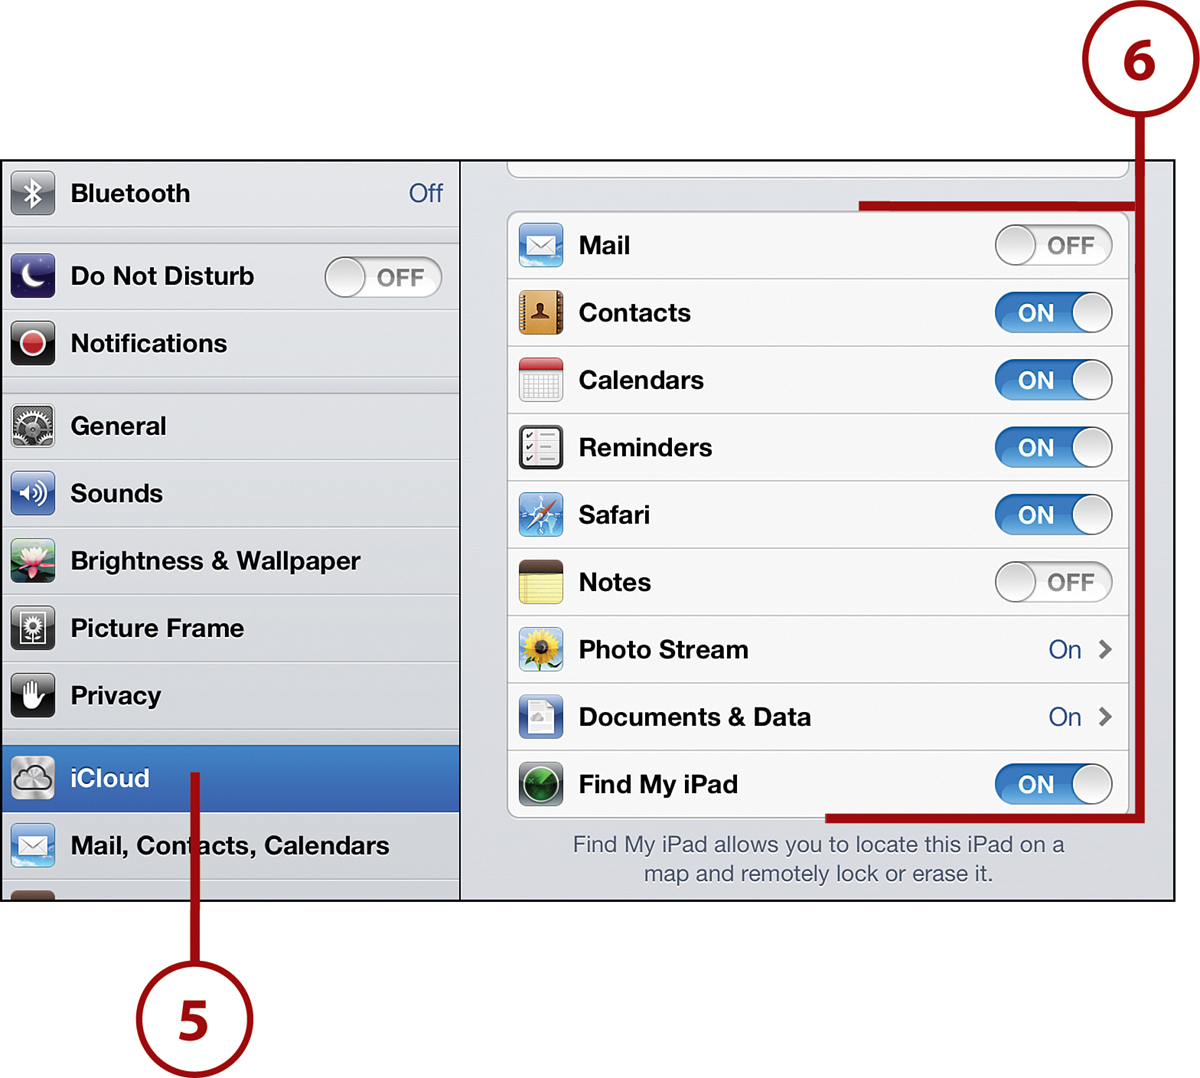
5. After you’ve turned iCloud backup on, you have to make sure all the stuff you want saved is getting backed up. Return to the iCloud screen in the Settings app.
6. On the iCloud screen, you see all the kinds of apps and data that iCloud can back up. For each one that you want to store, move the slider to On. When you’re done, you can just press the Home button and go do something else. Your changes are automatically saved.
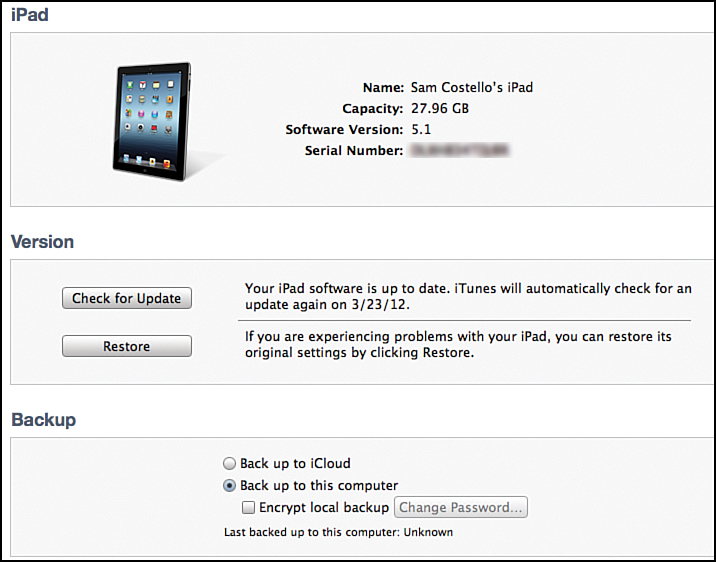
Backup by Syncing
The other way to back up your iPad is to use your computer: Every time you sync your iPad to a computer, you’re creating a backup. That’s because the iPad transfers all its data to your computer for use there or in case of emergency. Pretty easy, huh?
If you don’t back up to iCloud, just make sure to sync your iPad to your computer regularly (try every day or two) and you’ll have backups when you need them.
The good thing about this option is that it also backs up your music onto your computer, so you don’t have to worry about iTunes Match. It’s a good idea to back up the data on your computer too, just in case.
Restoring Your Data from Backup
Let’s say something bad happens and you lose some or all of the information on your iPad. If you’ve been backing up regularly, then it’s okay—you just need to restore your data from the backup. It’s important to know that when you restore your iPad, you can’t pick and choose what you want to restore. Instead, you have to erase everything on your iPad and replace it with the backup. That’s usually okay, because you want to get back lost data anyway, but it’s important to know because you might lose new data you added since the last backup.
Restoring from iCloud
To restore your iPad from an iCloud backup, make sure you’re connected to the Internet (there’s no way to reach iCloud otherwise) and tap the Settings app to open it. After you’ve done that, follow these steps:
1. Tap General.
2. Scroll to the bottom of the screen. Tap Reset.
3. Tap Erase All Content and Settings. Be sure you mean it, though—this erases everything from your iPad.

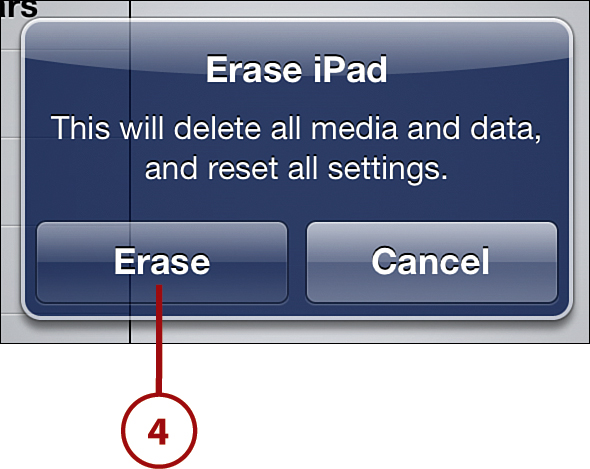
4. Tap Erase in the pop-up window. A second window pops up, making sure you really want to do this. If you do, tap Erase again.
When your iPad restarts, you go through the same set up process you did when the iPad was new. Check out Chapter 2 if you want a refresher on that.
5. After you’ve redone the initial setup, you have a choice of what backup you want to restore your data from. Tap Restore from iCloud Backup.

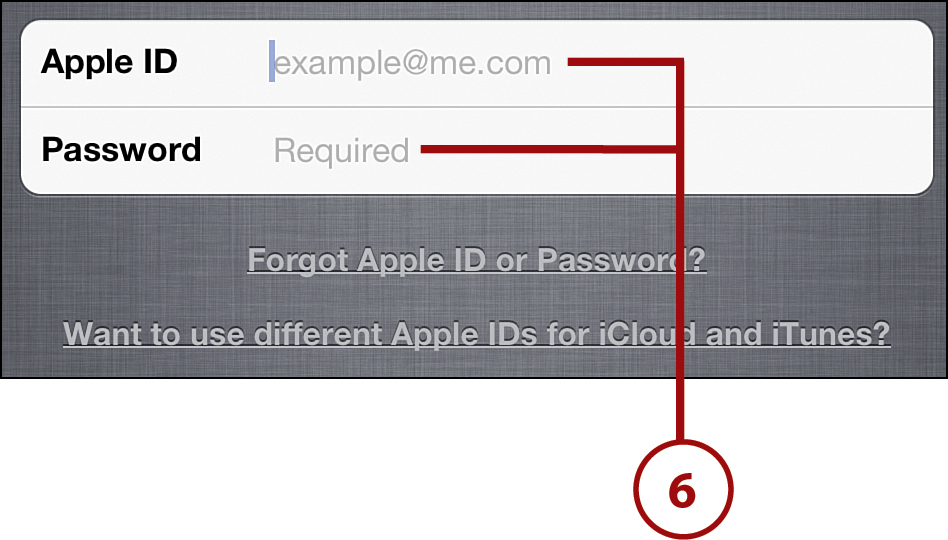
6. Sign in to your iCloud account. When asked about agreeing to the Terms of Service, tap the Agree button in the pop-up window.
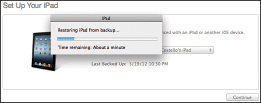
7. You now have a choice of what iCloud backup you want to use. Tap the one you prefer (probably the most recent one, but not always) and then tap Restore. The backup begins to download to your iPad. How long this takes depends on how much data and how many apps you have to download.

Restoring from iTunes
Just like you can back up your data using your computer, you can also use those backups on your computer to restore information to your iPad. To restore your iPad using a backup from your computer, follow these steps:
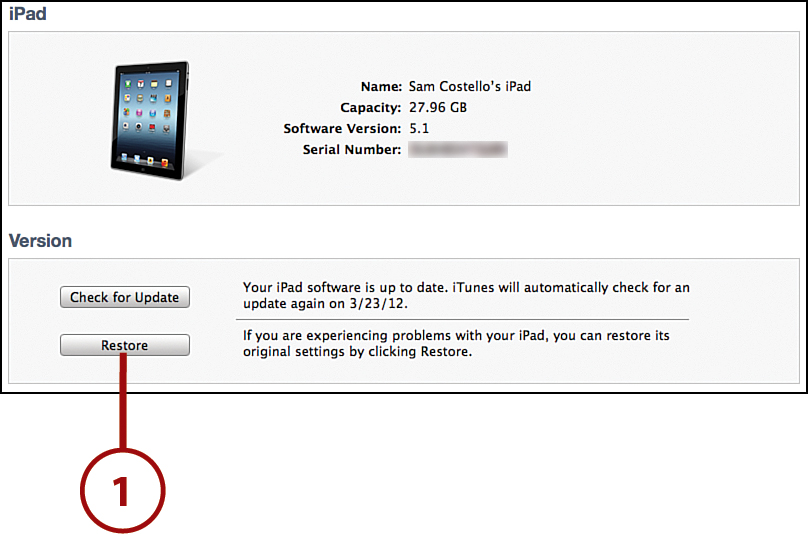
1. Connect your iPad to the computer you sync it with. It syncs again. When that’s done, click Restore in the iTunes window. When you do this, some windows pop up asking if you’re sure you want to do this. Click the buttons that let you continue.
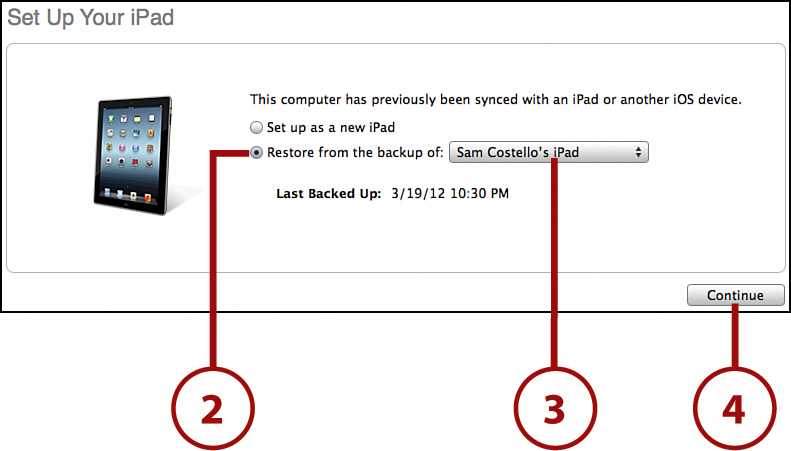
2. A box appears on the screen giving you two options: to set the iPad up like new or to restore from a backup. Click the Restore From button.
3. Select the backup you want to use (usually the most recent one) from the drop-down.
4. Click Continue to proceed. Your iPad restarts and all the things you’ve stored on it are erased. After a minute or so, the white Apple logo appears on the iPad’s screen. You then have to repeat the initial setup process from Chapter 2 of updating your sync settings to make sure to sync all the music, apps, and other data you want on your iPad.
Redownloading from iCloud
Although iCloud doesn’t back up all of your music or other data, it does offer a neat feature: It stores and lets you redownload almost anything you’ve bought from the iTunes or App Stores. This way, if you accidentally delete or lose any music, apps, books, or TV shows you’ve gotten from iTunes or the App Store, you can easily get them back again—for free!
How to Redownload Purchases
To redownload your iTunes purchases from iCloud, make sure your iPad is connected to the Internet, open the iTunes Store app from your iPad’s home screen, and then follow these steps:
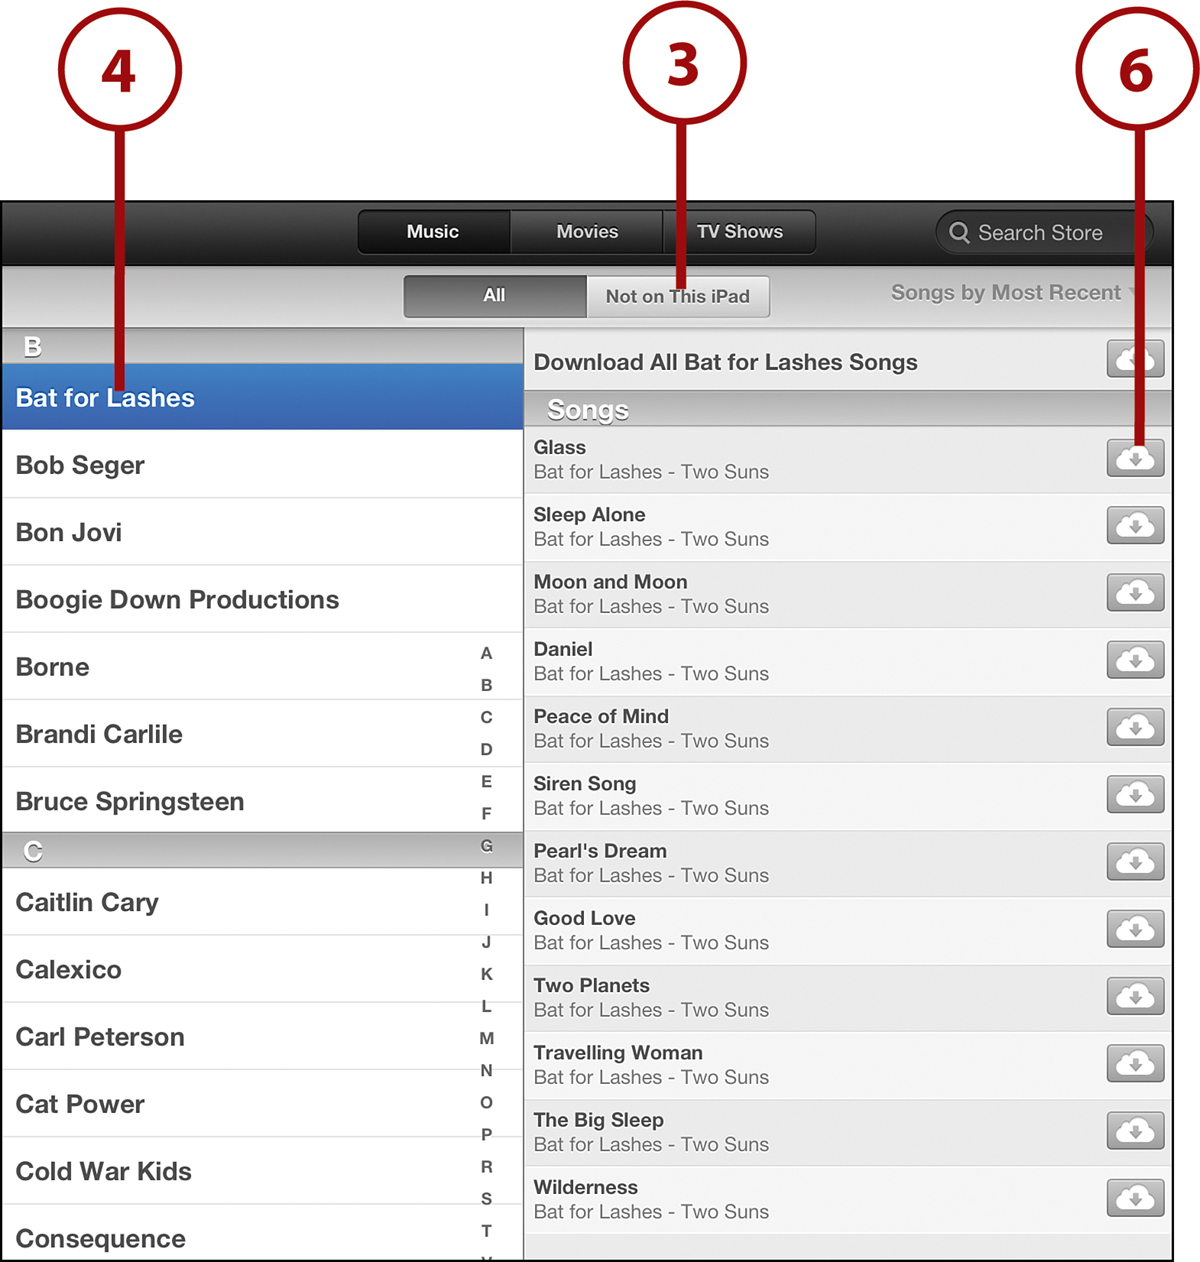
1. Tap Purchased from the list of icons along the bottom of the screen. This is the section that shows everything you’ve bought from iTunes.

2. In the Purchased section, you have three choices of what to see: TV Shows, Music, and Movies. Not all options show up, just those that you’ve bought things in. Tap the option you want.
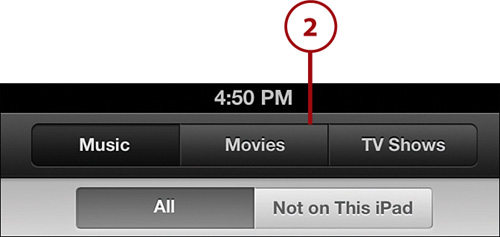
3. You can choose to see either everything you’ve bought from iTunes or just the purchased items not on your iPad. I’d choose the second option because that’s what you’re looking to download.
4. In TV shows, there’s a list of the shows you’ve purchased. The same is true for Movies. In Music, you see a list of all the artists you’ve bought songs or albums by.
5. For TV shows, tap the show you want to redownload an episode from and then tap the season.
6. When you’ve found the TV episode, movie, song, or album you want to download, tap the iCloud button next to it. You might be asked to enter your Apple ID again. After you’ve done that, the video or music downloads to your iPad and you’ll be able to enjoy it in no time.