
17. Managing Your Projects
Lesson overview
In this lesson, you’ll learn about the following:
• Working in the Project Manager
• Importing projects
• Managing collaboration
• Managing your hard drives
This lesson will take approximately 25 minutes.
In this lesson, you’ll learn how to stay organized when working with multiple Adobe Premiere Pro CC projects. The best kind of organizational system is one you already have when you need it. This lesson will help you be more creative with a little bit of planning.
Getting started
When you start creating projects with Adobe Premiere Pro, you may not feel the need to invest time in staying organized. Perhaps you’re just working on your first project now, and if that’s the case, it’s going to be nice and easy to find it on your hard drive.
Once you start working on multiple projects, staying organized gets a little more complicated. You’ll be using multiple media assets taken from multiple places. You’ll have multiple sequences, each with its own particular layout, and you’ll be generating multiple titles. You may also have multiple effect presets and title templates. All in all, you’ll need quite a filing system to keep all these project elements organized.
The solution is to create an organizational system for your projects and to have a plan in place for archiving those projects you might want to work on again.
The thing about systems for organization is that they’re usually easier to use if they exist before you need them. Look at this idea from the other direction: If you don’t have an organizational system in the moment you need it—when you have a new video clip to put somewhere, for example—you might be too busy to think about things like names and file locations. Consequently, it’s common for projects to end up with the same name, stored in the same place, with a mix of files that don’t go together.
The solution is simple: Make your organizational system in advance. Map it out with pen and paper if it helps, and work out the journey you’ll take, starting from getting your source media files, moving through your edit, and finishing with output, archiving, and beyond.
In this lesson, you’ll begin by learning about features that help you stay in control, without losing focus on what matters most—your creative work.
Then you’ll learn about some positive approaches to collaboration.
1. To begin, open Lesson 17.prproj in the Lesson 17 folder.
2. Choose Window > Workspace > Editing to switch to the Editing workspace.
3. Choose Window > Workspace > Reset Current Workspace.
The Reset Workspace dialog opens.
4. Click Yes in the Reset Workspace dialog.
The File menu
Though most of your creative work can be performed using buttons in the interface or using keyboard shortcuts, some important options are available only in the menus. The File menu gives you access to your project settings and to the Project Manager, a tool that automates the process of streamlining your project. Also, the Clip menu gives you the option to make clips offline, disconnecting the media file from the clip, or to link media to clips that are already offline.
File menu commands
The options available under File > Project Settings are the ones you used to create your project. Note that the only thing you can’t change here is the location of the project file, though you could easily do that by exiting the project and moving the file using Windows Explorer (Windows) or Finder (Mac OS).
Batch lists, also in the File menu, are for capturing; see Lesson 3, “Importing Media.”
The Project Manager automates the process of backing up your project and discarding unused media files. We’ll look at the Project Manager in a moment.
The Remove Unused command automatically removes clips from your project that are not used in any sequences. This is useful if you’re looking to tidy up your project.
The Clip menu also has some important options, many of which are duplicated in other parts of Adobe Premiere Pro. Link Media and Make Offline are also available in the Project panel, when you right-click a clip.
Automate To Sequence, a feature you learned about in Lesson 5, “Essentials of Video Editing,” is also available in the Project panel menu.
Making a clip offline
The words offline and online have different meanings in different post-production workflows, depending on the context. In the language of Adobe Premiere Pro, they refer to the relationship between clips and the media files they link to.
• Online: The clip is linked to a media file.
• Offline: The clip is not linked to a media file.
When a clip is offline, you can still edit it into a sequence, and even apply effects to it, but you won’t be able to see any video. Instead, you’ll see the Media Offline warning.

In almost all operations, Adobe Premiere Pro is completely nondestructive. This means that no matter what you do with your clips in your project, nothing will happen to the original media files. Making a clip offline is a rare exception to this rule.
If you right-click a clip in the Project panel or go to the File menu and choose Make Offline, you’ll have two options:
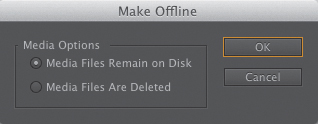
• Media Files Remain on Disk: This simply unlinks the clip from the media file and leaves the media file in place and unchanged.
• Media Files Are Deleted: This deletes the media file. The effect of deleting the media file is that the clip goes offline, because there is no media file to link to anymore.
The benefit of making clips offline is that they can be reconnected with new media. If you’ve been working with low-resolution media, this means you can recapture tape-based media, or reimport file-based media, at a higher quality.
Working with low-resolution media is sometimes desirable if you have limited disk storage or a large number of clips. When your editing work is complete and you’re ready for fine-finishing, you can replace your low-resolution, small file-size media with selected high-resolution, large file-size media.
Do be careful with the Make Offline option, though! Once your media file is deleted, it’s gone. Be cautious when using the option that deletes the actual media file.
![]() Tip
Tip
You can make multiple clips offline in a single step. Just select any clips you would like to make offline before you choose the menu option.
Using the Project Manager
Let’s take a look at the Project Manager. To open it, go to the File menu and choose it.
The Project Manager provides several options that automate the process of streamlining your project, or gathering together any media files you’ve used in your project.
It is very useful if you intend to archive your project or if you want to share your project. By using the Project Manager to gather all of your media files, you can be confident nothing will be missing—or offline—when you hand the project over to your creative colleagues.
The result of using the Project Manager is a new, separate project file. Because the new file is independent of your current project, it’s safe to try using the Project Manager and double-check that everything is fine before you delete anything.
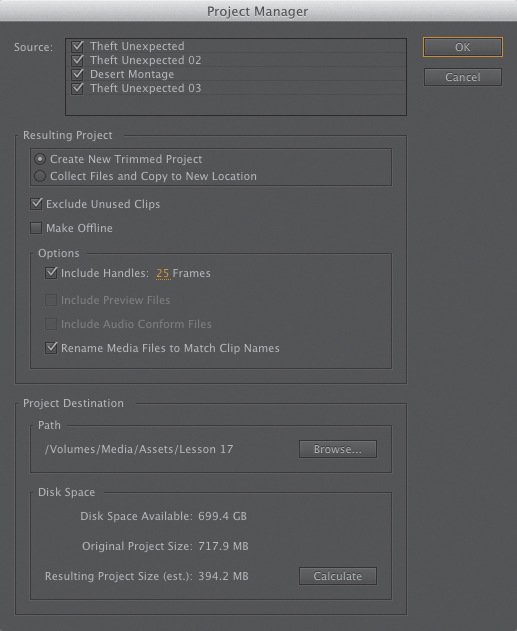
Here’s an overview of the options:
• Source: Select one or all of the sequences in your project. The Project Manager will choose clips and media files based on the sequences you select.
• Resulting Project: Create a new project with new media files based only on the trimmed parts of clips you have included in your sequence(s), or create a new project that has full copies of the clips you have included in your sequence(s).
![]() Note
Note
Some video formats, such as XDCAM, cannot be trimmed. When you create a trimmed project that includes these formats, full copies of media files are included.
• Exclude Unused Clips: With this option selected, the new project will not include clips you have not used in your selected sequence(s).
• Make Offline: When you choose this option, Adobe Premiere Pro will automatically unlink clips captured from tape, so they are ready to be recaptured using Batch Capture. This is useful if you originally captured your media at low resolution and now want to recapture at high quality only the parts you used in your project. This option has no effect on media imported from files.
• Include Handles: This adds the number of frames you specify to the new trimmed versions of the clips in your sequence(s). The extra content gives you the flexibility to trim and adjust the timing of your edits.
• Include Preview Files: If you have already rendered your effects, you can include the preview files with your new project so you won’t need to render the effects again.
• Include Audio Conform Files: This includes the audio conform files with your project, so Adobe Premiere Pro won’t need to conduct analysis of your audio again.
• Rename Media Files to Match Clip Names: As the name implies, this option renames your media files to match the clip names in your project. Consider carefully if you would like to use this option, because it can make it difficult to identify the original source media for your clips.
• Project Destination: Choose a location for your new project.
Working with a trimmed project
To create a new trimmed project file that includes only the parts of the clips you have used in your selected sequence(s), do the following:
1. Go to the File menu and choose Project Manager.
2. Select the sequence(s) you want to be included in your new project.
3. Select Create New Trimmed Project.
4. Choose Exclude Unused Clips, unless you want to be able to recapture or reimport files that will now be offline.
5. Select Make Offline if you intend to recapture all tape-based clips. In most cases, you will not want to choose this option.
6. Add some handles. The default is one second on each end of the clips used in your sequences. Consider adding more if you’d like to have more flexibility to trim and adjust your edits in the new project.
![]() Note
Note
Choosing to add 5 or 10 seconds of media at each end of the clip will do no harm; it will just mean your media files are a little larger.
7. Decide whether you want to rename your media files. Generally, it’s better to leave your media files with the original names. However, if you are producing a trimmed project to share it with another editor, it might be helpful for them to identify the media files if they are renamed.
8. Click Browse and choose a location for your new project file.
9. Click Calculate to have Adobe Premiere Pro estimate the new total size of your project, based on your selections. Then click OK.
The benefit of creating a trimmed project is that you no longer have unwanted media files cluttering up your hard drive. It’s a convenient way of transferring your project to a new location using the absolute minimum amount of storage space, and it’s great for archiving.
The danger with this option is that once your unused media files are deleted, they’re gone! Be sure that you have a backup of your unused media or that you definitely do not want to use the media before you create a trimmed project.
When you create your trimmed project, Adobe Premiere Pro will not delete your original files. Just in case you selected the wrong items, you can always go back and check before manually deleting the files on your hard drive.
Collecting files and copying them to a new location
To collect all of the files used in your selected sequences to a new, single location, follow these steps:
1. Go to the File menu and choose Project Manager.
2. Select the sequences you want to be included in your new project.
3. Select Collect Files and Copy to New Location.
4. Choose Exclude Unused Clips. If you want to include every clip in your bins, regardless of whether they are used in a sequence, deselect this option. Deselect this option if you are creating a new project to organize your media files a little better—perhaps because you have imported them from lots of different locations. When the new project is created, every media file linked to the project will be copied to the new project location.
5. Decide whether you would like to include existing preview files to save you from having to re-render your effects in the new project.
6. Decide whether you would like to include Audio Conform Files to save Adobe Premiere Pro from having to analyze the audio files again.
7. Decide whether you want to rename your media files. Generally, it’s better to leave your media files with their original names. However, if you’re producing a project to share it with another editor, it might be helpful for them to identify the media files if they are renamed.
8. Click Browse and choose a location for your new project file.
9. Click Calculate to have Adobe Premiere Pro estimate the total new size of your project, based on your selections. Then click OK.
Collecting all of your media files this way is very helpful if your media files are located in lots of different places and it’s hard to find them. Adobe Premiere Pro will make copies of the original files in a single location.
If you intend to create an archive of your entire original project, this is the way to do it.
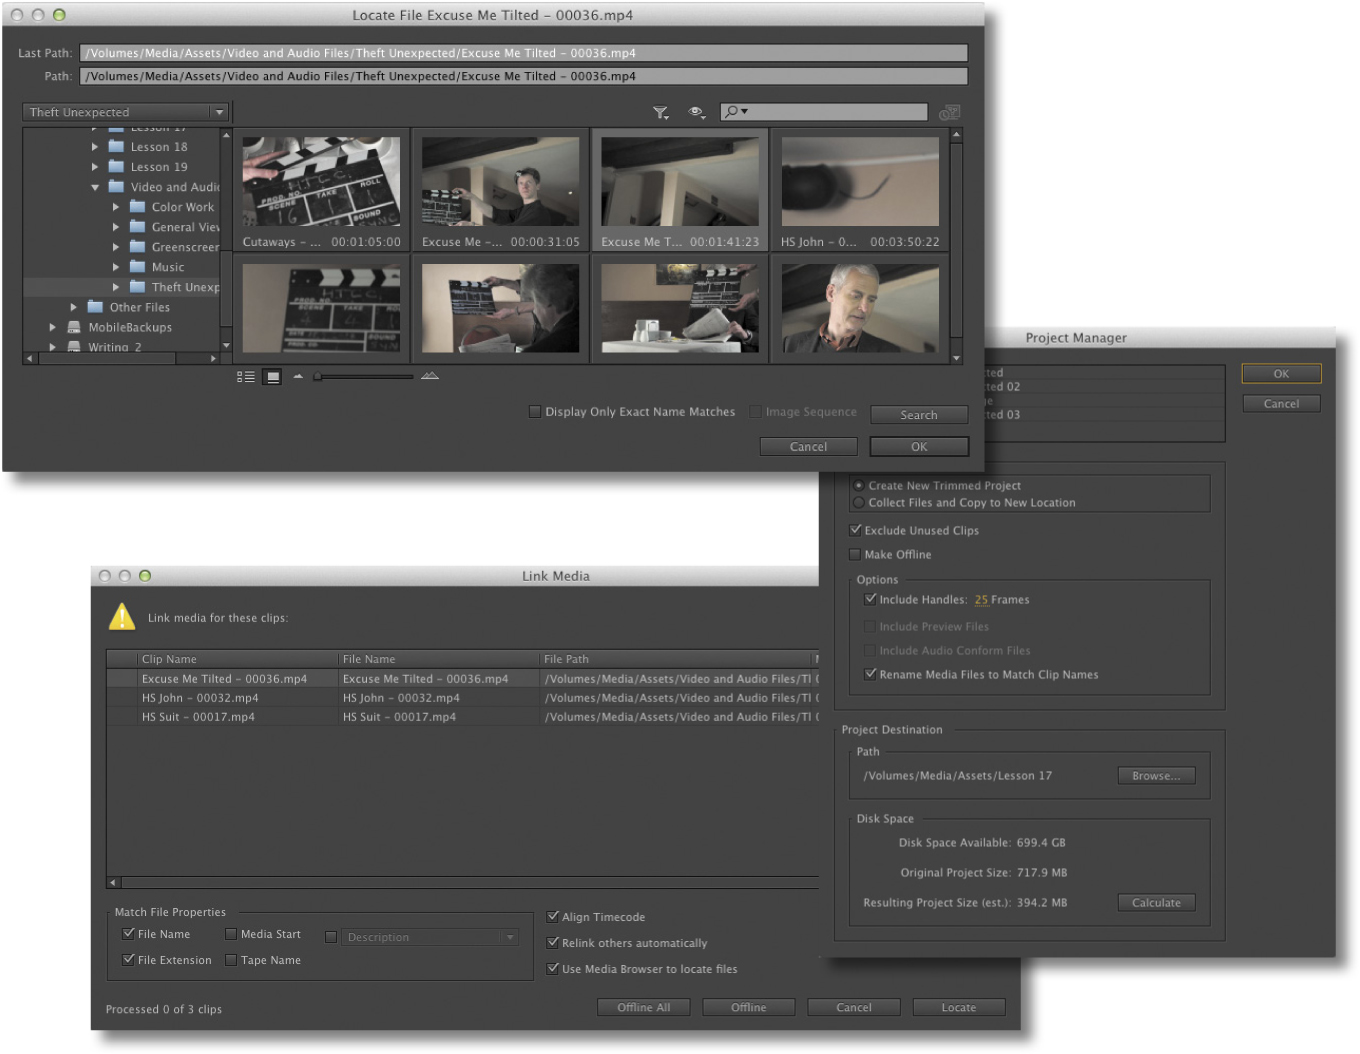
Using the Link Media panel and the Locate command
Adobe Premiere Pro CC has a new advanced feature for locating missing media files. The Link Media panel will appear automatically if you open a project with missing media. This panel gives you simple options to reconnect the clips in your bin with the media files on your storage drive.
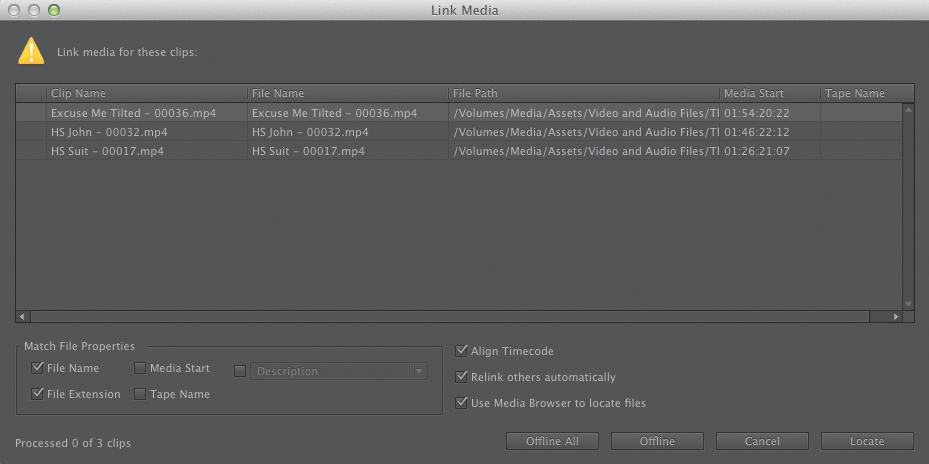
The default options work well, but if you’re relinking to different file types or using a more complex system to organize your media files, you may want to enable or disable some of the options for file matching.
If you choose to make a clip offline (you can also make all of the clips with missing media offline), Premiere Pro will keep the clip in the project but won’t automatically prompt you again to relink it.
If you have offline clips you would like to relink, click the Locate button. The Locate panel appears, and you can browse to your missing clip.
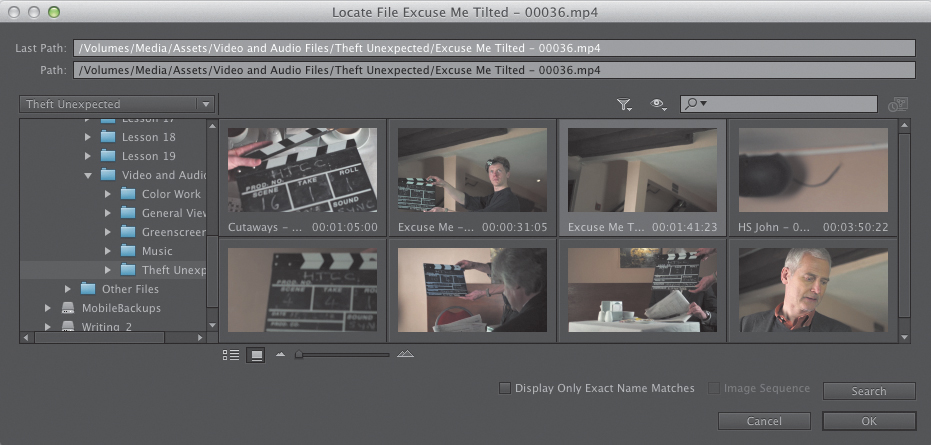
After you click OK, Adobe Premiere Pro will automatically search for other missing media files in the same location. This automation can dramatically speed up the process of relinking missing media files.
Final project management steps
If your goal is to give yourself maximum flexibility to re-edit your sequences based on the new project, consider using the Remove Unused option, available under the Edit menu, before you use the Project Manager.
Remove Unused will leave you with only those clips currently used in sequences. However, unlike the option to create a trimmed project file, when you use the Project Manager to collect your files to a new location, the entire original media file will be copied. This is perhaps the best of both worlds, balancing hard drive space with creative flexibility when working on the newly created project.
Importing projects or sequences
As well as importing many kinds of media files, Adobe Premiere Pro can import sequences from existing projects, along with all of the clips used to create them.
1. Use any method you prefer to import a new media file. If you double-click a black area in the Project panel, the Import dialog will appear.
2. Select the file Desert Sequence.prproj in the Lesson 17 folder, and click Import.
The Import Project dialog appears, with just two options:

• Import Entire Project: This imports every sequence in the project you’re importing and every clip already imported into a bin.
• Import Selected Sequences: This allows you to select the specific sequence you’d like to import. Only clips used in that sequence will be imported.
3. The project you’re importing has only one sequence, so leave Import Entire Project selected, and click OK.
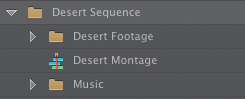
Adobe Premiere Pro adds a new bin to the project, containing the sequence that has been imported, and further bins containing the clips used in the sequence.
This is a nice way to work because Adobe Premiere Pro has automatically organized the new clips for you, based on the project you imported.
![]() Note
Note
If you import an Adobe Premiere Pro project file and choose to import selected sequences, the Import Premiere Pro Sequence dialog appears. Using this dialog, you can selectively import specific sequences, bringing associated clips into your project automatically.
Managing collaboration
Being able to import other projects unlocks novel workflows and opportunities for collaboration. You could, for example, share work on different parts of a program between different editors, all using the same media assets. Then, one editor could import all of the other projects to combine them into a completed sequence.
Project files are small—often small enough to email. This allows editors to email each other updated project files, open them and compare, or import them to do a side-by-side comparison in the project, provided that each editor has a copy of the same media files. You can also use local-folder file sharing services to update a shared project file that links to duplicated copies of local media files.
You can also add markers with comments to a Timeline, so when updating a sequence, consider adding a marker to highlight changes for your collaborators.
Be warned: Adobe Premiere Pro does not lock project files when they are in use. This means two people can access the same project file at the same time. This could be creatively dangerous! As one person saves the file, it updates. As the next person saves the file, it updates again. Whoever saves the project file last defines the file. If you intend to collaborate, it would be better to work on separate project files and import.
There are several dedicated media servers made by third parties that help you to collaborate using shared media files. These allow you to store and manage your media in a way that is accessible by multiple editors at the same time.
Keep these key questions in mind:
• Who has the latest version of the edited sequence?
• Where are the media files stored?
As long as you have simple answers to these questions, you should be able to collaborate and share creative work using Adobe Premiere Pro.
Managing your hard drives
Once you’ve used the Project Manager to create a new copy of your project or you have completed your project and finished with its media, you’ll want to clean up your drives. Video files are big. Even with very large storage drives, you’ll quickly need to think about which media files you want to keep and which ones you want to discard.
To make it easier to remove unwanted media when you’ve finished a project, consider importing all media files via your project folder or via a specific location on your media drive for your project. This means putting copies of your media into a single location before importing, because when you import media, Adobe Premiere Pro creates a link to it wherever it is on your computer.
By organizing media files before you import them, you’ll find it much easier to remove unwanted content at the end of the creative workflow, because everything is conveniently located in one place.
Remember that deleting clips in a project, or even deleting the project file itself, will not delete any media files.
Additional files
The media cache uses storage space as you import new media files to your projects. Also, each time you render effects, Adobe Premiere Pro creates preview files.
To remove these files and reclaim extra space on your hard drive, do the following:
• Choose Edit > Preferences > Media (Windows) or Premiere Pro > Preferences > Media (Mac OS), and click Clean in the Media Cache Database section.
• Delete render files associated with your current project by choosing Sequence > Delete Render Files. Alternatively, locate your Preview Files folder by checking under File > Project Settings > Scratch Disks. Then delete the folder and its contents using Windows Explorer (Windows) or Finder (Mac OS).
Consider carefully when choosing the location of the media cache and your project preview files. The total size of these files can be significant.
Review questions
1. Why would you choose to make a clip offline?
2. Why would you choose to include handles when creating a trimmed project with the Project Manager?
3. Why would you choose the Project Manager option called Collect Files and Copy to a New Location?
4. What does the Remove Unused option in the Edit menu achieve?
5. How can you import a sequence from another Adobe Premiere Pro project?
6. Will the Project Manager collect Dynamic Link assets, such as After Effects compositions, when creating a new project?
Review answers
1. If you’re working with low-resolution copies of your media files, you’ll want to make your clips offline so you can recapture them or reimport them.
2. Trimmed projects include only the parts of your clips used in sequences. To give yourself some flexibility, you’d add handles; 24 frame handles would actually add 48 frames to the total duration of each clip, because one handle is added at the beginning and end of each clip.
3. If you have imported media files from lots of different locations on your computer, it can be difficult to find everything and stay organized. By using the Project Manager to collect all of the media files into one location, you’ll make it easier to manage your project media files.
4. When you choose Remove Unused, Adobe Premiere Pro removes any clips from your project that are not used in a sequence. Remember, no media files are deleted.
5. To import a sequence from another Adobe Premiere Pro project, import the project file as you would import any media file. Adobe Premiere Pro will invite you to import the entire project or selected sequences.
6. The Project Manager does not collect Dynamic Link assets when creating a new project. For this reason, it’s a good idea to create any new Dynamic Link projects in the same location as your project folder or in a dedicated folder for your project. This way, it is easier to locate and copy the assets for the new project.