9. Messaging, Chatting, and Socializing

In this chapter, you explore the fine points of texting with the Messaging app, using Flipboard to stay current with your favorite social networking sites, and participating in chat sessions. Topics include the following:
→ Sending and receiving text and multimedia messages, managing conversations, and configuring Messaging
→ Using Flipboard to keep up with news, entertainment, and social networking friends and colleagues
→ Using imo and ChatON to participate in chat sessions
After mastering the calling features of the Galaxy S 4, many users want to explore the world of texting—the exchange of short text and multimedia messages. Compared to a phone call, texting is equally immediate but considerably briefer and less intrusive. This chapter also introduces you to Flipboard, so you can stay up to date with what’s happening in your favorite social networking sites, and—if you’re so inclined—to connect with friends on popular chat services.
Text and Multimedia Messaging
Phone calls can be time-consuming and, depending on the caller’s timing, intrusive. To get a quick message to a friend or colleague, you can text that person by sending a text or multimedia message. A message exchange between you and another person is called a conversation or thread. The messaging process is similar to what you’re probably familiar with from Yahoo! Messenger, Microsoft Messenger, iChat, or Google Talk online chats. Either party can start a conversation. After the conversation is initiated, it can progress in a back-and-forth manner with each person’s contributions shown in colored balloons.
Two types of messages can be exchanged: Short Message Service (SMS) text messages and Multimedia Messaging Service (MMS) messages to which you’ve attached a photo, video or audio clip, or similar item. Although text messages are normally exchanged between mobile phones, your service may also allow you to text to an email account or landline.
Texting is strikingly similar to emailing. You specify recipients, compose the message text, and—optionally—add attachments. The main differences are that texting generally occurs between mobile phones, the messages must be short (160 characters or less), and a subject is optional rather than the norm.
You can use the Messaging app to create both text (SMS) and multimedia (MMS) messages. When creating a message, what distinguishes a text message from a multimedia message is that the latter contains an attachment, such as a photo or video clip.
Some Differences Among Carriers
Different carriers have slightly different messaging features, determined by their implementation of text and multimedia messaging. For instance, although Sprint can receive attached contact info from AT&T users, the reverse isn’t true. Similarly, Settings options depend on your carrier, too. As a result, not all the information in this section will apply to all users, and you may find that a few options and procedures available to you aren’t discussed.
Composing a Text Message (SMS)
A text message can contain only text and is limited to 160 characters. If a message is longer, it is transmitted as multiple messages but recombined on the recipient’s screen.
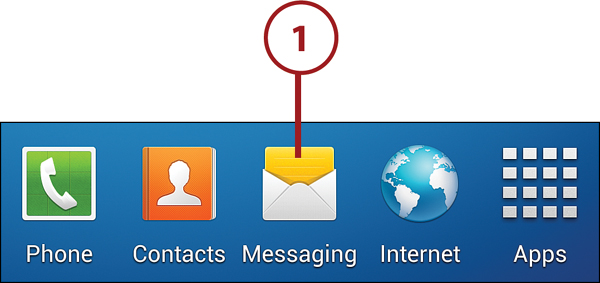
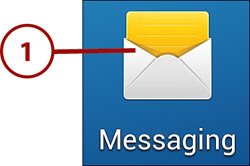
1. Tap the Messaging icon at the bottom of the Home screen. (If you’ve removed the Messaging shortcut, tap Apps and then tap Messaging.)
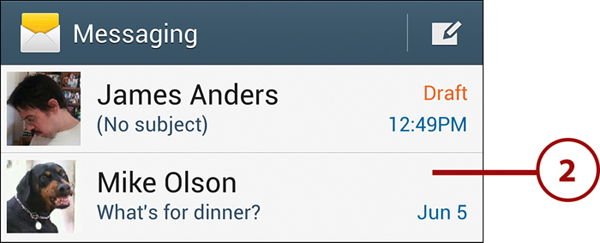
2. A screen showing all ongoing conversations appears. Tap the Compose Message icon.

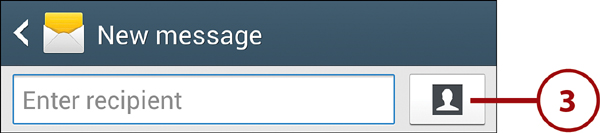
3. A message can have one or multiple recipients. To choose recipients from your stored contacts, tap the Contacts icon. (If you know that the recipient doesn’t have a Contacts record, type the person’s mobile phone number in the Enter Recipient box and skip to step 7.)
Adding Recipients by Typing
Another method of adding recipients is to type part of the person’s contact record (such as a name, number, or email address) in the Enter Recipient box and select the correct entry from the match list.
Finding Recipients in Contacts
To find someone in Contacts, you can scroll through the list by flicking up or down, go directly to an alphabetical section of the list by tapping its index letter, or drag down or up in the index letters and release your finger when the first letter of the person’s name displays.
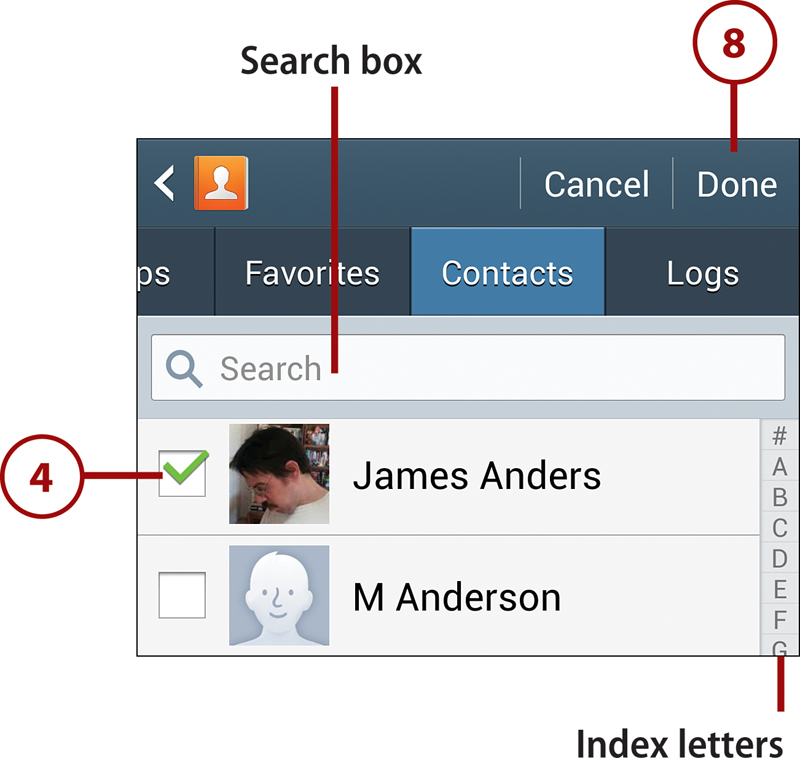
You can also filter the list to show only certain people. To view people with whom you’ve recently spoken or messaged, tap the Logs tab. Tap the Favorites tab to restrict the list to contacts you’ve marked as favorites. To search for a person, type part of the name, email address, or phone number in the Search box; press the Back key to view the results; and tap the person’s check box.
4. Select a recipient from the list by tapping the person’s check box.
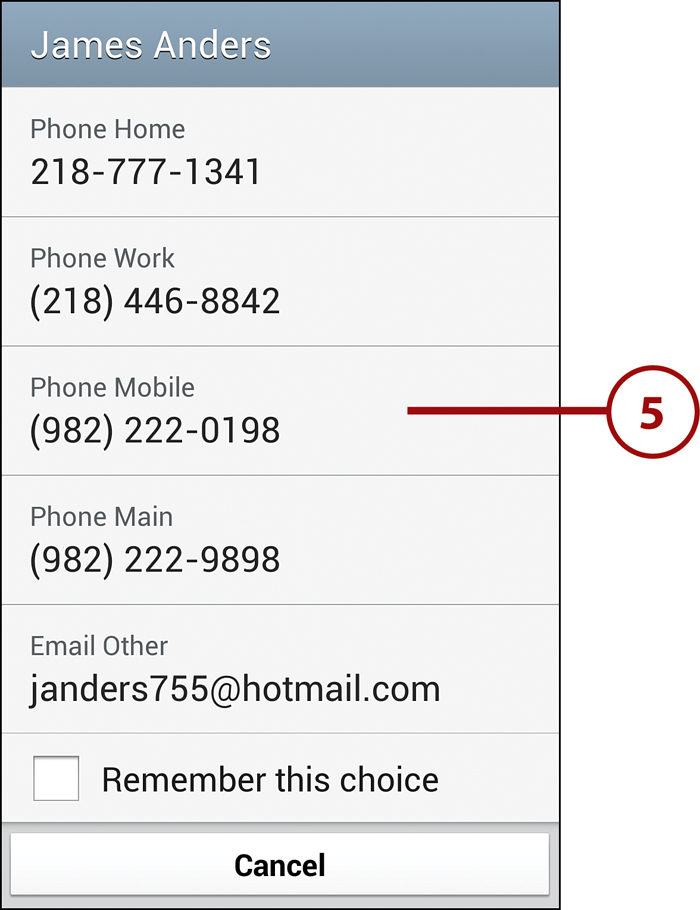
5. If the selected contact has only one phone number or you’ve set a default number for him, that phone number is automatically used. Otherwise, a screen appears that lists the person’s numbers and email addresses. Tap the number to which you want to send the message. The contact list reappears and the person’s name is checked as a recipient.
Limited or Default Contact Info
If the selected record has only one piece of usable contact information (a single phone number or an email address) or you’ve set a default number for the person, Messaging assumes that’s where you want to send the message. In that case, no selection screen appears and the person’s record is automatically checked. Before sending the message, you may want to open the Contacts app and ensure that the person’s record contains a mobile phone number.
6. To add other recipients, select them from the contact list as you did in steps 4 and 5.
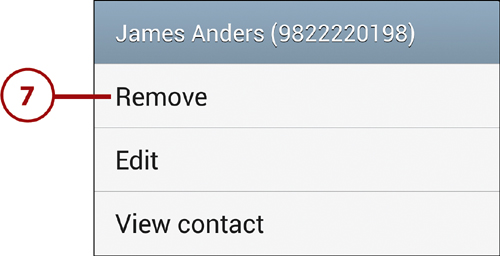
7. Optional: To remove a recipient, tap the Enter Recipient box to show all current recipients. Tap the recipient that you want to remove, and then tap Remove. Similarly, you can modify the person’s phone number or email address by tapping Edit.
8. When you finish, tap Done to create the recipient list. The message screen reappears.
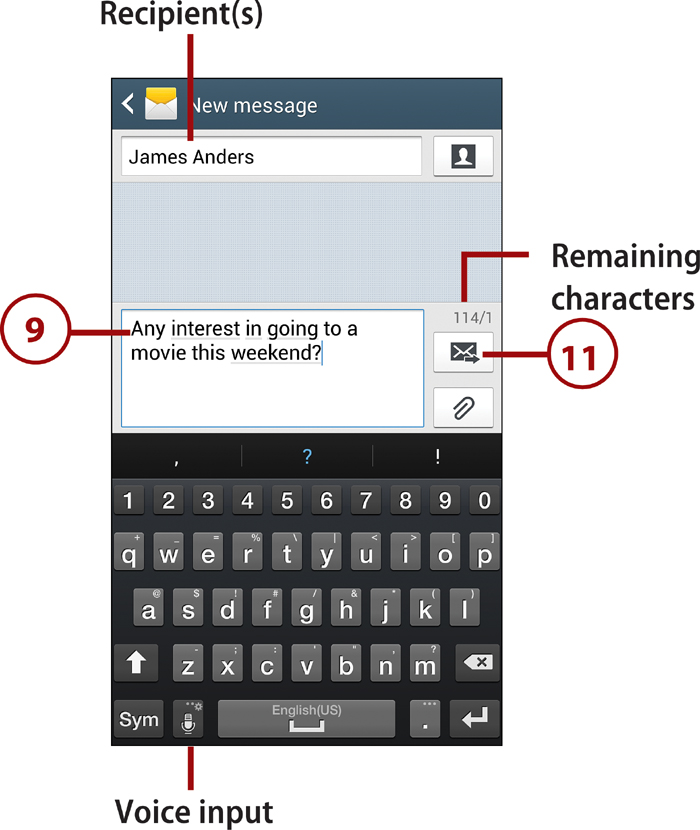
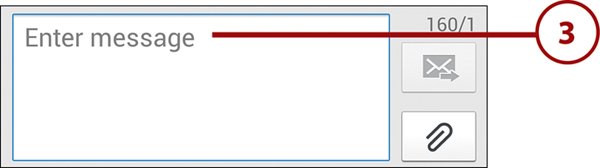
9. Enter your message in the large text box. You can type the message or tap the microphone key to dictate your message. (If the microphone isn’t shown on the key, press and hold the key, and then select the microphone.) As you type or dictate, the number of remaining characters is shown above the Send button.
Adding a Subject
Unlike email messages, text messages generally don’t have a Subject. If you’d like to add one, ensure that the Enter Message box is active, press the Menu key, and tap Add Subject.
Inserting Smileys
If you like to insert a smiley (also called an emoticon) into a message you’re creating, press the Menu key, tap Insert Smiley, and select the smiley that you want to insert. The smiley appears at the text insertion mark.
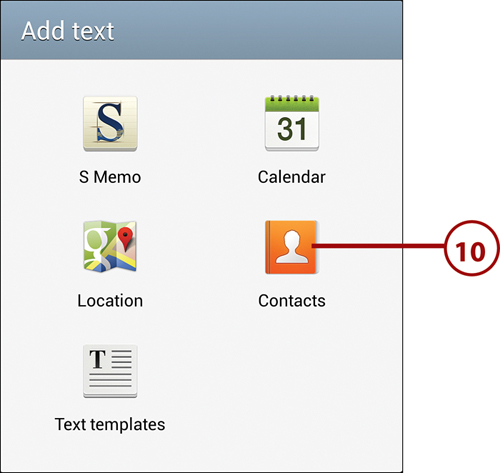
10. Optional: To insert a location, contact record, memo, calendar item, or a stock phrase into the message, press the Menu key, tap Add Text, and select an option.
11. Tap the Send button to transmit the message.
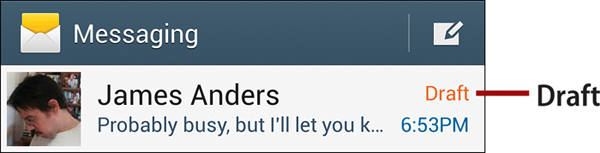
Saving a Message as a Draft
If you aren’t ready to send the message, you can save it as a draft by pressing the Back key. To later open the message, select it in the conversation list. You can then edit, send, or delete it.
>>>Go Further: Lazy Messaging
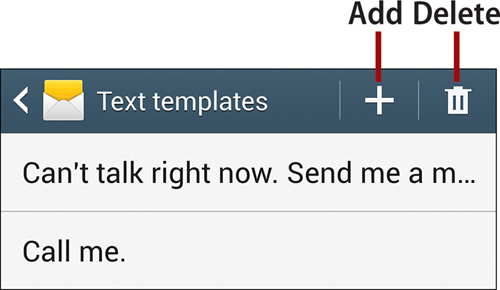
• To delete unwanted phrases, tap the Trash icon, select the phrases that you want to delete, and tap Done.
• To add a new phrase, tap the + (plus) icon, enter the phrase, and tap Save.
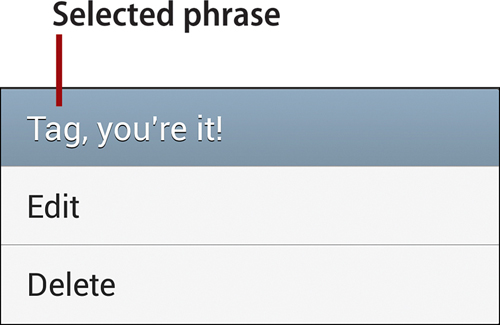
• To edit or delete a phrase, press and hold the phrase, and tap Edit or Delete in the menu that appears. Tap Save when you finish editing or tap OK to confirm the deletion, respectively.
>>>Go Further: More Ways to Start a Conversation
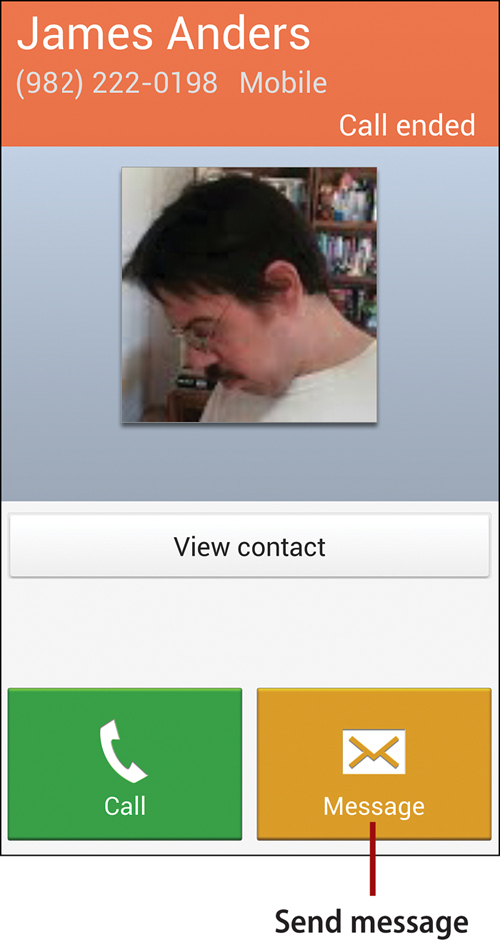
• Immediately after completing a call, you can begin a conversation with the person by tapping the envelope icon.
• To text someone to whom you’ve recently spoken, open the call log by tapping Phone on the Home screen and then tapping the Logs tab. Find the person in the log and then swipe the entry to the left. You can use this swipe technique in Contacts and Favorites, too. (You can also swipe to the right to initiate a phone call to the person.)
• Open Contacts, select the person’s record, and then tap the envelope icon to the right of the mobile phone number.
• You can also send a message to a group you’ve defined (see “Working with Contact Groups” in Chapter 5). Launch Contacts, tap the Groups tab, press and hold the group name, and tap Send Message. Select the group members that you want to message and tap Done.
>>>Go Further: More Message-Composition Options
• Embedded links in messages. If a message contains a web address, email address, or phone number displayed as underlined text, the recipient can tap the text and choose Open URL, Send Email, or Call to visit the page using the phone’s browser, address a new email message to the person, or dial the phone number, respectively.
• Texting to email or a landline. If a recipient doesn’t have a mobile phone, you can send text messages to an email address. Some carriers, such as Sprint, even allow you to send texts to a landline phone. Create the message as you normally would, but specify an email address or landline number in the Enter Recipient box. As appropriate, the text message is emailed, or the service calls the landline and a computer voice reads the text when the phone is answered. (Emoticons are read, too!)
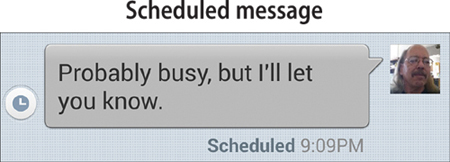
• Schedule a message. Rather than send a message immediately, you can set a date and time at which it will be delivered. (The scheduled time must be at least 6 minutes in advance.) Prior to tapping the Send button, press the Menu key, and tap Scheduled Message. Set a date and time for delivery, tap OK, and tap the Send button. A copy of the message (in gray) with the scheduled delivery time appears in the conversation. When sent, the message color changes to match that of your normal outgoing messages.
Composing a Multimedia Message (MMS)
A multimedia message (MMS) is any message that has one or more attachments—regardless of the attachment type(s).
1. Perform steps 1 through 10 of the “Composing a Text Message (SMS)” task.
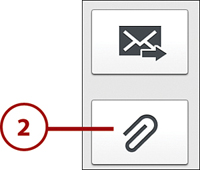
2. At any time during the message-creation process, tap the paper clip button.
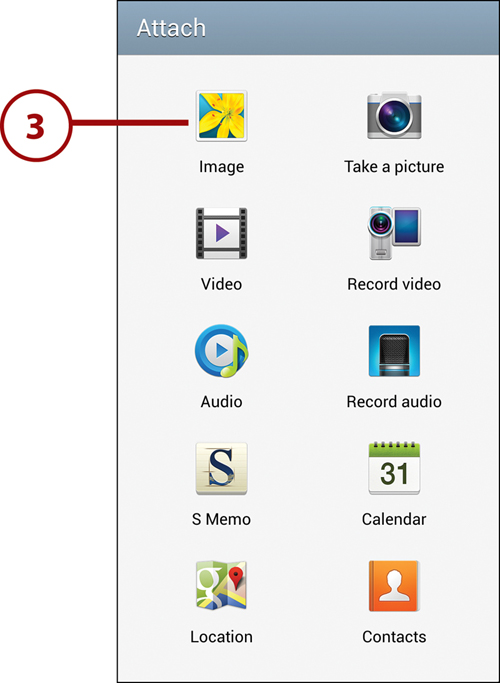
3. Select the item type that you want to attach to the message. If you’re attaching a file that’s already on your phone, continue with step 4. If you want to create a new file or insert a map location, skip to step 5.
4. Attach an existing file. Select the item(s) to attach, opening enclosing folders if necessary. For most attachment types, you complete the selection process by tapping Done. Go to step 6.

Size Matters
Existing video clips and audio recordings such as songs are often too large to transmit as part of an MMS message. Messaging rejects such items as attachments. Photos, on the other hand, are automatically compressed to meet MMS size limits.
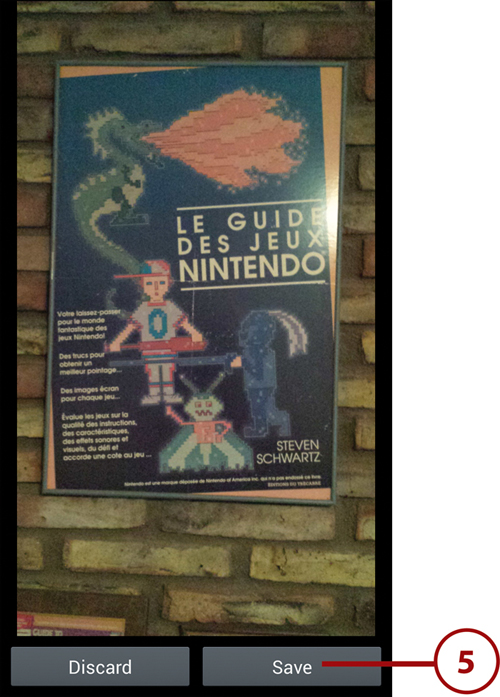
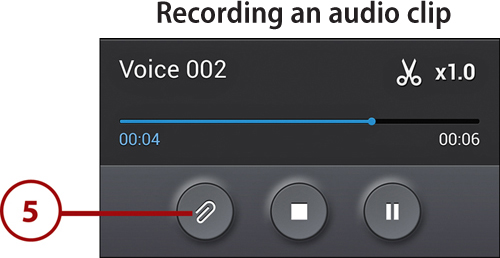
5. Create an attachment. Take a new picture or capture a video, and tap Save to add it to the message or Discard to try again. When you finish recording an audio clip, tap the Stop button to save it, listen to the clip, and then tap the Attach button.
6. A thumbnail representing the media is inserted into the message or the item is shown as a named file attachment. As you add items, the total size of the message and attachments updates.
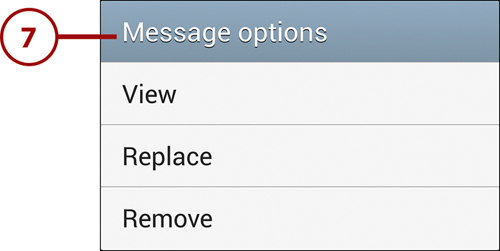
7. If you want to view/play, replace, or remove a multimedia item, press its thumbnail and select the appropriate option. (If you remove all attachments from a message, it reverts to a text message.)
Another Removal Option
You can also remove a multimedia item by selecting it and tapping the Delete key.
8. When the message is complete, tap Send.

Managing Conversations
There’s more to participating in a conversation than just creating new messages. The following tasks explain how to respond to new message notifications; continue, review, and delete conversations; and search for messages.
Responding to a New Message Notification
If you’re in Messaging and a message for the current conversation arrives, it simply appears onscreen as a new balloon. If you’re doing something else with the phone, the phone is resting quietly on your desk, or you’re viewing a different conversation, a new message notification appears.
Depending on your Messaging settings (see “Configuring Messaging Settings,” later in this chapter) and what you’re doing with the phone, you may be notified of a new message in one of several ways.
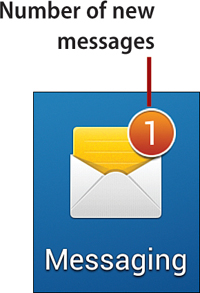
• The message text appears briefly in the status bar and is replaced by an envelope icon. The Messaging icon on the Home screen shows the number of new messages.
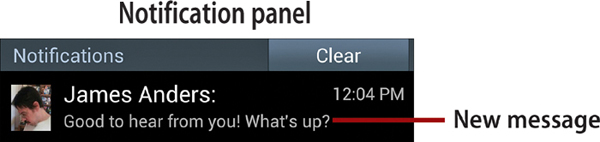
• You can also view the new message by opening the Notification panel and tapping the new message notification.
• Finally, you can launch Messaging (if it isn’t currently running) and open the conversation that contains the new message.

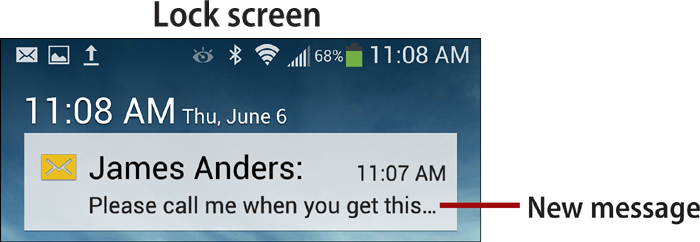
Lock Screen Notification
If your screen is dark when a message arrives, press the Power button to display your lock screen. To view the announced message in Messaging, tap the new message indicator. You can also launch Messaging from this screen—whether a new message is waiting or not—by swiping the Messaging icon at the bottom of the screen upward (if it’s present).
Continuing a Conversation
The default length for a conversation on your phone is 200 text or 20 multimedia messages—whichever occurs first. As long as the length limit hasn’t been exceeded, a conversation can be continued immediately or whenever either participant desires—days, weeks, or even months after it was begun.
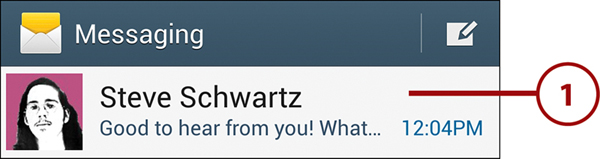
1. If Messaging isn’t running, launch it by tapping the Messaging icon on the Home screen.
2. On Messaging’s main screen, select the conversation that you want to continue. The conversation appears.
3. Tap in the Enter Message box.
4. Create a text or multimedia message as described in “Composing a Text Message (SMS)” or “Composing a Multimedia Message (MMS),” earlier in this chapter.
5. Tap the Send button to transmit the message. It is appended to the end of the conversation.

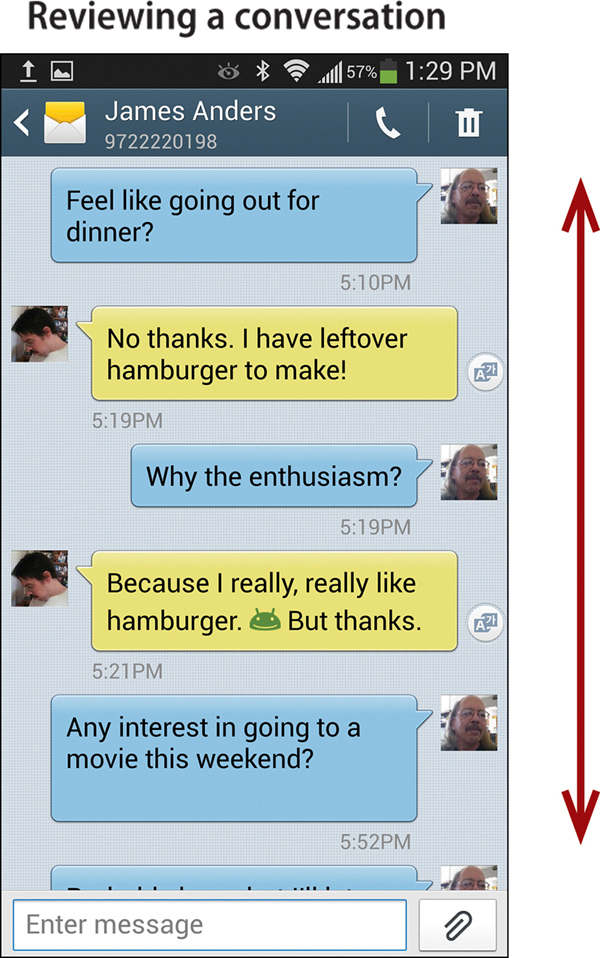
Reviewing a Conversation
As long as you haven’t deleted a conversation, you can reread it whenever you like. This is especially useful when a conversation contains important information, such as the time of an upcoming meeting, a phone number, a web address (URL), or driving directions. To review a conversation, select it on the Messaging screen (as described in the previous task) and scroll through the messages by flicking or dragging up and down.
Deleting Conversations
For the sake of privacy, saving storage space, or eliminating clutter in the conversation list on the Messaging main screen, you can delete entire conversations (threads).
1. Launch Messaging by tapping its icon on the Home screen. (If you’re currently in a conversation, press the Back key until the conversation list appears.)
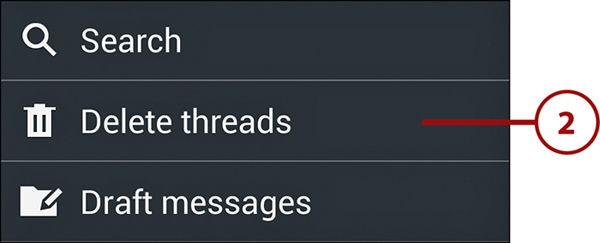
2. Press the Menu key and tap Delete Threads.
Deleting a Single Conversation
To delete a single conversation, press and hold the conversation, and tap Delete Thread in the dialog box that appears.
3. Select the conversations that you want to delete, or tap Select all to select all conversations.
4. Tap the Delete button.

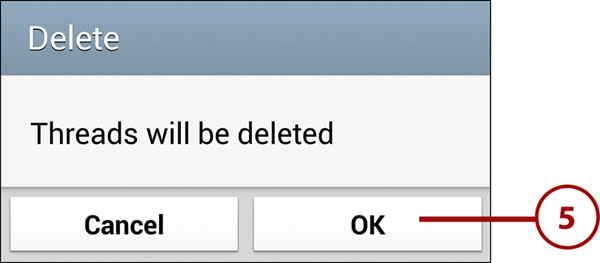
5. Confirm the conversation deletion(s) by tapping OK.
Deleting Messages
In addition to deleting entire conversations, you can selectively delete messages from a conversation.
1. In Messaging, open the conversation from which you want to delete messages.
2. Press the Menu key and tap Delete Messages.

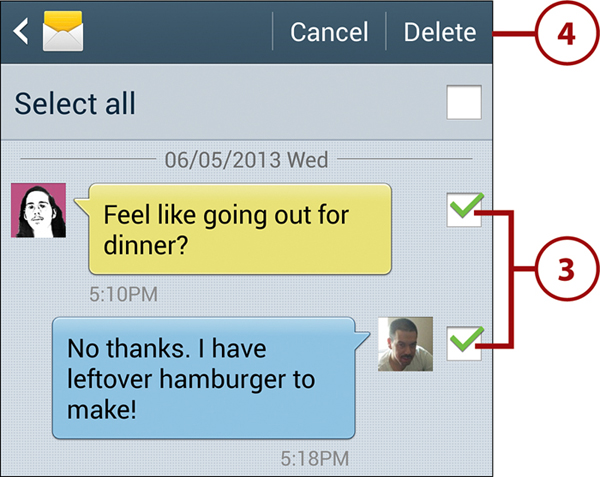
3. Scroll through the conversation, and select each message that you want to delete.
4. Tap the Delete button.
5. Tap OK to confirm the deletions.

Deleting a Single Message
To delete a single message in a conversation, you can press and hold the message, and then tap Delete Message in the Message Options dialog box that appears.
Other Options for Individual Messages
In addition to deleting individual messages, you can copy message text to the Clipboard (for pasting elsewhere), lock a message (to prevent it from being deleted), save the multimedia elements in an MMS message to an SD card, forward a message to others, or view a message’s properties.
1. Within a conversation, press and hold a message for which you want to display options. The Message Options dialog box appears. SMS and MMS messages offer slightly different options—as explained in step 2.
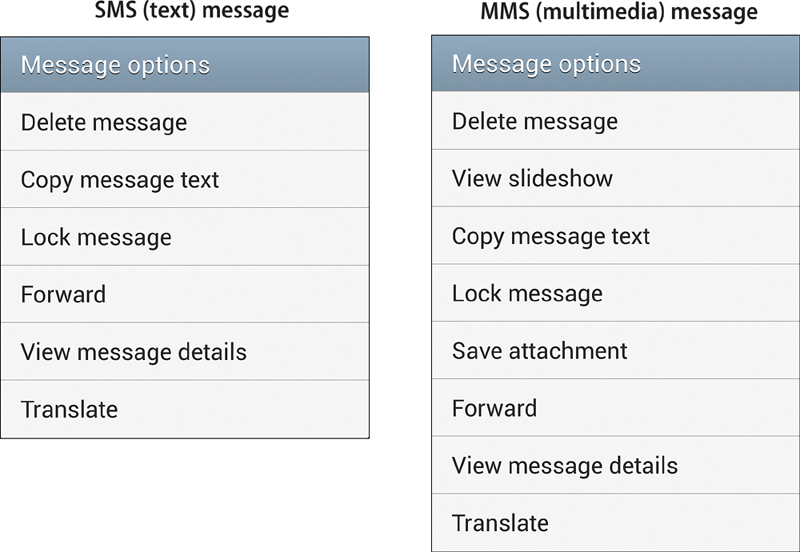
2. Tap a menu option to perform one of the following actions on the message:
• Delete Message. Delete the current message.
• View slideshow (MMS messages only). Displays message text and certain types of attachments (such as photos) as a slideshow.
• Copy Message Text. Copy the message text to the Clipboard, making it eligible for pasting into another message or app, such as an email message.
• Lock Message. Prevent an important message from being inadvertently deleted—even if you delete the conversation that contains the message. After a message has been locked, the Lock Message command is replaced by Unlock Message. You can optionally override the lock while attempting to delete the message or delete its conversation.
• Save Attachment (MMS messages only). Save an attached item, such as a picture or video, to the Download folder.
• Forward. Send the message to another recipient—passing along a picture, phone number, address, or driving directions, for example.
• View Message Details. Examine the message properties, such as who sent it and when, the date and time it was received, and its total size including attachments.
• Translate. Translate the message text from its current language to another one.
Searching for Messages
You can search all conversations for specific text.
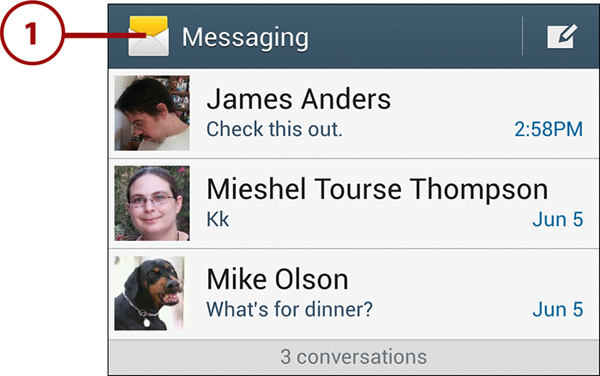
1. If Messaging isn’t currently running, tap its Home screen icon.
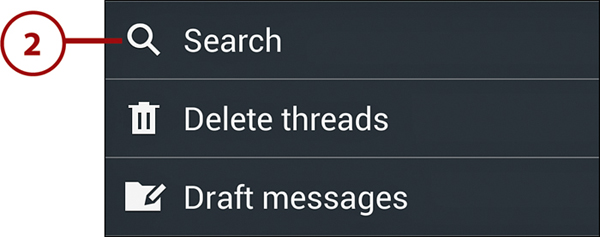
2. On the Messaging main screen (the conversation list), press the Menu key and tap Search. A Search Messages text box appears.
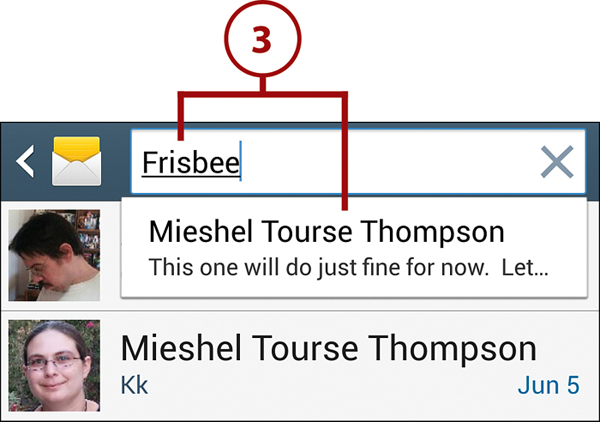
3. Enter the search text; matches appear as you type. Continue typing until the desired message is shown, and then tap to select it.
4. The conversation appears and displays the selected message. The matching text is shown in blue. (Note that there may be other matches in the conversation.)

Configuring Messaging Settings
You can customize the way Messaging works by changing its settings. All changes take effect immediately. Note that Settings options differ among carriers, depending on the features that each supports. The most common settings are discussed here.
1. Launch Messaging. If you’re already in or viewing a conversation, press the Back key until the conversation list appears.
2. Press the Menu key and tap Settings. The Settings screen appears. Scroll as necessary to view the entire menu. The following steps explain the most important settings (organized by category) and list the carriers that support each setting. When no carrier is listed for a setting, all carriers support it.
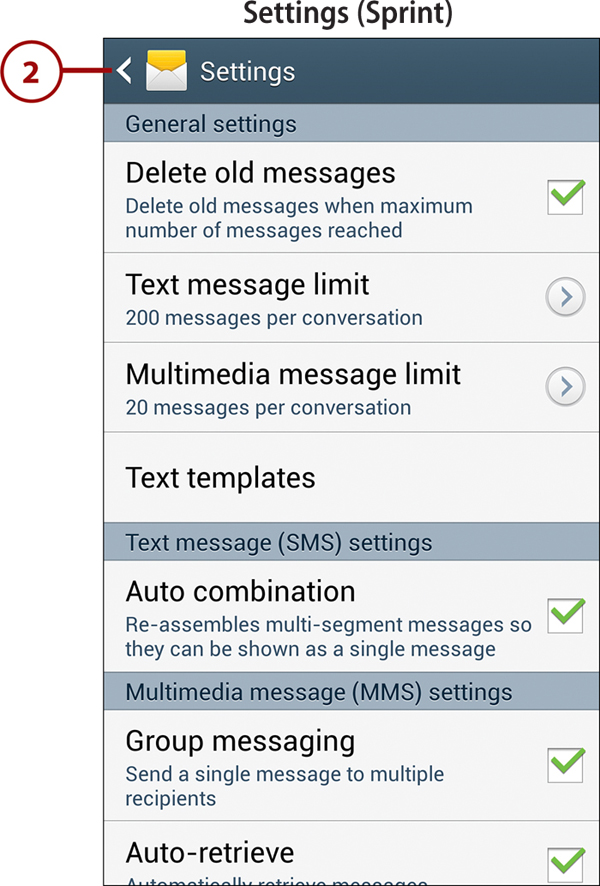
3. General Settings. You can modify these settings to free up space on the phone.
• Enable Delete Old Messages to automatically delete the oldest messages in any conversation that exceed either the text or multimedia message limit (see the next bullet). When disabled, the maximum text and multimedia messages per conversation are ignored.
• Tap Text Message Limit or Multimedia Message Limit to change the maximum number of messages of that type that are allowed in a conversation.
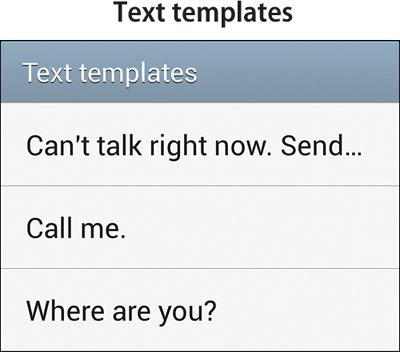
• A text template is boilerplate text that you can use to quickly create messages or responses to incoming calls. Examples include “What’s up?” and “Please call me.” Tap Text Templates to modify the current list of templates, as described in “Lazy Messaging,” earlier in this chapter. (T-Mobile users can find this command in the normal menu rather than in Settings.)
• Verizon: Enable Restore Messages to restore saved messages.
4. Text Message (SMS) Settings. These settings govern the creation and handling of text messages.
• Sprint, U.S. Cellular: When Auto Combination is enabled, text messages that exceed the maximum length limit are automatically combined into single messages. In general, enabled is the preferred setting.
• T-Mobile, Verizon, U.S. Cellular: When Delivery Reports is enabled, you’re notified when messages are successfully delivered.
5. Multimedia Message (MMS) Settings. These settings govern the creation and handling of multimedia messages.
• When Auto-retrieve is enabled, the entire content of each multimedia message is automatically retrieved—the message header, body, and attachments. Otherwise, only the message header is retrieved. (If you’re on a limited data plan and have friends who constantly attach material to their messages or you find that Auto-retrieve uses too much of your battery charge, you might want to disable this setting.)
• Enable MMS Alert if you want to be notified that the message you’re creating is a multimedia message rather than a text message. If messaging or data charges are a concern for you, enabling this setting can be useful.
• AT&T, Sprint, U.S. Cellular, Verizon: When Group Messaging is enabled, you can create a single message for delivery to multiple recipients. When disabled, the carrier sends a separate copy of the message for each specified recipient.
• T-Mobile, U.S. Cellular, Verizon: When Delivery Reports is enabled, you’re notified when messages are successfully delivered.
• T-Mobile: When Read Reports is enabled, a request to be notified when the message has been read is also sent.
• Sprint, T-Mobile, U.S. Cellular, Verizon: When Roaming Auto-Retrieve is enabled, MMS messages and their contents are automatically downloaded even when you’re roaming.
• AT&T, T-Mobile: Setting a Creation Mode enables you to specify the type of multimedia (MMS) messages that you can create. The intent is to avoid creating messages for which your plan assesses special charges. Contact your carrier for the proper setting: Restricted, Warning, or Free.
6. Display Settings. The following settings (supported by all carriers) determine the appearance of conversations.
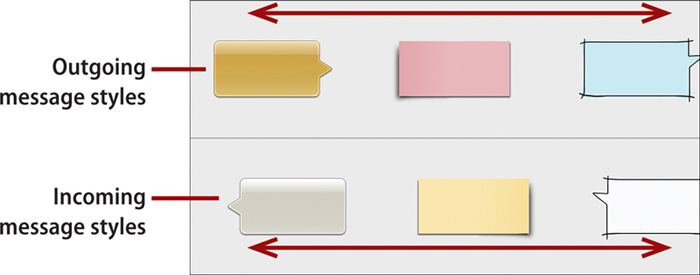
• Bubble Style enables you to vary the color and/or style of the message bubbles. The selected top bubble is used to display your messages, and the bottom one is used for messages received from others. (The top and bottom sets scroll horizontally—and independently—to show additional colors and styles.) Select a top and a bottom bubble style, and then tap Save.
• Background Style enables you to specify a different color background or a photo on which to display the conversations. The style thumbnails scroll horizontally. Select a style and tap Save. (Select the first thumbnail to use an existing image or take a photo to use as the background.)
• When enabled, Use the Volume Key lets you use the hardware volume control on the left side of the phone to increase or decrease the size of message text.
7. Push Message Settings (AT&T, T-Mobile). When Push Messages is enabled (default setting) and new messages are received by the network, they are pushed to your phone. That is, you don’t have to perform an action to receive the messages—they are simply transmitted to you.
8. Cell Broadcast (CB) Settings (AT&T). When CB Activation is enabled, your phone can receive messages that are designated for many users within a specified area; that is, broadcast messages. Normal SMS and MMS messages are intended for one-to-one or one-to-few transmission. You can modify the Channel Configuration setting (specifying the channel on which you’ll receive CB messages) only when CB Activation is enabled.
9. Notification Settings. The following settings (supported by all carriers) determine whether you receive notifications of newly received messages, as well as the manner in which the notifications are presented.
• Enable Notifications if you want to receive one or more notifications when a new message is received. To specify the types of notification methods to use, you must first enable this setting.
• Tap Select Ringtone to pick a ringtone to announce new messages. Select a ringtone, and then tap OK.
Ringtone Options
When you tap a ringtone on the Ringtone screen, its sound plays—enabling you to sample many ringtones before committing to one. If you’d rather not hear a ringtone when a message arrives, select Silent.
• With Vibrate enabled, the phone vibrates whenever a new message is received.
• Tap Message Alert Repetition to specify how frequently you will be notified of the receipt of new messages.
• When Preview message is enabled, notifications also appear in the status bar and on the lock screen.
Want to Know More?
For more information about message notifications, see “Responding to a New Message Notification,” earlier in this chapter.
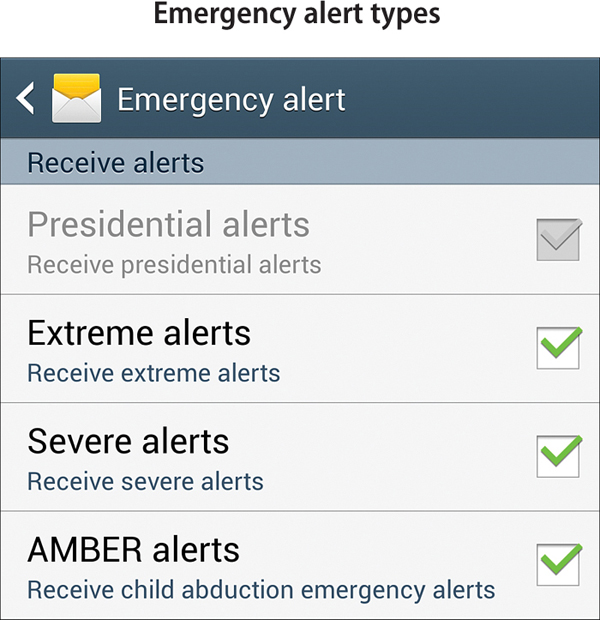
10. Emergency Message Settings. These settings are used to specify the types of emergency alert messages that you want to receive and special notification options that will be applied.
• Tap Emergency Alerts to enable/disable different types of alerts. By default, all alert types are enabled. You can disable any type of alert other than Presidential.
• Tap Alert Reminder to specify how frequently you want to be reminded of an active alert.
11. Signature Settings. This pair of settings (supported by all carriers) enables you to append a text signature to each outgoing message—in the same fashion as you can with email messages. Add Signature must be enabled to create or edit the Signature Text.
12. Spam Message Settings. These settings (supported by all carriers except Verizon) enable you to reduce or avoid unwanted (spam) messages. Spam Settings is the master control—that is, it must be enabled to use any of the spam options.
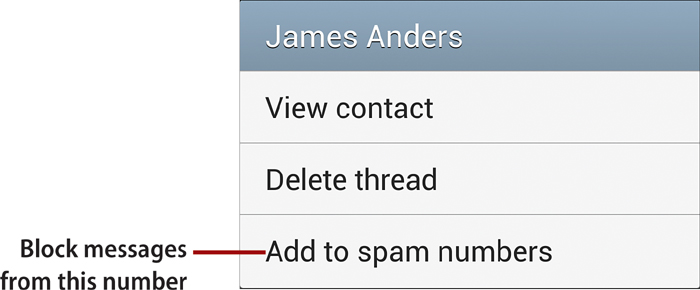
• Tap Add to Spam Numbers to manually add numbers of people and companies whose messages you want automatically blocked.
Add a Spam Number Without Typing
When you receive a spam message, press and hold the entry in the conversation list, and tap Add to Spam Numbers in the dialog box that appears.
• Similar to creating a junk mail rule in an email program, you can specify a key phrase or words (such as Viagra, credit, or mortgage) that are frequently found in spam messages that you receive. Tap Add to Spam Phrases and enter phrases which—if found in an incoming message—will result in blocking the message’s delivery.
• Enable Block Unknown Senders to block messages from people and companies who have no Contacts record.
13. When you finish reviewing and changing settings, press the Back key. Changes take effect immediately.
Restore the Default Settings
You can revert to the default Messaging settings by pressing the Menu key and tapping Restore Default Settings.
Social Networking with Flipboard
In addition to making phone calls, playing games, and listening to your favorite tunes, you can use your Galaxy S 4 for social or business networking, while keeping up with the news of the day. As an example, you can use Flipboard to read articles, watch videos, and follow feeds posted by your Facebook, Twitter, and LinkedIn friends and business colleagues. If you’re looking for a more interactive experience, you can use your phone to participate in text chats with friends—as explained in “Chatting On Your Galaxy S 4,” at the end of this chapter.
Dedicated Apps
Rather than use Flipboard for a full-blown—and potentially overwhelming—social networking experience, you may prefer to install dedicated apps for the social networking sites that you consider most important. The major sites, such as Facebook, Twitter, and LinkedIn, all have dedicated official Android apps that you can download from Google Play/Play Store.
Adding Social Networking Accounts
One of the first steps in using Flipboard is to link your social networking service (SNS) accounts that you want to track. If you aren’t currently a member of a social network, visit its website and sign up first. Flipboard currently supports Facebook, Twitter, LinkedIn, Google+, Google Reader, Instagram, Flickr, Tumblr, 500px, Sina Weibo, Renren, SoundCloud, YouTube, New York Times, and Financial Times.
1. From the Home screen, launch Flipboard by tapping Apps and then Flipboard.
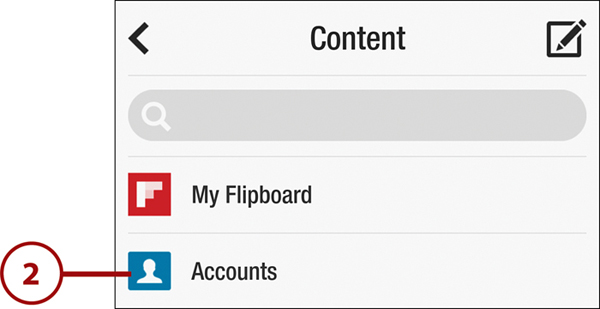
2. To link an account to Flipboard, tap the menu icon (three stacked bars) and then tap Accounts on the screen that appears.
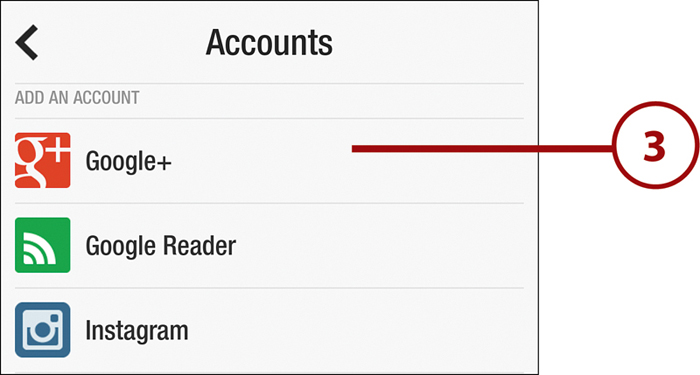
3. Scroll to the Add an Account section, and tap the name of the account that you want to track with Flipboard. Only accounts that you haven’t already linked are listed.
4. Sign into your account by entering your username (or email address) and account password. Then tap the Sign In button.
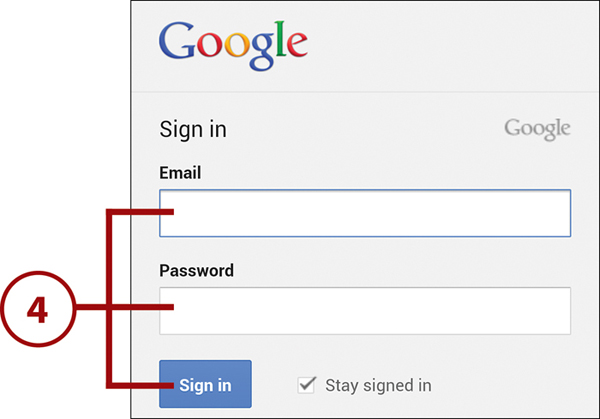
Lost Passwords
If you can’t remember your account username, email address, or password, use your browser to visit the social networking site. There’s usually a conspicuous link you can click to request the forgotten info.
5. Review the SNS’s permissions statement and tap Accept. If you don’t approve of the permission requirements, tap Cancel or No Thanks.
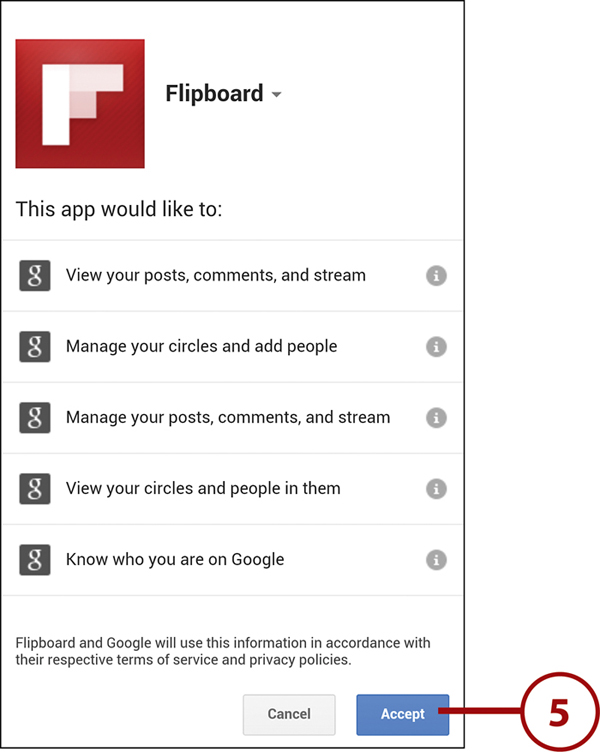
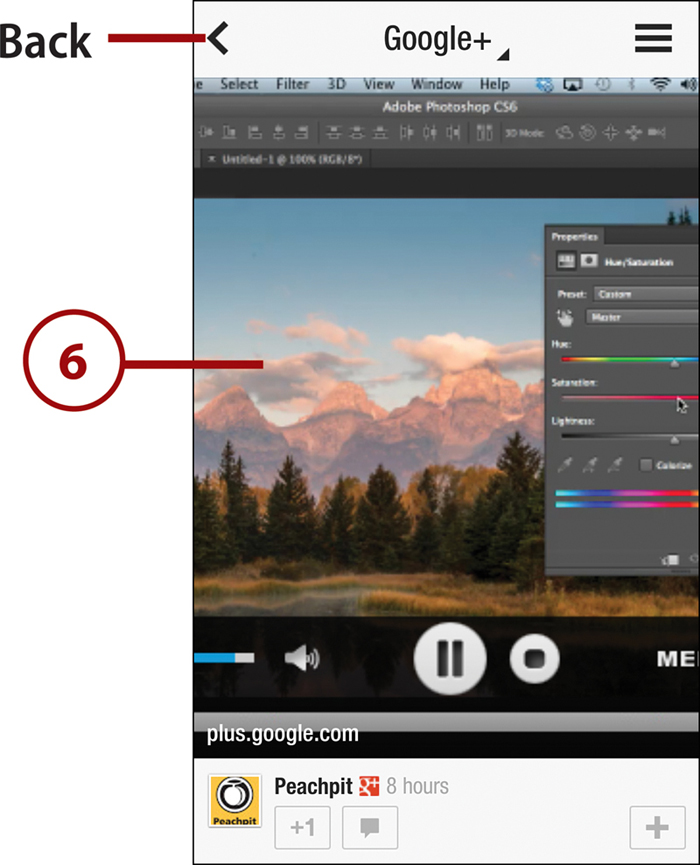
6. The site’s current feed appears. When you’re ready to return to the main Flipboard screen, tap the Back icon or press the Back key.
Removing an SNS Account
Although you can’t remove an SNS account from within Flipboard, there is a way to do it. From the Home screen, press the Menu key, tap Settings, select the Accounts tab, and tap the account that you want to remove. Tap the Remove Account button at the bottom of the screen and confirm the removal in the Remove Account dialog box.
Adding Content Feeds
In addition to SNS feeds, you can add content (such as news, music, and movies) from a variety of sources.
About the Main Pages
Flipboard’s main pages serve as a visual table of contents. The number of pages expands and contracts as you add or remove content categories and subcategories. Within these pages, every content category and subcategory has its own thumbnail that takes you directly to its content.
1. From the Home screen, launch Flipboard by tapping Apps and then Flipboard.
2. Tap the menu icon in the upper-right corner of the main page. (On other pages, the menu icon is white.)

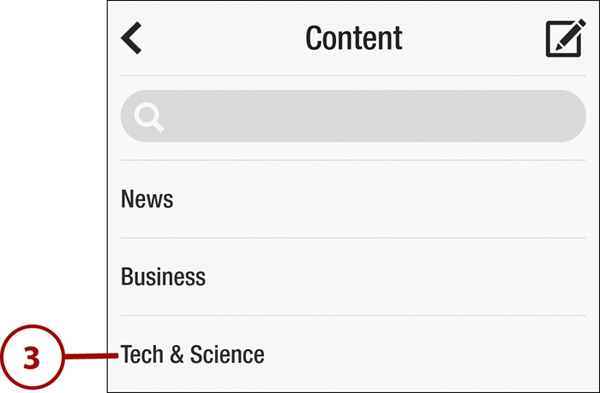
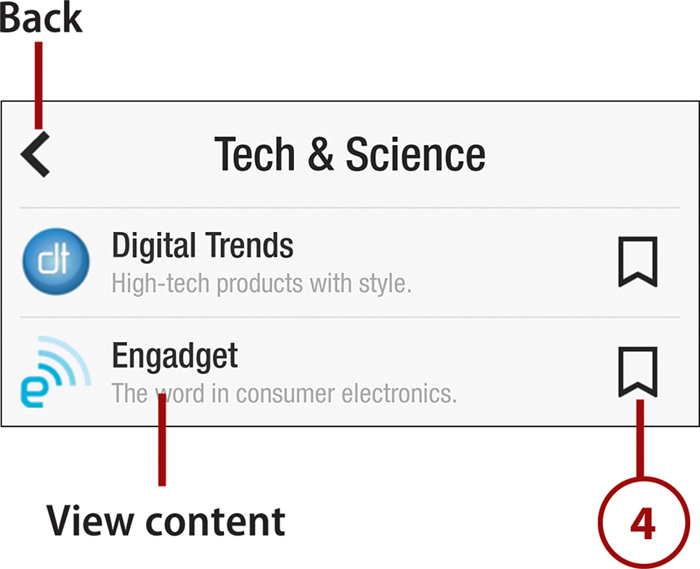
3. In the scrolling list, tap a content area that you want to configure, such as News or Tech & Science.
4. A vertically scrolling content list appears. To view a sample of a content source, tap its name. To add the source to your Flipboard feed, tap the box to the right of its name. Repeat this step for other content sources that you want to add. When you finish, tap the Back icon or press the Back key.
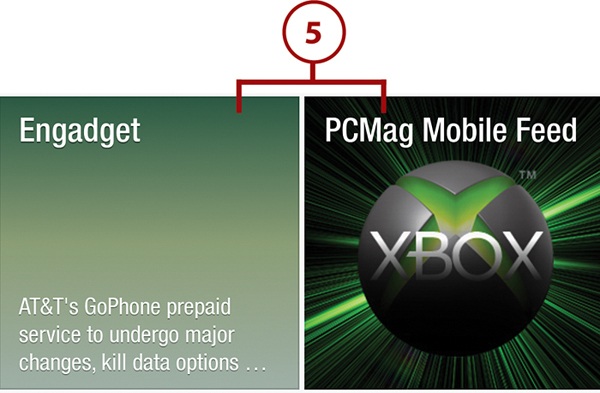
5. The selected content feeds are added and now available to you from Flipboard’s main pages.
Viewing and Interacting with Content and Feeds
You can use Flipboard to view content and status updates, as well as post your own updates.
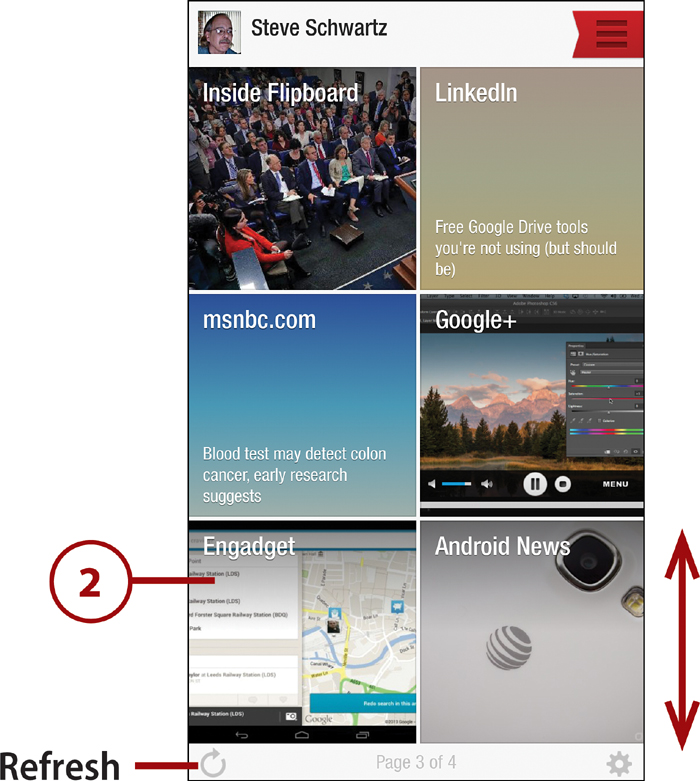
1. Launch Flipboard or, if it’s already running, tap the Back icon or press the Back key until the main pages appear.
2. To locate the content that you want to view, navigate through the main pages by flicking up and down. When you see the desired category or subcategory, tap its thumbnail.
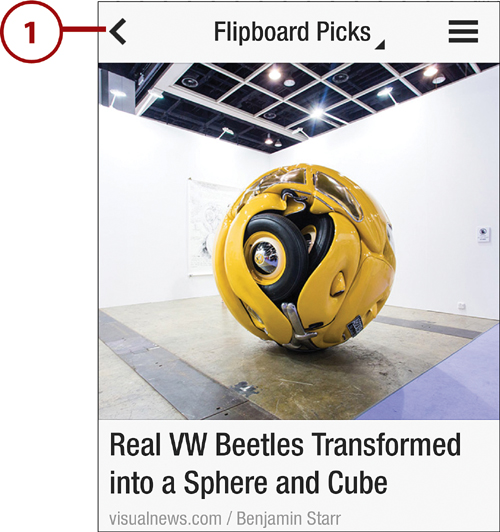
3. To navigate within a category or subcategory, flick up and down as you do in the main pages. When you see an item that you want to read or view, tap anywhere within its content to view the complete item.
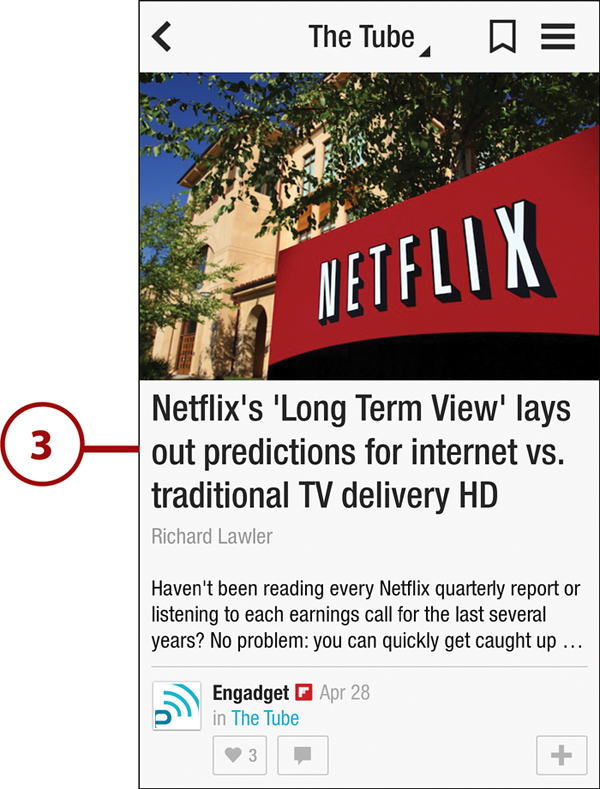
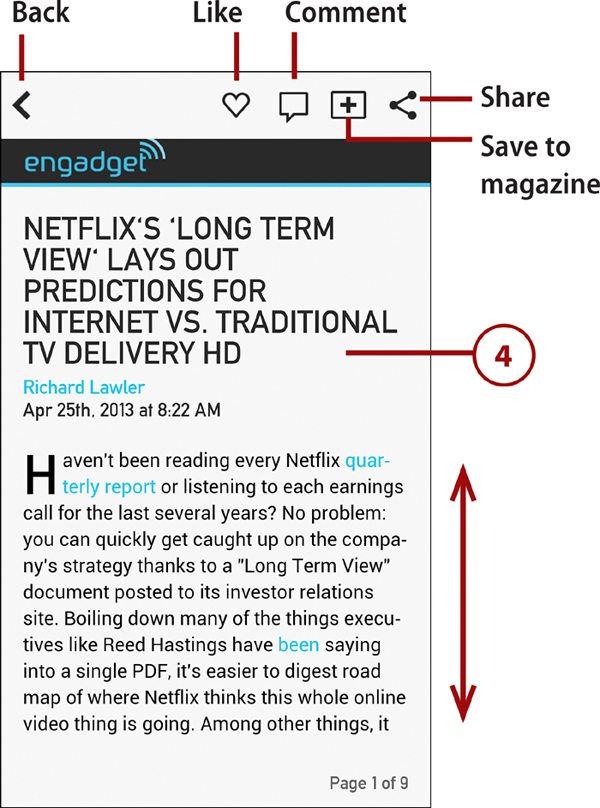
4. When reading a lengthy article, flick up and down to scroll the material. To interact with an item, you can tap icons on the page, such as Like, Comment, or Share. Different content sources and feeds have different icons and options. When you finish, tap the Back icon or press the Back key to return to the content pages.
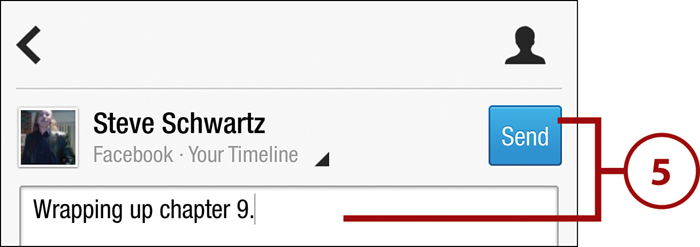
5. To post a status update, tap the menu icon on any page, tap the Compose icon on the Content page, tap your name, select the account to which the update will post, tap the Back icon, compose the update, and tap Send.
Add a Photo
To attach a photo to a status update, press the Menu key, and tap Take Photo or Choose from Library.
Chatting on Your Galaxy S 4
Before texting became popular, people relied on dedicated chat programs to conduct online conversations. Many of those same programs are now available as Android apps. Unlike texting, chat messages carry no per-message surcharge, and there’s no limit to the number of messages that can be exchanged in a billing cycle.
As an example of a general chat program with a wide audience, you should consider imo, a free app from Play Store/Google Play. (Downloading apps from Google Play is explained in Chapter 10.) Most chat programs only let you chat with other users of that program. If you have chat friends who use many different chat programs, you have only a few options:
• Install a dedicated app for each chat program and hop among them as you attempt to find friends who are online and available to chat.
• Convince your friends to switch to a specific chat service such as ChatON (discussed later) to chat with you.
imo, however, offers a simpler solution. It links to 10 popular chat services—including Yahoo! Messenger, AIM/ICQ, Google Talk, Jabber, Steam, and Facebook—enabling you to chat with friends on many services while using a single app. To learn more about imo’s features and how to use it, visit https://imo.im/android.html.
Another Chat Option: ChatON
ChatON, Samsung’s dedicated chat service, is preinstalled on many Galaxy S 4’s. If it isn’t on yours or you have a friend with a different Android phone, ChatON can be downloaded from Play Store/Google Play. Unlike imo, ChatON can be used only to chat with other ChatON users. ChatON has a clean, text message–style chat interface and includes many interesting features, such as group chats, animated emoticons, support for file attachments, and voice/video calling. All you have to do is convince your friends that they need yet another dedicated chat service/app if they want to chat with you.