11. Using GPS Apps
In this chapter, you discover how to use the phone’s GPS chip with two of the preinstalled location-based apps. Topics include the following:
→ Obtaining directions from the current location to your destination
→ Finding specific addresses and nearby businesses
The Galaxy S 4 has an embedded Global Positioning System (GPS) chip that enables the network to determine your phone’s current location. When the GPS is active, the phone can use E911 emergency location services to transmit your location (see “Emergency Calling” in Chapter 4), as well as run a variety of apps that display maps of your surroundings, provide turn-by-turn driving and walking directions, determine the distance to various locations, and show you where you are in relation to your friends.
Enabling/Disabling GPS
As with Bluetooth and Wi-Fi, you can enable and disable the phone’s GPS as needed. Because the regular polling of GPS drains the battery and consumes data, you can disable the feature when you aren’t using it.
Use any of the following methods to enable or disable GPS:
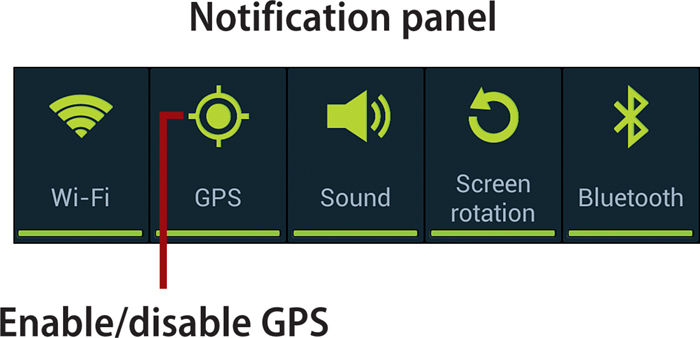
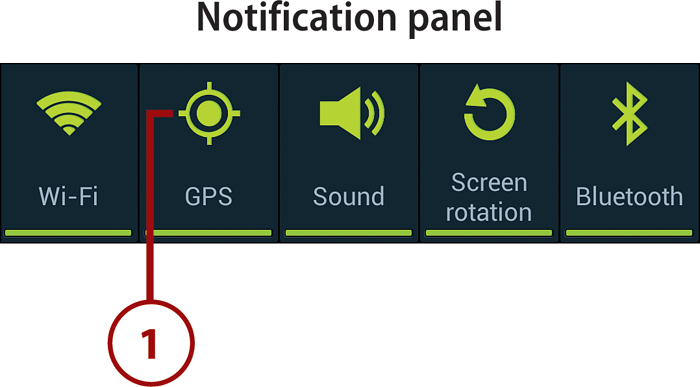
• Pull down the Notification panel and tap the GPS icon to toggle its current state.
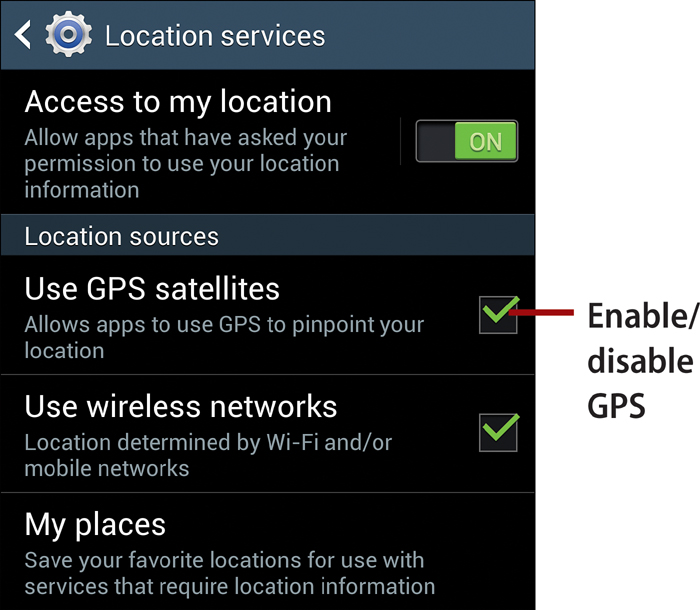
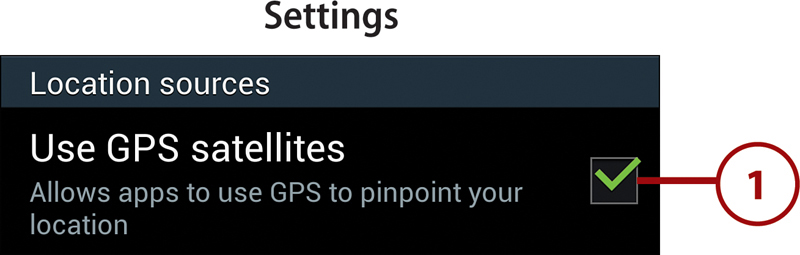
• Open Settings (switch to the Home screen and tap Apps, Settings, or use one of the other methods discussed in Chapter 1). Select the More tab and tap Location Services. Tap Use GPS Satellites to toggle its current state.
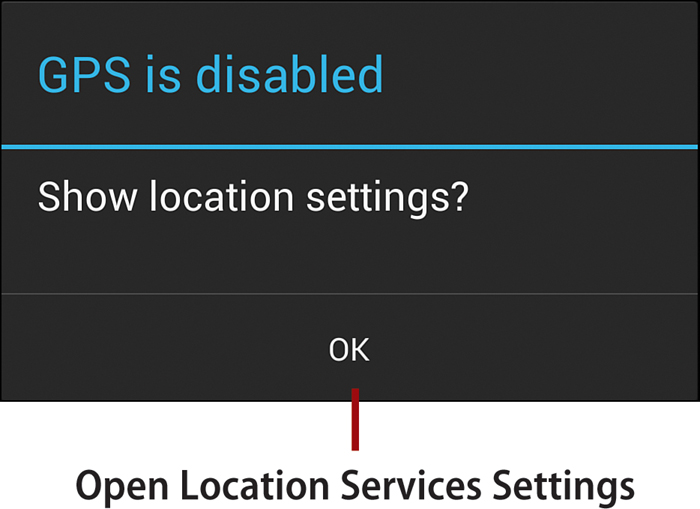
• If you perform an action in an app that requires GPS (such as requesting navigation instructions) but GPS isn’t enabled, you are usually asked to enable it in Location Services. After enabling GPS by tapping the Use GPS Satellites check box, press the Back key to return to the app.
Getting Directions
The most common use of GPS is to get turn-by-turn driving, bicycling, or walking directions from your current location (determined by the GPS) to a destination. Turn-by-turn directions are provided by Google Navigation. In addition to running this app directly, other apps such as Local and Maps link to Navigation when navigation assistance is requested. Some carriers, such as AT&T, also provide their own navigation app that you can elect to use rather than using Navigation.
Pick One—Any One
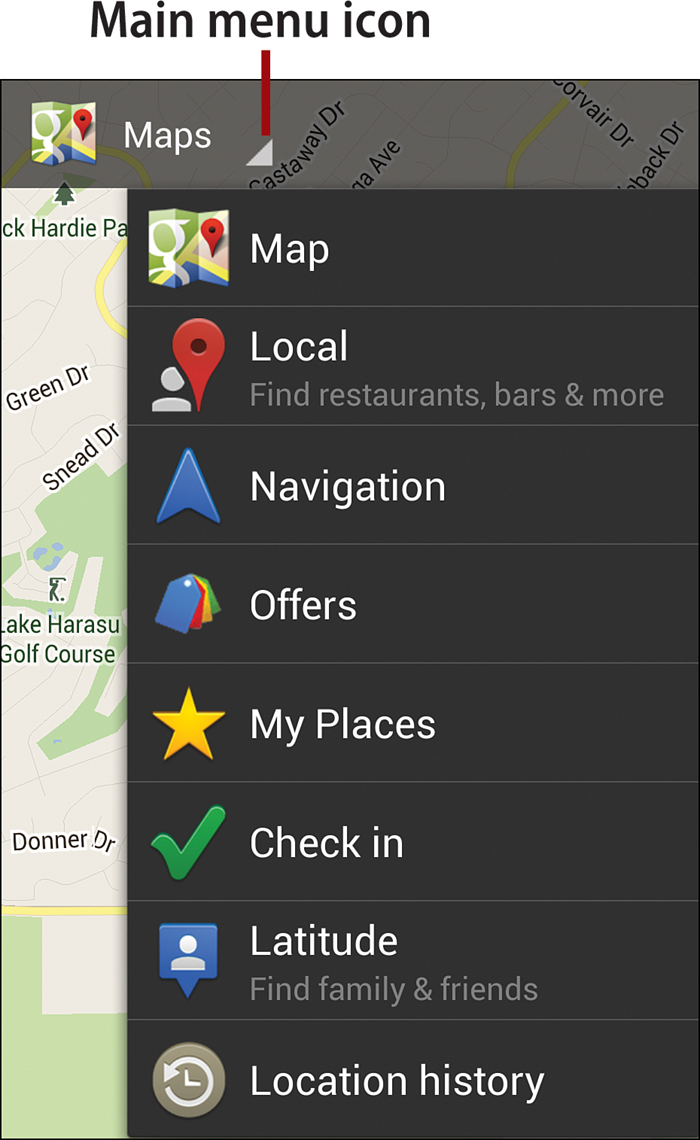
Google Navigation, Maps, and Local are interconnected. Essentially, it doesn’t matter which one you launch. At any time, you can open the current GPS app’s main menu to use the resources of one of the other apps: Navigation, Maps, or Local.
Using Google Navigation
Navigation is a GPS-based app that provides voice-guided directions between any two points. If you use Maps, Local, or a carrier-provided GPS app, you can usually switch to Navigation for directions by tapping a Navigation button, icon, or menu command.
1. Enable the GPS using one of the methods described in the previous section, “Enabling/Disabling GPS.”
2. On the Home screen, tap Apps, followed by Navigation.
3. Specify your mode of travel (Driving, Walking, or Bicycling) by tapping the menu icon, and then indicate your destination by speaking into the microphone, typing, or tapping the Go Home icon (as described in steps 4–6).
Where Am I?
To check your current location, tap the Map icon. You can customize the map by pressing the Menu key, tapping Layers, and selecting the items or views that you want to display. When you finish, tap Destination to return to Navigation’s main screen.
4. If the destination is your house, tap the Go Home icon.
Recent Destinations
If you’ve recently traveled to this destination using the GPS, you may be able to select it from the Recent Destinations list.
5. To set your destination by speaking, tap the Speak Destination icon and say where you want to go. If necessary, choose a location from the ones suggested.
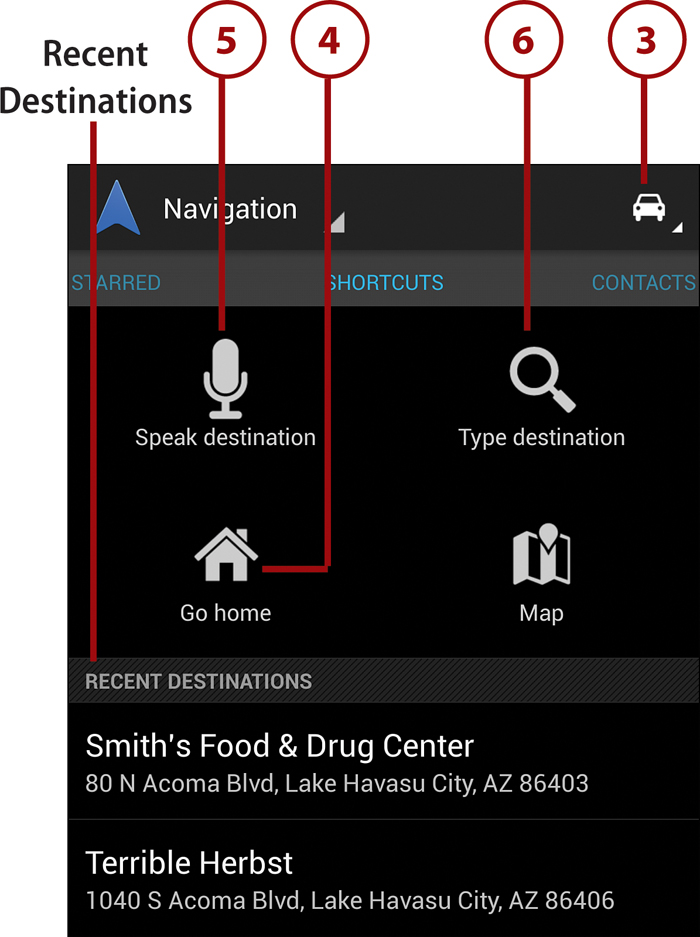

6. To set your destination by typing, tap the Type Destination icon, enter the search text, and tap the Search key. If necessary, choose a location from the ones suggested.

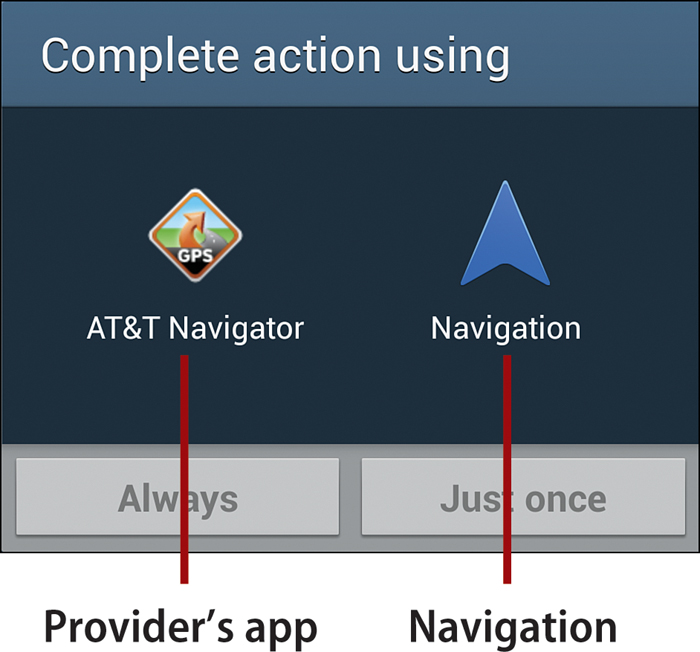
Use Navigation or the Provider’s App?
As mentioned, some service providers include their own navigation app as an alternative to Navigation. Prior to displaying the map to your destination, a Complete Action Using dialog box appears. Select the navigation app that you want to use for this trip and then tap Always or Just Once.
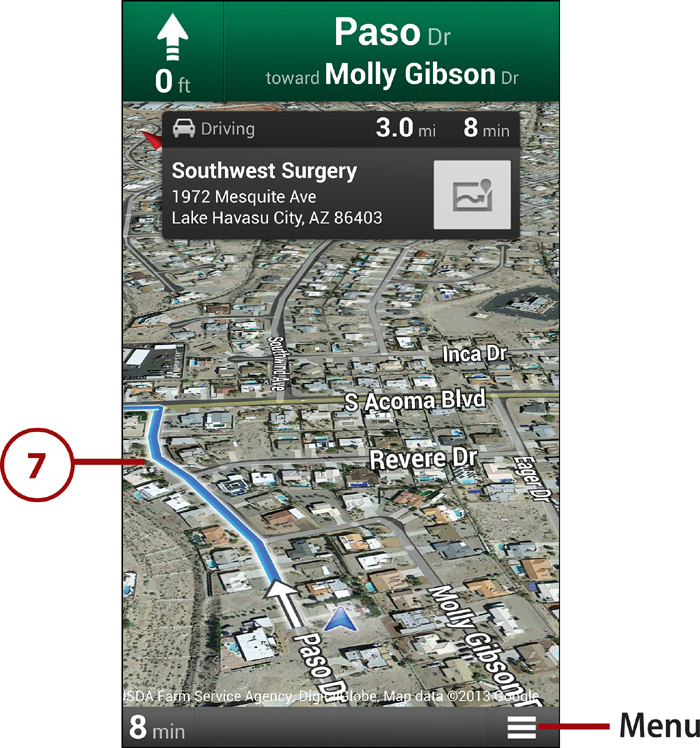
7. The route appears. As you travel, you receive audible instructions at each change in direction.
8. When you reach the destination, do one of the following:
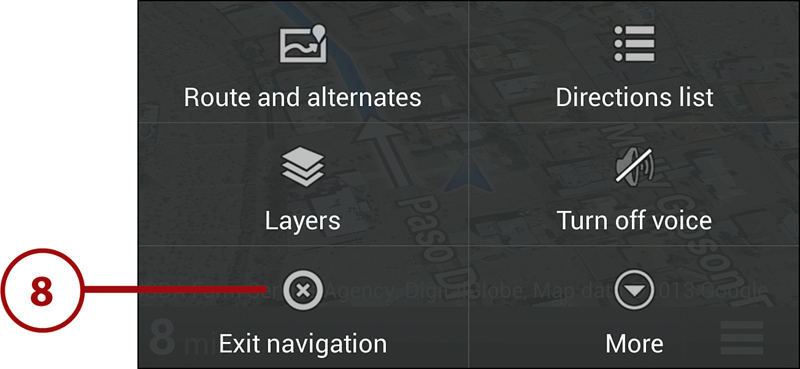
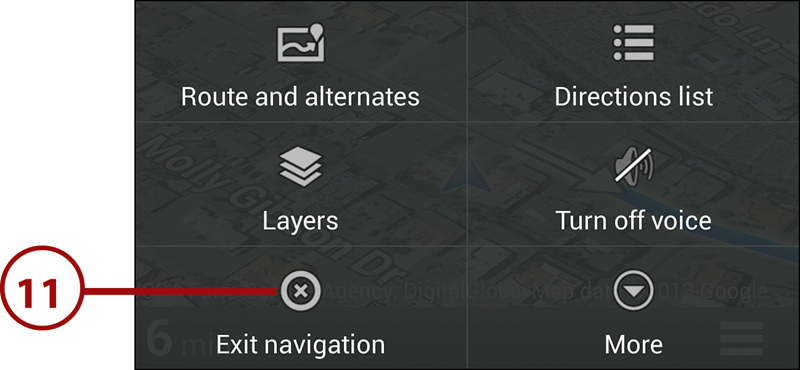
• To return to the main screen to set a new destination, press the Menu key or tap the menu icon (in the lower-right corner), tap More, and tap Set Destination.
• If you’re done using Navigation, press the Menu key and tap Exit Navigation. (As an alternative, repeatedly press the Back key until the Exit Navigation? dialog box appears, and then tap OK.) You can disable the GPS, if you’re done using it.
>>>Go Further: Other Navigation Options
• To display the buildings and terrain en route (as shown in the previous task), open the menu, tap Layers, and tap Satellite. To reveal nearby businesses, tap Gas Stations, Restaurants, and so on.

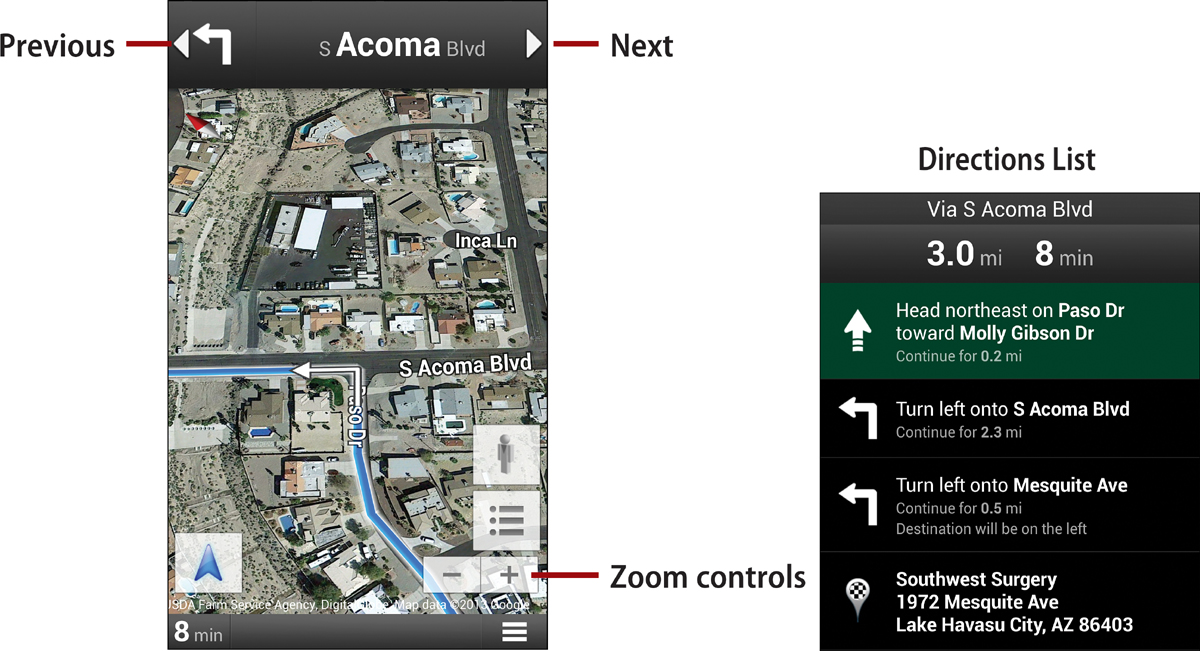
• Tap anywhere to reveal several useful icons. You can tap the + (plus) or – (minus) icon to zoom in or out. Tap the right or left arrow icon to step forward or backward through the route.
• To get a text list of turn-by-turn directions, press the Menu key and tap Directions List.
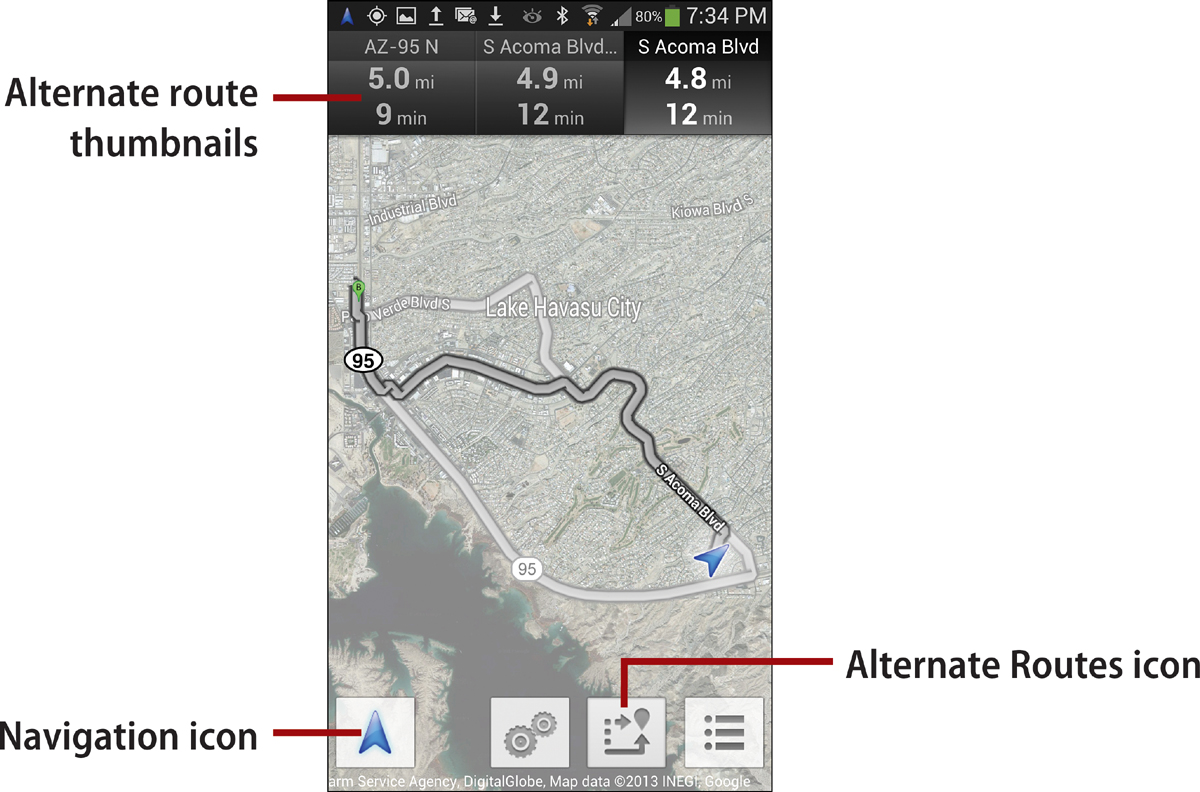
• To view alternate routes to your destination, press the Menu key and tap Route and Alternates. Tap the Alternate Routes icon to display alternate route thumbnails. To view an alternate route, tap its thumbnail. After selecting the route you want to take, tap the Navigation icon.
Using Google Local
Formerly known as Places, Local helps you find nearby places to eat, drink, or sleep. Each listed business typically includes a description, address, phone number, photos, and user reviews. After selecting a destination, you can get voice or text directions from your current location.
1. Enable the GPS using one of the methods described earlier in “Enabling/Disabling GPS.”
2. On the Home screen, tap Apps, followed by Local.
3. The opening screen of Local appears.
4. Optional: To start driving from a location other than your present one, tap the location indicator. In the Choose Your Location dialog box, tap Enter an Address. (To start from a location that’s close to the one shown at the bottom of the screen, you can tap the At location text.)
5. To set your destination, do one of the following:
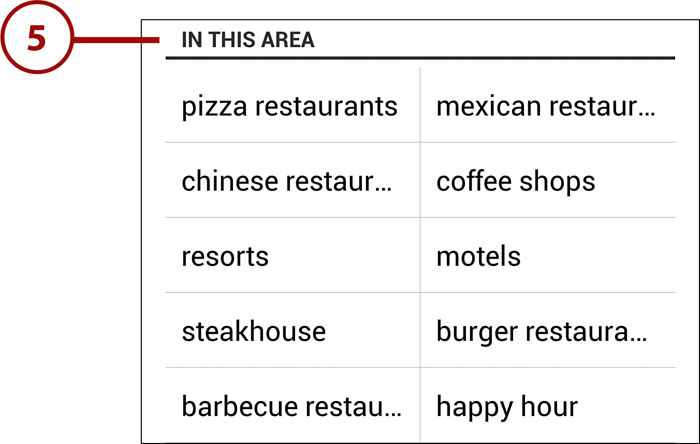
• General Destination. To see a list of businesses of a given type that are in your area, tap a general icon at the top of the screen or scroll to the In This Area list and tap a more specific text link.
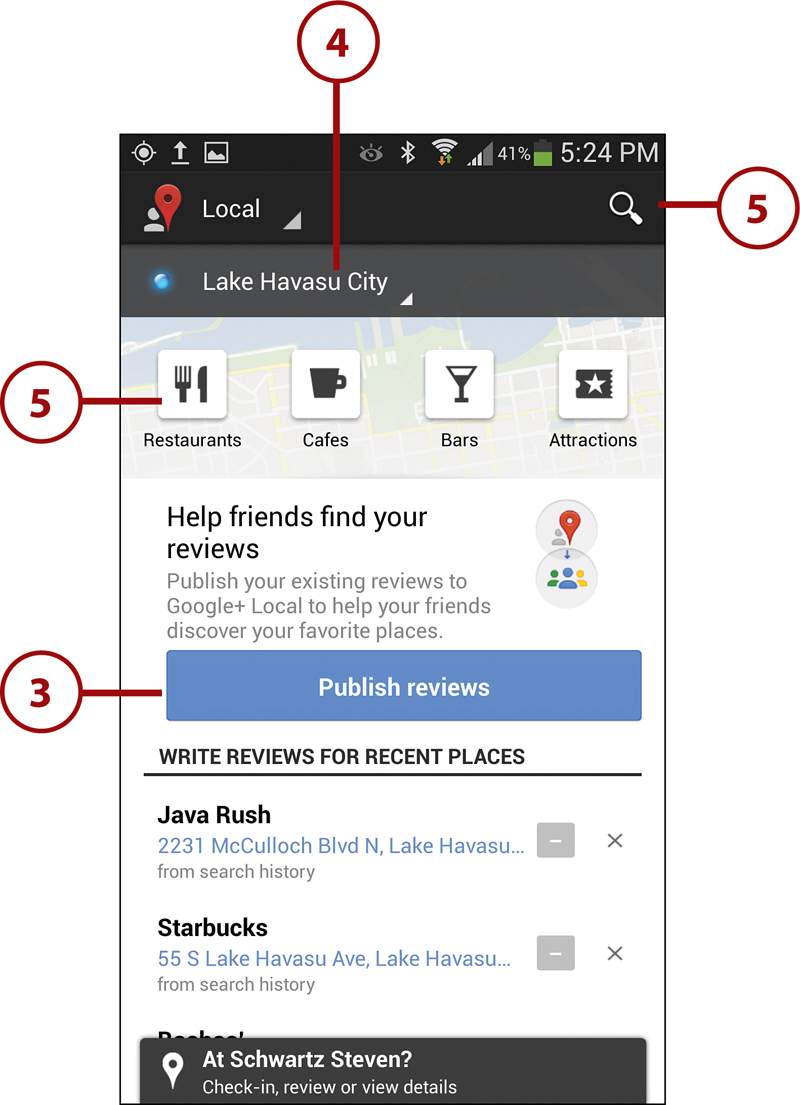
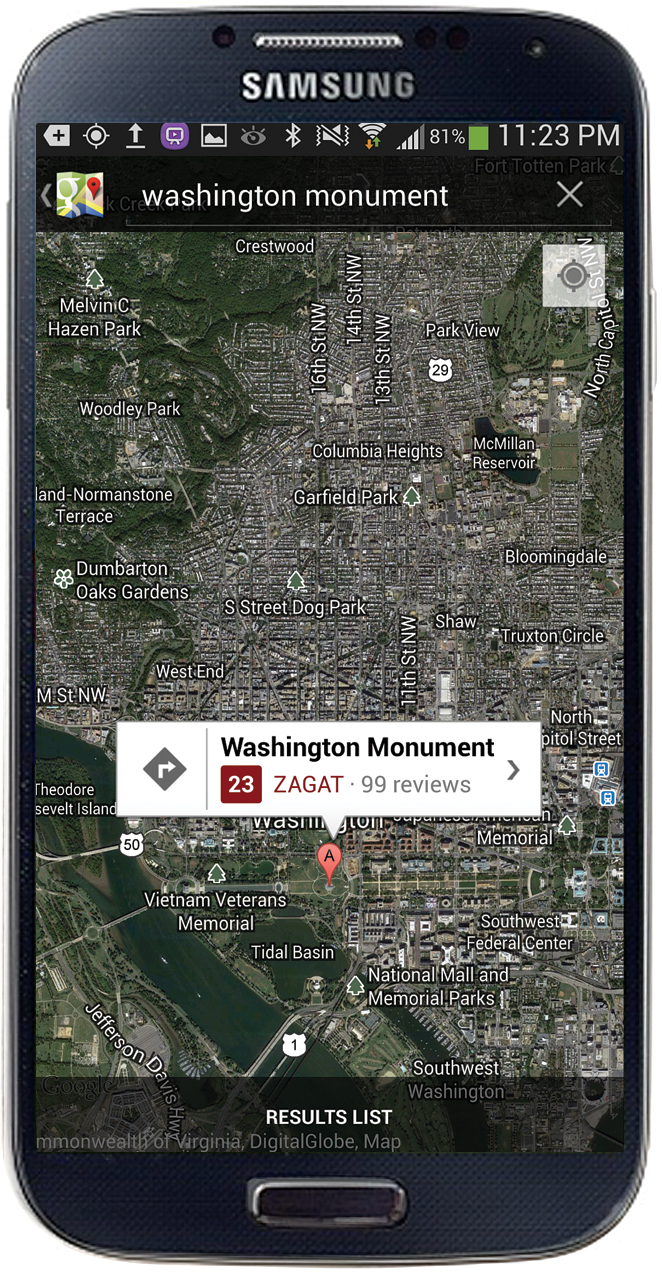
• Specific Destination. If there’s a specific place you have in mind, tap the Search icon at the top of the screen. Type or speak the destination, tap the Search key on the keyboard, and select your destination from the list that appears.
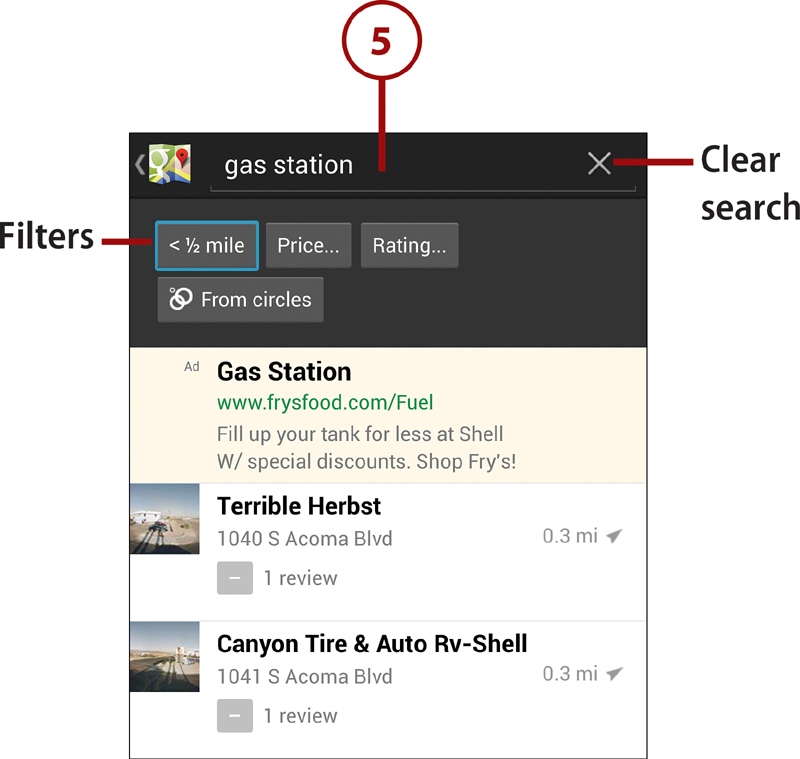
Try a General Search
In addition to searching for a particular business, you can search for a class of business by entering a search phrase, such as gas station or dentist. After executing the search, you can filter the results by tapping buttons at the top of the screen.
6. Review the information that appears, and do one of the following:
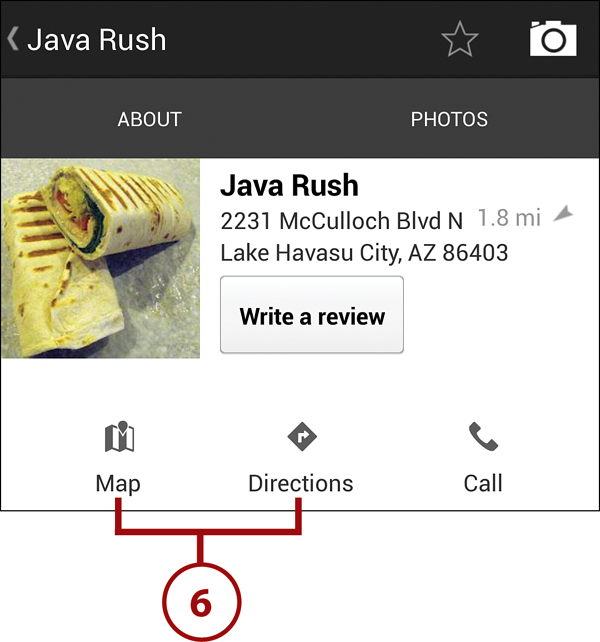
• To see the place’s location on a map, tap the Map icon. After viewing the map, press the Menu key and tap the Directions icon.
• To go directly to the Directions screen (skipping the map display), tap the Directions icon.
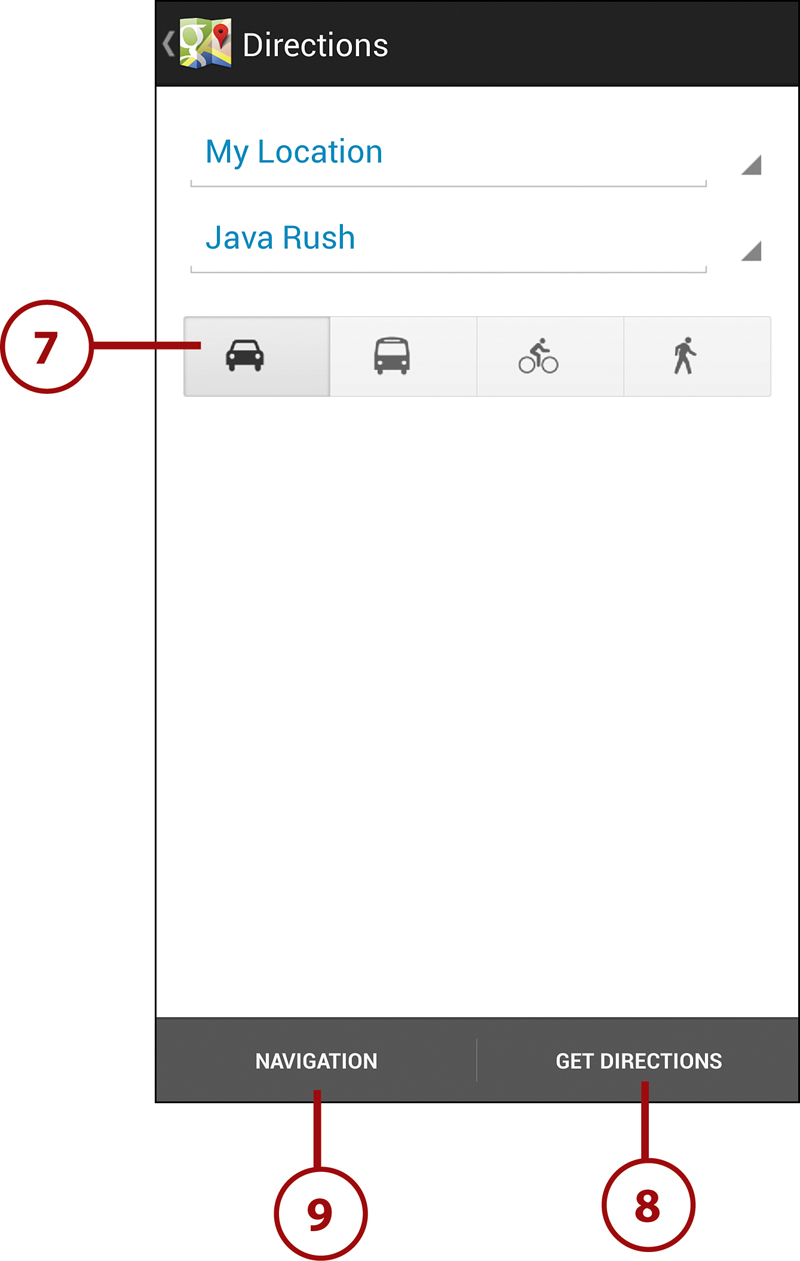
7. The Directions screen shows the starting point and destination. Select a transportation method (driving, public transportation, bike, or walking) by tapping its icon.
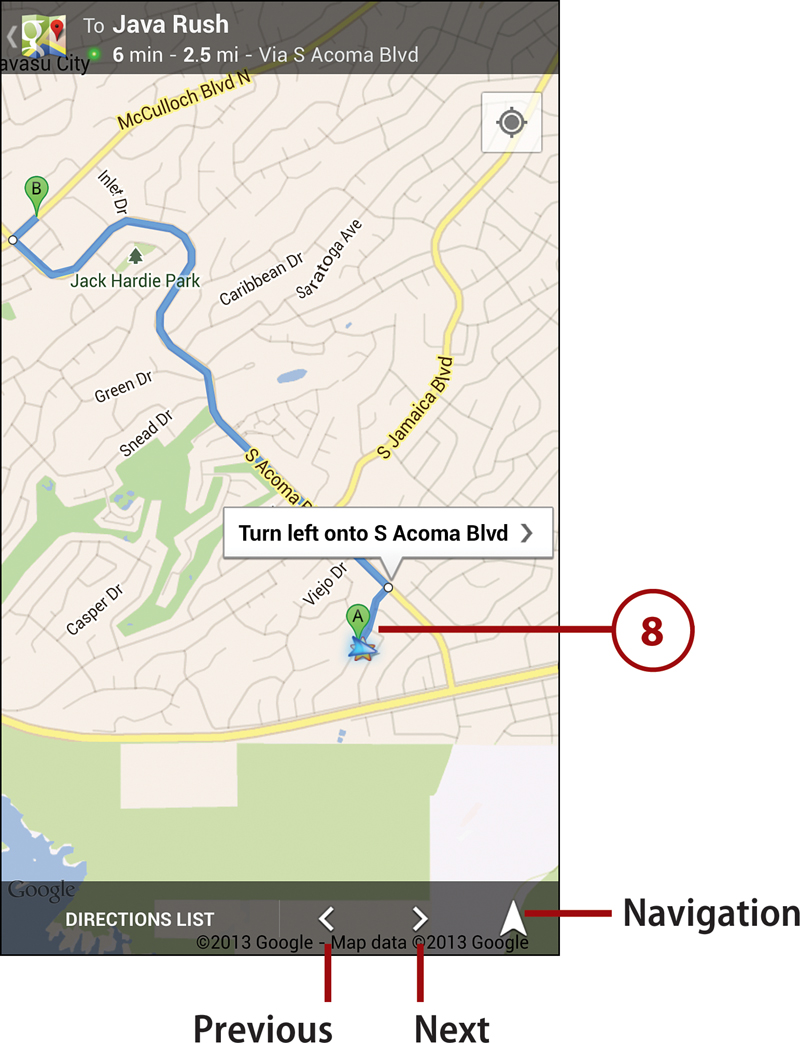
8. Optional: Tap the Get Directions button to view turn-by-turn instructions on the map. You can step through the route by tapping segments or the next or previous icon. You can scroll the screen by dragging, and zoom in or out by spreading your fingers apart or pinching them together.
Navigate from Get Directions
If you prefer audio instructions, tap the Navigation icon.
9. Tap the Navigation button for turn-by-turn audio directions. If a Complete Action Using dialog box appears, select Navigation or an alternate navigation app.
10. The route appears. As you travel, you receive audible instructions at each change in direction.
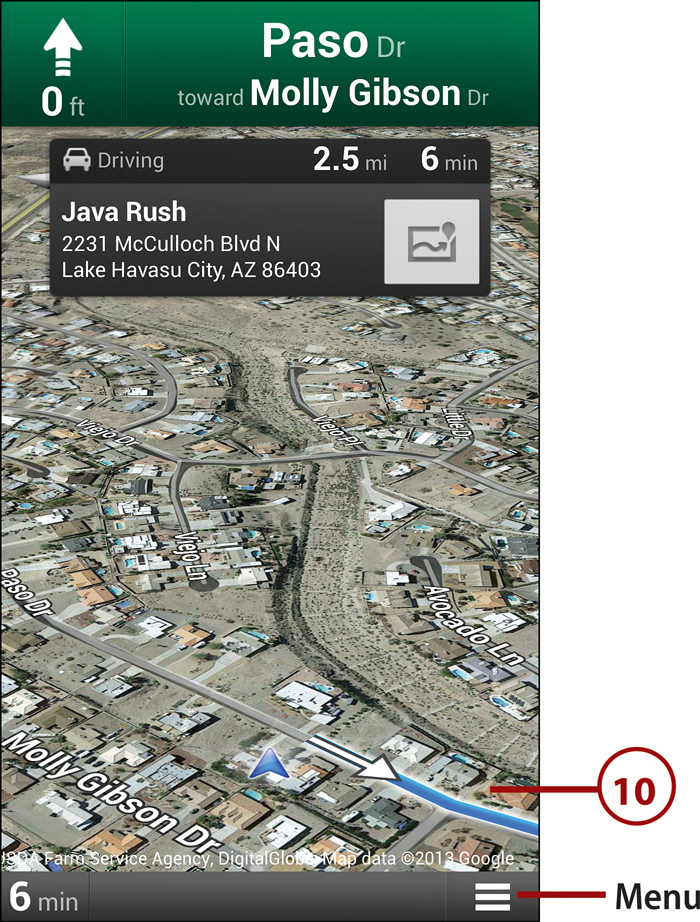
11. When you reach your destination, tap the menu icon (or press the Menu key) and select Exit Navigation. You can also disable the GPS, if you want.