
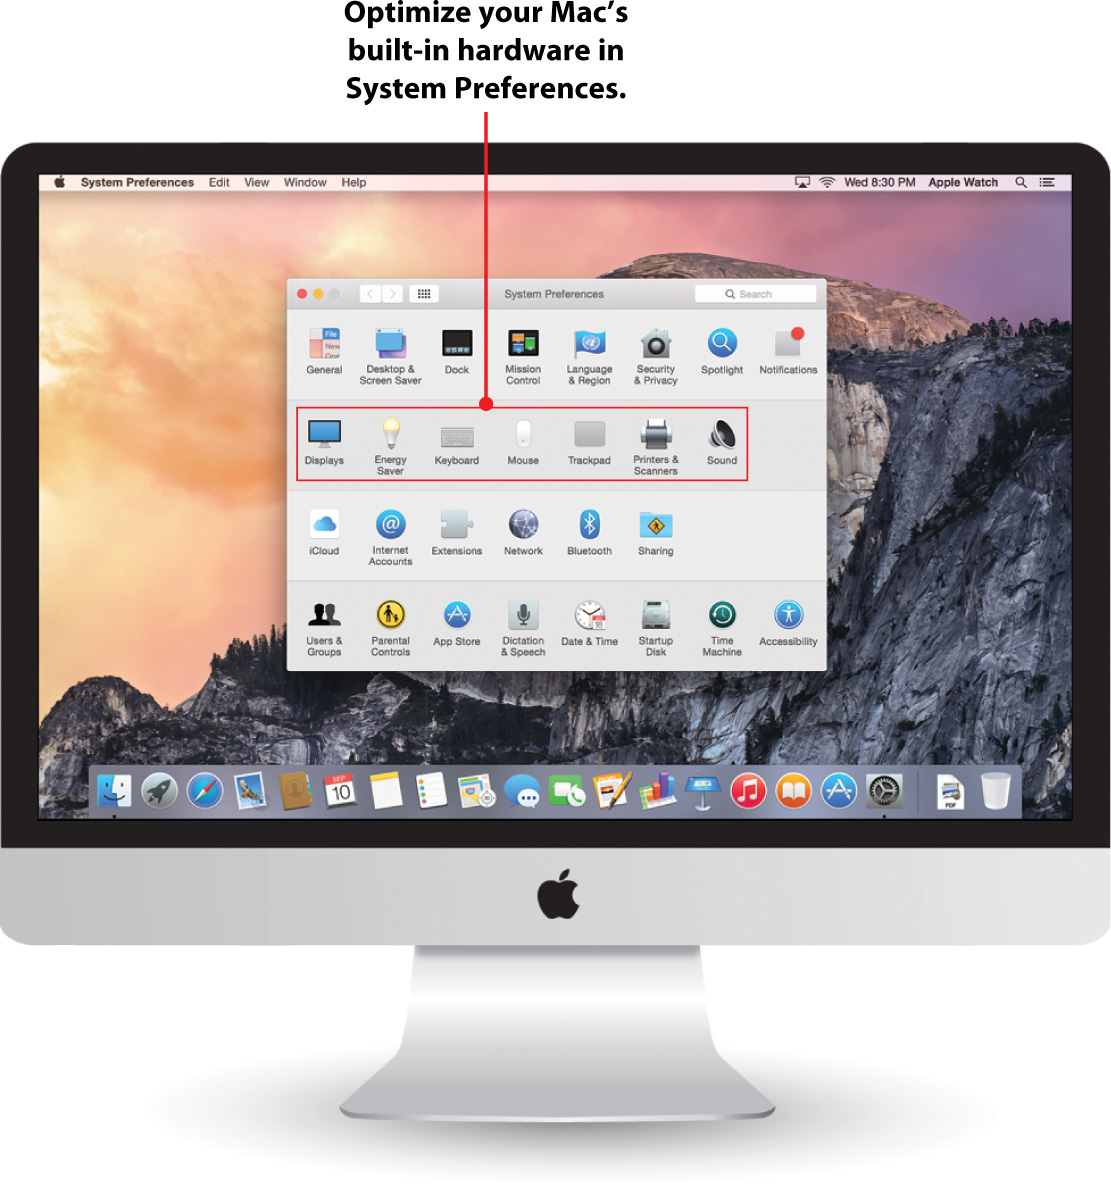
11. Making the Most of Your Mac Hardware
In this chapter, you find out how to make your Mac hardware work at its best for your particular needs, including:
![]() Balancing performance and efficiency
Balancing performance and efficiency
![]() Fine-tuning the keyboard settings
Fine-tuning the keyboard settings
![]() Adjusting trackpad and mouse gestures
Adjusting trackpad and mouse gestures
![]() Setting sound input and output
Setting sound input and output
![]() Configuring display resolution and color
Configuring display resolution and color
When you purchased your Mac, you bought more than just a “computer”—you bought a power system, monitor, keyboard, trackpad (and maybe a mouse), video camera, microphone, and speakers! On a traditional desktop system, these might all be separate components, but on your Mac, they’re part of a tightly integrated package.
To help personalize your Mac, you can adjust many of the settings available for these hardware devices, such as enabling trackpad gestures, setting a system boot and shutdown schedule, setting your microphone up for dictation, and much more. Yosemite even includes a few out-of-the-box tricks such as video, audio, and screen recording that let you take advantage of the built-in FaceTime HD camera without needing any additional software.
Going Green with Energy Saver
A decade ago, computers were appliances—much like microwaves. When you wanted something, you booted them up, performed your task, and shut them down. Today, computers that are actually turned off are harder and harder to find. Our expectation is that we can walk up to a computer, access it instantly, and move on.
Your Mac makes this scenario possible, and possible in an energy efficient way. You can always put your computer to sleep or shut it down from the Apple menu, but you can also have it take care of energy-saving tasks for you.
Configuring Display, Computer, and Hard Disk Sleep
To help improve energy efficiency, Yosemite includes the Energy Saver System Preferences panel.
1. Click the System Preferences icon on the Dock and then click the Energy Saver icon.
Different iMacs, Different Controls
Recent models of the iMac include power-saving CPU hardware and only have a Display Sleep slider. Additionally, other options, such as Power Nap, might not be available on all models. If you’re seeing controls you don’t recognize, just click the ? icon in the lower left of the settings panel.
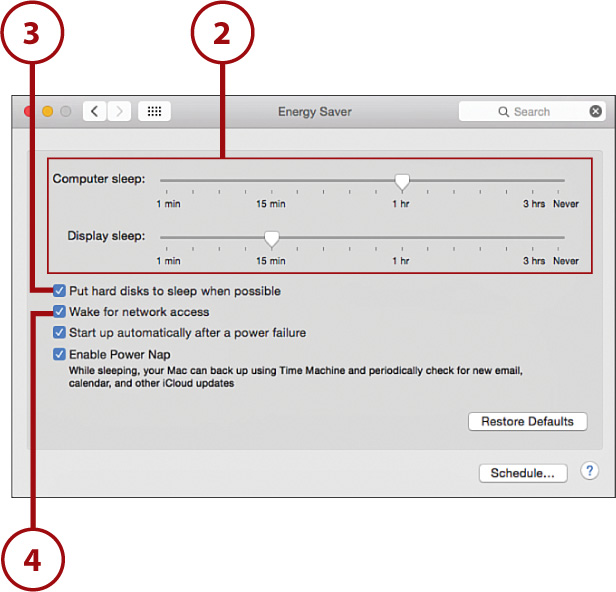
2. To set the period of inactivity after which your Mac puts itself or its display into Sleep mode, drag the sliders for Computer Sleep and Display Sleep to the desired timeframe.
3. Select Put Hard Disks to Sleep When Possible to spin down your hard drive when it’s not in use. This helps save power but sacrifices some speed.
4. If you’d like to let your computer wake up if you attempt to access it over a network, click Wake for Network Access.
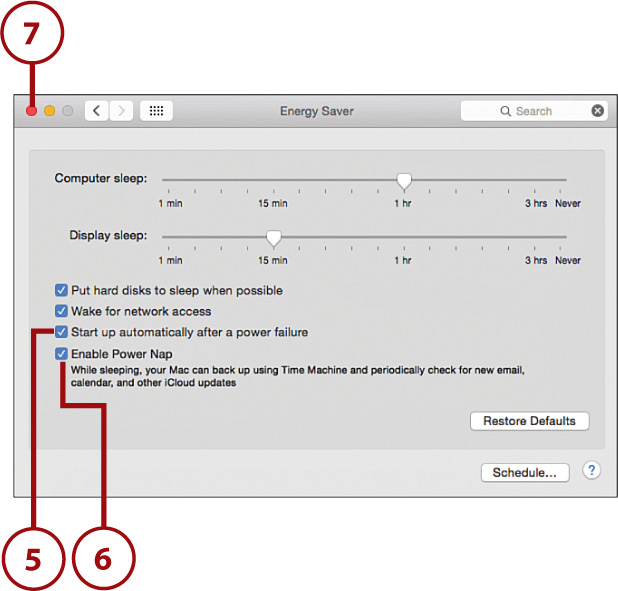
5. If you want your system to boot back up after a power failure, click Start Up Automatically After a Power Failure.
6. Select Enable Power Nap to have your Mac wake occasionally for backups and network updates while sleeping.
7. Close the System Preferences.
Creating a Sleep/Wake Schedule
If you have a daily schedule and want your Mac to follow it, you can configure wake-up and sleep/shutdown times. Follow these steps to set a power schedule for your system.
1. Click the System Preferences icon on the Dock and then click the Energy Saver icon.
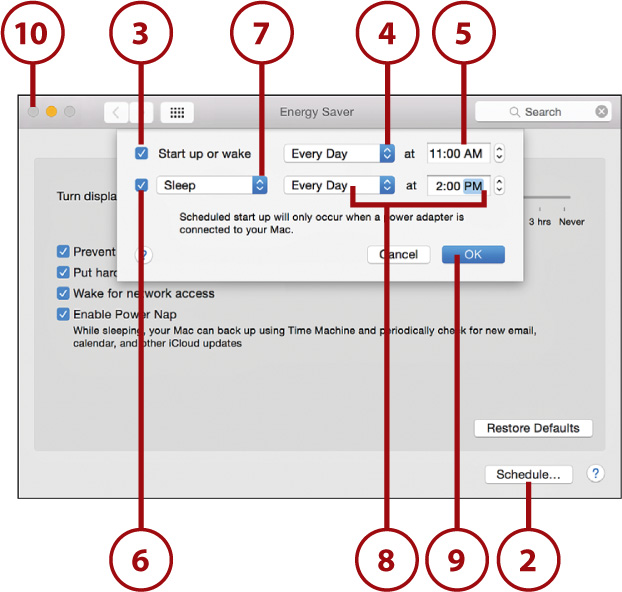
2. Click the Schedule button at the bottom of the window.
3. To have your computer start up on a schedule, click the checkbox beside Start Up or Wake.
4. Use the Every Day pop-up menu to set when (weekdays, weekends, and so on) the startup should occur.
5. Set the time for the computer to start up.
6. To configure your computer to go to sleep, shutdown, or restart, click the checkbox in front of the Sleep pop-up menu.
7. Use the Sleep pop-up menu to choose whether your Mac should sleep, shutdown, or restart.
8. Configure the day and time for the shutdown to occur, just as you did with the start options in steps 4 and 5.
9. Click OK.
10. Close the System Preferences.
Updating Keyboard and Dictation Settings
Having trouble getting used to your keyboard? Never fear! Using the built-in keyboard settings, you can adjust the keyboard repeat rate, key delay, and even set system-wide shortcuts for trackpad and mouse-free operation.
If you prefer to talk rather than type, Yosemite includes built-in dictation, accessed from anywhere with a single keystroke.
Setting Keyboard Repeat Rate
To choose how frequently the keys on your keyboard repeat, and how long it takes to start repeating, follow these simple steps:
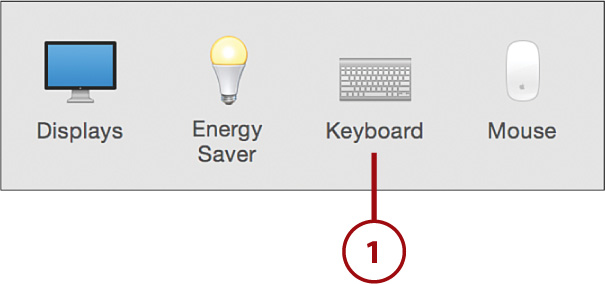
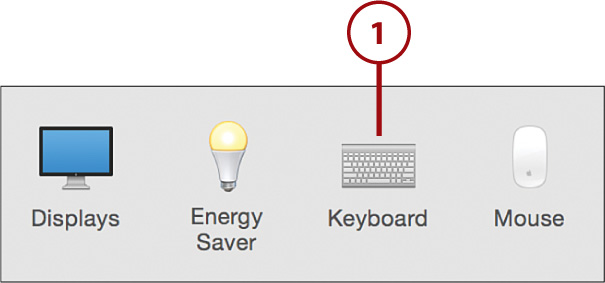
1. Click the System Preferences icon on the Dock and then click the Keyboard icon.
2. Click the Keyboard button at the top of the panel.
3. Use the Key Repeat slider to set how quickly letters appear when you hold down a key on your keyboard. Move the slider all the way to the left to turn off repeating.
4. Move the Delay Until Repeat slider to choose how long you must hold down a key before it starts repeating.
5. Close the System Preferences.
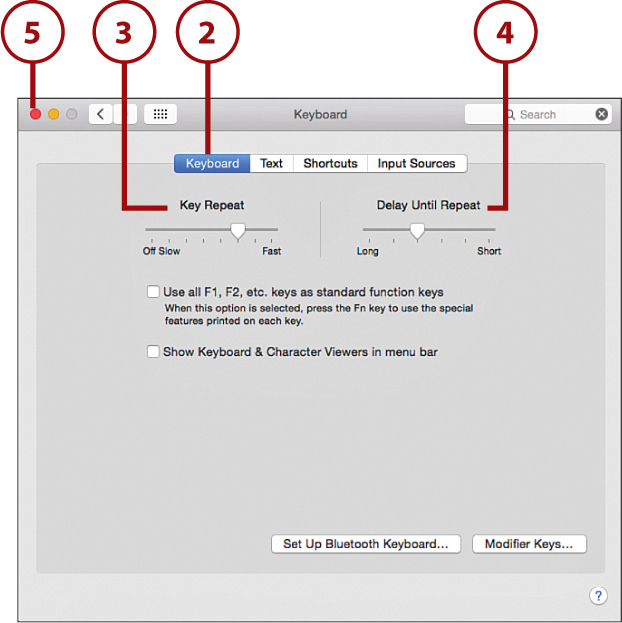
You’ve probably noticed that the top row of keys on your Apple keyboard have special functions, such as dimming the display, changing the volume, and so on. These keys, however, are also function keys that your applications might need. To set the keys to always work as function keys without having to hold down the fn key, click the Use all F1, F2, etc. Keys as Standard Function Keys checkbox.
Creating Keyboard Shortcuts
There are times you might find yourself working with your Mac and thinking, “Geez, I wish I could just push a key for that rather than having to mouse around.” Using keyboard shortcuts, you can create key commands for almost anything. There are two types of shortcuts supported in Yosemite—traditional shortcuts where you must press a key combination, and text shortcuts where you type a certain string and it is substituted with another. We will start with the latter.
Enabling Text Shortcuts and Spelling Correction
To set a shortcut for frequently typed text, follow these steps.
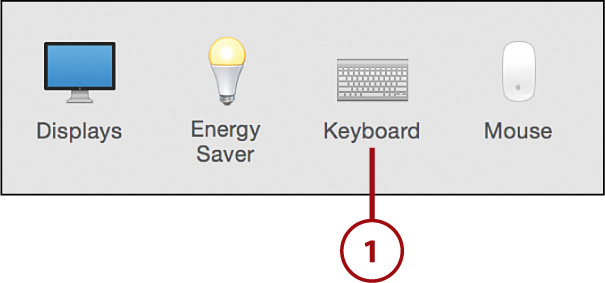
1. Click the System Preferences icon on the Dock, and then click the Keyboard icon.
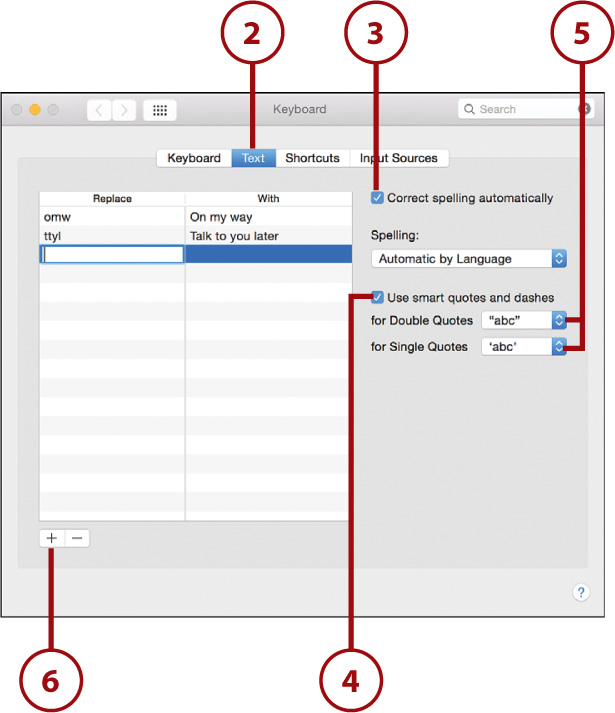
2. Click the Text button at the top of the panel.
3. Select the Correct Spelling Automatically checkbox to enable auto-correct across all your applications.
4. Select the Use Smart Quotes and Dashes checkbox to enable straight quotes to automatically be replaced by characters of your choosing.
5. Set the dropdown menus for Double Quotes and Single Quotes to the characters you’d like to appear. The default is for curly quotes to be used.
6. Click the + button at the bottom of the list on the left to create a text replacement shortcut.
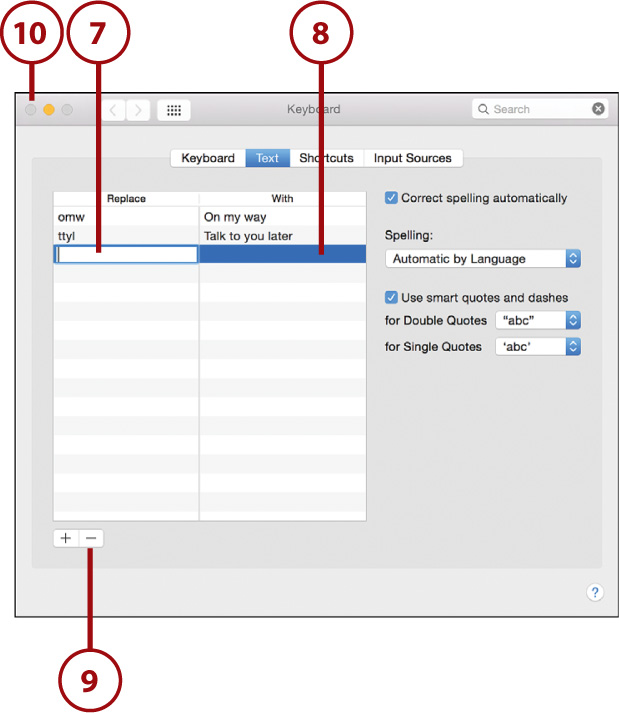
7. Use the left column field to enter the shortcut text you want to type (“brb,” for example).
8. Use the right column to enter the full text it should be replaced with (“Be right back”).
9. Use the – button to remove any shortcuts you are no longer using.
10. Close the System Preferences.
Setting Shortcuts for Existing Yosemite Actions
To set the shortcut for an existing system feature, follow these steps:
1. Click the System Preferences icon on the Dock and then click the Keyboard icon.
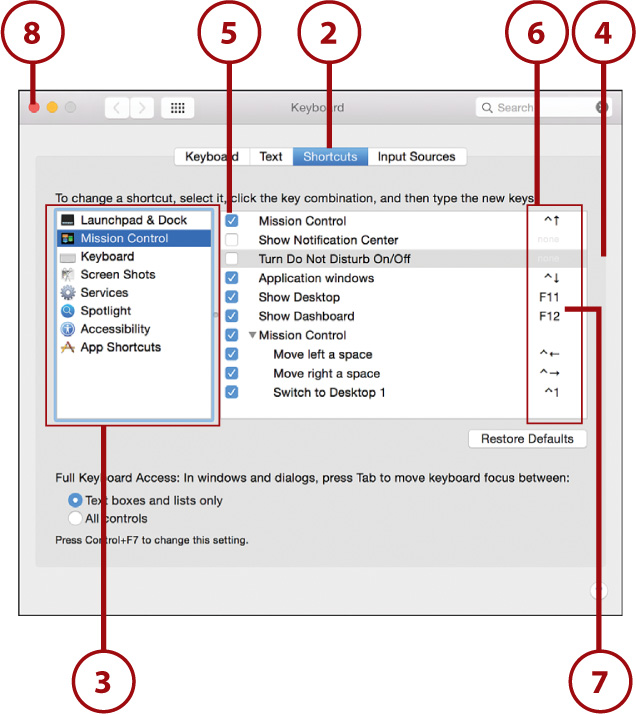
2. Click the Shortcuts button.
3. Choose one of the Yosemite system features from the left pane.
4. Scroll through the list of available actions in the right pane.
5. Click the checkbox in front of an action to enable it.
6. Click to the far right of an action name to edit its shortcut field.
7. Press the keys that you want to assign to the shortcut. If you are setting an F-key (for example, F12) that already has another function, you need to press the Function (fn) key on the keyboard to set the F key as the shortcut.
8. Close the System Preferences after making all of your changes.
Setting Shortcuts for Arbitrary Applications
To configure a shortcut that works with an arbitrary application, not a built-in feature, do the following:
1. Click the System Preferences icon on the Dock, and then click the Keyboard icon.
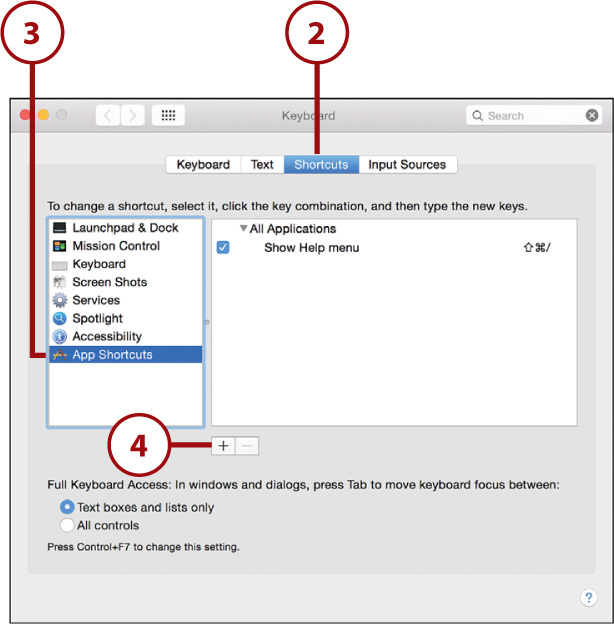
2. Click the Shortcuts button.
3. Click the App Shortcuts entry in the list on the left side of the window.
4. Click the + button at the bottom of the shortcut list.
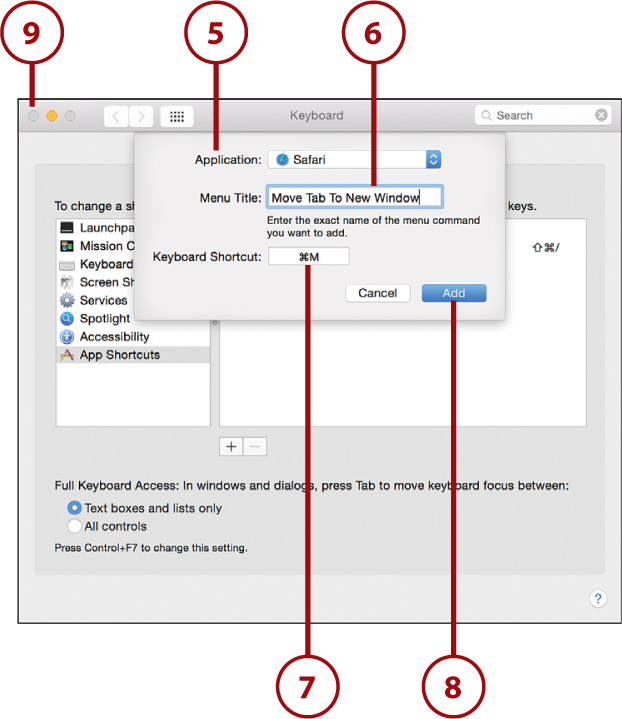
5. In the dialog box that opens, use the Application pop-up menu to choose an application to which you want to assign a shortcut.
6. Enter into the Menu Title field the exact wording of the menu item that you want the keyboard shortcut to invoke.
7. Click into the Keyboard Shortcut field and then press the keys you want to set as the shortcut.
8. Click Add when you’re satisfied with your settings.
9. Close the System Preferences.
Activating Dictation
If you find that your Mac’s keyboard is tiring your fingers, you may want to switch to using the Yosemite dictation feature. This enables you to input text anywhere using your voice. The only requirement is that you work in a noise-controlled environment (or have a high-quality headset). In Yosemite, you have the option of voice recognition being performed by Apple’s cloud servers or locally on your machine.
Enabling Dictation
To enable dictation support and configure how it is triggered, follow these steps:
1. Click the System Preferences icon on the Dock and then click the Dictation & Speech icon.
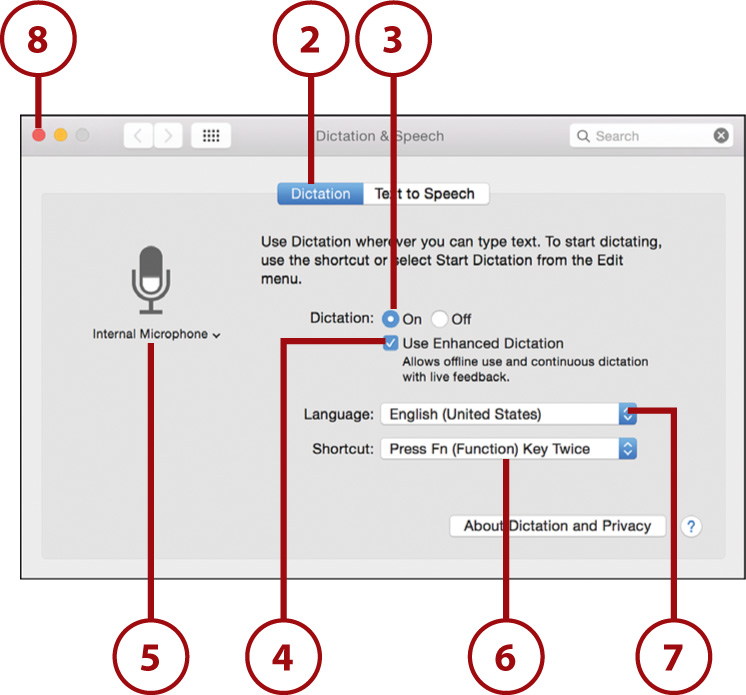
2. Click the Dictation button at the top of the panel.
3. Click the On radio button to turn on dictation support.
4. Click Use Enhanced Dictation to enable local (non-iCloud) dictation support. You need about 1.2GB of free space for Yosemite to download additional software.
5. Click the label below the microphone image to set your preferred input mic.
6. Use the Shortcut drop-down menu to configure what key combination will start dictation.
7. Set the language you will be speaking using the Language drop-down menu.
8. Close the System Preferences when finished.
Your Mac Can Talk Back
Your Mac can talk back to you using a variety of different voices. To configure speech feedback, click the Text to Speech button at the top of the Dictation & Speech Preferences panel. This will let you test and choose your favorite speech synthesizer and the rate of speech.
Using Dictation
To use dictation, you must have it enabled (see the preceding task) and have an active Internet connection. If you meet those qualifications, just complete these steps to type with your voice:
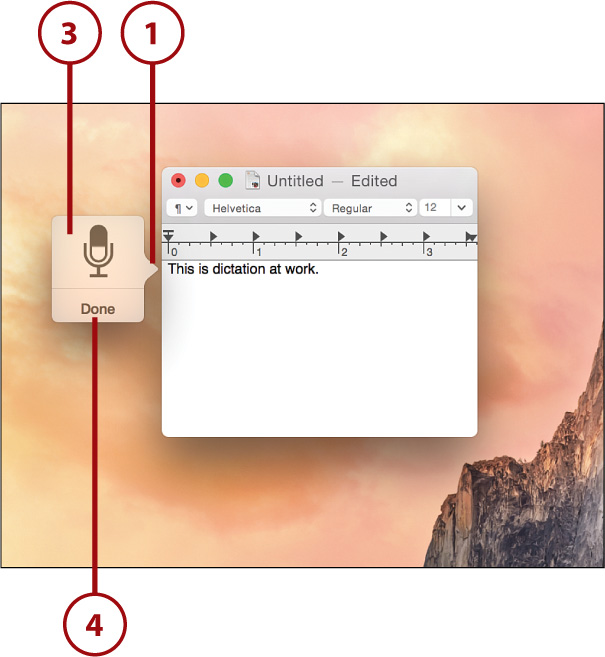
1. Position your cursor where you want to dictate.
2. Press the key combination you configured when enabling dictation (not shown).
3. The dictation microphone appears. Begin speaking now—be sure to speak the name of the punctuation symbols you want to insert, such as “period,” “comma,” and so on.
4. Press any key or click Done to end dictation. After a short pause, the spoken text is inserted into the document.
Changing Trackpad and Mouse Options
Whether you’re a mouser or a trackpad devotee, Apple’s hardware offers precision input in a multitouch package. Although these devices are intuitive for beginners, they can be customized to provide advanced features within Yosemite. Using the Trackpad and Mouse preferences, you can fine-tune the operation of your input device and set up different multifinger gestures in popular applications.
Perfect Pairing
If you’ve just purchased a new input device and need to connect it, skip ahead to Chapter 13, “Connecting Peripherals to Your Mac,” for details on Bluetooth pairing.
Setting the Trackpad Speed
To choose how quickly your trackpad follows your input, follow these steps:
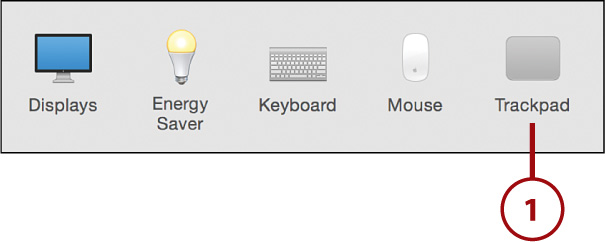
1. Click the System Preferences icon on the Dock and then click the Trackpad icon.
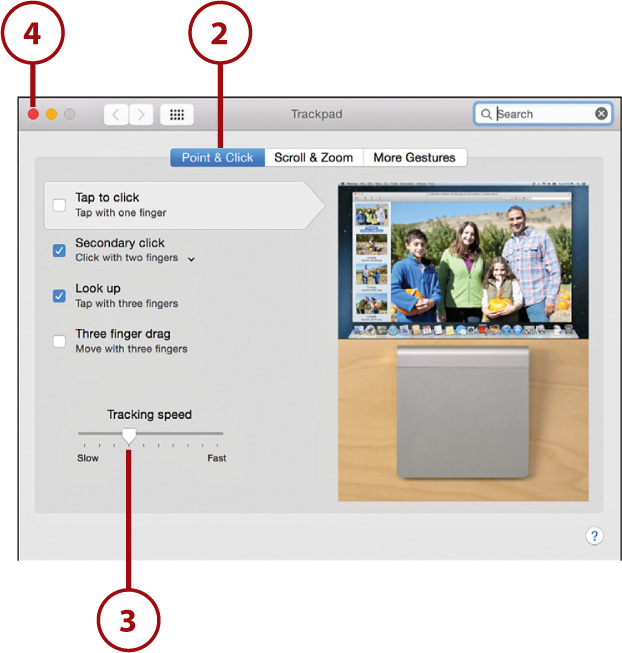
2. Click the Point & Click button at the top of the window.
3. Choose how quickly the cursor moves by dragging the Tracking Speed slider.
4. Close the System Preferences.
Controlling Trackpad Gestures
Apple trackpads can take advantage of a wide range of different two-, three-, and even four-finger motions to control your applications.
1. Click the System Preferences icon on the Dock and then click the Trackpad icon.
2. Use the Point & Click settings to configure click and drag options and dictionary look-ups.

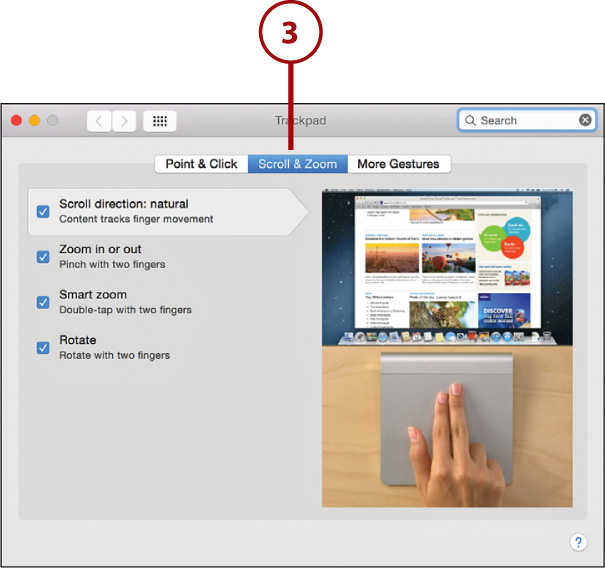
3. Use the Scroll & Zoom settings section to control scrolling, rotation, and pinching gestures.
4. The More Gestures settings control advanced features, such as whether swiping to the left or right moves forward or backward in Safari and how Mission Control is activated.
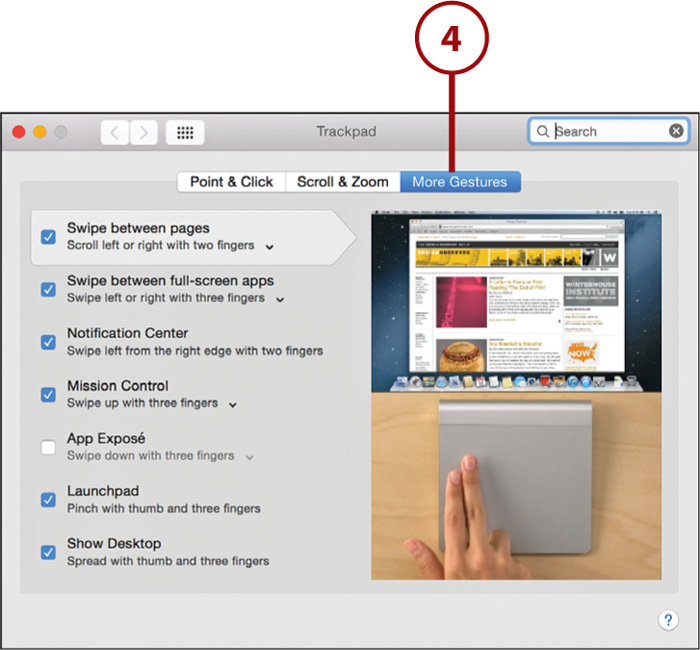
5. Many settings contain a dropdown menu to fine-tune the gesture.
6. As you mouse over a particular setting, a video demonstrating the action appears in the right side of the window.
7. Close the System Preferences.

Configuring the Magic Mouse Speed
The Apple Magic Mouse is a multi-touch trackpad and mouse in one. Although it doesn’t support nearly as many gestures as the trackpad, it’s still a capable device. To configure the Magic Mouse tracking speed, follow these steps:
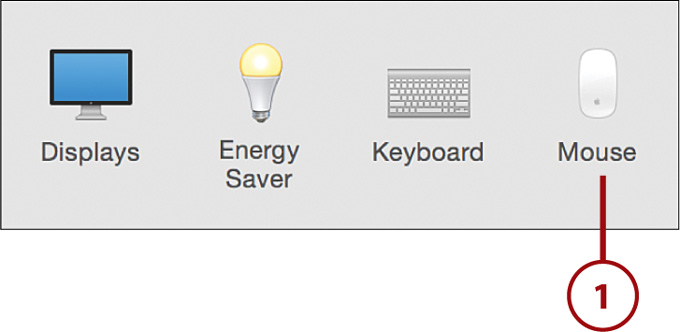
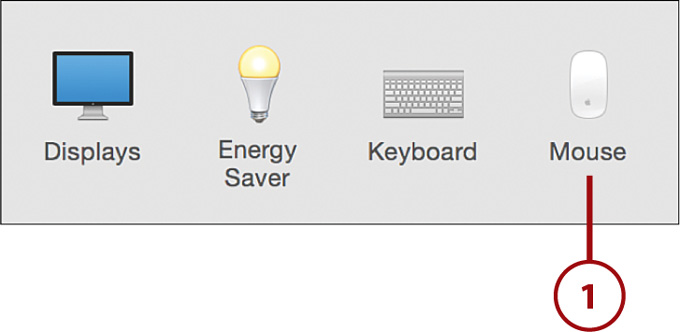
1. Click the System Preferences icon on the Dock and then and click the Mouse icon.
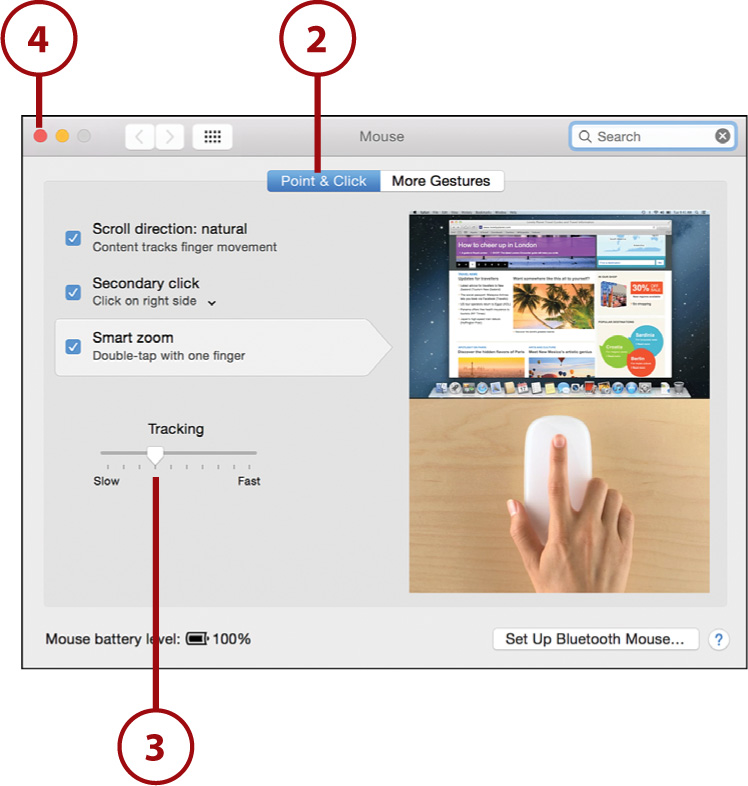
2. Click the Point & Click button at the top of the window.
3. Choose how quickly the cursor moves by dragging the Tracking slider.
4. Close the System Preferences.
Configuring Magic Mouse Gestures
To set up the different single and two-finger gestures supported on the Magic Mouse, complete the following:
1. Click the System Preferences icon on the Dock and then click the Mouse icon.
2. Use the Point & Click settings to configure click, scrolling, and zooming.
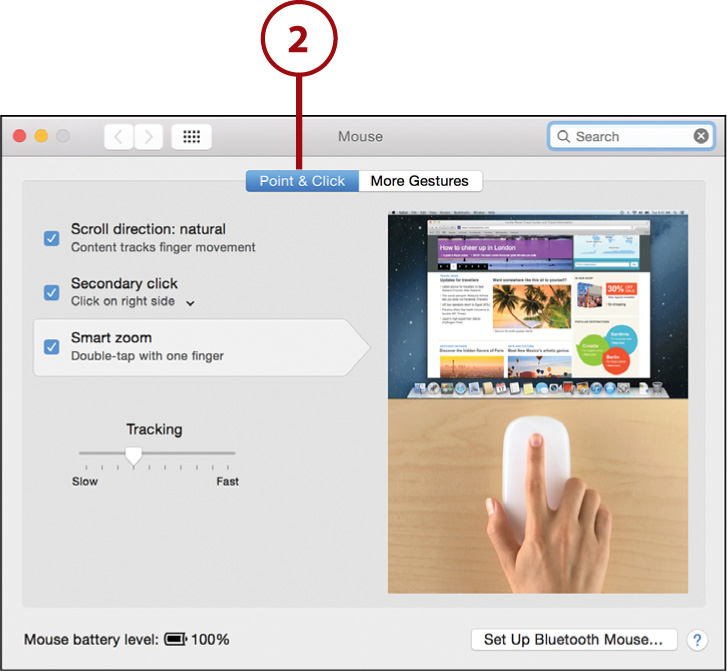
3. The More Gestures settings control advanced features, such as whether swiping to the left or right moves forward or backward in Safari and how Mission Control is activated.
4. Some settings contain a drop-down menu to fine-tune the gesture.
5. As you mouse over a particular setting, a video demonstrating the action appears in the right side of the window.
6. Close the System Preferences.

If You Have to Choose...
Choose the trackpad. Even if you are a life-long mouser, you’ll find that Apple’s trackpad gesture support integrates perfectly into Yosemite and makes performing common tasks similar to using an iPad.
Adjusting Your Display
Your Mac’s display is your window into your computer, so it’s important that you configure your display to best suit your needs. For detailed CAD or drawing, you might want to use the full resolution. Games or late-night typing might call for a larger (lower resolution) option. Using the Display settings, you can control the image so that it is right for the task at hand.
Setting Display Resolution
The display resolution is the number of pixels that are viewable on the screen at any time. Lower the resolution for a larger image—or raise it, for smaller details. To control the screen resolution on your system, follow these steps:
1. Click the System Preferences icon on the Dock and then click the Displays icon.
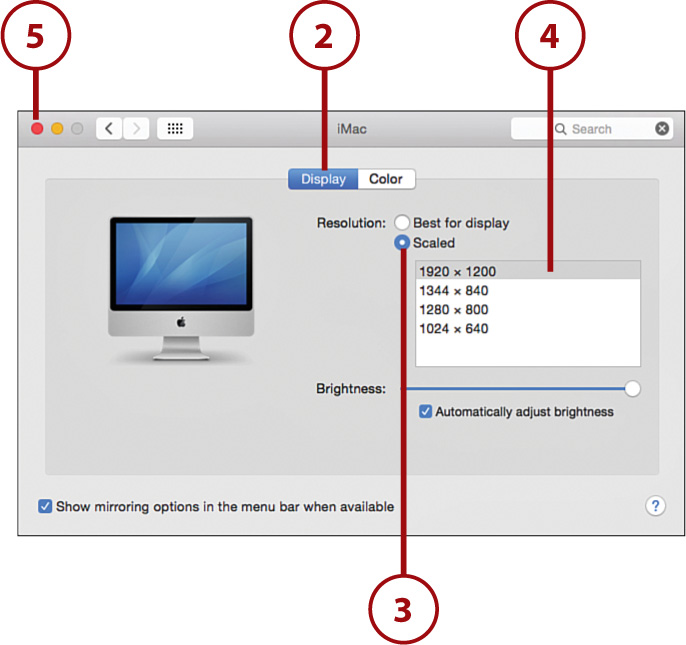
2. Click the Display button at the top of the panel.
3. Click the Scaled radio button. Alternatively, the default radio button (Best for Display) chooses the best option for your system.
4. Choose one of the listed resolutions to immediately switch your display. Note that some resolutions might look fuzzy on your screen because your Mac has to scale the images.
5. Close the System Preferences.
When setting your display resolution, you’ll notice a checkbox for showing Mirroring Options in your menu bar. This is for working with external displays that can mirror your Mac’s screen. You can read more about this feature in Chapter 13.
Controlling Display Brightness
Display brightness is a personal setting; some individuals like muted, dimmed displays and others like colors offered by full-brightness settings. To set the brightness of your display, follow these steps:
1. Click the System Preferences icon on the Dock and then click the Displays icon.
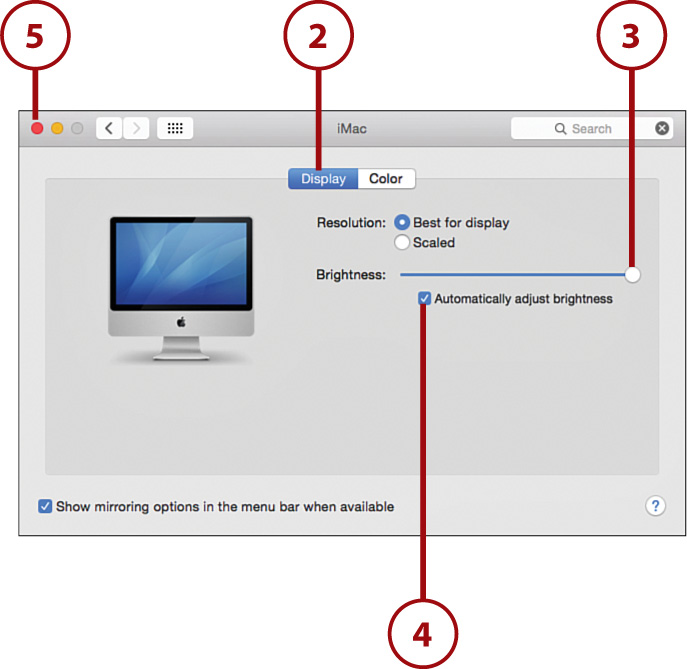
2. Click the Display button at the top of the panel.
3. Drag the Brightness slider left or right to dim or brighten the display.
4. Click the Automatically Adjust Brightness checkbox to have your screen dim or brighten depending on the room’s ambient lighting.
5. Close the System Preferences.
Adjusting Brightness from Your Keyboard
You can also adjust display brightness using the dim/bright keys (shared with F1 and F2) on your keyboard.
Choosing a Color Profile
Color profiles help keep colors consistent between computers with different monitors. By choosing a color profile that is calibrated for your display, you’re ensured that colors you see on one machine match a similarly calibrated display on another machine. To choose a calibration profile, follow these steps:
1. Click the System Preferences icon on the Dock and then click the Displays icon.
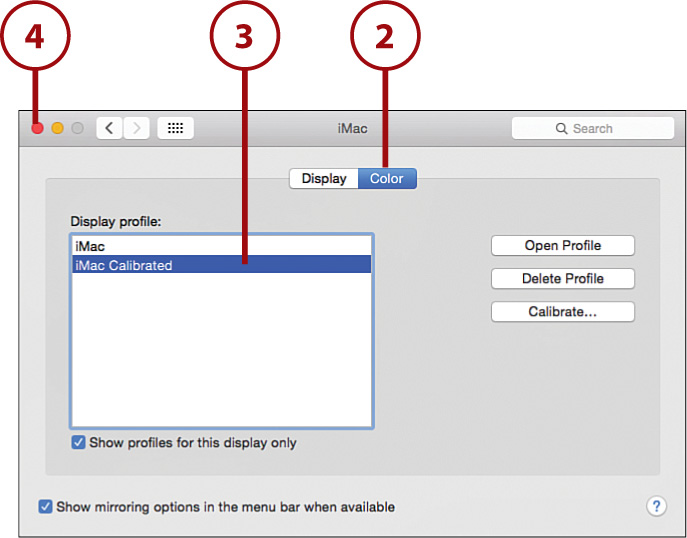
2. Click the Color button at the top of the panel.
3. Click the preferred profile in the Display Profile list. The changes are immediately applied.
4. Close the System Preferences.
Where Do These Profiles Come From?
You can add profiles to your system by installing software or by running the calibration procedure, which creates your own personalized color profile.
Calibrating the Display
If you’d like to calibrate your display manually, Yosemite provides a wizard-like interface for choosing the best display settings for your Mac.
1. Click the System Preferences icon on the Dock and then click the Displays icon.
2. Click the Color button at the top of the panel.
3. Click Calibrate.
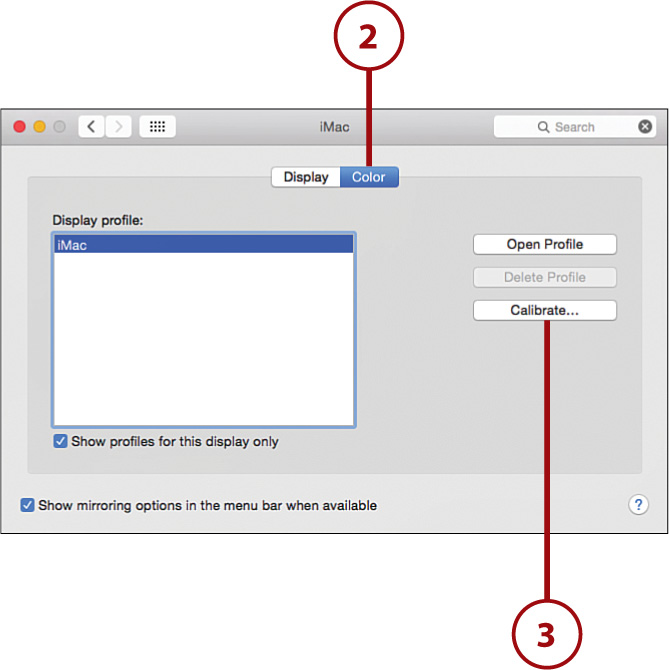
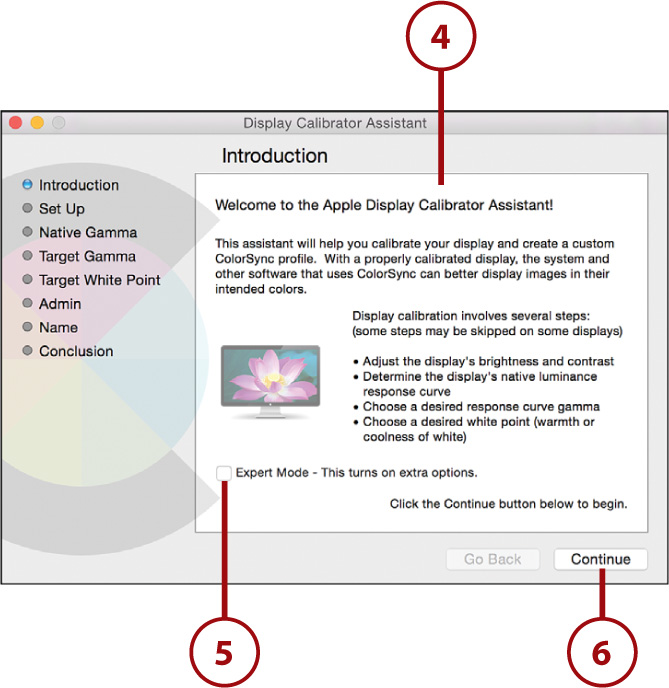
4. The Display Calibrator Assistant starts.
5. Click the Expert Mode checkbox to get the best results.
6. Click Continue to proceed through the assistant.
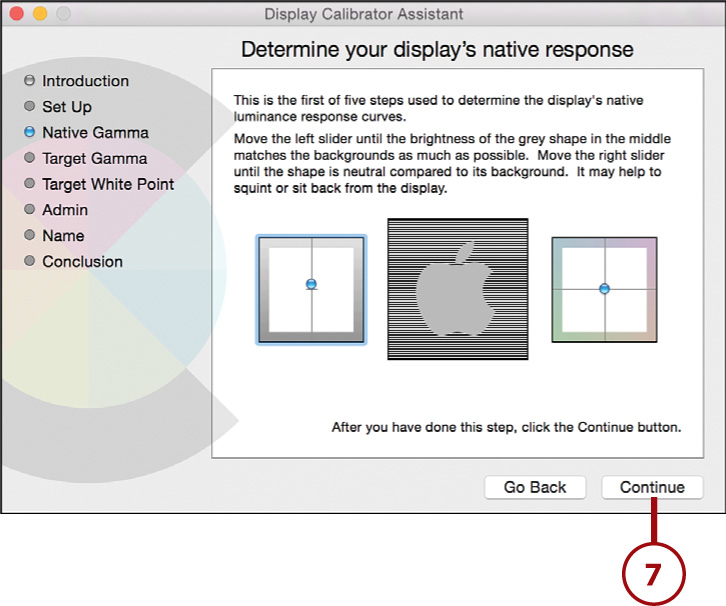
7. Follow the onscreen instructions to test the output of your display and click Continue to move on to the next screen.
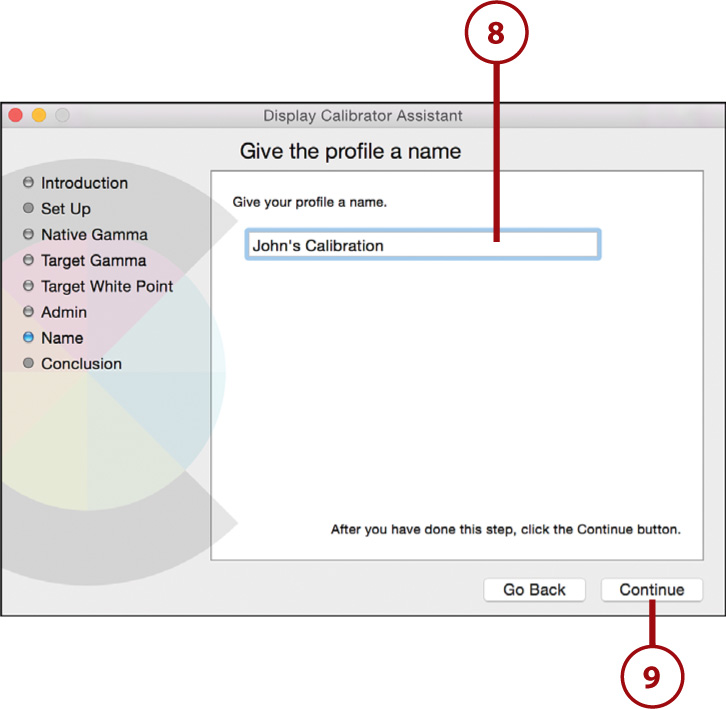
8. When finished, enter a name for the new calibrated profile.
9. Click Continue to save the profile.
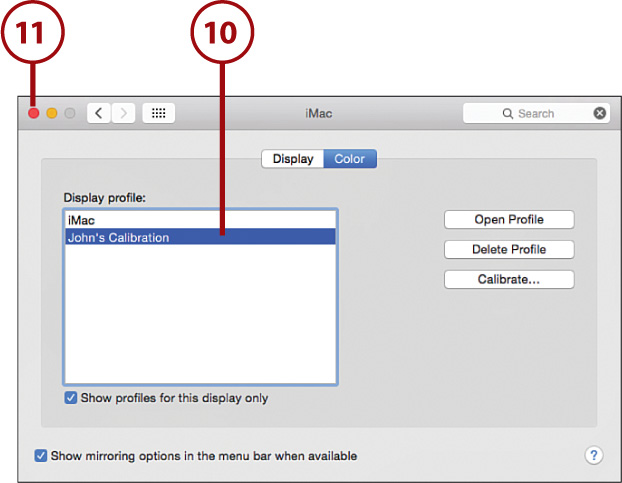
10. The new profile is added to the color profile list.
11. Close the System Preferences.
Setting Sound Input and Output
Sound has never been an afterthought on Macintosh systems, and yours is no different. Your system is equipped with a stereo sound system, headphone jack, microphone jack (shared with the headphone jack in recent models), and even digital audio out. You can configure these input and output options to reflect your listening needs.
Setting the Output Volume
Volume, as you might expect, is one control that is needed system-wide. To control the output volume of your system, follow these steps:
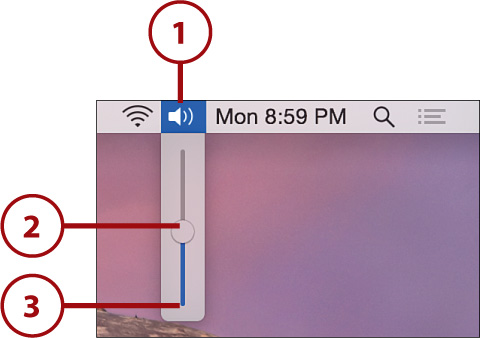
1. Click the speaker icon in the menu bar.
2. Drag the slider up to increase the volume, or slide it down to decrease the volume.
3. Drag the slider all the way to the bottom to mute all output sounds.
Keyboard Volume Controls
You can also use the special controls located on the F10, F11, and F12 keys to mute, decrease, and increase the system volume.
Adding the Volume Control to the Menu Bar
If sound control is not visible in your menu bar, it has been manually removed. You can re-add it to the menu using the Show Volume in the Menu Bar option in the Sound System Preferences panel.
Configuring Alert Sounds
Your Mac generates alert sounds when it needs to get your attention. To configure the sounds, and how loud they play, follow these steps:
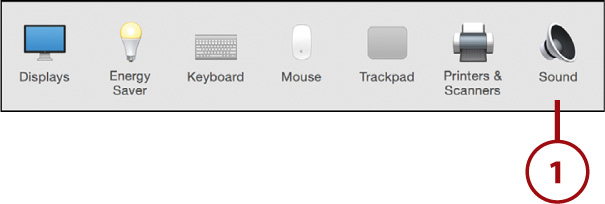
1. Click the System Preferences icon on the Dock, and then click the Sound icon.
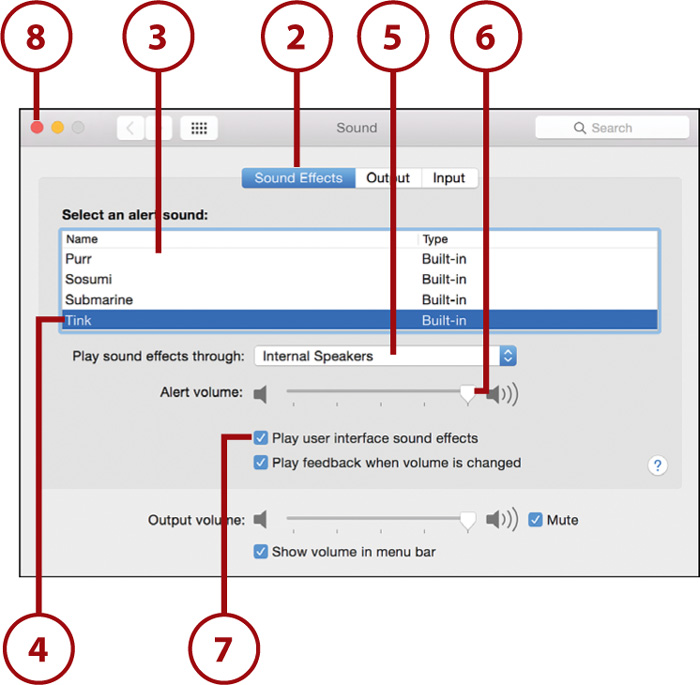
2. Click the Sound Effects button at the top of the panel.
3. Scroll through the alert sound list to see all of the available alert sounds.
4. Click a sound to select it as your alert sound and hear a preview.
5. Choose which sound output device (usually your internal speakers) should play the alert sound.
6. Use the alert volume slider to adjust the volume of alerts that your system plays. This is independent of the system output volume.
7. Check Play User Interface Sound Effects to play sounds when special events occur—such as emptying the trash.
8. Close the System Preferences when finished configuring the sound effects.
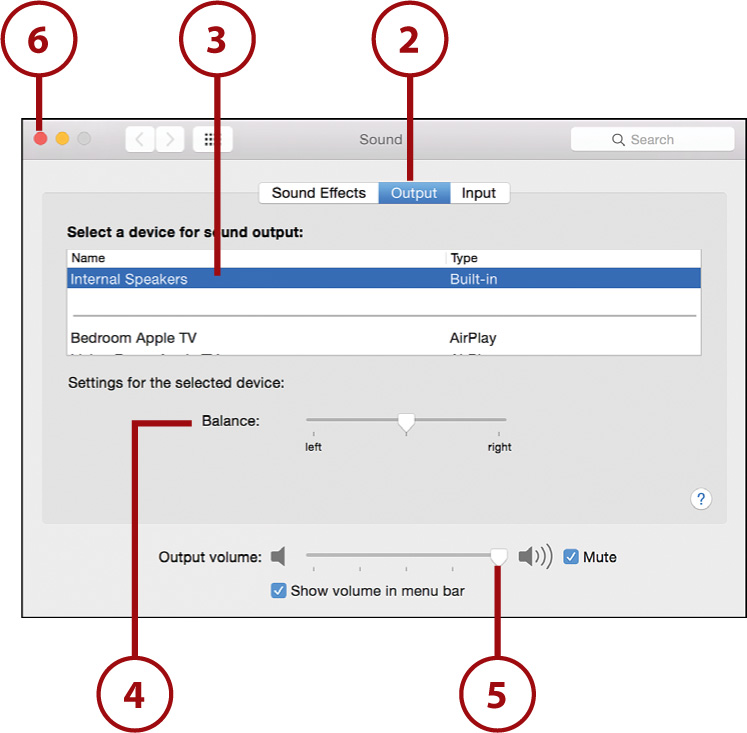
Choosing and Adjusting an Output Device
To configure your sound output options with a bit more flexibility than just changing the volume, you need to adjust the output settings for the device that is being used for playback—typically your speaker.
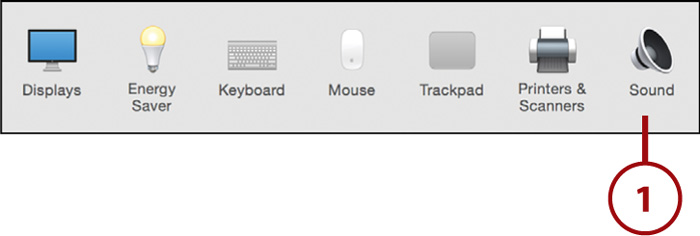
1. Click the System Preferences icon on the Dock and then click the Sound icon.
2. Click the Output button at the top of the panel.
3. Choose the output device to configure (probably your speakers).
4. Use the Balance setting to adjust audio to the left or right speaker.
5. Set or mute the Output Volume.
6. Close the System Preferences when finished.
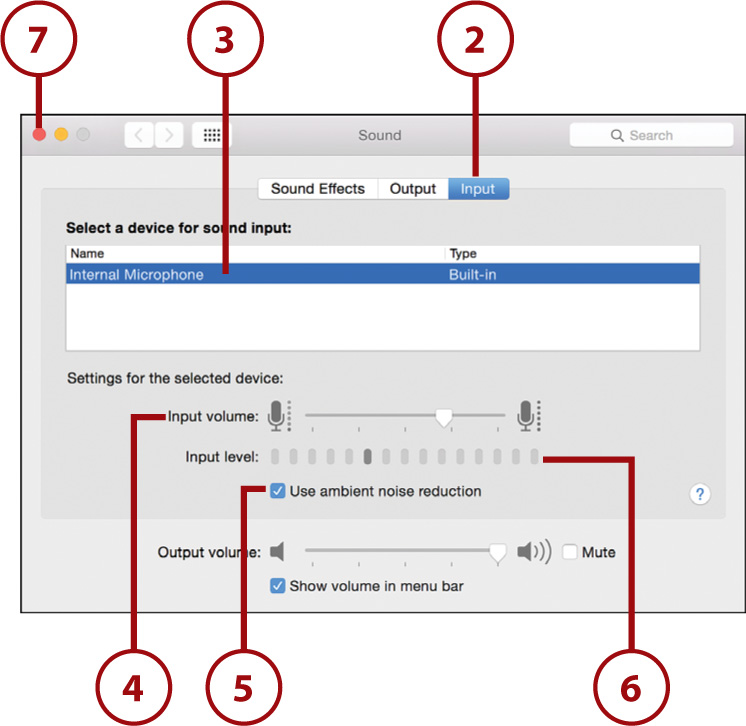
Picking and Calibrating an Input Device
In addition to sound output, you can also input sound on your Mac using either the built-in microphone or the line-in jack on the back. To configure your input device, follow these steps:
1. Click the System Preferences icon on the Dock and then click the Sound icon.

2. Click the Input button at the top of the panel.
3. Choose the device to use for input.
4. Use the Input Volume slider to adjust the gain on the microphone—this is how much amplification is applied to the signal.
5. Click the Use Ambient Noise Reduction checkbox if you’re working in an environment with background noise.
6. Speak at the level you want your computer to record. The Input level graph should register near the middle when you use a normal speaking level. If it doesn’t, readjust the input volume slider.
7. Close the System Preferences.
Quick Sound Input/Output Access
If you work frequently with audio and need quick access to your input and output device settings, you can skip the Sound Preferences panel entirely. Just hold down Option when clicking the speaker icon in your menu bar and, instead of showing you the volume, it will let you pick between all your input and output devices.
Keeping the Input Volume Under Control
It might be tempting to turn the input volume up as high as it goes so that the microphone detects even little noises. Keep in mind, however, that the higher the input volume for wanted sounds, the higher the volume for unwanted sounds as well!
Shhh...We’re Watching TV!
Your Mac can connect to a TV and output sound via built-in HDMI or Thunderbolt to HDMI adapter (depending on your model). Once connected, your TV set will be shown as a new output device!
Recording Audio and Video
It has always been possible to record audio and video “out of the box” with a new Macintosh, but not without jumping through a bunch of seemingly unnecessary hoops or trudging through unwieldy software. With Yosemite, Apple has made it easy to take advantage of your Mac’s built-in capabilities to record audio, video, and even screen actions.
Recording Audio
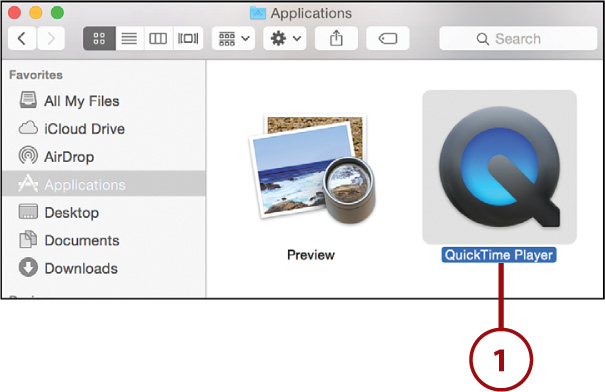
To create and save a new audio recording, first make sure that you’ve configured your sound input settings correctly (including ambient noise reduction, if needed) then follow these steps:
1. Open the QuickTime Player application. (You can find it in the Launchpad or the Applications folder.)
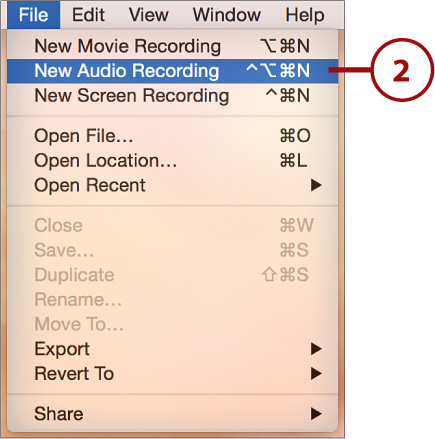
2. Choose File, New Audio Recording.
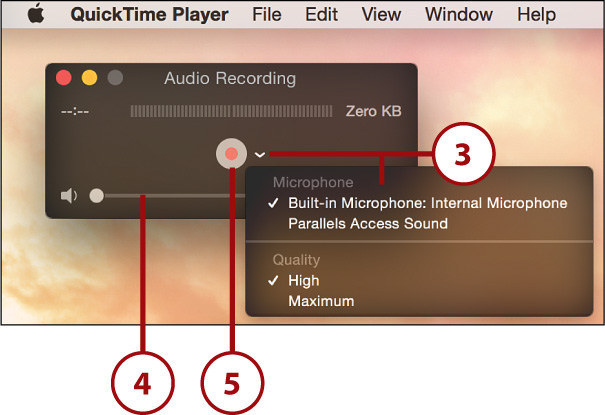
3. Use the drop-down menu to the right of the record button in the Audio Recording window to choose an input source and recording quality.
4. If you want to hear audio through the speakers as it is recorded, drag the volume slider to the right.
5. Click the Record button to begin recording.
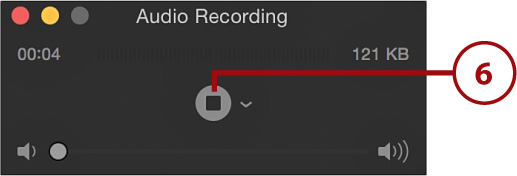
6. Click the Stop button to stop recording.
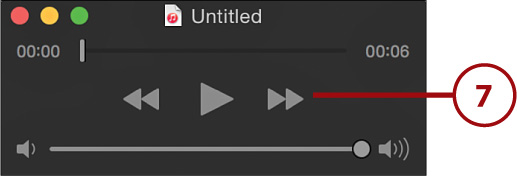
7. Use the playback controls to listen to your creation.
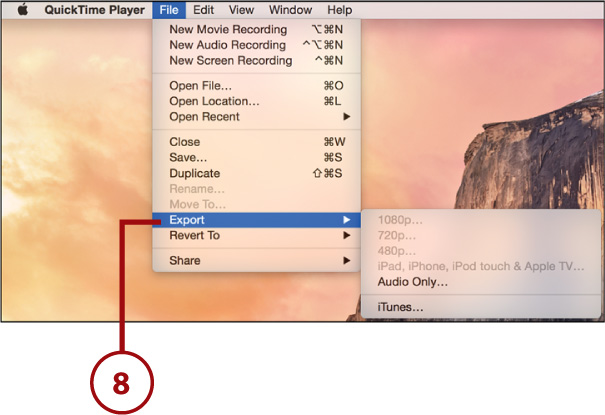
8. Choose File, Export to save the audio, if desired.
Recording with the FaceTime HD Video Camera
Although FaceTime enables you to see video of yourself on your computer, it doesn’t give you the option to record. If you want to take a recording of what the built-in camera sees, follow these steps:
1. Open the QuickTime Player application. (You can find it in the Launchpad or the Applications folder.)

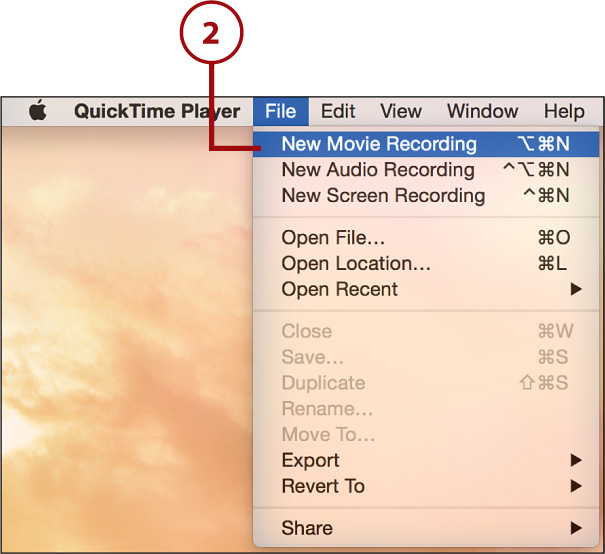
2. Choose File, New Movie Recording.
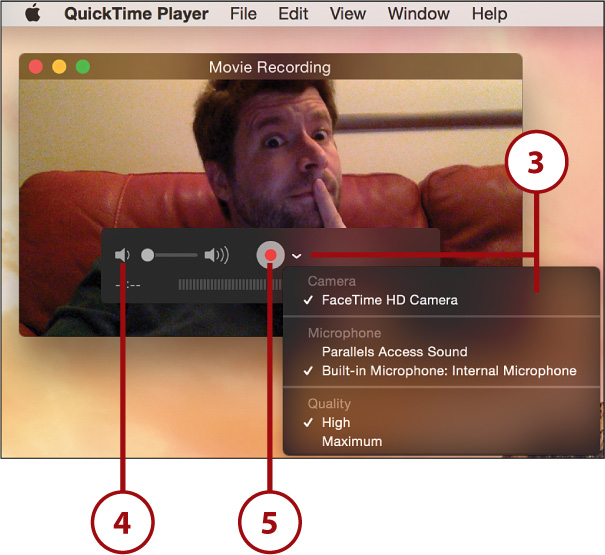
3. Use the drop-down menu on the right side of the recording controls to choose a camera (if you have more than one), input microphone, and recording quality.
4. If you want to hear audio through the speakers as it is recorded, drag the volume slider to the right.
5. Click the Record button to begin recording.
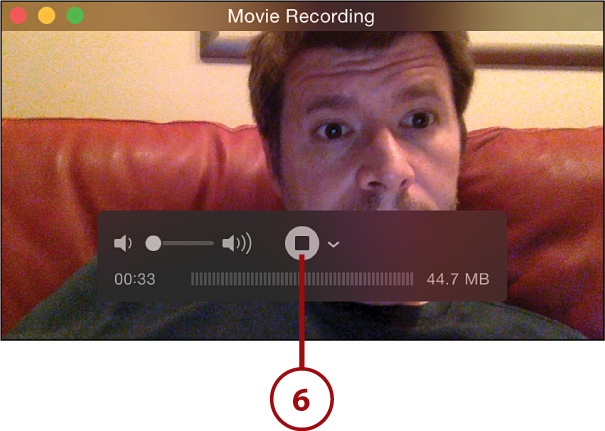
6. Click the Stop button to stop recording.
7. Use the playback controls to view the video you’ve recorded (not shown here).
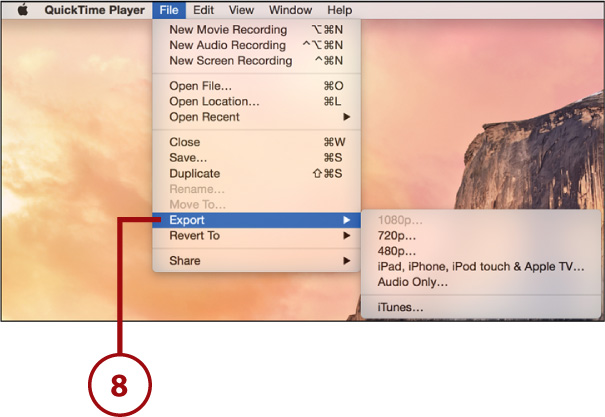
8. Choose File, Export to save the movie, if desired. (The available options vary depending on the quality of your camera.)
Lights, Camera, Screen Actions
In addition to audio and video, you can record whatever is happening on your screen. QuickTime Player offers a New Screen Recording option under the File menu that does exactly what you’d think.
Video and Photo Fun!
If you want to record and share videos and photos, or you want to just play around with your Mac’s HD camera, try Photo Booth—located in the Yosemite Dock (or Launchpad or the Applications folder). Photo Booth provides a simple interface for taking pictures and video, applying effects, and sharing the results.