
16. Upgrading Your Mac
In this chapter, you learn how to upgrade the built-in capabilities of your Mac’s hardware and software, including:
![]() Upgrading the built-in memory
Upgrading the built-in memory
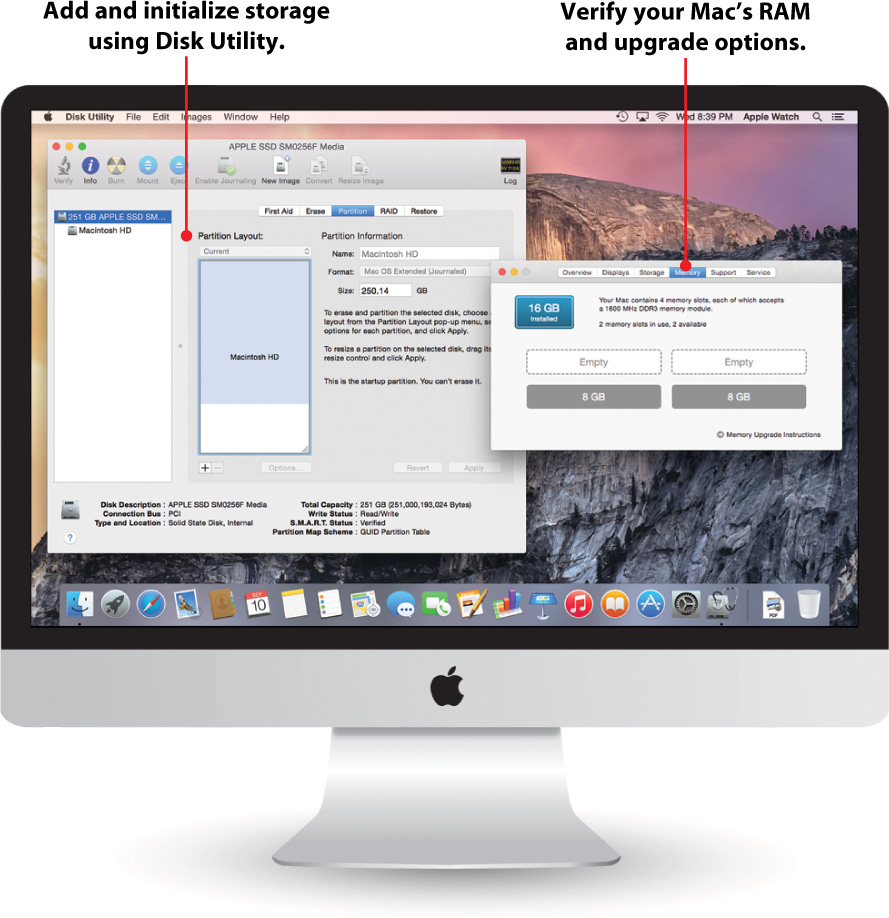
![]() Reinitializing the boot volume
Reinitializing the boot volume
![]() Using external storage devices
Using external storage devices
![]() Finding Thunderbolt devices
Finding Thunderbolt devices
It’s amazing how quickly “more than I’ll ever use” becomes “less than I need.” Even though your Mac likely came with at least 4 gigabytes of memory and a few hundred gigabytes of storage, chances are you’ll eventually need more. Some Mac models’ internal memory can be upgraded, but hard drives require potentially warranty-voiding surgery. Thankfully, with the high-speed buses on the Mac (Thunderbolt, USB 2 or 3, and, in some models, Firewire), you can make use of a wide range of external storage media.
Upgrading Your Built-In Hardware
As the years go by, computers get thinner and more complex—and our upgrade options fade. Of the Macs introduced in 2014, with the exception of the Pro, none of them officially support hard drive replacements. Apple has gone through several different iterations of cases in the past few years, and it’s impossible to describe the process in detail without knowing what model you have.
To locate the installation instructions for RAM and hard drives, review the manual that came with your computer, or visit http://support.apple.com/manuals/. The Apple support site has manuals for all the Mac models online. (You can even search by serial number.)
If you’re adventurous (and technically adept) you might want to visit http://www.ifixit.com/Device/Mac for detailed installation guides for Mac hardware, including hard drives. These guides will void your warranty, but they’re clearly written—and when you’re out of support options, they can extend the life of your computer.
General Guidelines for Conducting Mac Surgery
If supported, replacing RAM in your Mac isn’t difficult, but it does require a screwdriver. As long as you follow Apple’s instructions and keep a few key points in mind, the process should be painless:
• Always perform the upgrades on a flat, clean surface with your Mac face down on a protective cloth. Removing the RAM upgrade cover is easy, but (trust me on this) don’t try opening it up with your computer lying on its side or balanced precariously.
• Make sure that your system is shut down and unplugged before you open it. Upgrading the RAM on a computer that is sleeping is not a good idea.
• Do not rush. If parts appear to be sticking, re-read the instructions and make sure that you are following them exactly. There should be minor resistance when you remove the RAM, but these actions should not be feats of strength.
• Do not force connections. As with removing components, there should only be minor resistance when you install RAM.
• Make sure you use components that match Apple’s upgrade recommendations. Even if RAM technically fits, it doesn’t mean that it is compatible with your system. Apple has strict requirements on memory timing, so be sure to match what you’re buying with Apple’s specs. A great source is http://www.crucial.com.
• Do not over-tighten (or over-loosen) screws. Most of the upgrade compartments have screws that are retained in the covers (they don’t come all the way out). If you keep turning them, you might end up breaking them.
Document with Digital Photography
If you have an iPhone, iPad, or other digital camera, I recommend taking a photograph of each step of the disassembly process—especially if it is an unsupported upgrade. The photos give you a visual reference of how the system should look when you are reassembling it.
Verifying Your Mac RAM Upgrade
After completing an upgrade on your Mac’s RAM, you should always check to make sure that your system recognizes the memory you’ve added. Follow these steps to check your installed RAM:
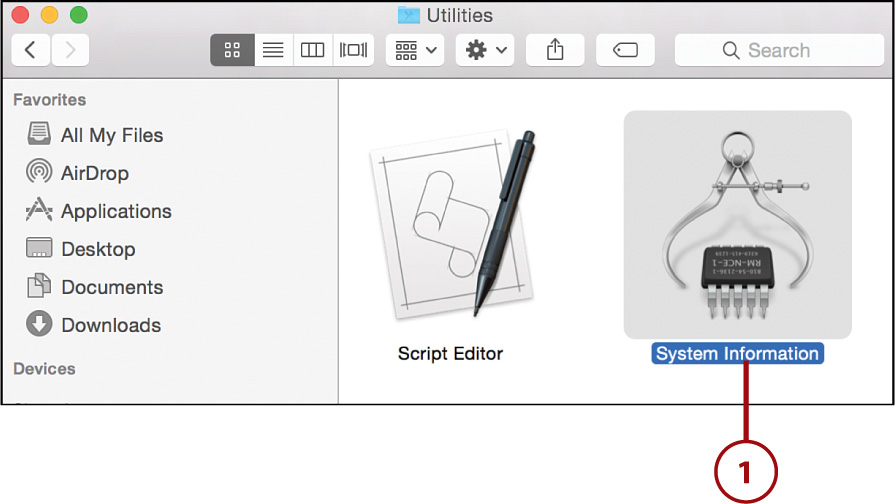
1. Open the System Information utility (found in the Applications folder under Utilities).
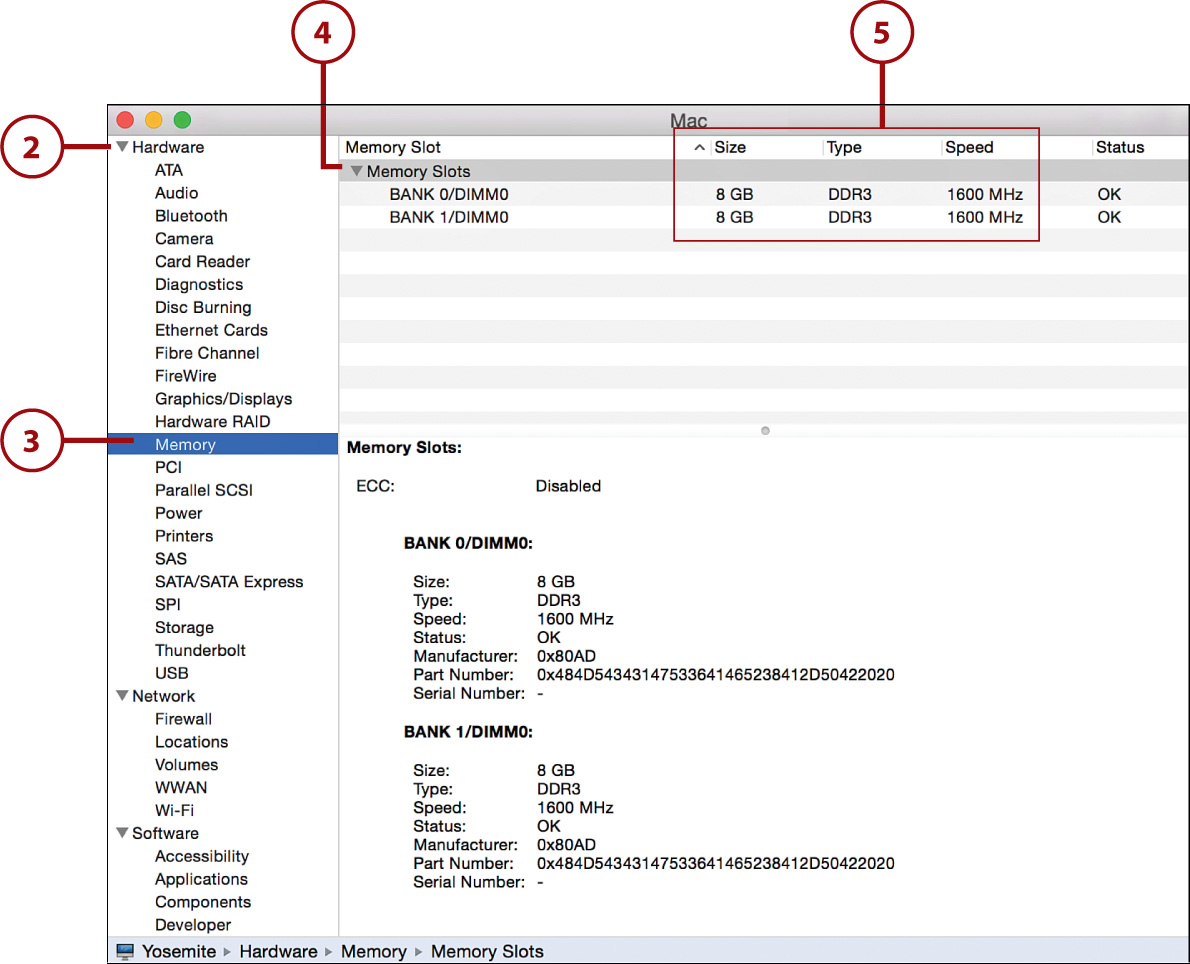
2. Expand the Hardware category.
3. Click to select Memory.
4. Expand the Memory Slots item to view the individual DIMMs installed in the system.
5. Verify that the memory size and speed match what you added to your system.
6. If these do not match, re-open your Mac and try removing and re-installing the RAM.
Simplified System Stats
You can access a simplified version of System Information (including a display of installed memory) by choosing About This Mac from the Apple menu.
Preparing a New Boot Drive
If you’ve been forced to have a repair shop replace your hard drive (or have done it yourself), you have a slight problem—Yosemite is no longer installed, so there’s nothing to boot from. To re-install OS X, you need to prepare the new hard drive:
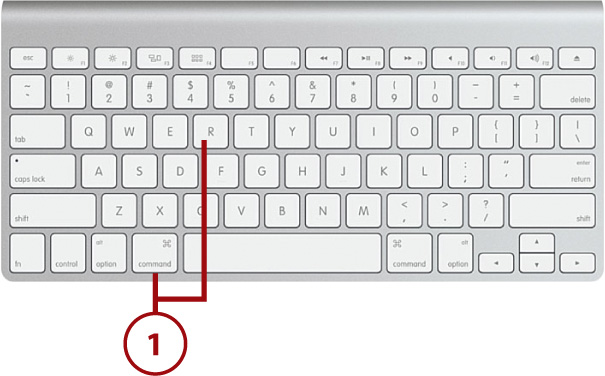
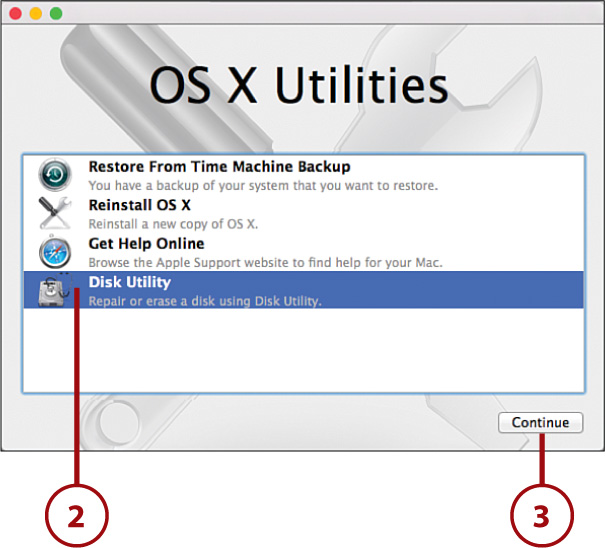
1. Start your Mac while holding down Command+R. This boots from the recovery partition, if available, or from Apple’s Internet-based recovery disk.
2. Choose the Disk Utility item from the list of utilities.
3. Click the Continue button.
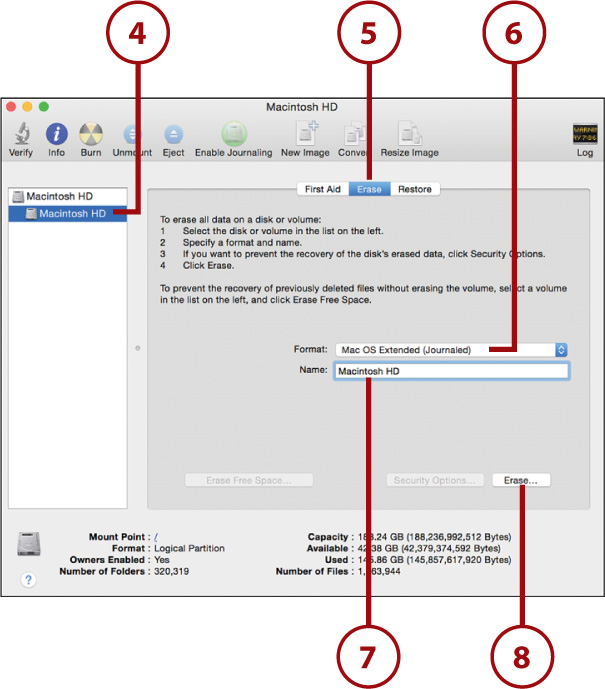
4. Choose your new Mac disk from the list of disks that appears on the left side of the window.
5. Select the Erase button in the top right of the Disk Utility window.
6. In the Format pop-up menu, choose Mac OS Extended (Journaled).
7. Enter a name for the new startup disk you’re formatting.
8. Click Erase.
9. Disk Utility warns you that all data will be erased. Click Erase to continue. The format process begins and might take several seconds (not shown).
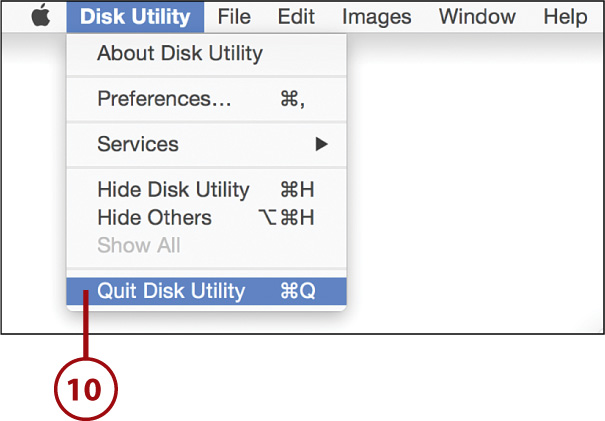
10. Choose Quit Disk Utility from the Disk Utility menu.
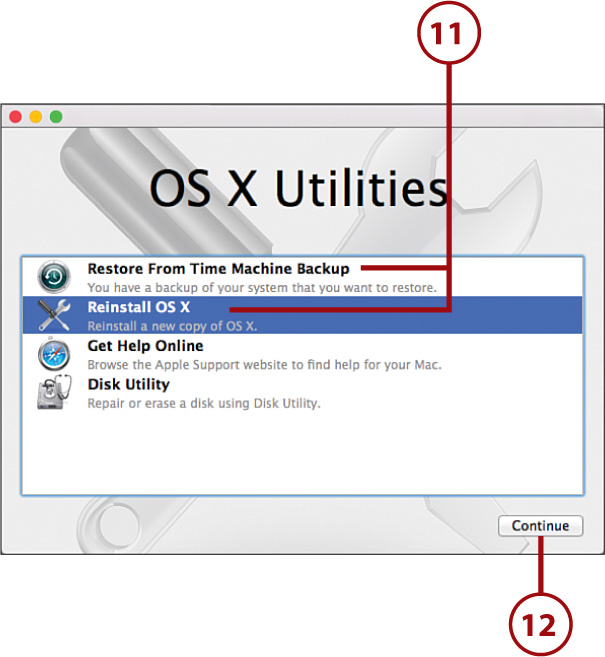
11. Select Reinstall OS X or Restore from Time Machine Backup.
12. Click Continue to begin installing Yosemite on your freshly prepared disk.
Fusion. It Works, or It Won’t.
If something minor happens to your Fusion drive (assuming you have one), Disk Utility will do everything it can to fix the drive. Unfortunately, if your Fusion drive completely dies, it’s best to go to an Apple Store for your repair; there are literally no user configurable options for the Fusion drive at this time.
Apple has stopped selling bootable media for reinstalling your operating system. Don’t worry—you can still make your own bootable thumb drive or DVD if you need to. Read this article for the details: http://www.techrepublic.com/article/pro-tip-how-to-create-a-bootable-usb-installer-for-os-x-yosemite/.
Adding External Storage
Long before PCs had a reasonable standard for connecting external storage, the Macintosh had external drives galore—thanks to a protocol called SCSI. This tradition of expandability continues with your Mac. Depending on your model, you have USB 3.0 ports (2012 and later models), a combination of USB 2.0 and Firewire ports (2011 and earlier models) or a high-speed, daisy-chainable Thunderbolt port (2011 and later models). Most Mac owners also have an SD card slot, which makes it possible to access the popular memory format used in many digital cameras and other devices.
Preparing the Storage Device
Before using a hard drive, thumb drive, or SD card with your system, you need to initialize it with a format that best suits your needs. The Disk Utility application (in the Finder choose Applications/Utilities/Disk Utility) is your one-stop-shop for preparing storage devices for use on your Mac.
There are three primary formats used in Yosemite:
• MS-DOS (FAT)—A disk file system that is accessible on any Windows-based system as well as your Mac.
• ExFAT—A disk format, created by Microsoft, that is especially suited to Flash drives. This format can be used across OS X (10.6/10.7/10.8) and Windows systems (XP/Vista/7/2008).
• OS X Extended (Journaled)—The modern OS X disk standard that offers basic error correction through a process called journaling.
Stick with OS X Extended (Journaled)
There are several other variations of the OS X Extended format available, but most are used in very specialized applications, such as server systems. The exception is OS X Extended (Journaled, Encrypted), which you can choose for full disk encryption.
Initializing Your Storage Device
With your storage in hand, follow these steps to erase and initialize your storage device:
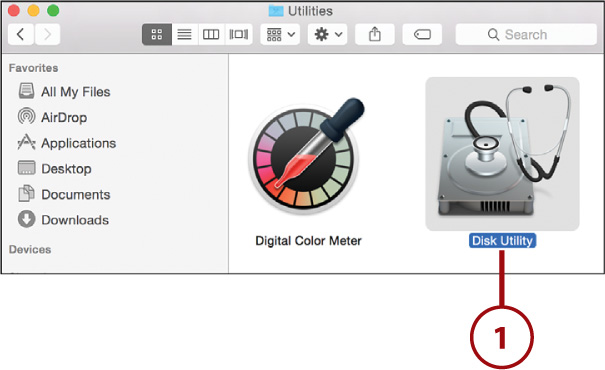
1. Open the Disk Utility application found in the Utilities subfolder of the Applications folder.
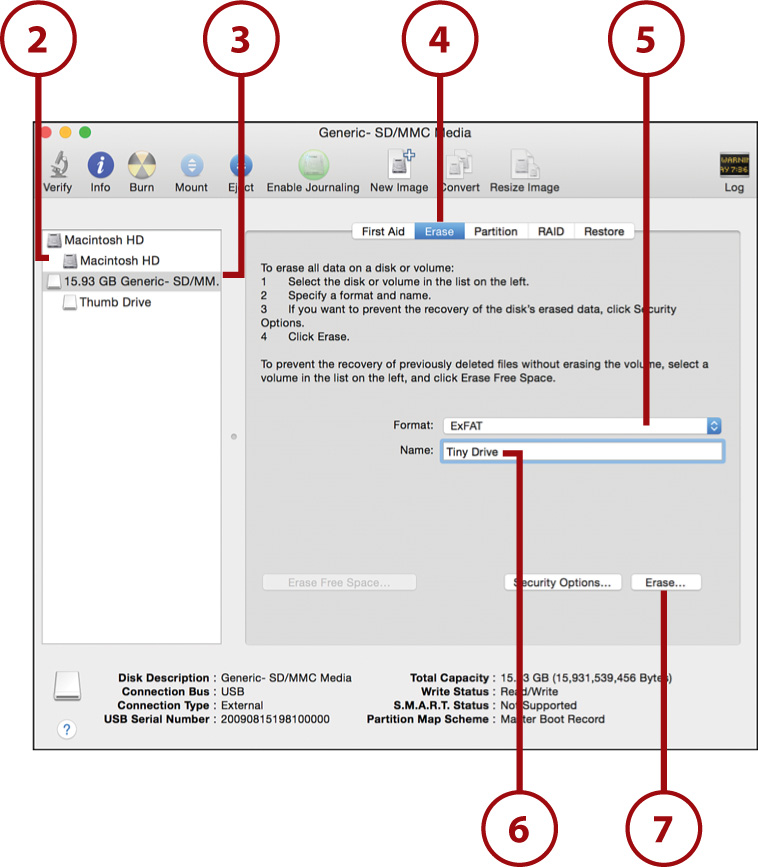
2. Plug the storage device into your Mac. The device appears in the device/volume list on the left. You’ll probably see at least two entries for each drive. The first entry is the device itself; the others are existing volumes located on the device.
3. Click to select the device you want to prepare.
4. Click the Erase button in the Disk Utility window.
5. Use the Format pop-up menu to choose the type of format you want to use on the device.
6. Enter a name for the volume you’re creating.
7. Click Erase.
8. Yosemite warns that all data will be erased. Click Erase to continue. The format process begins and might take several seconds.

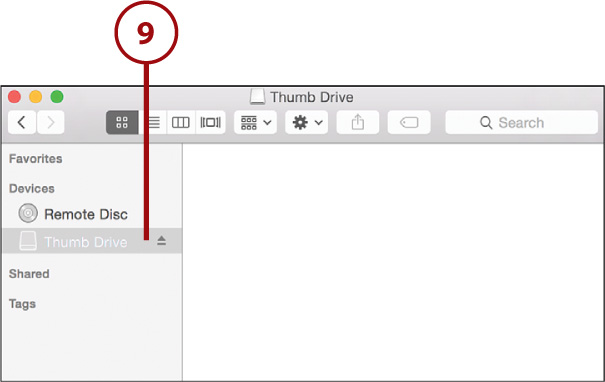
9. A new disk icon appears in the Finder. This is your initialized and ready-for-use volume.
Reformat for Efficiency
Many external drives and thumb drives are already formatted with the MS-DOS (FAT) file system. These drives are “plug and play” on both Windows and Macintosh systems, which means that you won’t get the most efficient use of the storage space until you reinitialize the device with OS X Extended or ExFAT.
Initializing in the Finder
If you encounter a completely unformatted disk (most packaged external drives you buy are formatted for Mac or Windows), you’ll receive a prompt in the Finder allowing you to begin the initialization process without opening Disk Utility first. Nowadays, however, this is a pretty rare occurrence.
Mounting and Unmounting Devices
Any storage device with a recognized file system can be connected and mounted on your Mac. To use your properly prepared storage, use the following approach:
1. Plug the device into your Mac to mount it (not shown).
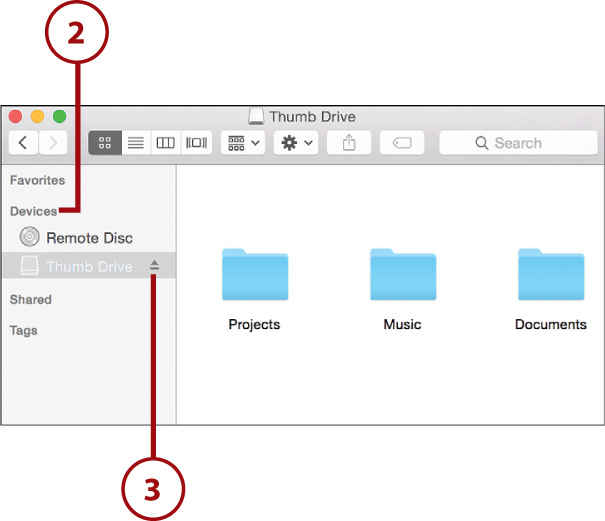
2. The volumes located on the device are mounted in the sidebar (in the Devices category) and the files and folders are made accessible through the Finder.
3. To unmount (eject) a volume, click the Eject icon beside the volume’s name in the Finder sidebar.
If you initialize a new disk or plug a new disk into your computer, Yosemite asks if you want to use it with Time Machine. You can use this prompt to jump straight into Time Machine setup, or dismiss the dialog box to use the disk for day-to-day storage.
Using NTFS-Formatted Disks
Most Windows-based systems now use a file system called NTFS. Your Mac is capable of mounting and reading NTFS volumes, even though it can’t create new volumes in the NTFS format.
You can read about the available options for fully supporting NTFS at http://reviews.cnet.com/8301-13727_7-57588773-263/how-to-manually-enable-ntfs-read-and-write-in-os-x.
Bring Back Firewire!
If you have Firewire storage and a new Mac, you’ll notice that there isn’t a Firewire port. Never fear, Apple has a simple solution. Browse the Apple Store for a Thunderbolt to Firewire connector that (for a nominal fee) will get you back in business.