12. Using Yosemite with Your iDevices (New!)

In this chapter, you learn about Yosemite and how it can integrate with your iDevices, including:
![]() Connecting your iOS Device with Yosemite
Connecting your iOS Device with Yosemite
![]() Transferring files with AirDrop
Transferring files with AirDrop
![]() Using Handoff to move between devices
Using Handoff to move between devices
![]() Making and receiving phone calls on your Mac
Making and receiving phone calls on your Mac
![]() Sending SMS messages on your Mac
Sending SMS messages on your Mac
![]() Using your iOS Device as a hotspot
Using your iOS Device as a hotspot
Yosemite is the first release of OS X that includes true integration with your iPhone and iPad. We’ve been limping along with some basic cross-device iCloud syncronization for a few years, but no more! Yosemite makes your iOS device an extension of your Mac—making it simple to move files back and forth, edit documents across devices, and even make use of the calling features of your iPhone.
Enabling Yosemite and iOS Communication
In order to communicate, your iOS device and Mac need a few simple settings tweaked—namely, they must both have active Bluetooth and Wi-Fi. Fortunately, these are the default settings for Yosemite, so chances are, you’re already all set. If you (or someone else who uses your computer) have altered these setting, it’s easy to change them back.
Verifying Your Wi-Fi and Bluetooth Settings
Follow these steps to check and enable your Wi-Fi and Bluetooth settings on both your Mac and your iOS device:
1. Open the Bluetooth System Preferences.
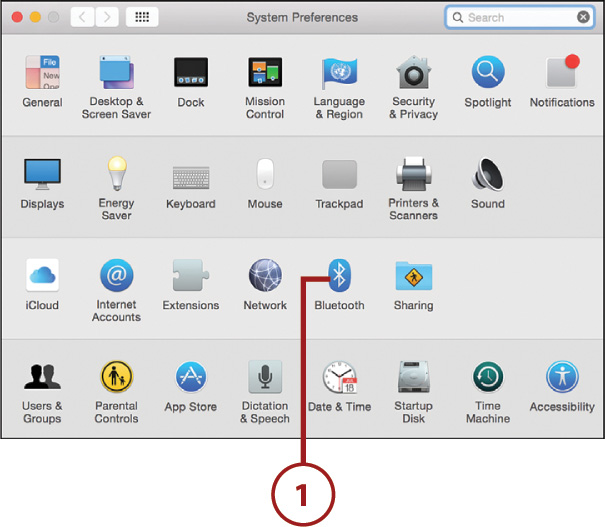
2. If Bluetooth is Off, click Turn Bluetooth On.
3. Close the Preferences.

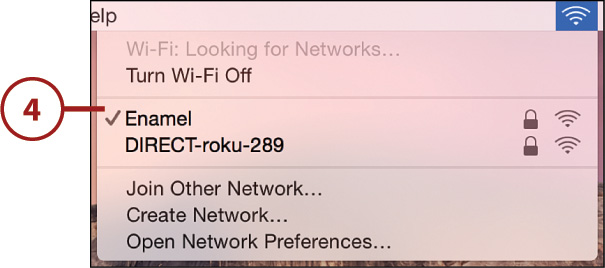
4. Use the Wi-Fi menu to verify that your Wi-Fi is on and connected to your wireless access point.
5. Use Control Center on your iOS devices to verify that Bluetooth and Wi-Fi are enabled on your iOS device. Enable them, if need be.

Using AirDrop
Earlier in the book you learned how to use AirDrop to share files between Macs. With Yosemite, it can also be used to share files between your Mac and iOS devices. Let’s look at both scenarios now—sending files from the Mac to iOS and vice versa.
Sending Files to iOS via AirDrop
To send a file to your iOS device, make sure you’ve enabled Wi-Fi and Bluetooth and then complete these steps:
1. Click AirDrop in the Finder sidebar.
2. After a few seconds, your iOS device appears.

3. Drag the file you want to transfer to the device icon.

4. iOS prompts you for the transfer. Click Cancel to stop the copy process.

5. iOS opens the file automatically when the transfer completes.

When in Doubt, iOS Asks
If iOS doesn’t know what to do with a file you’ve sent, it prompts you with a list of applications that can open it. Just choose your app and away you go.
Sending Files to Yosemite via AirDrop
To send a file from your iOS device to Yosemite, the process is similar. First, open the file on your iOS device and then complete the following steps:
1. Click AirDrop in the Yosemite Finder sidebar.
2. After a few seconds, your iOS device appears.

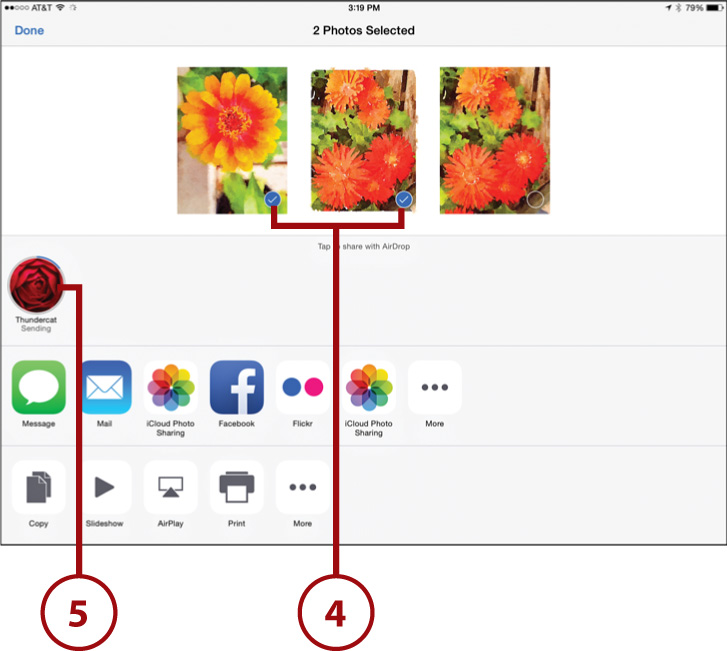
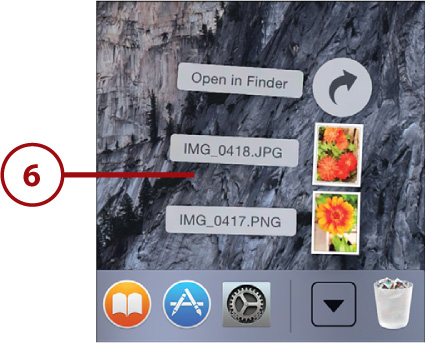
3. Touch the Share icon on your iOS device.

4. Select the items you want to transfer.
5. Touch the icon of the machine to which you want to transfer them.
6. Yosemite automatically downloads the files to the Downloads folder.
Enable AirDrop Access!
If you don’t see your iOS device (or Mac) in AirDrop, chances are you’ve disabled it or set it to be restrictive about whom it can communicate with. You can configure AirDrop to allow access from Everyone to Just Contacts, using the Control Center on iOS and the AirDrop window (see Chapter 3, “Connecting Your Mac to a Network,” for details) on OS X.
Using Handoff to Move Between Devices
The Yosemite Handoff feature is uniquely Apple. When you’re in the middle of a task and want to move from your Mac to your iPad or iPhone, you can seamlessly switch to your device and pick up where you left off—no need to save files and sync with cloud services. Handoff gives you a slick and fast way to move around without having to even think about the process.
Enabling Handoff
By default, Handoff should be enabled on your Mac and iOS device, but you might still want to verify this setting yourself. To verify your Handoff settings, complete the following actions:
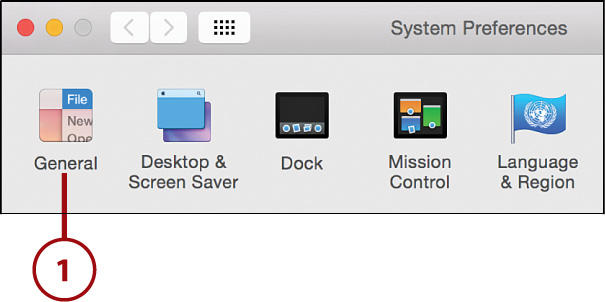
1. Open the General System Preferences panel.
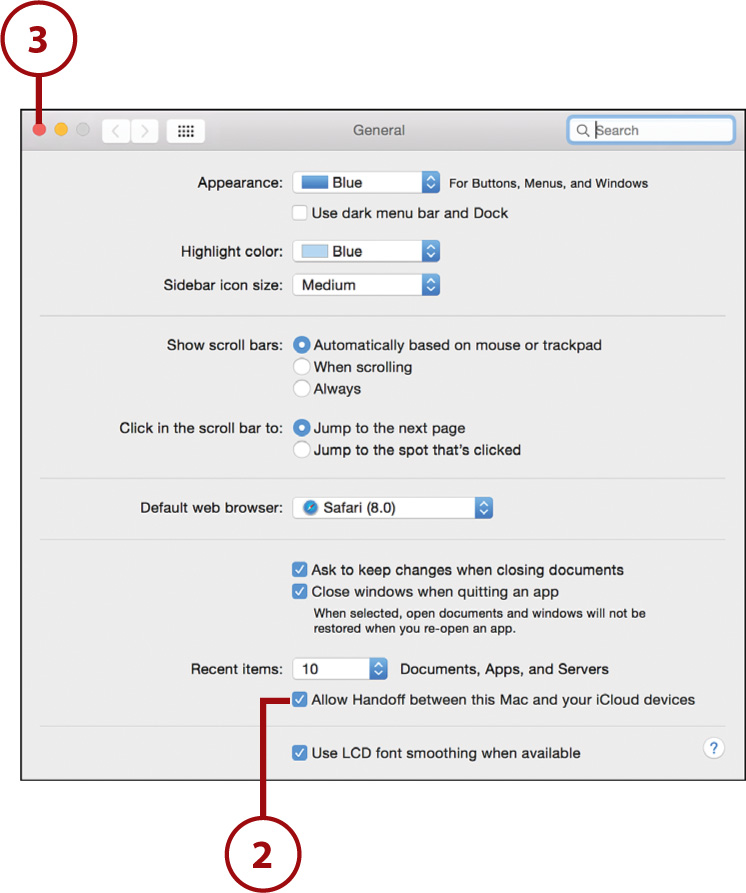
2. Click the Allow Handoff Between this Mac and Your iCloud Devices checkbox.
3. Close the System Preferences.
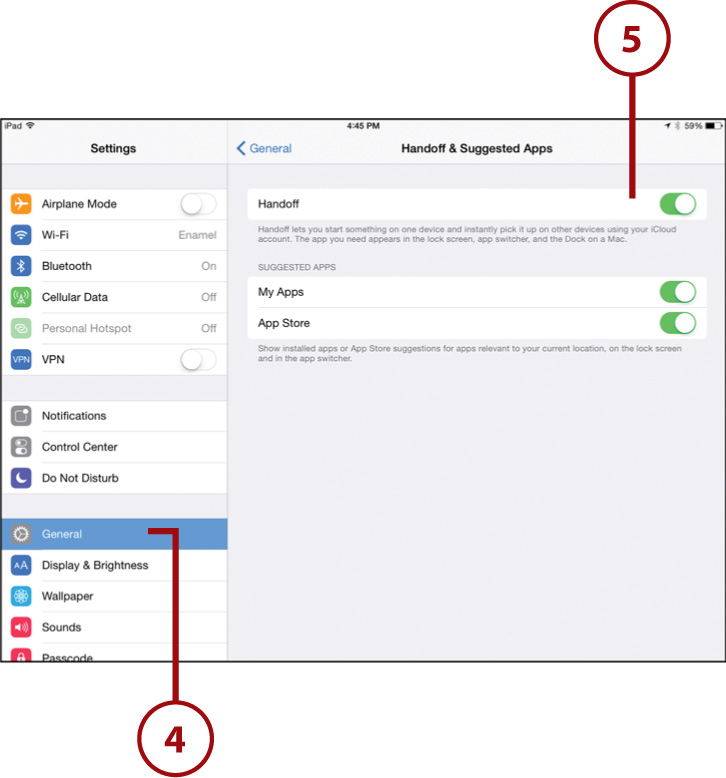
4. On your iOS device, open the Settings app and navigate to the General category.
5. Use the Handoff & Suggested Apps area to enable Handoff.
Handing Off from Yosemite to iOS
Handoff works with a variety of apps, including Safari, Mail, Pages, Keynote, and Numbers. Developers will obviously add Handoff to their apps where it makes sense, so these instructions are just general guidelines. Which apps it works with will change over time.
To handoff from a Yosemite application to iOS, follow these steps:
1. Open the application and use it as you normally would on OS X. (Here, Safari is in use.)

2. Activate your iOS device. An icon for the corresponding app appears in the lower left of the lock screen.
3. Swipe up from the lower left of the lock screen.
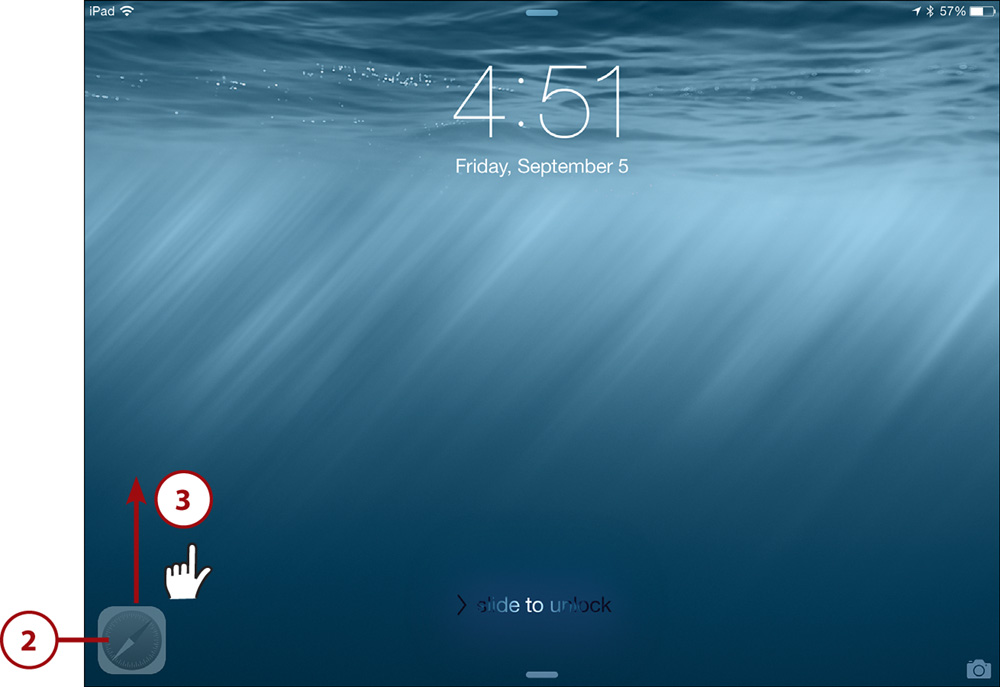
4. The application (and whatever content you were viewing/editing) is immediately visible on your iOS device.

Handing Off from iOS to Yosemite
Handing off from iOS to Yosemite is just as easy. To handoff from your iOS application to your Mac, just complete these actions:
1. Open the application and use it as you normally would on your iOS device. (Here, Mail is being used on an iPad.)

2. Your Mac displays an icon for the corresponding app alongside the dock. Click the icon.

3. The application opens and displays the content you were editing/viewing, ready to be completed.

Using Your iPhone to Cell-Enable Your Mac
An exceptionally cool feature of Yosemite’s iOS integration is the ability to enable your Mac to act as a speakerphone and make and receive phone calls through your iPhone, as well as send and receive SMS messages.
These features require your iPad and iPhone to be connected to the same network with Bluetooth enabled, and for them to both be logged into the same iCloud account. After that, enabling the cellular capabilities and using them is a piece of cake!
Keep an Eye on Your iPhone
When you start using Yosemite with your iPhone, you’ll likely see a few prompts on your iPhone screen asking for permission to handle calls and send text messages. I’d love to tell you when these appear, but they seem a bit unpredictable. Just pay attention to your phone and make sure you accept any requests to enable the features we’re about to explore.
Enabling Yosemite Cellular Calls
FaceTime controls the phone capabilities of Yosemite. To enable cellular calls, start FaceTime and then complete the following steps.
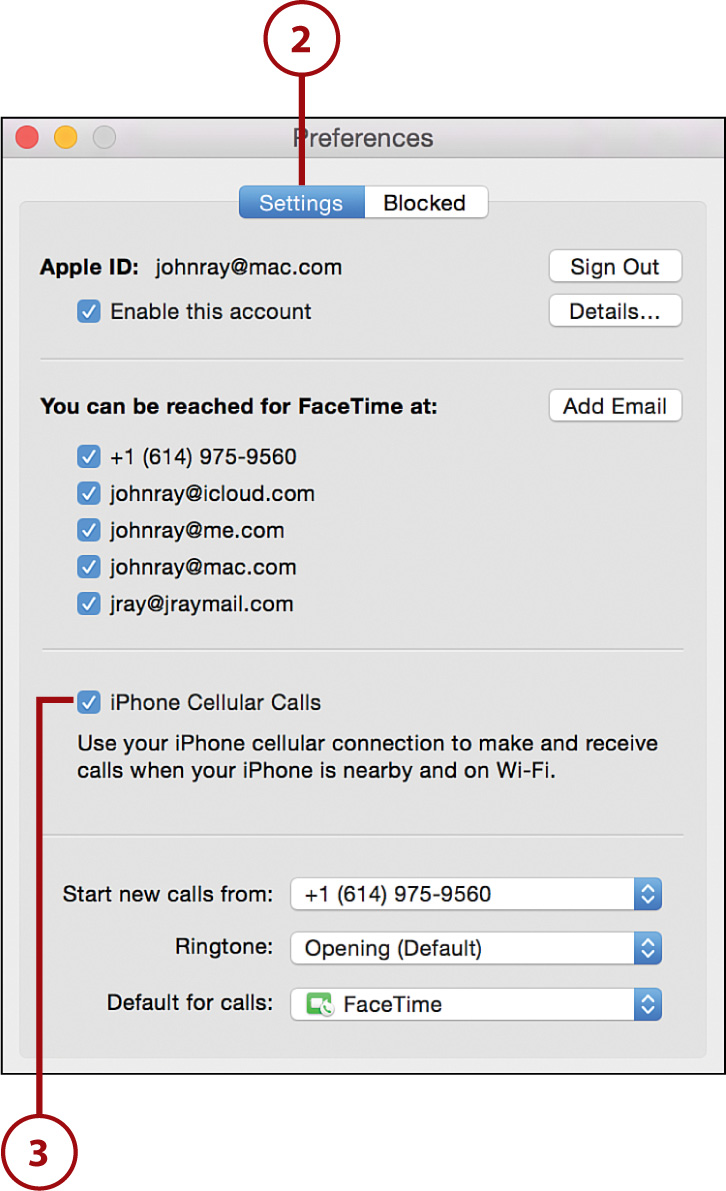
1. Choose FaceTime, Preferences to view the application preferences.

2. Make sure the Settings button is selected at the top of the window.
3. Check the iPhone Cellular Calls checkbox to enable your Mac to place calls through your iPhone.
Placing a Phone Call
To place a phone call, you again use FaceTime. Your iPhone must be on, connected to Wi-Fi, and somewhere in the general proximity of your Mac. Open FaceTime and then follow along:
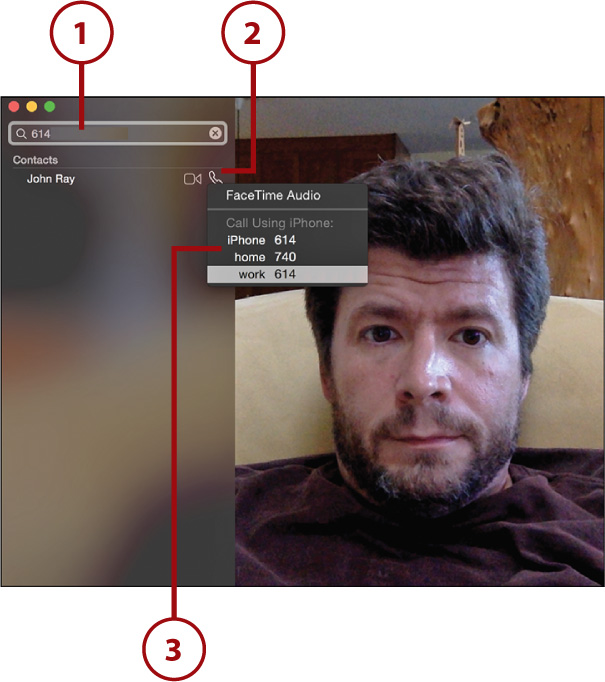
1. Type a name or phone number in the field at the top of the FaceTime window.
2. If the number matches a contact, the name is shown; if not, only a phone number is visible. Click the phone icon beside the name or number.
3. From the menu that appears, choose the number you want to call from under the Call Using iPhone section.
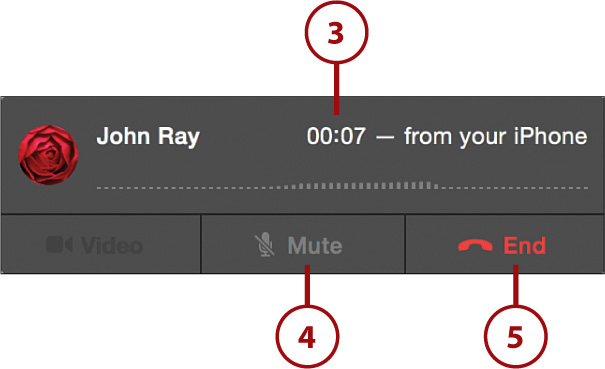
4. A window appears showing the call duration.
5. Click Mute to silence your microphone.
6. Click End to hang up.

Receiving a Phone Call
To receive a phone call, again it’s FaceTime—but, like other FaceTime video/audio chats, the application doesn’t even need to be running! Follow these steps to receive a phone call on Yosemite:
1. Wait for a phone call. A window appears with the name of the caller.
2. Click Accept to begin the call or Decline to ignore the call.

3. The window updates to show the call duration.
4. Click Mute to silence your microphone.
5. Click End to hang up.
Text Messaging with Yosemite
In Chapter 7, “Being Social with Messages, FaceTime, Twitter, and Facebook,” you learned about communicating online with Messages, but one little thing was left out. With Yosemite’s iPhone integration, you can send and receive messages from anyone. Doing so is identical to messaging with other Macs and iOS devices:
1. Within Messages, begin typing the name or number of a contact.
2. If the contact auto-completes, choose the number you want to text message. If not, just type the full number. You’ll notice that Messages designates the contact as a Text Message contact, rather than an iMessage (Mac/iOS) contact.

3. Converse with your text-messaging buddy as you would any other contact.

Receiving Is Believing
Receiving text messages (prior to sending one) is identical to receiving any other communication in Messages. If the app is running, it appears as a new conversation in the main window. If Messages is closed, you receive a notification of the new message with the option of responding. This service is so integrated, you won’t even know you’re chatting via SMS.
Using Your iOS Device as an Instant Hotspot
Yosemite offers the ability to quickly share your iPhone or iPad’s cellular Internet connection—assuming your plan already includes support for personal hotspots. To use this feature, you don’t need to do anything except make sure that your devices are signed into the same iCloud account.
Signing Into iCloud
To check that you’re signed into iCloud, follow these steps.
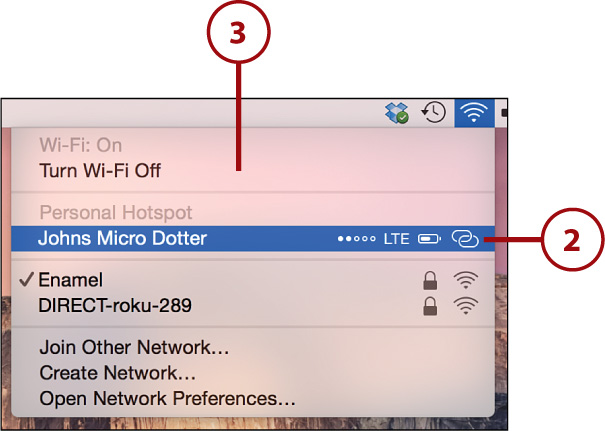
1. Make sure your iOS device is on and has a cellular connection (not pictured).
2. Open the Wi-Fi menu and select the Personal Hotspot item that appears from the list of available hotspots.
3. That’s it. No more configuration and no passwords. You’re immediately online! Use the Wi-Fi menu to monitor the signal strength and battery life of your iOS device.