
8. Working with Creative Cloud Libraries
Lesson overview
In this lesson, you’ll learn how to do the following:
Understand how Creative Cloud Libraries work.
Store different types of assets in a Creative Cloud Library.
Share assets among InDesign, Photoshop, and Illustrator.
Save assets to a Creative Cloud Library and add metadata to them.
Place and link library assets between InDesign, Photoshop, and Illustrator.
Update assets between design apps.

This lesson will take about 45 minutes to complete. Please log in to your account at adobepress.com/DesignCIB to download the files for this lesson, or go to the “Getting Started” section at the beginning of this book and follow the instructions under “Accessing the lesson files and Web Edition.” Store the files on your computer in a convenient location.
Your Account page is also where you’ll find any updates to the lesson files. Visit the Lesson & Update Files tab to access the most current content.
Saving and using assets from Creative Cloud Libraries allows you to build more complex workflows when combining Photoshop, Illustrator and InDesign.
What are Creative Cloud Libraries?
Creative Cloud Libraries are virtual libraries that are hosted on the Adobe cloud infrastructure. They can contain a variety of design-specific assets that allow you to use your most relevant design assets when you work on projects while using multiple Adobe apps. Most designers store their files and designs on either a company server or in a local folder, so switching to a cloud-based workflow might take a bit of getting used to. However, after this lesson you’ll have a better understanding of when and why to use Creative Cloud Libraries instead of a local folder or server. In previous lessons, you learned many of the differences between placing local assets and pasting them; here you’ll learn how those techniques change when you’re using assets from a Creative Cloud Library.
In Lesson 9, “Integration Through Collaboration,” we’ll take this concept further as we explore ways of collaborating using Creative Cloud Libraries and cloud documents.
How are they relevant to this book?
Creative Cloud Libraries are supported by nearly every Adobe application that comes with Creative Cloud, even some of the more recent mobile apps. This means that Creative Cloud Libraries enable you to take full advantage of the “Adobe ecosystem,” as they allow you to share files, layers, or settings that would otherwise be impossible to achieve using traditional cloud providers.
Imagine the following scenario: you have finished working on an icon, using Adobe Illustrator, that will be used in a large media campaign. Thanks to Creative Cloud Libraries, you can save the icon in a library and reuse it across multiple Adobe design apps:
You can place it in a document intended for print output, using InDesign.
You can place it in a web graphic, using Photoshop.
You can use it as part of an animation or video sequence, using Premiere Pro or After Effects.
You can use it as part of a UX/UI project, working with Adobe XD.
You can use it for creating social media posts, using Creative Cloud Express.
You can even use it within Microsoft Office 365 applications, like Word or PowerPoint, because those applications support Creative Cloud Libraries.
What is unique about this experience is that all the projects mentioned above are created using different Adobe (and even Microsoft) applications, and this allows you to do multichannel publishing. And all those projects will link to the same source, making it very easy to update the icon and immediately make the latest version of the icon available not only to all of your projects, but also to the projects of others. To learn more about sharing libraries, please consult Lesson 9.
This lesson focuses on exchanging assets between InDesign, Photoshop, and Illustrator and on how Creative Cloud Libraries enable you to exchange assets between apps in ways that would otherwise be impossible using the methods described in the earlier lessons in this book.
What makes Creative Cloud Libraries unique?
Many companies are moving to a cloud environment for software solutions and data storage; likewise, designers are increasingly likely to work from remote locations. The design industry in particular has seen massive growth in the adoption of cloud technologies for storing assets and collaborating online. Indeed, it is often more efficient to access design files via solutions like Microsoft SharePoint than it is to access the company server via a VPN connection, which can often be slow. So what is the value in using Creative Cloud Libraries when compared to other cloud solutions for designers? There are two main uses for libraries:
Reusing assets for your own projects
Sharing assets with other Creative Cloud users
Creative Cloud Libraries have three main differentiators that make them ideally suited to designers:
The types of assets they support
Interoperability among Creative Cloud and Microsoft Office apps
Sharing and collaboration among groups
Asset types
Traditional cloud solutions allow you to store “normal” files, like PSD, AI, and INDD files, among others, in an online folder. This means that they act the same way as a traditional file server. But Creative Cloud Libraries are not really about file management; they’re more about branded asset management. Let’s think about branded assets for a second. What makes up your brand? Is it only your company logo? No, your brand consists of:
Your logo in different color versions or modes—RGB, CMYK, spot colors
Company colors
Icons and other design elements
Text styles and font settings
Photoshop layer style settings
And much more
Looking at these different asset types, you’ll realize that many of the items listed above don’t have a dedicated file format. This makes it impossible to save them to a server or to cloud storage.
For example, it’s impossible to save a text style to your server or cloud storage as a file. Instead, we would save an InDesign text frame using the text style as a separate document. But that is very inefficient when you need to reuse the style across different projects.
So Creative Cloud Libraries were built specifically to store, reuse, and share design assets that don’t have a dedicated file format and that are available in nearly any Creative Cloud application. Additionally, you can preview all items in a library when you share them with others via a web browser. Contrast this with traditional cloud storage solutions, which cannot preview InDesign, Illustrator, or Photoshop documents, let alone swatches, text styles, and other asset types.
Interoperability
As mentioned, Creative Cloud Libraries aren’t limited to InDesign, Photoshop, and Illustrator. You can use them in nearly any Creative Cloud application and even within Microsoft 365 applications. On top of that, you can also integrate them into third-party solutions like Microsoft PowerAutomate, Frontify, and Zapier, to name a few. This means that you can expand on the Adobe ecosystem by integrating with solutions you might already be using. And this is a great way of sharing branded assets across systems that might be used by other departments—for example, mobile app developers or 3D artists.
Sharing and collaboration
As you’ll learn in Lesson 9, it’s very easy to share Creative Cloud Libraries with others on your team or outside your organization. This means that you can link a Photoshop layer, an Illustrator icon, or InDesign text not only across your own projects and files, but also across those of others. This ensures everyone is always using the latest version of your logo, or the right version of a specific product image. Additionally, you can share libraries with Microsoft Office 365 users. This is great for sharing assets with those who aren’t using Creative Cloud but still need to have access to the latest logo, colors, and images. This is useful whether you’re working in marketing or you just need to place native Illustrator, Photoshop, or InDesign assets in, say, a PowerPoint presentation.
What can you store in a library?
You can store a variety of types of assets from different applications in Creative Cloud Libraries. And while several Adobe design applications have some of these asset types in common—for example, color swatches—there are also asset types that are unique to specific apps. This means you can store these asset types in a library, but reuse them in other projects only when you use the same application.
At the time of this writing, there are 23 different asset types you can store in a Creative Cloud Library, and Adobe is constantly adding more as Creative Cloud products evolve.
Commonly used asset types:
Colors, color themes, and gradients
Paragraph and character styles
Text
Photoshop layers, Illustrator artwork, and InDesign snippets
Specialized asset types:
Lumetri color looks (for color grading video clips)
3D models and lights
Vector and pixel brushes
Adobe XD components
Know that it is also possible to save regular files into a Creative Cloud Library. You can achieve this by dragging files from the Finder (macOS) or Explorer (Windows) and dropping them into a library panel from either an Adobe application or the Libraries section in the Creative Cloud desktop app. The file types you can upload into a library include:
Adobe design app template formats like AIT, PSDT, and INDDT
Image file formats like JPEG, TIFF, SVG, and others
Video and sound file formats
3D formats like USDZ, OBJ, SBSAR, and others
Can Creative Cloud Libraries replace my server?
The short answer to this question is no. Creative Cloud Libraries are not built to replace your server, hard drive, external drive, digital asset management (DAM) system, or media asset management (MAM) system. Despite the fact you can also store some regular file types in a library doesn’t mean it can be used to replace your current storage system. The main purpose of a Creative Cloud Library is to give you an easy way of storing branded assets and using them across projects and teams, not to archive projects or build a database of images. If you do attempt to use libraries as a database, you’ll quickly hit the following limitations:
Every asset you store in a Creative Cloud Library will also be synchronized to your hard drive. This means that adding 500GB of images to a library will also consume 500GB of data on your hard drive, and the hard drive of anyone you’ve shared the library with.
The lack of metadata fields for filtering, categorizing, and tagging library assets will quickly prove that Creative Cloud Libraries are not a replacement for a DAM or MAM. The system does allow you to use a very basic description metadata field per stored item, which is just enough for searching through branded assets, but nothing more.
Anyone who needs access to your libraries will require an Adobe Creative Cloud account, via either a Creative Cloud membership or a (limited) free account. This makes Creative Cloud Libraries not very scalable to anyone in the organization who is not part of your design or marketing department.
Where are library items stored?
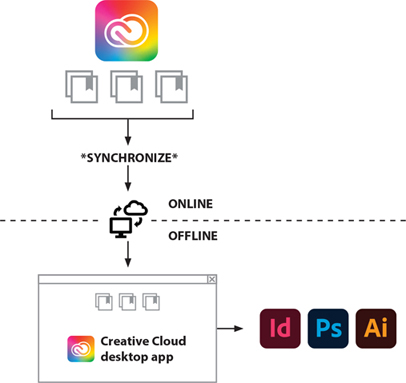
Creative Cloud Libraries are hosted on Adobe servers and synchronized to your Creative Cloud account. This means that, by default, all your libraries are safely stowed away behind your login and password. When you log in to Creative Cloud on your computer (to use your design apps), your libraries are downloaded and synchronized to your hard drive in order to make them available in all your Adobe applications. This process happens through a desktop application called Creative Cloud (more about this in the next few paragraphs).
When you add an item to a library, via either a design application or the Creative Cloud app, the new asset is synchronized to Creative Cloud. This makes it available across all the applications and services that come with your membership.
How to view your libraries
Viewing libraries locally
You can view all available libraries, either owned by you or shared with you, by using the Creative Cloud app on your computer. The app launches when you start up your computer and it keeps you signed in to your Adobe account, giving you access to your Adobe products. It’s also where you can view, share, and create your Creative Cloud Libraries.
There are two main ways of viewing a library: by asset type and by group. You can define a selection of assets as a group and give it a custom name. You can even create groups within groups, called subgroups, allowing you to better organize your libraries. This comes in handy, given that you can store up to 10,000 items per library.
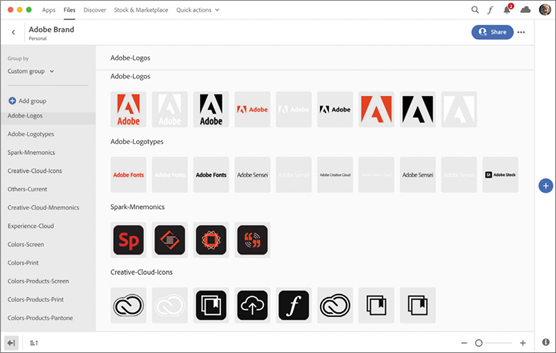
An example of a simple library that uses several subgroups, which are listed in the sidebar on the left side of the window.
Viewing libraries online
Alternatively, you can view your Creative Cloud Libraries online. To do so, open a web browser, navigate to assets.adobe.com, and log in to your account. From there, click the Files tab and then click Your Libraries.
Creating your first library
This exercise focuses on building your first Creative Cloud Library. We won’t be reusing the library’s assets in a project, so learning how to build the library itself is the purpose of this exercise.
Naming a library and grouping library items
The library we’re building is based on the dinosaur brand you’re already familiar with. And the library will hold a combination of regular files and assets from documents that you worked on in previous lessons.
Launch the Creative Cloud desktop application on your computer by clicking the Creative Cloud icon in your menu bar (macOS) or the Creative Cloud icon at the bottom right, next to the clock (Windows).
The Creative Cloud desktop application opens.

In the Creative Cloud app, click the Files tab, then click the Your Libraries category in the sidebar at left.
Click New Library to create a new library.
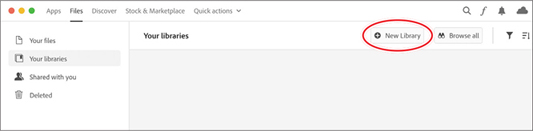
Name the library dinosaur and click Create.

Click Upload A File to start the upload process from your hard drive.
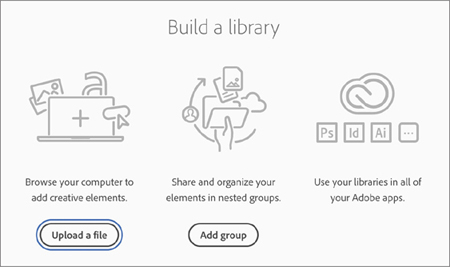
 Tip
TipIt’s also possible to drag and drop files from your hard drive into the library.
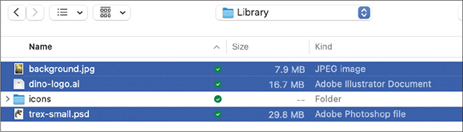
Navigate to Lesson08/Imports/Library.
Select background.jpg, dino-logo.ai, and trex-small.psd, and click Add to start the upload process.
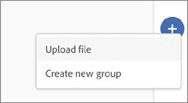
In the main Creative Cloud app window, make sure no files are selected, click the plus icon on the right side of the window, and choose Upload File from the menu to add more files.
Navigate to Lesson08/Imports/Library/icons, select all files in the folder, and click Add.
We have now uploaded a JPEG file, a Photoshop document, and a series of Illustrator files. In the next step, we’ll categorize the assets into groups and add some metadata to them, making them easier to find in the library.
 Note
NoteMulti-artboard Illustrator documents can also be uploaded into the library, but in the thumbnail you can see only the first artboard. To see whether other artboards are present, open the file from the library.
Select all icons in the library by clicking one and Command/Ctrl-clicking the others.
Click the Add Group button.
Name the group icons. This creates a group and adds the selected items to it.
Select the logo in the library and click the Add Group button again.
Name the group Logos and press Return/Enter to add the selected logo to the newly created group.
Select the trex-small and background items and click the Add Group button.
Name the group Jungle.
We’ve now created three groups with different items in them.
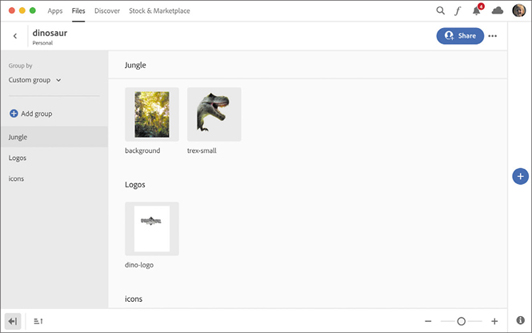
Viewing item information
The Creative Cloud app allows you to see the details of an uploaded asset. This includes the modification date, creation date, size, and file type. To view file details:
In the Creative Cloud app, open the dinosaur library.
Click the Info button at the lower right of the window to display information about your current library.

A pane displaying basic information about the library slides in from the right side of the window.
Click to select a library item to display information about it.
It’s possible to add a description to the library item from this screen. But for the purposes of this exercise, we’ll do so from a design application instead. That way, you’ll see that it’s unnecessary to leave your design app and return to the Creative Cloud app just to update an item description.
Viewing a library in Photoshop
These steps teach you how to view the contents of a Creative Cloud Library in an Adobe design app—in this case, Photoshop—and add a description to an item.
Start Photoshop, and choose Photoshop > Preferences > General (macOS) or Edit > Preferences > General (Windows).
In the Preferences dialog box, click Reset Preferences On Quit, and click OK in the confirmation dialog box.
Click OK to close the Preferences dialog box, then restart Photoshop.
Choose Window > Libraries to open the Libraries panel.
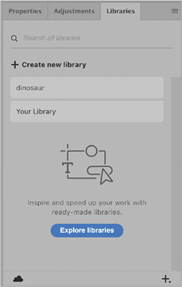
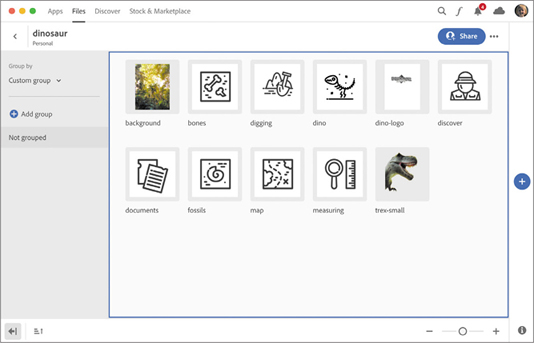
The Libraries panel lists all your Creative Cloud Libraries, including the dinosaur library.
Click the dinosaur library to view its items.
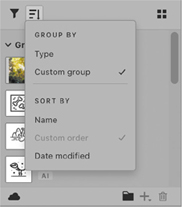
Click the Sort Options button. From the Group By menu choose Custom Group to display all items per group instead of per file type.
Right-click the background item and choose Add Description.
Enter Always use in combination with trex-small and click OK.
Hover your cursor over the background item.
The pop-up shows the item description.
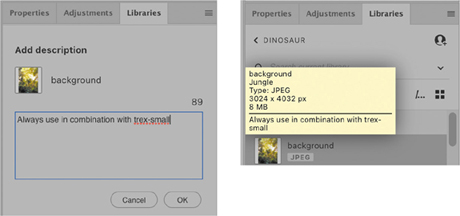
Descriptions help you find files, and you can use them to add instructions for use of the file.
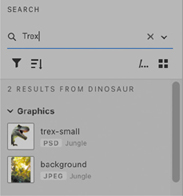
Click in the search bar at the top of the Libraries panel and type Trex to search for that term.
The search returns two items. One is the trex-small item itself because the search keyword is included in its filename, and the other is the background item because the word trex is in its item description.
Click the x in the search bar to delete Trex.
Creative Cloud Library workflows
The following exercises show you how to store design assets in a Creative Cloud Library and reuse them in other applications. There are many more asset types and sharing combinations available than just the ones described in this book. This is why you should experiment with different asset types and applications.
Combining InDesign and Photoshop library assets
In this example, you exchange assets between Photoshop and InDesign. This workflow is useful because it is difficult to get InDesign assets into Photoshop via the traditional methods of placing or linking. However, thanks to Creative Cloud Libraries we can link content from InDesign to Photoshop.
![]() Note
Note
In this lesson, each of the “-end” files has all of its artwork embedded so that you don’t have to deal with broken links. This is because my original Creative Cloud Library is not available with this book.
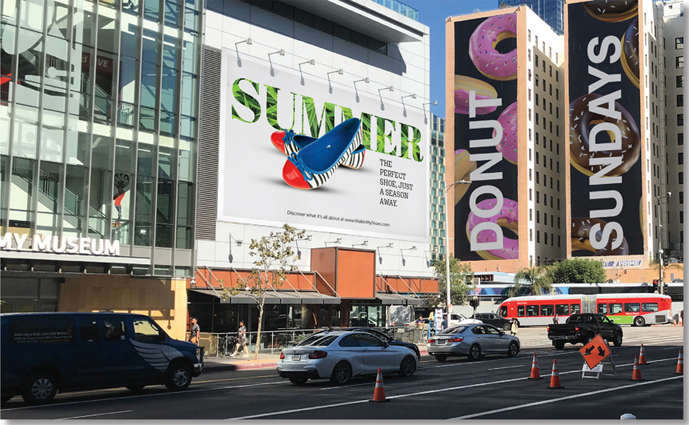
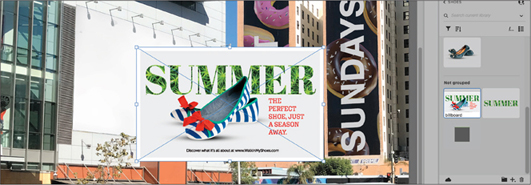
In Photoshop, open L08-billboard-end.psd from the Lesson08 folder.
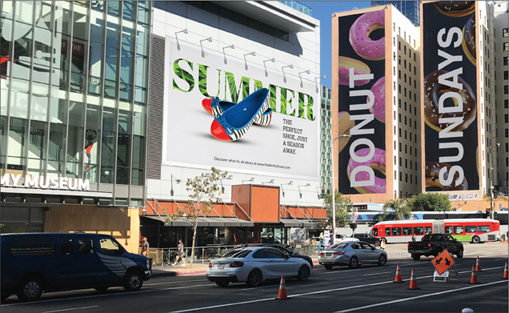
This Photoshop composition is a mockup of a billboard campaign. The billboard poster itself is an InDesign layout that is ready for print and linked as a library Smart Object to the Photoshop document. This means we can change the InDesign layout of the original billboard design and see its mockup update in Photoshop.
Start InDesign, and then press Control+Option+ Shift+Command (macOS) or Ctrl+Alt+Shift (Windows) to restore the default preferences.
When prompted, click Yes to delete the Adobe InDesign settings file.
From InDesign, open billboard-end.indd from the Lesson08/Imports folder.

This InDesign document is the billboard design that was placed in the Photoshop composition you just viewed. It consists of multiple images that were originally placed from a Creative Cloud Library created in Photoshop.
Close all files.
Saving Photoshop layers to a Creative Cloud Library
We’ll first create a library and add items to it.
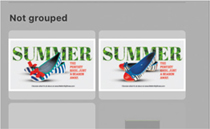
In Photoshop, open summer.psd from the Lesson08/Imports folder.

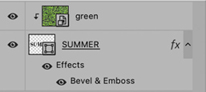
This document contains three layers: a shape layer, a grassy image that is clipped to the shape layer, and a layer filled with white that serves as the background. We need to keep both the grassy image and the shape layer intact in the Creative Cloud Library. That way, we can always edit the original layers for future updates—by, for example, replacing the grassy image with a different image. The Properties panel indicates that the grassy image has been placed as a linked file, using the Place Linked command.
NoteIf you notice a yellow triangle next to a linked layer, choose Layer > Smart Objects > Update All Modified Content to refresh all links.
Additionally, notice the Bevel & Emboss effect applied to the shape layer. We need to save the effect separately from the library for future projects that are part of same campaign.
In the Libraries panel, open the panel menu and choose Create New Library.
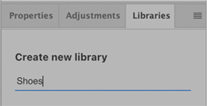
Name the library Shoes and click Create.
In the Layers panel, select both the grassy image layer (named green) and the shape layer (named SUMMER).

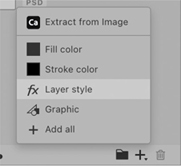
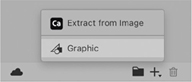
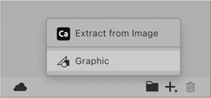
With both layers selected, click the plus icon at the bottom of the Libraries panel and choose Graphic to store both layers as a single item in the library.
Both layers are added as a single Photoshop document in the library.
TipIt is also possible to add items by dragging layers from the Layers panel onto the library, or by using the Move tool
 to drag items from the canvas onto the library.
In the Layers panel, select the SUMMER layer.
In the Libraries panel, click the plus icon again and choose Layer Style to add the Bevel & Emboss effect to the library as a reusable asset. (Clicking the plus icon in the Libraries panel shows different options depending on the properties of the selected layers.)
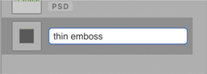
The layer style is added to the library, using the name of the original layer. Let’s change this to something that makes more sense for future projects.
In the Libraries panel, double-click the name of the newly added layer style and rename it thin emboss. Press Return/Enter to confirm.
Now that we’ve added our first Photoshop graphic and layer style to the library, it’s a good practice to see what we actually saved. Remember that the grassy image we saved as part of the library item was originally a linked layer. So let’s take a look at what happened to it in the library.
Double-click the first library asset, named green, to open it in its source application (in this case, Photoshop).
Here we notice two things. First, the canvas size is a lot bigger than before. This is because when a library item is created, the total size of all the elements in the layer stack is taken into account, including those hidden in the background. The grassy image extended far beyond the original canvas of summer.psd, which is why we now have a larger canvas.
Secondly, the linked layer has been converted into an embedded layer. This happens to make sure that the library item itself is not dependent on an externally linked image.
Close the library item file, then close summer.psd without saving.
Saving Photoshop Smart Objects as library assets
Photoshop has a unique feature that lets you automate the creation of a library and its library items. But in order to accomplish this, we need to convert the artwork we want to save to the library into Smart Objects.
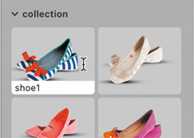
In Photoshop, open collection.psd from the Lesson08/Imports folder.

This document consists of images of shoes, each in a separate layer group. Each layer group holds a shoe layer and a shadow layer. We need to add all shoe groups to the library in order to use them in InDesign.
There are two ways of accomplishing this: either we manually add all nine items to the current library, or we ask Photoshop to do the work for us. Admittedly, for some it might be a little bit faster to quickly drag every shoe folder into the library. However, this scenario provides a great learning opportunity for auto-generating a library based on a Photoshop document.
The first step is to convert all items to Smart Objects.
In the Layers panel, select the shoe1 layer group.
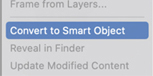
Right-click the group and choose Convert To Smart Object.
TipYou can also choose Layer > Smart Objects > Convert To Smart Object, or you can create a custom shortcut for this command by choosing Edit > Keyboard Shortcuts. That way, you can convert all folders with just a single keystroke.
Repeat the process for the eight other groups.

Open the Libraries panel menu and choose Create New Library From Document.
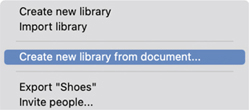
In the New Library From Document dialog box, make sure Smart Objects is selected.
This screen lists all elements from the current Photoshop document that can be automatically uploaded to the newly created library. Note that there is an option to replace and link the original Smart Objects in the Photoshop document to the ones uploaded to the library. Doing so would allow you to update the Photoshop document by editing the library items, a type of “upload, replace, and link” feature. This is interesting, but not useful in the current exercise, so leave that option unselected.
Click Create New Library to create a library that includes all objects.
This technique is a great way to quickly create a new library in Photoshop—and it is the only app that allows you to do this. The only problem we have now is that we already have a library for our project. So let’s move the content out of this library and into the one we created earlier.
Select all nine items in the current library by clicking the first and Shift-clicking the last in the list.
Right-click the selected items and choose Move Selected Items To.
In the dialog box, click the left-pointing arrow to navigate to the Shoes library we created earlier.
Click the Create New Group button at the bottom to add a new group. Name it collection and click Create.

Click Move to move all items into the newly created group in the Shoes library. The current library will be empty once this is done.
Open the Libraries panel menu and choose Delete “collection” to delete the empty library. Click Delete once more to confirm.
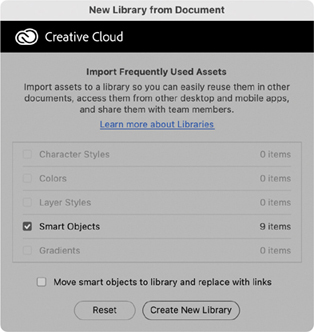
Click the Shoes library to navigate into it.
All the shoes are now available in the library and are ready to use in InDesign.
Placing Photoshop library items in InDesign
Now that our library of assets is ready, it’s time to reuse the content in other applications. We’ll reuse the summer graphic and shoes in InDesign.
In InDesign, open billboard-start.indd from the Lesson08/Imports folder.

Choose File > Save As and save the file as billboardWorking.indd.
NoteOnly InDesign refers to the Libraries panel as CC Libraries. This is because InDesign’s native library system already uses the term libraries. You can create these by choosing File > New > Library. However, with today’s Creative Cloud Library capabilities, this feature has become outdated.
Choose Window > CC Libraries to display the Creative Cloud Libraries.
In the CC Libraries panel, navigate to the Shoes library, then click it to open it.
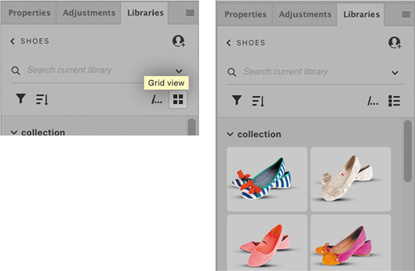
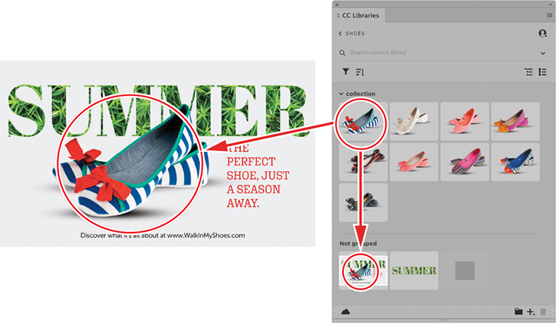
Drag the green summer title from the library onto the canvas. This results in a loaded cursor, ready to place the image.

Click inside the gray graphics frame to place the image inside it.
Drag the Content Grabber circle to move the image upward within the graphics frame. Then deselect it.

Find shoe1 in the CC Libraries panel and drag it onto the page. Place it in the middle of the page.
Scale the image up until it takes up approximately half the page.

Now we’ll add another asset type by converting the colors in the current shoe image into a color theme and saving it to the library.
Press and hold the Eyedropper tool
 in the Tools panel and select the Color Theme tool
  .
.Using the Color Theme tool
, hover over the shoe image and click once to convert its colors into a color theme.
Click the Add This Theme To My Current CC Library button.

InDesign adds a color theme of five swatches to the library.
Switch to the Selection tool
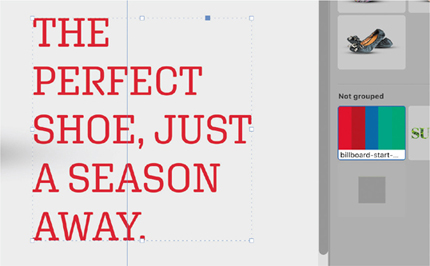
 and click the slogan text frame that begins, THE PERFECT SHOE….
In the Libraries panel, click one of the red colors in the newly created color theme to apply it to the text.
Save your file but leave it open.
Placing InDesign library items in Photoshop
Now you’ll learn how to place InDesign content into Photoshop—a great way to mock up a print project like a poster, a flyer, or packaging. This is difficult to do without Creative Cloud Libraries. Sure, you can copy and paste content into Photoshop as a Smart Object. But when you double-click the Smart Object in Photoshop as a way of editing the original artwork in InDesign, Photoshop opens the content in Illustrator instead—odd behavior that breaks the relationship between InDesign and Photoshop.
In InDesign, press Command+A/Ctrl+A to select all artwork on the page.
In the CC Libraries panel, click the plus icon and choose Graphic to add all selected objects as one item to the library.
Double-click the newly added item name and rename it billboard.

It is important to understand that adding an item to a library adds a duplicate of that item to the library. The item we see in the library is not linked to the InDesign layout. They are two separate entities.
By adding all these items to our Creative Cloud Library, we’re actually nesting library items, since the title and shoe objects were already library items. So we’re now saving library items grouped with other content as a new library item. This means that the summer title and shoe objects in the library are linked to both our InDesign document and the version that was duplicated into the library. The diagram below will help you understand what’s going on. Here you can see that the shoe object is connected to both the InDesign layout and the layout in the library. Updating the shoe object in Photoshop will update both items.
Go to Photoshop and open L08-billboard-start.psd from the Lesson08 folder.
Choose File > Save As and save the file as billboard-mockupWorking.psd.
Click the tree layer to select it in the Layers panel.
Choose Window > Libraries to display the Libraries panel.
Navigate to the Shoes library in the Libraries panel.
Drag the billboard object we just added to the library from InDesign. Drop it in the middle of the canvas and press Return/Enter to confirm.
The cloud icon in the layer thumbnail makes it clear this is a linked library item.
Right-click the layer and choose Convert To Smart Object.
Press Command+T/Ctrl+T to enter Free Transform mode.
Lower the opacity of the layer to roughly 50% so you can see the background through the billboard image.
Move the billboard image so its upper-left corner is aligned with the upper-left corner of the white billboard placeholder. You may need to nudge the layer using the arrow keys.

Hold down Command/Ctrl to apply a perspective transformation, and drag to align the lower-left corner of the billboard to the lower-left corner of the white billboard placeholder.
Repeat this process for all corners until the billboard image aligns with the background. Then press Return/Enter to confirm.

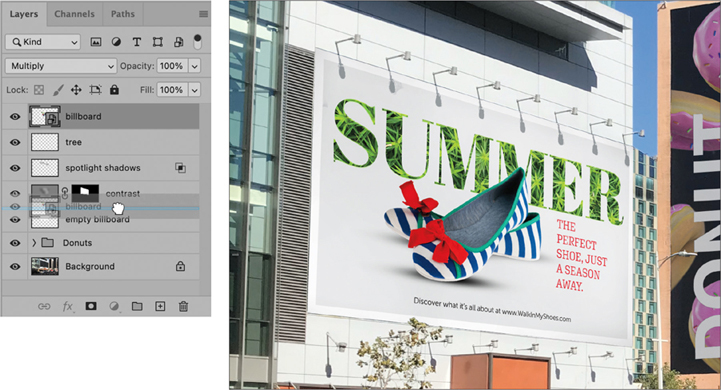
Set Opacity for the billboard image to 100%, and change its blending mode to Multiply.
In the Layers panel, drag the billboard layer down the layer stack until it is underneath the contrast layer.
You have now created a mockup of the billboard in Photoshop.
Save your work.
Updating the design
These steps show you the order in which to update nested items that originate from a Creative Cloud Library.
Return to InDesign.

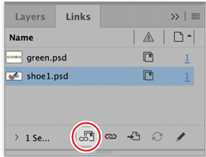
Option/Alt-click the library icon in the upper-left corner of the shoe frame.
The Links panel opens and the link whose icon you clicked is selected. This is a great way to quickly open the Links panel to find the link you need. Both links in the panel display the library icon.
With the shoe image selected in the Links panel, click the Relink From CC Libraries button to relink the image to a different library item.
The CC Libraries panel opens and asks you to choose a replacement graphic.
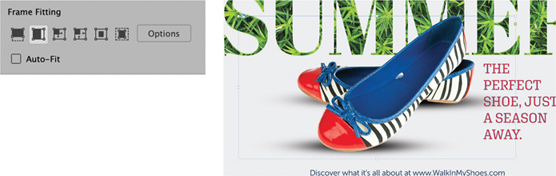
In the CC Libraries panel, select shoe8 and click Relink at the bottom of the panel.

This is a great way to update a design with a different asset from any Creative Cloud Library. This ability to relink an item to a different library graphic is also available in Photoshop and Illustrator.
However, since the shoe graphic and shadow effects are not the same size, you might see some clipping occur around the edges.
With the shoe image selected on the page, open the Properties panel and click the second icon under Frame Fitting to adjust the shoe image proportionally to fit the frame.
We’ve now hit a crossroads in our workflow: we need to update the billboard design that we used in Photoshop. We could repeat the same steps for the library graphic by double-clicking it in the CC Libraries panel to open it in InDesign. Or we could save the new layout as a second billboard item.
For flexibility, we’ll choose the second scenario, as it is just as easy switching library items from Photoshop as it was from InDesign. And we’ll always have a backup of the other shoe version in case our customer changes their mind and prefers the previous version after all.
Press Command+A/Ctrl+A to select everything on the page.
In the CC Libraries panel, click the plus icon and choose Graphic.
Double-click the graphic name and rename it billboard2. We now have two billboard versions to choose from in Photoshop.
Return to Photoshop.
Double-click the billboard Smart Object thumbnail to open its contents in a separate window. (If an explanatory dialog box opens, click OK.)
In the separate file window, right-click the billboard layer (displaying the cloud icon) and choose Relink To Library Graphic.
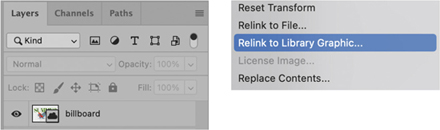
In the Libraries panel, select billboard2 and click Relink to update the layout.
NoteNote that the perspective transformation and blending mode were retained. This is because we created a Smart Object from the original layer before applying the perspective transformation.
Save and close the file to return to billboard-mockupWorking.psd.

Save and close your Photoshop document. Then do the same for InDesign.
You could even go another level deeper by selecting all the layers in the mockup file and saving the Photoshop layers as a library asset, only to place the library asset back in an InDesign layout (for a magazine, for example). As you can see, working with Creative Cloud Libraries is very powerful, but it can be confusing because of the endless nesting possibilities.
Combining Photoshop and Illustrator library assets
In this scenario, we’ll save Photoshop artwork into a library and use it in Illustrator. Then we’ll add a few elements from Illustrator to the same library and place both Photoshop and Illustrator content in InDesign.
You’ll start by inspecting the final Illustrator and InDesign documents in order to better understand the project details.
Start Illustrator, and choose Illustrator > Preferences > General (macOS) or Edit > Preferences > General (Windows).
In the Preferences dialog box, click Reset Preferences. Then restart Illustrator.
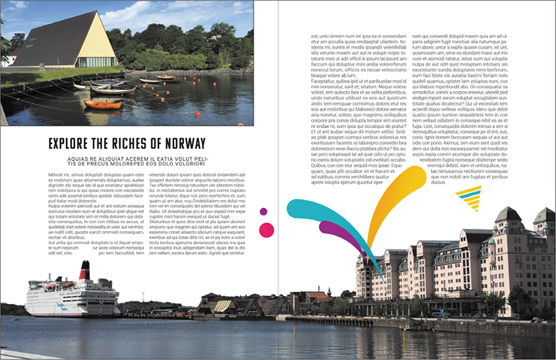
From the Lesson08 folder, open L08-travel-banner-end.ai.
Choose View > Trim View to hide all objects that extend beyond the artboard.

This document uses Photoshop layers in the foreground and vector artwork in the background.
Return to InDesign, then choose Window > Workspace > Reset Essentials.
From the Lesson08 folder, open L08-oslo-end.indd.
This layout reuses several of the Photoshop layers used in Illustrator, and also some of the vector artwork from Illustrator.
Close all files.
Creating a Creative Cloud Library
The first step is creating a library and adding content from Photoshop.
Return to Photoshop.
Choose Window > Workspace > Reset Essentials.
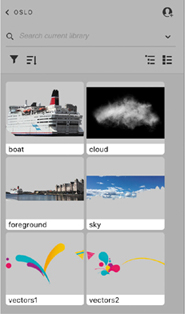
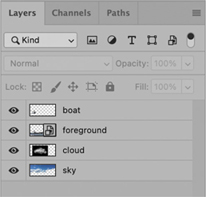
From the Lesson08/Imports folder, open oslo-layers.psd.
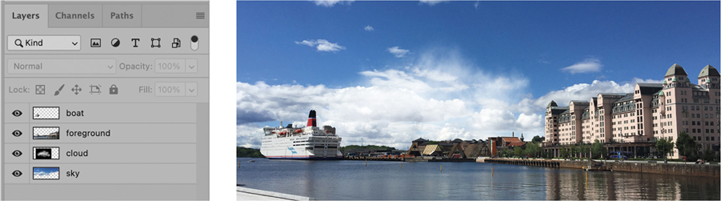
This Photoshop document used to be a single image, but it has been split into several layers. We need a way to bring the Photoshop document into Illustrator with full transparency and full control over the separate layers, while still having the ability to go back to Photoshop and make changes.
Based on the exercises from Lesson 2, we know that we could place the Photoshop document in Illustrator. However, we can retain separate Photoshop layers in Illustrator only if we choose to embed the document, which makes it impossible to update the file in Photoshop. And if we place and link the file in Illustrator instead, we’ll be able to update the file in Photoshop, but we won’t have access to the individual layers from Illustrator. Creative Cloud Libraries to the rescue!
Choose Window > Libraries to open the Libraries panel.
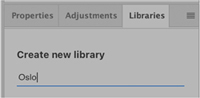
Open the panel menu and choose Create New Library.
Name the library Oslo and click Create to confirm.
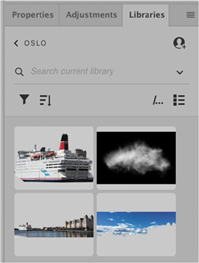
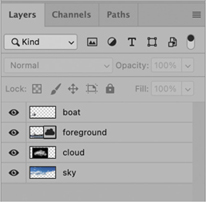
From the Layers panel, click to highlight the boat layer. Now click the plus button at the bottom of the Libraries pane and choose Graphic to add the layer to the library.
Repeat the same step for the remaining three layers.
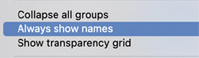
Open the Libraries panel menu and choose Always Show Names to see the names of all objects.
Placing Photoshop library items in Illustrator
Now we’ll import the library items we just created into Illustrator and reconstruct the composition.
In Illustrator, open L08-travel-banner-start.ai from the Lesson08 folder.
Choose File > Save As and save the file as L08-travelWorking.ai.
Choose Window > Libraries to view the Creative Cloud Libraries.
Click the Oslo library to open it.
Open the Libraries panel menu and choose Always Show Names to see the names of all objects.
Drag the sky layer from the library and click the upper-left corner of the artboard to place it.
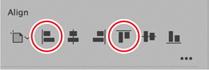
In the Properties panel, click the Horizontal Align Left and Vertical Align Top icons in the Align section to align the sky to the top left of the artboard.
In the Libraries panel, drag the foreground object onto the artboard and click the lower-left corner of the artboard to place it.
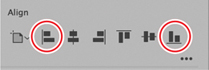
In the Properties panel, click the Horizontal Align Left and Vertical Align Bottom icons in the Align section to align the image to the bottom left of the artboard.
Place the boat object from the Libraries panel onto the artboard.
Use the Selection tool
 to position the boat so it perfectly overlaps with the boat in the image.
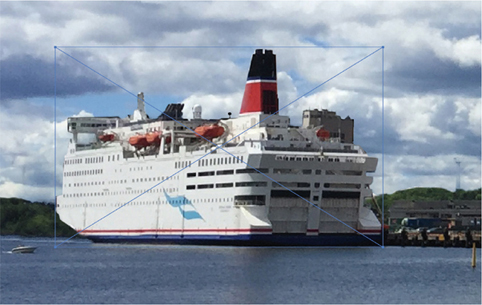
Drag and drop the cloud image onto the artboard, and place it in the middle of the image.
With the cloud image selected, go to the Properties panel and click Opacity to see more options. Then change the blending mode from Normal to Screen to blend the cloud into the background.

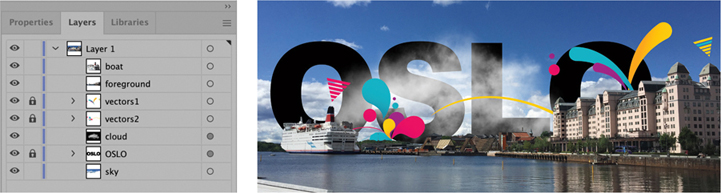
Open the Layers panel and drag the boat object to the top of the layer stack.
Drag the sky object to the bottom of the layer stack.
Drag the foreground object so it’s directly below the boat object.
Drag the cloud object on top of the OSLO layer.

Make the vectors1 and vectors2 layers visible.
Your layer stack should look like this.
Keep in mind that anytime you need to update any of the Photoshop layers, you only need to double-click the item in the library and make your edits. When you save your file it will trigger an update to the library, which will then trigger an update to the linked copies in the Illustrator document.
Choose View > Trim View to hide all objects that extend beyond the artboard.
Click the lock icons on the layers vectors1 and vectors2 to unlock them.

Click the selection rectangle of the vectors1 layer to select all objects on the layer.
With the selection active, go to the Libraries panel and click the plus icon. Now choose Graphic to add it to the library.
Repeat this process for the vectors2 layer.
Save your file.
Placing Photoshop and Illustrator library items in InDesign
Now we’ll place the artwork we saved to the library in an InDesign document.
Return to InDesign and choose Window > Workspace > Reset Essentials.
From the Lesson 08 folder, open L08-oslo-start.indd.
Choose File > Save As and save the file as L08-osloWorking.indd.
Choose Window > CC Libraries, then open the Oslo library to view all items.
Drag the foreground object onto the layout. Scale it down by dragging it from the left side of the spread to the right until it matches the width of the spread.
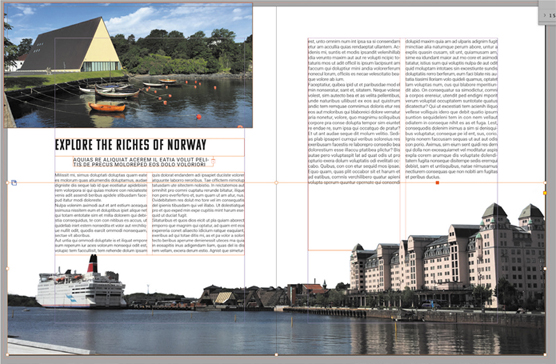
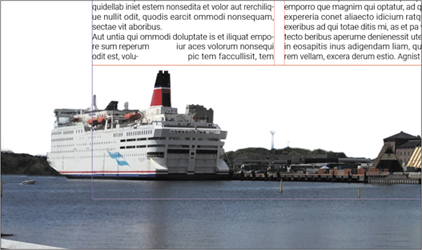
Now drag vectors1 onto the right-hand page.
Scale it so it partially overlaps with the text.
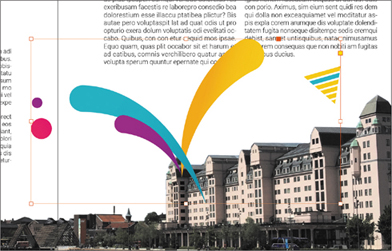
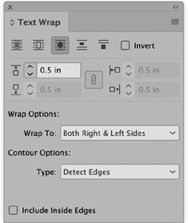
With vectors1 selected, choose Window > Text Wrap.
NoteIf the Subject Aware Wrapping pop-up appears, click OK.
Click the third Text Wrap option to wrap text around a shape, and enter 0.5 in for the Top Offset Value.
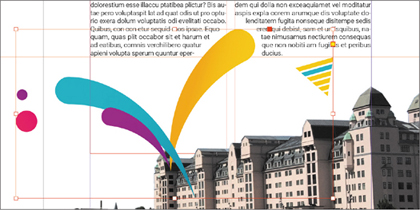
From the Contour Options Type menu, choose Detect Edges to wrap the text around the Illustrator artwork.
Using the Selection tool
, select the foreground object.In the Text Wrap panel, apply the third Text Wrap option and enter a value of 0.375 in.
Change the Contour Options Type menu to Alpha Channel.
InDesign detects that this layer is partially transparent, so we can leverage the layer’s transparency by choosing Alpha Channel when applying text wrap.
Relinking Photoshop layers and updating
To finish, we’ll replace one of the original Photoshop layers with the linked version from the library. That way, a layer used in Photoshop, Illustrator, and InDesign will link to the same source.
Return to oslo-layers.psd in Photoshop.
This file has the original layers that we saved to the library. However, when you save assets to a library they will always be unlinked copies of the original. This means that the current foreground layer in Photoshop is not linked to the library source.
We could just delete the foreground layer and place a fresh (linked) version from the Libraries panel. But that would require us to place it at exactly the same location, which is time consuming.
A better way is to use the Relink To Library Graphic command, which we’ve used before. However, you can’t use this command with normal layers. To make this work, the layer we want to relink to a library asset must first be converted into a Smart Object.
Right-click the foreground layer and choose Convert To Smart Object.
Right-click the same layer again and notice that we now have many more options available. Choose Relink To Library Graphic.
In the Libraries panel, select the foreground asset and click Relink to replace the original with the cloud version in the library.
Now the foreground asset in the Oslo library is linked to Photoshop, Illustrator, and InDesign projects at the same time. It would have been impossible to achieve this the traditional way, at least not with this level of control. Let’s trigger an update to see how all projects update.
In any application’s Libraries panel, double-click the foreground asset to edit it.

This library asset is actually a fully functional Photoshop document, which means we can add as many layers as we want.
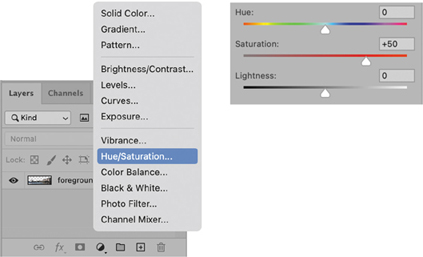
Use the Layers panel to add a Hue/Saturation adjustment layer.
Increase the Saturation value to +50. (We’ll exaggerate a little bit to make easier for us to spot the updated version of our library asset.)
Select the Spot Healing Brush tool
 from the Tools panel.
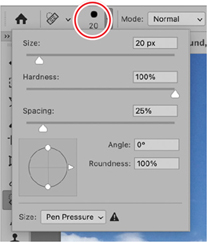
Click the brush settings at the top of the screen to change the brush Size to 20px and Hardness to 100%.
With the foreground layer selected, paint over the six yellow poles in the water by dragging from the top of each pole to the bottom, removing them from the picture.
Photoshop replaces the painted area with neighboring pixels to camouflage the painted area. One or two additional paint strokes might be required to make it look flawless.

Save and close the file.
The thumbnail in the Libraries panel updates to the latest version. All files in which we used the asset, oslo-layers.psd in Photoshop, osloWorking.indd in InDesign, and travelWorking.ai in Illustrator, update as well.
Backing up library items
Once you have a finished project that uses one or more linked library items, you’ll probably think about archiving your project. So how do you back up and collect cloud-based assets? There are two possibilities.
Creating a package
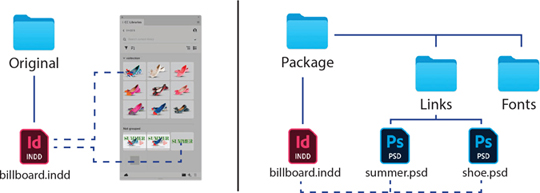
Just as with any other project in InDesign, Photoshop, or Illustrator, you can package your project to collect all linked project assets into a separate folder. The library items will be extracted from the library and stored locally in the package. This means that the packaged copy of your project will link to locally saved versions of the original cloud assets.
The following diagram will help you understand how linked library assets are converted to local assets when you package your project:
Exporting the library
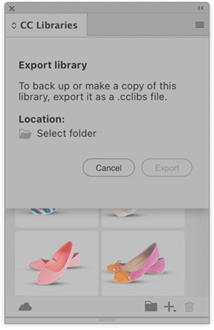
It is possible to export a Creative Cloud Library, including all assets, to a local file. This allows you to save a local copy of a library to back up a project or share a library with others offline.
To export a library, follow these steps:
In Photoshop, Illustrator, or InDesign, open the Libraries panel menu and choose Export name of library.
 Tip
TipYou can also export or import libraries using the Creative Cloud app.
Choose a destination folder for the library, click Save to confirm the location, then click Export.
The Creative Cloud Library is exported locally as a CCLIBS file. To import a library file, use the Libraries panel menu and choose the Import Library command.
TipIt is also possible to export a single item from a library: view the library using the Creative Cloud app, right-click the item, and choose Export A Copy.
For backup purposes it is recommended to apply both techniques: First, package your documents; and then, export a local copy of the Creative Cloud Library. It is a good idea to include a copy of the Creative Cloud Library because the package command can include only linked graphics; branded elements that were part of the campaign but remained unlinked—swatches, paragraph styles, and others—would be lost once the library is deleted.
Review questions
1 How are Creative Cloud Libraries different from more traditional cloud repositories?
2 Do you need to be online to use Creative Cloud Libraries?
3 Are Creative Cloud Libraries a good alternative to my file server?
4 Where can you view all assets stored within a Creative Cloud Library?
5 When you use assets from a Creative Cloud Library, are they always linked?
Review answers
1 Creative Cloud Libraries are unique because they offer a way for designers to save design assets that don’t have a dedicated file format, like InDesign text styles, colors, or Photoshop layer styles.
2 You don’t need to be online to use assets from existing Creative Cloud Libraries. But an active internet connection is required when updating assets, creating new libraries, or collaborating with others.
3 Creative Cloud Libraries are first and foremost intended to store and exchange design assets across multiple apps and teams. They are not built for long-time archiving and are not a replacement for a company server, a data drive, or a DAM or MAM system.
4 You can view all Creative Cloud Libraries stored in your Creative Cloud account either by using the Creative Cloud desktop app or navigating to assets.adobe.com.
5 Photoshop and Illustrator graphics are linked to the document in which they are placed by default, unless you right-click and choose Place Copy instead. Other asset types—like colors, text styles, and layer styles—are not linked.