Chapter 4
Communicating or Collaborating?
Most organizations today use their SharePoint portals with one of two main focuses: either to communicate with their employees, partners, clients, or the general public or to collaborate with them. To this end, MOSS 2007 provides different site templates for each focus, each with its own unique characteristics. Today's designers must have a solid understanding of what site types are available with SharePoint, as well as the design considerations that need to be made for each, before attempting to customize the look and feel of a SharePoint site.
This chapter will focus on the differences between MOSS 2007 publishing sites, which are primarily used to communicate to others, and collaboration sites, which are intended more to facilitate working in a joint intellectual effort.
This chapter will also touch on the various design considerations that must be taken into account when designing for these different types of sites, including what designers must know about master pages and page layouts at a basic level. At the end of this chapter, you will have enough knowledge to determine if your site should be a publishing site or a collaboration site and then make recommendations for the correct technology that should be used in that environment.
What Is a Communication/Publishing Site?
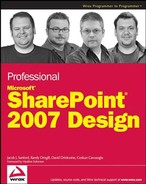
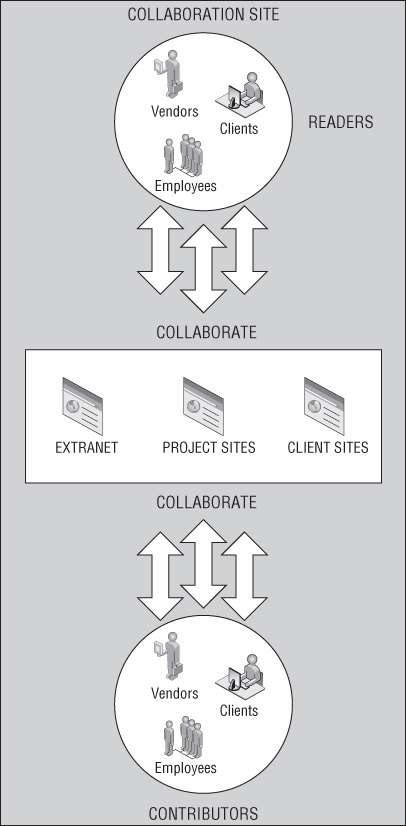
A site with a communication focus acts as a gateway to all shared information that can be consumed by a broad range of users. This information can be viewable by all users or limited to certain groups. And in this scenario, sites will typically have more readers/consumers than they have contributors, as shown in Figure 4-1.
Information Flow in Communication/Publishing Sites
Communication sites are frequently visited by people who would like to get updates on your business. This might include information such as the latest news in the organization, organizational updates, business analysis and reports, or just news from the boss.
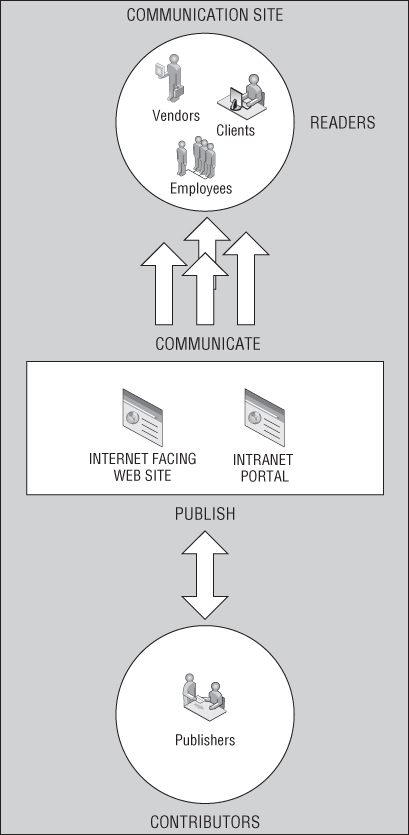
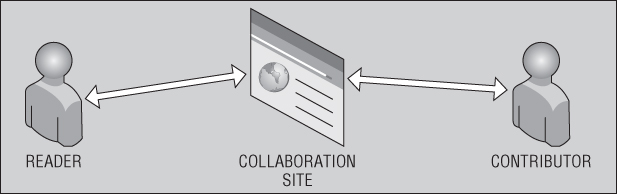
The act of adding content to a communication site is called publishing and can only be done by a select number of users in the organization who are called contributors or publishers. Contributors create the content that is then shared with a large number of readers through the communication site, as shown in Figure 4-2.
When to Use a Communication Site
The main goal of a communication site is to provide the readers with the information they are looking for within a few clicks. Getting the information delivered fast to a reader is critical in today's business world. Communication sites are a highly effective approach to publishing critical business data and communicate with the masses centrally through one location.
To determine whether using a communication site is necessary, the following question should be asked: “Is this site going to be used as a portal that will allow readers to come and find information that others have published?”
If the answer to the above question is yes, then the organization should use a communication site, as the goal of the site fits the criteria for a communication site.
Some other questions that will help determine whether a communication site is required are:
- What is the goal of this site? It's important to know what the goal of the site is. By determining this, you can easily ascertain whether a site should serve as a communication site. If your goal is to display data and the readers won't be creating the content, then it is considered to be a communication site.
- Who is the audience of the site? Content posted to internal sites versus external sites can easily change the way you need to design a Web site. The answer to this question will let designers know if they need an extranet or an intranet. The answer to this question needs to be known because the requirements for each site's branding are different. For example, an organization might require that their extranet look nearly identical to their public Web site for consistent branding but for an intranet site, they might decide that a completely different design is more appropriate. So it is important to know whether or not this site will need to be accessed by external users.
- Who will own the content? This question will help you determine who the contributors of the site are and if there are more contributors than readers. In most cases, when MOSS 2007 sites are managed by a small number of contributors and consumed by a large number of readers, they should be considered communication sites.
Using a Communication Site for Intranets
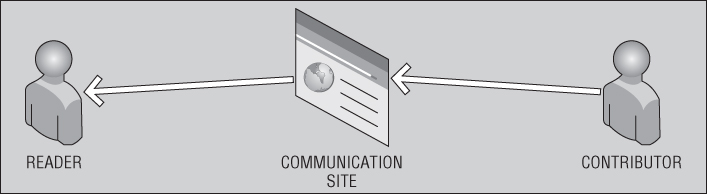
A good example of a communication site is the intranet of an organization. Intranets are a good way to communicate with your employees, partners and/or clients as an organization. There are more readers of an intranet than there are contributors. Typically the contributors of an organization's intranet would be the Corporate Communications/Affairs, Human Resource and/or the IT departments. Contributors throughout the organization publish data to the intranet as shown in Figure 4-3.
Examples of content that could get published to an intranet (see Figure 4-4) are:
- Internal announcements regarding the organization published by the Corporate Communications/Affairs division
- The new reimbursement workflow published by the HR division
- The new Support Request form published by the IT division
- The quarterly financials published by the Finance division
Essentially, if the site is going to act as an intranet, it should be considered a communication site, and the publishing site templates of MOSS 2007 should be used.
Using a Communication Site for Public Web Sites
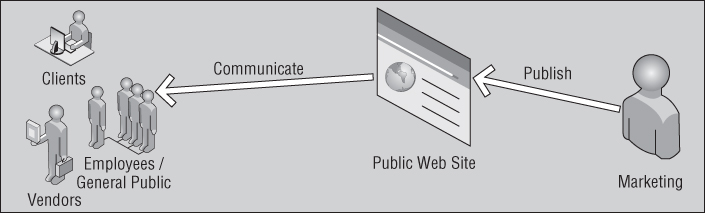
Another example of a communication site would be an Internet-facing public Web site as shown in Figure 4-5. Internet-facing Web sites are a great example of communication sites as they fit the criteria really well. The general public, who are the primary consumers of the public Web site, would be considered the readers. The Marketing department, who is responsible for updating the site, would be considered the contributors (see Figure 4-6). In this case, the number of readers is a lot more than the number of contributors, which satisfies the main identifying rule for a communication site.
Historically, updating the content on an external Web site has always presented a challenge since the users who create the content usually lacked the ability to publish the content directly to their public-facing sites. This could be due to a lack in server permissions, knowledge of how to update the sites, or proper Web-design tools. For whatever the reason, many contributors found it difficult and time-consuming to get their content published to their external Web sites.
However, with the introduction of Microsoft Content Management Server 2002, this process has become a lot easier. Since the content was stored in the database and displayed using page templates, users could simply log in to the administration area of the site and update the data. However, this approach had its own limitations, as these users could only update the text on the page without being designated as designers or developers.
To overcome these issues, organizations can now use MOSS 2007 publishing sites as their Web content management application. By using MOSS 2007 for Web Content Management (WCM), publishers can update their public-facing sites a lot quicker without the need to learn Web-development tools. Not only can these users update the text displayed on the page, but they can now also create entirely new pages or even sites without knowing any code and without using any development software; it can now all be done within the browser. This is a huge step forward in the realm of content management and dissemination.
Effectively Using a Communication/Publishing Site
Allowing publishers to publish data directly to the site in order to keep the content updated is one of the main requirements of a communication site. However, special considerations must be made when allowing multiple users to update the content of a communication site. For example, an organization with offices in Chicago and Paris might have two variations of their intranet site: one for English-speaking visitors and one for French-speaking visitors. To further complicate things, both offices may then have their own publishers responsible for various sections of the intranet. This means that different publishers from different offices in different continents are publishing content to different variations of the same intranet site. This can provide a management challenge if not handled properly.
Typically, in most organizations (including the one in the above example), it is not always the same user publishing the content to the communication site. As seen in that example, it very well may be users in Paris publishing the French equivalent of English content published by the Chicago office (and vice versa). Yet it is extremely important that the branding of a communication site is always kept the same to minimize confusion among the readers of a site. This means that all content published should be published the same way every time to keep consistency among pages.
With this in mind, there should be standards created on how items can be posted. For example, news articles should follow the same format, site pages should all have the same look and feel, and, if the logo of the organization is being used, it should follow the corporate identity rules. The main goal of a communication site is to provide the combined organizational content in harmony to potentially many different types of readers by a possibly dispersed, and certainly varied, group of contributors in the organization.
Consistency of the look and feel of a site and its contents is certainly an important requirement that might necessitate the use of a publishing site, but it is not the only one. In the next sections, you will see some of the ways communication sites can be used for maximum effectiveness.
Keeping the Look and Feel Consistent
Keeping the look and feel consistent is important for any Web site, regardless of which technology it is built on. And for any applications built on the .NET 2.0 Framework and above, the concept of master pages was introduced to help in this endeavor.
Master pages allow designers to create a page structure and shared properties and methods that can be inherited by pages within a site. This typically means that designers create, at a minimum, a header and a sidebar region that can be used to structure the pages that inherit the master page, as illustrated in Figure 4-7. The pages that then inherit these master pages will be consistent since the layout and, most likely, the navigation will be pushed down onto it.

It is worth noting that, even though it's recommended that any given site have only one master page to allow for consistency, designers have the option of creating multiple master pages that can be inherited by different pages to meet varying business requirements for a given site.
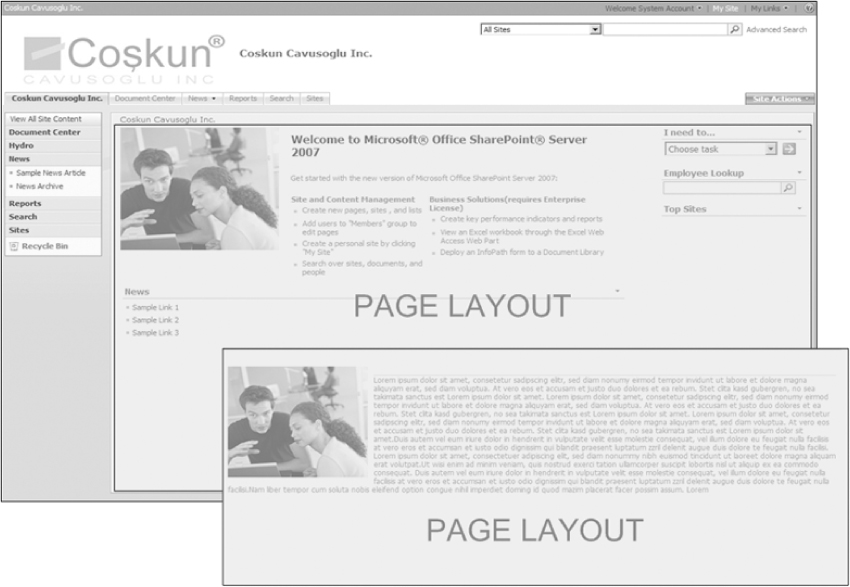
What sets publishing sites apart from collaboration sites or other sites is the ability to create several page layouts based on the requirements of the communication site. A page layout will act as a template page for your content. This goes beyond the simple header, sidebar, and footer layout typically provided by a master page. With page layouts, designers have the ability to provide different content structures for different pages of the site. For example, the welcome page of a site will probably have a very different content layout than an article page, as shown in Figure 4-8. Page layouts allow designers to create different templates for each type of page that is contained in a site.
Page layouts are great when there is a need for a page type that will be used frequently. For example, a job postings page should be a page layout so that HR can reuse the page layout for posting jobs every time they need to add a new job posting on the intranet. In the next example, you will go ahead and create a page using an existing page layout. Although this chapter will not dive into the details of how page layouts work and how you can create them, Chapter 9 will give you more insight on how page layouts work.
Enforcing Corporate Identity Guidelines
Master pages will also bring style standards into your site as you can define the CSS that the master page will inherit from. This means you can standardize font color, size, and font-family using master pages and external style sheets. By using CSS, designers can make sure that that every publisher uses the corporate standards in their pages.
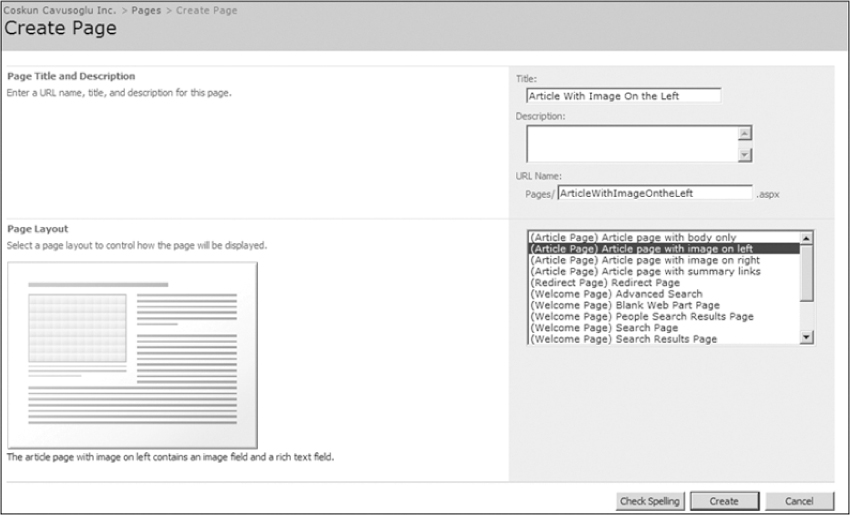
Once a page layout is created and approved, it is available to publishers to use to create their pages. Users will click the “Create Page” link and choose from available options, as shown in Figure 4-9.
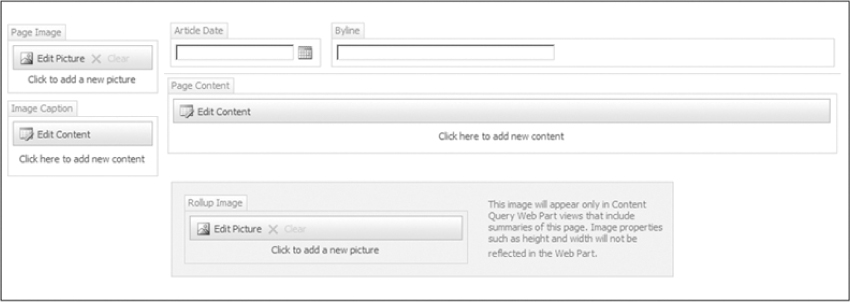
As users select the page layout they wish to use, they will be redirected to a new page that is automatically created and managed by MOSS 2007 that uses the page layout selected. Users will then have the ability to fill in specific data that is allowed for a particular page. For example, in an article page, the user may need to fill out the article's date, byline, and content, as seen in Figure 4-10.
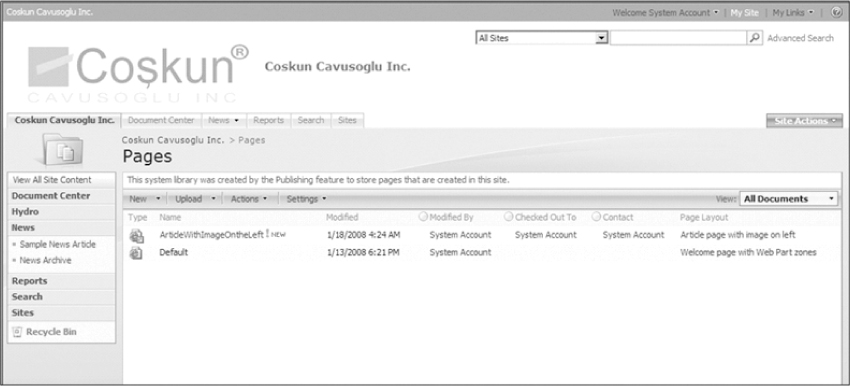
At this point, the new page is created, formatted consistently with other similar pages, and ready to be consumed by visitors to the site. Once you save your page, you will be taken to the Pages library as shown in Figure 4-11.
Enforcing Corporate Policy
In today's business world, most organizations need to maintain compliance with several operational procedures and external regulations. With MOSS 2007, policies such as auditing and content expiration can be easily applied to pages to ensure adherence with these policies.
By default, SharePoint libraries give users the ability to define and apply corporate policies to content on the pages of a site, which are stored in a document library named “Pages.” Policies for pages can be modified using the following steps.
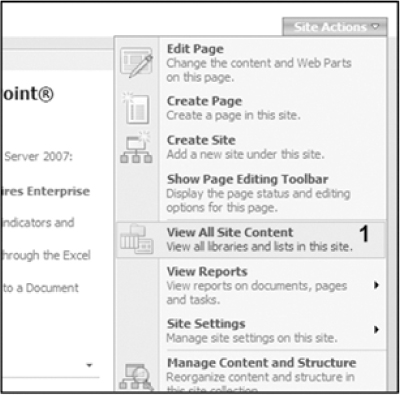
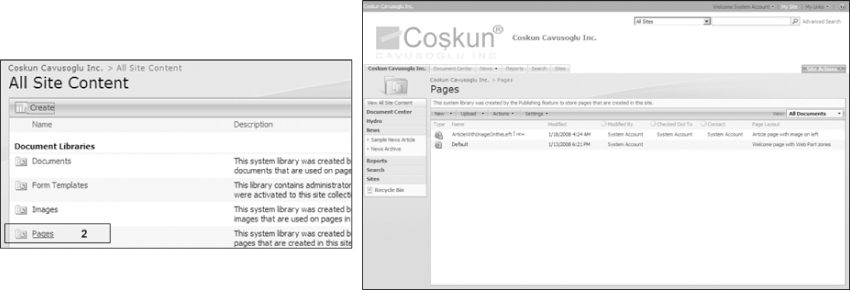
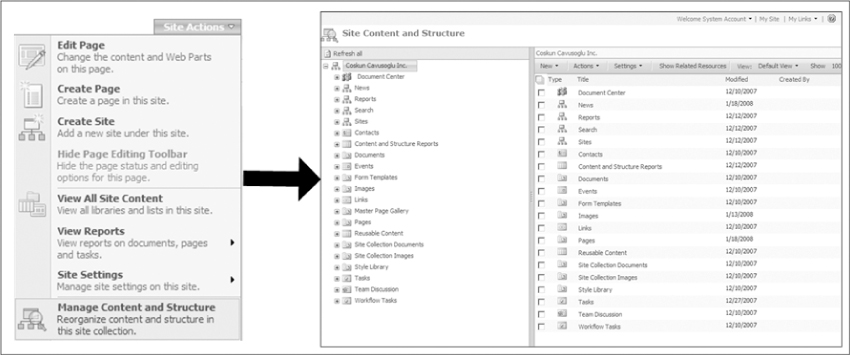
1. Click the “View All Site Content” link (see Figure 4-12).
2. Then click the “Pages” link, which will display the Pages Document Library (see Figure 4-13).
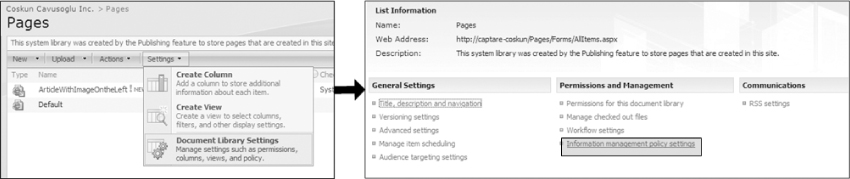
3. Next, click “Settings” and “Document Library Settings.” From the document library settings page that will appear next, click the “Information management policy settings” (see Figure 4-14).
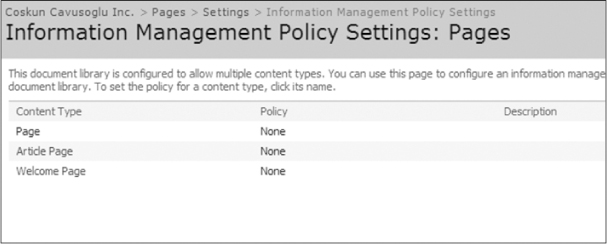
4. The Information Management Policy Settings page will display a list of content types that have been created in your communication site. Click the content type you wish to define a policy for (in this example, use the Article Page), as shown in Figure 4-15.
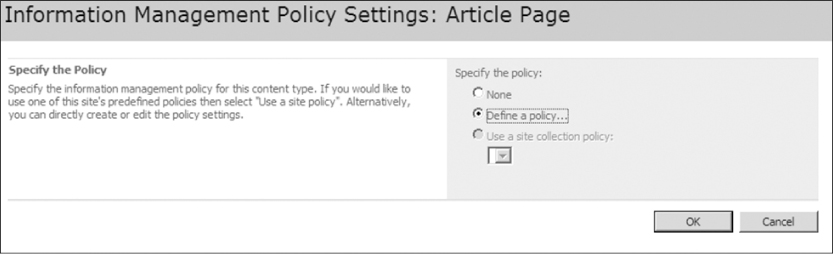
5. To define the policy, select the “Define a policy” radio button and click “OK” (see Figure 4-16).
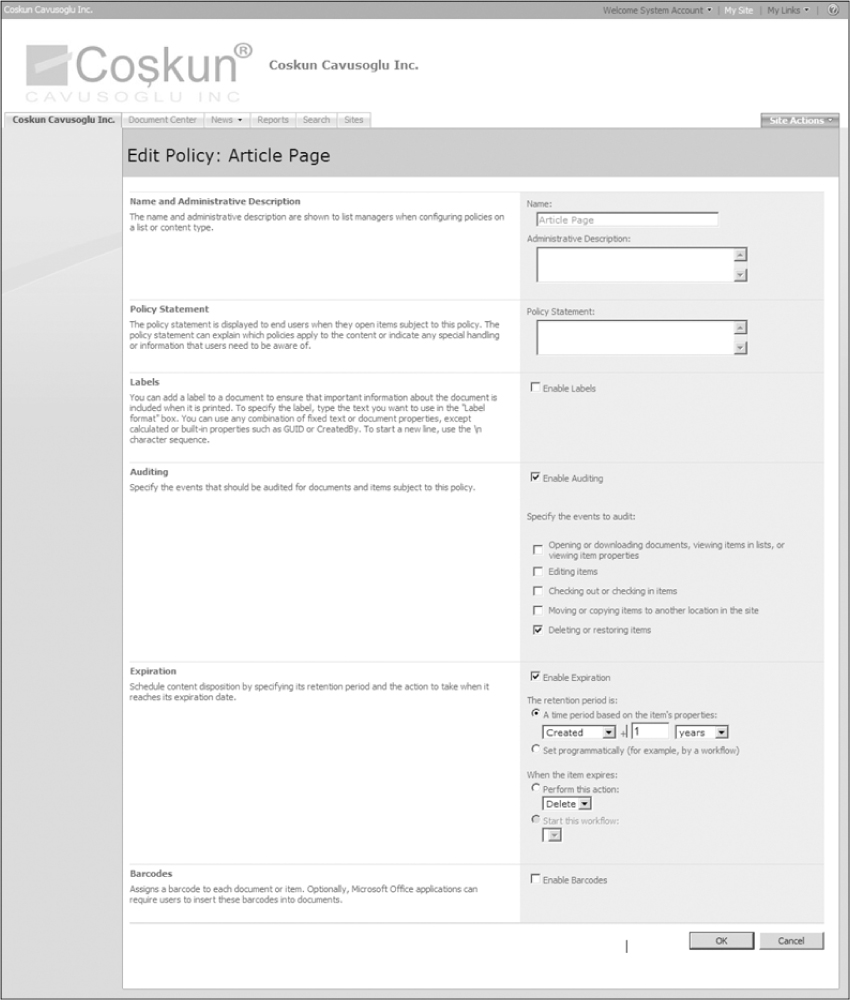
6. Users can now define auditing rules, expiration rules, labels, and barcodes, as shown in Figure 4-17.
Managing the Publishing Process with Publishing Pages
Security is one of most critical aspects for communication sites. Keeping the content accurate requires the help of several contributors providing updated information. However, giving all of those contributors publishing rights is not something many organizations are comfortable doing.
To help with this challenge, the publishing process for most organizations allows multiple users to create and publish content but only a select group of publishers to actually approve the content for display. In this way, organizations are allowed to open up the publishing aspect to more users but still maintain control over what actually gets displayed to visitors by a small group of administrators, as shown in Figure 4-18.
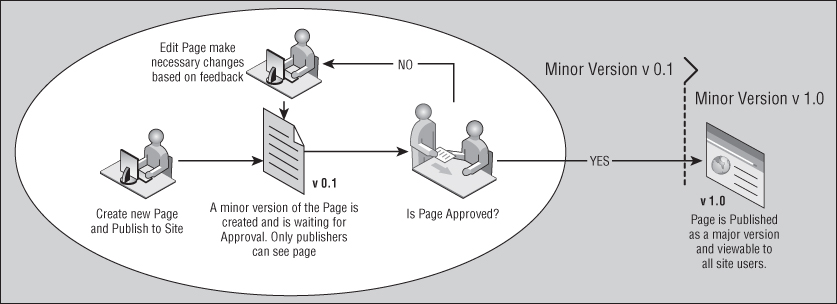
SharePoint accommodates the above process with version control and security roles. When a user creates a page for a SharePoint publishing site that has workflow enabled, SharePoint requires an approval before the content is made publicly available to all readers.
A good example of a communication site with this type of publishing process would be a local intranet. Typically, the intranet is maintained by the Corporate Communications/Affairs division of an organization. However, organizations may have, and probably do have, multiple users from various divisions publishing content to the intranet. When a divisional contributor publishes content, that page is not viewable to site visitors until someone from Corporate Affairs approves the published page. There might be strategic and even legal reasons why some information shouldn't be published to the intranet, and this process allows organizations to have checks and balances in the publishing process, while still allowing publishers the ability to upload content as soon as it is ready.
The Page Editing tool bar is the tool that is used when publishing pages to SharePoint sites and can be seen in Figure 4-19. The Page Editing tool bar shows the version and the status of the page and also gives users with approval permissions the ability to approve the content and interact with the workflow directly from the page.
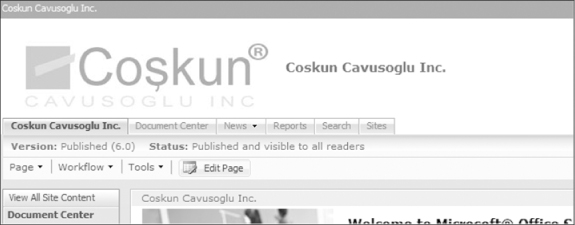
As publishers edit content on the portal, the version and the status detail is updated on the Page Editing tool bar. When the page is in Edit mode, for example, publishers will see the “Check In to Share Draft” button on the Page Editing tool bar and the status will show “Only you can see and modify this page,” as can be seen in Figure 4-20.

Even though the information icon (see Figure 4-20) indicates that a simple check-in will allow other people to see the changes, this is a little misleading. It should be known that a check-in will only make the page visible to users who have rights to see minor versions of pages.
Managing Security with Publishing Pages
There are several roles that can be used or created in a publishing site to maintain security. When creating SharePoint security groups, site owners must select the permissions the new group will have based on what the group will be doing on the site.
SharePoint comes with several pre-defined permission levels out of the box. These permission levels help site owners define security when a new user or security group is being added to the site. There are several permissions a user can have when he or she is logged in to a SharePoint site, and it would be very inefficient to select the rights of a user every time a new user was added to the site. To overcome this issue, SharePoint provides site owners with the ability to create permission levels, which are essentially subsets of the permissions that are available in SharePoint.
SharePoint has the following permission levels:
Table 4-1 Default Permission Levels for SharePoint Publishing Sites
| Permission Level | Description |
| Full Control | Has full control |
| Design | Can view, add, update, delete, approve, and customize |
| Manage Hierarchy | Can create sites and edit pages, list items, and documents |
| Approve | Can edit and approve pages, list items, and documents |
| Contribute | Can view, add, update, and delete |
| Read | Can view only |
| Restricted Read | Can view pages and documents, but cannot view historical versions or review user rights information |
| Limited Access | Can view specific lists, document libraries, list items, folders, or documents when given permissions |
For example, the permission level named “Full Control” includes all of the potential rights available to SharePoint users. This permission level is typically used when site owners are adding administrators to their sites.
The permissions in SharePoint are grouped into three sections: list permissions, site permissions, and personal permissions. List permissions govern things like managing lists and list items, as well as document management responsibilities (see Table 4-2). Site permissions are more geared toward the maintenance and administration of sites created by users and administrators (see Table 4-3). Finally, personal permissions relate more to the personalization permissions (see Table 4-4).
Table 4-2 Permissions Listed Under List Permission
| Permission | Description |
| Manage Lists | Create and delete lists, add or remove columns in a list, and add or remove public views of a list |
| Override Check Out | Discard or check in a document checked out to another user |
| Add Items | Add items to lists, add documents to document libraries, and add Web discussion comments |
| Edit Items | Edit items in lists, edit documents in document libraries, edit Web discussion comments in documents, and customize Web Part Pages in document libraries |
| Delete Items | Delete items from a list, documents from a document library, and Web discussion comments in documents |
| View Items | View items in lists, documents in document libraries, and view Web discussion comments |
| Approve Items | Approve a minor version of a list item or document |
| Open Items | View the source of documents with server-side file handlers |
| View Versions | View past versions of a list item or document |
| Delete Versions | Delete past versions of a list item or document |
| Create Alerts | Create email alerts |
| View Application Pages | View forms, views, and application pages. Enumerate lists |
Table 4-3 Permissions Listed Under Site Permission
| Permission | Description |
| Manage Permissions | Create and change permission levels on the Web site and assign permissions to users and groups |
| View Usage Data | View reports on Web site usage |
| Create Subsites | Create subsites such as team sites, Meeting Workspace sites, and Document Workspace sites |
| Manage Web Site | Grants the ability to perform all administration tasks for the Web site as well as manage content |
| Add and Customize Pages | Add, change, or delete HTML pages or Web Part Pages, and edit the Web site using a Windows SharePoint Services-compatible editor |
| Apply Themes and Borders | Apply a theme or borders to the entire Web site |
| Apply Style Sheets | Apply a style sheet (.CSS file) to the Web site |
| Create Groups | Create a group of users that can be used anywhere within the site collection |
| Browse Directories | Enumerate files and folders in a Web site using SharePoint Designer and Web DAV interfaces |
| Use Self-Service Site Creation | Create a Web site using Self-Service Site Creation |
| View Pages | View pages in a Web site |
| Enumerate Permissions | Enumerate permissions on the Web site, list, folder, document, or list item |
| Browse User Information | View information about users of the Web site |
| Manage Alerts | Manage alerts for all users of the Web site |
| Use Remote Interfaces | Use SOAP, Web DAV, or SharePoint Designer interfaces to access the Web site |
| Use Client Integration Features | Use features which launch client applications. Without this permission, users will have to work on documents locally and upload their changes |
| Open | Allows users to open a Web site, list, or folder in order to access items inside that container |
| Edit Personal User Information | Allows a user to change his or her user information, such as adding a picture |
Table 4-4 Permissions Listed Under Personal Permission
| Permission | Description |
| Manage Personal Views | Create, change, and delete personal views of lists |
| Add/Remove Personal Web Parts | Add or remove personal Web Parts on a Web Part Page |
| Update Personal Web Parts | Update Web Parts to display personalized information |
For cases where the out-of-the-box permission levels do not meet the criteria of the business rules, site owners can create their own custom permission levels by selecting permissions that should be a part of the new permission level.
Managing Site Hierarchy
Throughout the lifecycle of a communication site, there will be several cases where sites need to change their location. For example, as a result of an organizational change, maybe the HR site needs to move from under the Operational Site to under the root level site. Ordinarily in such cases, administrators will need to create a brand new site under the new location and bring over the content. With SharePoint publishing site's Manage Content and Structure functionality, however, site owners can easily move a site from one location to another with a few clicks.
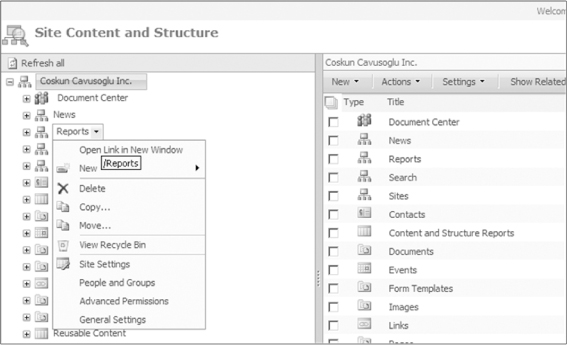
A site owner can access the Site Content and Structure by clicking on the “Manage Content and Structure” link on publishing sites as shown in Figure 4-21.
For example, say there is a “Reports” site that is currently under the root site but needs to be moved under another site entitled “Document Center.” To do this, a site owner can follow these steps:
1. The site owner will first click on the context menu of the site that he or she would like to move as shown in Figure 4-22. From the context menu the site owner will click on the “Move” link.
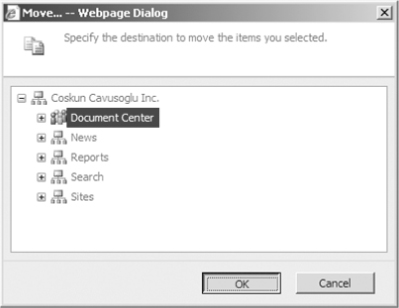
2. Next, a popup screen appears as shown in Figure 4-23. On this screen, the site owner should click the Document Center site as the destination and click OK.
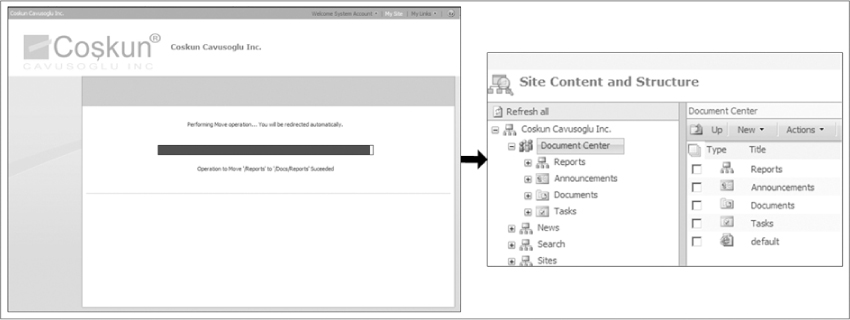
Once the OK button is clicked, SharePoint will move the Reports site under the Document Center site, as shown in Figure 4-24.
Managing Site Variations
Many publishing sites will have the need to maintain variations of a single site to accommodate different audiences. For example, the same content of a particular site may need to be accessible in several different languages for a global audience to consume. To extend that thought a bit, the site content may need to be displayed differently for a laptop visitor than for a mobile device visitor.
It would be difficult and time-consuming to maintain the variations of an organization that has an Internet-facing public Web site that requires English, Spanish, German, French, Chinese, and Turkish versions of their site. However, this can be fairly easily accomplished by using the variations feature of SharePoint publishing sites.
The variation process is usually thought of as a fully automated translation service, but this is not the case. What happens is that once site owners create their variation labels such as English, Spanish, and French, they select one of them as the source variation. Source variation sites are mostly where the process of publishing to variations begins. When there are changes made to the source variation, these changes can be automatically or manually propagated to other variations that have been created by the site owner.
These changes then will need to be translated to the languages of the variation by the users who own the variation site. Once the translation process is complete, the content is published and the content approval process begins, as shown in Figure 4-25. Finally, when that content is approved, the variation will be available to all readers of the site.
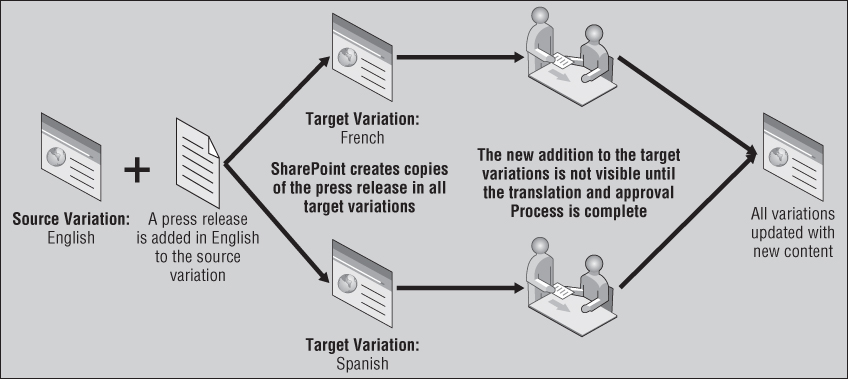
This means that when new content is published to the source variation (for example, a press release as in Figure 4-25), the content does not appear under the variation sites until a translated version of the page is published to those sites.
Variation Settings
Site owners update the Variation settings for their site by going to Site Actions > Site Settings > Modify All Site Settings > Variations.Variation settings can be modified by using the Variation Settings screen as shown in Figure 4-26.
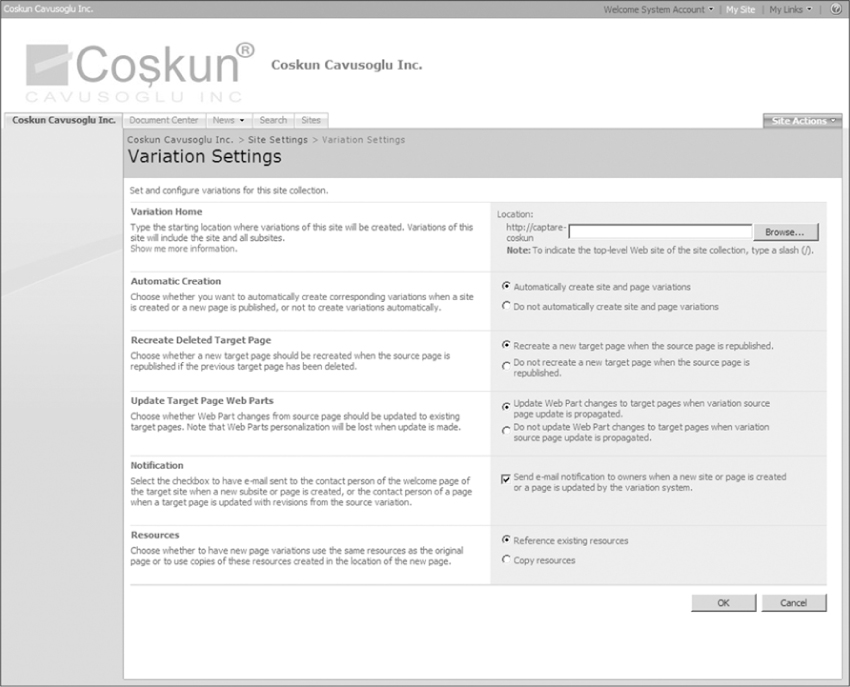
While most of these fields are intuitive, remember when specifying the Variation Home parameter to select the site that you would like variations for. For example, if you only would like to have the News section translated, you should select the News site as the Variation Home by using the Browse button.
Generally, you should leave the default option selected for the Automatic Creation parameter so that SharePoint creates the variation copies automatically for the newly created pages. For cases where you might want the site owner to determine whether a site or a page needs a variation, you should click the “Do not automatically create site and page variations” button.
And finally, if your source variation page references resources that are not local to that site such as a site logo or a specific image, you might want to copy the resources to make them local to the site by selecting the “Copy resources” radio button under the Resources section.
Variation Labels
A site owner will have to create a variation label for each variation they would like to have for site. This can be accomplished by going to Site Actions > Site Settings > Modify All Site Settings > Variation Labels > New Label. The Create Variation Label screen will allow the site owner to create the new variation label as shown in Figure 4-27.

Variation labels are used to create sites for different languages, cultures, or even devices. In SharePoint you will use variation labels to name your variants and when naming your variations make sure that they are intuitive to your users. An example of an English variant would be set up as the following:
- Label Name en-US
- Display Name English (United States)
- Locale English (United States)
Once you are ready to click OK on your settings page for the variation label you are creating, remember that the Source Variation settings cannot be modified after variation hierarchies have been created. Also remember that some of the master pages of publishing sites contain a reference to the Variations Label control, which enables you to switch between the variations labels in your site. In some cases, you will need to modify this control. You can find more information on the three different approaches to customizing the variations label by visiting http://msdn.microsoft.com/en-us/library/ms551625.aspx.
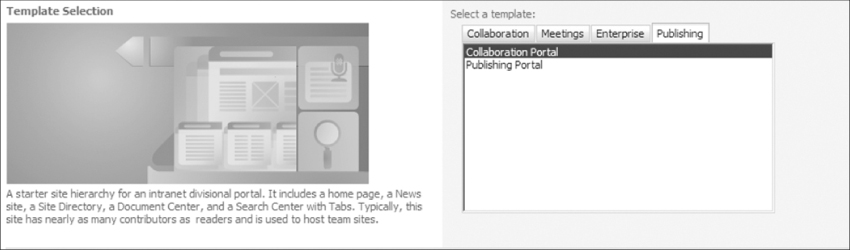
When creating sites in SharePoint, different types of sites are available under the Publishing tab as shown in Figure 4-28. Publishing site templates are a new addition to SharePoint with MOSS 2007. These site templates under the Publishing tab allow users to create communication sites. Note that in Figure 4-28 you will only see two options, Collaboration Portal and Publishing Portal, which are available to you when you create a top-level site collection. You can almost think of these as your top-level site templates.
When you try to create a sub-site under your top level portal, there are new options to choose from, and the Collaboration Portal and the Publishing Portal are no longer listed, as shown in Figure 4-29.
The following sections will explore the different publishing site templates.
The Top-Level Publishing Site Templates
As described previously, when creating a top-level publishing site, you can either create a Collaboration Portal or a Publishing Portal. The Collaboration Portal site template is used to create intranets, and the Publishing Portal is used to create Internet-facing sites. The following sections will detail which site template you should choose when creating your top-level site.
The Collaboration Portal Site Template
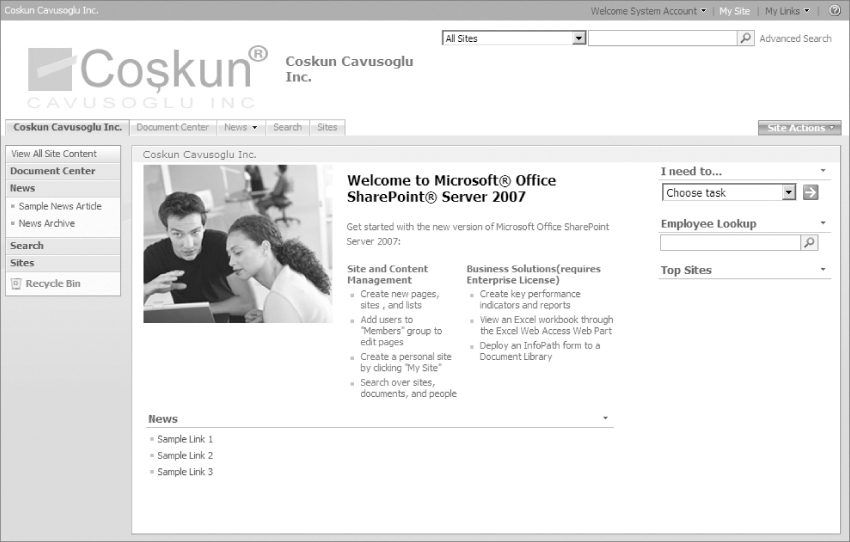
The Collaboration Portal site is typically used to create intranets or divisional portals. It includes a home page, a Document Center, a News site, a Reports site, a Search Center with tabs, and a Site Directory (see Figure 4-30).
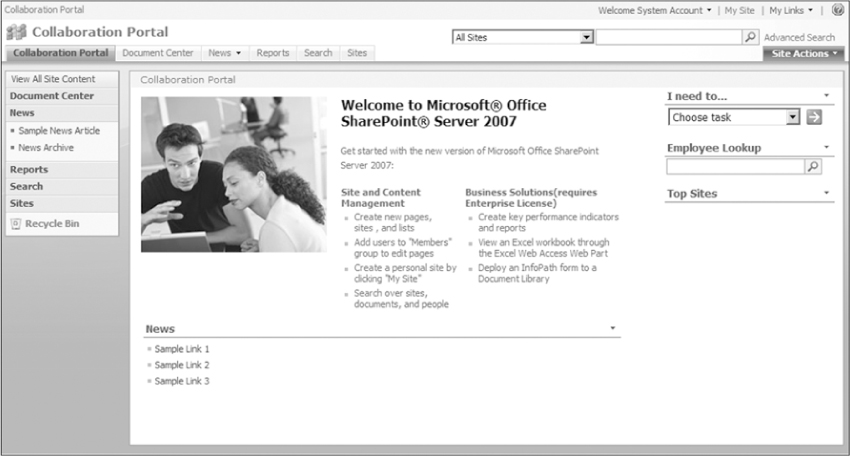
If you are creating an intranet-like department portal, such as an HR Portal, the Collaboration Portal site template is the type of template you should use as it provides most of the features you will need in intranet or departmental-type portals.
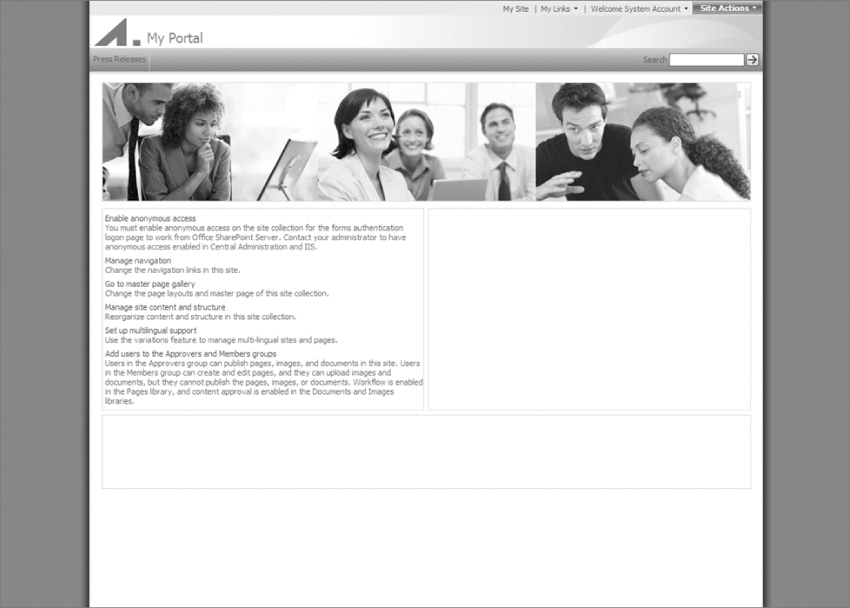
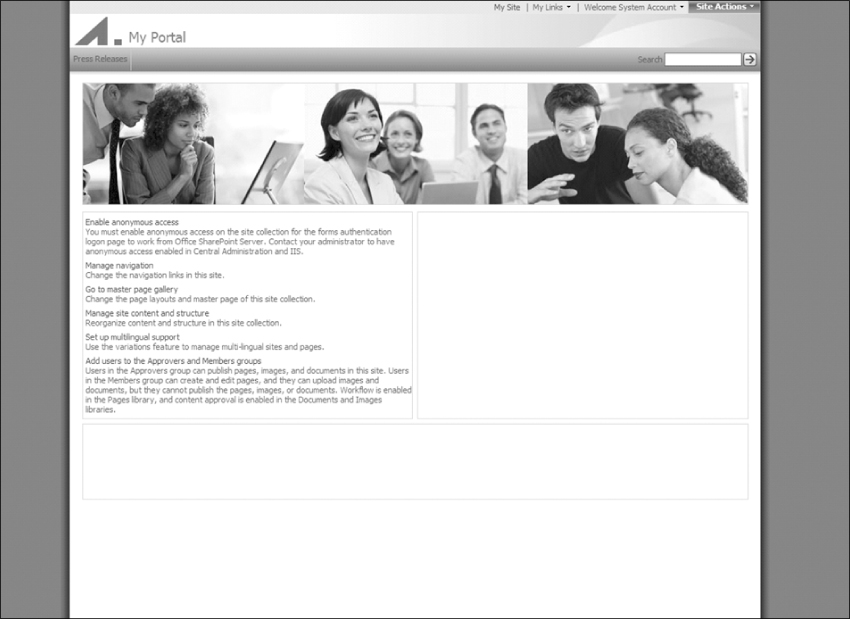
The Publishing Portal Site Template
The Publishing Portal Site template is the second template you get when you are creating a top-level publishing site. This template is typically used to create an Internet-facing site. This is the template to choose when heavy branding is needed. Typically, a Publishing Portal publishing site will have many more readers than contributors.
Also with the out-of-the-box approval workflow functionality the owners of the site can manage their content with standardized processes. It includes a home page, a sample press releases sub-site, and a Search Center (see Figure 4-31).
This site template also comes with several master pages that demonstrate different types of branding examples. Site owners can change the master page for a site by going to Site Actions > Site Settings > Modify All Site Settings > master page.
Site owners can select from the following master pages for Publishing Portal and Collaboration Portal sites:
- default.master
- BlueBand.master
- BlackBand.master
- BlueGlassBand.master
- BlueVertical.master
- BlackVertical.master
- BlueTabs.master
- OrangeSingleLevel.master
- BlackSingleLevel.master
Despite its name, default.master is not the master page for the Publishing Portal by default. This is a master page that has the light-blue default SharePoint look and feel. The BlueBand.master is the default master page for the Publishing Portal.
There are two sections when site owners are selecting the master page (see figure 4.32). The selected master page in the Site master page section will change the look and feel of the site viewed by all users while the selected master page in the System master page section will update the look and feel of all of the administration pages within the site. Designers also have the ability to upload a CSS file to update the look and feel of the site through this page.
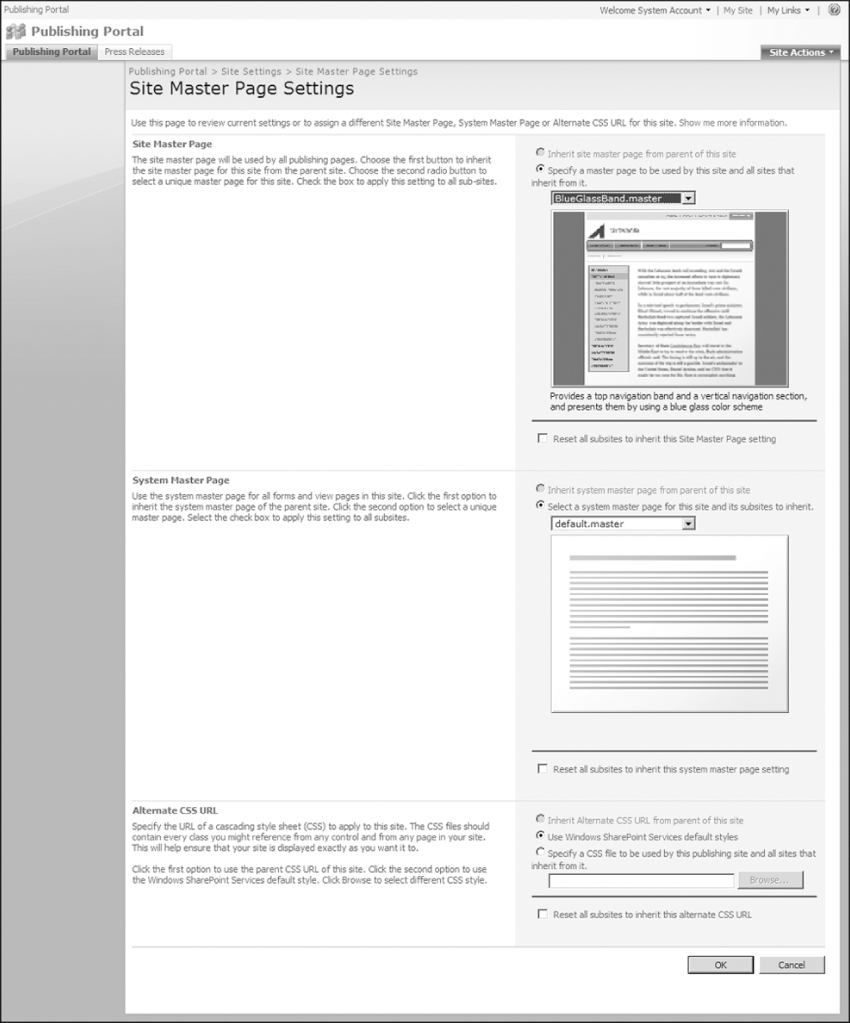
Another great feature that this page provides is the ability to reset all sub-sites to inherit the selected master page. This feature comes in quite handy when there are hundreds of sites under your publishing portal and you wish to update the master page for all of them.
By selecting a different master page, designers can instantly skin the Web site with the master page they have created. When a custom master page is created, published, and approved, that master page will appear in the dropdown that lists all of the master pages.
Designers must make sure that when they create their master pages for publishing sites with approval workflow, they publish and approve the master page before all users can see the changes.
To test their design, it is recommended that Designers create test accounts that have only read access to the site. The designers should continually test their design with this test user account to validate that all content has been published properly.
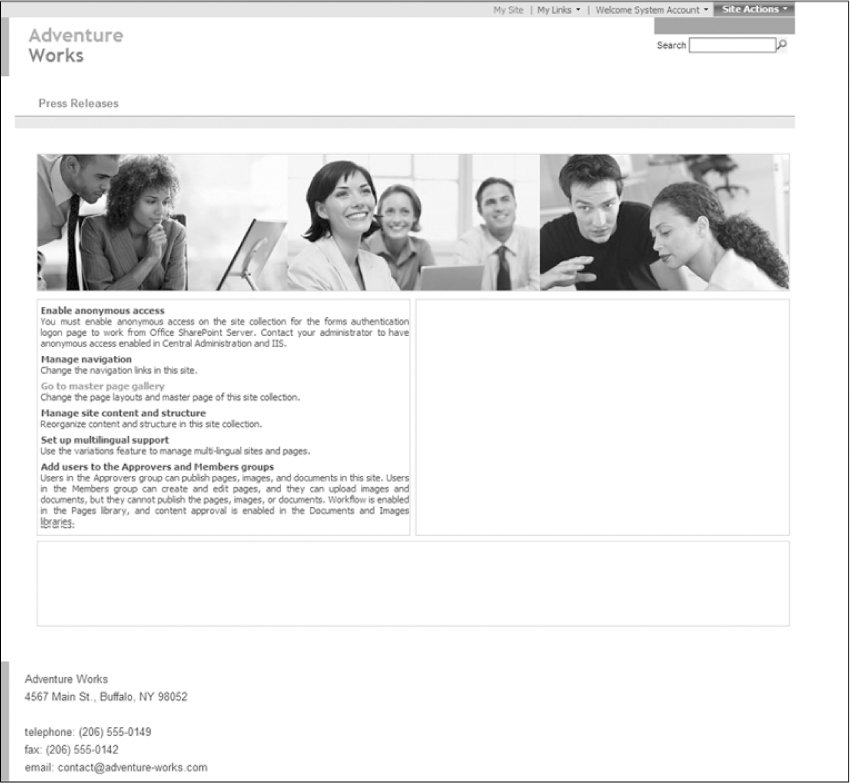
To change the master page, the user will select the master page he or she would like to update the site with and click OK, which will instantly update the look and feel, as shown in Figure 4-33.
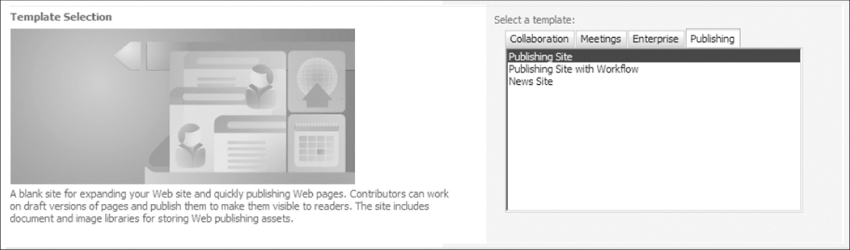
The Publishing Sub-Site Templates
When creating publishing sub-sites under publishing sites, you are able select from the following options:
- Publishing Site
- Publishing Site with Workflow
- News Site
The following sections detail which site template you should choose when creating your publishing sub-sites.
The Publishing Site Template
The Publishing Site template is a blank site that utilizes all of the publishing features of SharePoint. Contributors can create pages and easily publish them to their sites with a matter of clicks. This site template should typically be used when an approval process is not required and contributors need to publish to the site directly to make their content readily available to their readers. This site template includes a document and picture library for storing Web-publishing assets.
The Publishing Site with Workflow Template
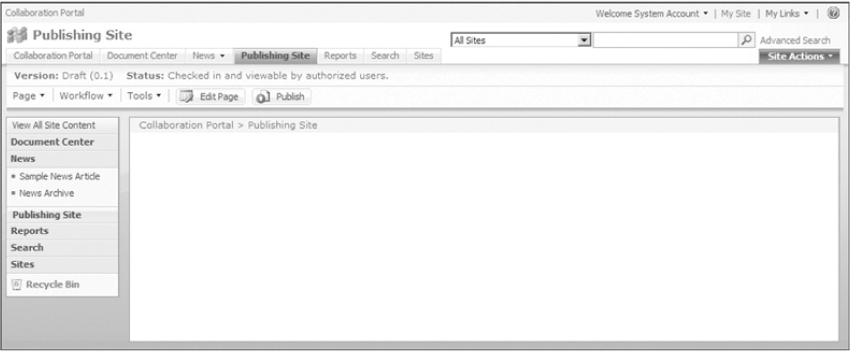
The Publishing Site with Workflow template can be used to add sub-sites with publishing features to existing publishing portals. Sites created with the Publishing Site with Workflow template will have the feature of publishing pages on schedule with approval workflows.
Contributors of a Publishing Site with Workflow Template can easily publish a page to their readers by clicking on the Publish button (see Figure 4-34).
Typically, sites created with the publishing site template will inherit their look and feel from their top-level sites. Sub-sites that live under a root publishing site should not have their own branding unless there is a special need for it. The look and feel should be maintained through the root level site. Setting up the sites this way will enable site owners to manage the look and feel for their portal more efficiently.
Designers must remember that once a publishing site is created, using the Publishing Site with Workflow template will create publishing sites with the workflow template as sub-sites.
The News Site Template
The News Site template is for sites needing to publish news articles. This site comes with the Collaboration Portal but can be added to the Publishing Portal as well. Sites created using the News Site template will include a sample news page and a News Archive section, as shown in Figure 4-35.
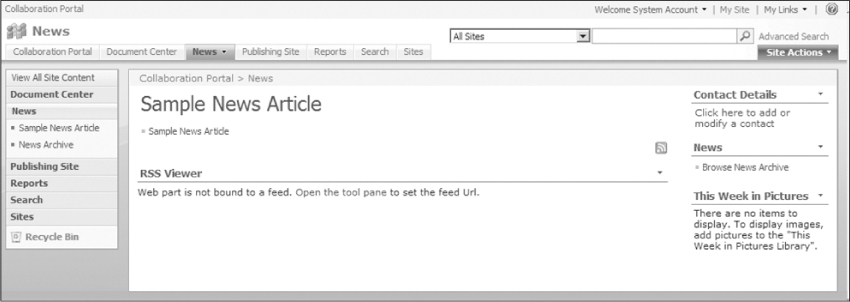
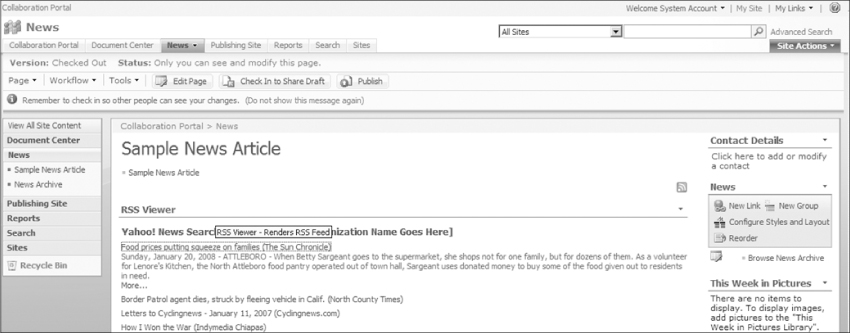
This site will be a good template to use not only for adding internal news but when adding news from other sources as well. With the addition of RSS feeds to MOSS 2007, site owners can easily subscribe to news feeds from other news sources. A nice way to use the RSS Viewer in your organization's portal is to subscribe to global news sources such as Yahoo! News, Google News, Live Search, CNN, or maybe MSDN and customize the feed so that it only returns news articles where the organization name is a part of the article. Customizing the news will allow the site readers to come to the News site to get the latest news about the organization, as shown in Figure 4-36.
Communication/Publishing Site Best Practices
Now that you have a solid understanding of what a communication site is and how to use it effectively, it is a good time to outline some of the best practices you might want to follow in your own communication sites. Since every site is different and business requirements change from project to project, it might be difficult to come up with a list of best practices that suit every situation. However, this list will provide some universal guidelines that should help best set up any communication site.
- Publish to communicate When you are trying to reach out to a large number of readers and you have a small number of contributors, use publishing sites.
- Internet or intranet? Use the Publishing Portal site template for Internet-facing sites and the Collaboration Portal site template for your intranets.
- Navigation Plan for your navigation, since this is what your consumers will use to find your information and, consequently, to help determine their satisfaction with your site.
- What took so long? Don't make your approval workflows complicated; keep them simple so the content can be published before it loses its relevancy and you lose productivity. For example, if your organization has five contributors who own and maintain two Web pages daily, and if publishing these pages takes two extra minutes because of a complicated approval workflow, the time used to update these pages once a day every workday in a single year will add up to more than 86 hours. That's five contributors wasting four minutes a day (two minutes for each of their two Web pages), five days a week, for 52 weeks. That is over two full weeks of productivity that could be used elsewhere.
- Corporate identity Make sure you utilize master pages and page layouts effectively to have a consistent look and feel.
- Variations vs. performance Plan for your variations and keep in mind that there will be performance-related issues if you create several variations without the proper planning. Make sure you do not create a variation unless you really need it.
- Don't forget to publish your changes Sometimes the readers of the site will not see your design correctly, since they do not have access to key components such as an image file or a style sheet. Be sure to check in and publish your design and also test the site with a reader account.
Following this list in your own projects will provide a great foundation for your finished project. You may have to make some decisions that are not covered here or that potentially deviate from this list if your business requirements necessitate doing so. Using this list, however, you should be well on your way to making effective communication sites and happy users.
What Is a Collaboration/Team Site?
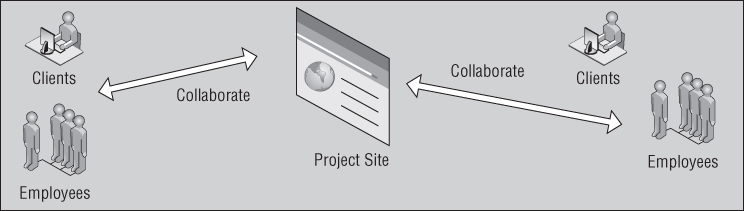
A site with a collaboration focus is one used by teams or groups of users that have a need to collaborate on work items such as projects or share information centrally to a group or team of users for a period of time. Sites that have a collaboration focus typically have the same amount of readers as they have contributors, as shown in Figure 4-37.
Information Flow in Collaboration/Team Sites
Collaboration sites are frequently visited by readers and contributors who collaborate on projects, documents, and similar information objects. Collaboration can be defined as the act of working together to achieve the same goal. In a collaboration environment, often the same user can be a reader and a contributor simultaneously. All users create the content available on the collaboration site, and the information flows both ways between readers and the collaboration site. See Figure 4-38.
When to Use a Collaboration Site
The main goal of a collaboration site is to provide readers and contributors with a central location that allows all site users to share information for a period of time. Sharing information with all team members is crucial in today's fast-paced business world. Project Managers needs to know how much time has been spent on a work item so that they can make critical business decisions and notify their stakeholders. Developers need to know the current specs for a project to accurately create deliverables. Clients need to know which deliverables have been finished and how close others are to completion. Team sites are a great way to collaborate with teams that work for the same goal.
Collaboration sites created and maintained by a specific group or team of users, and the visitors of a collaboration site are mostly the members of the group or team that owns the site. The SharePoint site template most commonly used for collaboration sites is called the Team Site template. Team sites are used to collaborate with a group or a team of users at a more granular level. Collaboration/team sites are used by team members to accomplish day-to-day activities. Almost any content required for a team can be stored in a team site.
To determine if using a collaboration site is necessary, the designer should ask the following question: “Is this a site that is going to be used as a team site where readers and contributors will both come to the site to collaborate on a common goal?” If the answer to the question is yes, organizations should use a collaboration/team site as the site fits the criteria for a collaboration site.
Using a Collaboration Site to Manage Projects
A good example of a collaboration site is a project management site. Projects require users to frequently update the information on a project, and others use the information to make decisions or to get answers to questions.
For example, a team at a manufacturing firm might want a collaboration site to discuss current project status, assign tasks, or arrange group lunches. Rather than having this internal information published to the corporate intranet, the team might choose to use a collaboration site, as shown in Figure 4-39.
Examples of content that could get published to a team site (see Figure 4-40) could be:
- Project documents (status reports, budget reports)
- Project tasks
- Project discussions
- Project calendar
Effectively Using a Collaboration Site?
The main goal of a collaboration site is to enable collaboration among team or group members. A main identifier of a collaboration/team site is whether or not a team needs to share information among the group or team but not publish the information to the corporate intranet. If that is the case, then that site is considered to be a collaboration/team site. Typically collaboration sites have the same amount of readers and contributors.
Teams who wish to collaborate will most likely need to share documents, create discussions around specific topics, share calendars, share meeting minutes, and share meeting agendas. Team sites help organizations improve the productivity among teams since they can meet a wide range of collaboration needs.
A team site can be storing information for a department, which would make it a long-term site. A team site can also be used for short-term goals by users. With collaboration sites, users of these sites become more productive and efficient, since they have access to the data they need through one central location.
Another reason to use a team site for collaboration is the Enterprise Content Management (ECM) capabilities of SharePoint. Team members can create documents and share the information with the other team members easily by using the document libraries in team sites. Document libraries enable team members to work on documents collaboratively using tools like check-in, check-out, submit minor/major versions, approval workflows on documents, request feedback using workflow, adding metadata to all documents, and creating reports with views.
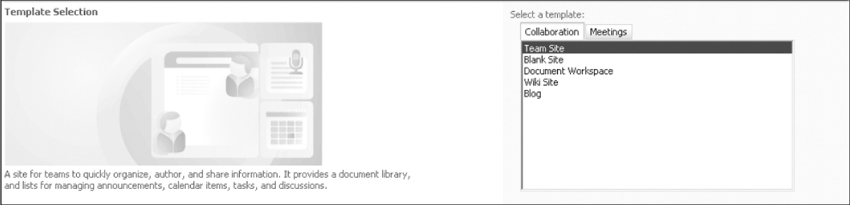
When creating sites in SharePoint, different types of sites are available under the Collaboration tab as illustrated in Figure 4-41. These site templates allow users to create different types of collaboration sites.
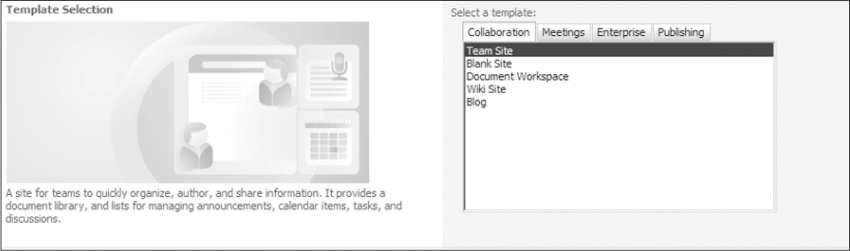
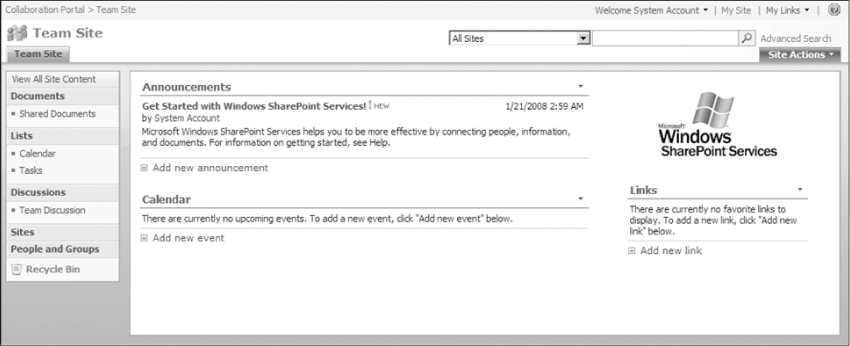
Team/Blank Site Template
The Team Site template is a site template that allows teams to quickly create, share, and organize information. It provides a document library named “Shared Documents,” lists named “Calendar” and “Tasks,” and a discussion board named “Team Discussion” as shown in Figure 4-42.

A blank site is a team site that has no lists or libraries. A blank team site is used when teams would like to start customizing with a clean site.
When designing for sites that are created using the Team Site template, designers should always try to leave the Quick Launch (left menu) in their design. The Quick Launch is a very important for collaboration sites, since it allows direct links to libraries, lists, and collaboration tools.
There are example master pages available through the Microsoft Download center for team sites. Designers can download and load master page examples to get a better understanding of what can be done with master pages.
Document Workspace Template
Sites created using the Document Workspace template allow users to work together on shared documents. Document Workspaces will have a document library, tasks list, and a links list, as shown in Figure 4-43.
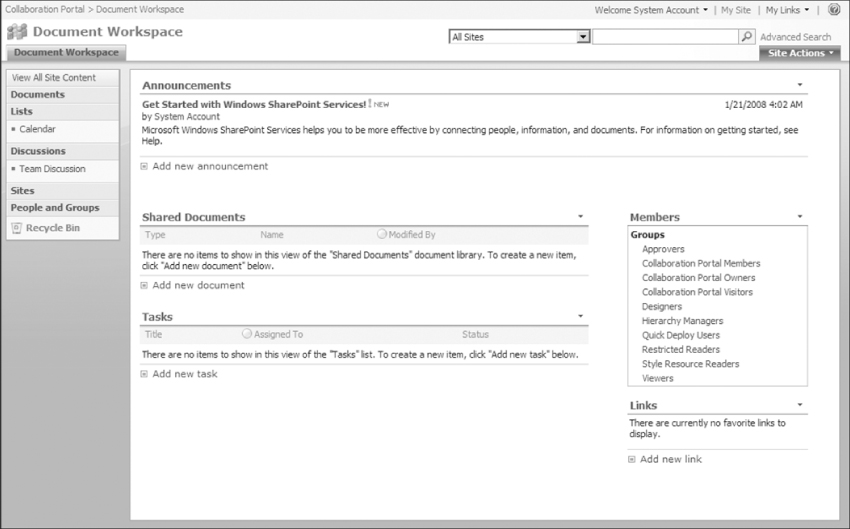
This site is used when several users have the need to work on the same document. By default, this site has Web Parts added to the default.aspx page. All of the design considerations that apply to team sites apply to a document workspace. The difference between the team site and the document workspace is the content stored on these sites. The look and feel should be the same.
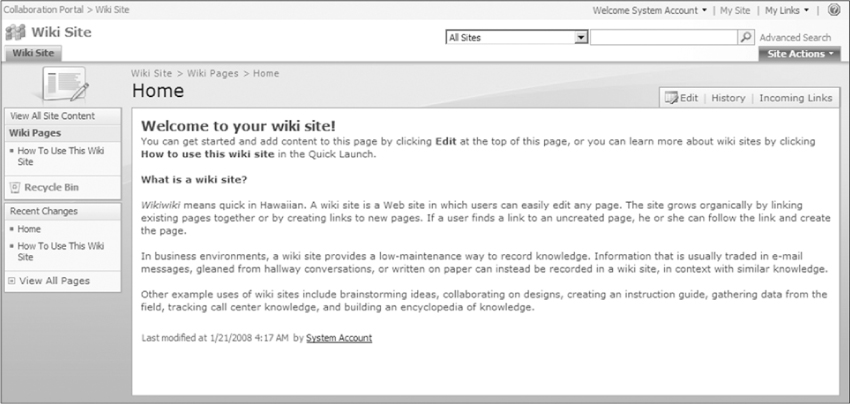
Wiki Site Template
The Wiki site template should be used for sites that will be used by a group of users to brainstorm and share ideas. The wiki site template provides easy to edit Web pages, which will allow users to share information efficiently. The default Wiki site has a description of what a Wiki site is in the home page as shown in Figure 4-44. There is also a link on the left menu Quick Launch that takes users to a page that explains how to use the Wiki site.
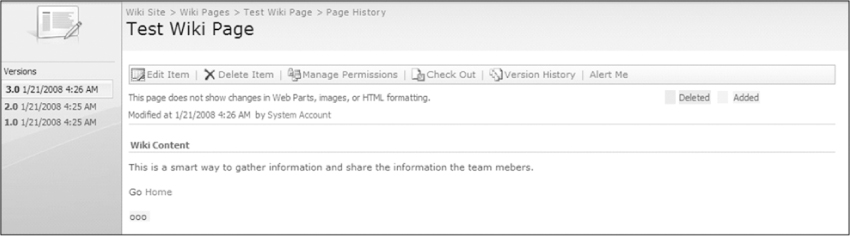
Wiki sites can be used for anything from working on a business plan to creating a knowledge base. Where there are several users and several topics that need information gathered, the best site template to use is the Wiki site. The versioning and history information of a particular Wiki page can be viewed by clicking on the History link, which will display all of the versions of the page and what was deleted or added (see Figure 4-45).
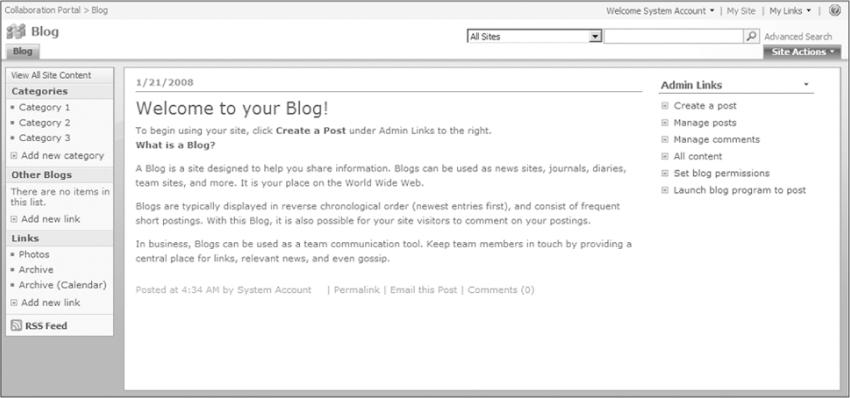
Blog Site Template
One of the new site templates that more and more users are interested in lately is the Blog site template. A Blog (shortened from “Web log”) site is a site for a person or a team to post information viewable by site visitors, who can then comment on individual posts. A blog site has a similar look and feel to a team site, as can be seen in Figure 4-46.
Site Templates with WSS 3.0
This chapter has been solely focused on MOSS 2007. While many of the intricacies of MOSS 2007 will translate to Windows SharePoint Services v3 (WSS v3), it is worth noting that, when creating sites, site owners will not get the Enterprise or Publishing tabs shown earlier in this chapter. Instead, the site owners will be presented with a subset of the tabs available in MOSS 2007, as shown Figure 4-47.
Collaboration/Team Site Best Practices
Now that you have a solid understanding of what a collaboration site is and how to use it effectively, it is a good time to outline some of the best practices you might want to follow in your own collaboration sites. Similar to the communication site best practices, every collaboration site is different and will have different business requirements. However, this list will provide some universal guidelines that should help best set up any communication site.
- Collaborate with your team Use the team site template when you have the same amount of readers and contributors.
- Look and feel Do not heavily brand collaboration sites. Use simple look and feel modifications to keep it consistent with the corporate identity. These sites are not intended for marketing/communicating purposes as the users of these sites will use collaboration sites to get the data they need to get their work done.
- Blogs Control the site provisioning processes for blogs and make sure your organization has and knows the policies around posting blogs in your organization.
- Training Make sure the users are fully aware of the site templates that are available in SharePoint.
- Taxonomy Plan your taxonomy carefully so that when you allow users to create sites on their own it does not result in chaos. Build good structures for collaboration sites. For example, create a top-level team site for all projects and only allow users to create project sites under this site. This way you will only have to maintain one site collection and can apply your branding changes easily.
In this chapter, the differences between communication and collaboration sites were discussed in great detail. By finishing this chapter, designers should know the differences between communication and collaboration sites and be able to determine the best approach and technology for their sites.
Designers should be able to look at the users and how they plan to incorporate the site into their business processes and determine which type of site should be created. If a site has more readers than it has contributors then a communication site should be used. If it has the same amount of readers and contributors, it should use a collaboration site. By knowing the type of site that is going to be used designers now can design either a heavily branded site or a lightly branded site depending on if it's a communication or collaboration site. Communication sites require heavy branding where collaboration sites should not be heavily branded, as those sites are being used to collaborate and branding should be kept at a bare minimum.
At this point, a designer should have an easier time answering the question, which is also the title of the chapter, “Communicating or Collaborating?”