
IN THIS CHAPTER
Java database connectivity
The Hibernate framework
Java has a wide variety of libraries available for working with databases. This chapter discusses two of the most widely used methods of working with databases in Java. The first, Java Database Connectivity, is included with the Java Development Kit. The second, Hibernate, is a separate open-source library.
Java Database Connectivity (JDBC) has been a standard component of the JDK almost since the beginning. JDK version 6 includes JDBC 4.0. It provides a set of classes that allow you to execute SQL statements and queries against a database and then work with the results. Because it uses standard SQL, developers who are familiar with SQL and running queries against a database are able to pick it up fairly quickly.
Note
For more on databases and SQL, see Chapter 8.
The JDBC classes included with the JDK are part of the java.sql and javax.sql packages. There are a number of classes and interfaces in this package. These include the following:
The
Connectioninterface represents a connection to a database.Connectionis used to create the statements and queries that are run against the database as well as to retrieve information about the database itself.The
Statementinterface represents the SQL statement to be run against the database.The
PreparedStatementinterface is much like theStatementinterface, but it also allows the addition of parameters. This allows you to execute the same query multiple times by using different values.The
ResultSetinterface represents the results of aselectstatement in SQL.
To support databases from different vendors, connections to databases using JDBC require a special class called a JDBC driver. The JDBC driver is responsible for managing communication and translation between the standard JDBC classes and the database. JDBC drivers aren't included with the JDK. They're usually provided by the database vendor or third-party developers.
Typically, code that uses JDBC to work with a database follows this pattern:
Get a connection to the database and make sure it's valid.
Create a SQL statement to execute.
Execute the statement.
If the statement was a
selectstatement, retrieve and manipulate the results.If the statement was an
insert, update, ordeletestatement, retrieve the number of rows affected by the query.
MySQL provides an open-source JDBC driver called MySQL Connector/J for use with MySQL databases. You need to download this JDBC driver in order to use JDBC with the MySQL database. MySQL Connector/J is available for download on the MySQL Web site at dev.mysql.com/downloads/connector/j/5.1.html. As of this writing, the most recent version of MySQL Connector/J is 5.1.6.
Note
Updates to MySQL Connector/J are likely, so use the current version available.
Note
For more on MySQL, see Chapter 8.
To download MySQL Connector/J, follow these steps:
Click the Download link to the right of Source and Binaries (zip) on the download page. The File Download dialog box opens.
Choose Save and then choose a directory to save the ZIP file to your computer.
Open the ZIP file and then extract it to a location of your choice. The ZIP file has a single folder that contains the MySQL Connector/J JDBC driver JAR file as well as the Java source code for the driver and documentation.
With MySQL Connector/J downloaded, you can create a simple stand-alone JDBC application by using the petclub database you created previously. This very basic application displays a list of pet names, their types, and which person they belong to. You use Eclipse to create a project, write the application, and run it.
To create the MySQL JDBC application by using Eclipse, follow these steps:
Right-click inside the Project Explorer view and then choose New
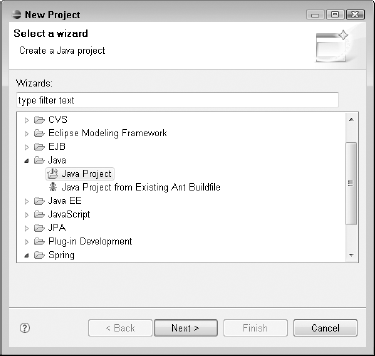
Project from the popup menu. The Select a wizard dialog box, as shown in Figure 9.1, opens.
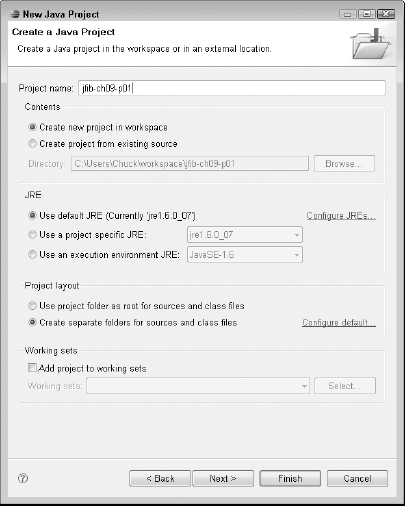
Click the arrow next to Java to expand it, choose Java Project, and then click Next. The Create a Java Project wizard, as shown in Figure 9.2, opens.
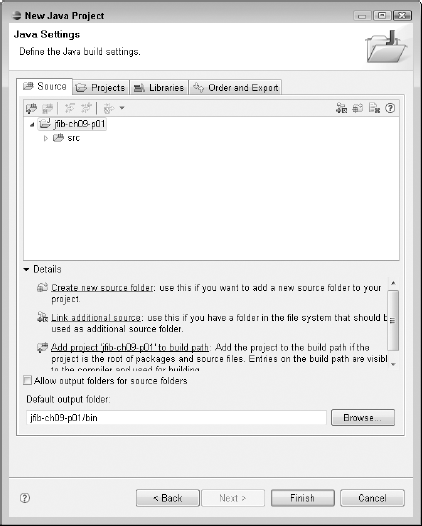
Type a name for your project and then click Next. The default values are appropriate for the rest of the options on this screen. The Java Settings screen, as shown in Figure 9.3, opens.
Click the Libraries tab and then click the Add External JARs button. The JAR Selection dialog box opens.
Navigate to the location where you extracted MySQL Connector/J, choose the
mysql-connector-java-5.1.6-bin.jarfile, and then click Open. The JAR Selection dialog box closes, and themysql-connector-java-5.1.6-bin.jarfile appears in the Libraries tab, as shown in Figure 9.4. JAR files listed in the Libraries tab for the project are added to the classpath used by the Java compiler and Eclipse.Click Finish. The wizard closes, and the new project appears in the Project Explorer view, as shown in Figure 9.5.
The application itself can't directly use any classes from the MySQL Connector/J library. Instead, the DriverManager class in the JDK searches for an appropriate JDBC driver on the classpath based on the connection information provided by the application. By adding the MySQL Connector/J JAR file to the libraries available to this project, when the application is run within Eclipse, the JDK can load the correct JDBC driver to talk to the database.

Figure 9.4. After choosing the mysql-connector-java-5.1.6-bin.jar file in the JAR Selection dialog box and clicking Open, the JAR file appears in the Libraries tab and is on the classpath used by the Java compiler and Eclipse.
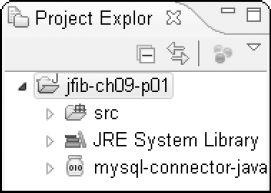
Figure 9.5. The newly created project appears in the Project Explorer view once the wizard is complete.
Now that the Eclipse project has been configured, the application can be coded. Follow these steps to create the Java file for the application:
Right-click the
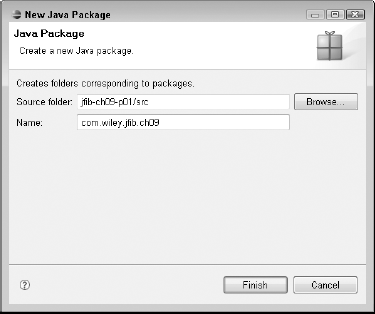
srcfolder under the project in the Project Explorer view and then choose NewPackage from the popup menu. The New Java Package dialog box, as shown in Figure 9.6, opens.Type com.wiley.jfib.ch09 for the package name and then click Finish. The default value for the Source folder is appropriate. The new package appears in the
srcfolder under the project, as shown in Figure 9.7.Right-click the
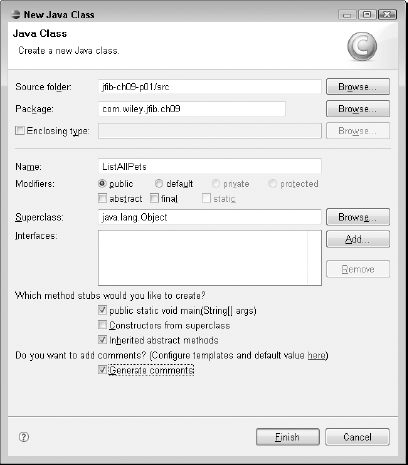
com.wiley.jfib.ch09package in the Project Explorer view and then choose NewClass from the popup menu. The New Java Class dialog box, as shown in Figure 9.8, opens.Type ListAllPets in the Name text field, click the check boxes next to public static void main(String[] args) and Generate comments, and then click Finish. The new Java class is created and opens in the editor, as shown in Figure 9.9.
Every stand-alone Java application includes a main method, which takes an array of string objects as a parameter. The array of strings corresponds to any arguments passed into the application, and the array is arranged in the order in which the arguments are passed. Arguments aren't required, and in this case, there won't be any arguments for the application, so the array of strings passed into the main method is null.

Figure 9.7. The newly created package appears in the src folder under the project in the Project Explorer view.
![The newly created Java class opens in the editor. A stub of the public static void main(String[] args) method has been created for you.](http://imgdetail.ebookreading.net/software_development/33/9780470400746/9780470400746__java-and-flex__9780470400746__figs__0909.png)
Figure 9.9. The newly created Java class opens in the editor. A stub of the public static void main(String[] args) method has been created for you.
The main method is where the main functionality of the application appears. Change the main method to match the following code listing:
public static void main(String[] args)
     {
          String jdbcUrl = "jdbc:mysql://localhost:3306/petclub";
          String username = "root";
          String password = "toor";
          Connection conn = null;
          Statement stmt = null;
          ResultSet rs = null;
          String sql = "SELECT pet_id, name, type, person_id FROM pet";

          try
          {
               conn = DriverManager.getConnection(jdbcUrl,username,password);
               stmt = conn.createStatement();
rs = stmt.executeQuery(sql);
while(rs.next())
{
System.out.println(rs.getString("name")
+ " is a " + rs.getString("type")
+ " belonging to person id "
+ rs.getInt("person_id"));
}
}
catch(SQLException sqle)
{
sqle.printStackTrace();
}
finally
{
try
{
rs.close();
stmt.close();
conn.close();
}
catch(SQLException e)
{
}
}
}The first three lines inside the main method define the three parameters needed to establish a connection to the database. The username and password parameters are fairly self-explanatory, but jdbcUrl needs clarifying. Each JDBC driver, such as MySQL Connector/J, defines a URL that tells the Java virtual machine (JVM) where to connect to the database. In this case, the URL jdbc:mysql://localhost:3306/petclub tells the JVM that this is a MySQL database that runs on the machine localhost on port 3306 and that the name of the database being connected to is petclub. The basic format of this URL is the same for all applications that use the MySQL Connector/J JDBC driver. If the database were located on a different server or running on a different port, those values could be changed to reflect that.
The next three lines define variables named conn, stmt, and rs. These variables hold implementations of the Connection, Statement, and ResultSet interfaces discussed earlier. Finally, a string variable named sql holds the actual SQL query that's used to get the data from the database.
The next section of code is enclosed in a try/catch block. A try/catch block is used to enclose code that might encounter an error that needs to be handled. The code in the try block is run, and if an error is encountered, it's caught and dealt with gracefully within the catch block. In this case, the JDBC classes and methods throw an SQLException if an error occurs, such as being unable to connect to the database or attempting to execute an invalid SQL statement. If a SQLException is thrown, execution of the code inside the try block ceases and the catch block then executes.
The first thing that happens inside the try block is that the JDBC DriverManager class attempts to connect to the MySQL database by using the connection information provided. You didn't have to tell the application that you're using the MySQL Connector/J driver. Using the jdbcUrl you provided, the JVM attempts to load an appropriate driver from the classpath.
Once the connection has been established, it's used to create a Statement object to be run against the database. Then, the sql string variable is passed into the Statement's execute() method, which runs that SQL against the database and returns the results of the query in a ResultSet object. The ResultSet object is a collection of rows returned from a database query. Finally, the code loops through the ResultSet as long as its next() method returns true, indicating it has more data. Each time next() is called, it moves an internal pointer to the next row in the ResultSet and returns true if it's pointing to a valid row or false if it has no more data. For each iteration of the loop, a message is printed out with the name and type of the pet along with the pet owner's person_id. The fields are referred to here by name explicitly, but they can also be retrieved by index. For example, because name is the first field in the results, calling rs.getString(1) has the same effect as rs.getString("name"). The advantage of using the field names rather than indexes is that if the query ever changes, you need to double-check that all your indexes are still appropriate.
Note
Although most things in Java are zero-indexed (meaning that the first item is index 0, the second item is index 1, etc.), ResultSet fields are one-indexed. It's easy to forget this and get a runtime error for using an invalid index of 0.
At the very end of the method is a finally block. The finally block contains code that's always executed at the end of the method, whether or not an error occurred. In this case, the finally block contains code that closes out all the database objects previously opened. This code is also contained in a try/catch block because the close() methods on all these objects throw SQLExceptions if something goes wrong (the connection is already closed, for example).
Eclipse has marked a number of lines of code with red underlines, which indicate that there's some error with the code. Mousing over each of these errors provides you with a description of the error and some possible solutions. In all these cases, the errors occur because the classes needed from the java.sql package can't be found. Add this line of code to the top of the class, just below the package declaration:
import java.sql.*;
This line tells the Java compiler to import all the classes in the java.sql package into this application. After you add this line and save the file, Eclipse knows to look for the needed classes in the java.sql package, and the errors then are cleared.
Run the application inside Eclipse by right-clicking the ListAllPets.java file in the Project Explorer and choosing Run As

Although JDBC is fairly straightforward to use, it does have a few disadvantages. First, it requires a fair bit of code to perform a set of database operations. In addition to running the actual SQL query you want to run and processing the results, you must establish the database connection and create the statement, and you must remember to close all the database resources you open to avoid database connection and memory leaks in your application. Second, because different databases add their own functions and extensions to standard SQL, code written in pure JDBC may not be portable to another database without extensive modifications. Finally, it requires you to mix SQL code in with your Java code, meaning that you're using two very different programming methodologies in the same program. If another developer with a limited understanding of SQL needs to work with your code, it might be more difficult and time-consuming.
Working with JDBC also brings another issue to the forefront — namely, that relational databases, such as MySQL and Java, work with data much differently. A database stores data in rows and columns composed of simple types like VARCHAR and INTEGER. Java objects typically contain both simple types like String and int as well as other objects. In Java, it's easy to build an object composed of a mix of simple types and other objects. In SQL, complex table joins are usually required to represent this mix of data. Using JDBC to save data from a complex Java object to a relational database or to load data from many tables into a single Java object can be cumbersome.
One solution to this problem is a technique known as object-relational mapping (ORM). This technique involves using a translation layer to allow Java objects to be stored in and retrieved from a database without actually needing to directly use SQL or JDBC. The objects themselves are simply passed into the ORM code, which does the work of translating the objects into SQL that the database understands. Similarly, objects can be retrieved from the database by asking for them from the ORM layer without having to write a SQL query. The code you write by using an ORM library is typically more portable than JDBC because you're not writing any SQL that's specific to a particular database; the ORM library translation generates appropriate SQL code for the database you're using.
One of the most popular ORM libraries for Java is Hibernate. Hibernate has all the features just mentioned but is also flexible enough to allow you to write your own custom SQL if you have complex or nonstandard data needs that don't quite fit what Hibernate does on its own.
Hibernate's flexibility and power can make its learning curve somewhat steep. This section covers the basics of Hibernate and provides a foundation upon which you can build.
Note
For more advanced Hibernate configuration and use, see Chapter 12.
Hibernate makes use of a number of XML configuration files. A global configuration file, usually named hibernate.cfg.xml, contains properties about the database being used by the application, such as the connection URL, username, and password (the same properties the JDBC example used). In addition to the global configuration file, each Java object that's saved to the database has a corresponding Hibernate mapping file. The mapping file tells Hibernate how the properties of the Java object should be translated to columns in the database table.
Hibernate uses the information in the global configuration file to create a Hibernate session. The Hibernate session is used to handle the translation between the objects and the database tables. Hibernate can also group multiple database operations into a single unit of work called a transaction. Using transactions is important when it's imperative that all database operations either succeed or fail as a group. Consider the example of a bank account transfer. A transfer involves withdrawing money from one account and depositing it in another account. These two operations should either succeed or fail as a group. Without a transaction, if the withdrawal succeeds but the deposit fails, the withdrawn money just disappears. With a transaction, the failure of the deposit causes the withdrawal to roll back so that both accounts are in the same state as before the transaction started.
To use Hibernate with MySQL, you need the MySQL Connector/J JDBC driver you previously downloaded. You also need a JAR file included with your Spring Framework distribution, and you need to download Hibernate and SLF4J, which Hibernate depends on.
Note
For instructions on downloading the Spring Framework, see Chapter 6.
The most recent version of Hibernate is available for download on the Hibernate Web site at www.hibernate.org/30.html. As of this writing, the most recent version of Hibernate is 3.3.1.GA.
There are a number of packages available for download on this Web site. As its name implies, the Hibernate Core package contains all the core functionality of Hibernate. This is the package you need to download.
To download Hibernate Core, follow these steps:
Click the Download link to the right of Hibernate Core on the download page. The Hibernate Core file listing page opens.
Click the
hibernate-distribution-3.3.1.GA-dist.ziplink. The File Download dialog box opens.Choose Save and then choose a directory to save the ZIP file to your computer.
Open the ZIP file and then extract it to a location of your choice. The ZIP file has a single folder that contains the Hibernate JAR file, other libraries used by Hibernate, and the Hibernate documentation.
Hibernate depends upon Simple Logging Façade for Java (SLF4J), which is a library that provides a single interface for many different Java logging mechanisms. This allows Hibernate to be used in applications that use any one of many different Java logging libraries, such as Apache's log4j, rather than requiring a specific logging library. This makes it easier to add Hibernate to an application with an established logging implementation.
The most recent version of SLF4J is available for download on the SLF4J Web site at www.slf4j.org/download.html. As of this writing, the most recent version of SLF4J is 1.5.6.
To download SLF4J, follow these steps:
Click the
slf4j-1.5.6.ziplink on the download page. The File Download dialog box opens.Choose Save and then choose a directory to save the ZIP file to your computer.
Open the ZIP file and then extract it to a location of your choice. The ZIP file has a single folder that contains the SLF4J JAR files as well as the source code and build files for each one of the SLF4J JAR files.
The JDBC version of the petclub sample consisted of one Java class. The Hibernate version uses three Java classes and four configuration files. On the surface, this seems to contradict the idea that using Hibernate reduces the amount of code needed to work with a database. However, much of the work involved here is reusable, and when you compare the actual application class with that in the JDBC example, the amount of code is smaller and much easier to read.
Launch Eclipse again if it's not already running. First, you need to create a new project in Eclipse for this version of the sample. To create a new Eclipse project, follow these steps:
Right-click inside the Project Explorer view. The Select a wizard dialog box opens.
Click the arrow next to Java to expand it, choose Java Project, and then click Next. The Create a Java Project wizard opens.
Type a name for your project and then click Next. The default values are appropriate for the rest of the options on this screen. The Java Settings screen opens.
Click the Libraries tab and then click the Add External JARs button. The JAR Selection dialog box opens.
Navigate to the location where you extracted Hibernate, choose the
hibernate3.jarfile, and then click Open. The JAR Selection dialog box closes, and thehibernate3.jarfile appears in the Libraries tab.Click Add External JARs again. The JAR Selection dialog box opens.
Navigate to the location where you extracted Hibernate, go into the
lib
equired
folder, click all the JAR files in that folder, and then click Open. The JAR Selection dialog box closes, and the six JAR files appear in the Libraries tab. Figure 9.11 shows the JAR Selection dialog box with the six JAR files in this folder.Navigate to the location where you extracted MySQL Connector/J, choose the
mysql-connector-java-5.1.6-bin.jarfile, and then click Open. The JAR Selection dialog box closes, and themysql-connector-java-5.1.6-bin.jarfile appears in the Libraries tab.Click Add External JARs again. The JAR Selection dialog box opens.
Navigate to the location where you extracted SLF4J, choose the
slf4j-log4j12-1.5.6.jarfile, and then click Open. The JAR Selection dialog box closes, and theslf4j-log4j12-1.5.6.jarfile appears in the Libraries tab.Click Add External JARs again. The JAR Selection dialog box opens.
Navigate to the location where you extracted the Spring Framework, go into the
libfolder, choose thelog4j-1.2.15.jarfile, and then click Open. The JAR Selection dialog box closes, and thelog4j-1.2.15.jarfile appears in the Libraries tab. Once this JAR file has been added, the Libraries tab should contain all the JAR files shown in Figure 9.12.Click OK. The wizard closes, and the new project appears in the Project Explorer view.
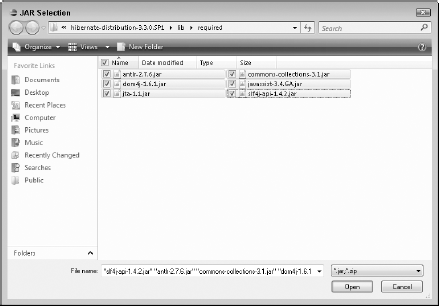
Figure 9.11. Click all six JAR files in the lib
equired folder in the Hibernate folder you previously extracted. As the folder name implies, these libraries are required by Hibernate.
Because one of the main features of Hibernate is to map Java objects to database tables, the first thing to do is create objects to represent the data in the tables in the petclub database. Figure 9.13 shows the two tables in the database. Using the information in the tables, you can create a Person class and a Pet class to represent the data.

Figure 9.12. Once all the necessary JAR files have been added, the Libraries tab should look like this.
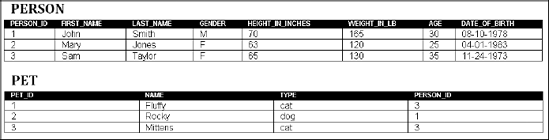
Figure 9.13. The PERSON and PET tables in the petclub database. Using the information here, you can create classes to represent the data in these tables.
To create the Person and Pet classes, follow these steps:
Right-click the
srcfolder under the project in the Project Explorer view and then choose NewPackage from the popup menu. The New Java Package dialog box opens.Type com.wiley.jfib.ch09 for the package name and then click Finish. The default value for the Source folder is appropriate. The new package appears in the
srcfolder under the project.Right-click the
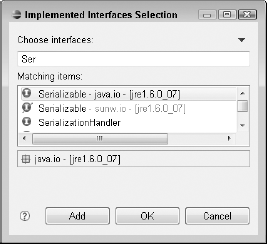
com.wiley.jfib.ch09package in the Project Explorer view and then choose NewClass from the popup menu. The New Java Class dialog box opens.Click the Add button to the right of the Interfaces box. The Implemented Interfaces Selection dialog box, as shown in Figure 9.14, opens.
Type Serializable in the Choose interfaces text field, choose
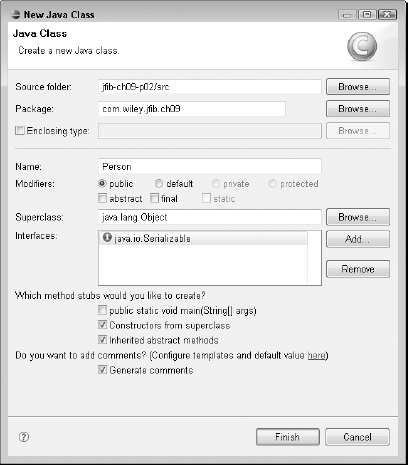
Serializable - java.iofrom the Matching items list, and then click OK. The Implemented Interfaces Selection dialog box closes, and thejava.io.Serializableinterface appears in the Interfaces box in the New Java Class dialog box.Type Person in the Name text field, click the check boxes next to Constructors from superclass and Generate comments, as shown in Figure 9.15, and then click Finish. The new Java class is created and opens in the editor.
Right-click the
com.wiley.jfib.ch09package in the Project Explorer view and then choose NewClass from the popup menu. The New Java Class dialog box opens.Click the Add button to the right of the Interfaces box. The Implemented Interfaces Selection dialog box opens.
Type Serializable in the Choose interfaces text field, choose
Serializable - java.iofrom the Matching items list, and then click OK. The Implemented Interfaces Selection dialog box closes, and thejava.io.Serializableinterface appears in the Interfaces box in the New Java Class dialog box.Type Pet in the Name text field, click the check boxes next to Constructors from superclass and Generate comments, and then click Finish. The new Java class is created and opens in the editor.
Clicking the Constructors from superclass check box in the New Java Class dialog box causes Eclipse to generate the Person and Pet classes with constructors that don't take parameters. One of the requirements for objects that Hibernate handles is that they have a default constructor like this. Hibernate uses this constructor to instantiate objects when it retrieves data from the database.
The classes have been created, but they have no properties in which to hold values from the database. Click the tab for the Person.java file in the editor and then add the properties for the Person class just below the opening curly brace for the class definition so that it matches the following code listing:
/**
 *
 */
package com.wiley.jfib.ch09;

import java.io.Serializable;
import java.util.Calendar;

/**
 * @author Chuck
 *
 */
public class Person implements Serializable
{
   private int personId;
   private String firstName;
   private String lastName;
   private String gender;
   private int heightInInches;
   private int weightInPounds;
   private int age;
   private Calendar dateOfBirth;

   /**
    *
    */
   public Person()
   {
   }
}
The Person class has a property for each column in the database. The types of these properties match the data types of the database columns. For example, the personId property is an int, corresponding to the PERSON_ID column of type INTEGER in the database. The dateOfBirth property is a java.util.Calendar object, which maps to the DATE type in MySQL.
The Person class also implements the Serializable interface. Serializable is a special interface that has no methods to implement. Although this practice isn't required, having your objects implement Serializable is a good practice. The Serializable interface tells the JVM that the current state of this object can be saved and restored as necessary.
Although it's not particularly important for this simple example, more complicated applications that use caching mechanisms or share objects across multiple application servers make use of this functionality frequently. It's good to get into the habit of implementing this interface.
All the properties in this class are marked private. Remember that this means they can't be accessed outside this class. A standard convention for writing Java objects is to mark the properties of the objects as private and allow them to be manipulated only by using sets of accessor methods, sometimes referred to as getters and setters. Getters and setters follow a standard naming convention: the word get or set followed by the name of the property. For example, the getter and setter for the personId property would be called getPersonId() and setPersonId(), respectively. A Java class that has a no-argument constructor, implements the Serializable interface, and uses the standard naming convention for getters and setters is called a Java bean.
Note
The naming convention for getters for properties of type boolean (true/false) is slightly different. Rather than using getProperty(), the convention for boolean types is isProperty().
Note
For more on about Java syntax and keywords, such as private and public, see Chapter 1.
Eclipse makes it easy to create getters and setters for all the properties in an object. To create the getters and setters for the Person class, follow these steps:
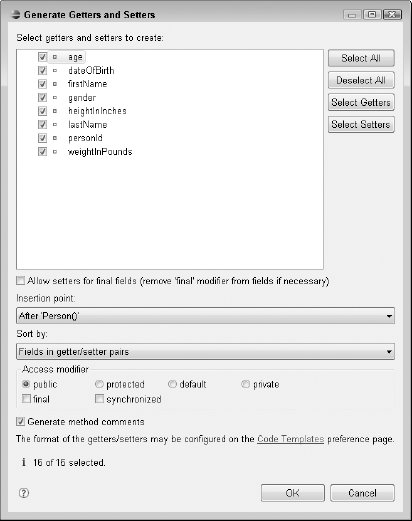
Right-click the
Personclass in the editor and then choose SourceGenerate Getters and Setters from the popup menu. The Generate Getters and Setters dialog box, as shown in Figure 9.16, opens.Click Select All and then click OK. The Generate Getters and Setters dialog box closes, and the getters and setters for all properties of the
Personclass are added to the class after the constructor.
Now add the properties of the Pet object. When finished, the Pet object should look like this code listing:
/**
 *
 */
package com.wiley.jfib.ch09;

import java.io.Serializable;

/**
 * @author Chuck
*
 */
public class Pet implements Serializable
{
   private int petId;
   private String name;
   private String type;
   private Person person;

   /**
    *
    */
   public Pet()
   {
   }
}
The Pet class is structured much like the Person class. It implements the Serializable interface and has a property for each field in the database. However, there's one big difference: The PET table in the database has a PERSON_ID field of type INTEGER. Rather than include a personId property of type int, however, the Pet class has a person property, which is a Person object. In the database, the relationship between Pet and Person is established by the PERSON_ID column. In a Hibernate mapping file, this relationship is used to provide the full Person object to the Pet class.
Generate the getters and setters for the Pet class the same way you did for the Person class. Now that these two classes are complete, you can create the Hibernate mapping files for them.
Hibernate mapping files are XML files that describe the relationship between the properties in Java classes and fields in database tables. Hibernate uses these mappings at runtime to save and retrieve the objects to and from the database. The mapping files need to be on the application's classpath at runtime for Hibernate to be able to locate them.
To create the Hibernate mapping files for the Person and Pet classes, follow these steps:
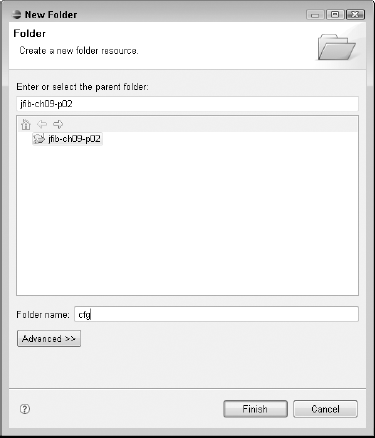
Right-click the project in the Project Explorer view and then choose New
Folder from the popup menu. The New Folder dialog box, as shown in Figure 9.17, opens.Type cfg in the Folder name text field and then click Finish. The New Folder dialog box closes, and the newly created folder appears in the Project Explorer view.
Right-click the
cfgfolder in the Project Explorer view and then choose NewFile from the popup menu. The New File dialog box, as shown in Figure 9.18, opens.Type Person.hbm.xml in the File name text field and then click Finish. The New File dialog box closes, and the
Person.hbm.xmlfile appears in the Project Explorer view and opens in the editor.Right-click the
cfgfolder in the Project Explorer view and then choose NewFile from the popup menu. The New File dialog box opens.Type Pet.hbm.xml in the File name text field and then click Finish. The New File dialog box closes, and the
Pet.hbm.xmlfile appears in the Project Explorer view and opens in the editor.
Click the Person.hbm.xml tab in the editor to switch to it. The file opens in the Eclipse XML editor, as shown in Figure 9.19. The Eclipse XML editor has two different views, represented by tabs at the bottom of the editor window. By default, the editor opens in the Design view, which shows a tabular representation of the XML structure or instructions for adding content to the document if the document is empty, as your Person.hbm.xml file is to begin with. Most of the time, however, it's easier to understand the structure of an XML document by examining the source directly. To switch the editor to Source view, click the Source tab in the bottom-left section of the editor window. All the instructions for editing XML files in this chapter assume that you have the Eclipse XML editor in Source view.
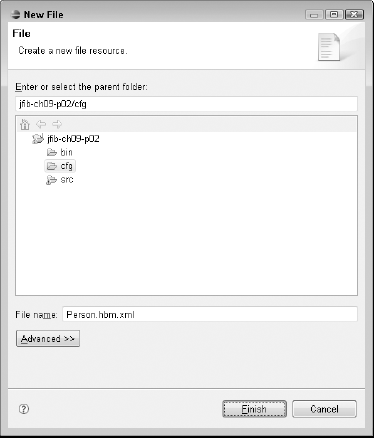
Figure 9.19. When editing an XML file in Eclipse, the Eclipse XML editor is used. By default, it opens in the Design view shown here. To switch to Source view, which is used in this chapter, click the Source tab in the bottom-left section of the editor window.
Switch the editor for Person.hbm.xml to Source view and then edit the file so that it matches this code listing:
<?xml version="1.0" encoding="UTF-8"?>
<!DOCTYPE hibernate-mapping PUBLIC "-//Hibernate/Hibernate Mapping
   DTD 3.0//EN" "http://hibernate.sourceforge.net/hibernate-mapping-
   3.0.dtd" >
<hibernate-mapping>
   <class name="com.wiley.jfib.ch09.Person" table="PERSON">
        <id name="personId" column="person_id" type="java.lang.Integer">
              <generator class="increment"/>
        </id>
        <property name="firstName" column="first_name"
               type="java.lang.String" />
        <property name="lastName" column="last_name"
               type="java.lang.String" />
        <property name="gender" column="gender"
               type="java.lang.String" />
        <property name="heightInInches" column="height_in_inches"
               type="java.lang.Integer" />
        <property name="weightInPounds" column="weight_in_lb"
               type="java.lang.Integer" />
        <property name="age" column="age"
               type="java.lang.Integer" />
        <property name="dateOfBirth" column="date_of_birth"
               type="java.util.Calendar"/>
   </class>
</hibernate-mapping>
The Person class is very basic, and the Hibernate mapping file for the Person class is also quite basic. The <class> tag relates the Person class in the com.wiley.jfib.ch09 package to the PERSON table in the database. Inside the <class> tag are an <id> tag and a number of <property> tags. The <id> tag tells Hibernate what the primary key of the PERSON table is (person_id) and what property it maps to in the Person class (personId). Inside the <id> tag, the <generator> tag tells Hibernate that the values for this field are generated by an auto-incrementing function in the database. Each <property> tag maps one of the properties in the Person class to a column in the database and gives the data type of each one.
Now switch the editor for Pet.hbm.xml to Source view and then edit the file so that it matches this code listing:
<?xml version="1.0" encoding="UTF-8"?>
<!DOCTYPE hibernate-mapping PUBLIC "-//Hibernate/Hibernate Mapping
   DTD 3.0//EN" "http://hibernate.sourceforge.net/hibernate-mapping-
   3.0.dtd" >
<hibernate-mapping>
   <class name="com.wiley.jfib.ch09.Pet" table="PET">
         <id name="petId" column="pet_id" type="java.lang.Integer">
                <generator class="increment"/>
         </id>
<property name="name" column="name" type="java.lang.String" />
<property name="type" column="type" type="java.lang.String" />
<many-to-one name="person" column="person_id" class="com.
wiley.jfib.ch09.Person"/>
</class>
</hibernate-mapping>This mapping file is largely similar to the Person.hbm.xml mapping file, but it also contains a <many-to-one> tag. The <many-to-one> tag describes a relationship between the Pet class and the Person class. It says that many Pets can belong to one Person and that they're related through the person_id column. Hibernate uses this relationship and the value in the person_id column to set the person property of each Pet object with the appropriate Person object.
The Java classes are configured with their own Hibernate mapping files, but Hibernate itself also needs a configuration file. This file gives Hibernate information about the database and also sets up the Hibernate session, which is used to perform all interactions with the database.
To create the Hibernate configuration file, follow these steps:
Right-click the
cfgfolder in the Project Explorer view and then choose NewFile from the popup menu. The New File dialog box opens.Type hibernate.cfg.xml in the File name text field and then click Finish. The New File dialog box closes, and the
hibernate.cfg.xmlfile appears in the Project Explorer view.
Switch the editor for hibernate.cfg.xml to Source view and then edit the file so that it matches this code listing:
<?xml version='1.0' encoding='utf-8'?>
<!DOCTYPE hibernate-configuration PUBLIC
        "-//Hibernate/Hibernate Configuration DTD 3.0//EN"

   "http://hibernate.sourceforge.net/
   hibernate-configuration-3.0.dtd">

<hibernate-configuration>
    <session-factory>

        <!-- Database connection settings -->
        <property name="connection.driver_class">com.mysql.jdbc.Driver
        </property>
        <property name="connection.url">jdbc:mysql://localhost:3306/petclub
        </property>
        <property name="connection.username">root</property>
        <property name="connection.password">toor</property>
<!-- SQL dialect -->
<property name="dialect">org.hibernate.dialect.MySQLDialect
</property>
<!-- Hibernate session -->
<property name="current_session_context_class">thread
</property>
<!-- Write SQL to log or console -->
<property name="show_sql">false</property>
<mapping resource="Person.hbm.xml"/>
<mapping resource="Pet.hbm.xml"/>
</session-factory>
</hibernate-configuration>Note
Be sure to use the correct password for your MySQL database's root user in your configuration file's connection.password property.
The Hibernate configuration file contains a <session-factory> tag. Much as a real-world factory's purpose is the construction or assembly of things, a factory class in object-oriented programming is a class responsible for the construction or assembly of other classes. Hibernate uses a SessionFactory class to create the Hibernate session. The configuration in this file is used by the SessionFactory when it creates the Hibernate session. There are quite a number of configuration options possible in this file. This example uses the bare minimum of required configuration options. The Hibernate documentation provides details on all the available options.
The first four <property> tags here provide the information needed to connect to the database. The connection.driver_class property tells Hibernate to use the MySQL Connector/J JDBC driver class to connect to the database. The next three properties contain the same information you used in the JDBC example: the connection URL, username, and password for the database.
The next property tells Hibernate which SQL dialect to use. Because most databases add their own proprietary keywords or structures to standard SQL, Hibernate needs to know what kind of database is being used so that it can generate SQL that the database understands. This is quite a powerful feature. For example, if your MySQL application ever needs to also run on Oracle, you can simply edit the Hibernate configuration file with the connection information and Oracle dialect. Little, if any, of your Hibernate Java code would need to change because the Java code doesn't contain anything database-specific.
The next property, current_session_context_class, tells Hibernate how the current session should be managed. The value thread means that the current session is tied to the running program thread. A thread is simply a set of running tasks within a program. Some programs split their operations into multiple threads so that more than one operation can be run in parallel. This program has only a single thread and uses only a single Hibernate session.
The last property tells Hibernate whether it should output the SQL it generates. Examining the SQL that Hibernate produces can be useful for understanding how Hibernate translates your Java classes into SQL by using the mapping files.
Finally, the two <mapping> tags simply list the Hibernate mapping files for your application. There's no path information for these files because they're in the same folder as the Hibernate configuration file, but if they were located in different folders, the file path would also need to be included.
The final configuration file is the log4j.properties file. Log4j is a Java logging library. Hibernate uses this library to output information either to a log file or to the console. Log4j supports several different levels of logging — such as info, warn, and error — allowing you control over how much information and what type of information is output to the log.
To create the log4j.properties file, follow these steps:
Right-click the
cfgfolder in the Project Explorer view and then choose NewFile from the popup menu. The New File dialog box opens.Type log4j.properties in the File name text field and then click Finish. The New File dialog box closes, and the
log4j.propertiesfile appears in the Project Explorer view.
Here's the code listing for the log4j.properties file:
log4j.appender.stdout=org.apache.log4j.ConsoleAppender
log4j.appender.stdout.layout=org.apache.log4j.PatternLayout

log4j.rootLogger=debug, stdout

log4j.logger.org.hibernate=error
log4j.logger.org.hibernate.SQL=error
log4j.logger.org.hibernate.type=error
log4j.logger.org.hibernate.cache=error
The important properties here are the four at the end that start with log4j.logger. Each of these properties tells what level of logging should be used for particular packages. In this configuration, code in the org.hibernate, org.hibernate.SQL, org.hibernate.type, and org.hibernate.cache package write to the log only in case of error.
Now that all the configuration files are written, you need to add them to the project's build path so that they can be found at runtime. To add the configuration files to the build path, follow these steps:
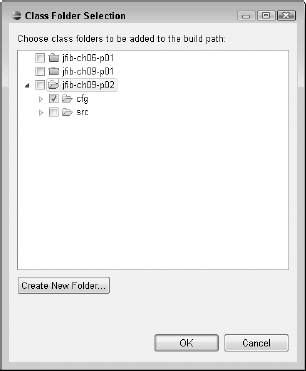
Right-click the project in the Project Explorer view and then choose Build Path
Configure Build Path from the popup menu. The Properties dialog box opens with the Java Build Path's Libraries tab selected.Click Add Class Folder. The Class Folder Selection dialog box, as shown in Figure 9.20, opens.
Click the check box next to the
cfgfolder and then click OK. The Class Folder Selection dialog box closes, and thecfgfolder appears in the Libraries list.Click OK. The Properties dialog box closes.
The final step is to write the main application class. This application is much like the ListAllPets application you wrote in the JDBC portion of this chapter but uses Hibernate instead. To create the main application class, follow these steps:
Right-click the
com.wiley.jfib.ch09package in the Project Explorer view and then choose NewClass from the popup menu. The New Java Class dialog box opens.Type ListAllPetsUsingHibernate in the Name text field, click the check boxes next to public static void main(String[] args) and Generate comments, and then click Finish. The new Java class is created and opens in the editor.
Here's the code listing for the ListAllPetsUsingHibernate class:
/**
 *
 */
package com.wiley.jfib.ch09;

import java.util.List;

import org.hibernate.HibernateException;
import org.hibernate.SessionFactory;
import org.hibernate.Transaction;
import org.hibernate.cfg.Configuration;
import org.hibernate.classic.Session;

/**
 * @author Chuck
 * The ListAllPetsUsingHibernate class retrieves all of the pets from the
 * PETS table in the database and lists the name, type, and
 * owner's name for each one.
 */
public class ListAllPetsUsingHibernate {
   /**
    * @param args Any arguments passed to this application.
    * This application expects and uses no arguments.
    */
   public static void main(String[] args)
   {
         try
         {
                // Set up the Hibernate session
                Configuration config = new Configuration();
                config.configure("hibernate.cfg.xml");
                SessionFactory sessionFactory = config.
   buildSessionFactory();
                Session session = sessionFactory.
   getCurrentSession();
                Transaction tx = session.beginTransaction();

                // get the current list of pets and owners
                List<Pet> allPets = session.createCriteria(Pet.
   class).list();
                for(Pet pet : allPets)
                {
                       // print out each pet in the list
                       System.out.println(pet.getName()
                                     + " is a " + pet.getType()
                                     + " belonging to "
                                     + pet.getPerson().
   getFirstName() + " " + pet.getPerson().getLastName());
                }
tx.commit();
          }

          catch (HibernateException e)
          {
               e.printStackTrace();
          }
     }
}
At the beginning of this class, a number of Hibernate classes are imported. Configuration is used to read the configuration from the hibernate.cfg.xml file. SessionFactory uses this configuration to create a Session class. Transaction is a class that Hibernate provides for transaction management, which is a way of grouping operations into a single unit so that they all succeed or fail as one. Finally, any errors that occur within Hibernate code result in a HibernateException being thrown.
In the main method of this class, the Hibernate session is created by the SessionFactory by using the information from the Configuration object config. A transaction is started by the session — although, in reality, a session doesn't serve much purpose here with only a single operation being run; Hibernate requires some sort of transaction management to be in place.
This line of code does the bulk of the work:
List<Pet> allPets = session.createCriteria(Pet.class).list();
The Hibernate Session object has a variety of methods for retrieving objects. For retrieving single objects whose primary key value (for example, PET_ID) is known, you would use the load() method and supply it with the class of the Pet object and the primary key value. To retrieve a list of all objects of a given class, you would use a line like the one just presented. This line says to get a list of every Pet object from the database. Hibernate goes to the database and retrieves not only all the pets, but because of the many-to-one relationship you set up in the Hibernate mapping file between Pet and Person, it also populates the Person object property in the Pet object. The type List<Pet> indicates that this List object contains only Pets. The loop takes each Pet object in the list and prints out the pet's name and type, but thanks to the many-to-one relationship, it can also print out the owner's first and last names.
To run the application, right-click the ListAllPetsUsingHibernate.java file in the Project Explorer and then choose Run As
Hibernate also makes it easy to limit the results by using criteria. Change the line that retrieves the list of pets so that it looks like this:
List<Pet> allPets = session.createCriteria(Pet.class).
    add(Restrictions.eq("type", "dog")).list();
Figure 9.21. Running the application results in this output in the Console view. The Person property of each Pet was populated just by retrieving the Pet.
You also need to add an import statement at the top for org.hibernate.criterion.Restrictions. The Restrictions class functions much like a WHERE clause in a SQL statement, allowing you to place limits on the results of a database operation. In this case, the eq method of the Restrictions class is used to limit the list to those pets for which the type equals dog. Save the application and then run it again. This time, only one pet is retrieved because there's only one dog in the database.
Tip
If you're curious to see the SQL that Hibernate uses behind the scenes, click the hibernate.cfg.xml tab in the editor to switch to that file and then change the value of the show_sql property near the bottom of the file from false to true. You can run the SQL that Hibernate generates directly against your database. Just substitute any parameter placeholders (the ? character) with real values.
In this chapter, you learned about two common methods of working with databases in Java. First, you learned about JDBC, which uses classes from the java.sql package to allow you to write and run standard SQL queries within your Java code, and you saw an example that used JDBC to work with data in a MySQL database. Next, you learned about some of the disadvantages of working directly with JDBC and how using an object-relational mapping library can help. From there, you learned about and downloaded Hibernate, one of the most popular object-relational mapping libraries for Java database development. Finally, you saw an example that used Hibernate together with MySQL, and that showed how Hibernate lets you directly work with objects instead of having to write SQL code inside your Java code.
JDBC and Hibernate are both very deep topics. These examples provide a good starting point for more in-depth work with JDBC and Hibernate.