Internet Explorer's (IE) event model has its roots in early versions of the browser, and it has remained virtually the same for over 12 years. In fact, the organizations behind Chrome, Safari, and Opera saw fit to implement it in their browsers—only Firefox doesn't support it. Despite this rather broad support, IE's event model is still considered to be incorrect, and its use in any standards-supporting browser is discouraged.
The key to IE's event model is an object called event. This object is populated with event information every time an event is handled. In this lesson you will learn how to access the event object and glean event information from it.
The event object is a global object, so it is actually a property of window. You can therefore access it rather easily, as shown in the following code:
eventUtility.addEvent(document, "click", function() {
    alert(event);
});
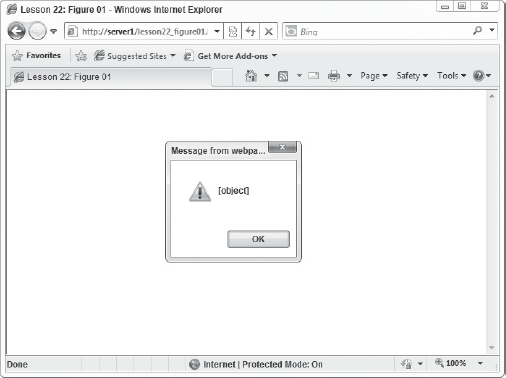
Here an event handler is assigned to the click event for the document object. When you click anywhere in the document an alert box, shown in Figure 22-1, simply displays the text "[object]".
When an event handler is assigned with the attachEvent() method, which the eventUtility.addEvent() method uses, the event object is also passed as a parameter to the handling function, much as the standard Event object is in standards-supporting browsers. The following code shows this:
eventUtility.addEvent(document, "click", function(event) {
    alert(event);
});
There is no difference between the global event object and the event object passed to the handling function.
In Lesson 21 I mentioned that the standard event model uses multiple types of Event objects to represent different events (such as MouseEvent objects). In contrast, IE's event object is a multipurpose object that contains not only basic event information, but information regarding mouse- and keyboard-based events. Despite this difference, you can gather the same information from the event object that you can from the standard Event and MouseEvent objects, but you may have to use different property names to get at that information.
To determine what event took place, use the type property. You do this exactly as you saw in Lesson 21:
eventUtility.addEvent(document, "click", function(event) {
    alert(event.type); // click
});
It returns a string containing the name of the event without the preceding on, and you can use it exactly as you would the standard Event object. The following example is an exact duplicate of the code from Lesson 21:
function eventHandler(event) {
    if (event.type === "click") {
        alert("You clicked me!");
    } else if (event.type === "keypress") {
        alert("You pressed a key!");
    }
}

eventUtility.addEvent(document, "click", eventHandler);

eventUtility.addEvent(document, "keypress", eventHandler);
This code uses the type property to determine the event that occurred and display an appropriate message for that event. It is a simple property supported by all browsers. Unfortunately, discerning the target of the event, while simple, isn't the same as with the standard Event object.
The standard Event object provides the target property to access the HTML element that the event originated from. IE's version of target is called srcElement, and it can be used exactly as you would use target. Let's revisit the example from Lesson 21 with the following HTML:
<body>
    <div id="divElement"
        style="width: 100px; height: 100px; background-color: red; "></div>
</body>
Once again, this is a snippet of an HTML page. The <div/> element is styled to look like a red square, and you can set up an event handler to change the background color of this element when it is clicked, like this:
eventUtility.addEvent(document.getElementById("divElement"), "click",
    function(event) {
        var bgColor = event.srcElement.style.backgroundColor;
        var color = "red";

        if (bgColor === color) {
            color = "green";
        }

        event.srcElement.style.backgroundColor = color;
});
Just as in Lesson 21, this event handler toggles the background color of this <div/> element between red and green. The first statement initializes two variables. The first, bgColor, contains the current background color of the element, and color, the second, contains the text red. The function then determines what color to change the element's background to, and then does so by changing the element's backgroundColor. This code achieves the same results as the code in Lesson 21, but uses the srcElement property instead of target.
Also, because of the bubbling nature of IE's event model, you can use event delegation to provide the same functionality to as many elements as you want. Here, once again, is the updated HTML from the previous lesson:
<body>
    <div id="divElement"
        style="width: 100px; height: 100px; background-color: red; "></div>
<br/><br/>
    <div id="divElement2"
        style="width: 100px; height: 100px; background-color: red; "></div>
</body>
The event handler to toggle the background color of both <div/> elements looks like this:
eventUtility.addEvent(document, "click", function(event) {
    var eSrc = event.srcElement;

    if (eSrc.tagName.toUpperCase() === "DIV") {
        var bgColor = eSrc.style.backgroundColor;
        var color = "red";

        if (bgColor === color) {
            color = "green";
        }

        eSrc.style.backgroundColor = color;
    }
});
This code was extremely easy to modify for IE. Only the first line of the function was changed from event.target to event.srcElement. The remainder of the function is untouched. So the tagName property allows you to determine whether or not the event source was a <div/> element. If it was, the element's background color is changed to either red or green.
In this lesson, you learn how to use IE's event object to retrieve basic information regarding an event.
For this lesson, you need a text editor; any plain text editor will do. For Microsoft Windows users, Notepad is available by default on your system or you can download Microsoft's free Visual Web Developer Express (www.microsoft.com/express/web/) or Web Matrix (www.asp.net/webmatrix/). Mac OS X users can use TextMate, which comes as part of OS X, or download a trial for Coda (www.panic.com/coda/). Linux users can use the built-in VIM.
You also need a modern web browser. Choose any of the following:
Internet Explorer 8+
Google Chrome
Firefox 3.5+
Apple Safari 4+
Opera 10+
Create a subfolder called Lesson22 in the JS24Hour folder you created in Lesson 1. Store the files you create in this lesson in the Lesson22 folder.
You will rewrite the toolbar script from Lesson 21 for IE. Use event delegation to handle the events for the buttons.
Open your text editor and type the following HTML. It is the final HTML from
lesson21_example01.htm:<html> <head> <title>Lesson 21: Example 01</title> <style type="text/css"> #divContainer { background-color: silver; height: 50px; padding: 2px; } span { display: inline-block; width: 50px; height: 50px; } .button-normal { background-color: gray; } .button-over { background-color: navy; } .button-click { background-color: yellow; } </style> </head> <body><div id="divContainer"> <span class="button-normal"> </span> <span class="button-normal"> </span> <span class="button-normal"> </span> </div> <script type="text/javascript" src="eventutility.js"></script> <script type="text/javascript"> function mouseHandler(event) { var eSrc = event.target, type = event.type; if (eSrc.tagName.toUpperCase() === "SPAN") { if (type === "mouseover") { if (eSrc.className !== "button-click") { eSrc.className = "button-over"; } } else if (type === "mouseout") { if (eSrc.className !== "button-click") { eSrc.className = "button-normal"; } } else if (type === "click") { if (eSrc.className !== "button-click") { eSrc.className = "button-click"; } else { eSrc.className = "button-over"; } } } } eventUtility.addEvent(document, "mouseover", mouseHandler); eventUtility.addEvent(document, "mouseout", mouseHandler); eventUtility.addEvent(document, "click", mouseHandler); </script> </body> </html> ]]>Save it as
lesson22_example01.htm.Modify the HTML and JavaScript using the following bold lines of code:
<html> <head><title>Lesson 22: Example 01</title><style type="text/css"> #divContainer { background-color: silver; height: 50px;padding: 2px; } span { display: inline-block; width: 50px; height: 50px; } .button-normal { background-color: gray; } .button-over { background-color: navy; } .button-click { background-color: yellow; } </style> </head> <body> <div id="divContainer"> <span class="button-normal"> </span> <span class="button-normal"> </span> <span class="button-normal"> </span> </div> <script type="text/javascript" src="eventutility.js"></script> <script type="text/javascript"> function mouseHandler(event) {var eSrc = event.srcElement,type = event.type; if (eSrc.tagName.toUpperCase() === "SPAN") { if (type === "mouseover") { if (eSrc.className !== "button-click") { eSrc.className = "button-over"; } } else if (type === "mouseout") { if (eSrc.className !== "button-click") { eSrc.className = "button-normal"; } } else if (type === "click") { if (eSrc.className !== "button-click") { eSrc.className = "button-click"; } else {eSrc.className = "button-over"; } } } } eventUtility.addEvent(document, "mouseover", mouseHandler); eventUtility.addEvent(document, "mouseout", mouseHandler); eventUtility.addEvent(document, "click", mouseHandler); </script> </body> </html>The change is minor: You change the
<title/>element and the first statement of themouseHandler()function (fromevent.targettoevent.srcElement).Open this page in any browser supporting the IE event model (any version of IE since IE5, Chrome, Safari, or Opera), and see that it behaves exactly like the version supporting the standard event model.
To get the sample code files, you can download Lesson 22 from the book's website at www.wrox.com.
Note
Please select Lesson 22 on the DVD to view the video that accompanies this lesson.

