CHAPTER 11
Macro Photography
Macro photography, also referred to as close-up photography (although technically speaking, you don't necessarily need to be close up to get a macro shot) is one of the most popular types of photography.
Macro photography can encompass many different types of subjects, from small products and plants to insects and beyond. I think the reason why macro photography is so interesting is that it allows you to see the small details of things that you overlook at first glance. Getting closer to the subject makes these details stand out.
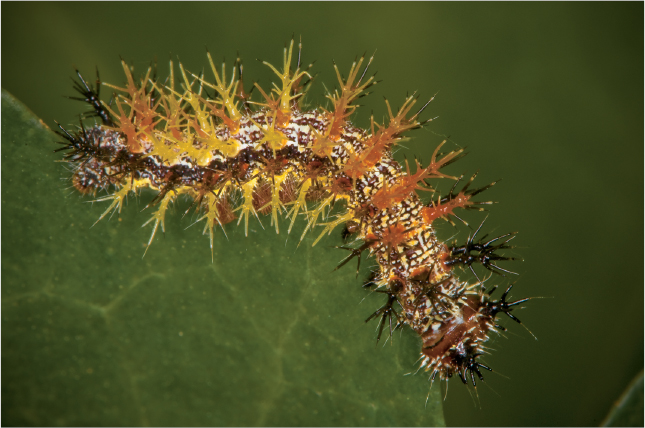
Insects such as this caterpillar make very interesting macro subjects. Exposure: ISO 800, f/45, 1/250 second using a Nikon 105mm f/2.8G VR macro lens.
Preparing Your Shot
To do macro photography, you need to be able to focus close enough to your subject that the image your lens projects on the sensor of your camera is the exact same size as the subject. The relative size of the actual subject to the projected image is defined in terms of a reproduction ratio. So if your image size is the same as the subject size, you have a ratio of 1:1.
Strictly speaking, the true definition of a macro image is one that has a ratio of 1:1 or better. These days, however, the marketing gurus at the camera and lens manufacturing companies have broadened the definition of macro lens to encompass any lens that allows you get a ratio of 1:2, or half the size of your subject.
![]() Nikon's macro lenses are termed Micro-Nikkor.
Nikon's macro lenses are termed Micro-Nikkor.
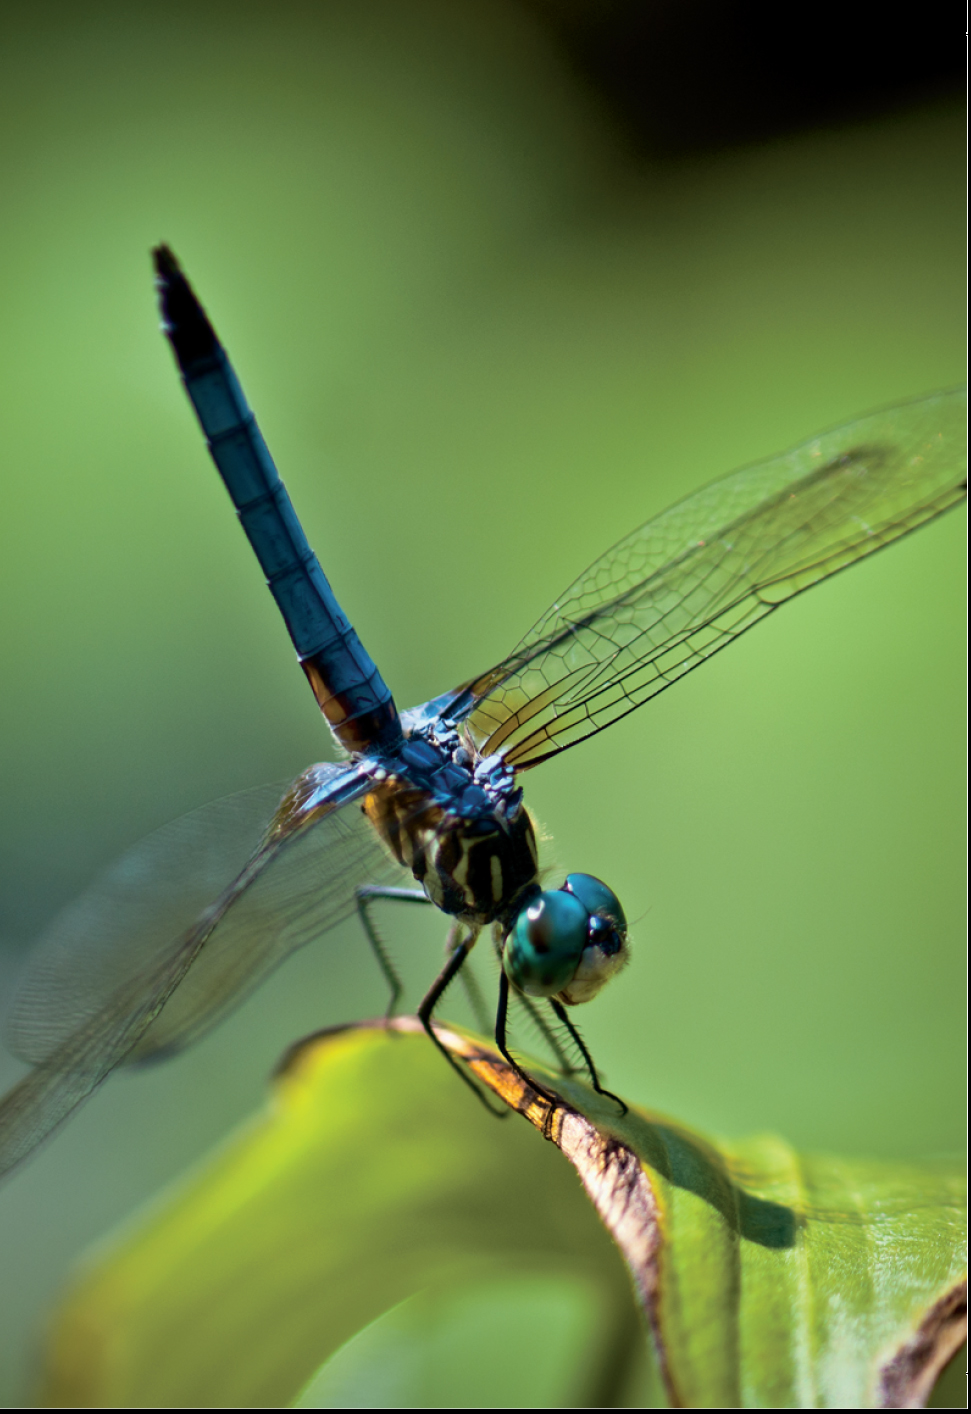
Generally speaking, the most difficult aspect of macro photography is getting your entire subject in focus. The depth of field is reduced the closer you focus on the subject and it can be difficult to maintain focus. When you're handholding your lens an inch or so from the subject, breathing in and out is sometimes enough to lose focus on the area that you want to capture. For this reason, you usually want to use the smallest aperture you can to increase the depth of field. Of course, you may not always want to have the entire subject in focus, so using a shallow depth of field and selective focus is a great way to draw attention to a specific aspect or feature of the subject.
Tools of the Trade
As you've probably already figured out, each discipline of photography, from landscape to portraiture, has many different tools to get the job done. Macro photography is no different. There are lenses and accessories that you can use to get close up or to magnify the subject, ranging from expensive lenses to relatively inexpensive reversing rings.
Lenses
The preferred and probably easiest method of taking macro shots is to purchase a lens specifically designed for this purpose. Macro lenses allow you to focus very close to the subject, which is how you get a reproduction ratio of 1:1 or better.
Using a good, dedicated macro lens is going to get you the best results by far, although it can be a bit expensive.
![]() For more detailed information on macro lenses, see Chapter 4.
For more detailed information on macro lenses, see Chapter 4.
Close-up filters
An inexpensive alternative to a macro lens is a close-up filter. A close-up filter is like a magnifying glass for your lens. It screws onto the end of your lens and allows you to get closer to your subject. It has a variety of different magnifications, and they can be stacked, or screwed together, to increase the magnification even more.
As with any filter, there are cheap ones and more expensive ones. Using cheap close-up filters can reduce the sharpness of your images because the quality of the glass of the filter isn't quite as good as the glass of the lens elements. This reduction in sharpness becomes most obvious when you stack filters. Buying the more expensive filters is still cheaper than buying a macro lens, and the quality of your images will definitely be better.
Extension tubes
An extension tube is exactly what it sounds like: It's a tube that extends your lens. An extension tube attaches between the lens and the camera body and gives your lens a closer focusing distance, allowing you to reduce the distance between the lens and your subject. Extension tubes are widely available and easy to use. Manufacturers make both autofocus tubes and those that require you to focus manually.
A drawback to using extension tubes is that they reduce the aperture of the lens they're attached to, causing you to lose a bit of light. Extension tubes come in various lengths, and some of them can be stacked or used in conjunction with each other.
Reversing rings
Reversing rings are adapters that have a lens mount on one side and filter threads on the other. The filter threads are screwed into the front of a normal lens like a filter, and you attach the lens mount to the camera body. The lens is then mounted to the camera backward. This allows you to closely focus on your subject. One thing to be careful of when using reversing rings is damaging the rear element of your lens; special care should be taken when using one of these.
Not all lenses work well with reversing rings. The best lenses to use are fixed focal-length lenses that have aperture rings for adjusting the f-stop. Zoom lenses simply don't work well, nor do lenses that don't have aperture control (such as the kit lens). If you're thinking about going this route, the best option for a lens is an inexpensive MF (manual focus) lens like a 50mm f/1.8. Another thing to remember is that when you are using a reversing ring, your camera will have no CPU contact with the lens; therefore, you will have to shoot in Manual exposure.
Although autofocus (AF) is a great help in most photography, there are times when it's beneficial to focus manually. Quite a few photographers swear that manual focus is the only way to do macro photography. Personally, I find that AF is a great benefit with macro photography, especially when you are trying to catch small, fleeting critters, though there are many instances where only manual focus will do.
As I discussed previously, the closer you focus on a subject, the less depth of field you have at any aperture. For this reason, the point of focus is extremely important. For example, when you're photographing an insect's face, if the point of focus is just a little bit off, the eyes of the insect will be out of focus, while just behind the insect, it will be sharp. As with any portrait, even those of nonhumans, the eyes should be sharp.
When you're photographing up close, it's best to pick the spot that you feel is most important to the image and focus on that (eyes, for example). When using AF, the best way to do this is to use a single point, but even then, you are relying on the AF module, which may not always be exact. Simply switching to Manual and using your own eyes to determine that your point of focus is exact can be the best method to ensure that your image comes out exactly as you want it.
That being said, another option for inexpensive macro photography is a manual focus lens. Nikon has a few older MF macro lenses that are very sharp and much less expensive than the newer AF-S versions. You can also look into other options. I have an excellent Pentax M-42 screw-mount macro lens (Macro-Takumar 50mm f/4) that I found for next to nothing. With an inexpensive M-42 to Nikon F-mount adapter that I got on eBay, I have a great macro setup that gives me a 4:1 ratio. So don't overlook the benefits of taking control and focusing manually. After all, the camera is your tool; make it work for you, not against you.
Tripod
Arguably one of the most important tools in the macro photographer's toolkit is the tripod. As I mentioned before, sometimes even the small motion of breathing in and out is enough to shift focus away from your subject when the lens is very close. To remedy this, simply stick your camera on a tripod. This ensures that the focus is maintained exactly where you want it. Of course, a tripod only works if the subject is stationary; it can be quite difficult to chase down small insects and try to get them to stand still in front of your tripod-mounted camera.
A tripod is also great to counteract camera shake. As you magnify the subject, any camera movement is also magnified. Even the smallest amount of shaking from your hands or any vibration is enough to cause blur in your images. VR lenses can also help with this, but as you get closer to your subject, the VR function has less of an effect.
Flash
To get enough depth of field, you often need to stop down the aperture to the point that you don't have enough light to make the shot without having a very long exposure, high ISO settings, or in the worst case, both. If you have a moving subject or are handholding your camera, using a slow shutter speed isn't an option. The only other option is to add some light.
Nikon and a few other manufacturers make macro flash kits that attach to the end of your lens to evenly illuminate your subject; this allows you to get maximum depth of field by providing enough light so that you can use a small aperture. Nikon's R1-C1 kit is expensive, costing almost half as much as the D7000 camera body itself, but it is an excellent kit. I have also found a very inexpensive unit, the Phoenix Smart Flash RF46N ring flash. It costs about $100 and functions with i-TTL, albeit with pretty limited features. For the price, the Phoenix works exceptionally well, and I don't have any problems recommending this simple macro flash unit.
Indoor Macro
One of the cool things about macro photography is that it can basically be done anywhere with almost any subject. For the simple shot in Figure 11.1, I used the Phoenix ring flash I mentioned previously. Ring flashes are circular and are attached to the end of the lens with an adapter. Putting the flash around the lens allows the light to surround the optical axis of the lens. This type of light enables you to see the fine detail in a macro shot.
While this can be great for technical photography (think circuit boards) and simple product photography (think eBay), for artistic purposes, this type of lighting can lack depth and drama. One way you can add interest and depth to an image when using a ring flash is to use a contrasting background or one with complementary colors.
The settings I used for the flash were very simple. I used Matrix metering and set the flash to TTL. After a couple of test shots, I decided to dial down the flash exposure –1EV. You will often find that when photographing up close with a ring flash, you will need to reduce the output a bit to avoid overexposure.
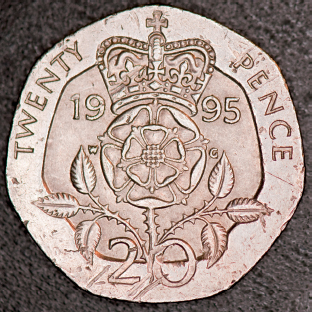
11.1 The on-axis lighting really highlights the fine details of the twenty pence coin. Exposure: ISO 3200, f/5.6, 1/30 second using a Nikon 105mm f/2.8G VR lens.
For Figure 11.1, I set the exposure manually (as I often do when using flash), and set the aperture to f/5.6. For a shot like this one, using a small aperture isn't absolutely necessary. The camera was on a tripod pointed at a 90° angle to the coin. Because coins are thin, a deep depth of field isn't required. When shooting something with a lot of depth at an angle, you want to maximize your depth of field.
If you don't have (or don't want to buy) a ring flash and you have an additional Speedlight such as the SB-400, SB-600, SB-700, SB-800, or SB-900, you can get your light on axis with the lens by using an inexpensive, off-camera TTL flash cord such as the Nikon SC-28 or 29 (the SC-29 adds an AF-assist feature). This cord allows you to hold the Speedlight next to the lens for softer lighting (remember, the closer the light source is to the subject, the softer the light). I often use this technique because the one-sided light adds a nice depth to some images, allowing textures to be highlighted.
For Figure 11.2, I simply used the available light in my living room, which came from a standard, old end-table lamp, to photograph this small box of kitchen matches. This shot wasn't planned, but rather I just noticed it out of the corner of my eye. I really liked how the warm yellow light of the tungsten lamp offset the brown of the box and table. For this shot I wanted an extremely shallow depth of field to limit the sharp focus to the match heads only, so I chose a wide aperture of f/2.8. The light was rather low and adding any type of flash would have completely ruined the effect I was after with the tungsten lighting, so I pulled out the tripod to be sure that the shot was nice and sharp. Because the D7000 is so great in low light, I didn't mind cranking up the ISO to 1600 to keep the shutter speed faster than the 1-second mark.
Figure 11.2 shows that you don't really need elaborate setups to get really cool indoor macro shots. A simple lamp and an everyday object such as a box of matches can make a great shot with just a small amount of effort.
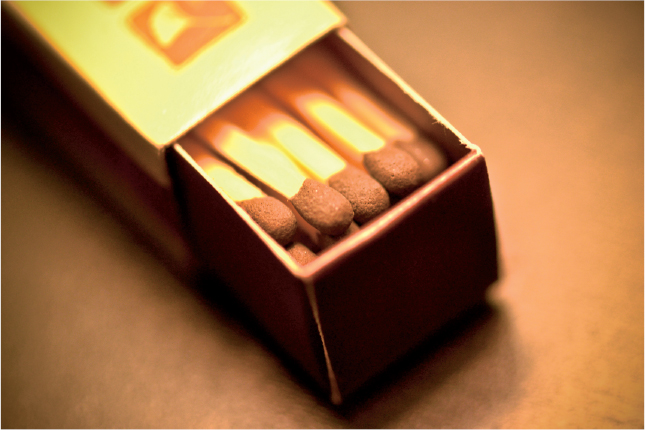
11.2 An indoor macro shot of a box of matches. Exposure: ISO 1600, f/2.8, 1/25 second using a Nikon 105mm f/2.8G VR lens.
Outdoor Macro
Unfortunately, when you're photographing outdoors, the lighting is far from perfect most of the time. During the brightest part of the day, the sun is often too bright, giving your images a lot of contrast, which can result in blown-out highlights and/or blocked-up shadows. When the lighting is the best for outdoor photography (early morning or evening and overcast days), there often isn't enough light to allow you either a small aperture setting to ensure a deep depth of field or a fast shutter speed to combat camera shake.
There are a few ways you can get around these problems. In bright light, you can use Spot metering to ensure that the highlight detail is retained while letting the shadows go completely black. Active D-Lighting can also help in this situation. You or a friend can hold a small diffuser in front of the subject (although this could possibly frighten your subject off). You can also use a bit of fill flash to reduce contrast.
For Figure 11.3, I was photographing whatever insects I could run across at the local botanical gardens. This is a pretty simple way to come across interesting subjects and can be a great way to kill a few hours.
As previously mentioned, when you focus very close to a subject, the depth of field is greatly reduced. For this shot of a honeybee collecting pollen from a flower, I wanted to be sure that the whole bee was in focus and I wanted to catch all the details of the flower. I set the camera to Aperture Priority and stopped down to f/22. As you can see, even at that extremely small aperture the depth of field is so narrow that the background is out of focus, which really serves to bring attention to the subject.
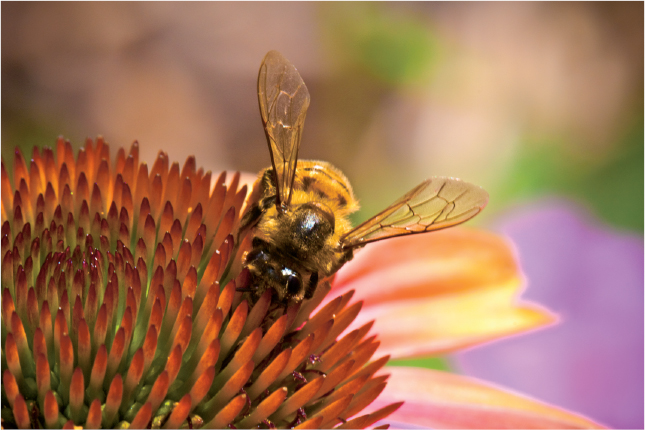
11.3 An outdoor macro shot of a honeybee on a flower. Exposure: ISO 800, f/22, 1/125 second using a Nikon 105mm f/2.8G VR lens.
When you're shooting close-up not only is the subject magnified, but also so is any movement your hand makes while holding the camera. This makes using a relatively fast shutter speed a necessity, even when you are using a lens with Vibration Reduction (VR). When shooting Figure 11.3, I chose a relatively fast shutter speed of 1/125.
Because I was photographing a moving subject, I couldn't really use a tripod and I had switched the camera to AF-C, or Continuous AF, to ensure that when the honeybee moved, the camera would continue to focus on the subject.
When you're handholding your camera to get a macro shot, I recommend using AF-C because even the slightest movement can throw your focus off, and allowing the AF to adjust for your movements will result in sharper images. If you're using a tripod and photographing a nonmoving subject, using AF-S (Single AF) or Manual focusing is advised.